


Ahhh...my first build thread.
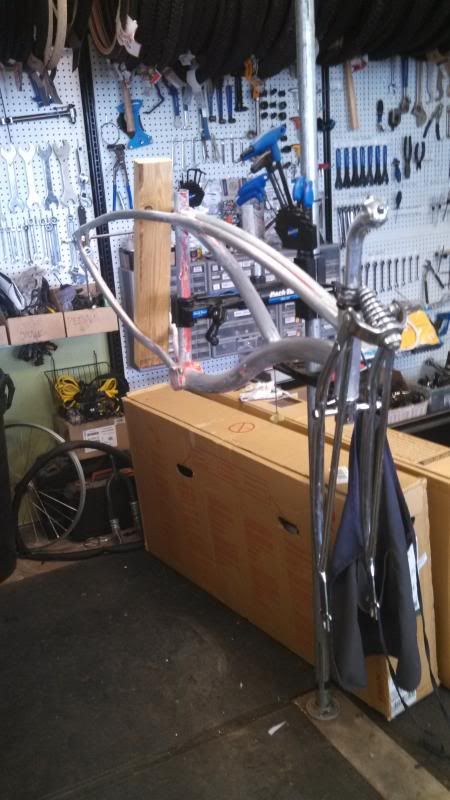
I purchased a Diamondback Della Cruz new back in '05 with the intent of converting it to an Indian motorcycle replica(ish) project, but was too ambitious and only got the frame and rims (Surly Large Marge) stripped and slightly modified to accept larger tires. It sat in my storage until recently when I started dating a very special lady from Salida. She has been riding highwheelers for 30 years now and has been trying to teach me how to ride one too. I've spent several weekends over there and wanted a bike to leave at her house so I don't have to haul one. Unlike my town of Pagosa Springs CO, a cruiser is just fine on the flatter roads over there, so I dug it out and started pawing the parts bins for what I could put together.
Starting with a tire and rim mockup, the same issue still existed: the frame had to be bent. Since it's aluminum I was a bit hesitant, so I asked a welder friend how I should approach it. He said to go for it. I work part time at a shop and have full access, so I gathered a few things from the hardware store and the woodpile...and got after it.
I spread the rear triangle using 3/8" allthread, nuts and washers and a Gearwrench (would've taken forever without it) until I could get a 2X4 wedged in there and drove it further with a mallet.

I then used the allthread to pull it back together again while gently caressing it with a deadblow hammer at the 2X4 junction placed at roughly the 13-1/2" mark from the dropout. The first attempt wasn't enough, so I got more aggressive. My fellow mechanic and I were giggling like Bender. Heeheeheeheehee... The best part is...it worked. I went from the tire (2.35" Fat Frank in brown) barely wedging into place to a full 1/2" clearance. Today I mocked up two other rim/tire combos, a 26X3.0" Kenda Flame mounted on the Large Marge and a 24X3.0" Kenda on a 24X100MM CyclesUS rim. Surprisingly...they all fit. I still have the chainline to work out, but I'm satisfied for now.
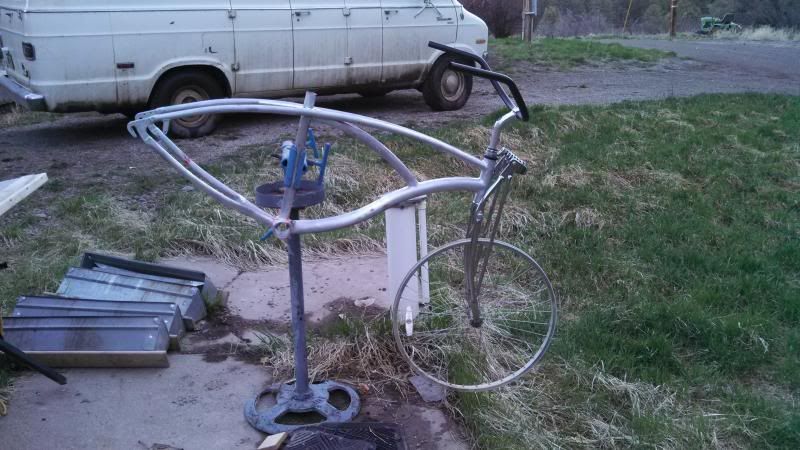
After realizing I lack the patience to do a fully polished frame is when I decided to go Rat Rod. The aluminum welds are just too rough to smooth out as I'd originally planned, but going with paint allows me to use filler.
There used to be a substantial gusset plate here that I cut out in order to spread the frame.
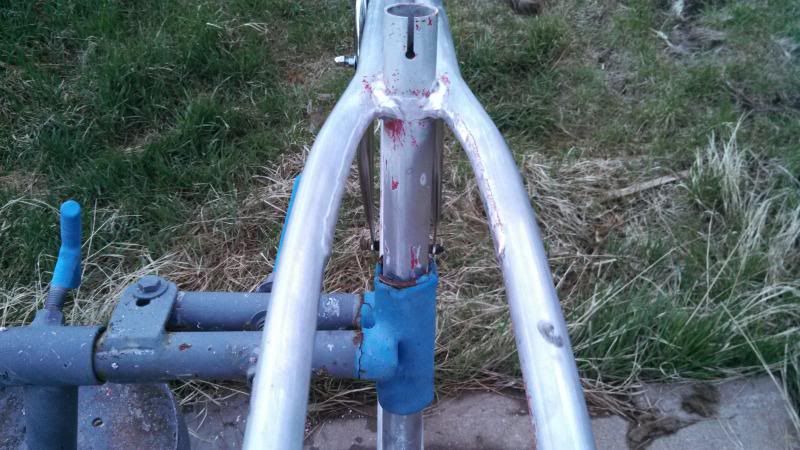
The fork is the stock chromed Della springer. I spread that by removing the bolt, adding some bronze bearings and then pinching it again with the allthread.
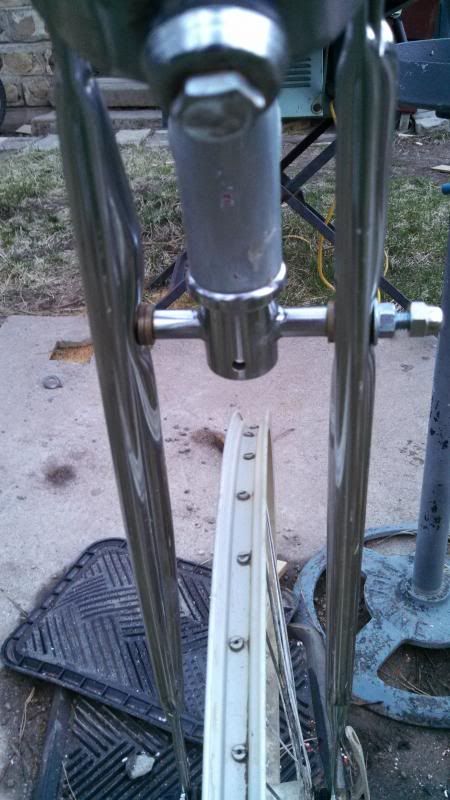
In that process I discovered that the fork is really cheesy. It's crooked, insubstantial and I may replace it.
I'm still in the parts gathering process, but so far I have the black alloy bars pictured up above, a brown Electra saddle, a Sturmey 2-speed kickback hub in silver and some other interesting bits out of my bins. Tomorrow I'll be ordering a Shimano dynamo hub for the front and once that's in I'll build the wheels and really be able to check the clearances. So far the planned theme is silver hubs, black spokes, silver nipples and red rims, frame will be matte black. I intend to ride this bike and lock it up on the streets so I didn't go apewire with fancy parts. Mainly I want it to be low maintenance and very rideable.
Thanks if you've read this far! I appreciate any and all input/advice.
I purchased a Diamondback Della Cruz new back in '05 with the intent of converting it to an Indian motorcycle replica(ish) project, but was too ambitious and only got the frame and rims (Surly Large Marge) stripped and slightly modified to accept larger tires. It sat in my storage until recently when I started dating a very special lady from Salida. She has been riding highwheelers for 30 years now and has been trying to teach me how to ride one too. I've spent several weekends over there and wanted a bike to leave at her house so I don't have to haul one. Unlike my town of Pagosa Springs CO, a cruiser is just fine on the flatter roads over there, so I dug it out and started pawing the parts bins for what I could put together.
Starting with a tire and rim mockup, the same issue still existed: the frame had to be bent. Since it's aluminum I was a bit hesitant, so I asked a welder friend how I should approach it. He said to go for it. I work part time at a shop and have full access, so I gathered a few things from the hardware store and the woodpile...and got after it.

I spread the rear triangle using 3/8" allthread, nuts and washers and a Gearwrench (would've taken forever without it) until I could get a 2X4 wedged in there and drove it further with a mallet.

I then used the allthread to pull it back together again while gently caressing it with a deadblow hammer at the 2X4 junction placed at roughly the 13-1/2" mark from the dropout. The first attempt wasn't enough, so I got more aggressive. My fellow mechanic and I were giggling like Bender. Heeheeheeheehee... The best part is...it worked. I went from the tire (2.35" Fat Frank in brown) barely wedging into place to a full 1/2" clearance. Today I mocked up two other rim/tire combos, a 26X3.0" Kenda Flame mounted on the Large Marge and a 24X3.0" Kenda on a 24X100MM CyclesUS rim. Surprisingly...they all fit. I still have the chainline to work out, but I'm satisfied for now.
After realizing I lack the patience to do a fully polished frame is when I decided to go Rat Rod. The aluminum welds are just too rough to smooth out as I'd originally planned, but going with paint allows me to use filler.

There used to be a substantial gusset plate here that I cut out in order to spread the frame.

The fork is the stock chromed Della springer. I spread that by removing the bolt, adding some bronze bearings and then pinching it again with the allthread.

In that process I discovered that the fork is really cheesy. It's crooked, insubstantial and I may replace it.
I'm still in the parts gathering process, but so far I have the black alloy bars pictured up above, a brown Electra saddle, a Sturmey 2-speed kickback hub in silver and some other interesting bits out of my bins. Tomorrow I'll be ordering a Shimano dynamo hub for the front and once that's in I'll build the wheels and really be able to check the clearances. So far the planned theme is silver hubs, black spokes, silver nipples and red rims, frame will be matte black. I intend to ride this bike and lock it up on the streets so I didn't go apewire with fancy parts. Mainly I want it to be low maintenance and very rideable.
Thanks if you've read this far! I appreciate any and all input/advice.


