Schwinn tank bike out of spare parts.

Rat Rod Bikes Bicycle Forum

Help Support Rat Rod Bikes Bicycle Forum:

This site may earn a commission from merchant affiliate links, including eBay, Amazon, and others.
Joined
Jul 27, 2013
Messages
101
Reaction score
129
Rating - 0%
0   0   0
I had a spare canti tank and chainguard on the shelf for a few years. They were brush painted black. Also had bought a black typhoon about 22 years ago(my first purchase @7 years old) with a broken frame, one canti bar broke away from the seat post and down tube. I rode the bike with the frame wired together for years.. I recently placed the tank and guard on the bike to see how i liked the look. ... Always wanted a brown and cream b6 so decided to change the color in that direction. Rather than scallops like you see on the b6 I went with the paint scheme you see on hornets spitfire etc of the 50s since this is a middle weight frame with s7 rims I figured it would be a little more 'correct'. I painted the tank a couple months ago with spray paint. ... experimental (posted that in the how to section back then) I normally use automotive paint.
Here is the typhoon with the spare tank, guard, and rack.. you can see the wire around the seat post that's been holding er together for 22 years.


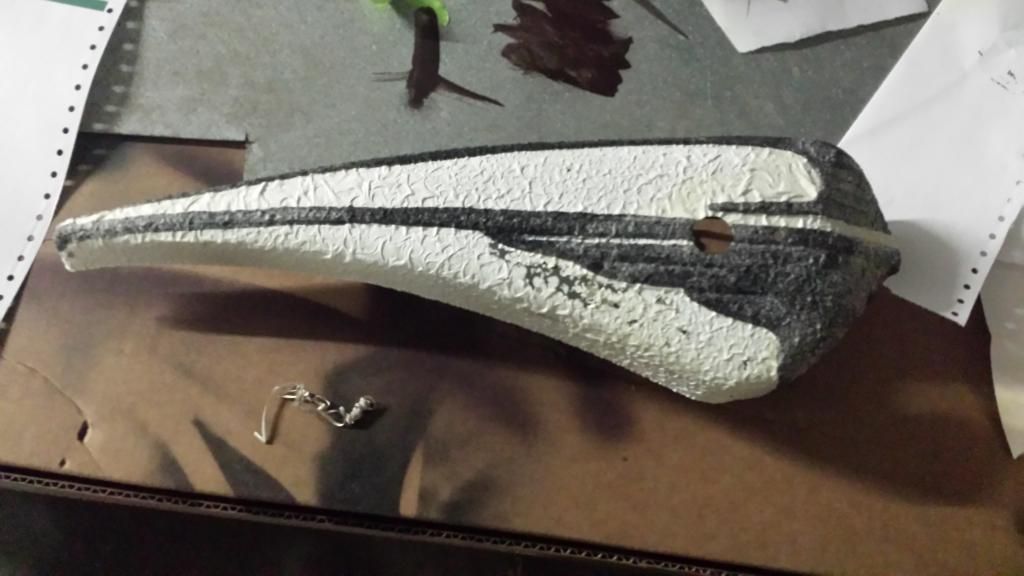
Paint stripper to the brush paint:


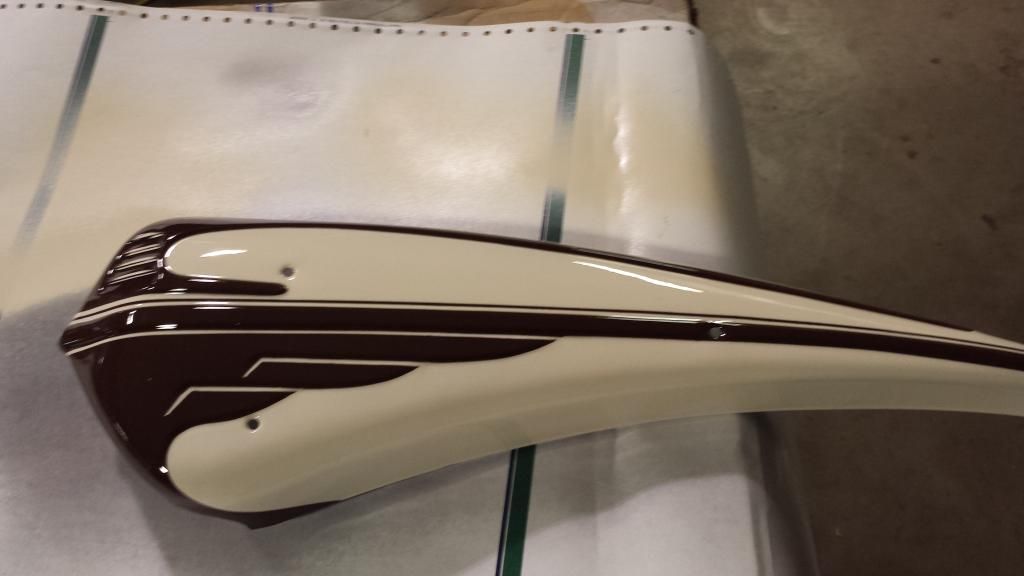
Tank painted and cleared


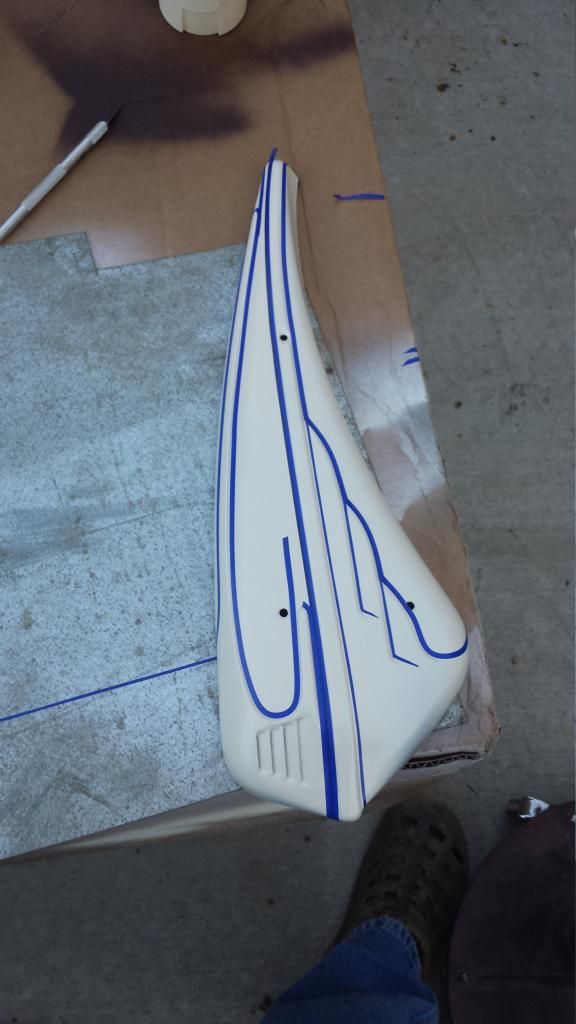
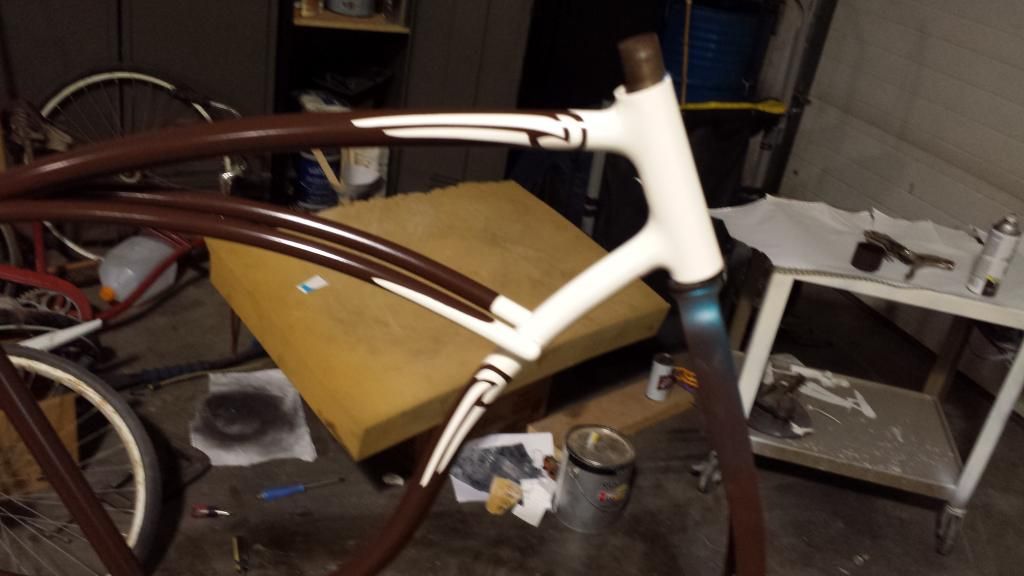
Sanded frame with 80 to bare metal...180... primed. .then 400 wet sand. Painted front half cream. ... Allowed dry time... wet sanded with 600... back taped design...sprayed brown.
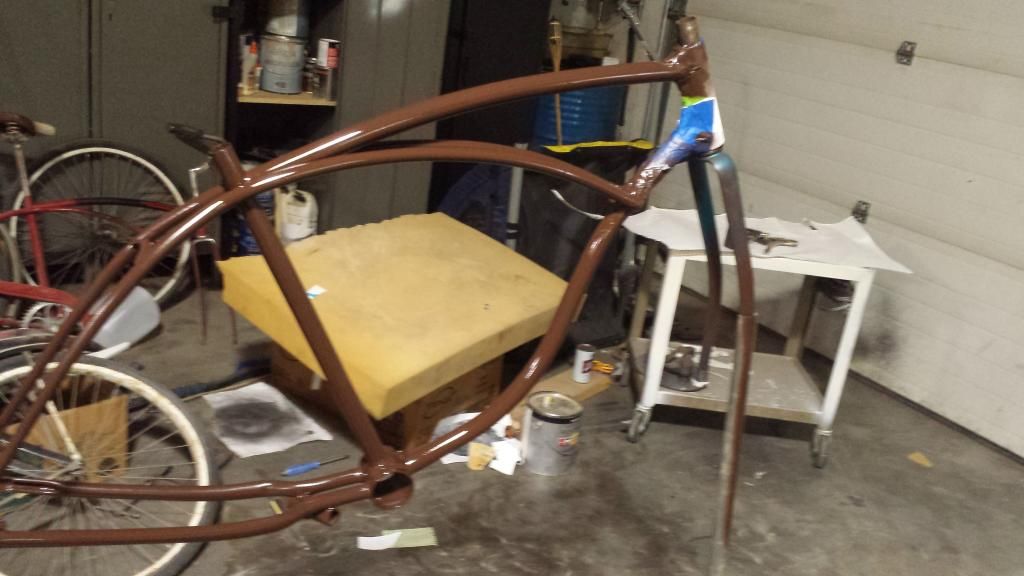
Don't mind the messy shop...I know right where everything is at!


Got the tank mounted. And bearing cups installed(donated from a nice Hollywood). Looking a lot better with a little bit of chrome contrast! Used one of the re pop horn button blanks till I get a horn unit.


Got crank and ring installed. Also donated from the Hollywood. And painted a head badge the brown color.


Forks painted!


And found a older set of middle weight fenders. Pretty beat rolled most out and very light skim coat to cover mostly just grinder marks from metal working.
 
Thanks guys! I'm looking for some opinions. ...I've got both a feather type chainguard (the style with no flat spot for a name) and the phantom style guard. ... i'm in a toss up on what one to use. The Feather guard looks clean and simple, the phantom guard flows with the tank nicely and I can name the bike. Want to try to get it painted this weekend. If I go with the phantom guard what do you guys think i should badge this bike? I have spitfires and hornets in my collection what else is out there?
 
Really nice man, great job, looks sweet.
 
Personally I prefer the feather, but I don't like the way it looks with my smaller 46t chianring... I think the lines beg for the larger ring. I suspect the Phantom style would better hide with the big gap at the front.

13df658a-bd45-4210-aec7-474c1e7c449b.jpg
 
use the chain gaurd tha best fits what look you are going for !
Well, I started this project knowing I wanted brown and cream... and that is the only thing I was dead set on.... The rest is just happening. I'm not very good at decisions like this lol. Example: I've got a 48 chevy that has been in primer for 12 years because I can't decide what color to paint it. I could just finish the rest of the bike, leave the guard for last, poof can them quick and try both out and see which one gives me that tingly feeling.
I was looking at images on my Google box and it seems like most no name feather guards were on dx frames? Anyone know Is there any truth to that or was my Google image search being bias in photo selection.
 
This Bike build has been on hold for a few others that interrupted. Worked on er a bit this weekend. Got one rim painted and fenders ready for paint. Stainless spokes are on order to re lace the rims. This thing should look nice!
Yes, that is 4 different types of masking tape. I used up all my partial rolls. Lol.

I might use the rim stencils next time because this probably took a couple years off my life.


Fenders in primer wet sanded and ready for paint.


Last edited:
Got the spokes in the mail today!
1 2 3 4...1 2 3 4....I got this!

.... I've found that if you insert the spoke at an angle, if the hole diameter allows, the spoke falls right where it needs to rather than inserting straight and having to bend under the next spoke to get to its hole. Most spoking tutorials will show straight in then bend to get to the hole


. ... Stainless aren't original but they sure are a lot nicer looking.
 
Last edited:

Latest posts

Back
Top