~~~BLACKJACK~~~ <<<FINISHED>>>

Rat Rod Bikes Bicycle Forum

Help Support Rat Rod Bikes Bicycle Forum:

This site may earn a commission from merchant affiliate links, including eBay, Amazon, and others.
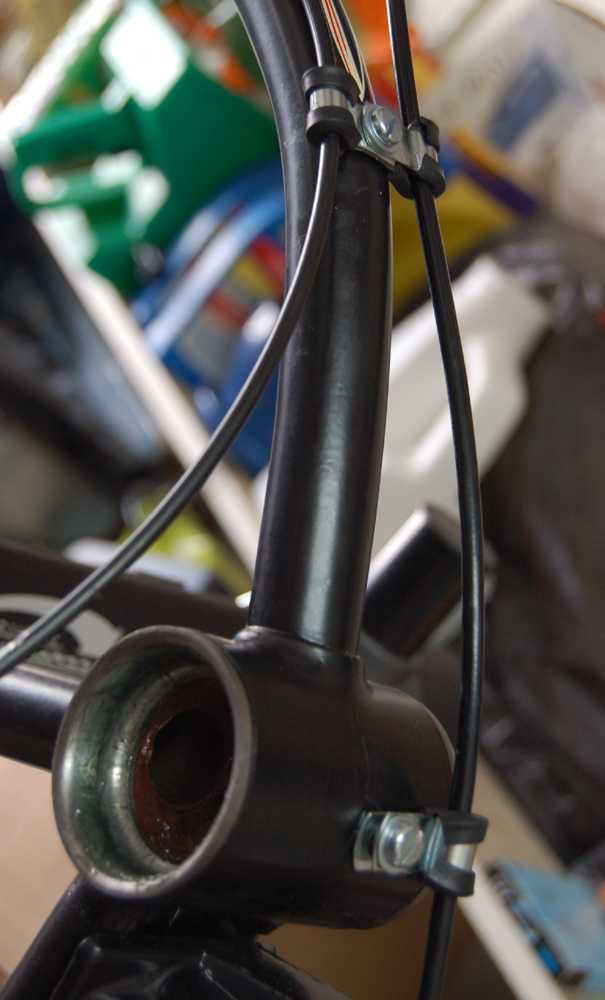
Spacer washers on both sides of the rear hub should fix the rear clearance issue, you may have to bend slightly more to give them clearance though. I seem to remember someone on here adding a spacer washer between the chainring and the lockring/inner bearing race to space the entire cranks sideways, not sure if you would gain enough room on this bike, but that would be the easiest way, the next way I can think of would be switching to a spider/bolt on chainring center and spacing that out to fit... The last way I can think of is the most drastic, but is the way I would do it, cut/move/weld...

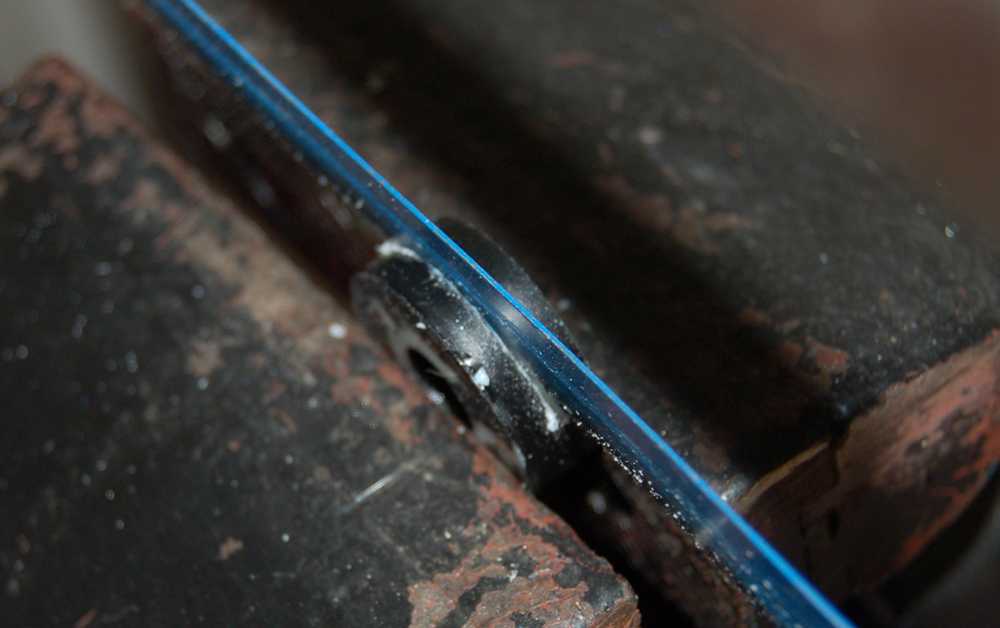
This is a three piece one I did to space further in, no reason it could not go the other way...

9263146758_ac68029a01.jpg


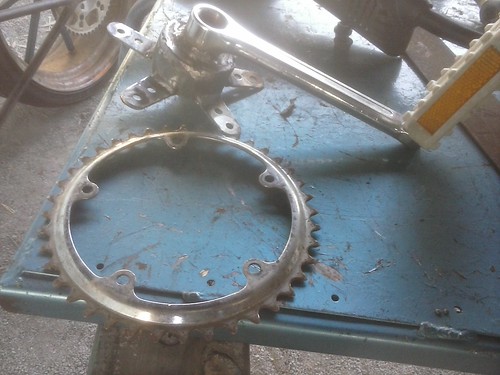
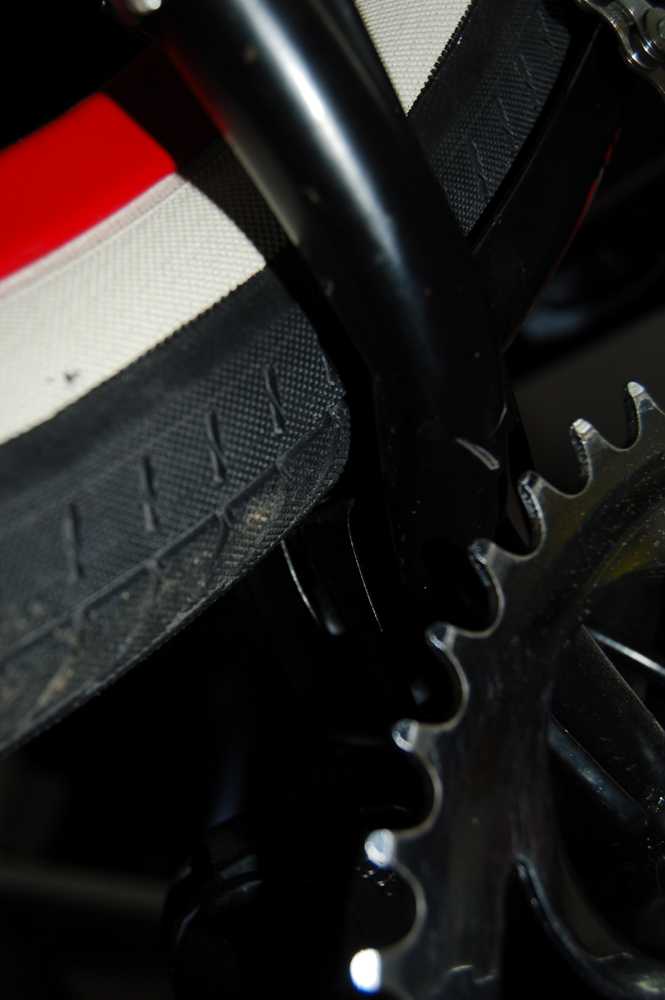
Multi-speed set ups quite often have a fair amount of offset between the front and rear, you may find it is a non issue once the rear is fixed... :wink:

Luke.
 
Since my situation shot me in the foot, and the bike is already painted, the cut/move/weld option isn't an option. Spacer washers... ugh. That means I'm going to have to try to crank those stays out farther. I swear that's all this little frame wanted to give. I'll see what I can do. Maybe a single washer on the drive side will move the wheel over enough to line the chain better too. I'll give that a go.
 
raggedjim said:
How important to you is the outer sprocket? If it were me I would remove the outer sprocket and adjust my shifters so they never down shifted past the 2nd smallest ( but I'm always looking for an easy way out)

Good luck, Rg
That's a last resort option I've already considered. I mean, between that and a major frame mod, I'll make it a 4 speed first. This weekend I'm going to try the spacing washer in the frame and in the sprocket. Hopefully that will be the answer. My "new" sprocket arrived, so that's going on with the changes.
 
Major progress!! I shimmed the crank, and it pulled it out for a better chain line. I put a washer inside the drop out and it gave it enough clearance for the chain.

You can see the washer just on the inside of the drop. I had to grind off part of it so it would clear the clamp from the derailleur. I adjusted the stop for the derailleur movement limit in, which is good, because the derailleur will have full movement.
n59r.jpg


Here's a side shot after I measured and installed the chain. I spun it around a bit on the 5th gear and it's running smooth!
aa4e.jpg


As you can see, I have a Schwinn front sprocket on it. I'm not sure if I like it. We'll see what it looks like with the guard on. But none of the other sprockets I have will work with that chain because they are thick coaster sprockets.

I then installed the shifter after painting it and putting it back together. Unfortunately the innards are really loose, and I can move the shifter handle back and forth a good bit. I bought it used in beat up condition and put it back together with everything it came apart with, but I don't like how lose it is. I'm going to have to see if I can tighten things up.
l72r.jpg


No Kingfish that's not one I bought from you. But I do have the drawer handle you recommended previously. That will go on when I get things situated with the mechanics.
 
Got the shifter working better I think. And put the handle on it (Thanks to Kingfish's recommendation earlier in this build). I found out the shifter cable I bought had the incorrect head, so am going to have to return to the LBS to correct that before continuing.

28hh.jpg
 
This is my first look at your build since you jumped back on it. That wheel turned out great.
Glad to see the shifter placement and knob idea is working. I like the looks of that on your bike!
Keep up the great work!
 
I got the correct old school shifter cable on Friday, so routed the housing and set up the brakes and shifter. The shifter/derailleur is a little testy, requiring som extra pressure to get seated in certain gears, despite adjusting the cable tension. I'm thinking maybe the 'Falcon' derailleur sucks? I don't know, I've never set up this kind before. Maybe it's just what I can expect from old stuff. Regardless, the shifting works.
The brakes are a little worrisome. The don't seem to pull back on the cable very well, so the braking action at the lever feels... "gooey"? The lever just doesn't snap back. Again, maybe I'm just more used to modern stuff. Or maybe it's just the nature of the drum brake. But when the brake is engaged, that wheel stops! I can't wait to see how it works with him on it! The brake and the shifter are going to need broken in. I'll let my kid do it.

mxc9.jpg


Routing wasn't exactly "clean". In order to get the housing to sit right, and not stick out or interfere with the wheel or anything else, I crossed them around the seat tube. Weird looking?

bp03.jpg


And now what I have left is the guard. I got a mount set up for the front. I haven't decided how to mount the back. It doesn't sit flush with the seat stay, so I'm thinking maybe I'll have to get a spacer and drill a screw hole into the stay and mount it that way. I think a bracket from the chain stay would look dumb, and wouldn't secure the guard like I want it.

The enigma is going to be what the heck I do with those fender braces. Particularly the vertical one. The guard interferes with it coming straight down. Maybe cut another slot in the guard? Or I could cut the brace and mount it to the guard? I'll have to figure that out, and fast. This bike is almost ready to hit the streets again!

x2wf.jpg
 
Falcons are cheap but functional low end Shimano, have used one for years. Chain's short a link or 2. :|
An immediately adjacent turn in the opposite direction of cable housing like that can create friction binding, and I also wonder if the brake arm is supposed to have a return spring. :?
 
I was thinking about better routing for the cable. Right now I just have old school clips. But Electra had bolt in guides on a Rat Fink at the shop, so I'm going to try to contact Electra to see if I can buy some. If not, I may be able to make them and screw them into the frame.

So... today...

i worked to try to put rubber on the road. I took off the chain guard as I still have some fab to attach the back to the seat stays and get it over the the fender braces. Speaking of braces, I ran into this snag... the brace doesn't clear the derailleur mounting bolt. So I have to cut out a little chunk to clear.

2nqr.jpg


So we were set to go. I pulled it off the stand, pumped up the rear tire to 90psi :shock: and carried it out to the driveway. It didn't roll. :oops: 
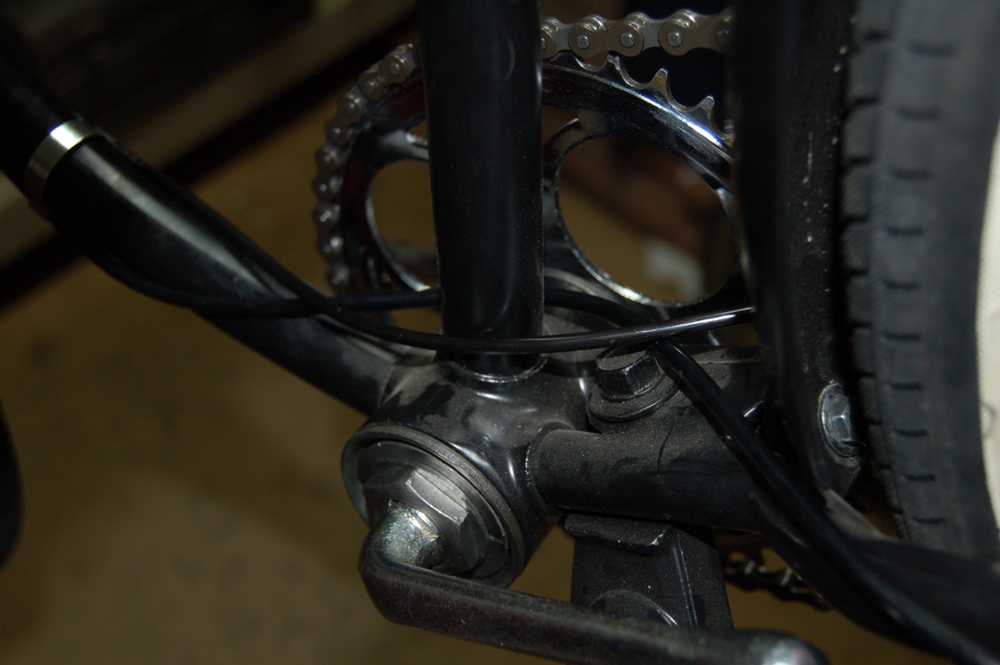
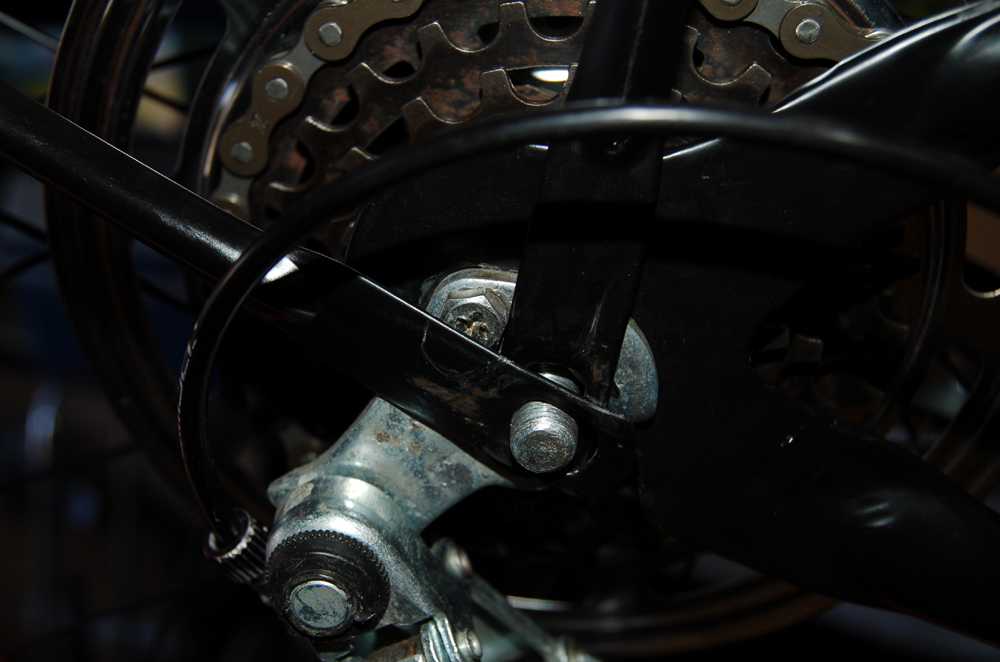
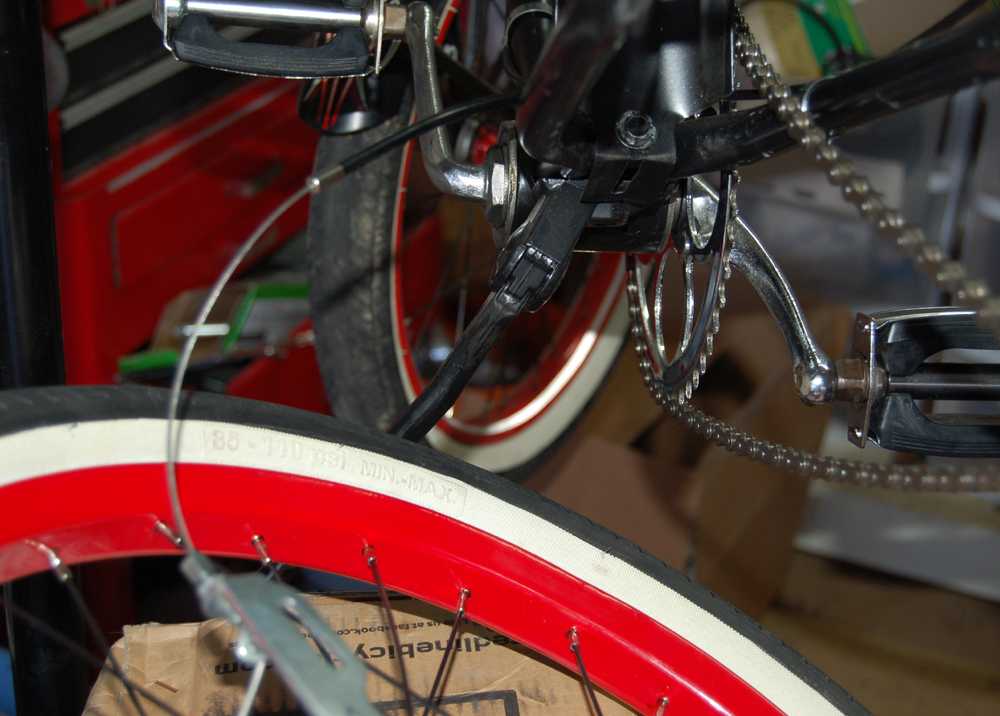
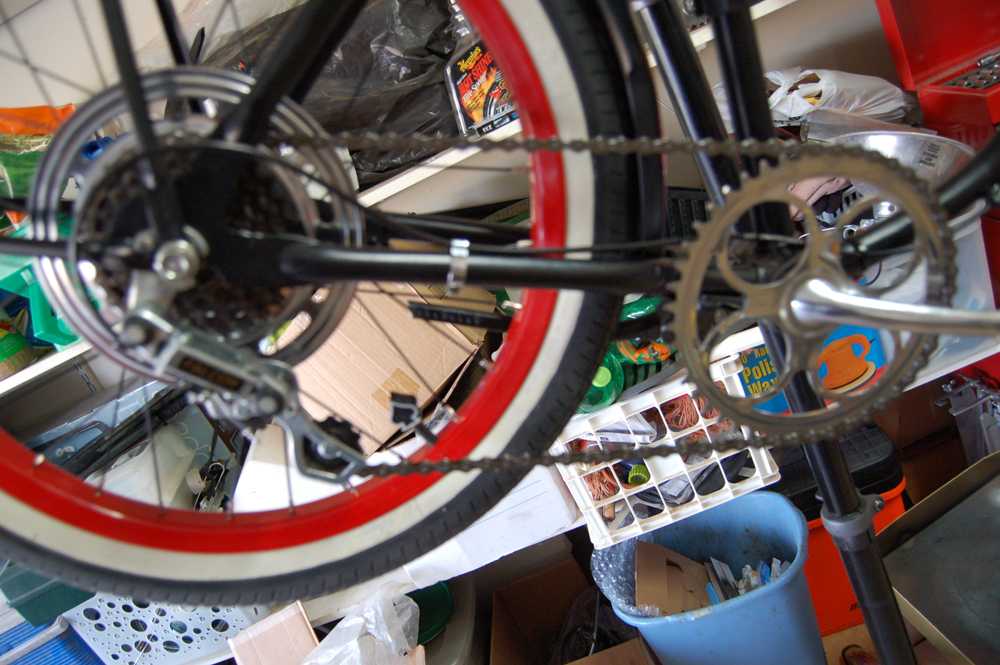
The tire was hitting the bolt head holding on the bottom of the fender. It worked back when it was single speed, but the mods have moved the wheel a little forward. You can just make out the tire rubbing the bolt from this bottom up view.

t0hv.jpg


So to figure out what to do I wanted to pull the rear wheel off... and realized yet another dilemma. The brake cable is bolted in to the brake actuator of the drum brake. But there is no release. So in order to actually remove the wheel, I'll have to cut the brake cable every time. :x Who the heck designed this thing??? I'll have to figure out a fix for that. I've got the same axle for another build, and it's going to be a huge pain in the rear. Any idea on what to do? But for now I put a box under the frame, removed the wheel and sat it down still attached. You can see the bolt the tire was rubbing in this pic.

mfvm.jpg


The fix (hopefully) is cutting the nylon spacer in half, pushing the fender forward. I thought about just removing it, but I think that would actually pull the fender into the rear of the wheel, which is not good. I threw some paint on the space and am waiting for it to dry.

vk8w.jpg
 
ok, fighting back I made some progress. I decided the cable routing could cause too much friction. So I chose to drill and tap in some housing clamps into the bottom of the frame. I told myself I would avoid zip ties, but I had to do it to tame the wild housing. So I zipped it down in a could of (hopefully) inconspicuous places.

(Don't freak out, they aren't tightened in or zip stripped yet. They look a lot better now)
vx0c.jpg


I put the rear fender back on with the thinner spacer, and the wheel cleared fine. An issue I'm having with the tire is it isn't seating evenly around the rim and causing it to be out of round. How can I fix that?

Sorry this is out of focus. Someone said the chain was too short. I measured it like I would a MTB bike. So you think I should add some links back in? What should it look like when correct?

alrh.jpg


I solved the brake line problem by cutting off the end cap and soldering the end so I can pass it through when I need to take the wheel off. A bit of a pain, but that's the price of a custom I suppose.

Brakes still seem to not be snapping back, and you actually have to push the handle back down to full out. I'm going to look for a small spring tomorrow. That will have to hook to the fender brace to pull that actuator arm back and snap the brake lever back where it should be. These drum brakes aren't the best I suppose.
 
I had the same problem seating a repop 16" tractor tread tire the other day, I think it was made for the original style single wall steel rims and I was fitting it to a double wall modern alloy one (bead seating area limited by the hump over the hollow supports in the rim), you may have the reverse issue of that... I solved it by inflating a little at a time and working the bead in or out as needed at each stage, did not come out perfect but much better than the first attempt.

Personally it looks like a couple of extra links could be used in the chain, but it can be hard to run it perfect and still get the chain control you want on the smallest ring, how does it look when in top gear? (Smallest ring.)

Love your idea of soldering the end of the brake cable to stop it fraying out, going to try that! :wink:

Luke.
 
LukeTheJoker said:
inflating a little at a time and working the bead in or out as needed at each stage
how does it look when in top gear? (Smallest ring.)

An mtb has to accommodate the tiny low range sprocket, and generally has a much longer arm/(idler cage/whatever) to allow for the greater range of chain length needed. :|
Clear as mud, right? :mrgreen:
 

Latest posts

Back
Top