I agree that it does look just a little "thick" up front at this stage. I am guessing once you blend it in with the lights it will balance out more visually. This process is sooooo cool.
You are using an out of date browser. It may not display this or other websites correctly.
You should upgrade or use an alternative browser.
You should upgrade or use an alternative browser.
SPACELINER CONVERTIBLE (A Non-Invasive Sex Reassignment)
- Thread starter The Renaissance Man
- Start date


Help Support Rat Rod Bikes Bicycle Forum:
This site may earn a commission from merchant affiliate
links, including eBay, Amazon, and others.
The Renaissance Man
__CERTIFIED DIVER__ (Open Water & Open Dumpster)
Staff member
Moderator
Pro Member
Thanks everyone for the props and constructive criticisms.")
CeeBee, I believe there are a couple of things going on with the actual tank at this point.
The first thing is that without the headlights it appears more bulky with all of that space not being broken up.
The second thing is that in the original rendering, I drew it on top of the picture and made all of the lines do what I wanted them to do. When it came time to make a scaled pattern I shot another picture from farther away and as straight and centered as possible to try to eliminate as much camera skewing as I could. I then redrew it and also extended the nose forward just a little.
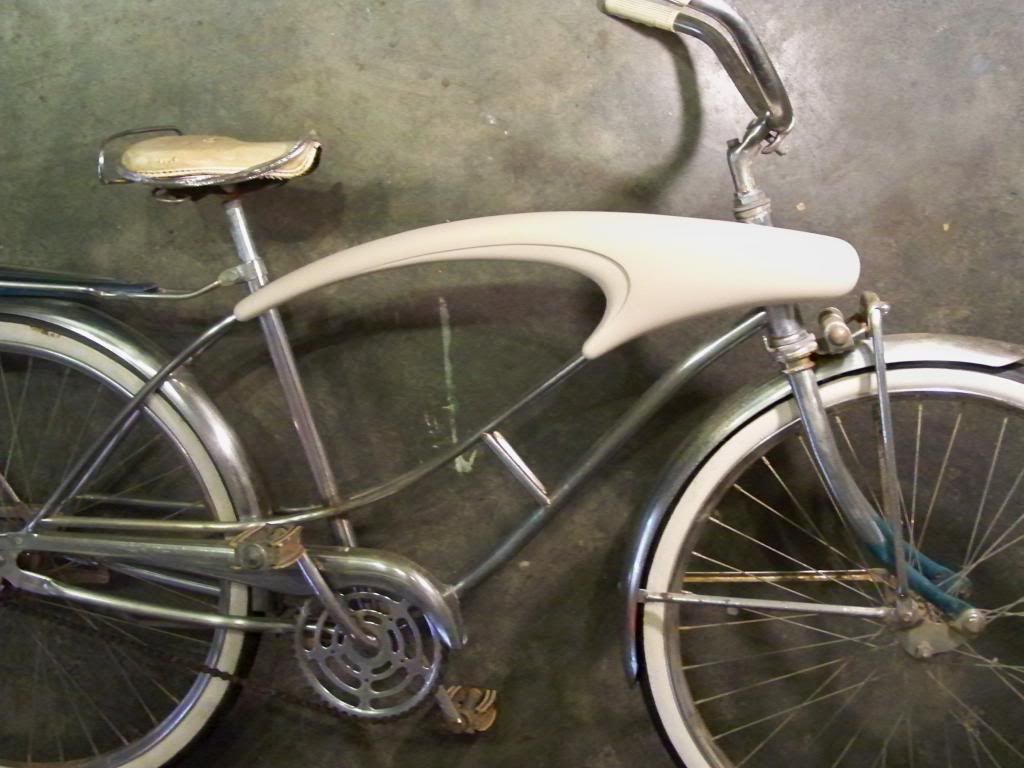
The new picture for scaling was taken of the frame from this parts bike (that I got for the chainring hubcap):

It turns out that there are some subtile differences in the frames.

If you look at the top tubes, you'll notice that the Spaceliner is basically flat from the brace to the head tube while the top tubes on the Lancer are curved like the down tube.
When I tested the full size pattern, it fit the Lancer perfectly, but i had to shift it about 1/2" forward on the Spaceliner in order to get the bottom to line up with the top tubes. This combined with the fact that I also decided to extend it out more than the original rendering makes it stick out even further!
Even though I extended it to more closely match the length of the original head light, I may look at taking some back off of the nose if it still looks front heavy after I get the lights made. The good thing is that at this stage, I still have the option!
Here are the two pictures for comparison:
CeeBee, I believe there are a couple of things going on with the actual tank at this point.
The first thing is that without the headlights it appears more bulky with all of that space not being broken up.
The second thing is that in the original rendering, I drew it on top of the picture and made all of the lines do what I wanted them to do. When it came time to make a scaled pattern I shot another picture from farther away and as straight and centered as possible to try to eliminate as much camera skewing as I could. I then redrew it and also extended the nose forward just a little.
The new picture for scaling was taken of the frame from this parts bike (that I got for the chainring hubcap):
It turns out that there are some subtile differences in the frames.
If you look at the top tubes, you'll notice that the Spaceliner is basically flat from the brace to the head tube while the top tubes on the Lancer are curved like the down tube.
When I tested the full size pattern, it fit the Lancer perfectly, but i had to shift it about 1/2" forward on the Spaceliner in order to get the bottom to line up with the top tubes. This combined with the fact that I also decided to extend it out more than the original rendering makes it stick out even further!
Even though I extended it to more closely match the length of the original head light, I may look at taking some back off of the nose if it still looks front heavy after I get the lights made. The good thing is that at this stage, I still have the option!
Here are the two pictures for comparison:
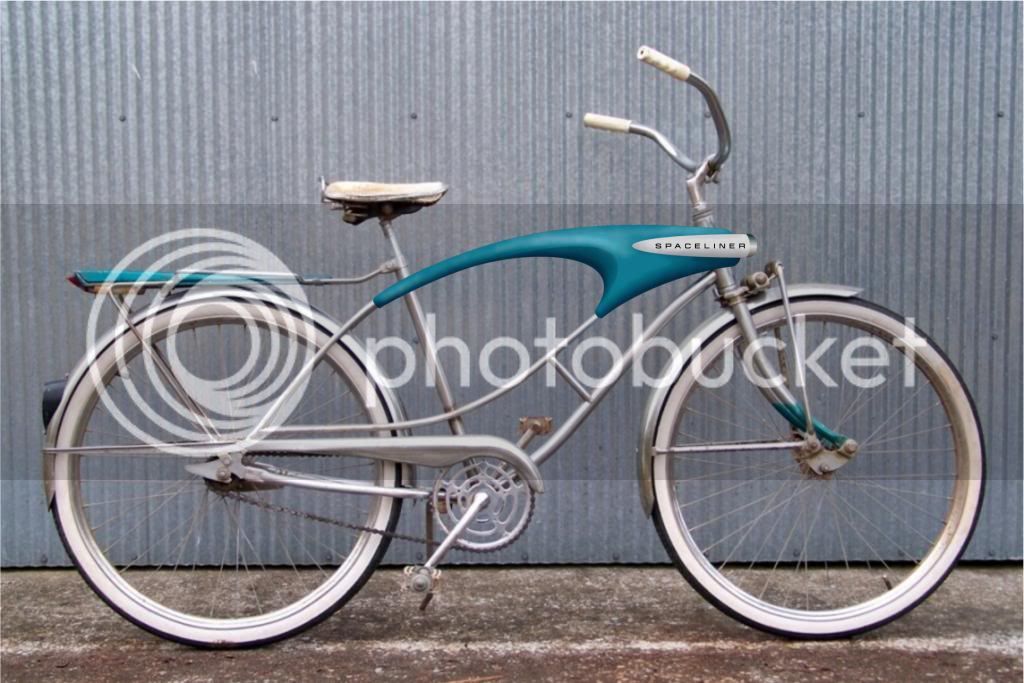
I may be in the minority, but I like the mock up tank better than the rendering. It has a look sort of like an Airflow, and I really like the cut in style line. Though not as sleek it has a more masculine feel.
also the shot of the bike laying down is cheating a bit of a 3/4 view more than true profile. we are seeing some of the top of the tank cause it is sitting on its bar end. do your thing, i have not seen a better buck being made on this site, very creative and slick all around...
*edit look at how much of the seat top and bumper you can see in the lay down shot as opposed to the profile against the corrugated wall...
*edit look at how much of the seat top and bumper you can see in the lay down shot as opposed to the profile against the corrugated wall...
Last edited:
The Renaissance Man
__CERTIFIED DIVER__ (Open Water & Open Dumpster)
Staff member
Moderator
Pro Member
Masculine is good since that's the point of a gender change! I'm glad you like it.I may be in the minority, but I like the mock up tank better than the rendering. It has a look sort of like an Airflow, and I really like the cut in style line. Though not as sleek it has a more masculine feel.
The Renaissance Man
__CERTIFIED DIVER__ (Open Water & Open Dumpster)
Staff member
Moderator
Pro Member
You are right about the profile and also the fact that the floor shot was taken from only 4 to 5 feet away can really cause things to distort.also the shot of the bike laying down is cheating a bit of a 3/4 view more than true profile. we are seeing some of the top of the tank cause it is sitting on its bar end. do your thing, i have not seen a better buck being made on this site, very creative and slick all around...
*edit look at how much of the seat top and bumper you can see in the lay down shot as opposed to the profile against the corrugated wall...
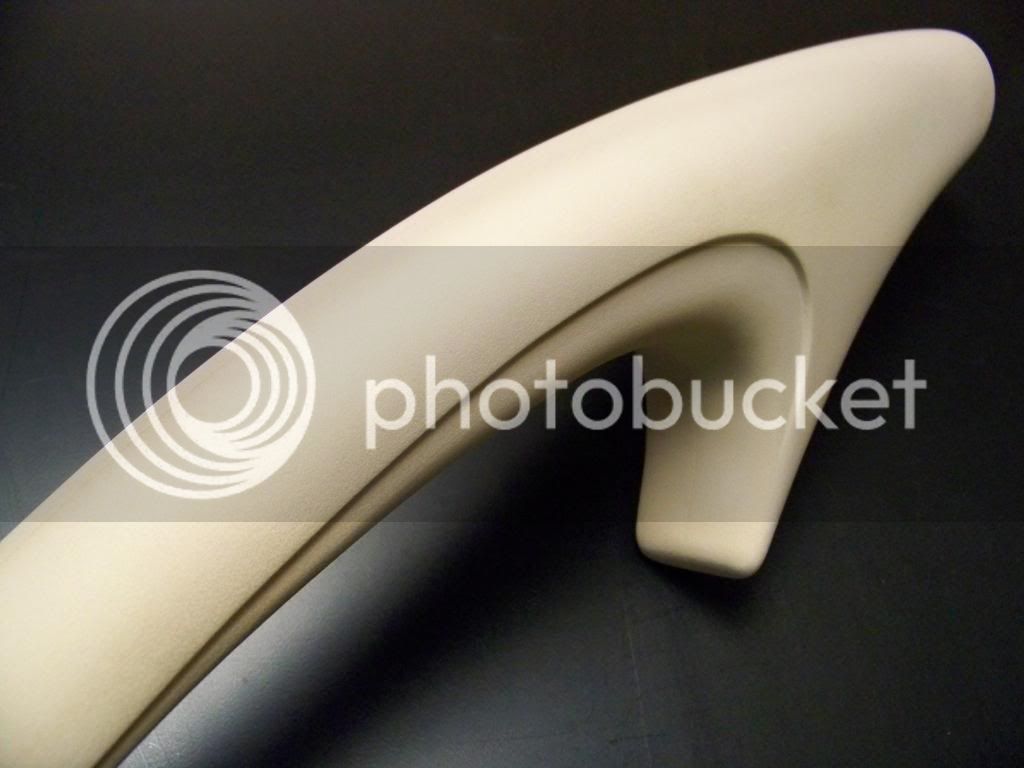
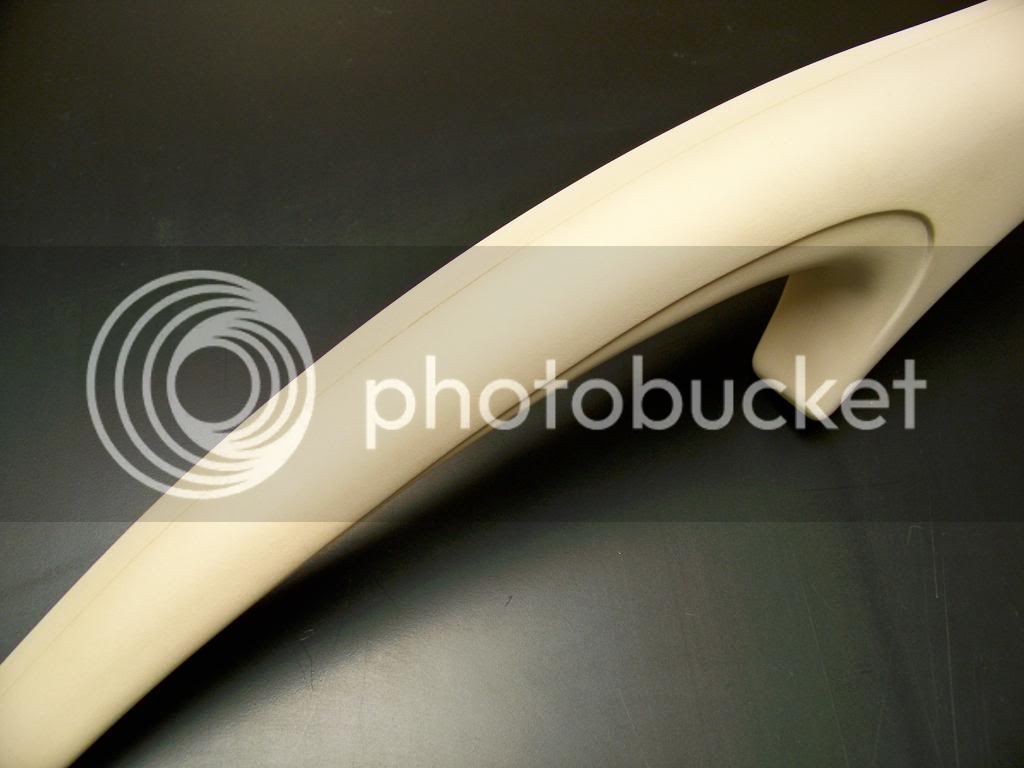
I went back and looked at the floor pictures again (I usually take several), and found this one that was more from the bottom than top, and it does seem to back up the point that you made.
This picture looks a little 'slimmer' to me. Maybe it's my imagination.

it happens all the time when working long curves on sleds.. the matt light color dose not help the effect, as it dose not show highlights, just some shadow, the highlight gets washed out... so your eye is being cheated of information... in gloss im sure it is more than fine.. actually if you look at the second photo, and strain your eyes, you can see some highlight contrast looks like it has about the same radius as the bottom... very impressive... ive seen many many production models that were never as thought out as this... go to town..You are right about the profile and also the fact that the floor shot was taken from only 4 to 5 feet away can really cause things to distort.
I went back and looked at the floor pictures again (I usually take several), and found this one that was more from the bottom than top, and it does seem to back up the point that you made.
This picture looks a little 'slimmer' to me. Maybe it's my imagination.
The Renaissance Man
__CERTIFIED DIVER__ (Open Water & Open Dumpster)
Staff member
Moderator
Pro Member
Thanks pholTmonx.
I'll try to get a better picture of just the tank later today.
I'll try to get a better picture of just the tank later today.
i also really like the stepped body line.. it makes it look like it was possibly stamped, away from the bondo mold outs on lowriderbikes... the keep adding till the shape is washed out look... when you get to figuring out mounts take a gander at these... http://www.simplyspeakers.com/speaker-grill-peg-mounting-kit-gc-smpeg.html
i use these a lot on installations and for hidden mounts. quick easy cheap and adjustable..
i use these a lot on installations and for hidden mounts. quick easy cheap and adjustable..
The Renaissance Man
__CERTIFIED DIVER__ (Open Water & Open Dumpster)
Staff member
Moderator
Pro Member
OK, so I took a picture of the tank by it self and purposely shot it from the trailing end just to further bolster the whole photo skewing discussion. Now the front is smaller than the rear!
I also ran into some of the same issues when I took pictures of my truss rods.
That second shot makes a big difference, so it must have been the angles.
Once you get the colors on it the front will look slimmer as well.
Sent from my HTC EVOLTE using Tapatalk 4 Pro.
Sent from my HTC EVOLTE using Tapatalk 4 Pro.
i am going to need you to put it in a white light scanner so you can pull a 3d wire frame of it, then we can further discuss the true dimensions radius and axis digits.. till then im going to give you the benefit of the dout of a guy who has enough experience with HDF to know what it is, and how to build a buck, the same guy who pulled the concept out of who knows what crevasse...
I really do hope you are just joking around...i am going to need you to put it in a white light scanner so you can pull a 3d wire frame of it, then we can further discuss the true dimensions radius and axis digits.. till then im going to give you the benefit of the dout of a guy who has enough experience with HDF to know what it is, and how to build a buck, the same guy who pulled the concept out of who knows what crevasse...
The Renaissance Man
__CERTIFIED DIVER__ (Open Water & Open Dumpster)
Staff member
Moderator
Pro Member
i am going to need you to put it in a white light scanner so you can pull a 3d wire frame of it, then we can further discuss the true dimensions radius and axis digits.. till then im going to give you the benefit of the dout of a guy who has enough experience with HDF to know what it is, and how to build a buck, the same guy who pulled the concept out of who knows what crevasse...
I really do hope you are not joking around...
The Renaissance Man
__CERTIFIED DIVER__ (Open Water & Open Dumpster)
Staff member
Moderator
Pro Member
Thanks CeeBee, here's one at an angle from above:The low rear angle does look amazingly graceful!
Another thing I realized is that the actual current buck doesn't have the scallop with "SPACELINER" in it to break it up visually.
Just to keep the conversation going, how about a pic from above at an angle that approximates the view the average person standing will see when the bike is on its kick stand. You know, the stand back in awe of its awesomeness view.

Here are both sides from above:
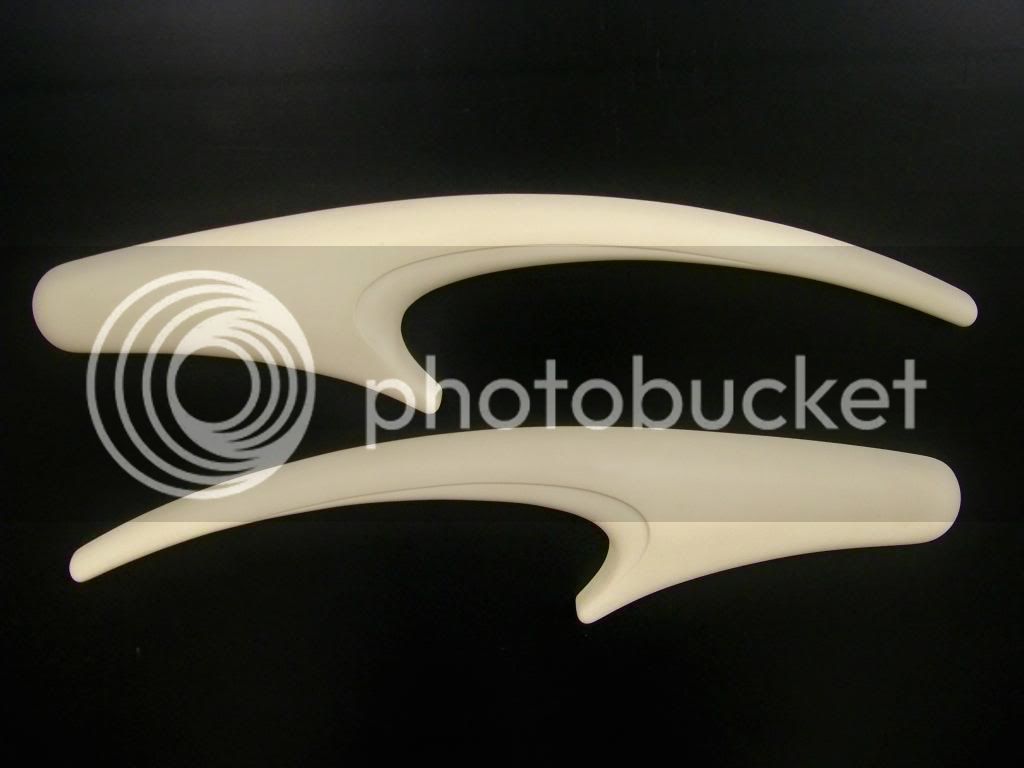
Once again, because of the camera angle, the top piece looks heavier than the bottom but of course they're the same profile.
I've started on the torpedo lights and hope to have something to show soon.
such talent.
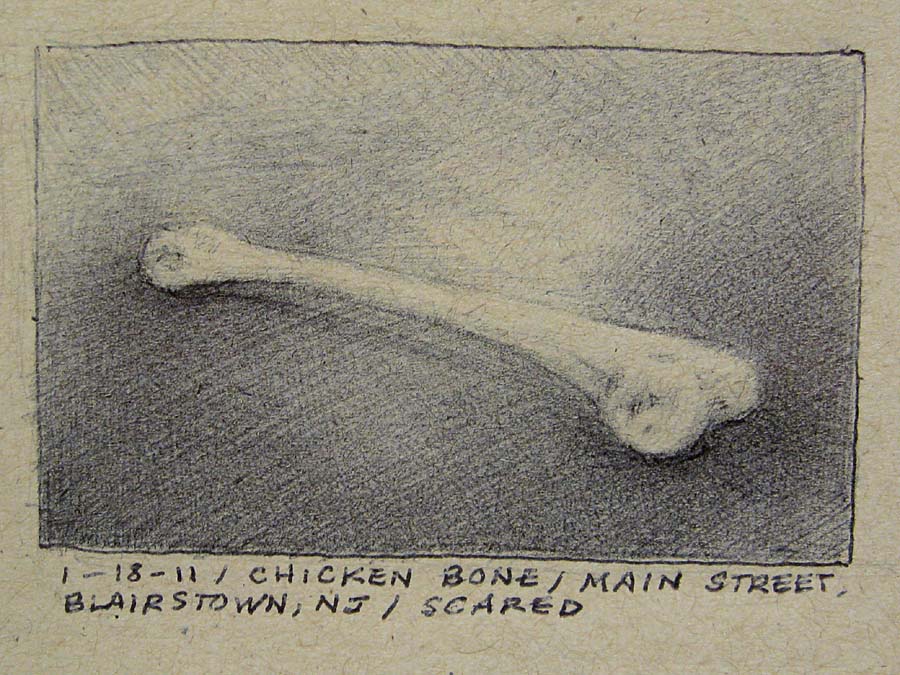
Looks like a chicken bone to me. 
Poultry in motion.
Poultry in motion.
The Renaissance Man
__CERTIFIED DIVER__ (Open Water & Open Dumpster)
Staff member
Moderator
Pro Member
Thanks guys.
KF... I think your right! That made me laugh out loud.
Deja vu
BTW, we're getting several inches of snow today in my town. Might have to go snow bike riding!
KF... I think your right! That made me laugh out loud.
Deja vu
BTW, we're getting several inches of snow today in my town. Might have to go snow bike riding!