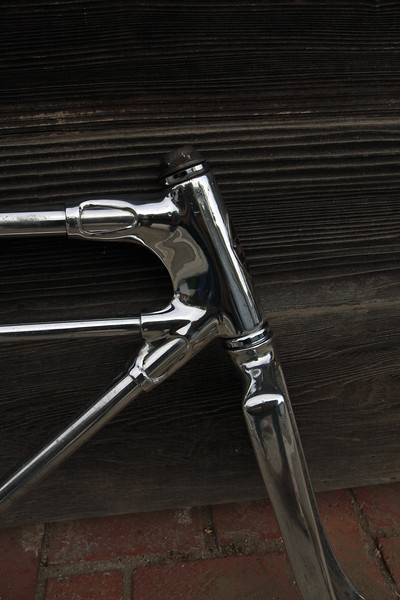
i think those steer tubes are removable..
You are using an out of date browser. It may not display this or other websites correctly.
You should upgrade or use an alternative browser.
You should upgrade or use an alternative browser.
'35 silverking ... kinda
- Thread starter kingrider
- Start date


Help Support Rat Rod Bikes Bicycle Forum:
This site may earn a commission from merchant affiliate
links, including eBay, Amazon, and others.
killer work love it!
stretch said:i think those steer tubes are removable..
Yes they should be. Just like a reverse or upside-down stem you should be able to come from the bottom and remove it/get it cleaned up. I love this build as this frame was my first choice for this build. Good luck and can't wait to see whats next!
Yes it does! I have a pic on my Build. My head tube won't come out so i am using a modern set up.
The electrolysis between the aluminum and the steel amplifies the rusting. Hopefully your tube is strong enough to use.
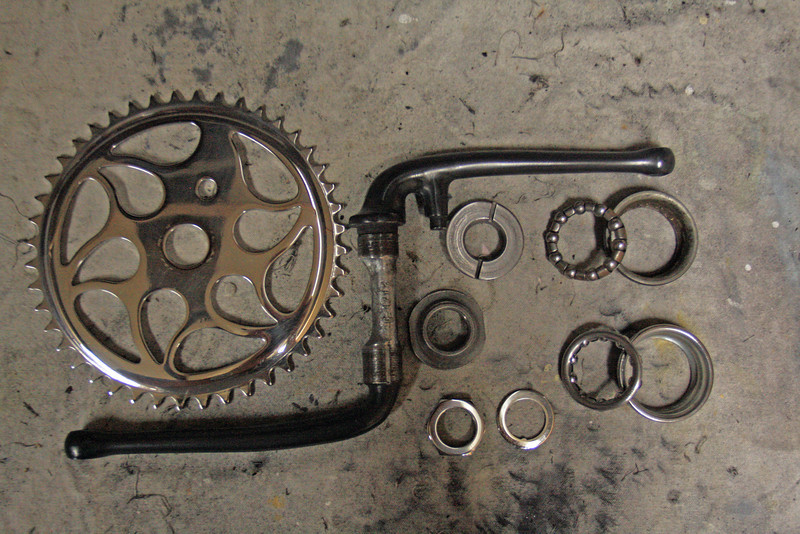
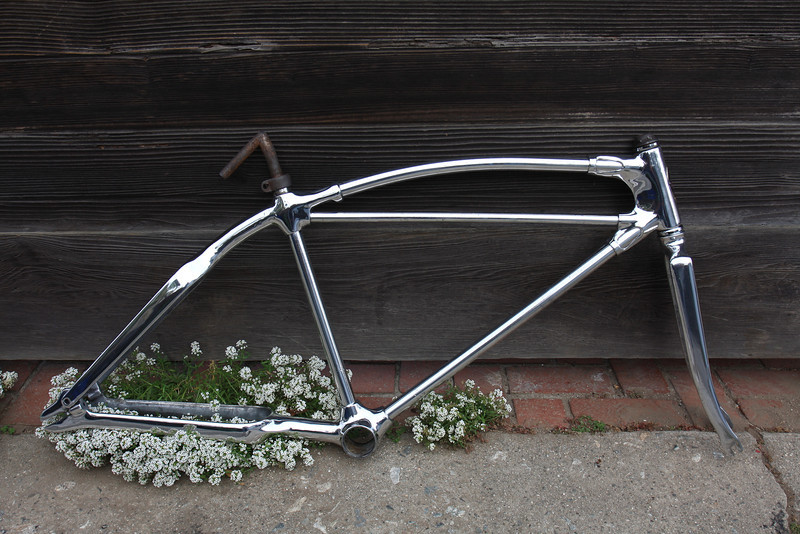
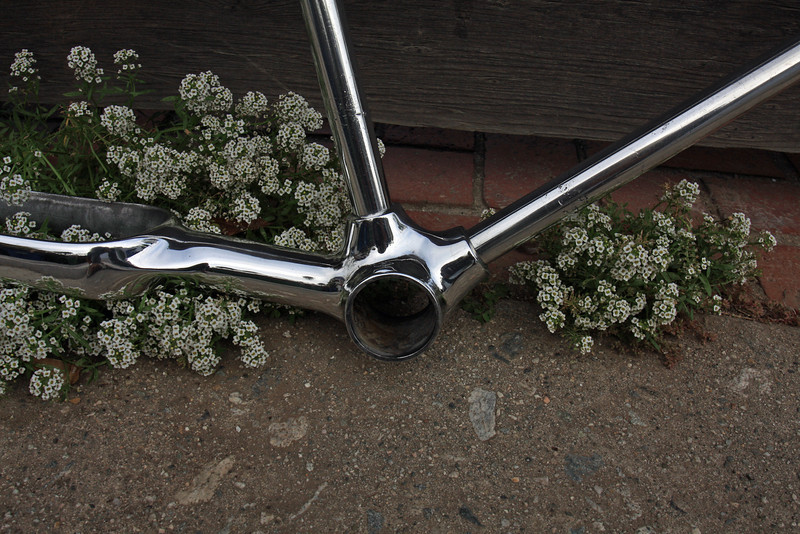
14 hours of polishing ((Ouch))
The electrolysis between the aluminum and the steel amplifies the rusting. Hopefully your tube is strong enough to use.
14 hours of polishing ((Ouch))
Still had the polishing stuff lying around so why stop at the frame. Crank, sprocket, bearings, nuts and cups needed a clean-up. The crank I had primered getting ready to paint but just ended up polishing the primer. Ended up looking just like what I was aiming for. Was lucky enough to find an alloy sprocket. Still waiting on those darn wheels.
") !!
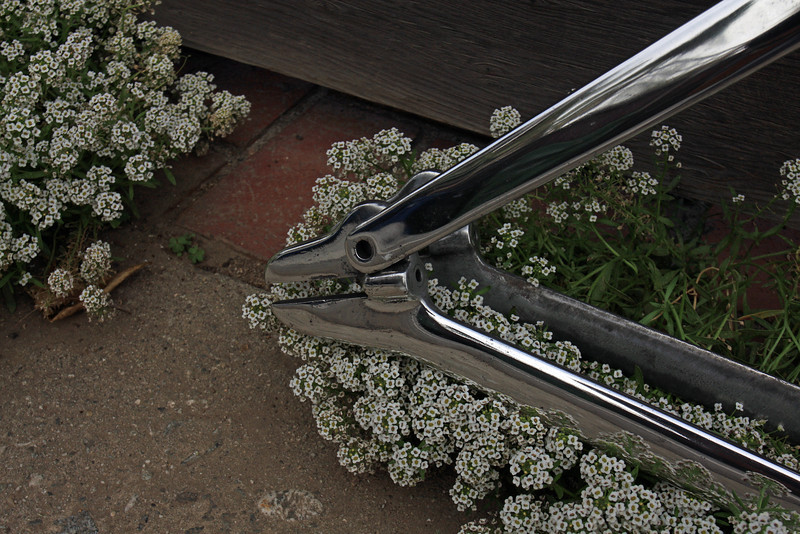
!!kingrider said:Well the polishing wasn't exactly quick . Didn't punch a time clock but probably close to 14 hours total. and i skimped on the tubes. Yes, much easier with the fork off . Found a bit of rust when the fork finally separated. The bearing set seemed to solidify to the head tube. Found a perfect fit nos set of bearings and cups and it now spins freely. the previous owner must've smacked into something head-on as the fork has a slight crook where the post goes into the fork. I'm a bit scared , probably just gunna leave it.
The fork does look bent. Wonder if you could replace the steer tube? I would be afraid to try and straighten it since its aluminum.
Nice job on the polishing, it looks like chrome!
:shock: ^^^^^^Work of art!^^^^ Keep up the great work! :mrgreen:
kingrider said:
That's some serious polishing gone on there. I've a friend that has a serious polishing afliction, he went weak at the knees when he saw this. Bloody good job. 8)
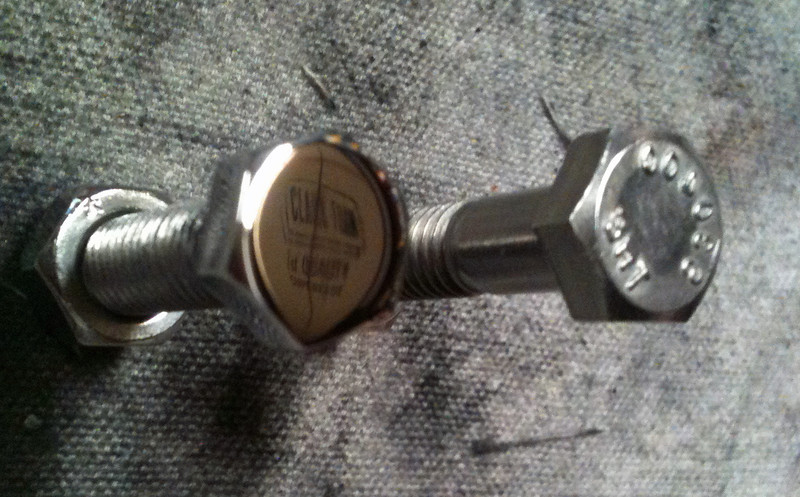
Startin' to get really nuts here. I bought all stainless fasteners to hold the bike together (frame) and parts (seat clamp, handlebar stem etc.) on to it. But I just didn't like that they had those pesky numbers embossed on 'em. So, off they went
Now that's a great idea! Ace hardware has a section of chrome plated bolts that look like that, spendy though! :  what's the average amount of time to accomplish that?
what's the average amount of time to accomplish that?The DeViL is in the details! Looks Good...
That's dedication for you.
Surprisingly not bad. Just start with a metal file for the embossed stuff then slightly on all sides to remove forging marks, about 2 minutes max. Then I went with 220 wet or dry followed by 600 followed by 2000 another couple minutes. Then the buffing wheel wheel with tripoli buffing stick followed by white buffing stick. I don't think I spent more than 5 minutes each one. I saw no reason to go further with jewelers rouge. The reflection on the finished bolt is a stamp on an old surfboard blank I have hanging from the raftersOneuglybike said:what's the average amount of time to accomplish that?
Been checking out many other builds and I gotta say you guys know your stuff. Fantastic vision, concepts, workmanship, machining, Paint, pinstriping , the list goes on... And your work areas, unbelievable!, In a good way . I’m thinking my area is unbelievable also so I thought I’d toss in a picture of it . . This is my first bike I’ve ever altered since replacing my front typhoon tire for a rear knobby on my stingray back in 1965 so I’d have better traction playing bike tag on the trails around us.
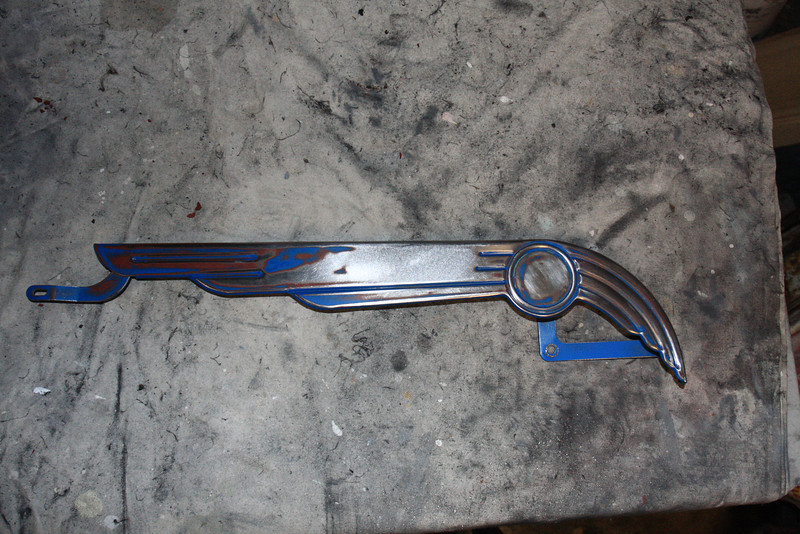
Well, I was thinking of having the chain guard and rear rack pieces powder coated but didn’t want to mess with rule #9.
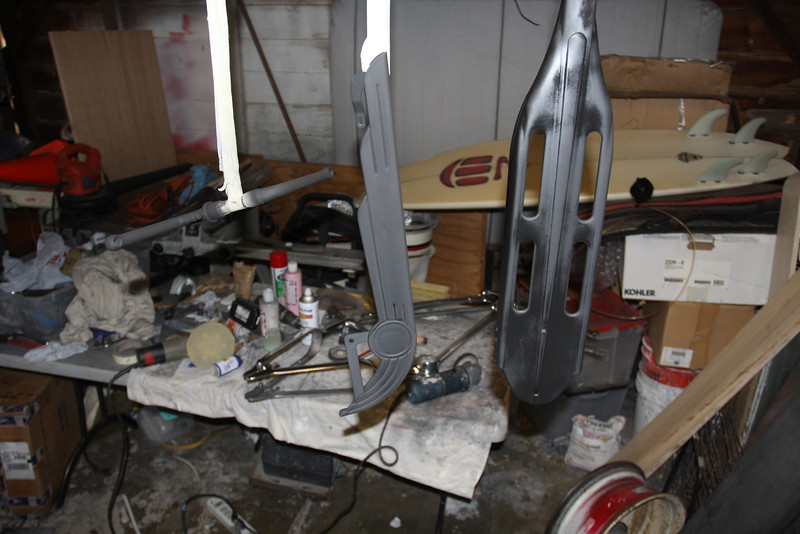
My HVLP spray rig is in here somewhere… let’s hear it for spray cans..was thinking of just rubbing out the primer but I think I'll go with a color
Well, I was thinking of having the chain guard and rear rack pieces powder coated but didn’t want to mess with rule #9.
My HVLP spray rig is in here somewhere… let’s hear it for spray cans..was thinking of just rubbing out the primer but I think I'll go with a color
well, took a break from this and life in general. went down to Baja Mexico for a surf trip trip for a couple weeks. when I returned I found the rims still not finished . the LBS had a problem finding long black nipples for my thicker stainless spokes and the hubs needed to be drilled out to accommodate the added thickness. they had a hard time drilling the new black Sturmey Archer kick-back two speed hub as it is case hardened. darn, those black nipples would have really set off those rims. the spray can red paint job really ended up smooth and now I'm thinking the simple black seat is too simple. maybe a trip to the local fabric shop to see if any red leather is laying around.
a quick video of the assembly can be found here http://mox90291.smugmug.com/gallery/17563133_stx3mB#1399447953_B8q9QDc-A-LB
a quick video of the assembly can be found here http://mox90291.smugmug.com/gallery/17563133_stx3mB#1399447953_B8q9QDc-A-LB
Amazing before and after on this frame!
Was it common for silver kings to be painted?
Sent from my iPhone using Tapatalk
Sent from my iPhone using Tapatalk