You are using an out of date browser. It may not display this or other websites correctly.
You should upgrade or use an alternative browser.
You should upgrade or use an alternative browser.
BonniRocket - Pretty much done at this point
- Thread starter expjawa
- Start date


Help Support Rat Rod Bikes Bicycle Forum:
This site may earn a commission from merchant affiliate
links, including eBay, Amazon, and others.
Re: BonniRocket
Nice plans for this one, I know all about being sidetracked
Nice plans for this one, I know all about being sidetracked
Re: BonniRocket
This is gonna be a sweet bike Can't wait to see it with the aluminum :wink:
Nice job on stripping the frame 8)
This is gonna be a sweet bike
Can't wait to see it with the aluminum :wink: Nice job on stripping the frame 8)
Re: BonniRocket
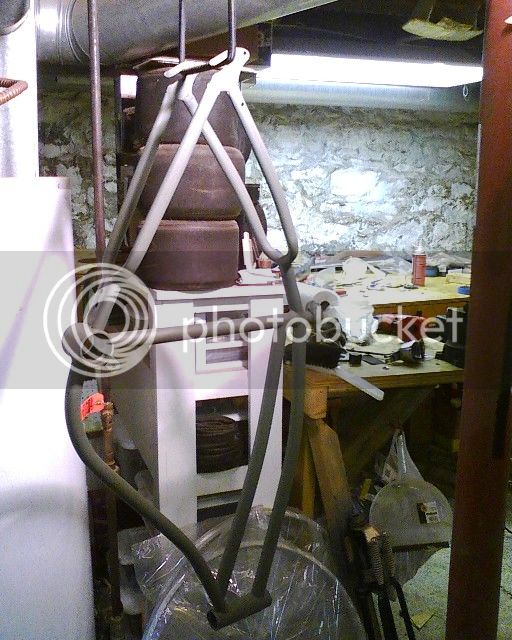
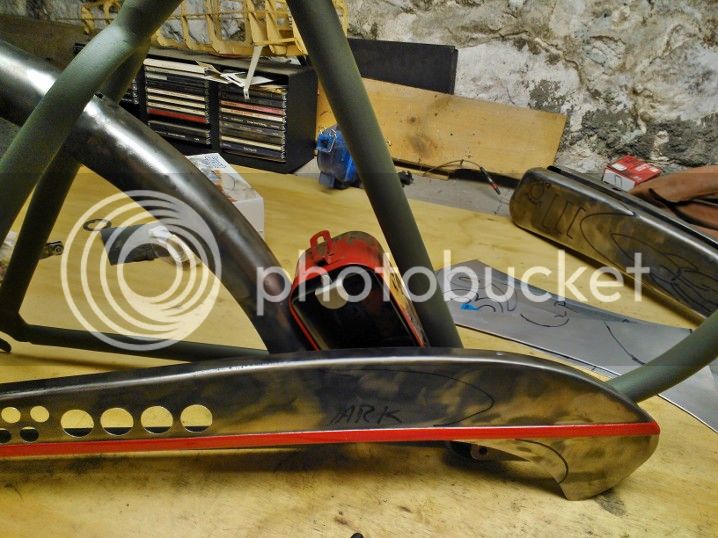
Well, I can oblige that one. I stopped over to my folks' place this morning. My dad had the sheet stock to make my fairing bits out of, which I was pretty sure he would. So, I applied the templates, cut them out on his band saw, and back over to my shop for a test fitting. Forgive that its all taped together...
Drive side:
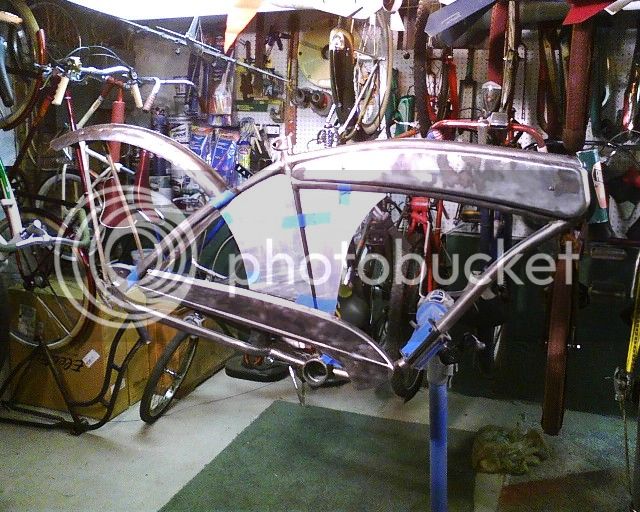
Other side:
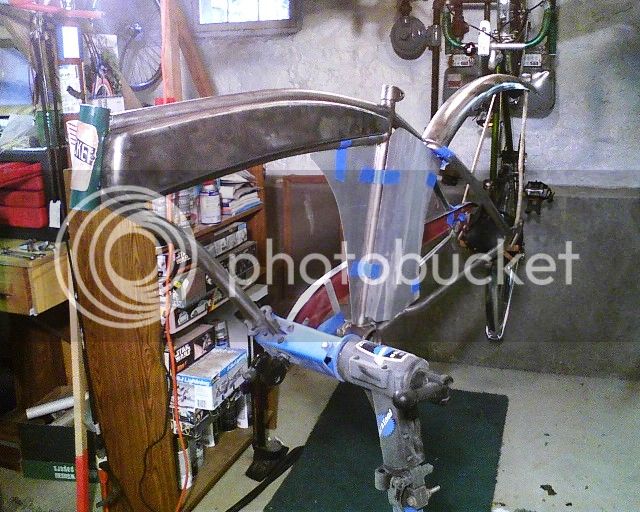
It took a little fitting and filing, but these should work pretty well. A rear view:

Then, I got creative with a Sharpie and started sketching out on the panels how I wanted the paint and graphics to look.
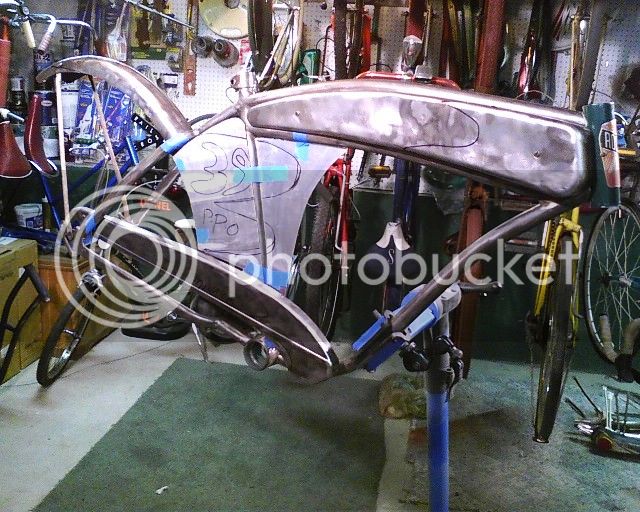
It's crude at this point, but the scallops will be in a translucent green. My intent is that the lettering will be gold, and there will be red piping dividing the green from the raw, as well as a red stripe along the chain guard (on the raised horizonal line that's visable in the pic). The rims will also be bright red. At least, that's the current plan.
Note that I left the paint on the head tube. It just struck me as appropriate. By the same token, I decided to do the same with the fork, so it matches the head tube. That save me some time with added stripping and painting...
Anyway, back at it!
Well, I can oblige that one. I stopped over to my folks' place this morning. My dad had the sheet stock to make my fairing bits out of, which I was pretty sure he would. So, I applied the templates, cut them out on his band saw, and back over to my shop for a test fitting. Forgive that its all taped together...
Drive side:
Other side:
It took a little fitting and filing, but these should work pretty well. A rear view:
Then, I got creative with a Sharpie and started sketching out on the panels how I wanted the paint and graphics to look.
It's crude at this point, but the scallops will be in a translucent green. My intent is that the lettering will be gold, and there will be red piping dividing the green from the raw, as well as a red stripe along the chain guard (on the raised horizonal line that's visable in the pic). The rims will also be bright red. At least, that's the current plan.
Note that I left the paint on the head tube. It just struck me as appropriate. By the same token, I decided to do the same with the fork, so it matches the head tube. That save me some time with added stripping and painting...
Anyway, back at it!
Re: BonniRocket
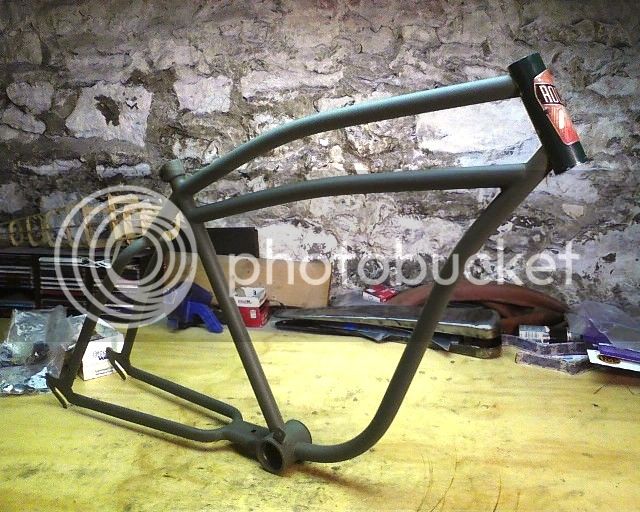
OK, end of the day update.
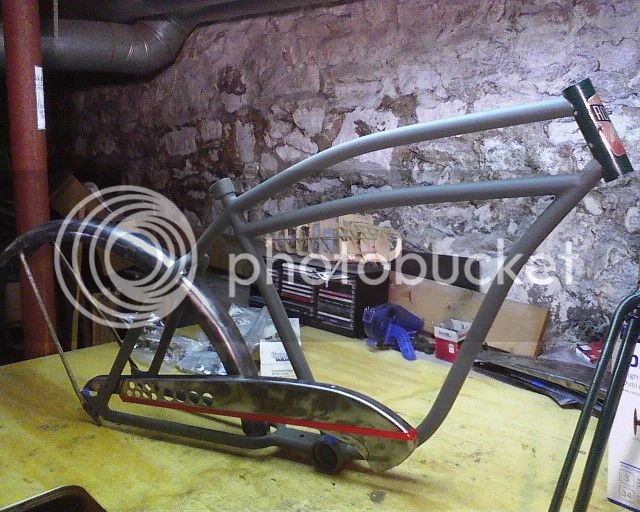
I primered the frame. I used Dupicolor self-etching primer, which I was told was good stuff.
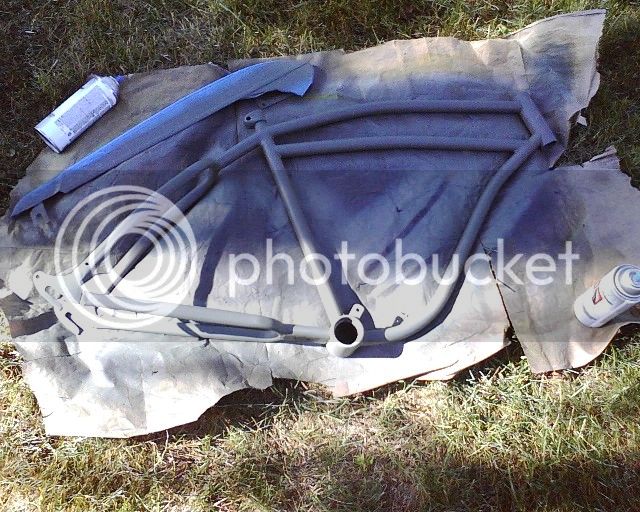
You see that I also masked off the chain guard to primer and paint the accent stripe on the horizontal line.
The frame hanging as the paint dries:
I've decided that the color of the primer is pretty neat, it's sort of a grey-green, almost a pale olive drab. I hadn't really settled on the color of the frame yet, but I think I'm going to leave it as is. I may clear coat over the primer to make it glossy, but I might just leave it matte.
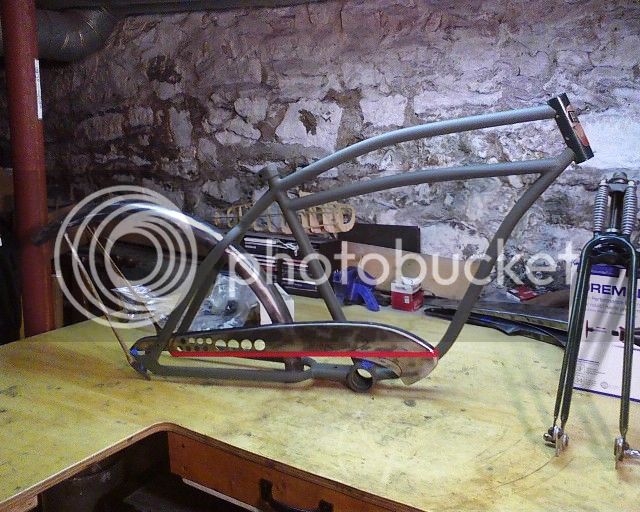
The red stripe on the chain guard:
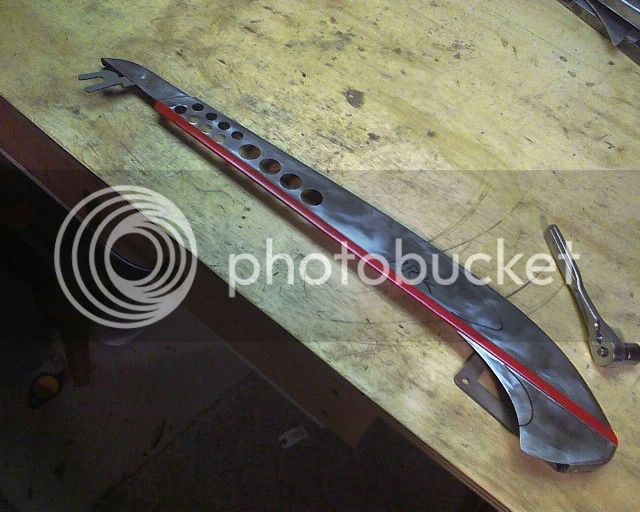
I also decided that any theoretically performance-themed build out to make it look like efforts were spent in reducing weight, so I borrowed some radio chassis punches from my father and added a series of Homer-style speed holes. Actually, I was initially going for an aircraft air brake look, but that's neither here nor there now. Here's the guard against the primered frame to see home the Rustolium Apple Red works against the drab. It actually seems to go together better than I would've guessed...
Anyway, that's enough for now. 5:00 AM comes too early...
OK, end of the day update.
I primered the frame. I used Dupicolor self-etching primer, which I was told was good stuff.
You see that I also masked off the chain guard to primer and paint the accent stripe on the horizontal line.
The frame hanging as the paint dries:
I've decided that the color of the primer is pretty neat, it's sort of a grey-green, almost a pale olive drab. I hadn't really settled on the color of the frame yet, but I think I'm going to leave it as is. I may clear coat over the primer to make it glossy, but I might just leave it matte.
The red stripe on the chain guard:
I also decided that any theoretically performance-themed build out to make it look like efforts were spent in reducing weight, so I borrowed some radio chassis punches from my father and added a series of Homer-style speed holes. Actually, I was initially going for an aircraft air brake look, but that's neither here nor there now. Here's the guard against the primered frame to see home the Rustolium Apple Red works against the drab. It actually seems to go together better than I would've guessed...
Anyway, that's enough for now. 5:00 AM comes too early...
Re: BonniRocket
Sweet work man!!!!
Sweet work man!!!!
Re: BonniRocket
A minor update before the weekend. This week, picked up another Big Beam flashlight, this one a model 164, that I intend to use (at least in part) on the bike.
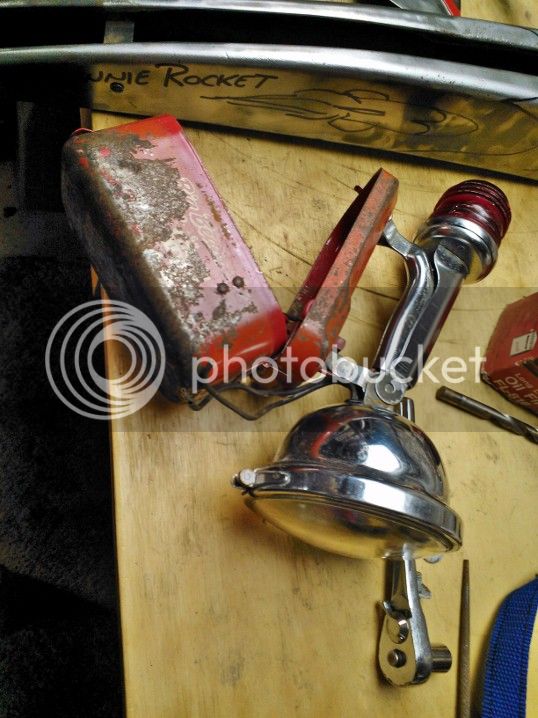
Here's the lamp unit removed.

The chrome is in pretty good shape, with minor rust. That which won't clean up will add to the patina. The beacon light might make a good tail light for another project, but I'm not using it here.
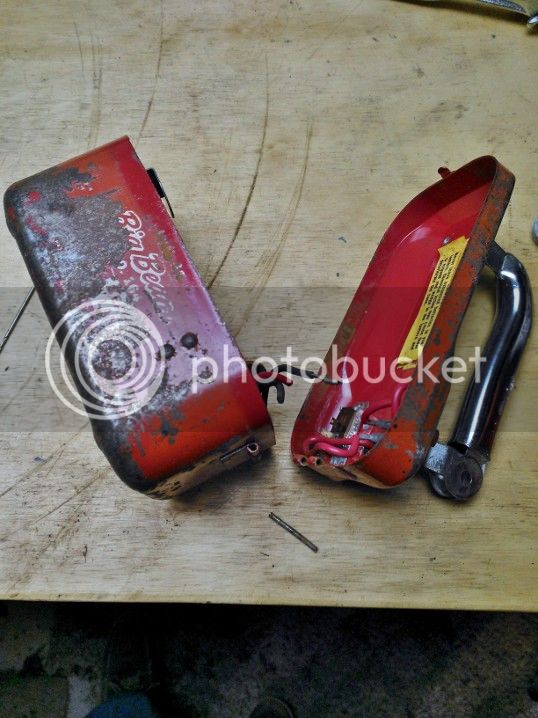
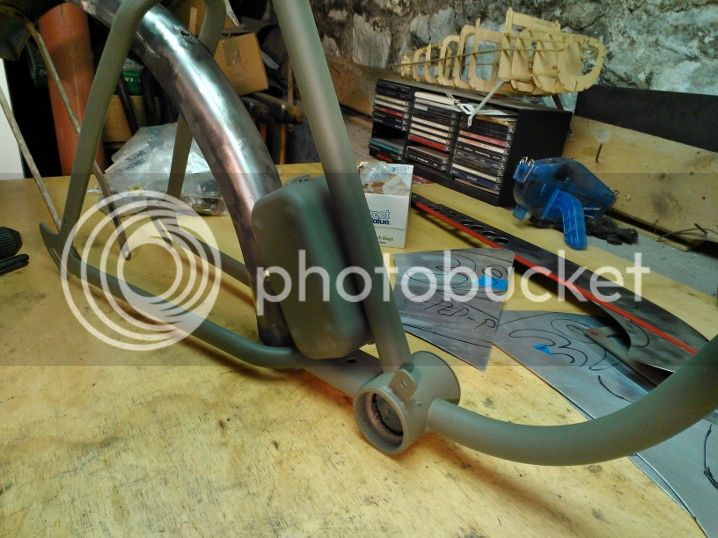
My plan is to mount the battery box on the frame, since there isn't enough room in the tank for a 6V. Even if there was, with my shifter and brake cables routed into there, it would still be in the way. I seperated the lid by driving out the hinge pin, which came out easily.
Here's the box sitting behind the seat tube base:
Actually, it'll probably be more like this:
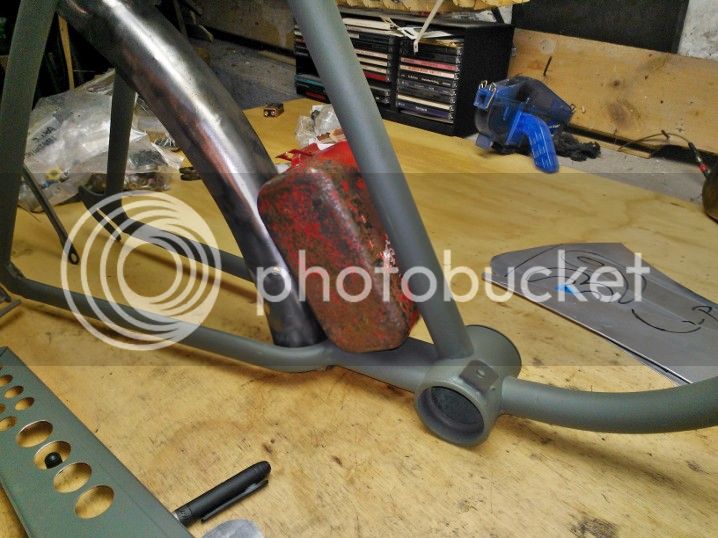
That'll allow easier access to the battery itself by simply removing the left side fairing panel. I sprayed the box in the self-eching primer because it was starting rust a bit.
 It won't be too visable in the assembly, but I want to preserve it as much as possible.
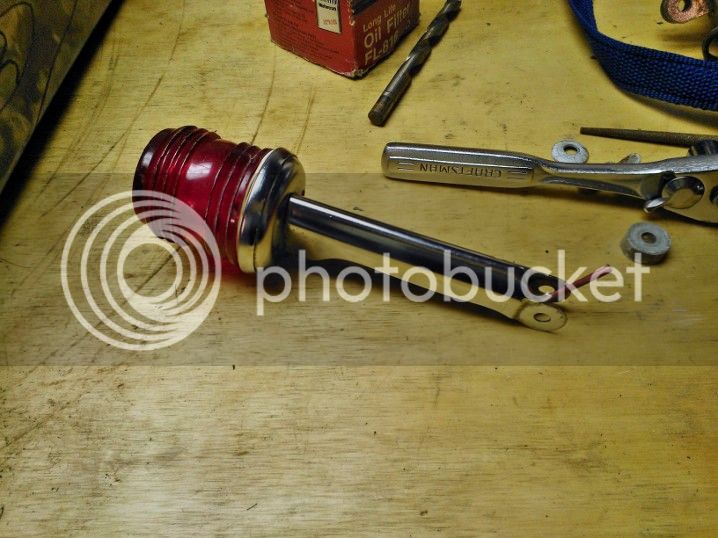
Anyway, I did test the lamp by jumpering it directly to a battery:
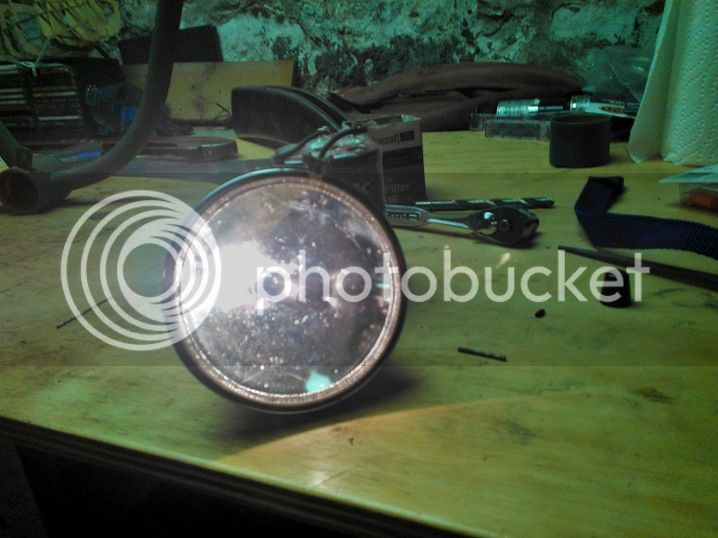
It's definately brighter than my 166 model, which uses a different lamp/bulb assembly. I haven't yet decided how or where I'm going to mount this. I originally planned to mount one on each side of the fork, but I'm not sure. It's pretty big, and two of them might be visually overwhelming.
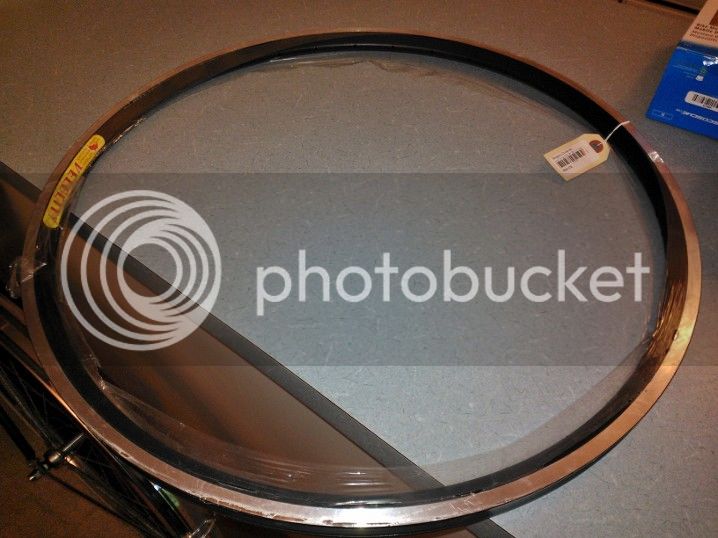
In other news, the rim for my front wheel showed up yesterday:
The rest of my wheel set components should arrive today, if UPS's tracking info is to be believed. So, there's a lot to do this weekend...
A minor update before the weekend. This week, picked up another Big Beam flashlight, this one a model 164, that I intend to use (at least in part) on the bike.
Here's the lamp unit removed.
The chrome is in pretty good shape, with minor rust. That which won't clean up will add to the patina. The beacon light might make a good tail light for another project, but I'm not using it here.
My plan is to mount the battery box on the frame, since there isn't enough room in the tank for a 6V. Even if there was, with my shifter and brake cables routed into there, it would still be in the way. I seperated the lid by driving out the hinge pin, which came out easily.
Here's the box sitting behind the seat tube base:
Actually, it'll probably be more like this:
That'll allow easier access to the battery itself by simply removing the left side fairing panel. I sprayed the box in the self-eching primer because it was starting rust a bit.
Anyway, I did test the lamp by jumpering it directly to a battery:
It's definately brighter than my 166 model, which uses a different lamp/bulb assembly. I haven't yet decided how or where I'm going to mount this. I originally planned to mount one on each side of the fork, but I'm not sure. It's pretty big, and two of them might be visually overwhelming.
In other news, the rim for my front wheel showed up yesterday:
The rest of my wheel set components should arrive today, if UPS's tracking info is to be believed. So, there's a lot to do this weekend...
Re: BonniRocket
I am gonna keep my eye out for one of those lights at the yard sales now. Pretty cool.
Love the front weel,
Great progress!!!
I am gonna keep my eye out for one of those lights at the yard sales now. Pretty cool.
Love the front weel,
Great progress!!!
Re: BonniRocket
This is looking good I have a Big Beam too, different model.
Good luck on the build, Rg
This is looking good I have a Big Beam too, different model.
Good luck on the build, Rg
Re: BonniRocket
I was actually surprised to see how many different models of Big Beam light there are, once I started looking into it. The first one I bought I got for $0.99 + shipping. This one was $17, I think.
But the versions w/ the flanged lamp shape have a sealed beam bulb that's brighter then the ones that take a 6V turn signal bulb, although the later lends itself to LED conversion so you don't need the big battery. OTOH, you can probably power the bulb with a pack of C or D cells, just with shorter burn times. Without knowing the amp draw of the bulb, its tough to figure out amp-hour requirement...
Re: BonniRocket
Looking really nice! Great work so far! Looking forward to more
Looking really nice! Great work so far! Looking forward to more
Re: BonniRocket
Thanks, all, for the comments. So, this weekend, I plan to build the wheels, paint the fenders, fairings, & wheel covers, and then get the headset & crankset in place.
It doesn't sound like a lot, but I think that there will probably be more complication in the wheelbuilding then I realize, since it'll be the first time I've done it. I guess I don't have to fuss too much with actually getting them round and true, for the sake of assembling everything, but I doubt I'll be able to let it go half-finished. Anything else that I have time for, I'll have time for...
Re: BonniRocket
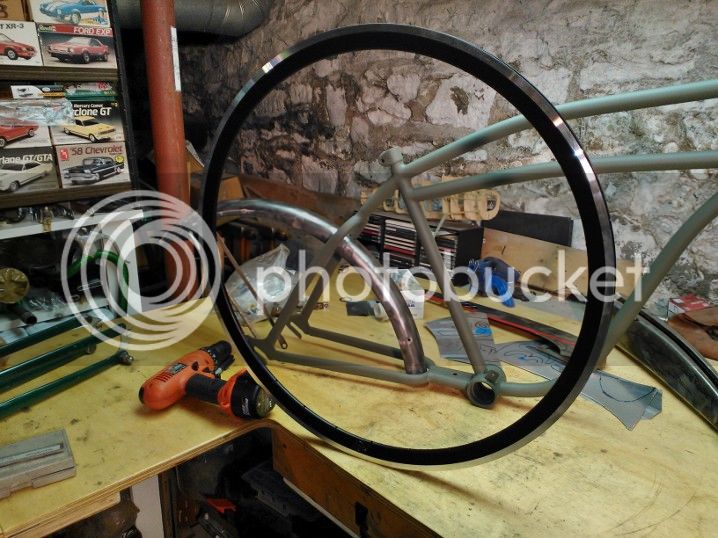
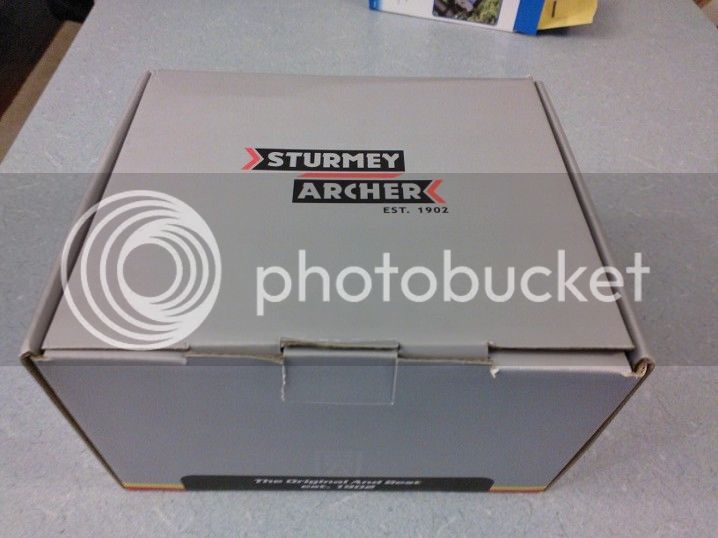
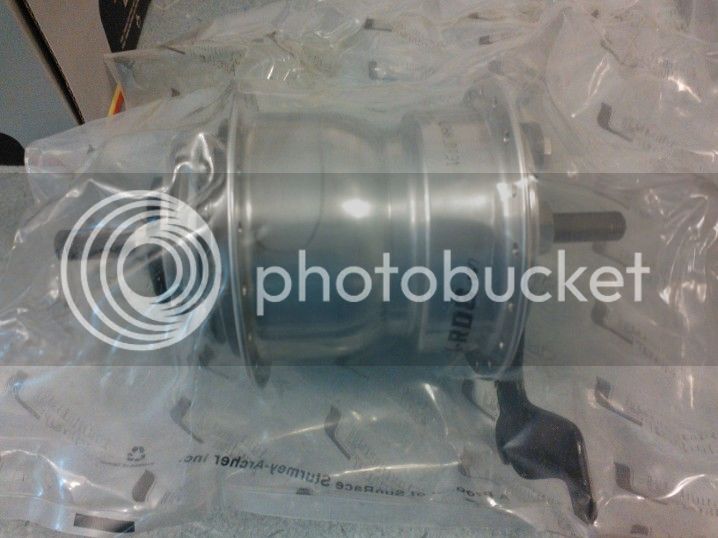
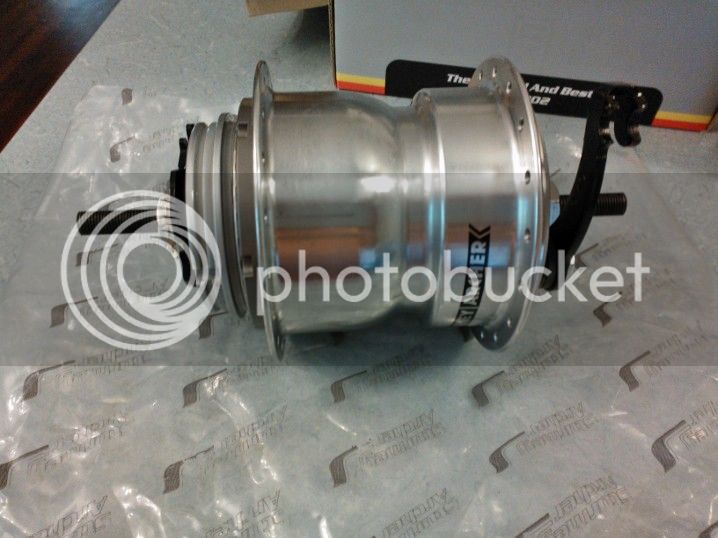
OK, first update of the weekend. Admittedly, I was operating in kind of a scattered manner today, so I touched on several different things and probably wasn't too efficient with time. Anyway, I got in a bunch of parts today. First up, my rear rim, both hubs, spokes/nipples, and such arrived. The rear rim:
And the S-A 8-speed rear hub:
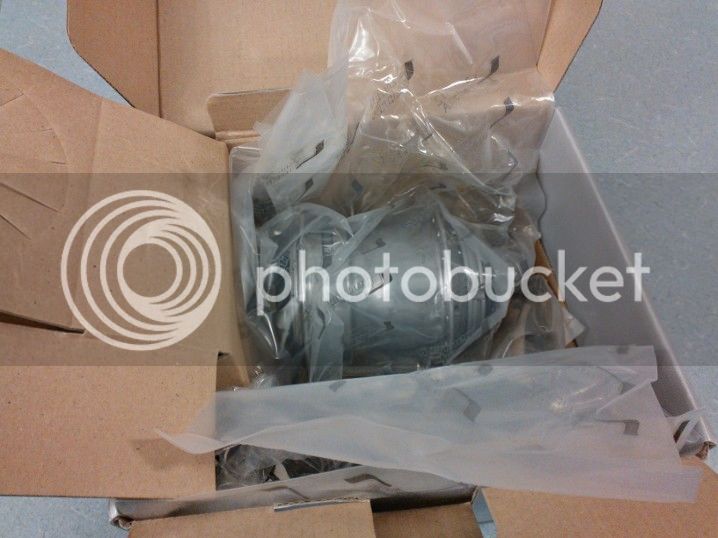
The hub itself:
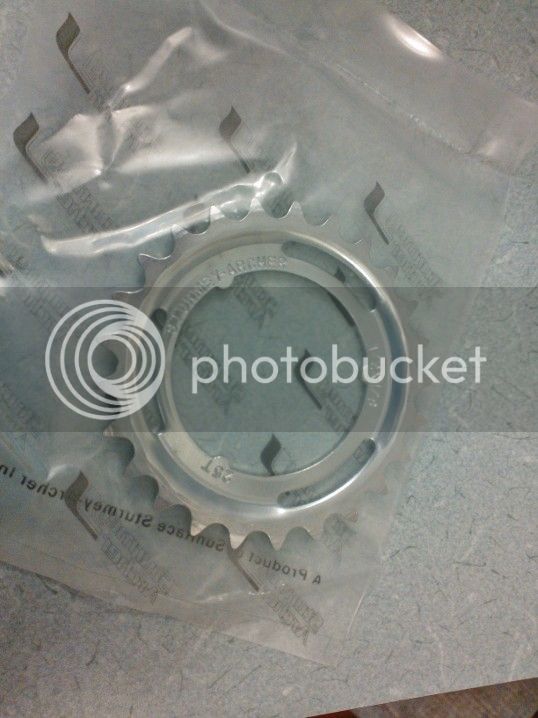
the 25T rear sprocket:
Misc hardware:

Fitting up the shifter base is important to the project, because it has to attach to the side of the tank and form the basis of the shift & brake quadrant. So, I immediately started to take it apart and modify it to fit up.
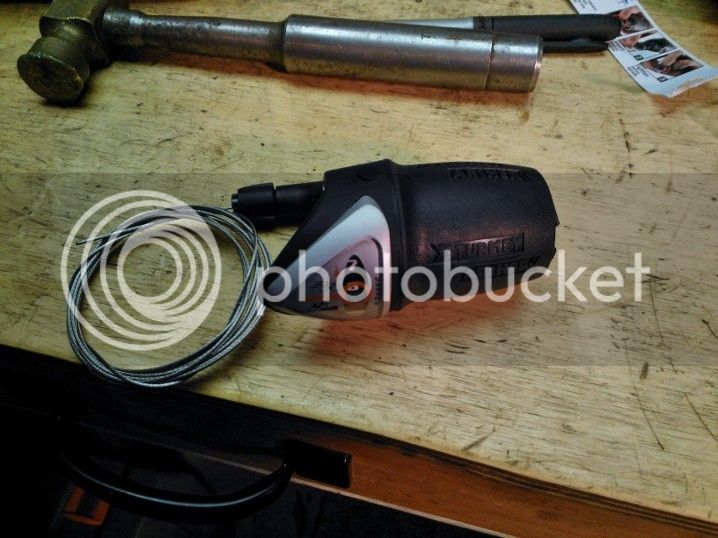
Removed the grip:
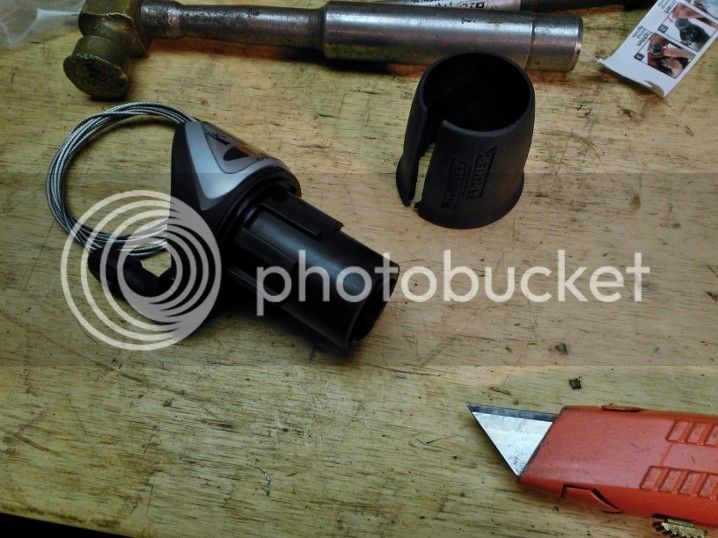
The sub-grip snapped over the chassis and was readily removeable:
I then shortened chassis and sub-grip to about an inch long. The snap-retainer was removed in the process, but my design will retain it otherwise. I also filed and dremeled the flange on the shift base (which houses the gear indicator) so that it fit better over the edge of the tank. I haven't taken any pictures of the finished product yet, that'll have to come tomorrow.
Here are the rims painted Apple Red:
To be fair, I've only done one side so far. I'll paint the flip side tomorrow after this side has dried. The front is a Velocity Deep-V, the rear a Velocity Arrow Heat. It's pretty obvious here the size difference between a 700C and 26" rim...
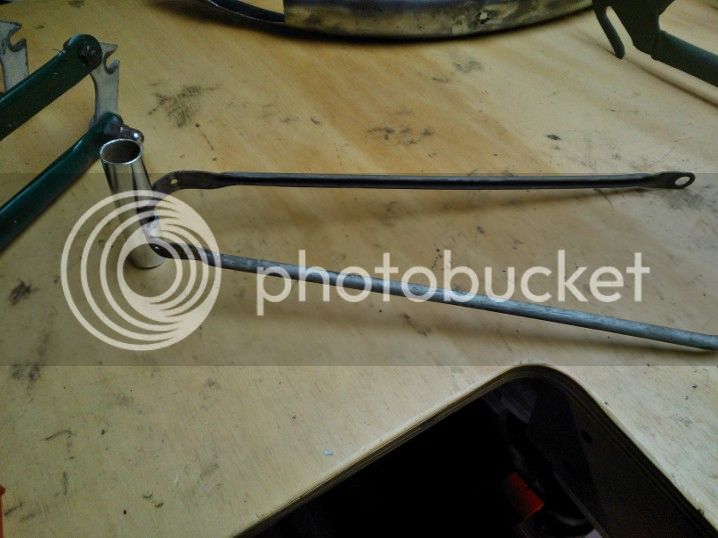
I cut section of an old handle bar to use as the basis of the quadrant mount. I cut a second piece to use as an overrider on the push-bumper:
I decided to use the fender stay I removed from the fender as the bumper itself, so I cut a notch so that the bar segment fit over it.
I'll have a buddy of mine weld it on.
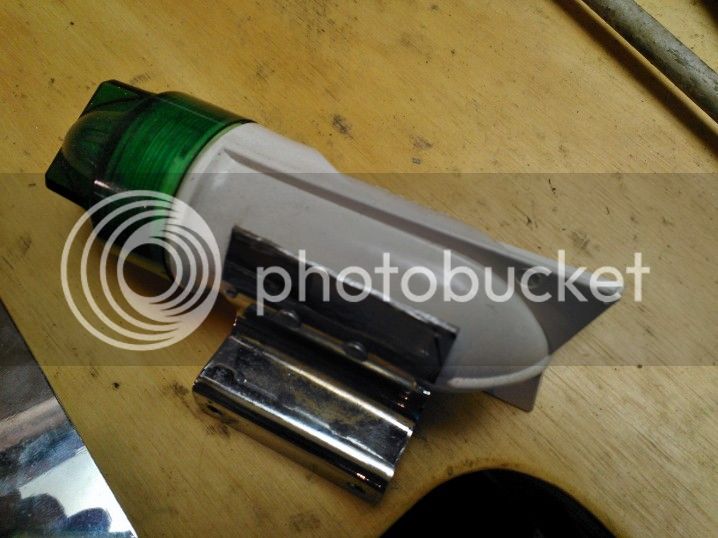
The bumper is to double as the mount for the tail lights, which themselves are a pair of Delta red/green bow lights (shown earlier in the thread). However, they had to be separated from their bracket. I was going to drill the rivets, however, they also hold the battery contacts inside, and reassembling on a new bracket would be kind of a PITA. So, I elected to use a cut-off wheel on the dremel and slice the bracket.
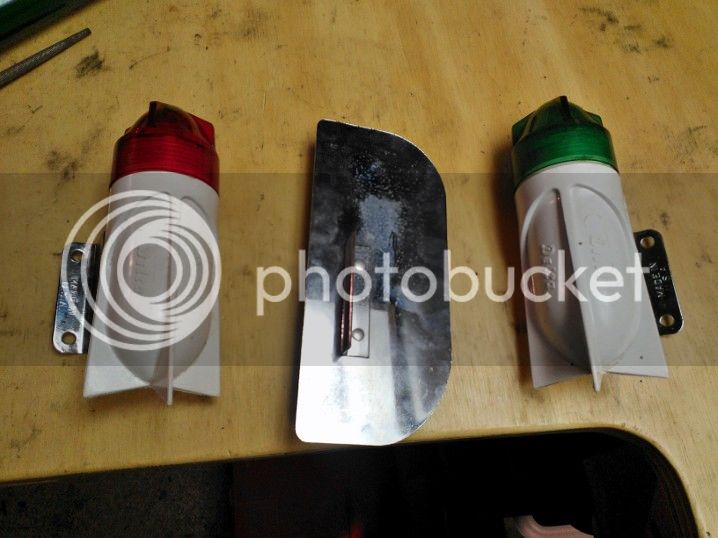
Doing this left one mounting foot on each, which ought to make for a nice mount bracket for each.
One last note for now. It turned out that when I was test fitting the battery box behind the seat tube the other day, I didn't have the fender pulled up against the brake bridge. Consequently, I don't actually have enough room in between the two to fit it without modification. I had to cut a clearance hole in the front of the fender:
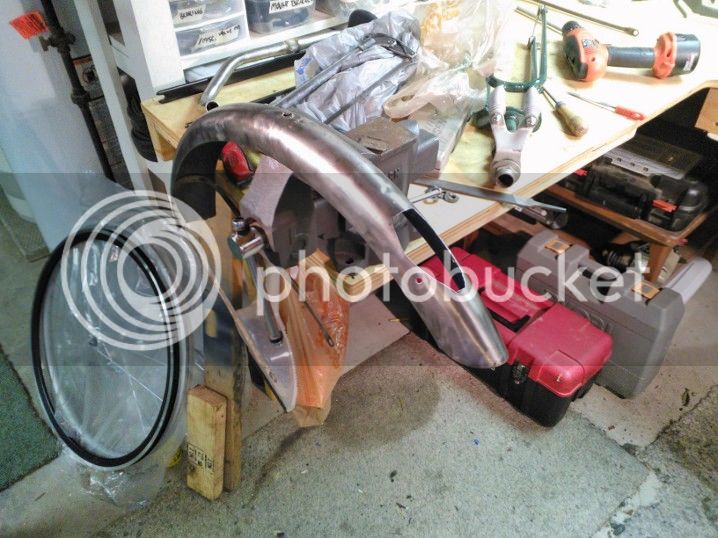
Its kind of an ugly hole, but it'll be hidden. The battery box only protrudes slightly into it, really, so it shouldn't pose a tire clearance issue. At least here, I have the ability to make the chain long enough to keep the wheel & tire aft a ways if need be.
Anyhoo, that's all till tomorrow...
OK, first update of the weekend. Admittedly, I was operating in kind of a scattered manner today, so I touched on several different things and probably wasn't too efficient with time. Anyway, I got in a bunch of parts today. First up, my rear rim, both hubs, spokes/nipples, and such arrived. The rear rim:
And the S-A 8-speed rear hub:
The hub itself:
the 25T rear sprocket:
Misc hardware:
Fitting up the shifter base is important to the project, because it has to attach to the side of the tank and form the basis of the shift & brake quadrant. So, I immediately started to take it apart and modify it to fit up.
Removed the grip:
The sub-grip snapped over the chassis and was readily removeable:
I then shortened chassis and sub-grip to about an inch long. The snap-retainer was removed in the process, but my design will retain it otherwise. I also filed and dremeled the flange on the shift base (which houses the gear indicator) so that it fit better over the edge of the tank. I haven't taken any pictures of the finished product yet, that'll have to come tomorrow.
Here are the rims painted Apple Red:
To be fair, I've only done one side so far. I'll paint the flip side tomorrow after this side has dried. The front is a Velocity Deep-V, the rear a Velocity Arrow Heat. It's pretty obvious here the size difference between a 700C and 26" rim...
I cut section of an old handle bar to use as the basis of the quadrant mount. I cut a second piece to use as an overrider on the push-bumper:
I decided to use the fender stay I removed from the fender as the bumper itself, so I cut a notch so that the bar segment fit over it.
I'll have a buddy of mine weld it on.
The bumper is to double as the mount for the tail lights, which themselves are a pair of Delta red/green bow lights (shown earlier in the thread). However, they had to be separated from their bracket. I was going to drill the rivets, however, they also hold the battery contacts inside, and reassembling on a new bracket would be kind of a PITA. So, I elected to use a cut-off wheel on the dremel and slice the bracket.
Doing this left one mounting foot on each, which ought to make for a nice mount bracket for each.
One last note for now. It turned out that when I was test fitting the battery box behind the seat tube the other day, I didn't have the fender pulled up against the brake bridge. Consequently, I don't actually have enough room in between the two to fit it without modification. I had to cut a clearance hole in the front of the fender:
Its kind of an ugly hole, but it'll be hidden. The battery box only protrudes slightly into it, really, so it shouldn't pose a tire clearance issue. At least here, I have the ability to make the chain long enough to keep the wheel & tire aft a ways if need be.
Anyhoo, that's all till tomorrow...
Re: BonniRocket
Wow, you're getting a lot of work done!
People that use bow lights for tail lights are wickedly brilliant***
***Just look at Fugsley.
Wow, you're getting a lot of work done!
People that use bow lights for tail lights are wickedly brilliant***
***Just look at Fugsley.
Re: BonniRocket
Well, wickedly brillant might be something of an overstatement... :mrgreen:
But anyway, I'm making up for lost time. By my reckoning, we've this weekend, plus two more to finish. In that time, I've got to build a wheelset, fabricate the lever quadrant, paint the scallops, do the pinstriping, clearcoat everything, figure out the cable and wire routing, my light mounting, fab up my windscreen, not to mention do the basic bike assembly stuff. It'll be a minor miracle if I can pull it all off; I've already decided against fabricating the silly header pipe looking thing that was shown in the sketch. It adds weight, takes time and serves no purpose. And I have no way to bend the tubing. As it is, I think this thing is only going to vaguely resemble the concept sketch when done. But that's ok, that was just a jump-off point. These things have a life of their own sometimes . I think the final version will be as much of a surprise to me as anyone else!
Re: BonniRocket
Weekend update #2: less to report than I'd hoped, but still a significant milestone. For starters, I painted the other side of the rims this morning. But after that, I went with my father and a buddy out to the Syracuse Nationals hot rod show, and was there for a good part of the day. Perhaps I'll post on that elsewhere later; there were a lot of rat rods (they had their own pavilion), and I'd bet that folks here would be interested in seeing them.
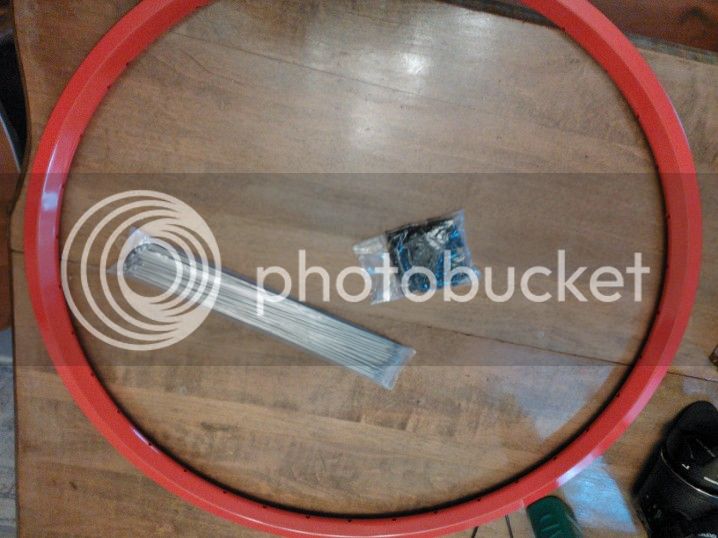
The one accomplishment today was the building of the rear wheel. It took longer than I'd thought, and frustrated me more than expected, but it's done. The next one should go faster. The hub itself:
The rim, spokes & nipples:
All the trailing spokes in place:

The leading spokes in place:
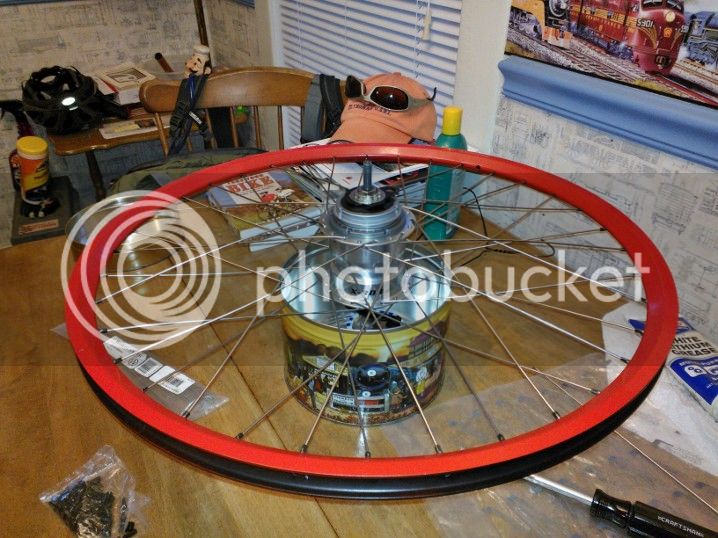
This was the part that proved frustrating. The hub was heavy, with a long axle, so it was tough to keep upright. Figuring out which hole on the rim the first leading spoke was supposed to go to held me up for a while. There was only one that it would really reach, but that looked different from Sheldon's diagram. The weight of the hub made it difficult to keep cranked around, and pushed the spokes out of the rim holes as it sagged down. Eventually, it all pulled together as it should, but I just wasn't sure I had it right until I got to that point.
After that, I set it into the frame to true and tension the spokes (I don't have a truing stand yet, and the hub was too wide to stick in a fork in the vice).
Fortunately, the rim is a good quality one, stiff and true to start, so the wheel came up true and round right off the bat. I really just had to dish it and tension the spokes. For the record, the wheel also dropped right into the frame, so the respacing of the rear triangles seems OK.
I also started trimming up the wheel covers so I can paint them tomorrow. The drive side was easy, the center hole just had to be large enough to fit around the lip behind the sprocket. The brake side, though, has to clear the anti-rotation arm and the actuator lever. I'll have to figure out how to fit that without taking off a lot of material. So, that's that for now. I'm not sure if I'll do the front wheel tomorrow or not. I have to get spokes for it yet, so that'll depend on if a local shop has the length I need or if I have to order them...
Weekend update #2: less to report than I'd hoped, but still a significant milestone. For starters, I painted the other side of the rims this morning. But after that, I went with my father and a buddy out to the Syracuse Nationals hot rod show, and was there for a good part of the day. Perhaps I'll post on that elsewhere later; there were a lot of rat rods (they had their own pavilion), and I'd bet that folks here would be interested in seeing them.
The one accomplishment today was the building of the rear wheel. It took longer than I'd thought, and frustrated me more than expected, but it's done. The next one should go faster. The hub itself:
The rim, spokes & nipples:
All the trailing spokes in place:
The leading spokes in place:
This was the part that proved frustrating. The hub was heavy, with a long axle, so it was tough to keep upright. Figuring out which hole on the rim the first leading spoke was supposed to go to held me up for a while. There was only one that it would really reach, but that looked different from Sheldon's diagram. The weight of the hub made it difficult to keep cranked around, and pushed the spokes out of the rim holes as it sagged down. Eventually, it all pulled together as it should, but I just wasn't sure I had it right until I got to that point.
After that, I set it into the frame to true and tension the spokes (I don't have a truing stand yet, and the hub was too wide to stick in a fork in the vice).
Fortunately, the rim is a good quality one, stiff and true to start, so the wheel came up true and round right off the bat. I really just had to dish it and tension the spokes. For the record, the wheel also dropped right into the frame, so the respacing of the rear triangles seems OK.
I also started trimming up the wheel covers so I can paint them tomorrow. The drive side was easy, the center hole just had to be large enough to fit around the lip behind the sprocket. The brake side, though, has to clear the anti-rotation arm and the actuator lever. I'll have to figure out how to fit that without taking off a lot of material. So, that's that for now. I'm not sure if I'll do the front wheel tomorrow or not. I have to get spokes for it yet, so that'll depend on if a local shop has the length I need or if I have to order them...
Re: BonniRocket
Third weekend progress report. I tried posting this last night, but IE crapped out on me when I was half way through typing it and I didn't feel like redoing it at the time. Anyway, I would have preferred to have made more progress, but I got some important things done. I did wind up loosing a good part of the day, since a friend & I rode a 22 mile railroad trail, which was more of a single or double track through the woods in most places, not the refined stonedust surface multi-use path that many of them are. But it needed to be ridden, it was a good ride, so that was that.
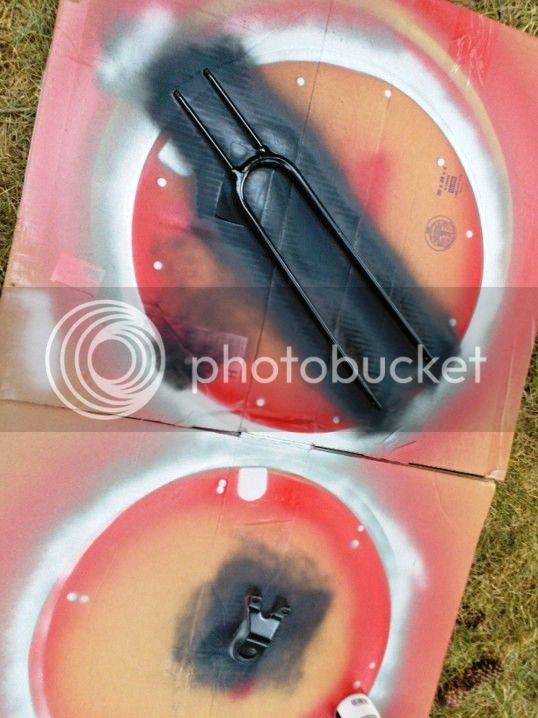
I trimmed, primed and painted the wheelcovers before I left.
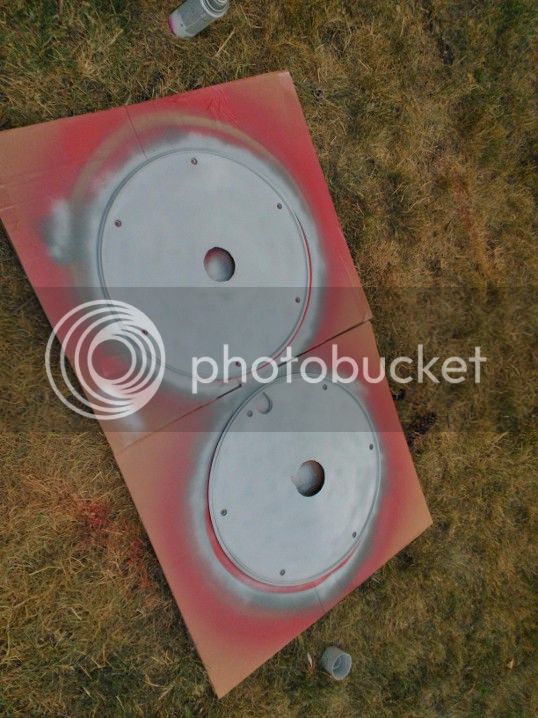
The Duplicolor Groundcoat silver that I used didn't go on real evenly (the can doesn't have the friendly spray nozzle a lot of theirs use), but I think it'll even out with some sanding and clearcoating.
When I got back, I took apart the fork. Someone had previously painted over the worn chrome on the coil springs and upper bracket with silver paint. I wire brushed the paint off of the springs and polished them some with NeverDull.
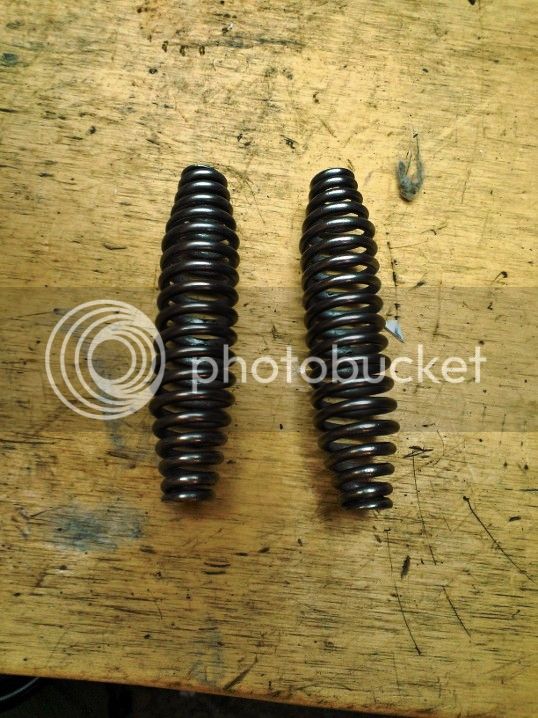
They don't look like chrome, but they're not bad looking.
I painted the secondary fork and upper spring bracket with gloss black.
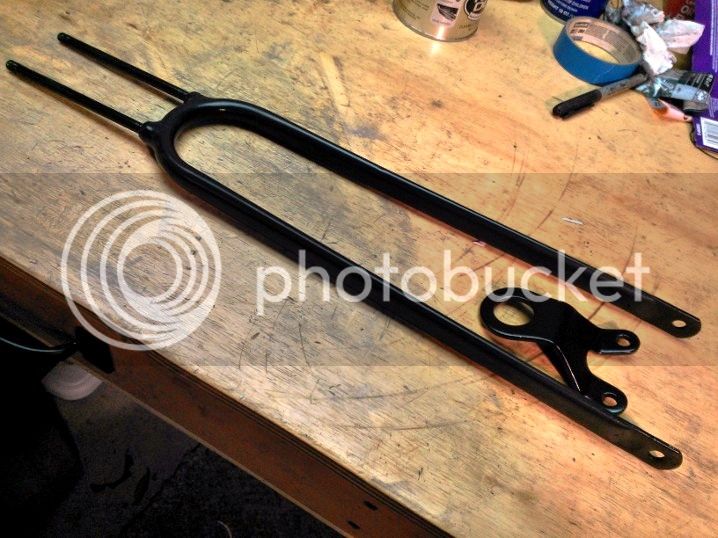
I should be able to put the fork back together tonight.
I masked off the fairing panels, fender and chainguard for the scallops, but I didn't have time yesterday to spray them. I'll do that tonight or tomorrow night, depending on the weather.
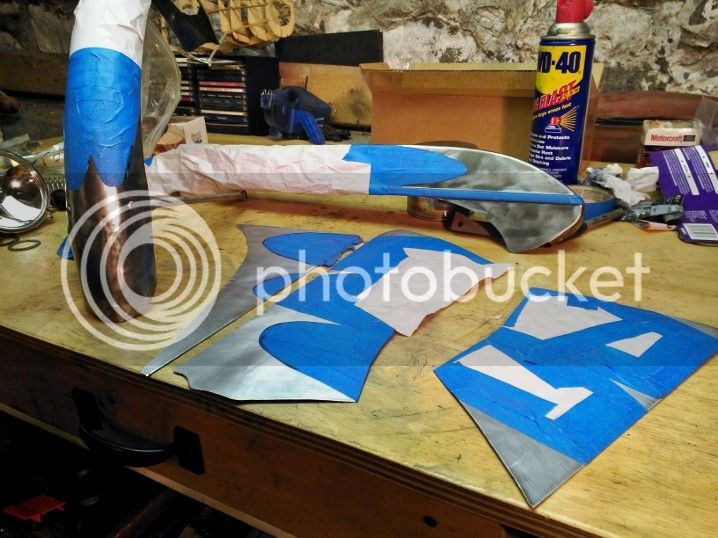
Masking took a little bit of effort, I had to figure out how would be the most effective way to cut the masks and have the cuts come out smooth. In the end, I put painters tape over what I'd drawn on the panels, traced the shape onto the tape, then peeled it off and cut it out with scissors. It isn't perfect, but it should look decent. I also made an attempt at brush graining the aluminum (I'm not going to try to polish these things). We'll see how it comes out.
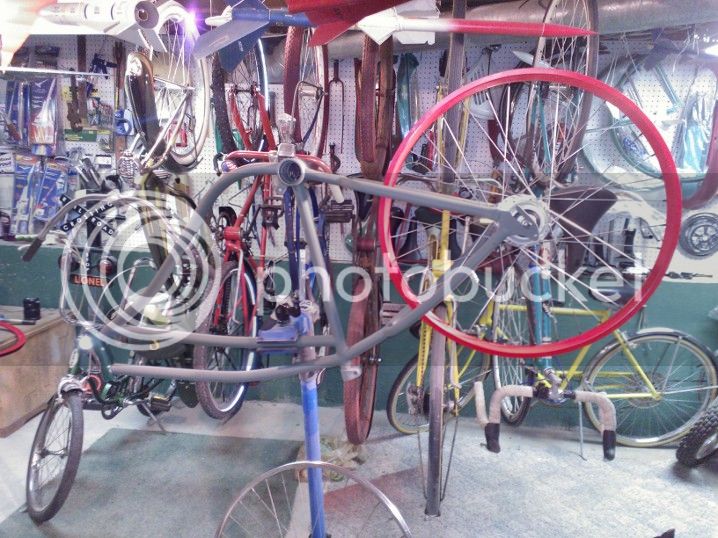
The last thing was that I installed the primary fork and crank into the frame.
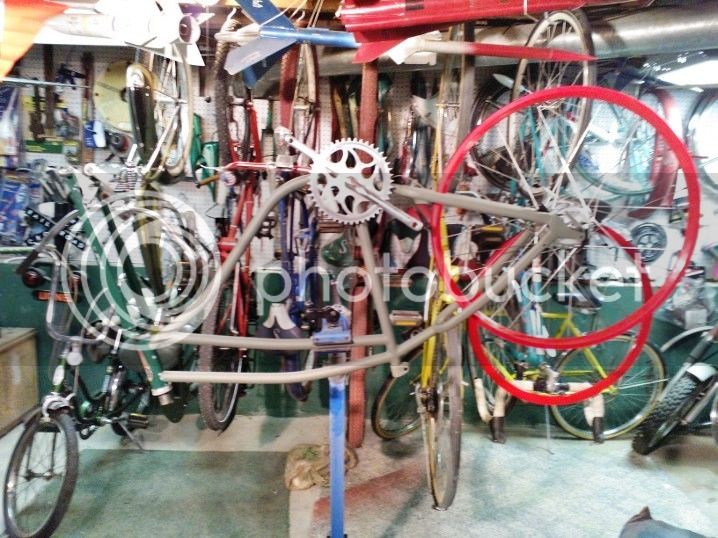
It's not much to look at yet, but is slowly taking shape.
I haven't found the spokes I need for the front wheel locally yet, so I may have to order them. That means I likely won't be building that wheel till this weekend. Also, I'm ordering today the bits I need to build my lever quadrant (yay McMaster Carr!). Oh, while I was at the car show yesterday, I got the contact info for a local chap that does louvering. It nearly perished in the laundry yesterday, but I remembered it in the pocket of my shorts as I was typing this the first time, and was able to save it from be completely lost. The phone number is still legible. I'll give him a call today, hopefully he'll have time stamp 8-10 louvers for me in the near future...
Third weekend progress report. I tried posting this last night, but IE crapped out on me when I was half way through typing it and I didn't feel like redoing it at the time. Anyway, I would have preferred to have made more progress, but I got some important things done. I did wind up loosing a good part of the day, since a friend & I rode a 22 mile railroad trail, which was more of a single or double track through the woods in most places, not the refined stonedust surface multi-use path that many of them are. But it needed to be ridden, it was a good ride, so that was that.
I trimmed, primed and painted the wheelcovers before I left.
The Duplicolor Groundcoat silver that I used didn't go on real evenly (the can doesn't have the friendly spray nozzle a lot of theirs use), but I think it'll even out with some sanding and clearcoating.
When I got back, I took apart the fork. Someone had previously painted over the worn chrome on the coil springs and upper bracket with silver paint. I wire brushed the paint off of the springs and polished them some with NeverDull.
They don't look like chrome, but they're not bad looking.
I painted the secondary fork and upper spring bracket with gloss black.
I should be able to put the fork back together tonight.
I masked off the fairing panels, fender and chainguard for the scallops, but I didn't have time yesterday to spray them. I'll do that tonight or tomorrow night, depending on the weather.
Masking took a little bit of effort, I had to figure out how would be the most effective way to cut the masks and have the cuts come out smooth. In the end, I put painters tape over what I'd drawn on the panels, traced the shape onto the tape, then peeled it off and cut it out with scissors. It isn't perfect, but it should look decent. I also made an attempt at brush graining the aluminum (I'm not going to try to polish these things). We'll see how it comes out.
The last thing was that I installed the primary fork and crank into the frame.
It's not much to look at yet, but is slowly taking shape.
I haven't found the spokes I need for the front wheel locally yet, so I may have to order them. That means I likely won't be building that wheel till this weekend. Also, I'm ordering today the bits I need to build my lever quadrant (yay McMaster Carr!). Oh, while I was at the car show yesterday, I got the contact info for a local chap that does louvering. It nearly perished in the laundry yesterday, but I remembered it in the pocket of my shorts as I was typing this the first time, and was able to save it from be completely lost. The phone number is still legible. I'll give him a call today, hopefully he'll have time stamp 8-10 louvers for me in the near future...
Re: BonniRocket
Man, I love the masking on the fairing. Can't wait to see the finished product.
GABTW-PEACE!
Man, I love the masking on the fairing. Can't wait to see the finished product.
GABTW-PEACE!
Re: BonniRocket
Yeah, me too! :mrgreen:
For lack of something better to post right now, here's the fancy CAD rendering of the lever quadrant that I promised several pages ago:
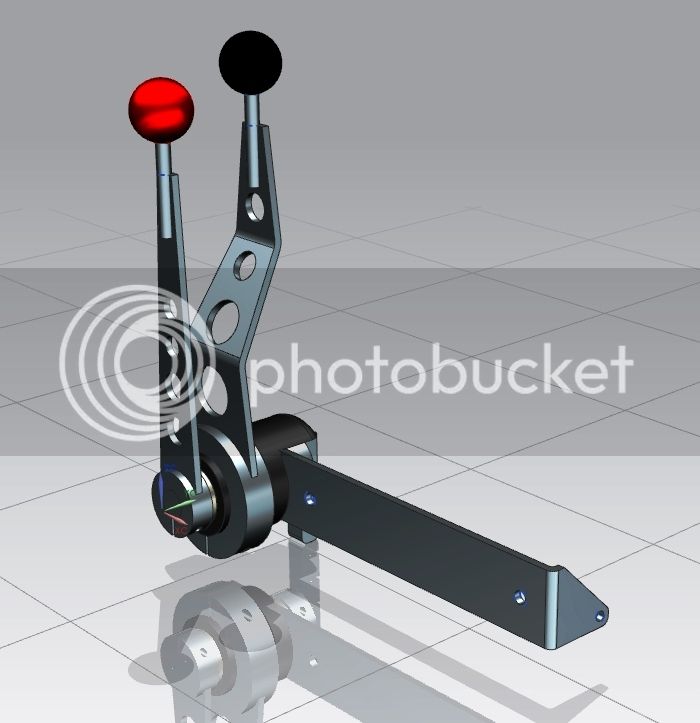
I should be able to build this over the weekend, but I'll have to rely on a buddy to do the welding it requires. Hopefully, it'll even looks something like that!
kingfish254 said:Can't wait to see the finished product.
GABTW-PEACE!
Yeah, me too! :mrgreen:
For lack of something better to post right now, here's the fancy CAD rendering of the lever quadrant that I promised several pages ago:
I should be able to build this over the weekend, but I'll have to rely on a buddy to do the welding it requires. Hopefully, it'll even looks something like that!
yoothgeye
I build stuff.
Re: BonniRocket
Oooooo! Digital Shiny!
Oooooo! Digital Shiny!