Fat Trike Build

Rat Rod Bikes Bicycle Forum

Help Support Rat Rod Bikes Bicycle Forum:

This site may earn a commission from merchant affiliate links, including eBay, Amazon, and others.
Joined
Aug 14, 2013
Messages
612
Reaction score
483
Location
Ca
Rating - 0%
0   0   0
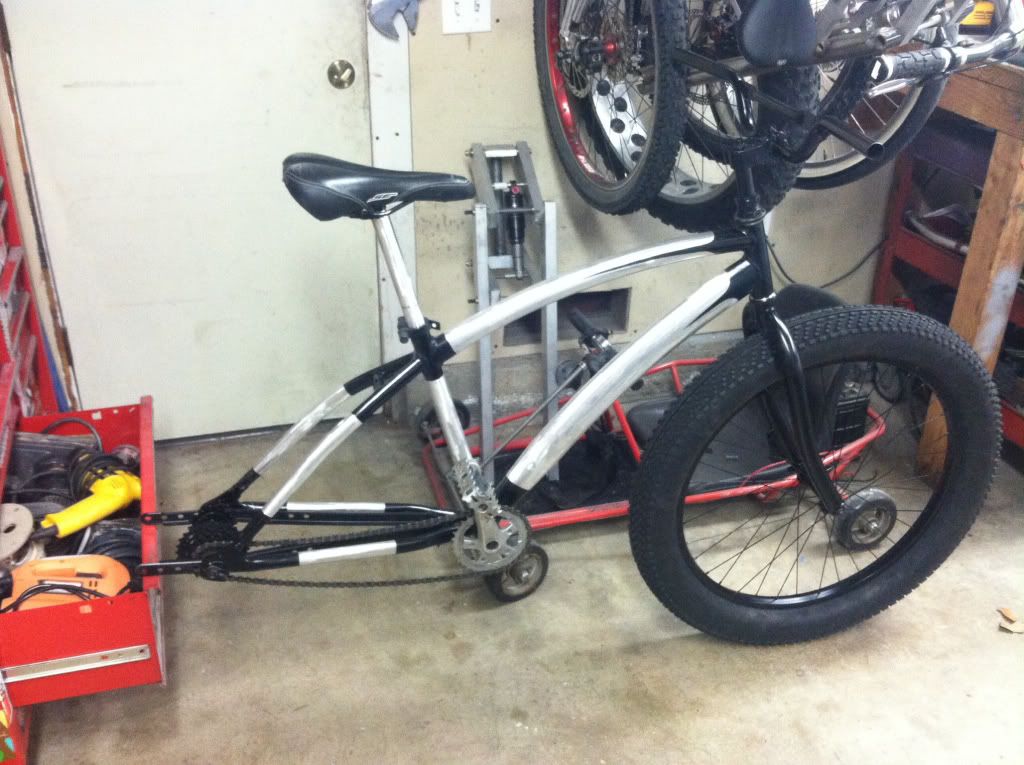
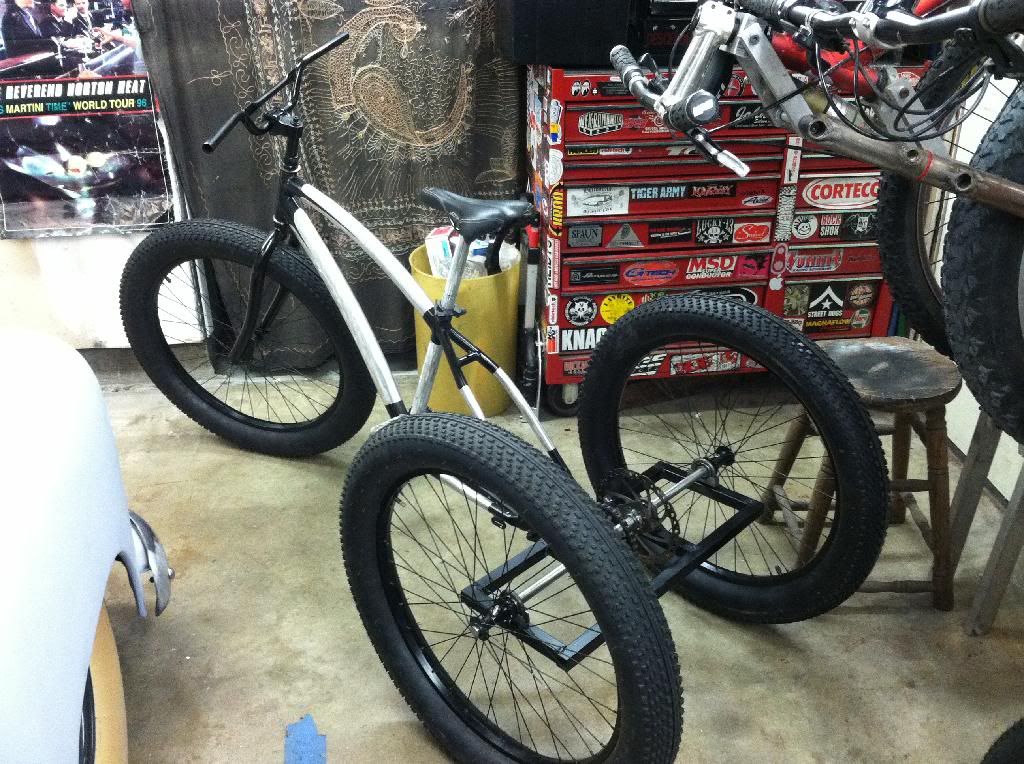
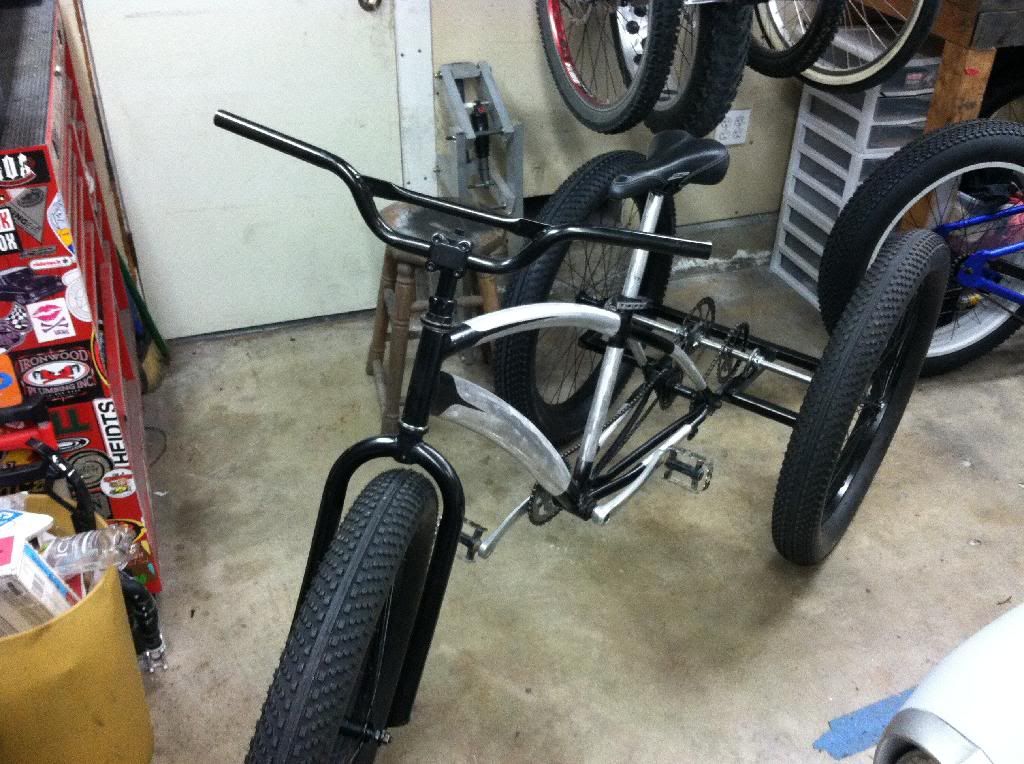
Time to start my fat trike build! I need a break from my fork build.

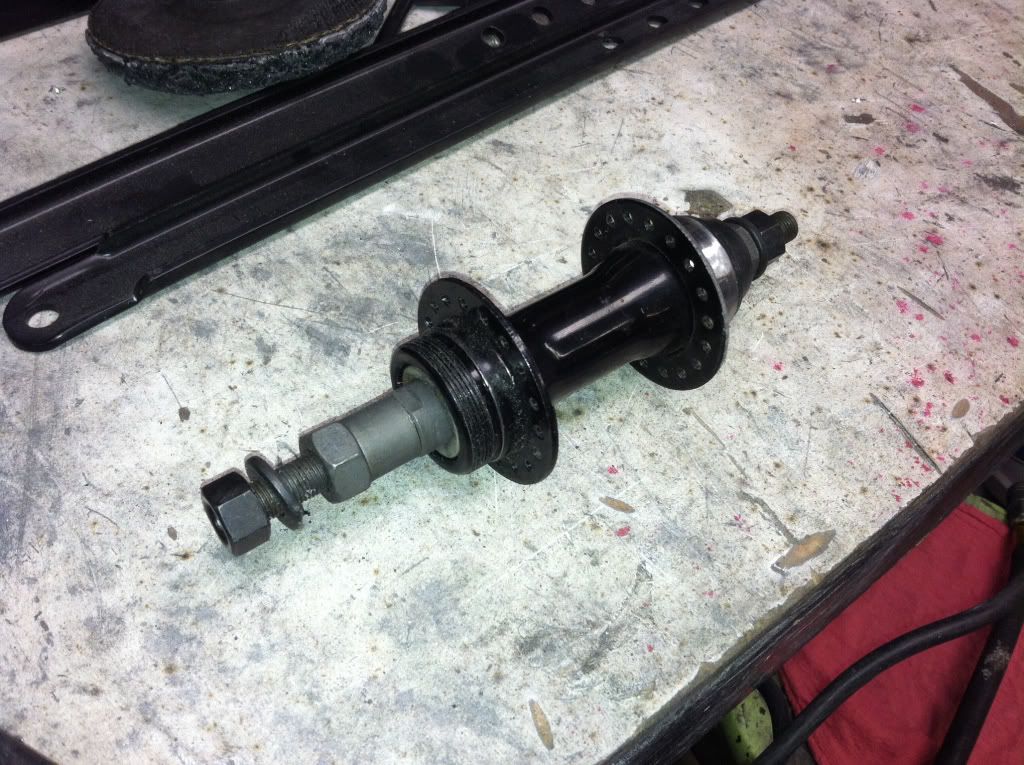
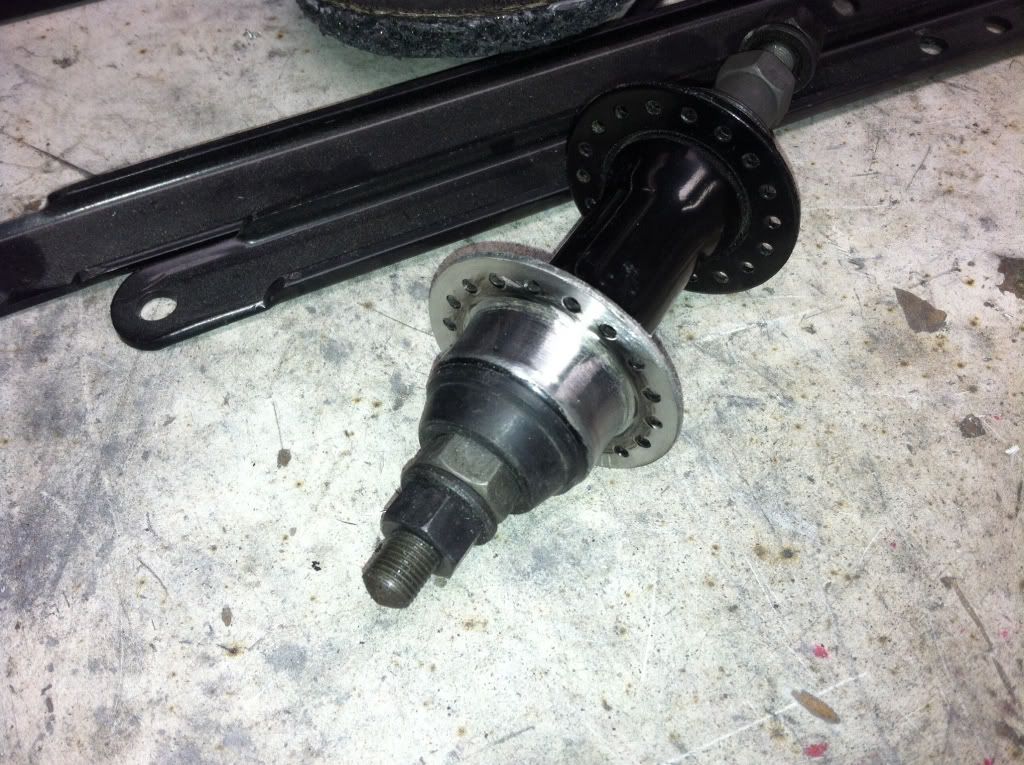
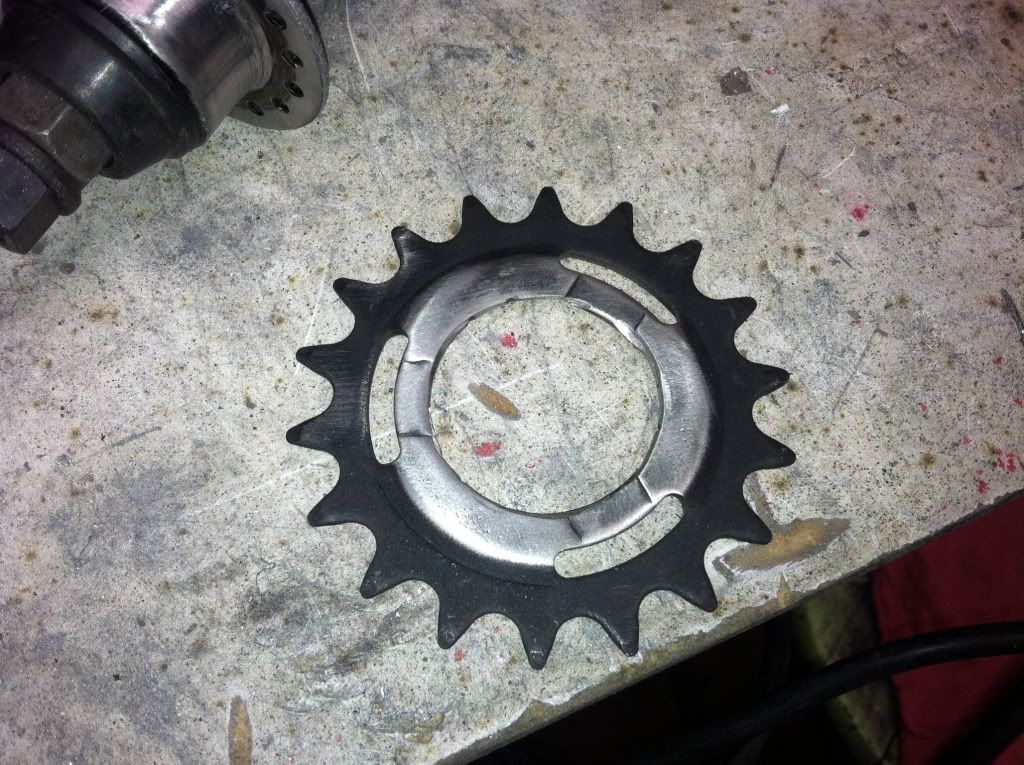
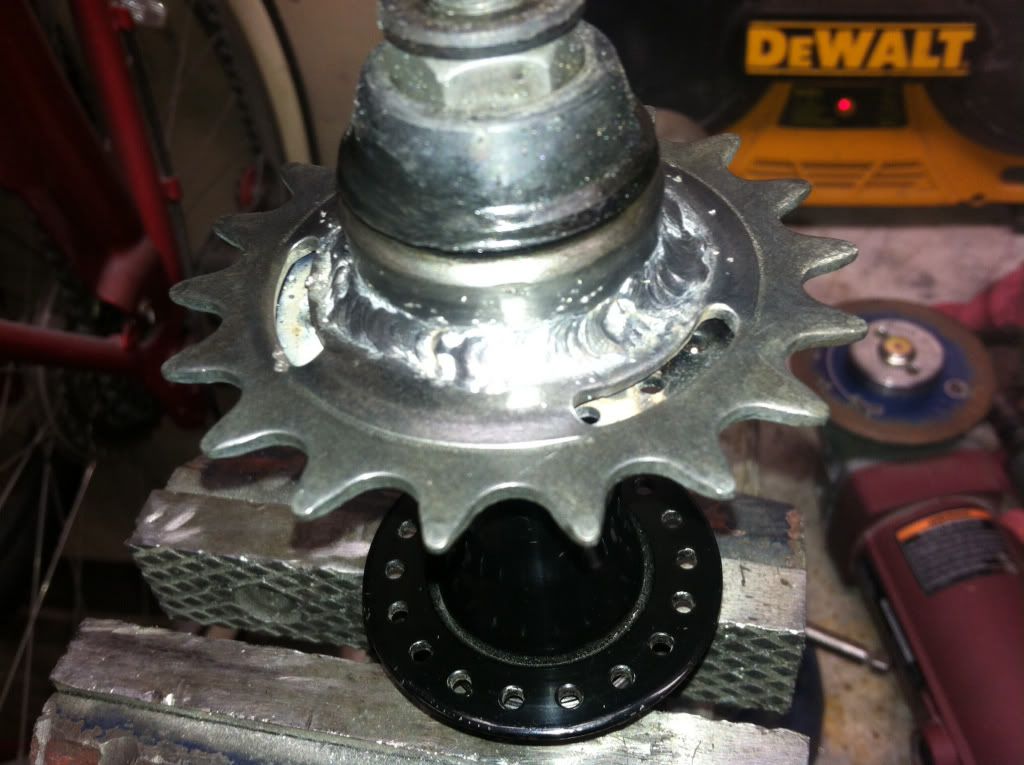
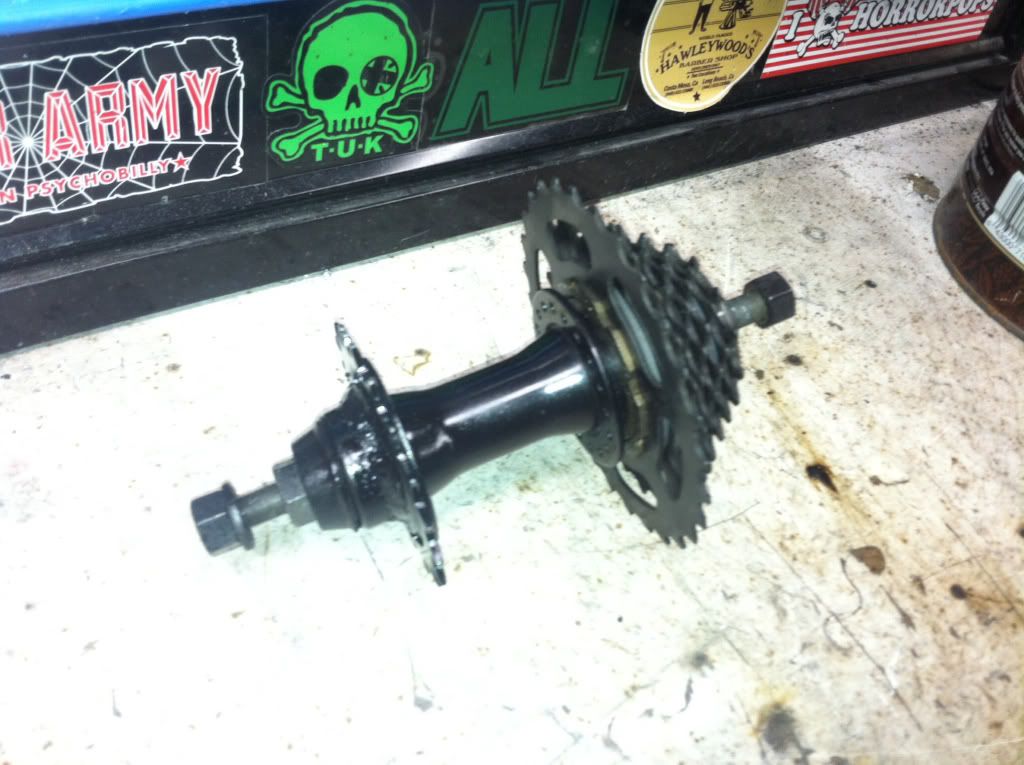
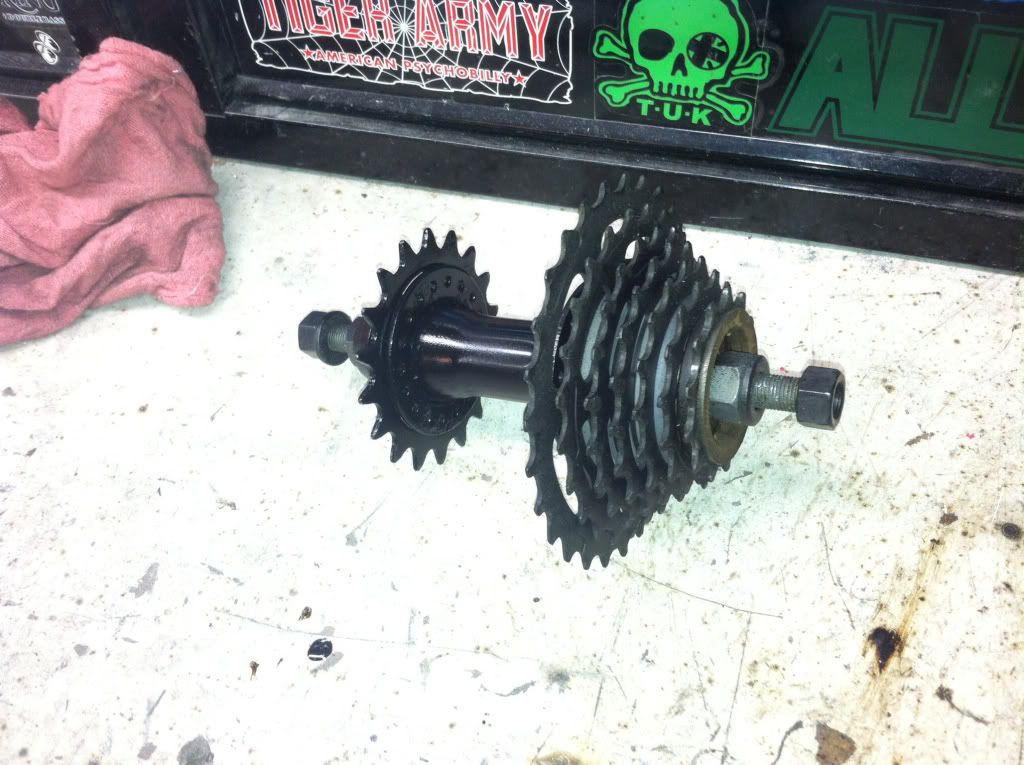
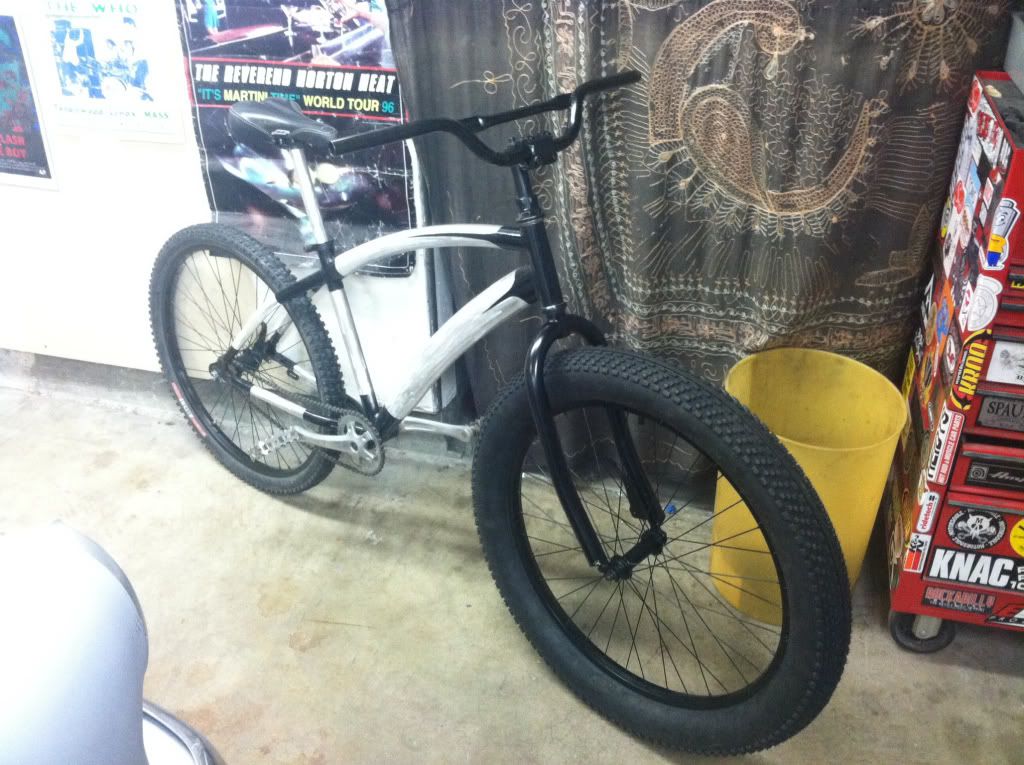
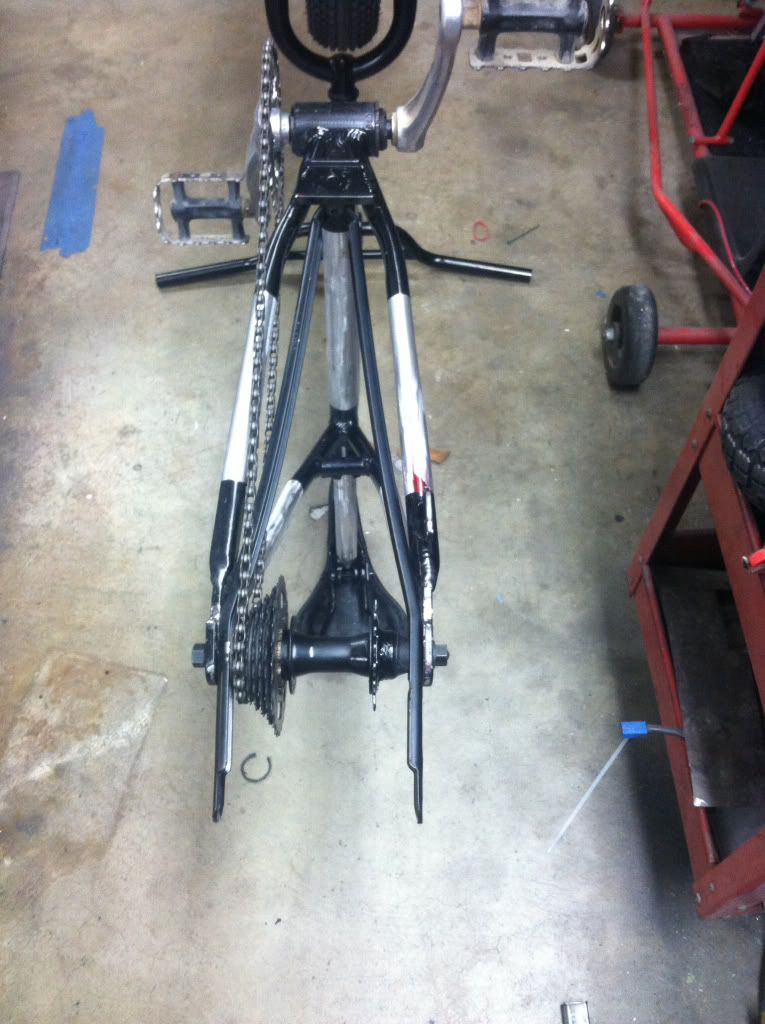
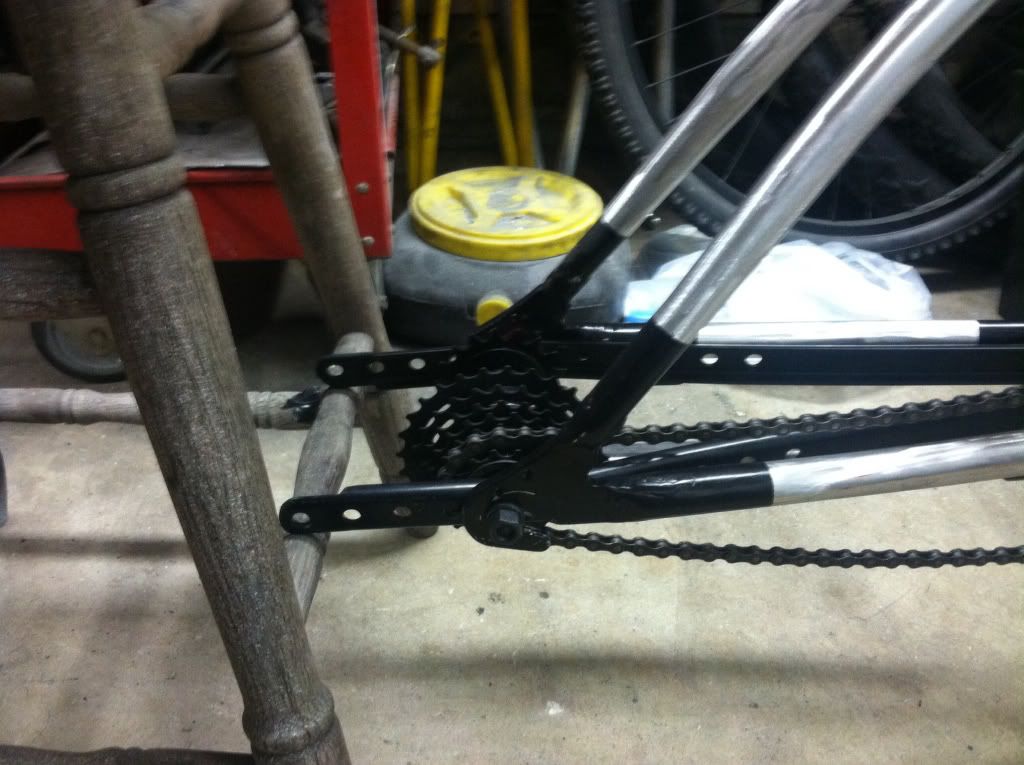
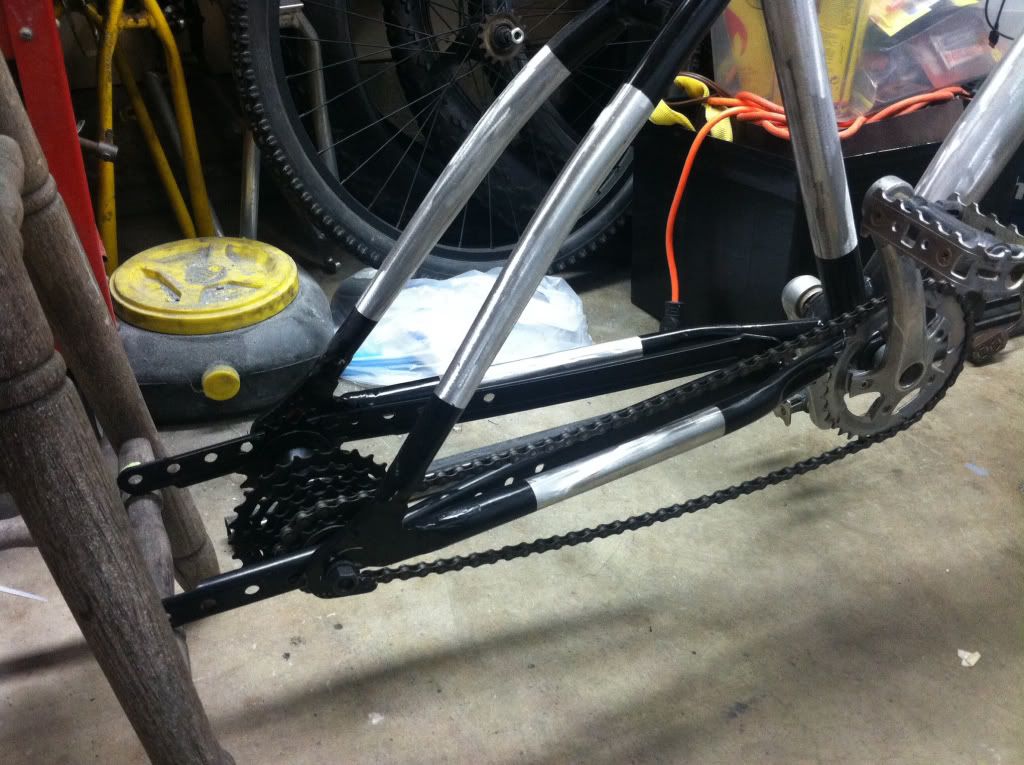
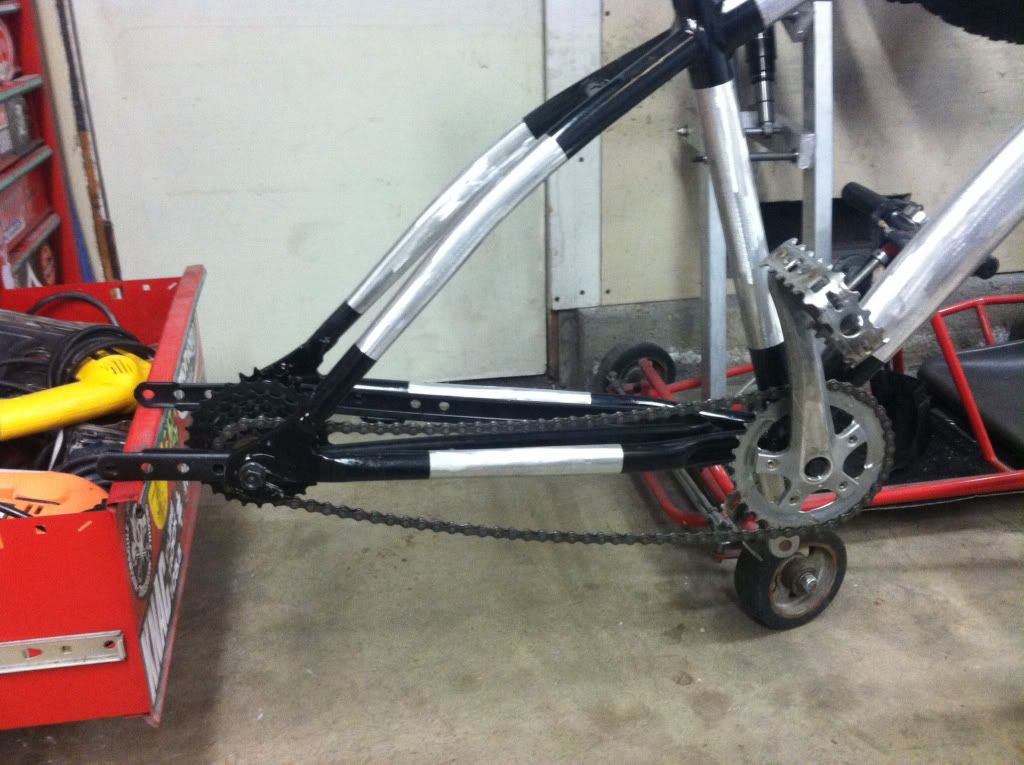
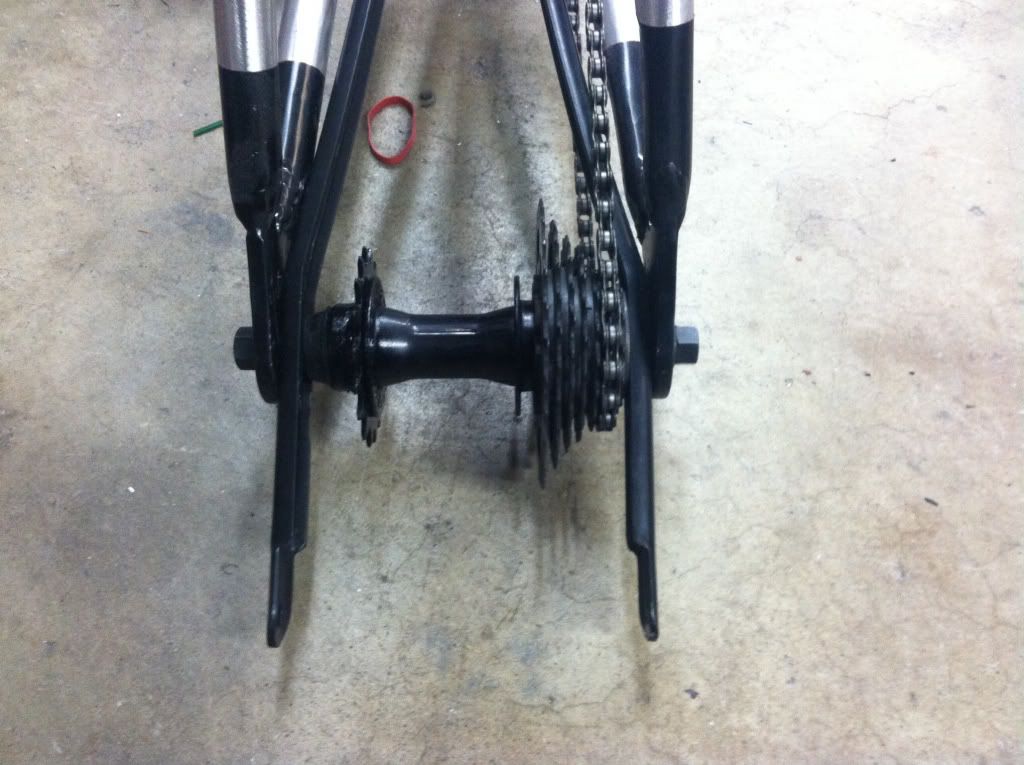
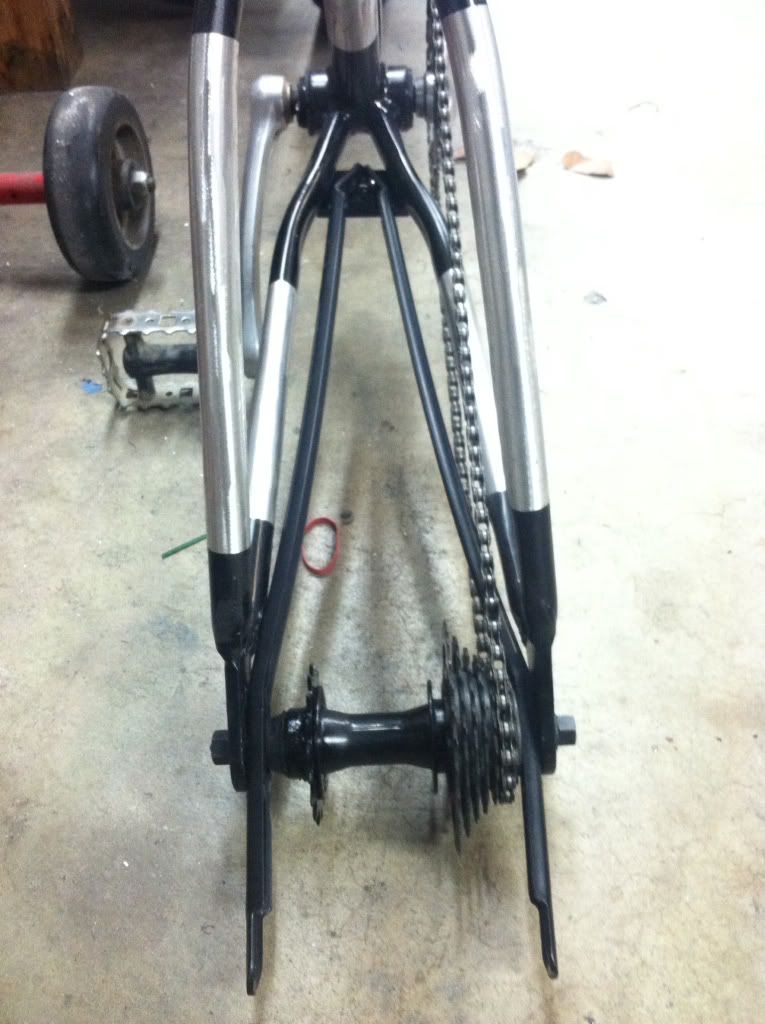
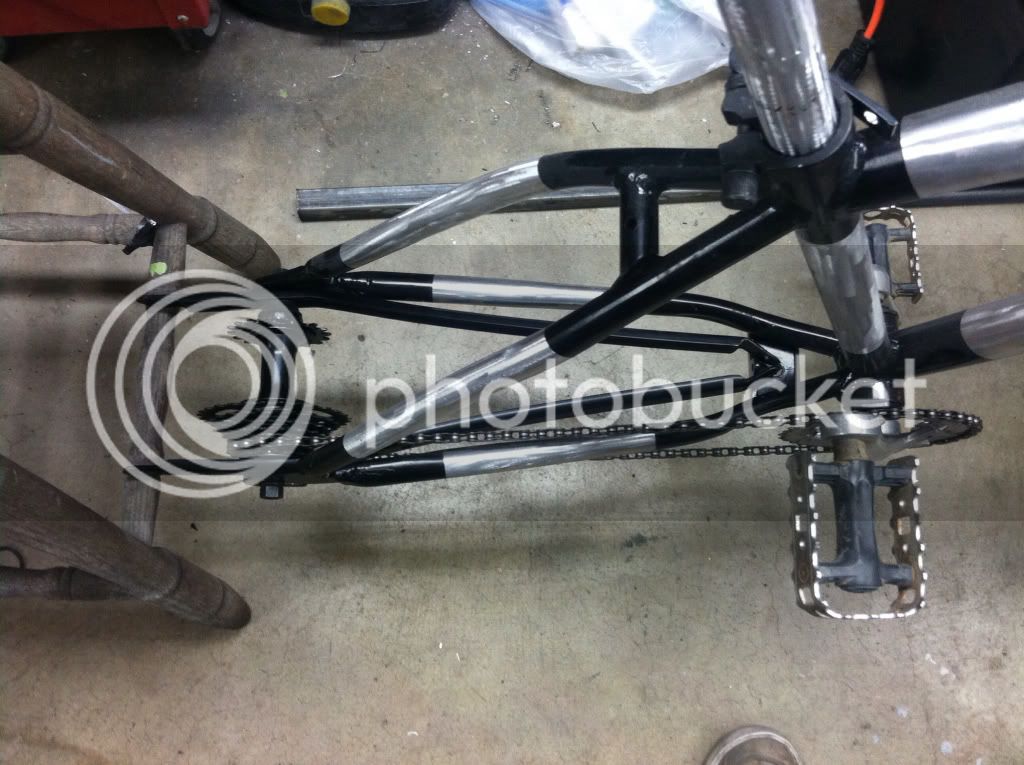
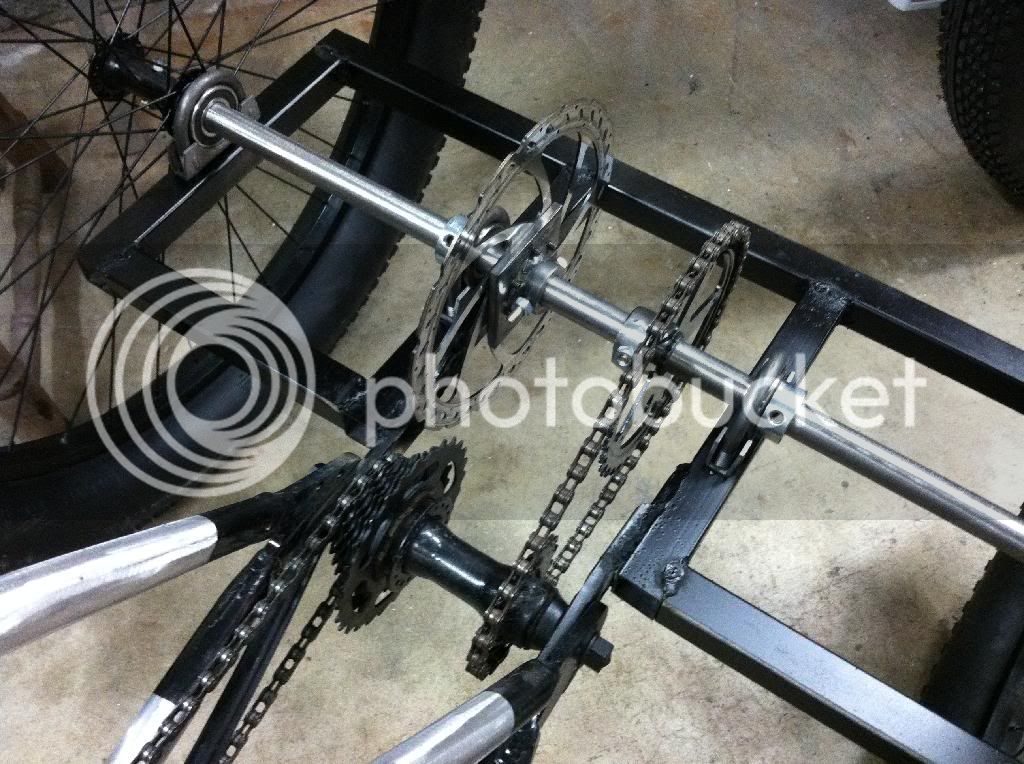
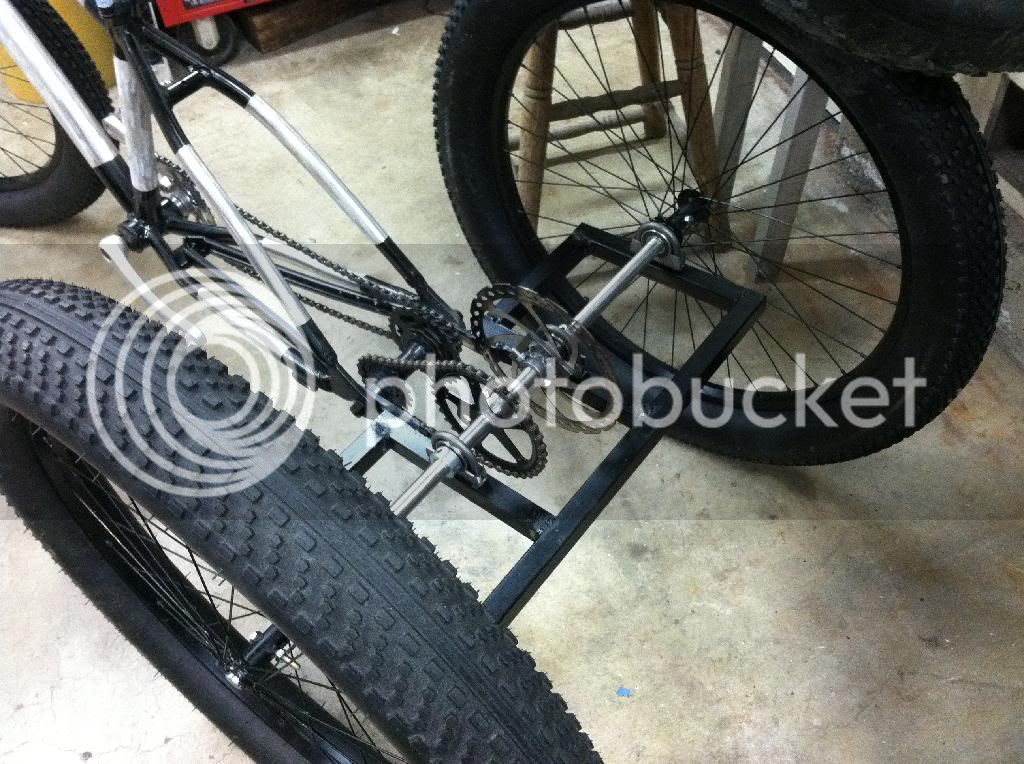
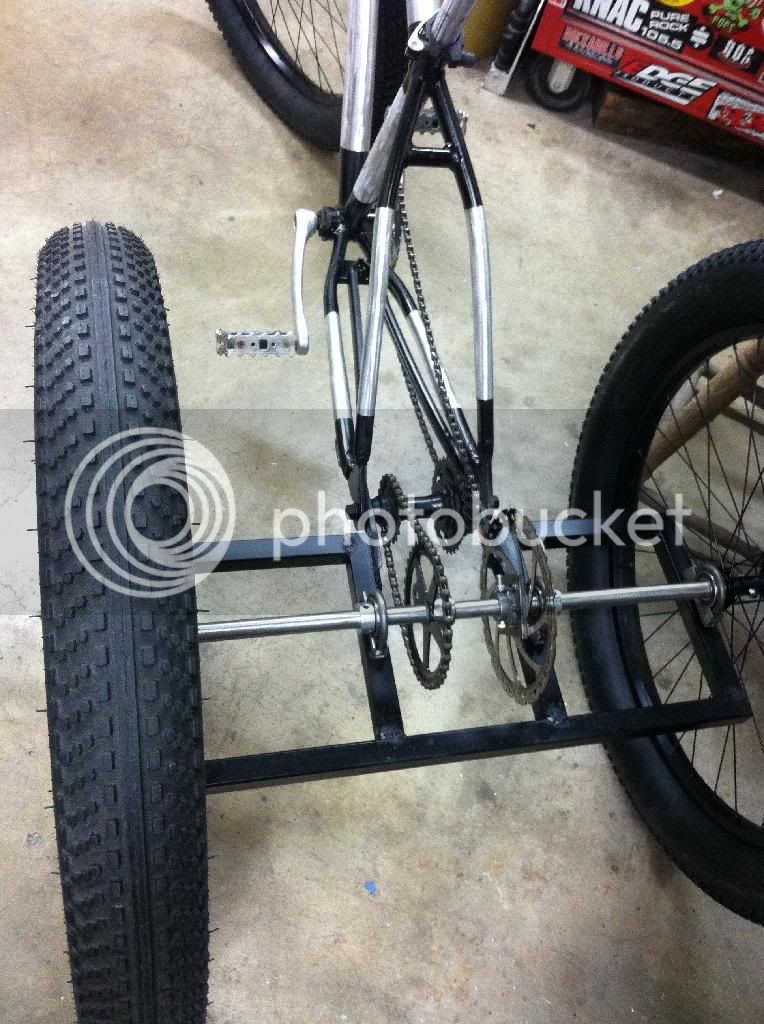
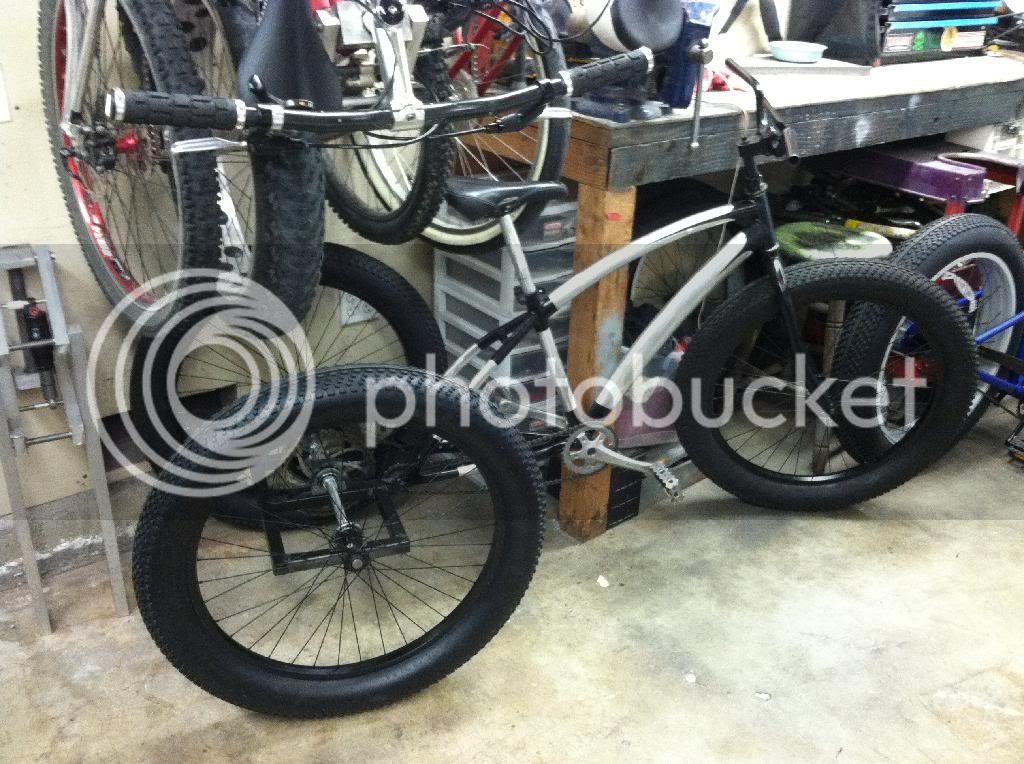
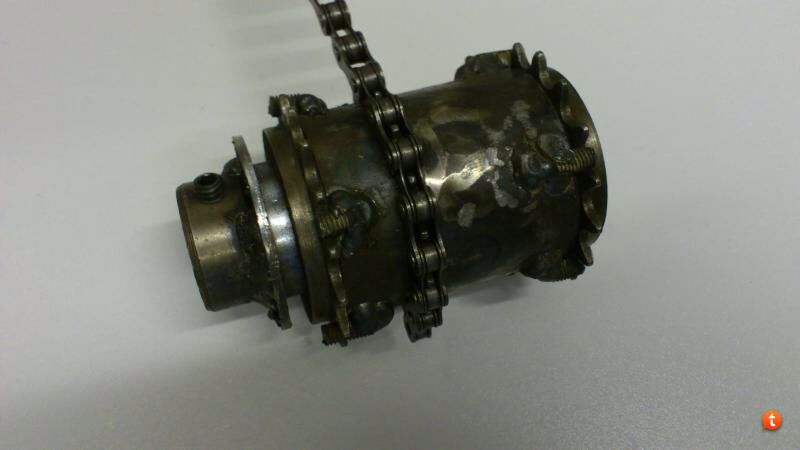
Im starting with my aluminum cruiser. I will use a steel freewheel hub for the jackshaft. It will have a 7 speed freewheel and a cog bolted to the opposite flange. There will be a gear reduction from the jackshaft to the rear axle, probably about 50%. There will be a single gear and a disc brake on the rear axle.

I need to make some decisions:

1. Rigid or full suspension. If I go full suspension it will be independant in the rear. I know how I will do it, but it will add some weight to the trike for sure, and some expense. Rigid is easier, but my bikes I really like are full suspension.


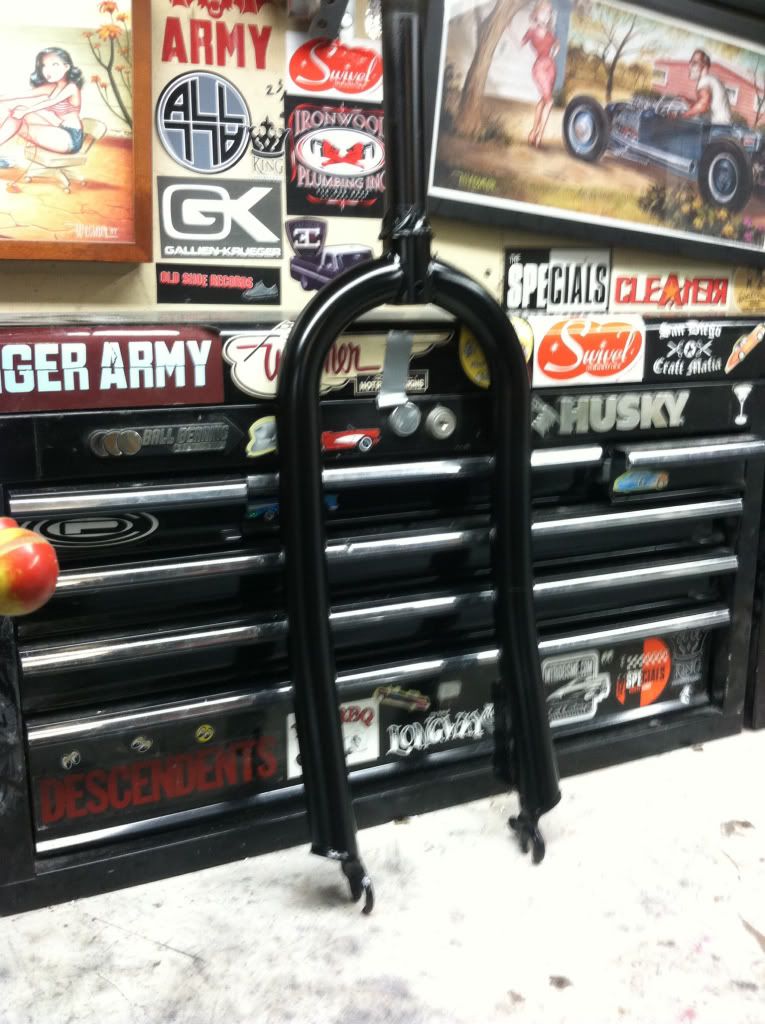
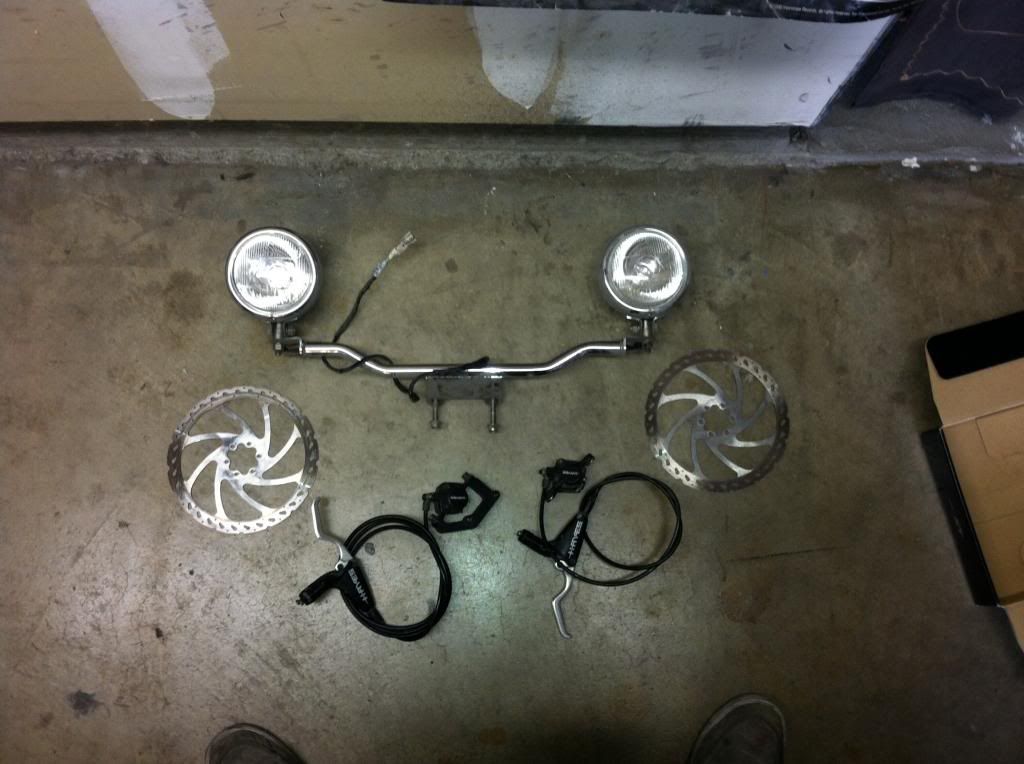
2. Fork. I have my rigid beast fork, it already has a disc tab on it. OR, I could make some crowns for some shock legs I have, or wait till my second linkage fork is done, and put my original one on this bike.


3. Should the seat and bars be cruiser style or MTB style.


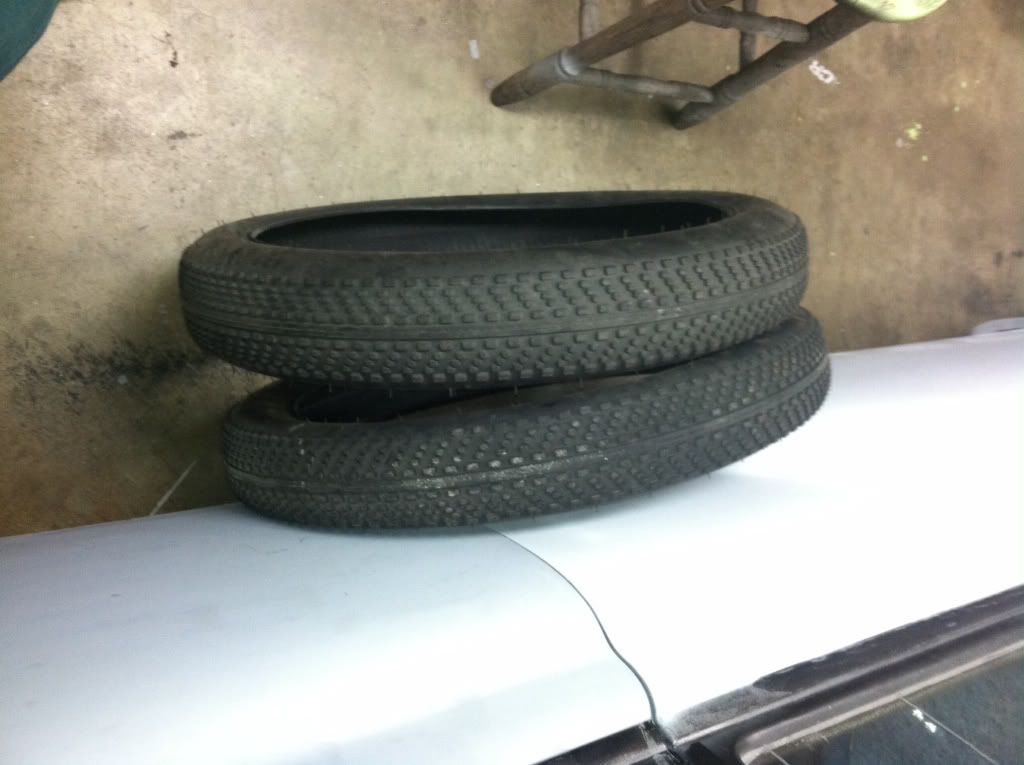
4. Front Wheel: I am trying to decide if I should buy another fat tire for $35 or build a double wheel from parts on hand. I have some white wall cruiser tires and some MTB tires. I could do 2 rims on 1 hub fairly easily.


What do you guys think? Give me some opinions, input, scolding, etc.
 
I started to get some parts together that i am going to use.
So far I have the fork off of my Beast, it has a disc mount. I have a pair of 26x4 tires from my beast, but I may get 3 Devist8rs for this build. I have an ok set of pedals i forgot i had too.

b7c70845b1ecb7754d929d586c2e53d2_zps5306e06a.jpg


43805d156e7064978107372015cb17f0_zps9ddc410c.jpg


224728ef8590a488a3905b667f8b0903_zps8c1b19e7.jpg


I also made the jackshaft. I want to use as many parts I have already, so I started with a rear freewheel hub that I have. I turned the end of it down a bit, and rounded out the inside of a cruiser cog to weld to it. Ill let the pics do the talking.

d61d1866dceaf4ca1cca82905291722a_zps8472fd16.jpg


10c28687b2781fff1443c073bce2119d_zpsf013558b.jpg


b22531e370731799bc96c78dd24ec173_zps0c952e04.jpg


e7bab9092357d6fc5867a6735a971bcd_zps4a8839d4.jpg


c7b83fb22abce860fa360454a460e644_zps54c86521.jpg


c3092a2aa612b3cf5f8f262321bd60a9_zps8fc91813.jpg


As a side note:
Its best to do welding on a hub with it totally disassembled. That way you sone boil the grease, and have to rebuild it, like i did...
 
I did the gearing calculations:

Crankset is 24/34/42
Cassette is 13/28
Jackshaft to axle dear reduction is 50%

So hi gear will be 1.61-1 and low gear .42-1. That should be a relatively useful range based on what I want this bike to do and the weight of it.

In comparison to my other bikes:

Fat Trike: .42 low gear; 1.61 high gear
Fat Bike: .52 low gear; 2.0 high gear
Yeti 575: .61 low gear; 3.72 high gear
 
Last edited:
watching this! I vote for a full suspension mtb fat trike!!!
 
I got a couple more parts for this build.

I found a set of Hayes Hydraulic disc brake with 203mm rotors for $40 on craigslist. I also got a pair of lights from a buddies motorcycle. I think they are off if a newer Triumph. Not exactly sure how Ill use them, but they are pretty sweet and were free. Im thinking of making a 12v battery pack and swapping some LED bulbs in.

0DE18B74-6C03-4D40-B1F9-A82CACDEB57A_zpscvwkpsan.jpg


Now I need to see what I am going to do for a front wheel. I can get a 26x4 wheel with a disc mount for $140 from a local shop.
 
I finally got some garage time yesterday, and was able to get some work done on the Fat Trike.

I used the fork, stem, and bars that came stock on my Beast. Also the stock front hub, and a spare rim that I had laying around. I had a random set of spokes too, that just happened to work nicely as a 2 cross.

Here is the bike with the fat front:

031d8b163f0a5ff60e4cef52bde911f7_zpsd19c2857.jpg


Then I got to work on the back. I really wanted to avoid having to make supports that ran up to the seat post, and I think I found a good solution. I used a couple of stamped steel channels that are for a garage door opener. I bolted them in with the rear jackshaft/hub. Then I bent them so that they sit on the kickstand mount. Later ill make a brace to reinforce this area a bit. Im pretty sure this will be strong enough to not have to use kickers up to the seat post, and it gives me something to build the rear trike portion off of.

Here are some pics:

d69627b94667f6bbbe094111ee4f4b34_zps583a285b.jpg


52bf23e842de9abad0c8de987ca4de30_zpsbdd8e8ad.jpg


37dc6a663a8f2ed0a42ba6a6e66aab1c_zps0a4d97fb.jpg


7ecbf7b250cf925c8a1d406c59f15ce7_zpsa4d9bc2d.jpg


09dc0f0e8adbfcaf9b146e7875e1f7be_zpsca29b52d.jpg


4552abd99f70706834bdcb82f063a080_zps2de36c58.jpg


ce50018297f7326f32d78a80cd77a94d_zps57efadc9.jpg


9c6a4d8be9c4cdd6325755e8799f1643_zpsea3de93f.jpg


22c39802055bc983c7a378791e18c2dd_zpsee2dba5e.jpg


Thats it for now. Hopefully I'll get more time with it later in the week.
 
Now that I have bandwidth again on photo bucket, I can do a much needed update to this build.

I was able to go for my first test ride tonight. It went OK, but not great. Its strange to ride a bike that doesn't lean, and I overlooked 1 BIG thing....

First some pics to show where I'm at with it:

B7B73FBD-003F-4A81-ACDE-6FE4BAE38527_zpsbil0zgfc.jpg


023C6039-DD8D-417D-8B4F-DFFAF2BC0E6B_zpso1sylwle.jpg


0F71780F-DFA5-456D-995F-03A276705D91_zpspddcesij.jpg


35BDD1E8-8B87-474E-8048-E3D2D030A782_zpsloaki8ji.jpg


D935CCF5-721A-4D90-A986-62D85E9A8621_zpsfst2b0sg.jpg


9A09A0F6-B0BE-48CA-9B09-38CACB21EB71_zps9ritkcdf.jpg


So I think it looks really cool. And I know that when I get the bench on the back for the kids, they will LOVE it.

But heres where I screwed up. My idea for the rear hubs was terrible. Basically I just took standard cheapie front hubs, knocked the races out of them, slid them onto the axle, and drilled a hole for a grade 8 bolt to bolt them on. The problem is that I underestimated the force that is on the hubs when turning. Both wheels drive, so there is a lot of drag as one wheel is forced to slide sideways when cornering. This force caused the grade 8 bolt to rip thru the hub body. I should have known the hub bodies were not strong enough, but I never thought about it.

This pic is after about 100 feet of riding on the street in front of my house:

C17C7003-C51C-473F-8270-2D48218E23B3_zps8lcvryup.jpg


So my next step is to make some new hub shells out of DOM tubing, then ill weld them to the hub flanges I have, or maybe make some hub flanges.
 
Works kind of like a Detroit Locker, drive will always go to the slowest wheel, and the faster (outside) wheel will freewheel. Great method of getting both wheels driven without scrub issues!

Luke.
 
Luke I'm impressed that you know what a Detroit Locker is.
I may be only 32, but I have a wealth of car knowledge and experience from my Father and much older Brother... ;)

Luke.
 

Latest posts

Back
Top