Teaser...some lipstick on the pig.

Sent from my iPhone using Tapatalk
Sent from my iPhone using Tapatalk


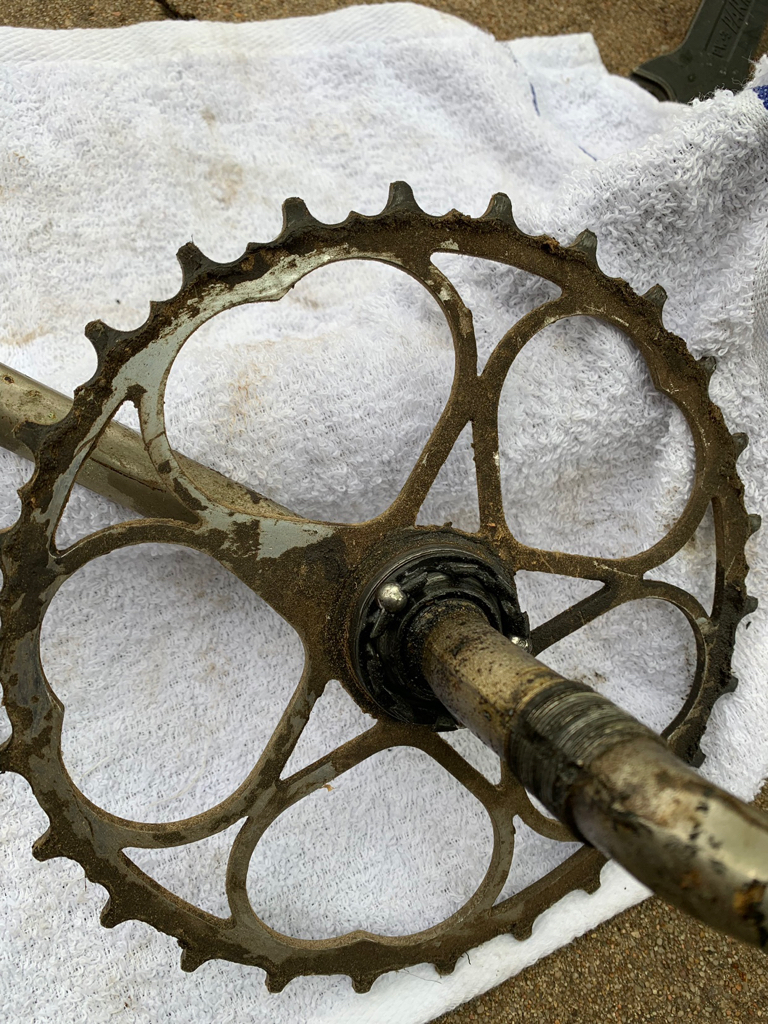
Thanks! The chainring does appear to have a lot of wear in the photo with the crank. The extra point between cogs is actually just grease/crud. The bike does probably have a bunch of miles on it though. I’ve also found that bikes from farms were kept well lubricated. Thus critical parts stay preserved. The bearings are another story.Very cool bike! I like where it's going so far.
That chain ring has some serious miles on it! wow!
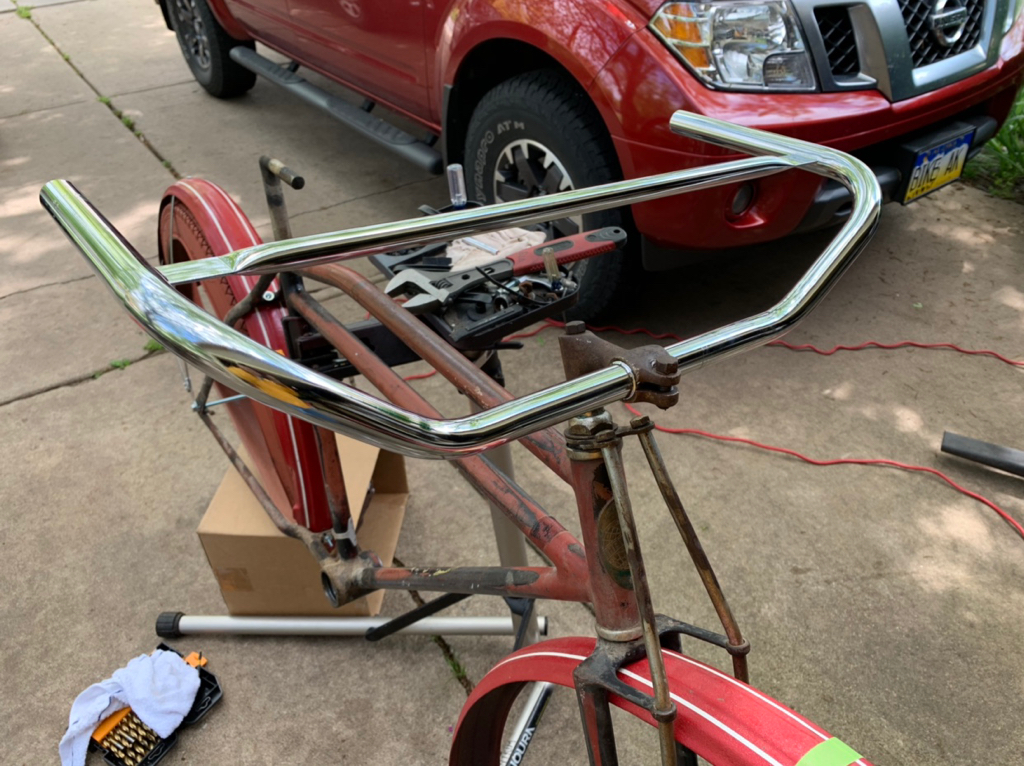
I’ve been “mentally” working on this bike since seeing it show up in Facebook Marketplace. So I have a plan ingrained in my mind. It was unleashed when RatRod said let the games begin.Progress on this is flying!
Really looking forward to seeing the tank!
I’ve been “mentally” working on this bike since seeing it show up in Facebook Marketplace. So I have a plan ingrained in my mind. It was unleashed when RatRod said let the games begin.
I’m looking forward to seeing the tank as well.
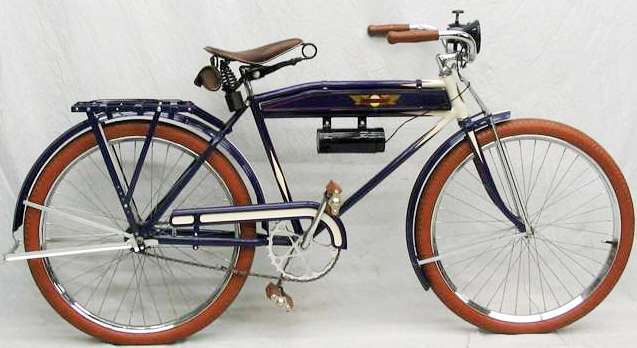
Inspiration image:
Sent from my iPad using Tapatalk


[emoji106]
It’s a work in progress, stay tuned more to come. Thanks!That bike is taking shape so very nicely. I'm really enjoying this thread.
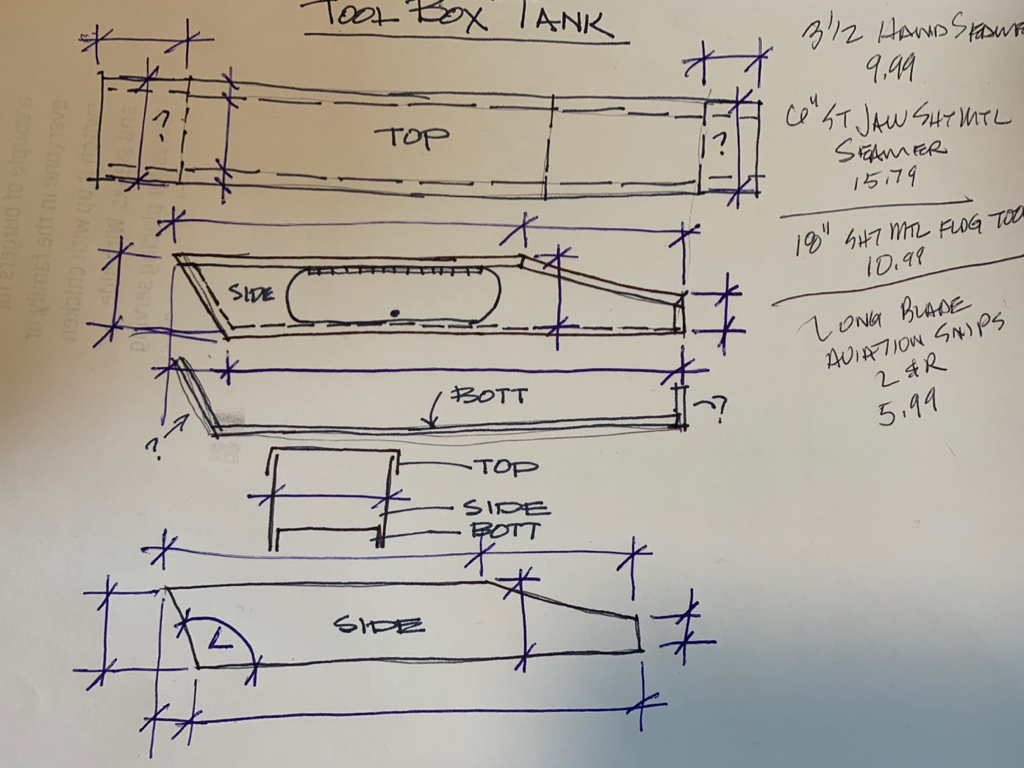
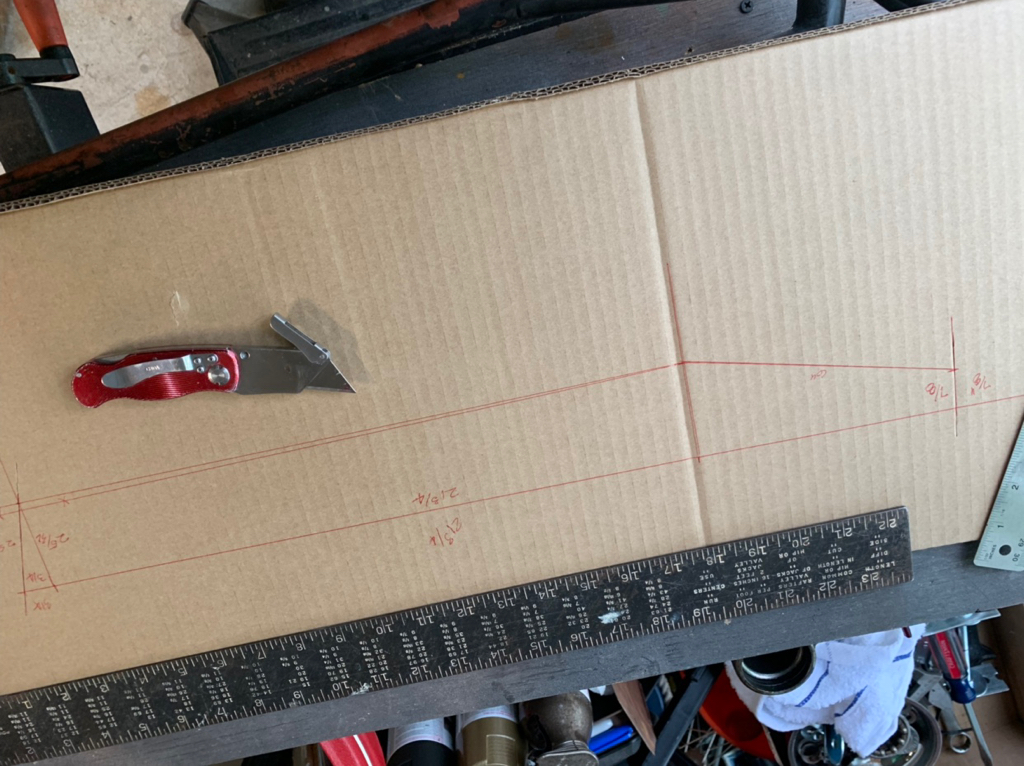
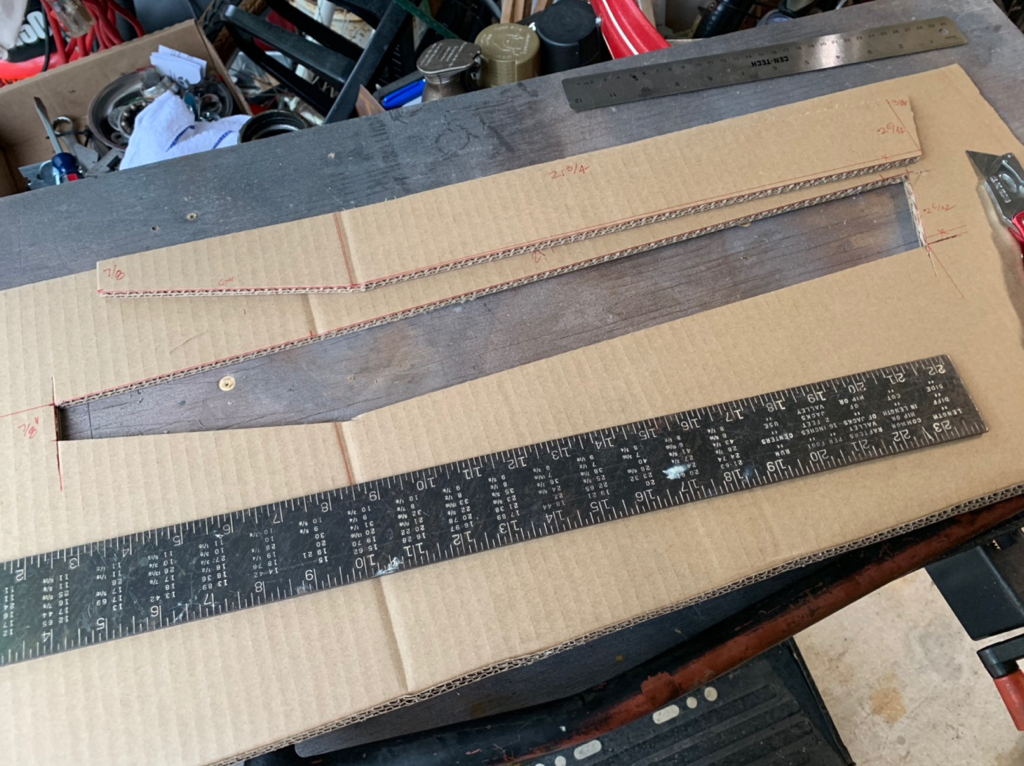
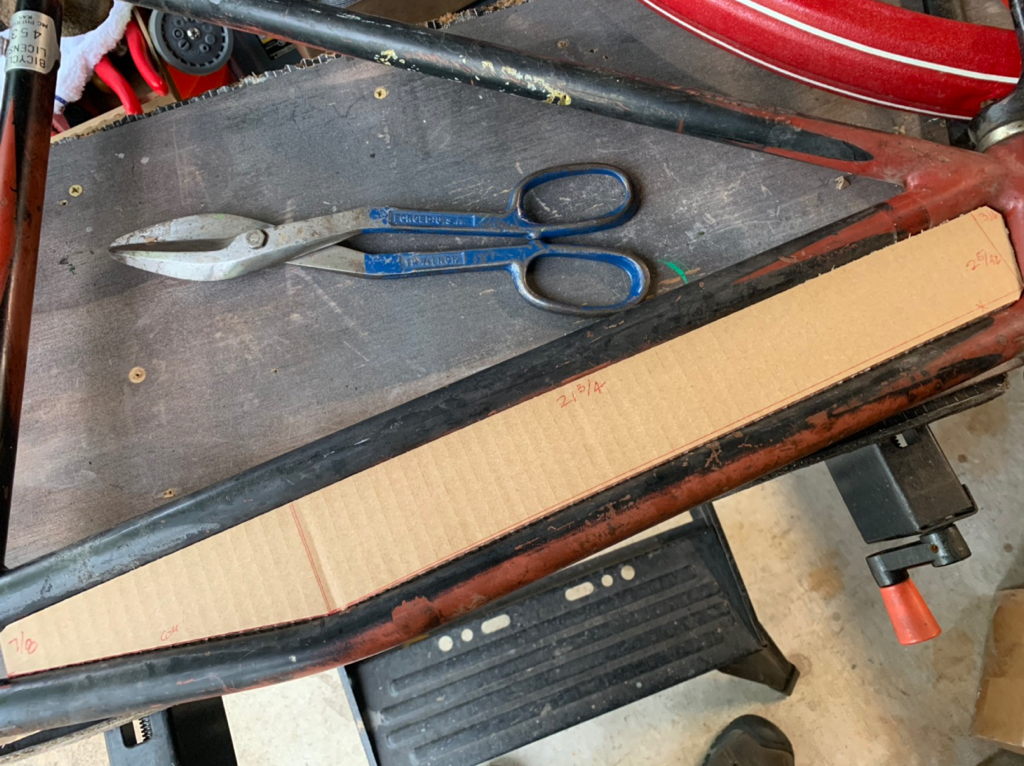
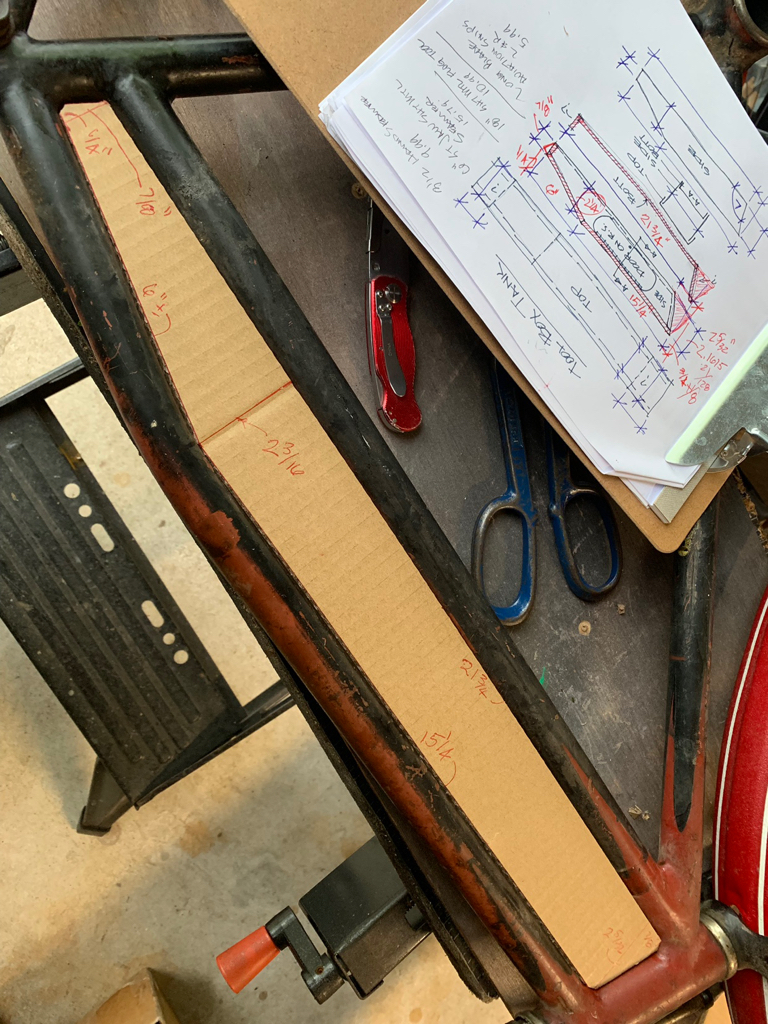
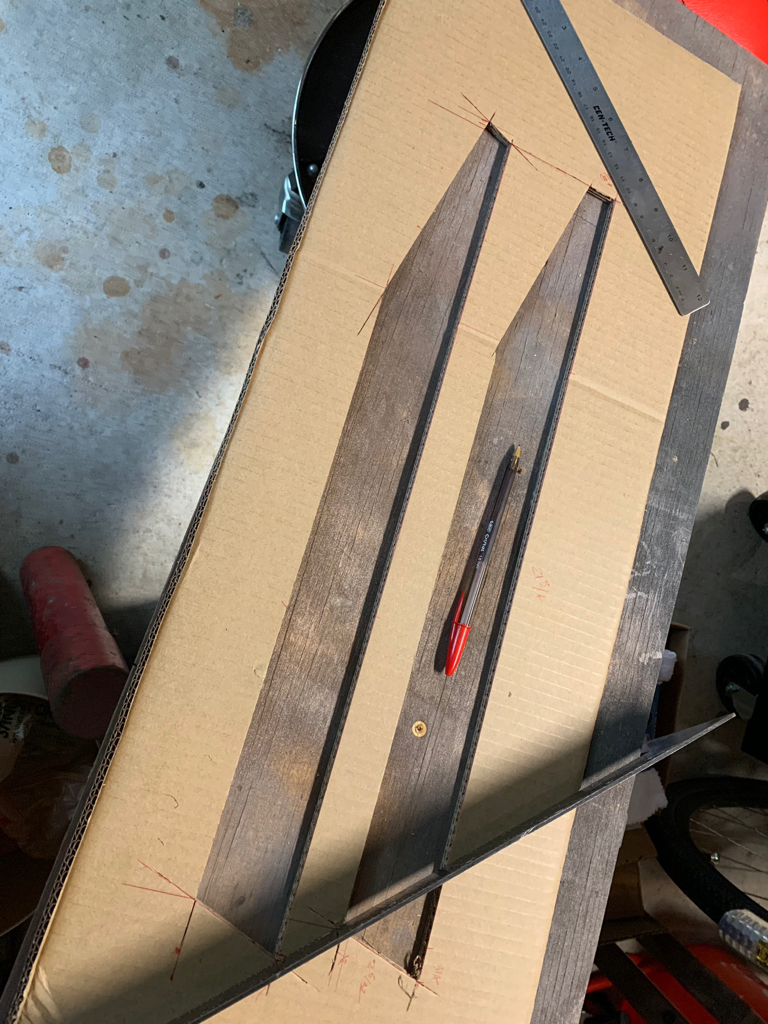
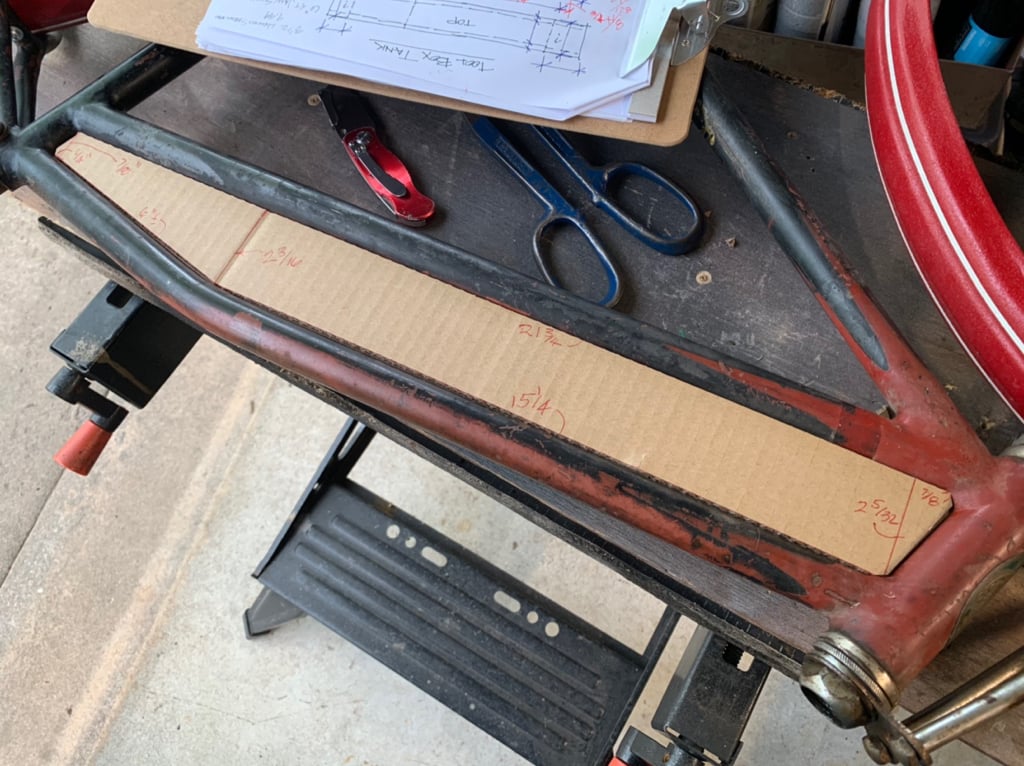
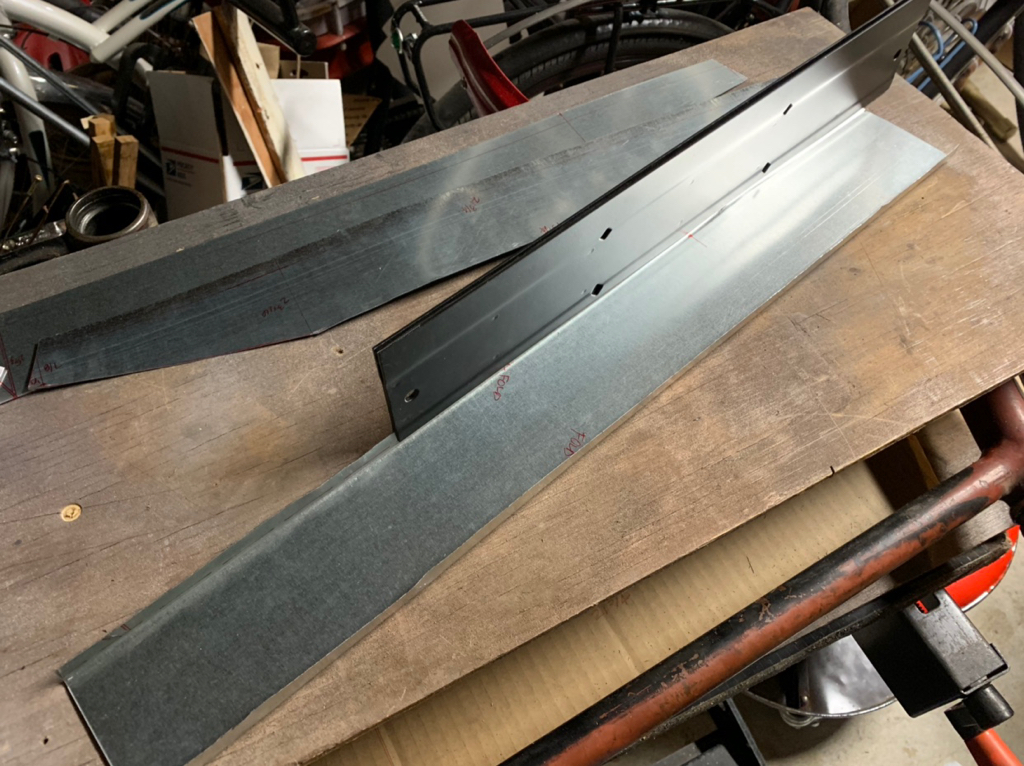
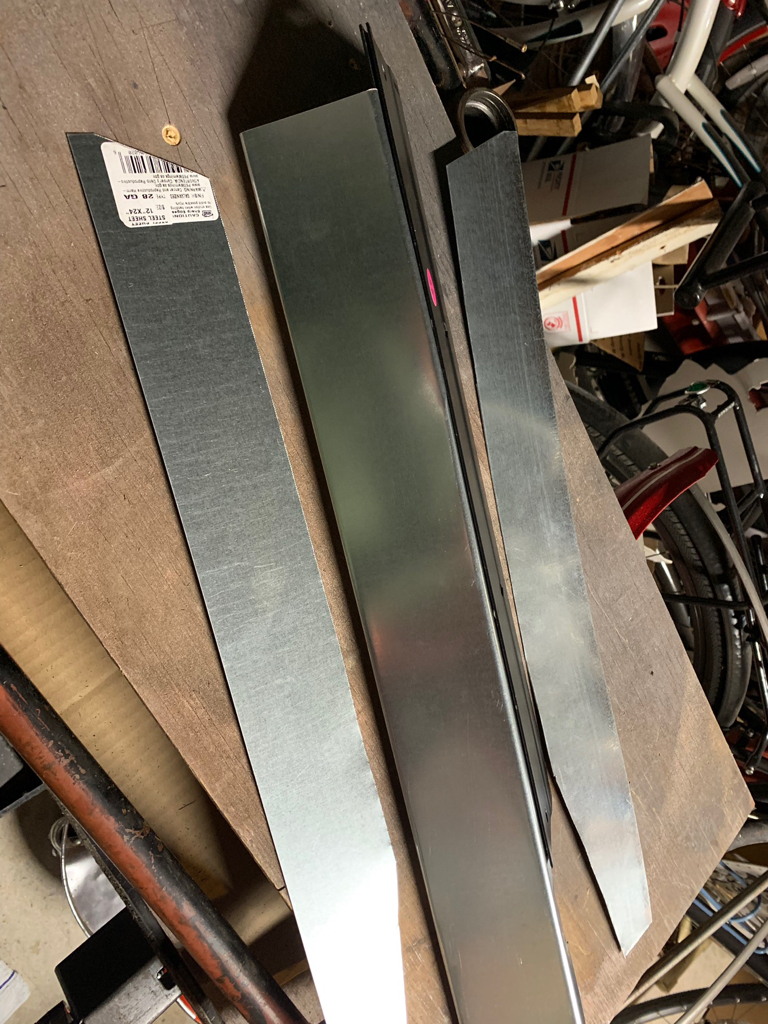
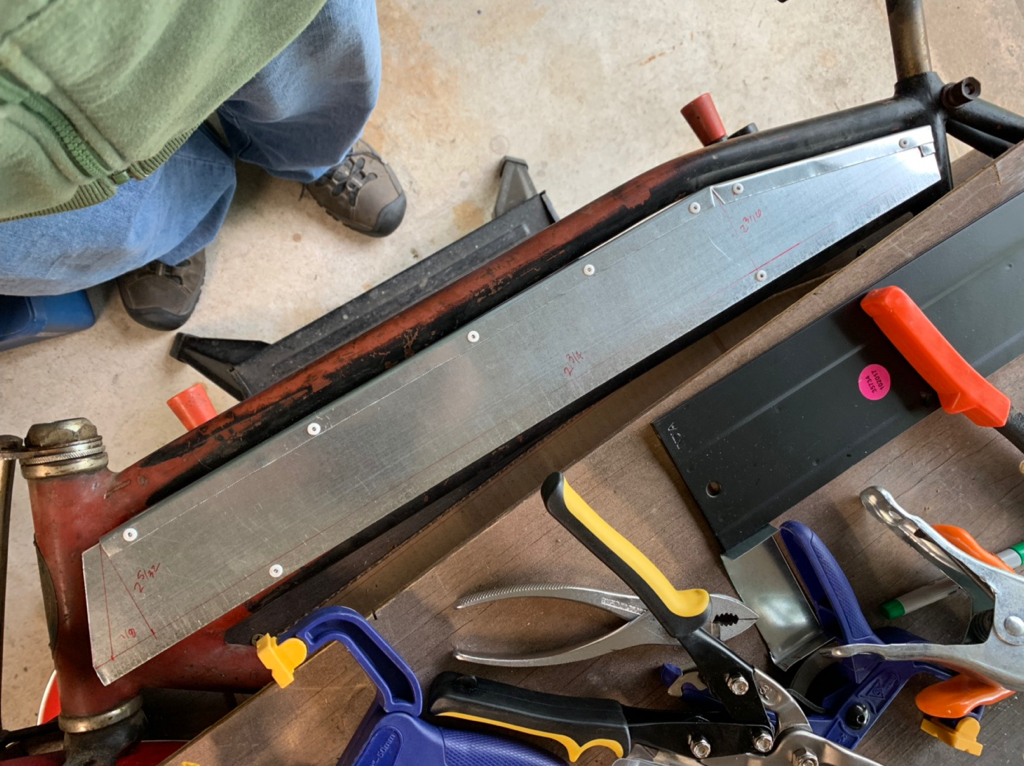
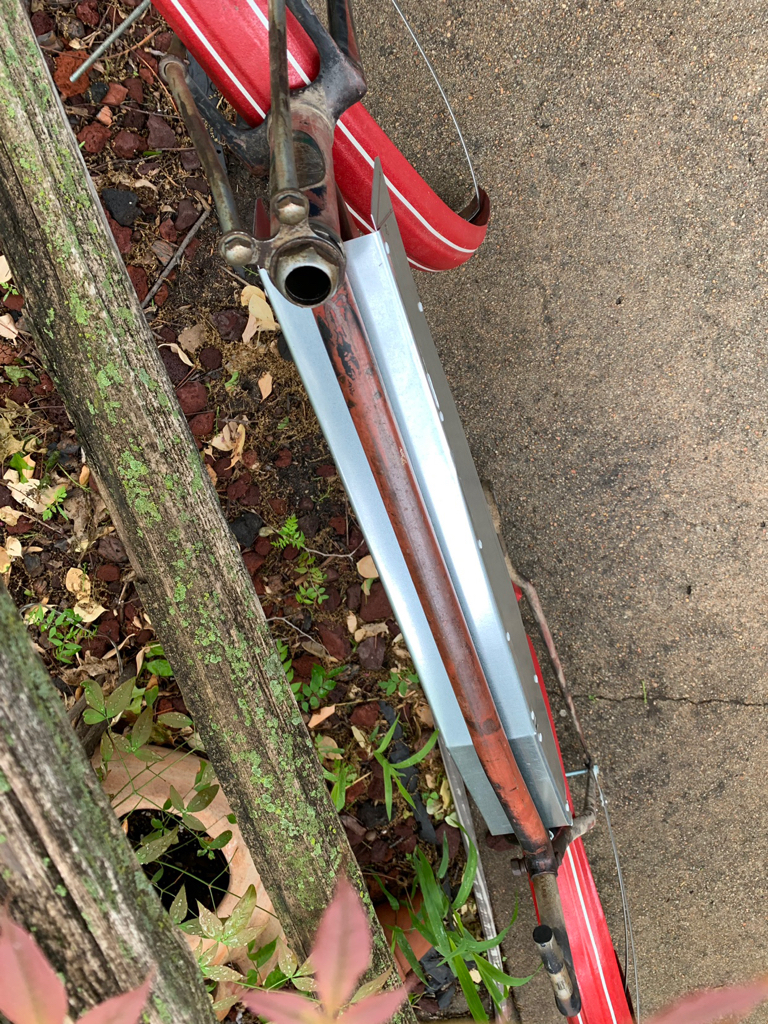
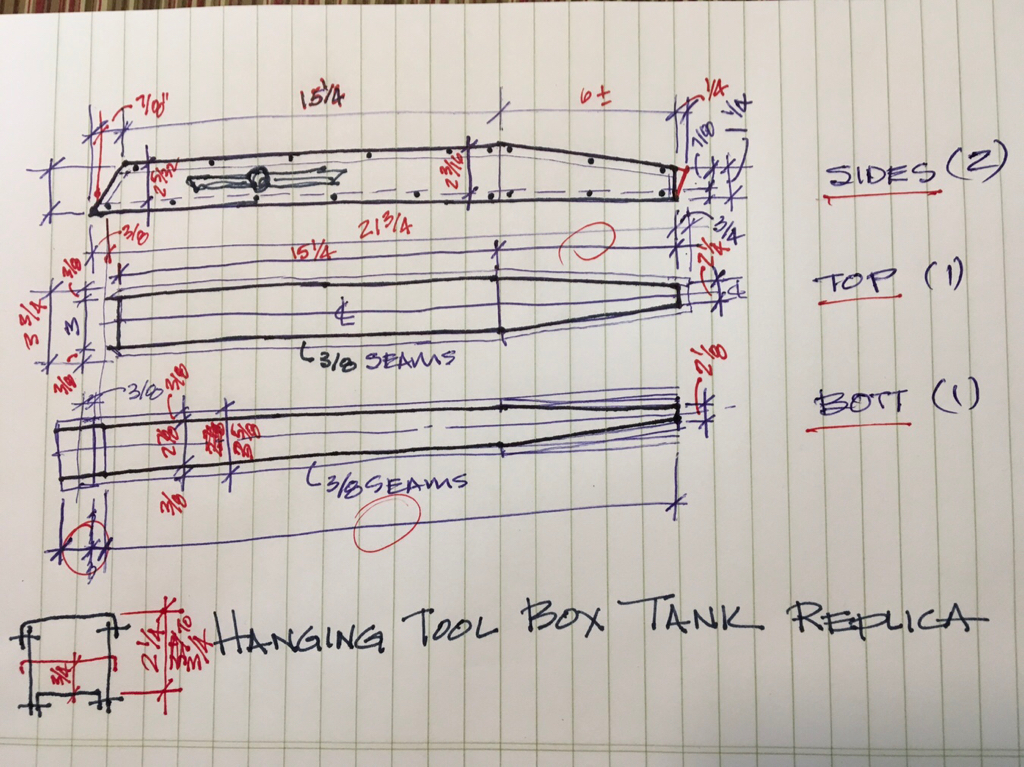
Thanks! Not really that difficult. Just some measuring, drafting, cutting, bending, filing, drilling. Used a pair of long cut aviation snips, a seaming jig and pliers, ....... file, drill and pop river gun. A little trial and error. I will do the bottom for this one and then a “final” version #2, paint and decals.Looks good. More work than I feel like I can do well. I gave it a half-hearted attempt once upon a time and found I dob’t have the right tools or skills for sheet metal work.
Rivets could add some character, if that fits your look. Kinda like up close airplane skin.
I notice the type file I used has been censored...lol.

Yeah, axle grease in most cases for farm bikes. Same thing that was used on the moving parts of tractors. Since I've joined and participated in this forum, my mind keeps going back to the farm bike my uncles rode on my mom's home farm where I often worked during Summer hay season and rock picking in the Spring. They were only 6 and 7 years older than me, so more like big brothers.Thanks! The chainring does appear to have a lot of wear in the photo with the crank. The extra point between cogs is actually just grease/crud. The bike does probably have a bunch of miles on it though. I’ve also found that bikes from farms were kept well lubricated. Thus critical parts stay preserved. The bearings are another story.
Sent from my iPad using Tapatalk

A tank on your Trans bike would somewhat emulate the early ‘30s Rollfast and Elgin deluxe tank Bikes.Oh and, Ed; you've now officially made up my mind not to try to configure a metal tank of my own. Yours is turning out so well, all others will pale in comparison.
Excellent work on that sheet metal fabrication!
Enter your email address to join: