(MMBO Class 1) Super Stock Scrambler...10 Speed Stingray SRAM-bler

Rat Rod Bikes Bicycle Forum

Help Support Rat Rod Bikes Bicycle Forum:

This site may earn a commission from merchant affiliate links, including eBay, Amazon, and others.
Joined
Sep 7, 2014
Messages
3,278
Reaction score
6,407
Location
Columbus OH
Hey Guys,

Started building another bike. I knew it was too early for the WBO but since I'm off work for 20 days right now I very well could have this turned into a runner before the deadline so I'll add it to the mix.

Wanted something I can ride through grass and on sidewalks. As wonderful as the 9-speed Fastback is it's mainly a street machine.

I also want to see how much weight I can drop from one of these by swapping out all the Ashtabula parts (stem, forks, cranks) for light weight replacements. I also want to build a more sophisticated sissy bar suspension.

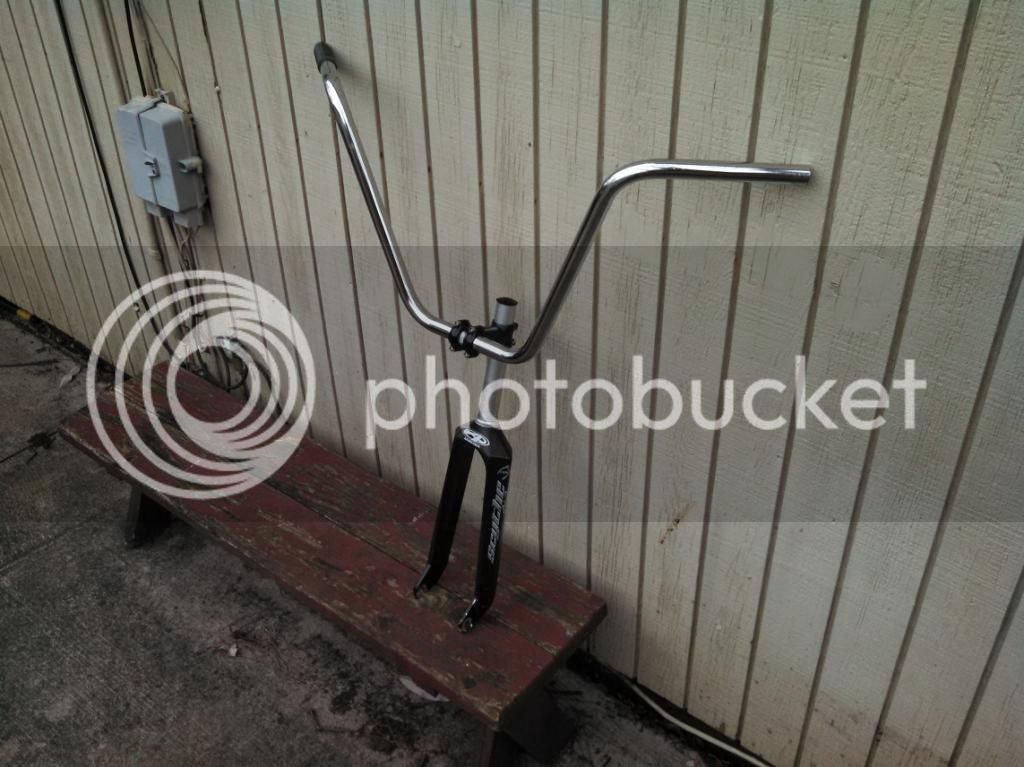
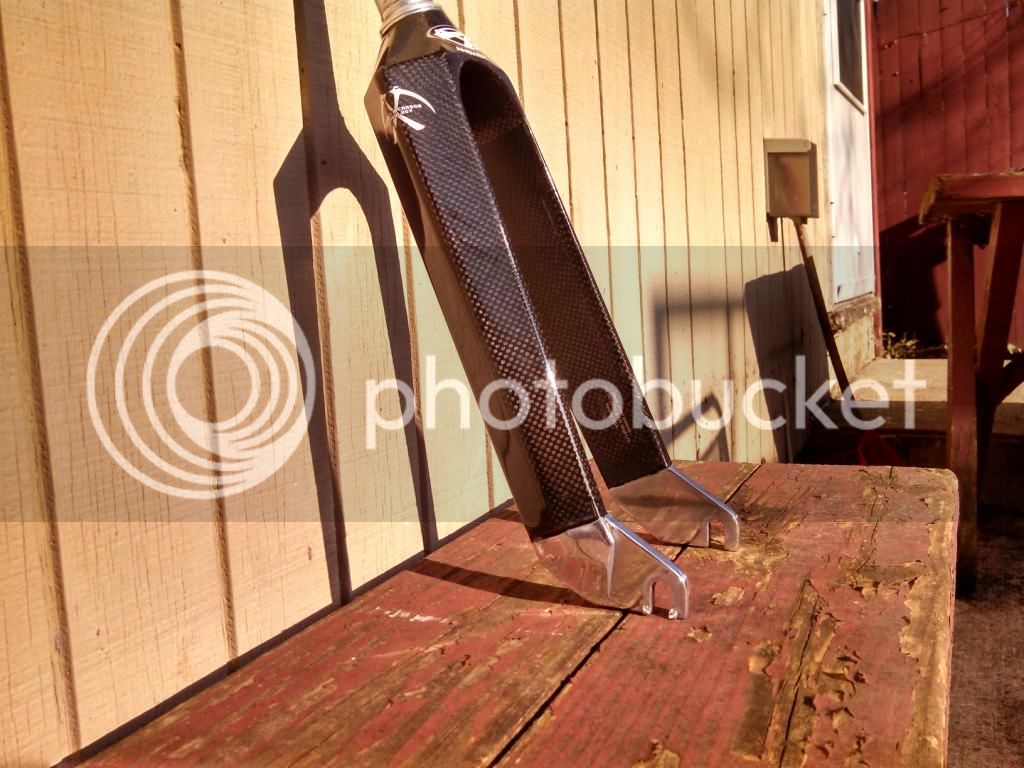
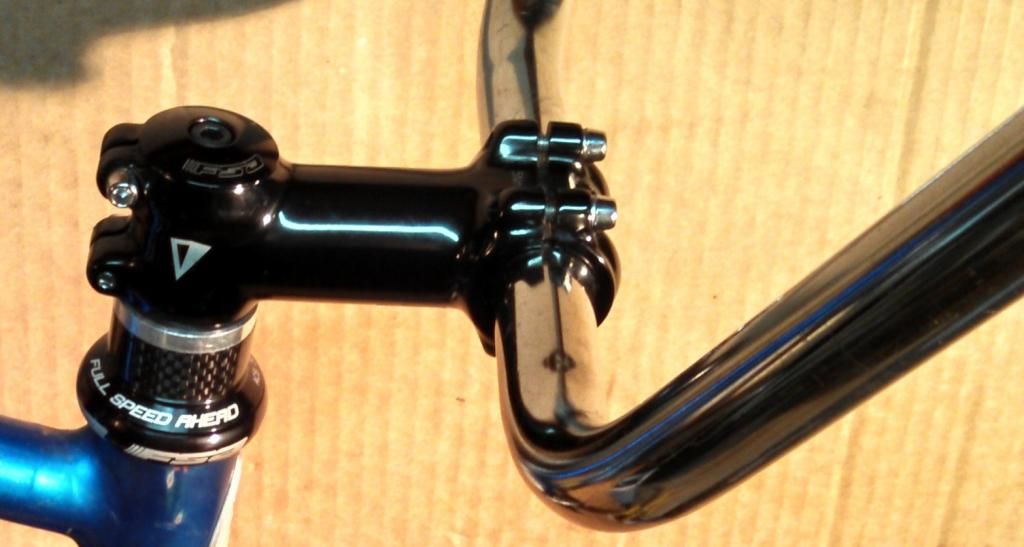
I bought a carbon fiber Answer Schythe BMX fork a few weeks ago. I already had the threadless stem and early stingray bars which I really like. This assembly is feather light.

scythe2_zps1378c857.jpg~original


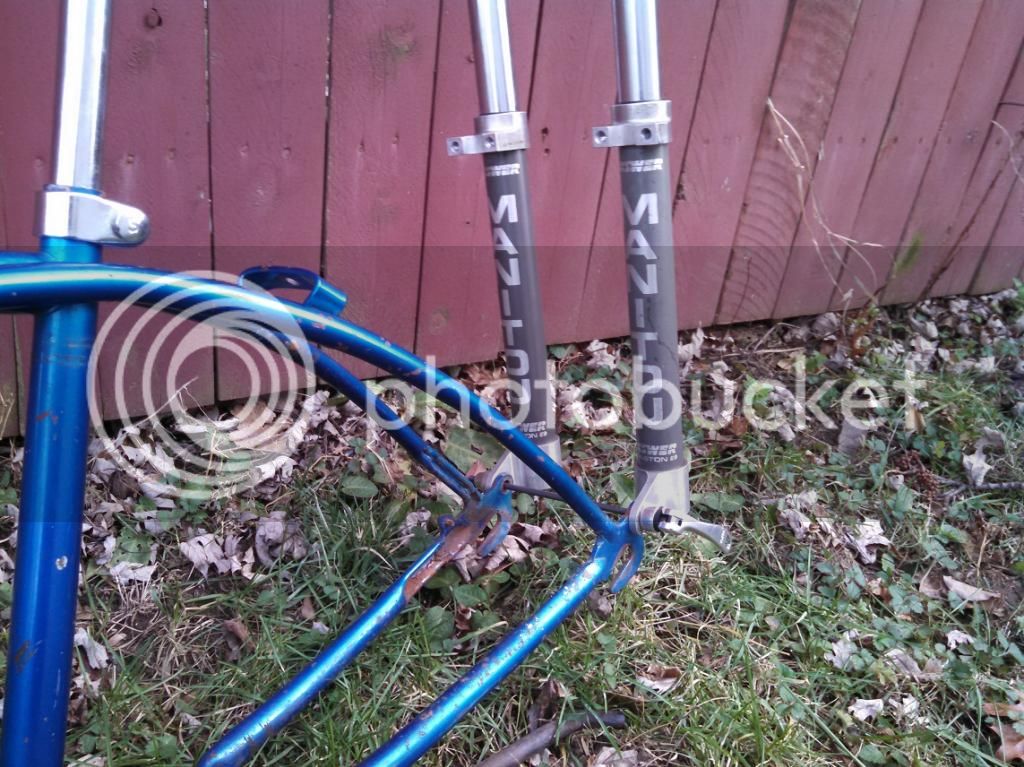
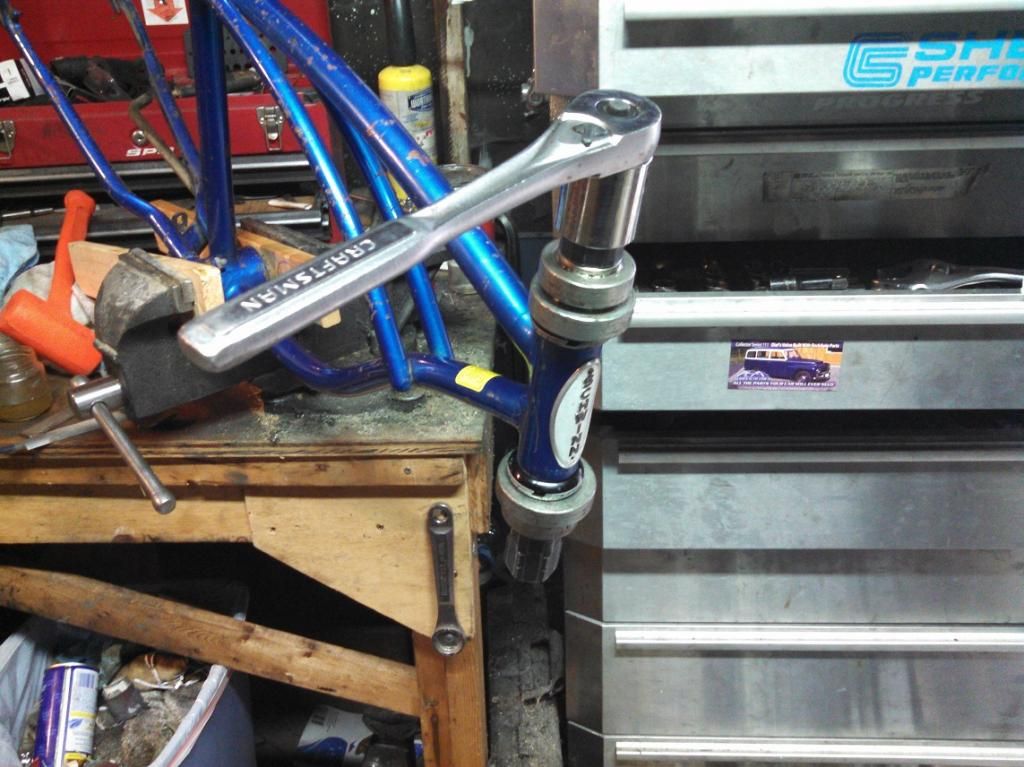
Local Scwhinn store here has had this Answer Manitou fork hanging on the wall for 20 years. I've had my eye on it for a long time to use for a suspension sissy. Was able to talk him out of it by telling him what I wanted to do with it. Things started snowballing rapidly after that. Before you know it I had a 1976 Stingray 3 speed frame here.

scrambler2_zps716cbd76.jpg~original


scrambler1_zps4c34c991.jpg~original


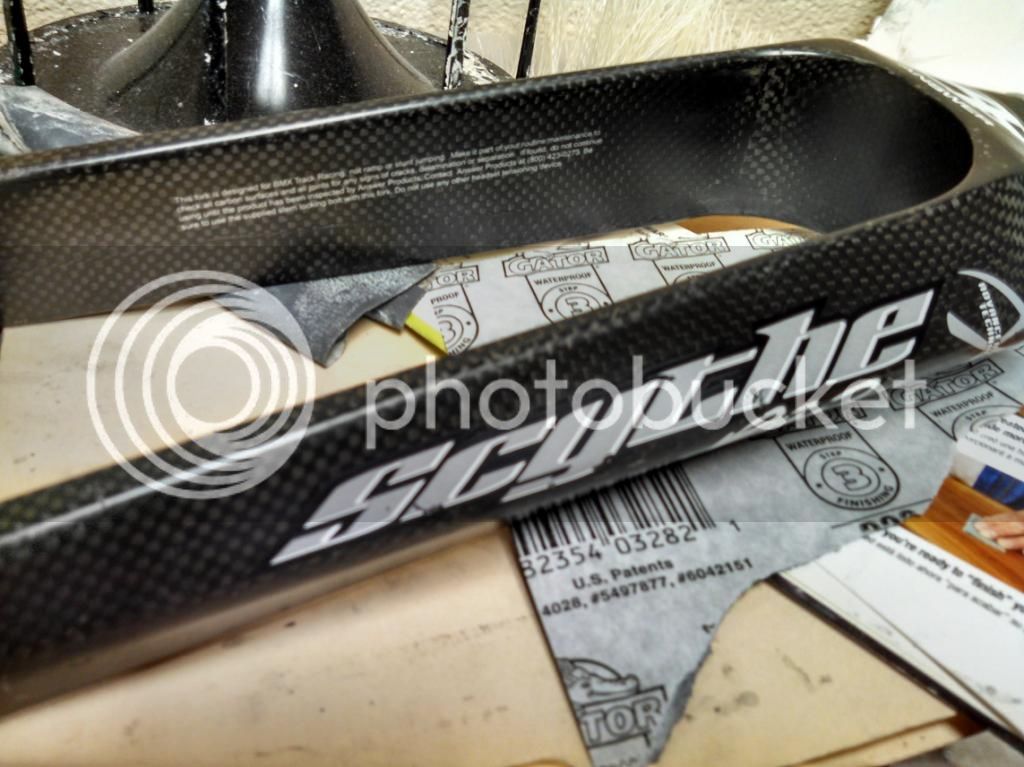
Wet sanded the Scythe off of the fork.

scythe_zps973fc631.jpg~original


fork_zps41210868.jpg~original


fork2_zpscea093ee.jpg~original


Campagnolo high flange Record hub.

crecord_zpsff1f12de.jpg~original


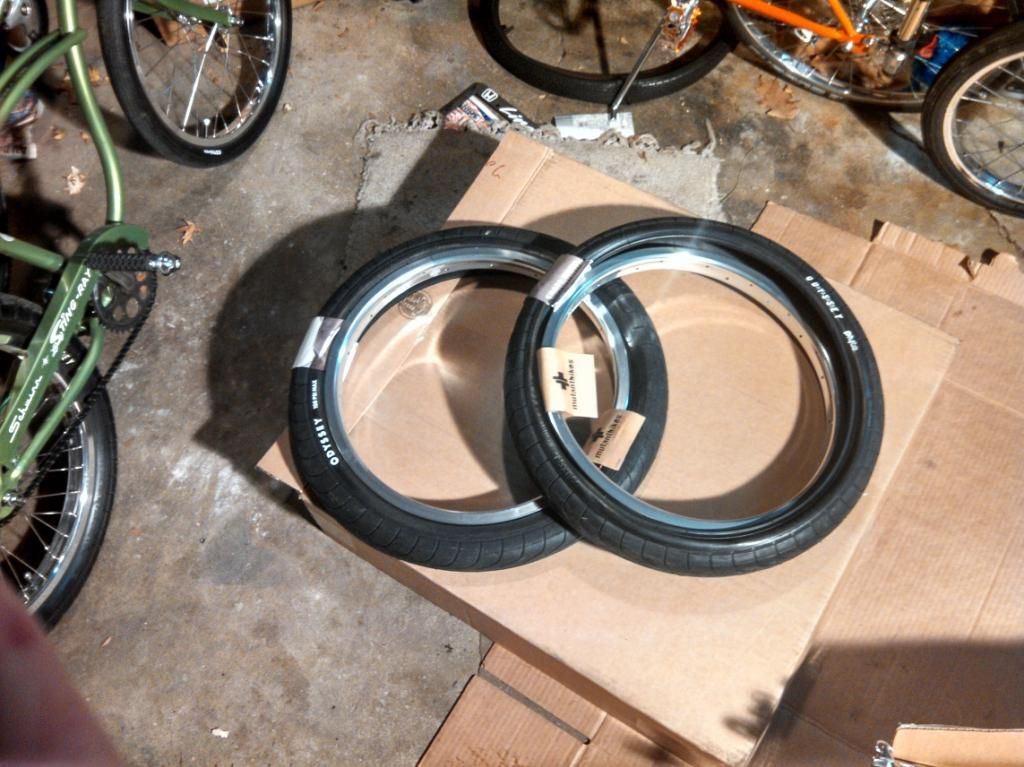
Mutant Elektra rims with Odyssey Chase Hawk tires. 2.4" rear 2.2" plyte front.

hawks_zps1800ecbd.jpg~original


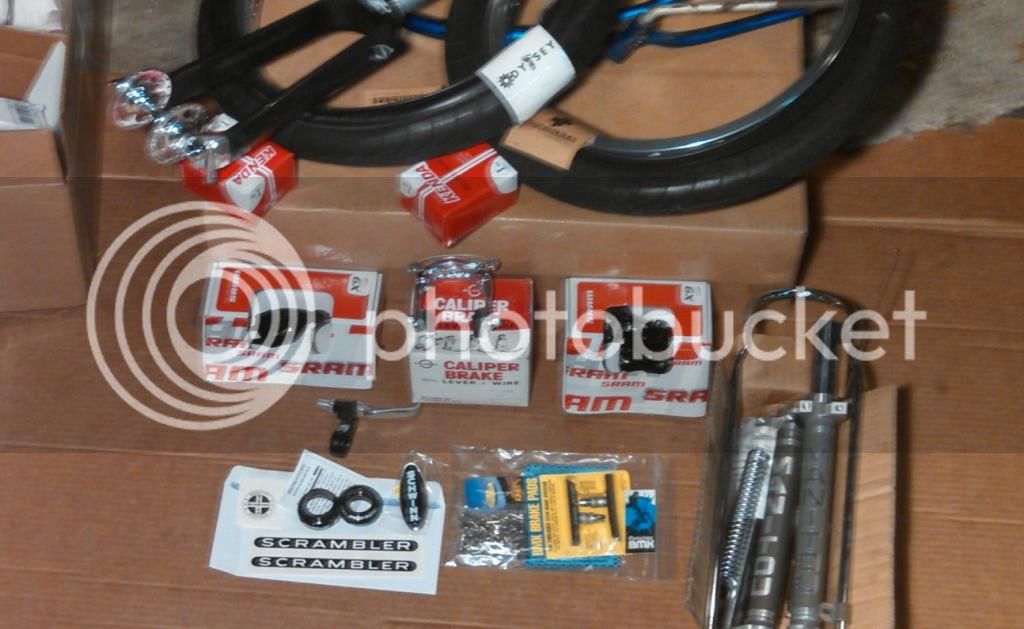
Some of the blowback from a ravenous parts buying frenzy..parts are still trickling in.

parts_zps76049701.jpg~original


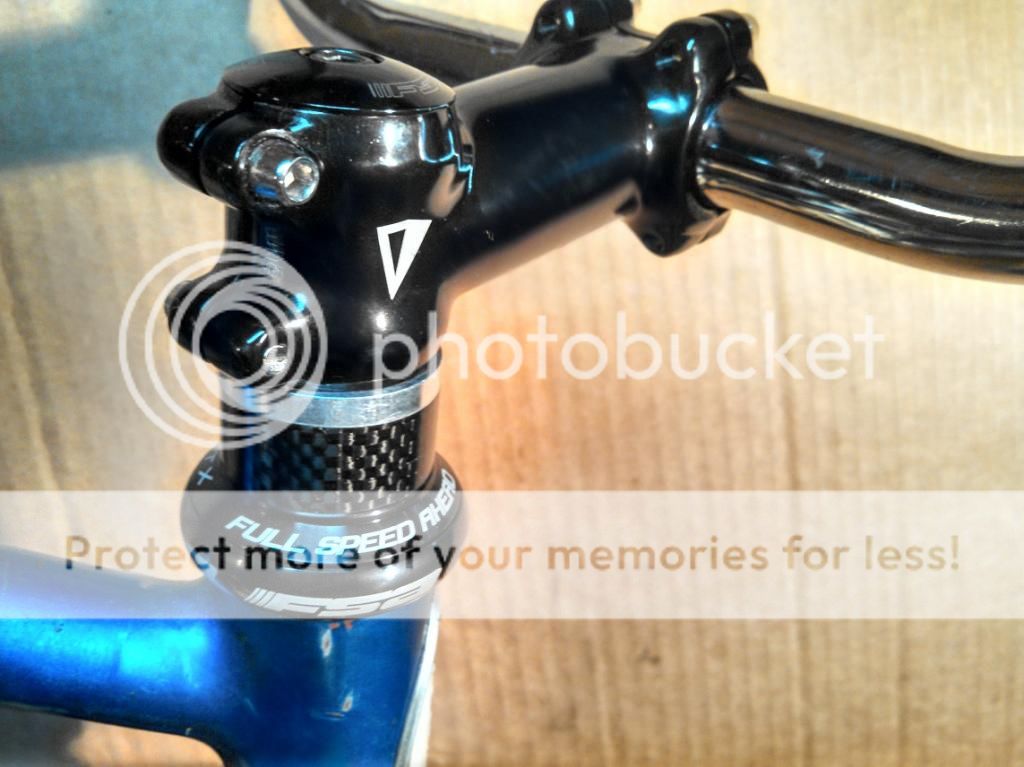
Reamed out the headtube from 32.5mm to 34mm and installed the threadless headset yesterday. Lots of detail about that in my thread in the builds section. http://ratrodbikes.com/forum/index....-scrambler-10-speed-stingray-sram-bler.88655/

threadless_zps743eb2c1.jpg~original


threadless5_zps87614699.jpg~original


threadless6_zps3b20c135.jpg~original


threadless7_zpsea466be2.jpg~original


Grips came in the mail yesterday as well. Tried them on with some of the works.

x92_zpsf273e8c6.jpg~original


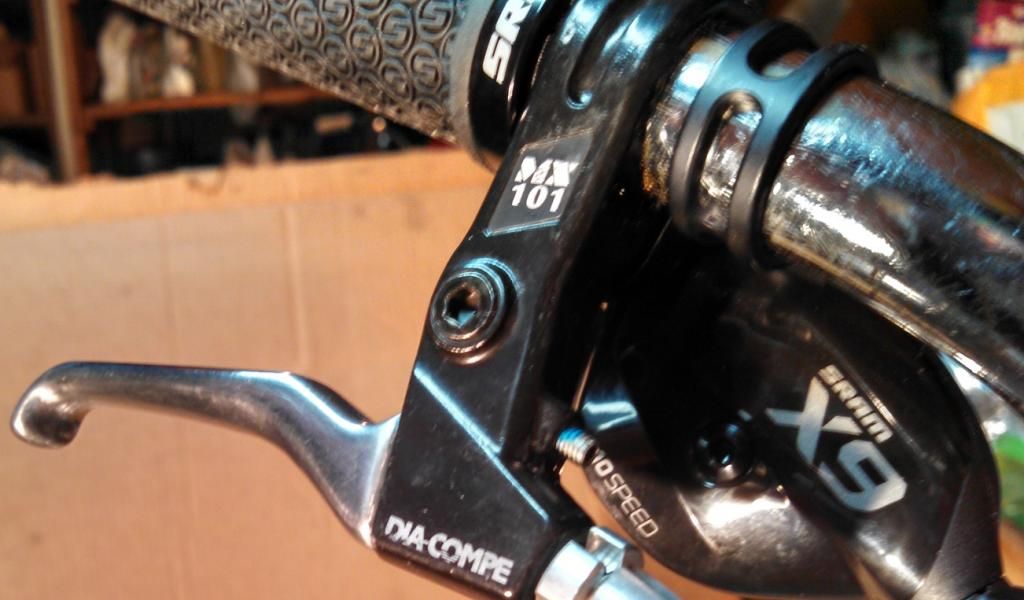
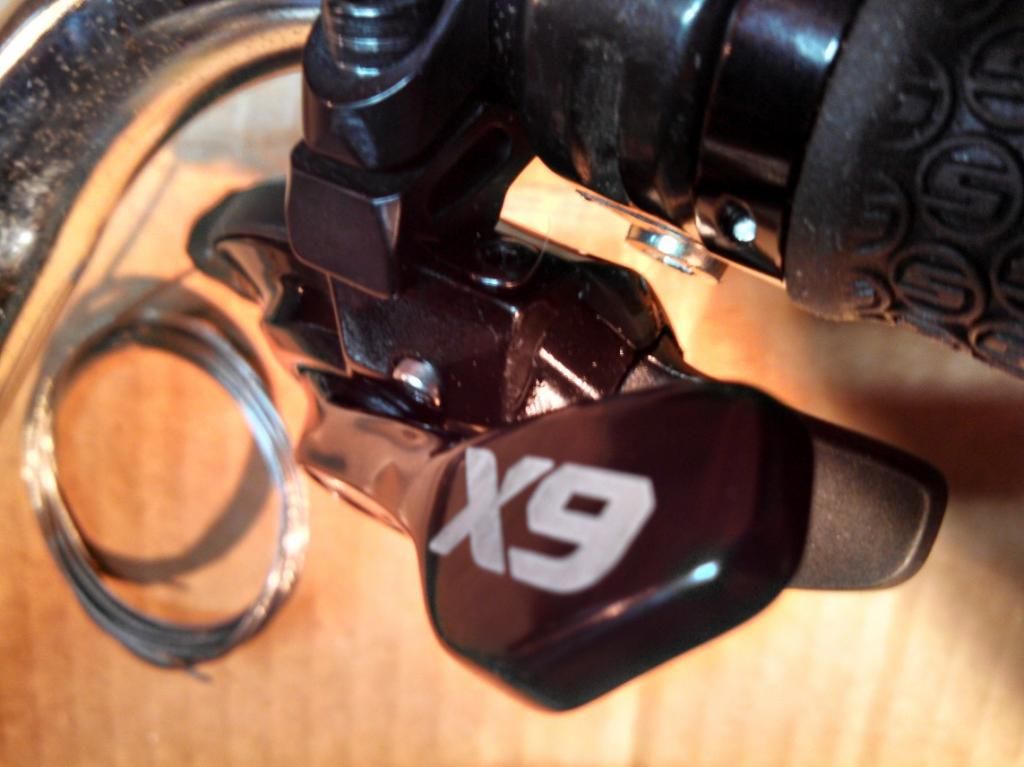
Not quite as pretty as the mid 2000's XO SRAM stuff on the Fastback but it's newer technology. Should shift nice. Derailleur is pretty sharp and high tech. Scrambler build allows me to get away with the black SRAM which is a lot eaisier to find than the polished carbon fiber 9-speed stuff.

Had to file down the brake handle clamp bolt to get the shifter into better alignment. I like them to be parallel.

x9bolt_zpsd23b8ffd.jpg~original


Worked on it all day today again...I need to sort through the pics and get the latest posted up. These bikes have been manifesting themselves fairly rapidly once I get the momentum going. I call it the bike tornado.

This bike most likely won't have it's final paint job by the deadline but I have an idea for a quick makeover with the blue.

This will all be reruns for anyone following the thread in the builds section but I'll have todays progress pics ready soon. Might be time for a nap....;-)
 
You've got 11 more days. Shouldn't be a problem! I like the concept... again! :D

Thanks Crash! 11 days and I posted it at 1:11 Works for me. Feels good to get back at it.

Love this build, very cool!

Luke.

Thanks again Luke....I'm glad you like this one.

Did the 'ole frame stretch today. Last time I used an old axle between the dropouts which worked but left the dropouts pointing inward. this time I used my hub shark (it's a wheel bearing remover for a car). I spread the stays to where they needed to be then pinched the dropouts with a c-clamp until they were reasonably straight.

After that I stretched the stays way out until they relaxed where I needed them. Actually hit it perfect on the first pull this time.

streatch_zps7dd295a3.jpg~original


Another thing I learned with the 9-speed is that those bolt on hangers can rotate especially with a quick release axle. So I added a small screw to keep it from rotating. Got this screw out of a bag of hardware I found for a 944 Turbo throttle body rebuild kit.

streatch2_zps614618e9.jpg~original


For the X9 rear derailleur I could have got a carbon fiber cage or the new type 2 with a roller bearing clutch on the cage and a cage lock on it.

x93_zps6a14dcfa.jpg~original


After riding the Fastback for a while I could see why they put a clutch on the cage. It bounces pretty good when you shift sometimes. Kind of cool though as it clangs on the chianguard real loud. This x9 should be quieter and smoother. XO shifter is super loud but sounds cool. Scrambler will be more luxurious and refined.

I'm putting all of the braking responsibility on this 1984 NOS Dia Compe center pull.

diacompe_zps82c85b9b.jpg~original


Hope these are as good as I remember them being. I upgraded from the 1984 pads.

kool_zps38769858.jpg~original


Going through lots of SRAM over here! Sometimes I sing that Monty Python spam song while I'm looking at the all the SRAM.

Speaking of SRAM. I got a box in the mail today and had no idea what was in it. It felt like it was empty but if you shook it sounded like it was full of broken glass.

cassette_zpsc4150674.jpg~original


It either escaped it's holder or somebody took it out and couldn't get it back in. Took a while to get all them gears shuffled the right way and onto the freehub.

I really like these Mutant Elektra rims. I searched and searched for a rim that would look like an upgraded Schwinn 36 hole S2 for my '64 Stingray. Since a Scrambler has 2 36h S2 rims the choice was easy.

What I really like about these is that the top of the rim is concave and the spokes lace to the opposite side of the rim compered to where they originate on the hub. Cross lace they call it. Should look cool with another 1/2 radial lace. Spokes are on the way.

The thing that sucks about these rims is they come with a bomb proof powder coat clear on them that can only be penetrated with lots of sanding.

Broke the power sander out and shined one up. I would take cleaning up a rusty rim any day over sanding down this powder coat. You almost have to sand the rim completely smooth as the powder coat will stay in the low spots.

This one came out OK. Will probably use it on the back and try to get a little better finish on one for the front.

plyte_zpsa47a0441.jpg~original


Was dying to see how the 2.2 plyte looked. Kind of a sexy little thing compared to the 2.4. Should have some noticeable stagger.

plyte2_zps3af27a58.jpg~original


Another thing that sucks is these rims didn't some with the nice Mutant rim tape like they used to. I was able to get some fast + cheap online though.

sunday_zps725a0de6.jpg~original


They're so nice I'm gonna use them all week...;-)
 
What rim tape is that? That's wide. I just use rubber ones, but they aren't very wide for wide rims.
something I have always used for nearly 30 years now is electrical tape wrapped twice around the rim and only very slightly stretched,has worked everytime,just be careful around the valve hole
 
What rim tape is that? That's wide. I just use rubber ones, but they aren't very wide for wide rims.

They're Sunday brand but you can use them any day of the week...;-) 5 bux for 2 strips.

http://www.sundaybikes.com/gear/wheels-and-parts/rim-strips/#/0

On these double wall BMX rims you need a stiff tape as you are bridging holes that are about 1/4 inch instead of just cushioning the nipples.

Some good progress today. Installed the brake cable stops and brake cable yesterday. Today I tackled the shift cable. Got these black casings from my LBS the shift cable is compressionless for index shift and both are lined.

Had a little interference from the cantilever tube which I at first solved like this.

cable3_zps550765fd.jpg~original


Didn't like that so did this.

cable1_zpsf339c18a.jpg~original


Cable barely touches the side of the hole. I may work on that with a file and/or ad some sort of sleeve through there.

Did the bottom bracket guide a little different. Cut the guide in half and used part of it to get over the kickstand.

cable2_zps2fdccf89.jpg~original


Did the rear just like the Fastback.

cable4_zpsffff029b.jpg~original


When I went to put the first shifter cable stop on this morning I realized I had the stops that were flat on the back. Took them to the LBS but looks like I already cleaned him out of the rounded ones.

When I got home I had one round one in the baggie with my other flat one! Yay!.. he must have found one and not told me. It was the one for the down tube too. The other one was for the chainstay so I just filed the back of that one to fit the chainstay.

Check out the big bolts on the brake stops compared to the shifters. I really needed a confidence booster to use these on my only brake cable.

cable5_zps3c6915f9.jpg~original


Now I'll have some handy adjusters right there as well. Probably need to stop with the stops but I really like these deals.

Came inside to eat and relax for a while and the wifey tells me I got a package. A medium sized box that seemed weightless just like the box the cassette came in but when I shook it I could hear something that made noise like a heavy object but didn't feel like anything.

Cranks! Double bonus! Was hoping those would get here soon. Perfect timing since the shift cable is done.

Now as much as I would love, and I mean LOVE to shine up those old bearing cups I have a different plan.

cranks2_zpsfc7e1fd3.jpg~original


Truvative cranks cost me less than my Mag cranks for the Fastback. Truvativ is somehow SRAM related. Not sure how but I'm sure I'll know more about the SRAM as time progresses.

The spindle is hollow. Not sure how modern this tech is but I've never had anything like it. I thought the clear sleeve with the bearings was just packaging. Turns out it has o-rings on the ends and it's a seal. Should keep out all that old frame crust.

cranks3_zps655387f3.jpg~original


Moved the big (53t) chainring to the inside and slid the cranks on there.

cranks1_zps54e0d04f.jpg~original


Now these are 6.5 inch (165mm) cranks. I probably would have went with something smaller but wanted to find something with a nice 10-speed (meaning 1X10 chain compatable) chainring on it.

Kept scratching my head on how I could verify the ground clearance situation and then the light bulb went off and I pulled the wheels off the '64 stingray for a quick test.

cranks7_zpsc11efb2c.jpg~original


Yes!! There it is 6.5 cranks on a Stingray!

That will work. The carbon fiber fork raises the front a bit just like the original long ashtabula forks did on the Scrambler.

I think this actually has More clearance than the Fastback with the original Mag cranks.

cranks5_zpscae95cdd.jpg~original


You would have to tip the bike almost completely sideways in a turn to catch the pedal on the ground. I couldn't be more pleased with this situation. I was so worried about that. What a relief.

Chainline is looking pretty good. This is 5th gear. (A 19t on this setup.) Ratios look to have even better spacing than the 9-speed which is fantastic.

chainline_zps6cc14871.jpg~original


Cassette is a SRAM pg-1050 11-32. It has the best looking black alum spider on the big rings.

cassette2_zpsc59521b6.jpg~original


Oh and I have a question. I'm assuming these adaptor cups should be bottomed out? Looks like I might have to get the drum sander deal I used on the head tube back out. Didn't tighten the crank arm on all the way yet. Not sure if it would tighten up all the way with those adaptors sticking out.

cranks6_zps8200a364.jpg~original


Tried sanding the other rim the rest of the way but didn't get too far. I made a game where I would sand if there was a bad song or commercial on the radio. I lasted through one bad song then I stared at the cranks during the next song then came inside.

Been drinking some coffee while posting this so I'll try to do some more. I want this one to be extra special shiney for the front.
 
Last edited:
Figured out the bottom bracket adapter. While I didn't have to clean those bearing cups I really needed to clean the bottom bracket on the frame.

bb1_zpsaf99ac4a.jpg~original


Tightened her down with the hub shark just for good measure and then re-torqued the screws.

bb2_zpse0209241.jpg~original


After that it measured exactly 68mm. I remember seeing that somewhere. I think that's right. The adapter cups actually bottom on the shoulder inside the frame and do indeed stick out a little. Cranks tightened back down fine and are nice and smooth.

Finally finished with the hoops. Here is the last one after power sanding the rest of the clear off. Lots of scratches.

hoop1_zpsbaddf9da.jpg~original


After much wet sanding I had it pretty smooth. I knew when I hit it with the soapy 600 grit that things were starting to go my way with this one. Was almost shiny after the soapy 1200 grit.

This is before any polishing. Just sandpaper. That's the key with the polished alum.

hoop2_zps204945dd.jpg~original


I really like this 2.2 plyte chase hawk front tire. Just a hint of stagger with the 2.4 rear.

hoop4_zpsd1eae5a9.jpg~original


Time to re-pack that Campy Record front hub.
 
Man, you need to lay off the coffee haha!

Looks awesome Chad! I am digging this resto mod!
 
Mmmmm...coffee!:crazy2:

Thanks Robby! Hide the good stuff...I'll see you next week...:banana:

Them Sunday rim strips are even better on a Sunday....:thumbsup:
 
Either you're not married or your wife is nothing like mine. I have to steal away time in the shop. That's why it takes me 4 months to complete a build. You're doing more in a day than I could accomplish in a month! lol
Nice BB cup press. I tried to build one but it didn't work out. So I use the 2x4 hammer trick. It ain't pretty, but it works. Of couse, I'm not installing the high-tech gear you're installing either.

Looking great so far!
 
I was surprised when I opened your thread and seen you are building another cool bike you make this stuff seem simple almost like one of them 30 minute shows where they resto a old car but without the nonsense keep it up and good luck :41:
 
Very cool stuff, going to be an awesome bike!

Luke.

You gotta build you one sometime....so much fun.:thumbsup:

Either you're not married or your wife is nothing like mine. I have to steal away time in the shop.

Well the last few days during this bike building berserker deal the wife and boy were both sick. He just laid around all day which while I felt bad he was sick I was able to get a lot done with him and momma occupied.

Now he's turned back into an impish little creature I lovingly refer to as "Hey Daddy". So I have to answer a number of "hey daddy" type questions every time I pass by him lol.

Nice BB cup press. I tried to build one but it didn't work out. So I use the 2x4 hammer trick. It ain't pretty, but it works. Of couse, I'm not installing the high-tech gear you're installing either.

Another post brought to you by the Hub Shark! That thing is real handy for bikes. Torturous work with a car though. First time I used it was on a 1993 Audi S4 without an air gun to drive it. That was the beginning of the end of me working on my daily driver car. Eagleye had that car for years after I sold it to him to buy an Acura.

Looking great so far!

Thanks CRASH. I wish we could see what what yours looks like you tease...;-) The suspense is wonderful though.

Got a little more done last night. Greased that beautiful Campagnolo Record hub. I wish I knew more about it. I think it's old and it appears to have very little mileage. I also think it's plated which I don't think is standard for this type of hub. I googled Campagnolo dust cap removal but couldn't figure it out so just cleaned them out as best I could. Grease was in good shape so was pretty easy.

Re-packing this was a real privilage.

record1_zpsf40e1974.jpg~original


record2_zps5a429470.jpg~original


Momma and Jr just left for the "House of Bounce" to meet one of his friends. Thought I would take it easy today but she came back in after they left and handed me a package....what could it be...?

God.....please let my spoke calculations be correct...

spokes_zps595819d8.jpg~original


Gotta go....time for more COFFEE!! :crazy2:
 
I was surprised when I opened your thread and seen you are building another cool bike you make this stuff seem simple almost like one of them 30 minute shows where they resto a old car but without the nonsense keep it up and good luck :41:

Thank you Jamie...I missed your post this morning because we posted at exactly the same time!

Well I wasn't planning on lacing wheels today but since the spokes showed up that's what I did.

spokes4_zpsfc9e3cf8.jpg~original


Was nice outside but then I realized I still need to watch a youtube vid to get me started. So I headed inside for my recliner.

spokes5_zpsf3b55da7.jpg~original


Lacing wheels is fun but the 1st spoke is a little more fun than the 72nd...;-)

Offset rear wheel looks wild. I lace the drive side first as it's 3 cross then lace the non-drive side with a radial pattern. This is with just the drive side laced on the rear wheel.

spokes6_zpsf35ba23e.jpg~original


Came out pretty good. Love these cross-lace rims.

spokes7_zpsc8cd62eb.jpg~original


Hit a little snag with the brake. It's too short of a reach. Good news is that means it is just like the old center pull brakes I remember so I'll make a drop bolt deal like this.

dropbolt-r20.jpg


I don't have to drop down very much. Hopefully I can make it so it's not too frankensteiny.
 
Thanks fellas!

Today was a tough day. Last night after I got the wheels done I brought the bike in the house and was going to adjust the brake shoes. When I went to re-install the shoes I saw that the bottom of the caliper arm was in the middle of the tire!

The Krates and 5 speed Stingrays must have used a super long reach caliper. Not only was my caliper too short the angle was way off from where it would need to be to reach. Found a big piece of alum that's been sitting in my garage for ages. It was already bent about to the angle I needed.

Lots of sawing drilling and filing today.

brake3_zps38292a71.jpg~original


I can probably pretty this up some more but it's functional for now. I plan on attaching those bottom legs to the seat stays for some extra stiffness but it's pretty stout as is.

brake1_zps3ab521dc.jpg~original


brake2_zpse17f9523.jpg~original


Man I'm pooped..that was a lot of whittling but now I've got brakes.

Hope my chain gets here soon...guy is taking his time but it was a killer price for a SRAM 10-speed hollow pin chain.
 

Latest posts

Back
Top