Spreading Drop Outs for Wider Hub

Rat Rod Bikes Bicycle Forum

Help Support Rat Rod Bikes Bicycle Forum:

This site may earn a commission from merchant affiliate links, including eBay, Amazon, and others.
Hi. I wanted to add to this thread, in case anyone else was interested. I read this thread, and some others on widening / stretching my frame. I have a Micargi stretch beach cruiser, and the lockouts were 115 mm. I needed 135mm to fit my Nuvinci n380 hub. After about 20 hours of research.... I chose the car scissor jack. I was going to go to Habor freight and figure out which of the 8, 10 or 12" wooden clamps I would need for this 1-time job. I also own a hydraulic spreader, for working car bodies. And have access to a machine shop to cut a adapter plates to put on (at the expense of probably 40 hours of time). But the car sciscor jack did the job in like 20 whole minutes.

The spread gave me enough room to fit the 3" tire mounted on a 57mm rim, as well. The two ends where the nuts go on the hub, are bent outward, and need adjusting. But I am able to fit the wheel, chain and get the shifter cables in today and hopefully to a test ride soon. A trip to the machine shop, to bend the hub-mounts would finalize the job.

I thank everyone on this thread for their advice, helped me with the research I needed.
Great stuff!

Luke.
 
I stumbled on this tool a few weeks back via eBay and, though pricey, thought it might be a good buy for a co-op or other group of bike buildin' buddies. It certainly appears to "get in there" in a way most other frame spreading solutions fail.
s-l500.jpg

You could even affix a hub in the dropouts and apply force precisely where there is tire rub.
 
I think that tool might be a spring spreader tool used in automotive to compress strut coil springs.... Yes, I am getting tire rub on a few spots up the chain-stays, was going to re-seat the tire and tube to even it out - but the tolerance is still very close on my bike.

Also I have an issue with the chain rubbing against the tire, so I have to figure out, which one of the 5,000 different 3-piece crank styles to pick from, that will fit my bottom bracket, and move the front chainring over the to left, so the chainline clears the 24x3" tire.
 
a fat washer between the race and sprocket will often move the chain over enough to clear the tire but you won't feel any difference in pedaling... check clearances on the left side though because the crank will move over the same as the thickness of the washer.

Carl.

sent from my banana phone...
 
Autozone or most auto stores will "tool rent" a coil spring compressor, it will spread or compress depending on what direction the hooks are pointing. A piece of leather or towel should protect the paint. I already own one from auto work, never used on a bike before. The wood clamp looks good for the rear spread, these might work a little better for chainstay area.
27200nopkg.jpg

I like the measurement info on checking square/straight.

I use a dial indicator clamped to the frame for rim straightening. Doesn't have to be an expensive one. It works really well, you can eye ball it and looks straight, throw the indicator on it and the dial will wave a little on some spokes, let's you know it needs a little more.
 
Today we are going spread the rear dropout. I will introduce you to some highly specialized bicycle tools that you might aspire to own someday. Heretofore, I have been wresting this wheel into the rear triangle with some difficulty. Today we will rectify that. I have learned that Morrow hubs are a little wider than New Departure hubs.

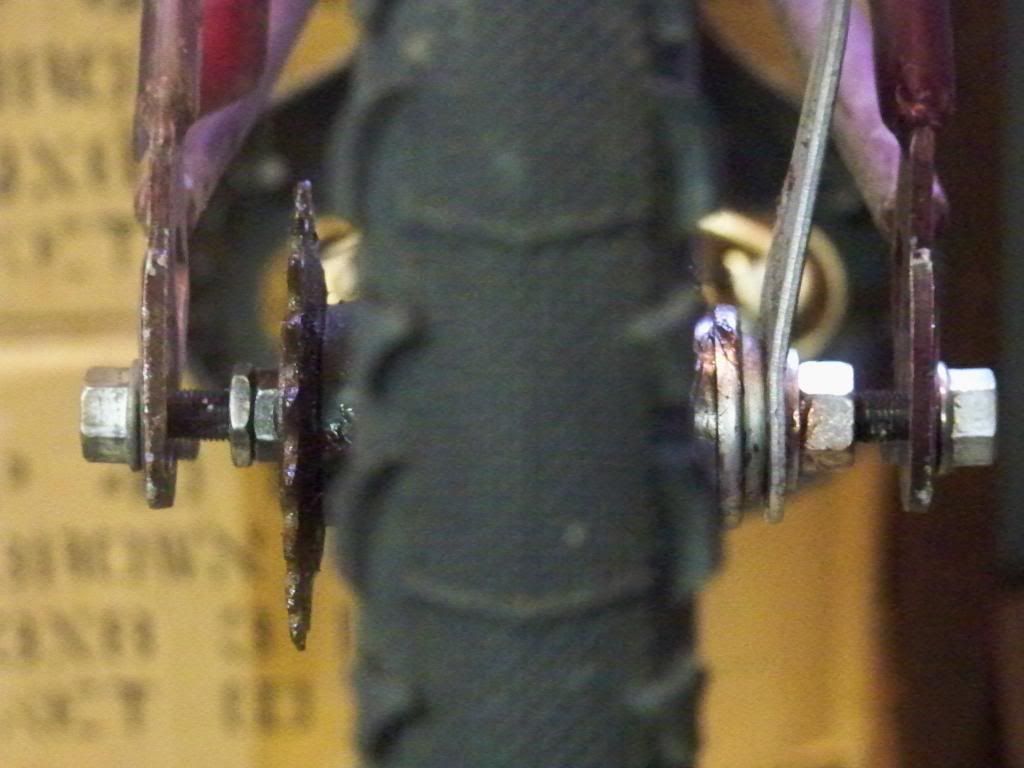
Our spacing is presently a piddling 4 1/16in. :(


The hub itself measures 4 1/2in... doesn't sound like much of a difference, but this traingle is stiff! I struggle every time to get this installed.


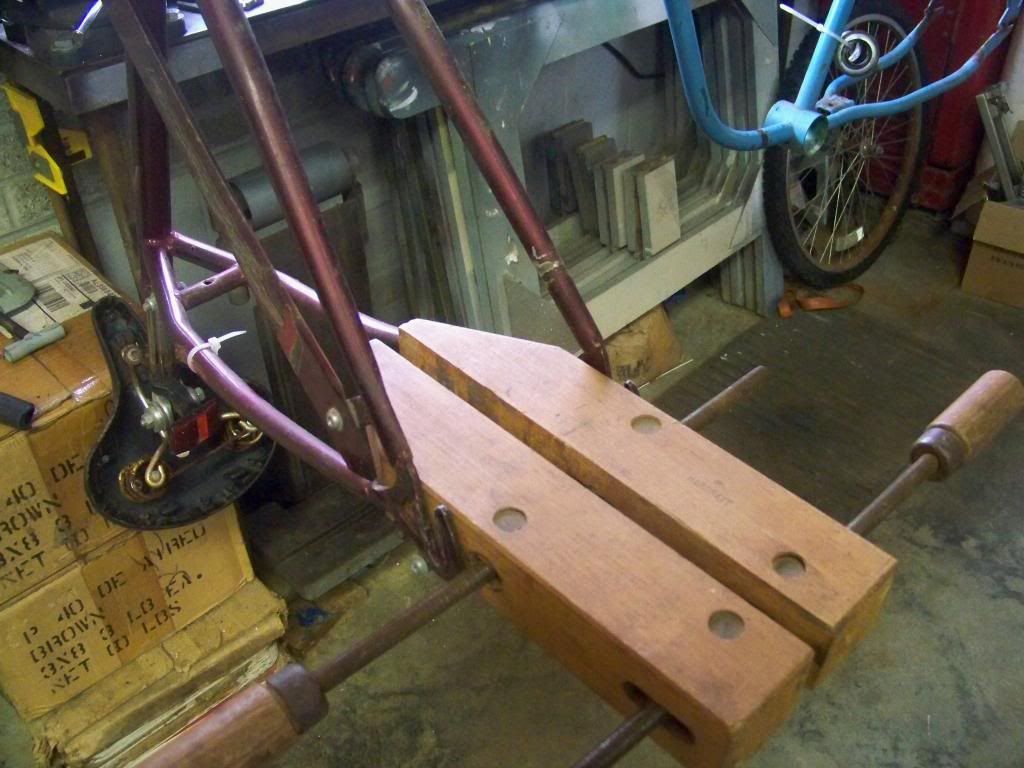
Our first specialized bicycle frame tool... the "RM-1 Rear Dropout Tool" (Renaissance Man). This photo is of the second application. The first attempt was only partially effective. You can see I have cranked it out to 6in this time! :shock:


So how did we do? The spacing is now 4 5/8in - just about perfect. BUT - how do we know if the rear triangle is still in alignment??


So here is our second highly specialized bicycle frame tool - the "SE-2 Frame Alignment Gauge" (Straight Edge) The result is not quite perfect... The right side is out about 1/8 more than the left side... :(


Lucky for us; we have another highly specialized bicycle frame tool at our disposal, the "ZAD-56 Rear Triangle Fine Adjustment Jig" (Zora Arkus Duntov). This is really the only tool for the job. :)


So, how did the ZAD-56 perform? ...Dang!, 4 1/2in - right on the money and perfectly centered to boot...

Very Good
Where can I buy those tools, or is it top secret?
:cool2:
F.
 
Autozone or most auto stores will "tool rent" a coil spring compressor, it will spread or compress depending on what direction the hooks are pointing. A piece of leather or towel should protect the paint. I already own one from auto work, never used on a bike before. The wood clamp looks good for the rear spread, these might work a little better for chainstay area.
View attachment 32445
I like the measurement info on checking square/straight.

I use a dial indicator clamped to the frame for rim straightening. Doesn't have to be an expensive one. It works really well, you can eye ball it and looks straight, throw the indicator on it and the dial will wave a little on some spokes, let's you know it needs a little more.


Just be a little careful about your selection--not all are created equal. CRASH used a reversed spring compressor on his Monster Ray build, and had a devil of a time getting it to fit in the tight spaces.
 
Thanks, guys, exactly what I was looking for tonight. I had seen Sheldon's article a couple of times, but I like this better. I was especially worried about making the dropouts parallel again after spreading them. This makes it look so much simpler than what I was putting together in my head.
 
Now that everyone and their brother has purchased a Nexus 7 recently (except me sense I already had a used one), a lot of us are faced with the problem of forcing it into a frame that was not designed to accept it. We probably all know about using 2x4's to pry open the rear stays and other equally barbaric methods. Today I discovered an easy CONTROLLED method for this. If you own a hand screw wood clamp or have a friend with one, it's a piece of cake.

Just slide the clamp between the drop outs and screw them apart. Of course (as with other methods) you must go past where you intend to finish so as to allow for the metal to spring back a little. The good thing is that you're applying equal pressure to both sides with very little effort and you're not going to scar up your paint if that's a concern.

I didn't feel the need for a before picture, but it was a normal width for a coaster hub.
Here's the clamp (these things have some real force):

100_4679_zps9477b99a.jpg


And here's the coaster hub back in place showing the added 1/2" or so on each side:

100_4685_zps63378912.jpg


If you over shoot it, you can open the clamp, put it on the outside, and squeeze it back.
I had thought about using wood clamps to spread the stays, but I wasn't exactly sure how I would use them until I saw this.

Thanks. It's all crystal clear now.

Think I'll see if I can order a coaster brake for the Nexus 8.
 

Latest posts

Back
Top