The Longboard

Rat Rod Bikes Bicycle Forum

Help Support Rat Rod Bikes Bicycle Forum:

This site may earn a commission from merchant affiliate links, including eBay, Amazon, and others.
Fireproof hit the nail on the head. Print you design and use carbon paper to transfer it to the wood. Let the burner get good and hot before starting and practice on some scrap to get the feel of the process. You will do well. Also I would rout both sides of th rack if it where mine.

JimK
 
Fireproof said:
Then, there's the laser . . . :wink:
It's definitely tempting! Mind if I keep that offer in my back pocket for a future build? I'm sort of in the mood to "do it all" on this build, if you catch my drift.

@JimK: I'm definitely on board with you on everything you wrote, especially routing both sides of the rack deck.

-=-

Update on the bike:

I was staring at the bike and decided that there's no way on God's green Earth that I'd allow the chain guard to remain stock. I thought about wood inlays, details, that kinda stuff, and settled on making my own chain guard out of poplar and oak. I've got the main part of the chain guard cut to size using a jigsaw already, and spent some time designing the spacer and raceway for the chain. It's all hand-drawn on a sheet of paper, so no dice with an image, but I think it's gonna turn out good. I'll have to take some measurements when I get home to see if my plan will pan out.

Photographs later when I've got it all figured out, cut out, and glued together.

Tomorrow, I'm going to my brother's shop to fine-tune the tank pieces on a drum sander so I can get the fit on the frame juuuuuust right. I will be bringing scraps, because I don't wanna be behind the learning curve when it comes time to fit my precious, precious tank pieces.

My order for a new springer fork and Avenir springer seat with crashbar arrived, and I've got a new headset on its way, also. The threaded portion of the fork is about 3" longer than the head tube, so I'll either have to chop it off or buy some spacers to put on it. It's looking like spacers, since the spring attachment attaches to the threaded extension at a particular angle, and it might not work any other way I can think of without bending some chromed metal, and that's low on my list of things I want to do before I die.

Also, I just discovered a new danger to me and my pocketbook. Rockler Woodworking and Hardware has a retail store not but 10 minutes from my house. See PayPal link below for donations. :)

Thanks for your interest and input, guys! Cheers!
 
Hey Paul,
Get everything that you need for the front end and see how much play you actually have. If it is the 3" that you think maybe you can make a Oak/Poplar spacer. Could be cool. Also, if you never have checked out Harbor Freight tools it might be worth a look. They are cheaper tools for sure but I have a lot of tools from them and have had very few issues. And when I did customer support took care of it, no questions asked.

JimK
 
JimK said:
Hey Paul,
...maybe you can make a Oak/Poplar spacer. Could be cool.
Brilliant!

Okay, here's a proper photo update of the build.

Ahh, the woodworker's tools. A scribe, a square, and whole lot of hope.
DSC_0595.jpg


-=-

I have an idea about that chainguard...
IMG_2204.jpg

DSC_0600.jpg

DSC_0599.jpg

DSC_0597.jpg


That radius on the front end isn't perfect, but I'm just gonna go and say that it "adds character" to the build. Truth is, this is one of the first pieces of wood I've routed since I took wood shop in middle school all those years ago.

-=-

I've got it all glued up and drying on the bench.

IMG_2206.jpg


In the meantime...

-=-

The more I thought about it, the more it made sense to radius the bottom edge of the rear deck. So I introduced Mr. Rear Deck to Mr. Table Router, and we all had a wonderful routing party.
IMG_2199.jpg


-=-

After JimK mentioned it, I loved the idea of wood spacers for the fork. I would have liked to have put a piece of poplar in there to go with the strong contrast motif of the bike, but I didn't have any 1/4" thickness poplar, and didn't feel the desire to make yet ANOTHER trip to Lowe's, so here we go.

I scribed circles into the oak and got the forstner bit set ready to go.
DSC_0601.jpg

DSC_0602.jpg

DSC_0603.jpg


And, figuring I needed three, I went ahead and cut four center holes. Something that stems from my military days is the following adage: When you have two, then you only have one. If you've got one, then you have none. So anything worth doing three times is worth doing four times, in case I screw up with the hole saw and crack one of these spacers.

I'll be going to my brother's shop tomorrow to hit some pieces with the belt sander and put the finishing touches on them. I don't have a hole saw, so I'm waiting to do it tomorrow at the shop, also.
 
Very nice. The chain guard is another great idea. The rear rack looks awesome. It is hard to believe what a difference such a small detail can make. Can't wait to see it all together.

JimK
 
sarap na sarap pare
 
Aaaaand here we go. I'm waiting for a coat of lacquer to dry so I can keep going with the woodwork, but while that's happening, here's an update!

Here are all the completed wood parts, waiting for stain and lacquer. That's two tank pieces, a rear deck, and a complete chainguard. COMPLETE CHAINGUARD OMGWOW!

DSC_0605.jpg

DSC_0606.jpg


-=-

There, I stained it. Bam!

DSC_0607.jpg

DSC_0608.jpg


-=-

Here's the original support bracket for the (boring) metal chainguard. Note that the 90º bend in the metal is now straight. Nothing an anvil and a ball peen hammer couldn't fix.

DSC_0610.jpg


-=-

After a little work with a vice, a hacksaw, a metal file, and a drill bit, I was able to mock it up and see it all come together.

DSC_0611.jpg

DSC_0612.jpg

DSC_0613.jpg

DSC_0614.jpg

DSC_0615.jpg

DSC_0616.jpg


-=-

I seem to be spending a lot of time watching things dry. Oh well, I have plenty of beer.

DSC_0617.jpg

DSC_0619.jpg


-=-

Finally, I brought JimK's amazing idea for wood spacers to realization with the use of a hole saw and a forstner bit.

Mock up:
DSC_0609.jpg


Sanded, stained, and lacquered:
DSC_0621.jpg


Thanks again for coming by, everyone. I think this guy will be ride ready before the week is over.

Now, to check on that lacquer and see if it's ready for some dry sanding...
 
outstanding work.. the wooden chainguard is mint..... as the whole idea.... please promise to get some full shots outside when its done.... simply beautiful.
 
DHrider said:
outstanding work.. the wooden chainguard is mint..... as the whole idea.... please promise to get some full shots outside when its done.... simply beautiful.
Thank you! I'm shopping around for a new neck, handlebars, grips, fenders, and kickstand now. I hear there's a place in Berkeley called Recycle Bicycle, and I'm planning on dropping by there this weekend. Maybe I'll score some good finds.

I'll post an outdoor photograph of it as soon as I get some decent daylight.
 
Paul,
If you have access to a wood lathe glue up some oak and poplar blocks and turn some grips from them. The details make the bike and you have made all of the details so far. Why not keep going? Just a thought.

JimK
 
JimK said:
Paul,
If you have access to a wood lathe glue up some oak and poplar blocks and turn some grips from them. The details make the bike and you have made all of the details so far. Why not keep going? Just a thought.

JimK
I like the idea - execution might be difficult for me, though. In the meantime, there are some nice leather grips by Electra that look like they'll match the leather on my Avenir saddle nicely.

Most of the woodwork is done and I'm looking at painting the frame a different color that will really make the wood and leather details pop. I'm leaning heavily toward black (and possibly doing a blackout on the wheels and spokes), but before it's all ready for paint and stuff, I'll need to reconsider the hubs and gearing.

So I have a question for you veteran bike guys: What are good internally geared hubs? I live near the top of a hill, and it's a pain in the neck to get uphill with this single-geared steel beast. I was thinking about getting a smaller crank wheel and then throwing on a three-speed rear hub at a minimum. I know there are 7- and 8-speed hubs out there, but I don't know about their quality and I definitely don't know about spending the kind of money they're asking for that stuff.

I'd also really like to put a dynamo on the front hub, but I'm willing to ditch that idea for some good, old-fashioned battery power for my lights.

I'm not a weight weenie, so that's not factoring into the decision at all. I'm also not snobby about using classic, vintage, or reproductions, either. Whatever brand/type works the best is what I'm going with on this build.

Some help deciding, please?
 
Hey Paul, the WOOD is lookin' GOOD! (hee hee, I'm a poet!) :) Keep up the nice work!
I think that on a three-speed hub, "2nd gear" is direct drive, "1st gear" is underdrive, and 3rd is overdrive. you might want to try yer existing chainring/sprocket with the new hub . . . it might be okay.
 
There is a couple topics here on converting old headlights over to battery operated LED models. I have done this with one of mine with a 2.00 LED flashlight, this may be an option other than an internal dynamo.

Also IMO good 3 sp hubs are sturmey archer and shimano. there is others but i feel these are the most tried and true. Not much to installing them yourself if you can lace a wheel. On my Sunshine i simply changed the rear cog from an 18 to a 20 tooth. it made starting up noticeably easier.. i do still have to walk up big hills and the like, but it made a surprising difference. I know there is also 22 tooth options out there too...
these cogs can also be implemented on a 3 sp hub as well for added gearing. :)


here is a couple products i came across today and immediately thought of your build, kinda cheating but none the less.

http://www.chainganglowrider.com/Produc ... e=CHP04127
http://www.chainganglowrider.com/Produc ... e=ASPD0112
 
@DHrider: Okay, those grips are gorgeous.

@JimK: DH's link just sold your idea. I have no idea where I'm gonna get to a lathe to do this, but I'll make it happen.

Thanks for the tips! This is definitely bringing it together. I saw a Sturmey Archer 3-speed hub for about 60 bucks on Amazon. I'll keep an eye out for something cheaper, if it's out there. Or maybe I'll see something at Recycle Bicycle in Berkeley.
 
GREAT JOB!! LOTS OF GREAT IDEAS. KEEP UP THE GOOD WORK AND...GET TA BUILDIN'!! PEACE
 
I went to a bike shop in Berkeley known for having bins upon bins of old, used stuff. Perfect for the rat rodder bike builder. While I was there, I showed one of the employees a picture of my build in progress, and he asked for my number.

He was friends, he explained, with the editor-in-chief of a local bike mag, and apparently this particular editor-in-chief likes doing photo spreads on unique bicycles. Perhaps he'll find the Longboard to be sufficiently unique, and maybe I'll end up with my bike and my smiling mug in glossy print. Who knew?

Not bad for a project I started not but a few weeks ago. Neat, right?
 
Paul,
That would be way too cool. The Long Board would be a fantastic candidate for a magazine. Congrats! Now lets see some more progress pics.

JimK
 
YOUR BIKE IS LOOKING AWESOME!!

I hope amazing azim wasn't in too bad of a mood.. that place is too much... they got rolled up in 05 for peddlin hot bikes.

I don't know how I missed that you were right across the freeway from me... : :lol: we gotta get together and have a beer!! were practically neighbors!!!


HAHA just saw you went to Recycle Bicycle, not Karims.. DOH
 
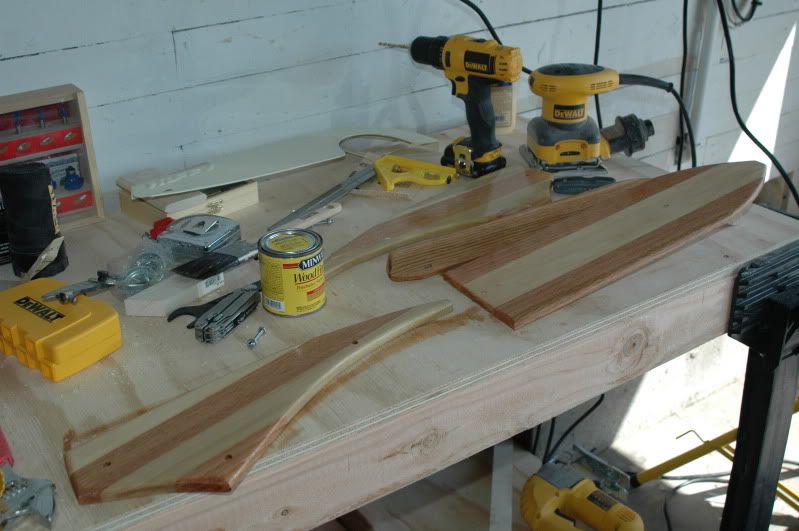
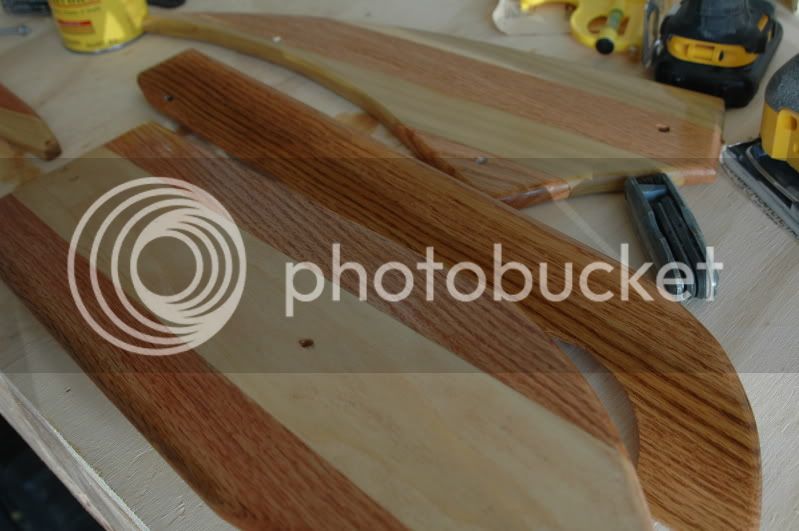
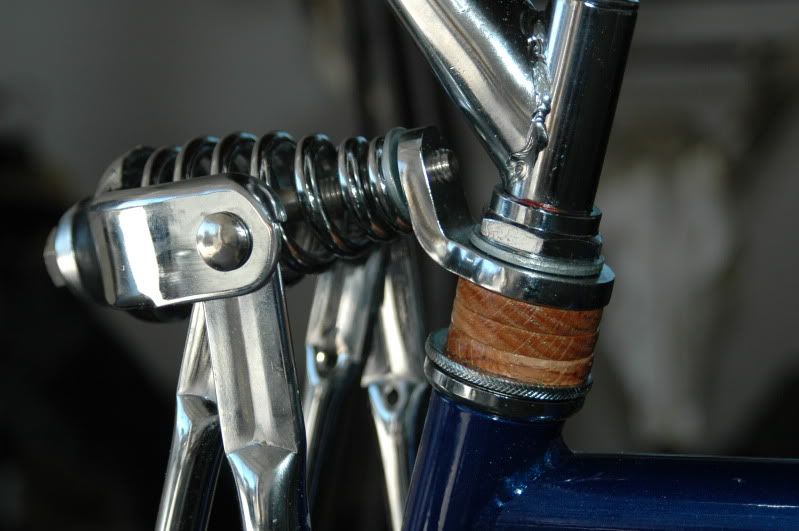
Hey guys, thanks for all the awesome comments. And since JimK asked so nicely, here's a proper photo update of the build.

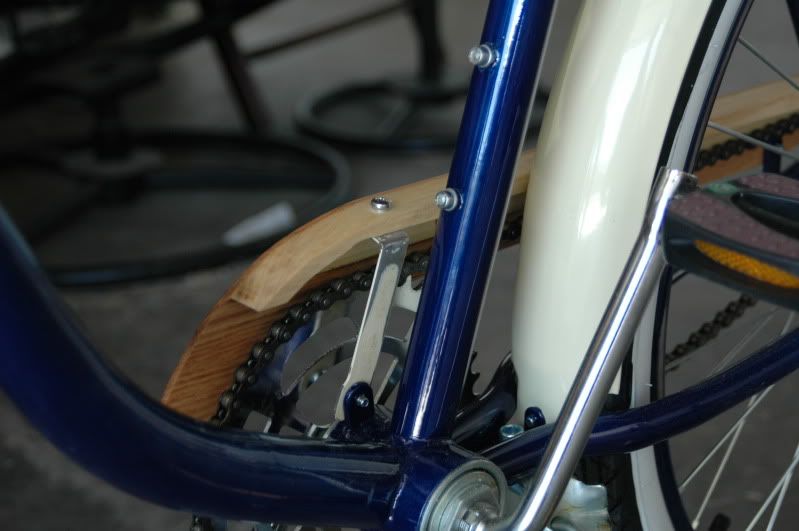
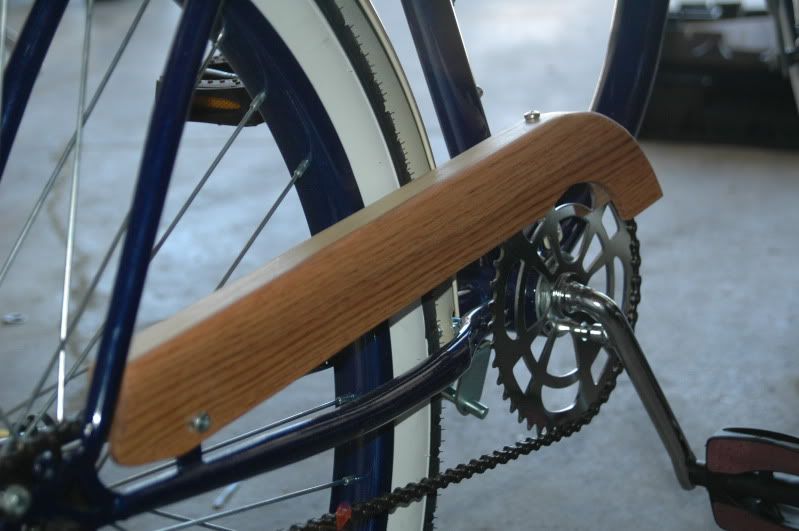
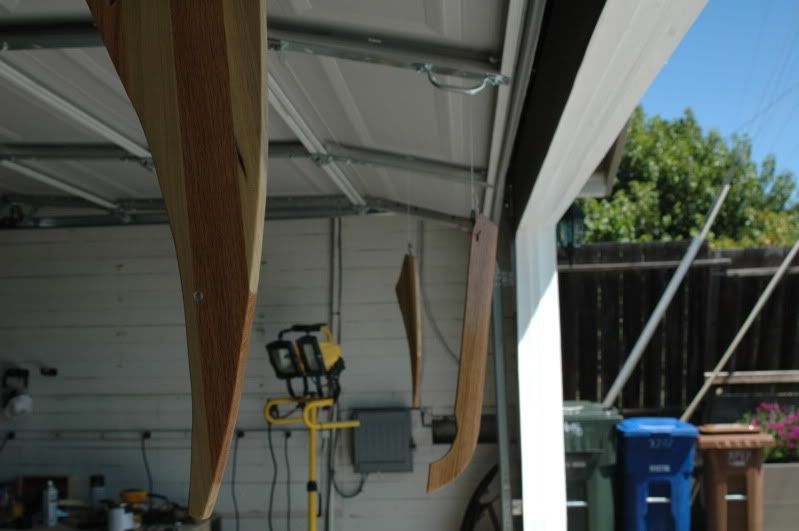
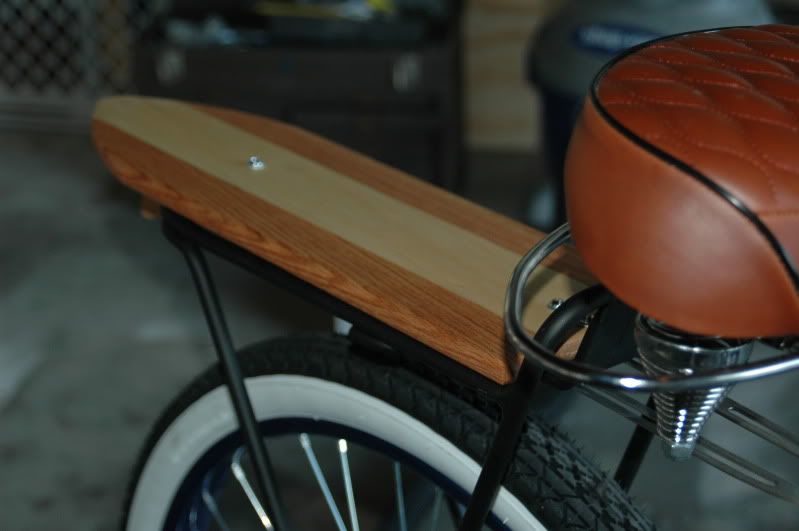
After I'd completed all the woodwork, stained, and lacquered the wood parts, I couldn't help myself and I put it all together. Just like when I was a kid and found my parents' hiding spot for my Christmas gifts, I "opened it early," as it were, even though I really couldn't do anything with it.

DSC_0624.jpg

DSC_0623.jpg

DSC_0625.jpg


-=-

I rode to my brother's house to show it off, and I realized that no, this single speed is not gonna do it. It must be the mountain biker in me, but I have an innate need to go as fast as I can pedal every time I ride. I think I need to learn how to cruise.

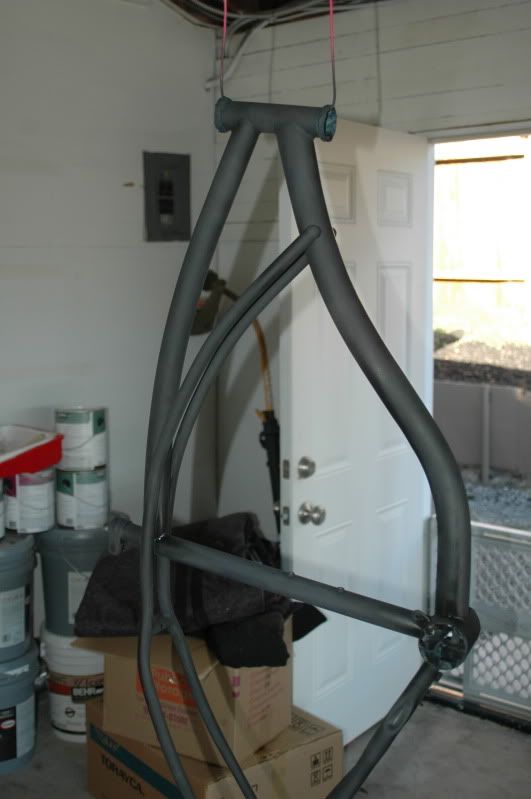
Fast-forward a couple of days, and now I've got the frame completely disassembled for paint.
DSC_0627.jpg


And some flat black primer. I was curious how it was gonna look, even though that's not the final product, not by a longshot.

DSC_0628.jpg


-=-

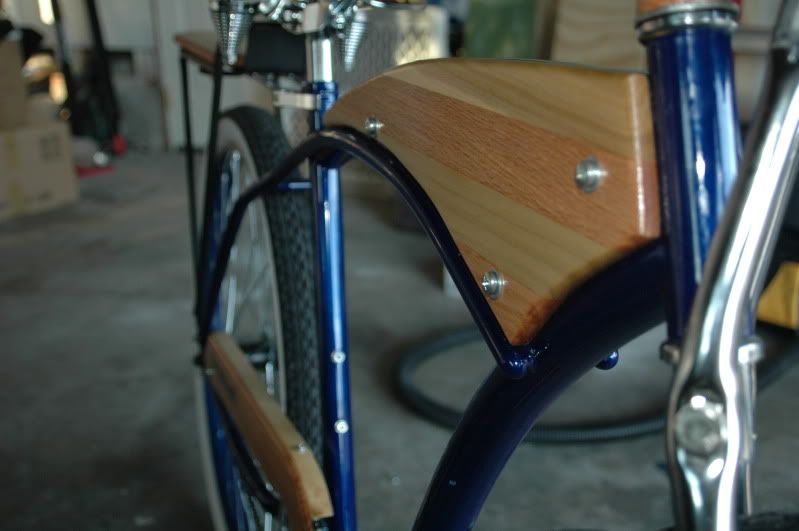
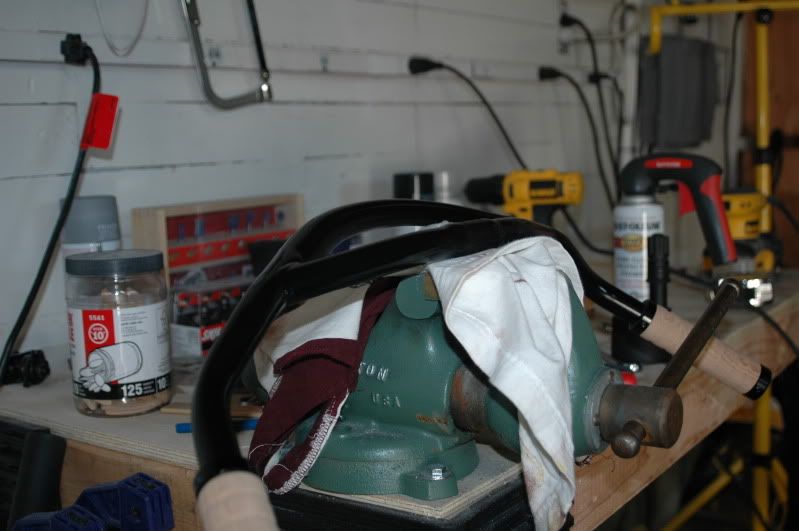
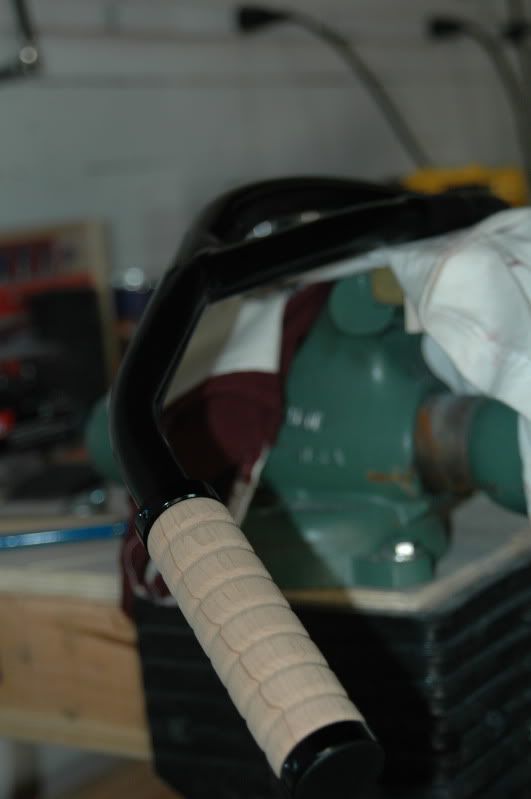
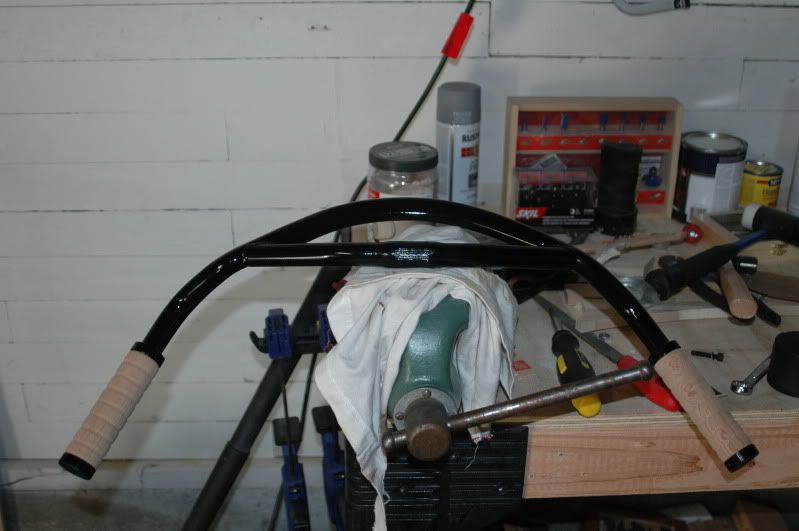
On Saturday I took a trip to Berkeley to Recycle Bicycle, and after rummaging around in their old parts bin, I found these way awesome handlebars, sanded the rust off, primed it, and painted it black with about four layers of clear enamel over the top.
DSC_0629.jpg

DSC_0630.jpg

DSC_0631.jpg


-=-

Naturally, the stem that comes with the bike will not work with this handlebar, so I've got something on the way that has a removable top portion so that I can fit this weird, mountain bike/BMX/cruiser hybrid handlebar.

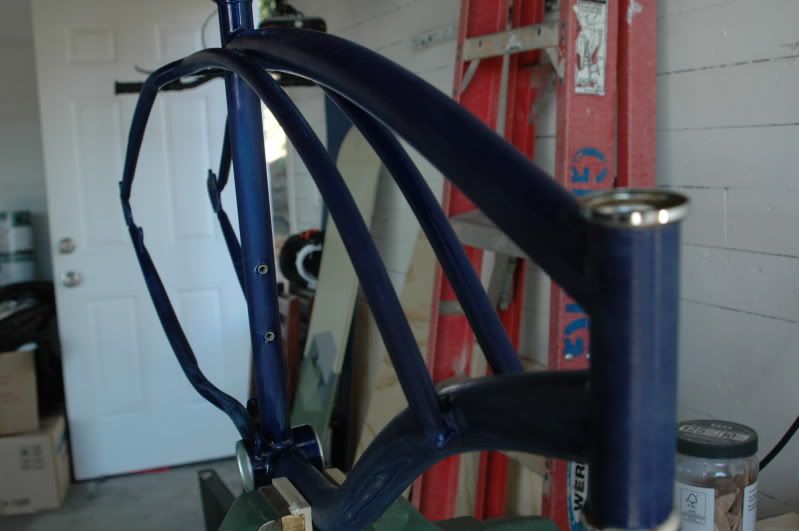
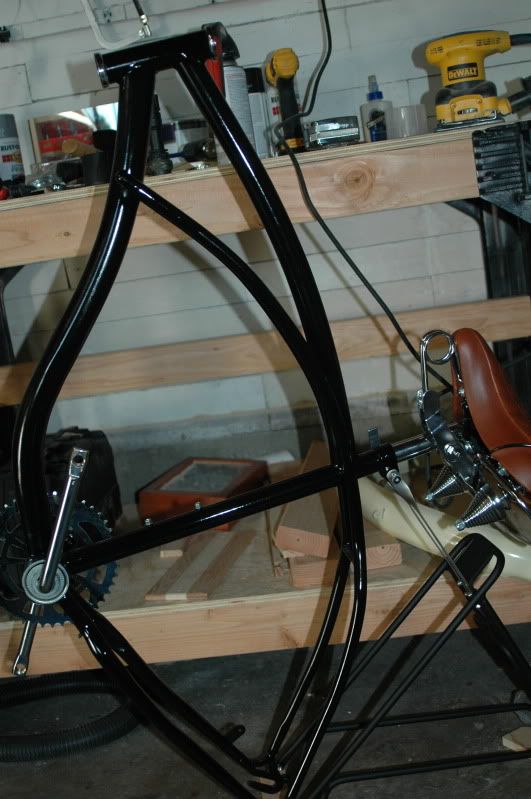
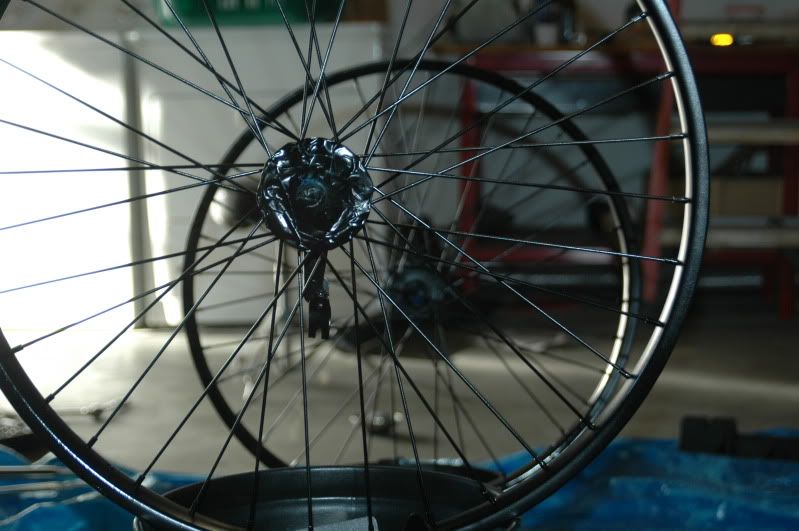
And now, the frame and blacked-out wheels.

DSC_0632.jpg

DSC_0633.jpg

DSC_0634.jpg


-=-

Between the primer, the main color coat, and the MULTIPLE coats of clear enamel, I've got about 8 or 9 coats of paint going on here. It's taking forever to cure, but revenge is a dish best served... wait, that doesn't work. Whatever. I think you guys know what I'm getting at.

So for now, I'm waiting on the new stem, a double kickstand, a new chain to replace the one I all but destroyed during paint prep, and the piece de resistance - the cream Fat Franks. Those Fat Franks are a mother to find, and I think I found the jackpot of custom bike parts: Custom Motored Bicycles. It seems that she uses a bunch of crap Chinese parts for her motorized builds, but she had the Fat Franks when everyone else is sold out, so bonus points to her!

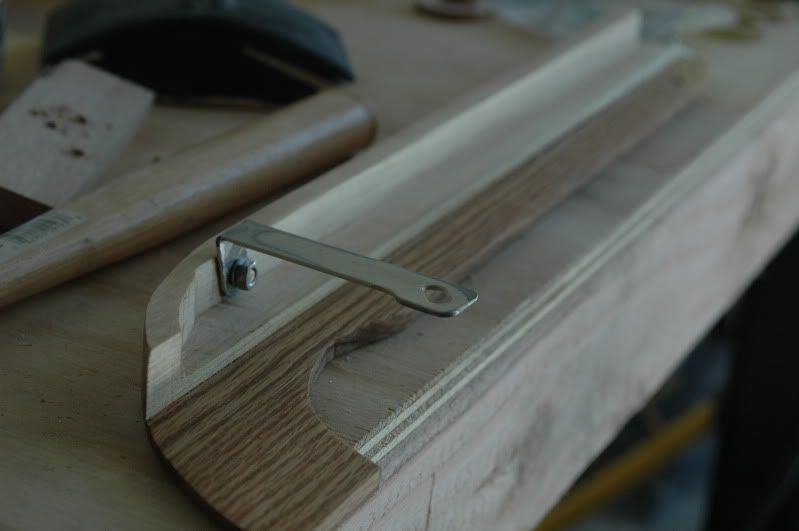
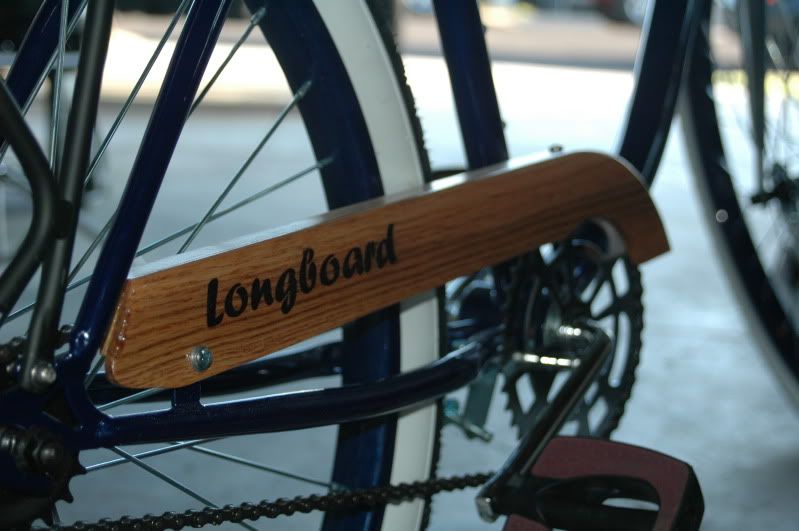
Okay, thanks for stopping by, guys! As always, your input and comments are very much appreciated. Special thanks to JimK for the awesome woodworking input, and Fireproof for being genuinely cool and offering up the laser etcher for the rear deck design.
 

Latest posts

Back
Top