- Joined
- Mar 28, 2019
- Messages
- 91
- Reaction score
- 180
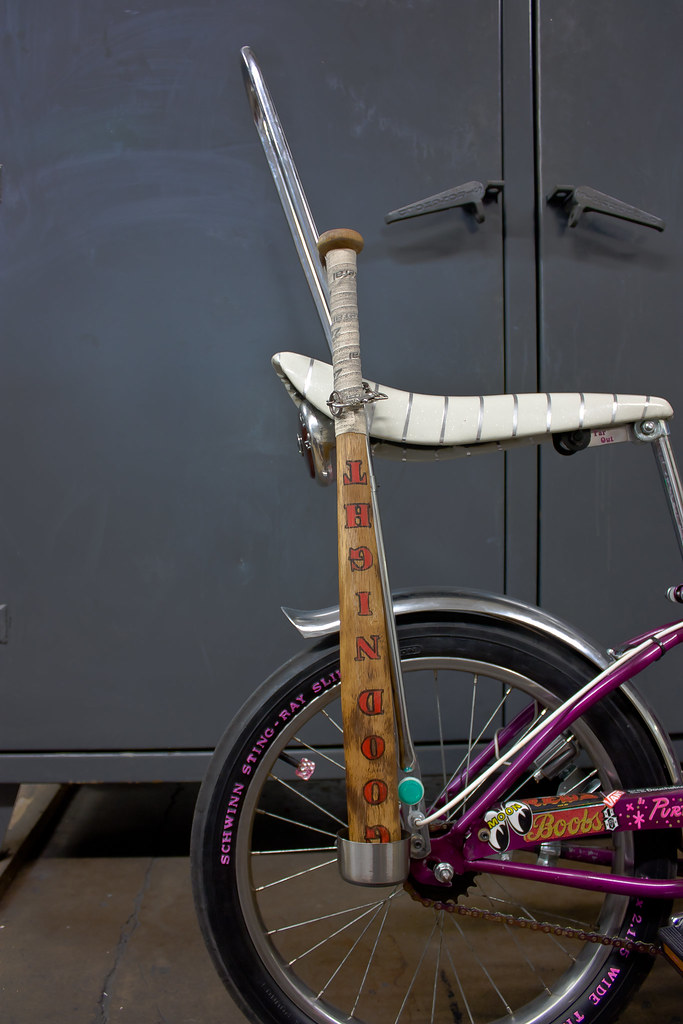
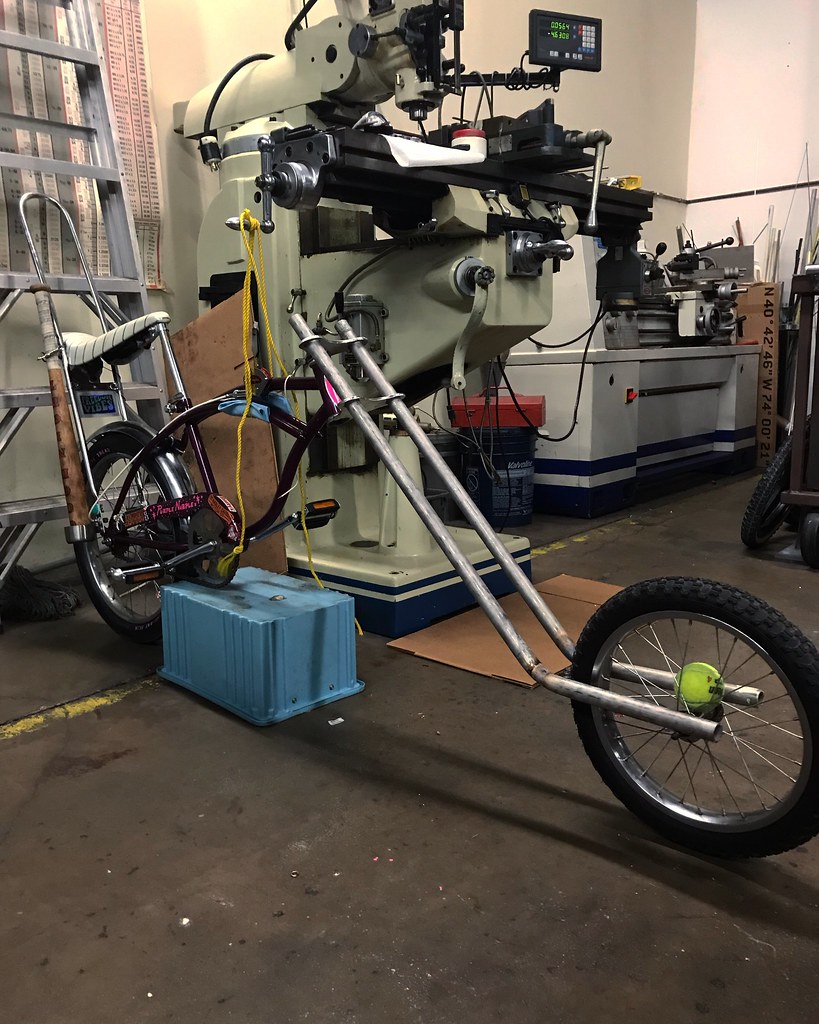
Time to move on to bigger and better things.
The front fork.
Yep! Took today off to get spring cleaning out of the way on my house. I’ll be back in the shop machining my triple trees tomorrow!


Time to move on to bigger and better things.
The front fork.
'GOOD NIGHT'PERFECT!
No Glock 23 under the banana seat eh?
")
dude, I ride a childish bikes against road bikes. "How the heck are you keeping up with us with that thing!''
You'll be refunded
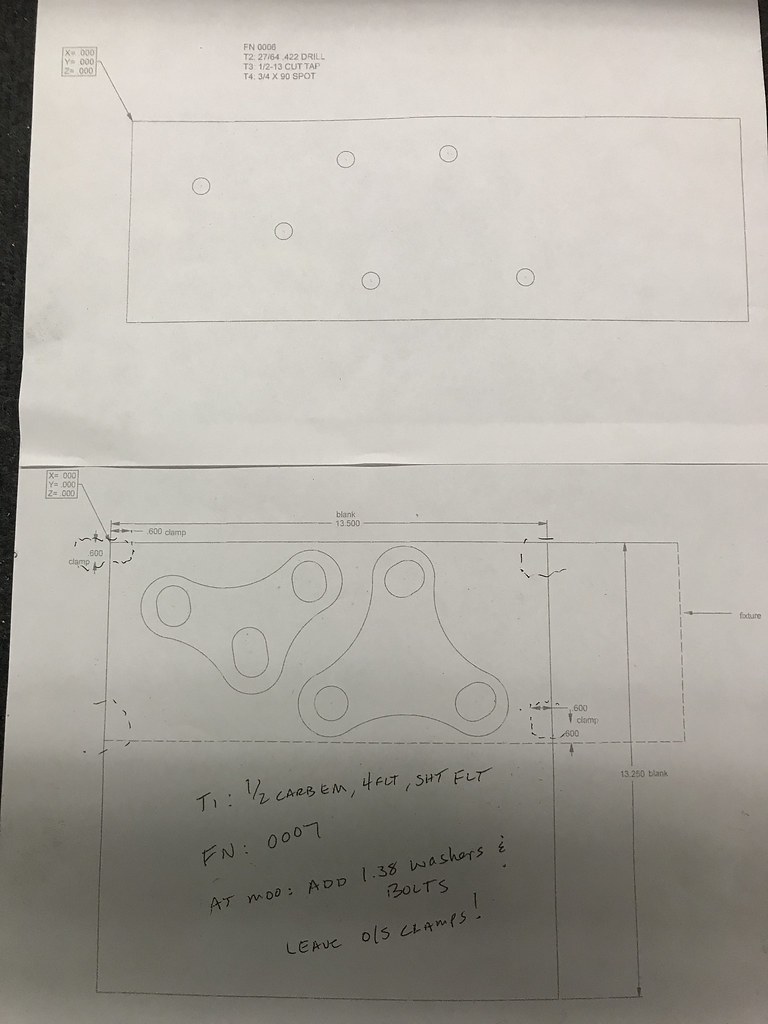
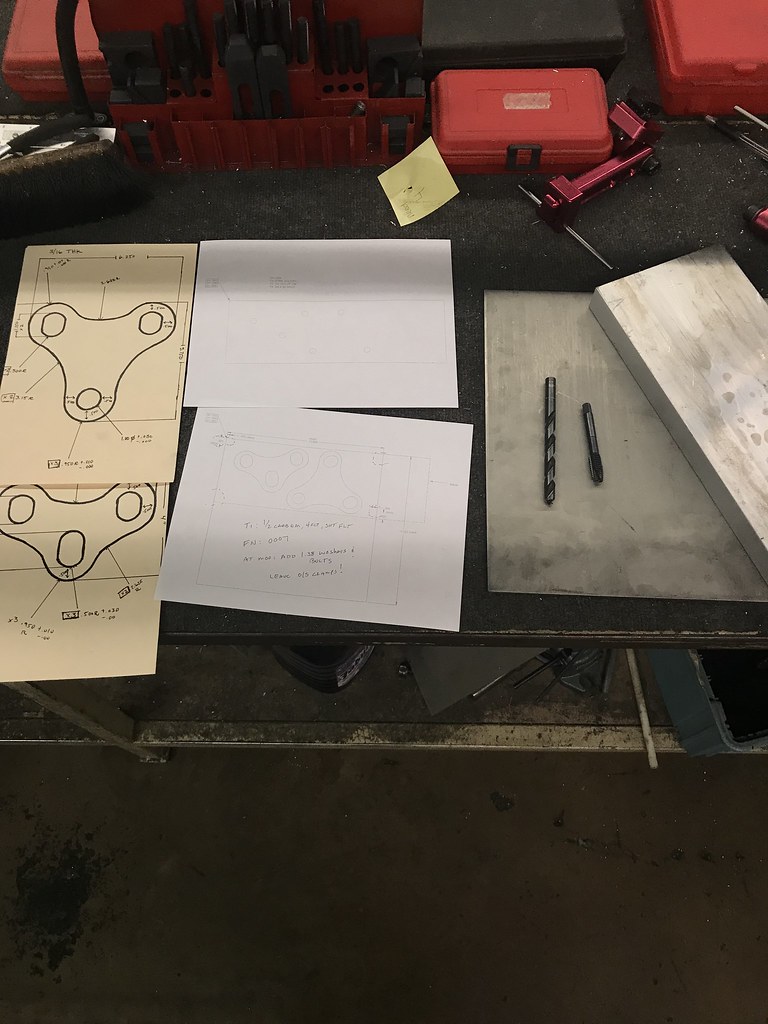
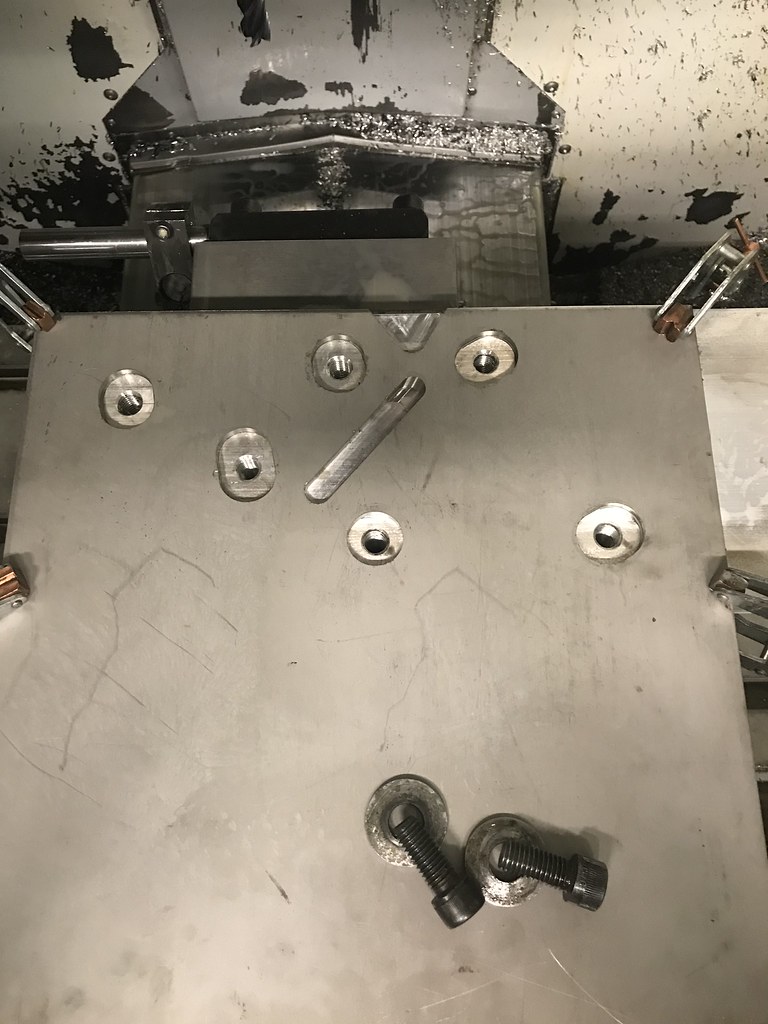
Looking forward to seeing the results!Finally finished my programs today! With some advice from my father, I decided to go with a fixture plate instead of a custom set of vice jaws. It will make for a quicker set up, and instead of two operations, the fixture plate allows me to completely machine the top and bottom tree in one. As far as time efficiency having the trees water jet would be best, but for this first run I wanted to do it myself. If I make these for other bikes in the future, I'll source our water jet supplier. These are my drawings produced using Esprit, which is what I used to create the programs:
The top print is my fixture plate hole pattern, with 1/2-13 thread bolt holes. This will allow me to mill the holes first, and once those are made I can add bolts and washers to secure the stainless to the plate for the final profile cuts.
The bottom print is my program for milling the trees themselves. For material saving purposes they are angled to save as much space as possible. I'll be using a 1/2'' 4FLT endmilll for anyone looking for reference.
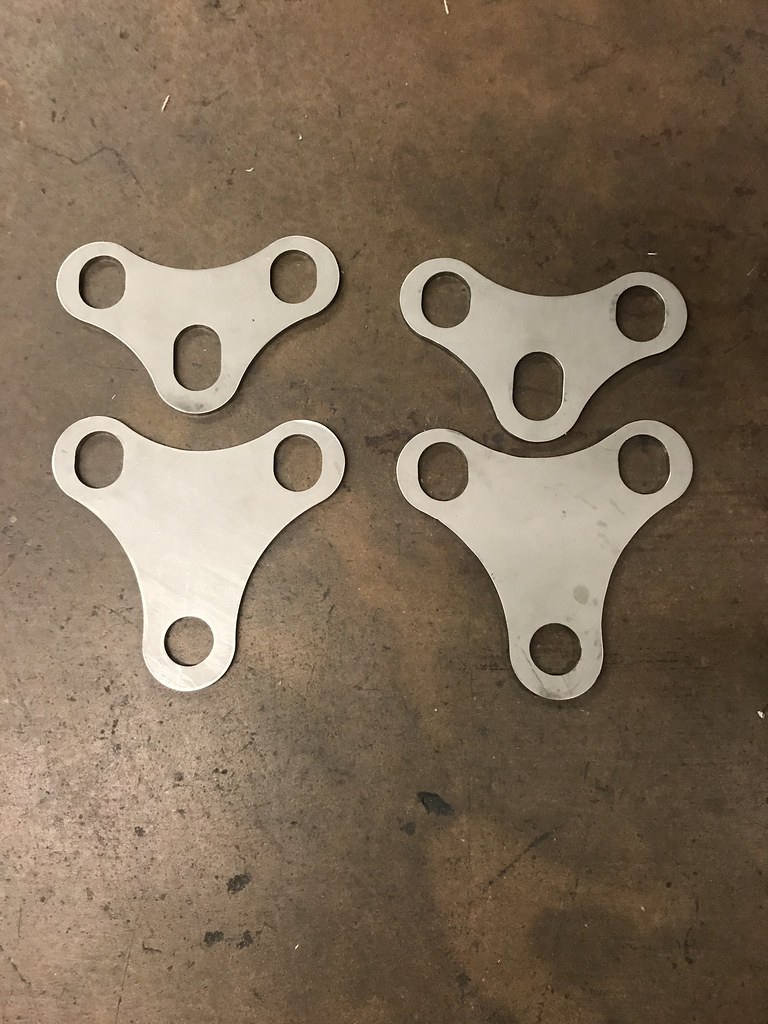
I pulled my material, 1.25'' x 6'' x 14'' aluminum fixture plate and 3/16'' x 13.500'' x 13.250'' 304 stainless plate for the trees themselves. Also my tooling for the fixture plate. Just wanted to get everything ready for tomorrow when I start machining them. I'll be making two sets just in case, and because I have enough excess from the same blank:

 ).
).Its a little late now, but, a skim cut would have probably made the polishing a bit easier...304 SS polishes up real nice (though I prefer the luster of 17-4 SS
hi Ty,
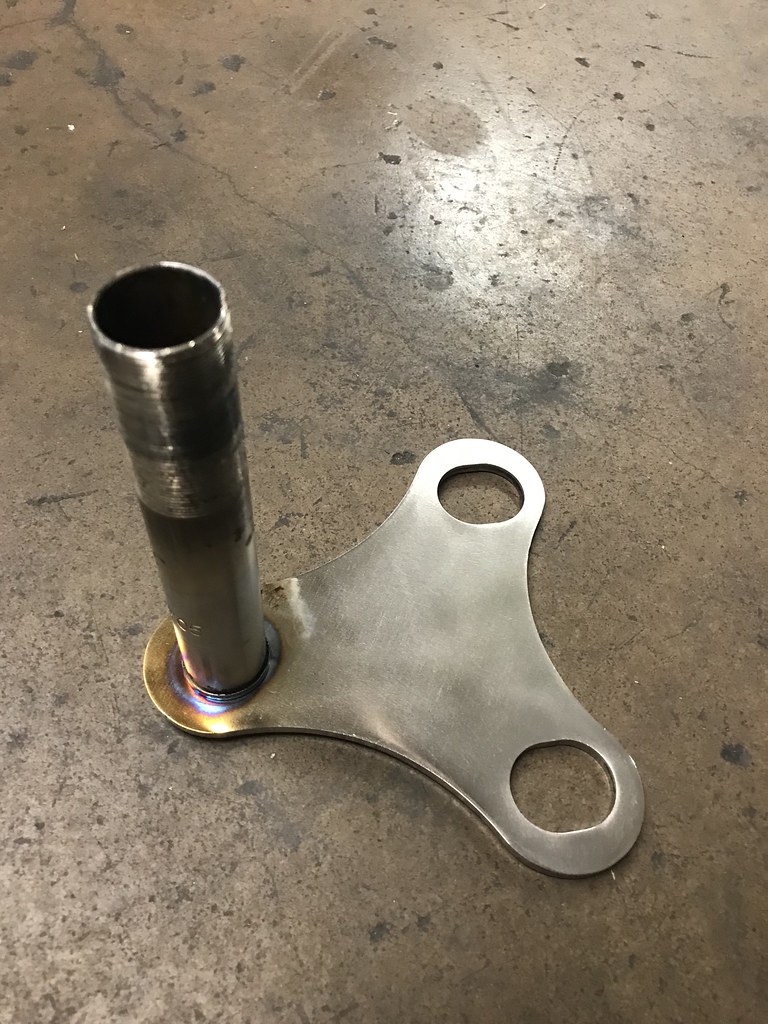
Interested in seeing how yours perform. Cross section from leg to leg in front of the steerer is much narrower than the originals. There's noticeable flex in that area which is why I believe plates with more surface area were used for the thin plates. The legs move up and down through the top plate holes slightly. There is a clicking sound when they do. I've added durable polymer sleeves to fill the voids of the top plate holes to reduce movement (noises). Ideally, small metal collars with pinch bolts around the legs beneath the top plate would stop the legs from pushing upwards over bumps. Both bottom and top plates would work together more effectively. It's a feature I'm planing to add to my set. My bottom plate appears to have bent up a small mount in a short time. Albeit, I'm a hard rider.
Tubing is fine. Adds a bit of spring so there's some give. The bottom plate is doing most of the work.
When you do put it together, make sure the top plate is tightened down good! The legs want to push the plate back to you hard. If it can move, it will cause the bottom plate to flex more than normal. That may have happened to me riding for many miles without checking. Use race nuts and washer with gobs of surface area for more grip.
they ride crazy...but in a good way...I dunno
Cool build!....So you doing a long fork like the top fuel? Couldn't find what the plan was for the triple trees. Nice work on them plates.
Makes sense. Definitely don't want that sucker moving around under all that load tension. I'm sure this thing will get ridden more than I'm expecting, but I'm thinking it will be for putting around car / bike shows, the neighborhood, and occasionally to and from the neighborhood market. Probly no real hard miles... but ya never know. Super cool, and I love the bike, but not nearly as practical as my daily bikes hahaha.
Race nut goes under the top plate.
Once installed, bologna cut 2 tubes to slide over the legs to fit between the top and bottom plates for good measure. The pieces can even be decorated. That's a easy way to prevent the legs from pushing up. You'd still be screwed if you came down hard from a wheelie if the top plate is not secured.
 [
[Enter your email address to join:
