CWC-1 Updated 7/30/10 Build Finished!

Rat Rod Bikes Bicycle Forum

Help Support Rat Rod Bikes Bicycle Forum:

This site may earn a commission from merchant affiliate links, including eBay, Amazon, and others.
Re: CWC-1 Updated 5/14/10

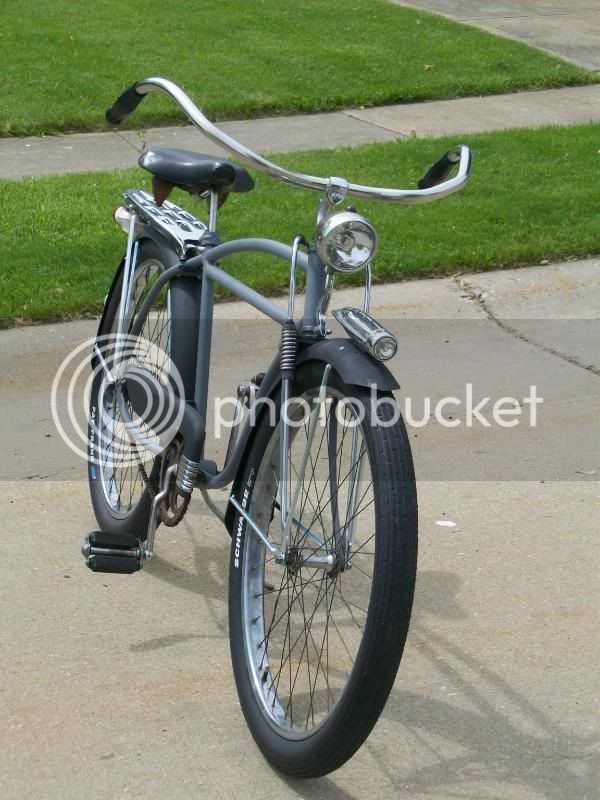
why not make a cross bar for these bars? very cool
 
Re: CWC-1 Updated 5/15/10

It's reflector day! I've always liked the raspberrry style reflectors so anytime I can find them cheap I scarf them up. So far all I have is the 1 1/2" red and green. I've seen yellow ones also, just hasn't happened yet. I'm trying to fill all the existing holes with something so I threw a green one on the rear fender. I also picked up a couple of the Persons repops which were common on Roadmasters. This required drilling two holes but I really dig these reflectors. The housing is aluminum but I've seen pics of these polished up so nice they look like chrome. Should be able to be seen at night with all these on the rear.
I'd like to thank everybody for all the positive comments. I guess the general concensus is that the handlebars are a keeper. Seems to me like there would be a small market for custom handlebars. This is almost like shopping - I just keep trying different parts till I see something I like. Great fun!

8.jpg


9.jpg


7.jpg
 
Re: CWC-1 Updated 5/15/10

Hi Robert !

i like to continue to say that's one good looking ride the bars are realy great looking and love the rear end with all those great looking reflectors like you said they should be able to see you at nite great looking repop Road Master reflector !
 
Re: CWC-1 Updated 5/16/10

I went over to my storage space looking for some nice grips and I found this pair of coke bottle grips that I had forgotten about - much better. I also snagged a pair of the Starburst repop pedals and threw them on to see if they would liven things up a little. I took her for a night ride to see how the lights work. The rear tail lights are cool but the head light is pointing right straight out and never touches the road. I have a little play with the fender because the springer fork is pretty big where it bolts on so I may be able to drill another hole back far enough so I can shift the fender forward to get the head light pointing down at the road but still cover the original hole. More fine tuning to this build than I had imagined. Onward!


00u.jpg
 
Re: CWC-1 Updated 5/16/10

or just hammer down the spot where it mounts in the front. :wink:
 
Re: CWC-1 Updated 5/16/10

maybe you could install a small washer or two in between the rear light mount and the fender. that should point the front down and could be somewhat adjustable by adding or removing a washer.
 
Re: CWC-1 Updated 5/17/10

Thanks for the suggestions - I had considered the washer trick but not only would that bother me but when looking at the pics the bottom of the front fender was noticebly closer to the ground than the rear fender. I ended up drilling an additional hole 1" farther back on the fender which accomplished 2 things - the light is pointing towards the ground and the bottom of the front fender is closer to the same distance from the ground as the rear fender. It may be subtle but when you compare the two pics below it is functional.

00u.jpg

00v.jpg


Although I really like the looks of the Star Burst pedals, the endcaps are so tall that my shoe actually rides on top of one side so I went back to the Torringtons. This Shockmaster fork has the headlight mounting tab so I took an old bullet style light with a glass lense and mounted that on the fork. Double the headlights, double the light.

00x.jpg

00y.jpg


Ever since I installed the rack I've had a problem that really annoys me - everytime I get back from riding the bike the rack and rear fender have shifted out of alignment with each other. Traditionally Roadmaster rear fenders only have one fender brace but are attached to the rack via a bracket welded on the bottom. Fabricating a bracket isn't really part of my shop skills so I added another fender brace parallel to the rack braces and bolted them together. You have to look close to notice the bolts but they work perfectly.

00z.jpg


Next up - I gotta do something with that saddle.
 
Re: CWC-1 Updated 5/17/10

Everything I've heard about repop pedals is that the tear drop pedals have something like nylon bushings instead of ball bearings so they wear out quickly. The Tear Drop and the Torrington repops all have ball bearings. They do need to be greased before you run them.
 
Re: CWC-1 Updated 5/17/10

i like the basic pedals too. doesnt distract the eye. and good idea with the struts!
 
Re: CWC-1 Updated 5/22/10

Well, I ended up working for 8 days and am exhausted but now it's time to get back to the fun. I really want a black covered saddle for this bike. The only one I have is this Messinger. It's a pretty short saddle and doesn't compliment the bike at all. So I was thinking if it was longer in appearance that might help. I picked up a seat crash rail at the LBS made by Electra for $10. I've spent a year trying to find a saddle that it would mount right onto the spring bolts just like the originals - no luck. So I decided to tear this one apart, clean it up and add the crash rail. It took 4 days for my secret chemical to eat all the rust off the pan. My biggest problem now is getting the pan straight out of the dunk tank dried off before it starts to rust again. I'll post some after pics when I get them - actually when it stops raining. This will be my first attempt at refurbishing a saddle.
After I diassembled it I mocked up the location of crash rail mounting holes, marked them, drilled the holes and filed them into squares with a jewelers file to properly seat the stove type bolt head without spinning upon tightening. Finally, everything goes into the secret chemical tub. Next step is painting.


01a.jpg

01b.jpg

01c.jpg

01d.jpg

01e.jpg

01f.jpg

01g.jpg
 
Re: CWC-1 Updated 5/24/10

Alright, so the secret chemical isn't so secret. I use white vinegar to eat the rust off. It took four days to completely clean the pan. My biggest problem was getting the pan dry before it started to rust again so I hit it with a wire brush attachmant on my dremel. Got the parts primed - it's coming.

01h.jpg


01i.jpg
 
Re: CWC-1 Updated 5/24/10

WOW :shock:

That came out real good :!: , one more great detail job 8)
 
Re: CWC-1 Updated 5/24/10

If the chrome is intact with just some surface rust no problem at all. If there's a lot of chrome left but has pitting from rust I keep an eye on it twice a day because if you forget about it for a few days the vinegar gets under the chrome via the rust pits and literally disolves it - I know.
 
Re: CWC-1 Updated 5/30/10

Took a minor minor step backwards yesterday. I had applied two coats of Dupli-Color Chromium paint on all the saddle parts but the pan. First coat just looked silver to me but then the second coat really started to shine - not like chrome but definitely better than silver. Then I painted one side of the frame with Dupli-Color Gloss Clear and it immediately turned it grey. I took these pics of opposite sides of the frame - it's hard to tell the difference but up close it's real easy to see. So much for the chromium idea. Guess I'll just go straight black for the whole thing. Have some more parts coming in this week that I am really excited about. One in particular is going to change the whole look of this build. Can't wait.

01j.jpg


01k.jpg
 
Re: CWC-1 Updated 6/1/10

I switched to black paint on all the saddle parts. I just need to snag a hunk of carpet pad to finish up.

B47.jpg


B48.jpg


The seat clamp was painted black also but I like mine "natural". I stipped it down with the vinegar which only took 1 day - you can see by the time I got the remainder of the saddle done the bare metal clamp parts had started to rust.

B43.jpg


I took a Dremel Tool with a wire brush attachment and buffed the bare metals parts to a shine.

B44.jpg


One coat of clear and it's ready to rock & roll. The bolt head even has "Messinger" embossed on it. I do this same treatment to many bare metal parts - kick stands, seat posts, bolts & nuts. The clear coat keeps it from rusting and doesn't dry out like a lubricant plus the vinegar treatment eats out the rust from cracks, threads, etc. Moving on.

B45.jpg


B46.jpg
 

Latest posts

Back
Top