Diamondback Della Cruz

Rat Rod Bikes Bicycle Forum

Help Support Rat Rod Bikes Bicycle Forum:

This site may earn a commission from merchant affiliate links, including eBay, Amazon, and others.
Me too Luke!

Unfortunately we've been having some Colorado Spring weather and that's put off the riding season a bit, which means the shop isn't placing many orders yet. I have the dropper post on queue to be ordered, but it could take a while.

After having another discussion with my co-wrench Ant on options for the crank and bottom bracket, instead of using an adapter to English or adaptive bottom bracket set, I decided to dig around in the parts bins a bit and came up with this beauty:


It's a cheap generic BMX crank, but it's hard to beat for free! I checked and there is a press-in Subrosa bottom bracket to fit the Mid/American shell and 19mm spindle...and it's cheap too! I was considering using a vintage Cook Bros crankset, but then realized that valuable shiny parts can be a real magnet for thieves. Also since the bike is intended to be a loaner, a nearly impervious crankset makes more sense in sticking with the bulletproof theme. It should be very stiff and fun to ride, yet still adjustable for chainline with the provided washers.

I've been doing more research on the leatherwork and the tools and materials can be quite expensive...especially if you don't know what to buy! I'm hoping to enlist the help of a friend that has a lot more experience than me...which is limited at best. I made some steampunk goggles, but that was merely cutting and sewing, no fancy tooling or shaping. I am now considering more of a southwestern Native American style. Handmade conchos, some feathers and beads...you get the picture. I did score a slab of granite for doing the leatherwork on. It pays to be friendly to the installers!
 
Hmmm....


The cantilever mounts would have to go, but if so...it clears the tire for width. These forks are notorious for bottoming on the crown with big tires so I may need to talk to my welder about extending them and perhaps flipping the dropouts forward...
 
Last edited:
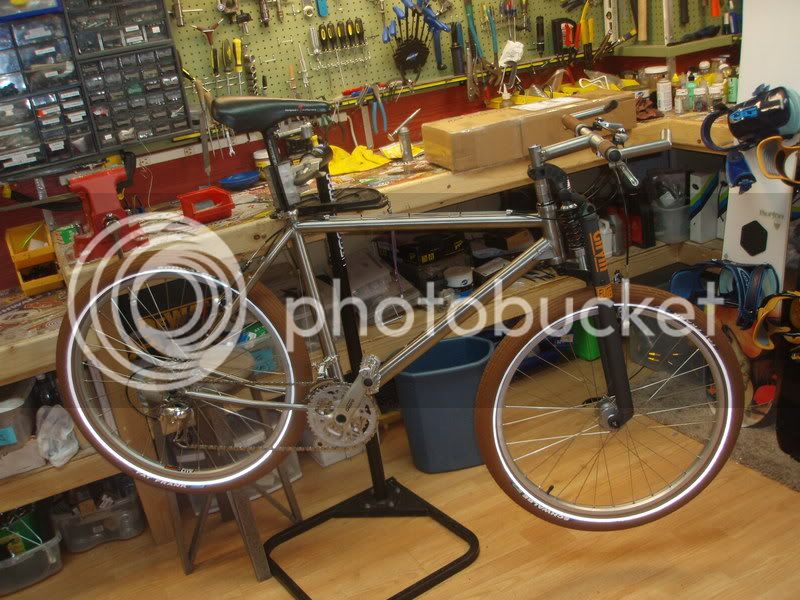
Today I swapped forks. My son's bike, the "dumpster bike" because I found it in a rolloff container out in Moab, became the donor of the original OEM Girvin fork I bought for my Indian project back in the day. It was period correct, but I didn't realize at the time that those forks had two heights, a large (200mm from crown to bottom of clamp) and a small (163mm from crown to clamp).


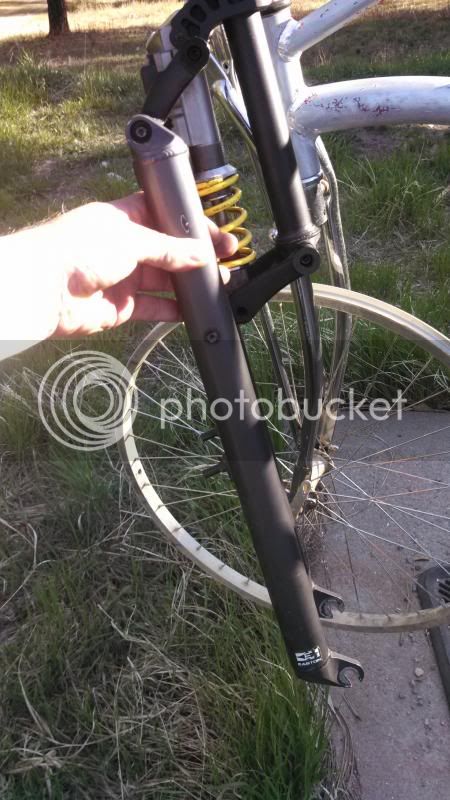
The large resulted in too many spacers needed to make it work. I'd been gifted with another fork, the one pictured earlier from a friend that has the K2 "Smart Shock" that uses a battery to adjust the shock damping on the fly and it's the "small". I not only felt this was far too sophisticated for a cruiser, but requires maintenance due to the battery and just doesn't fit my simple bulletproof cruiser concept.

After some measuring time today I realized that the "tall" fork was both simpler and fits the Della's dimensions better and that the "small" would fit his headtube length better, so I swapped them. My son now has a very cool and still vintage correct fork, but it fits with more precision regarding Girvin's specs.

Ignoring all the specs, I still want the look I want, but keeping the geometry of the fork that makes it work, I'd like to go for aesthetics and still plan to modify the "Tall" fork to suit my needs. It's going to require some welding that's beyond my means, but at least it will be all my ideas. I'll let you all know what my welder thinks.
 
Thanks Luke.

I did try swapping them, but it kicks the legs at a funny angle and doesn't solve the bottoming issue I mentioned. I think I'll go with my plan as it seems to solve the aesthetics as well as mechanical issues. It will "ruin" the fork, but hey...I'm making an omelette here. ;)
 
I spent some time this weekend examining the Girvin fork and reading what had been done with them in other's builds. I'm even more convinced that it will work...but may take some real doing. The first step was removing the Noleen shock and collapsing the fork.


This allowed me to take a measurement from the fork "crown" to the dropout center. 13-1/4" and a tire height of 27" isn't going to fly (although the rider might if it ever bottomed out!). I figure that at a minimum I'll need 1/4" of clearance to prevent bottoming and about 1" over the tire height to fit a fender.


Making a crude sketch I figured that by centering the new dropout on the fork leg I can get about 14-1/4" from axle to fork crown and gain a couple fender tabs in the process.


Of course this will change the handling of the fork a bit, but it was originally designed for a mountain bike's geometry anyway. The more relaxed cruiser angles shouldn't pose a problem.

The fork is also hollow and open at the bottom, perfect for running dynamo lighting wires internally. The legs pivot on two smooth threaded pins that are bolted at the ends. At least one fellow Girvin modifier had longer pins machined to increase the leg width. With a 3-1/4" tire and 3-3/8" between the legs...I'm afraid I may have to do the same. The lower pin pivots on a reinforcement that is riv-nutted to it.


These are hollow so I can pass a wire through and internally threaded so a fender and/or light brace could easily be fabricated and bolted right on. If I need all the holes I have a riv-nut tool and could also add one more hole for the light wire. Thanks for reading so far!
 
Last edited:
Hmmm....


The cantilever mounts would have to go, but if so...it clears the tire for width. These forks are notorious for bottoming on the crown with big tires so I may need to talk to my welder about extending them and perhaps flipping the dropouts forward...

Cool to see another girvin is gonna get butchered in BONINE. Thanks for the info about them bottoming out. I'll make sure take a look at that with mine before moving too far along on it.
 
I took a little time today and went over details of the Girvin with my welder friend...and discovered a few things.
Going over the dropout relocation we decided that it would be good if it not only welded to the existing dropout, but extended up into the fork where it might also be riveted or even tapped or bolted. He gave me a good chunk of 6mm aluminum to work with, same thickness as the rear dropouts.


I'll have to shape it by hand to fit up into the inner slot on the fork end.


As you can see it doesn't line up perfectly with the inside of the dropouts requiring the fork to be widened. Great! It needed to be widened for clearance anyway...or did it? We did work out that the pivot pins for the fork are exactly 0.50" and cold-rolled steel rod fits perfectly. This allows new stronger pivots to be simply turned to a new length, tapped and spacers applied to add whatever width is needed. When I got back home I discovered that my tire wasn't as wide as I'd thought (eyeball measuring with a tape instead of using a caliper) at a mere 73mm/2-7/8". I could basically leave the pin widths alone and have decent clearance and just shape the new dropout to fit precisely over the existing one and just fill it in with a weld. Time to make some shavings.
 
Ugh...parts problems.

After placing an order through my shop, waiting for the order to be placed...some of the items were out of stock, including the spokes and cool dropper post. I'll get them in when I can, but I was hoping to get to work on the wheelset.

The bottom bracket I ordered was listed as a Mid/American, which usually means it includes the adapter cups or the bearings can be pressed out to fit the Mid. This one is just a Mid, so I've been hitting the local shops in a vain search to find cups. I may end up going with the bolted American to English threaded adapter since the existing bearings seem in good shape.

Since I'm switching from threaded to threadless I also purchased a new stem and headset.

After preparing for and hosting my son's graduation party, free time has been a bit scarce. Hopefully this weekend I'll have some time to work on the fork.
 

Latest posts

Back
Top