Okay, the errors do not seem to disappear, but the updates have to be posted somehow, so i will do as RustyGold advised and write the post again. I got problem with pictures, so please follow the links i paste in a raw format. Also writing with no smileys, but you may be sure, the smile is on my face all the time, especially when i work with my bikes!
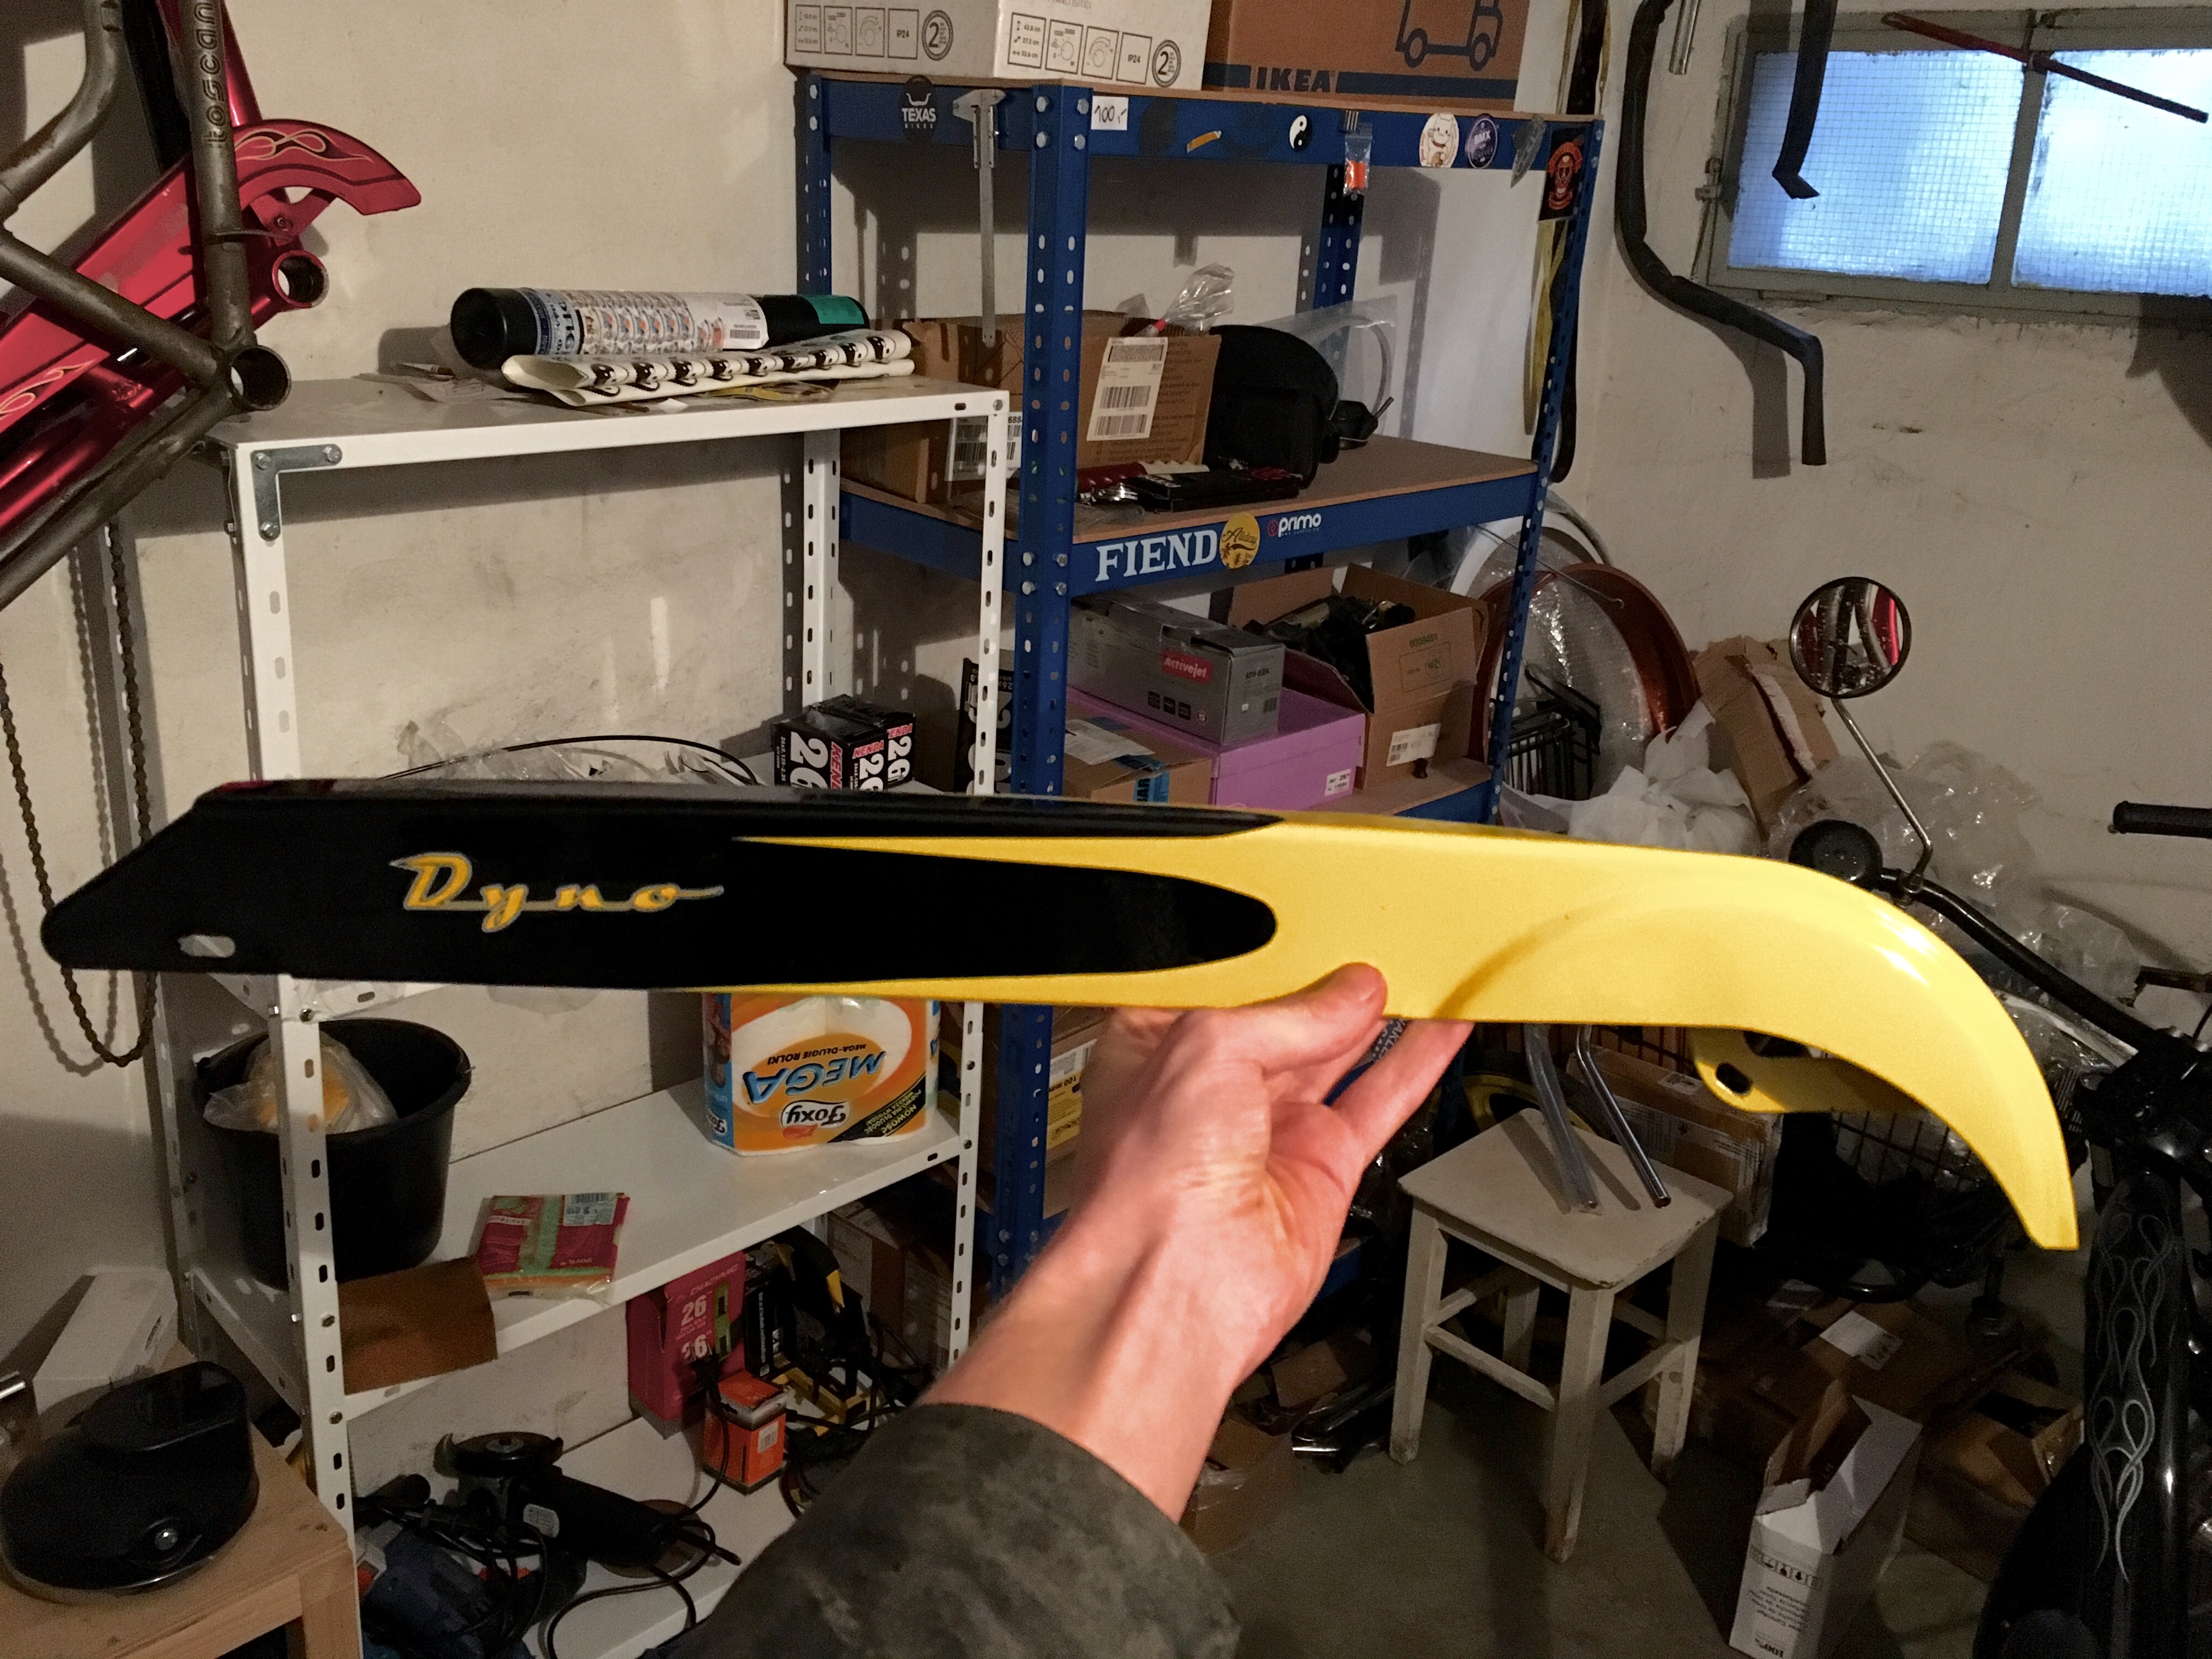
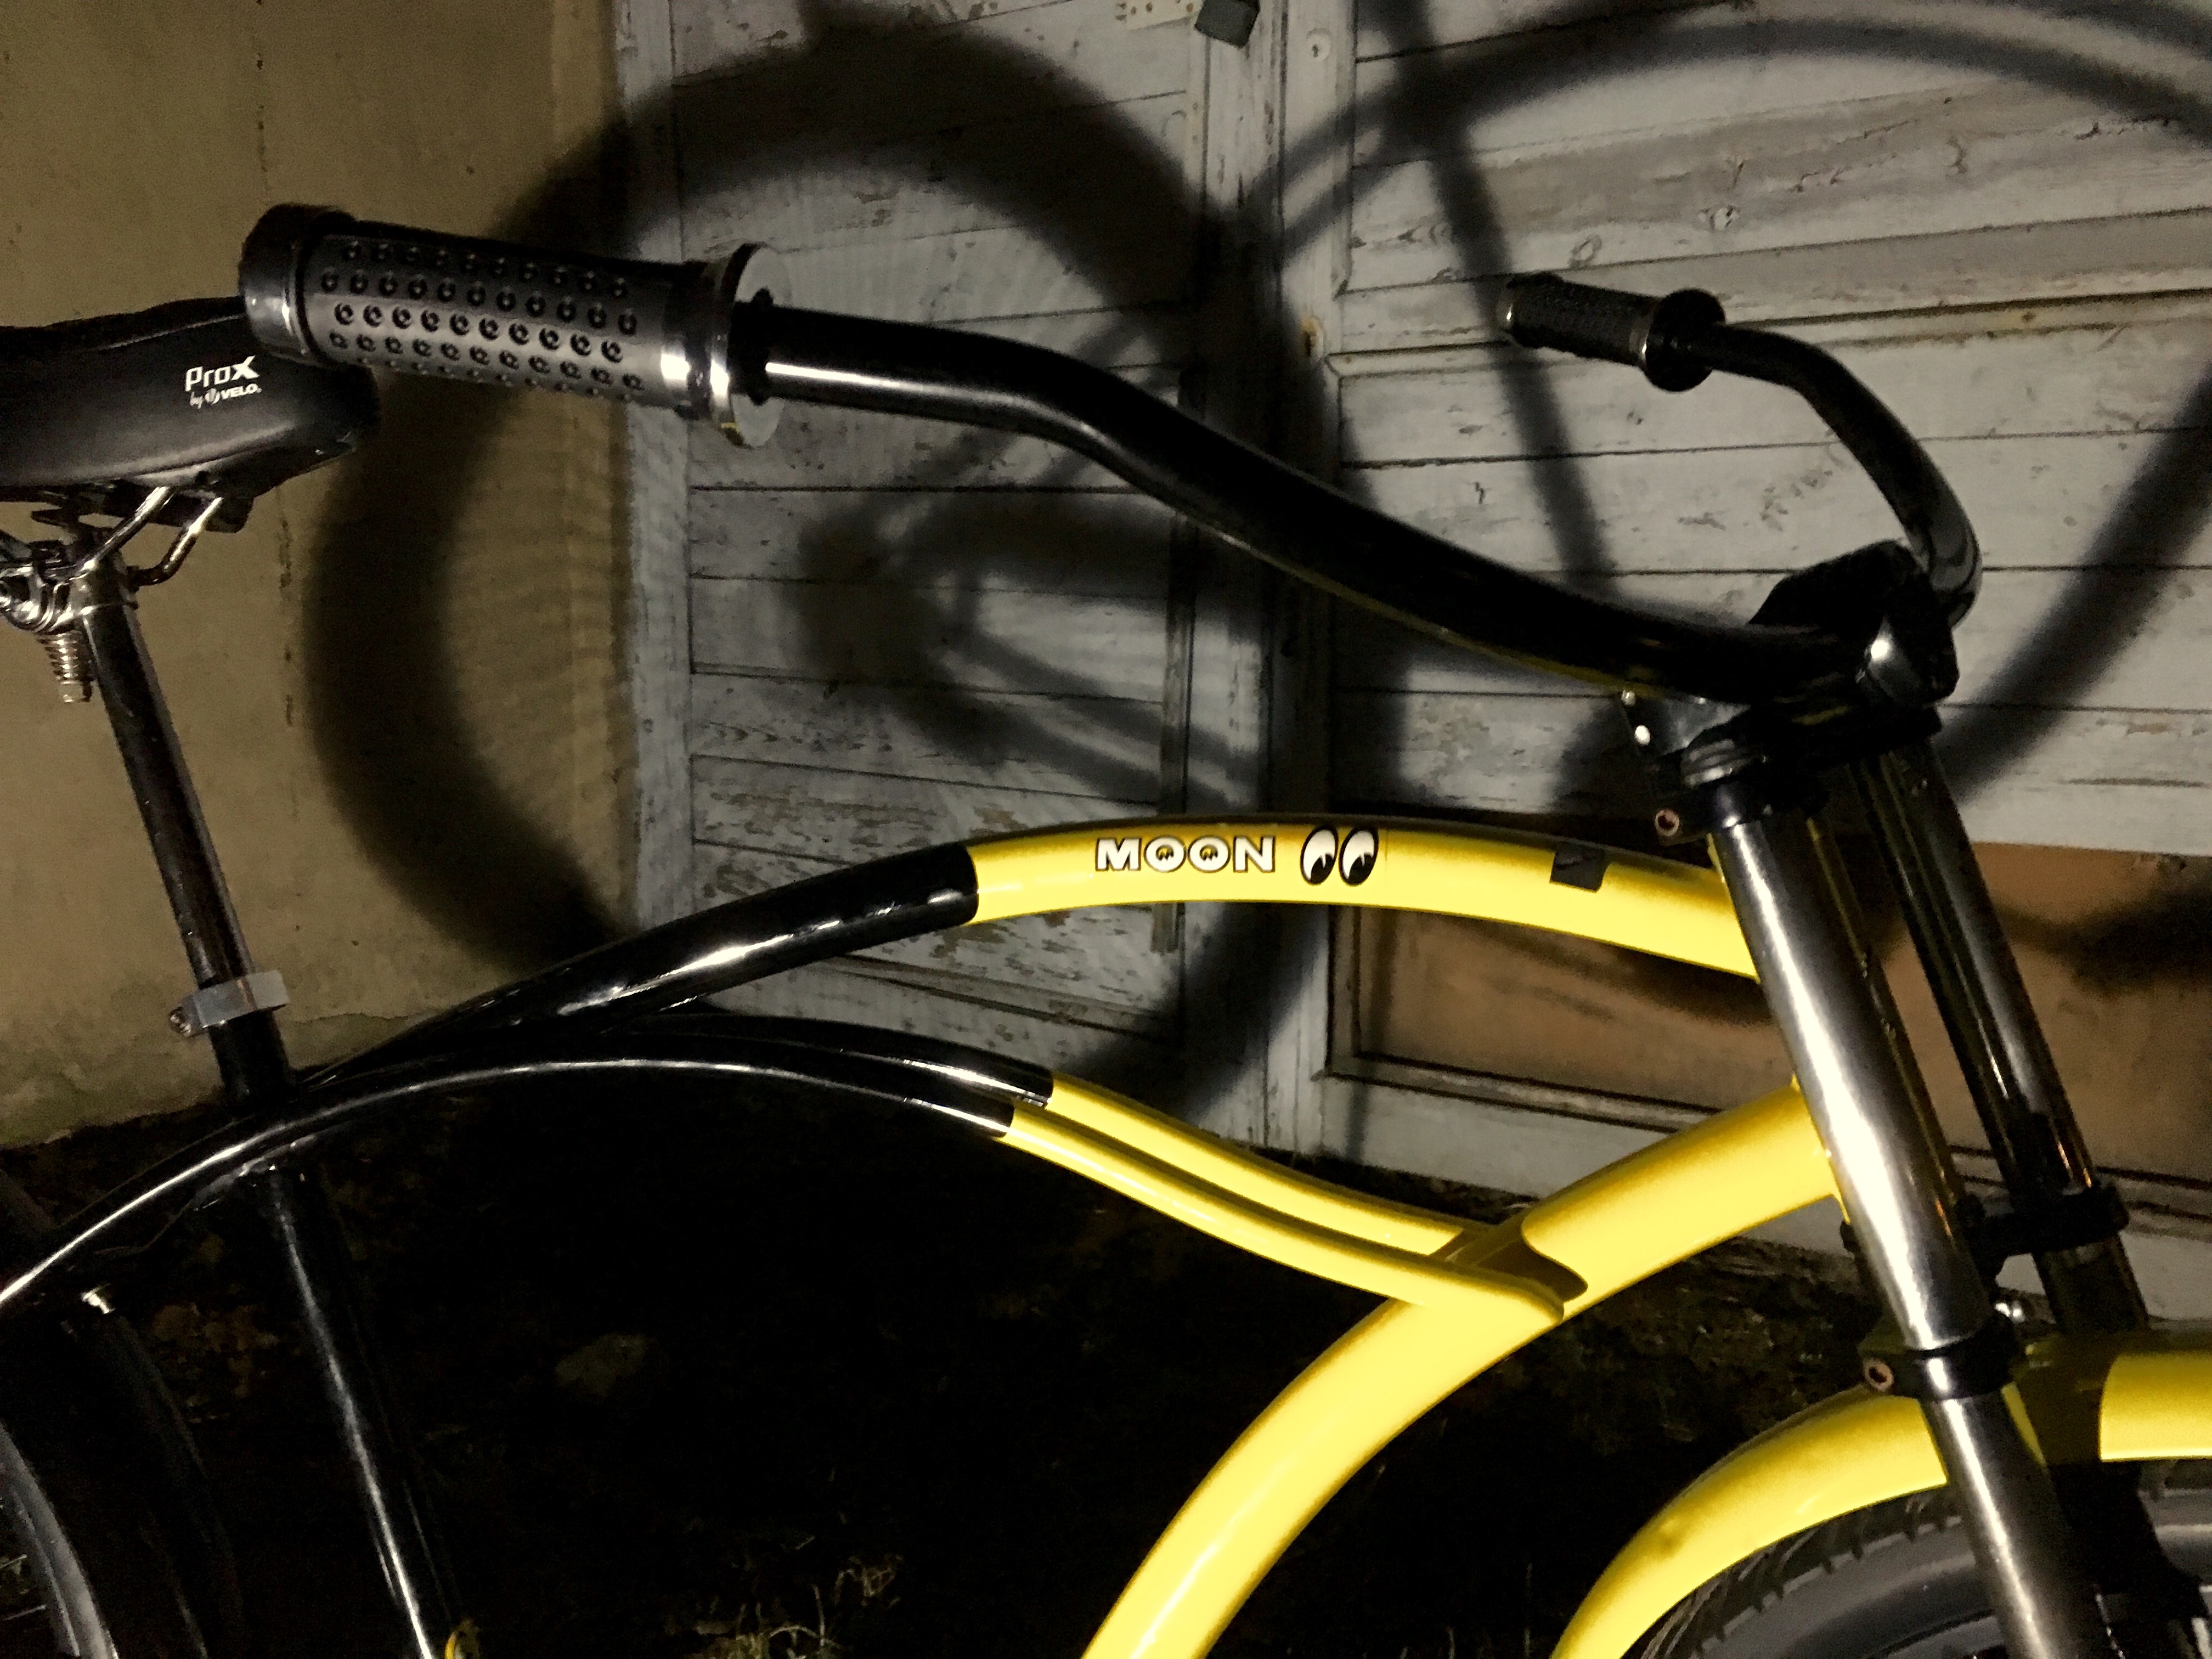
Lets start with the chain guard. Last time i made a mistake masking it, laying down some masking on the painted yellow side. The result is now paint distribution is not even and you can see the difference in color.
https://armarium.org/u/2018/03/17/74de9b25b4aa35422a59eee5d235f9f7.jpg
I compared the result to the pictures of original mooneyes bike and realized also that the curve i put down is quite different. The original one was more pointy then mine. So, i decided to remake it once again. I do not have a picture of the new curve finished, but i have this one so you may get the idea of what am i doing:
https://armarium.org/u/2018/03/17/d16378343318eb2f6b20f5555ba13d23.jpg
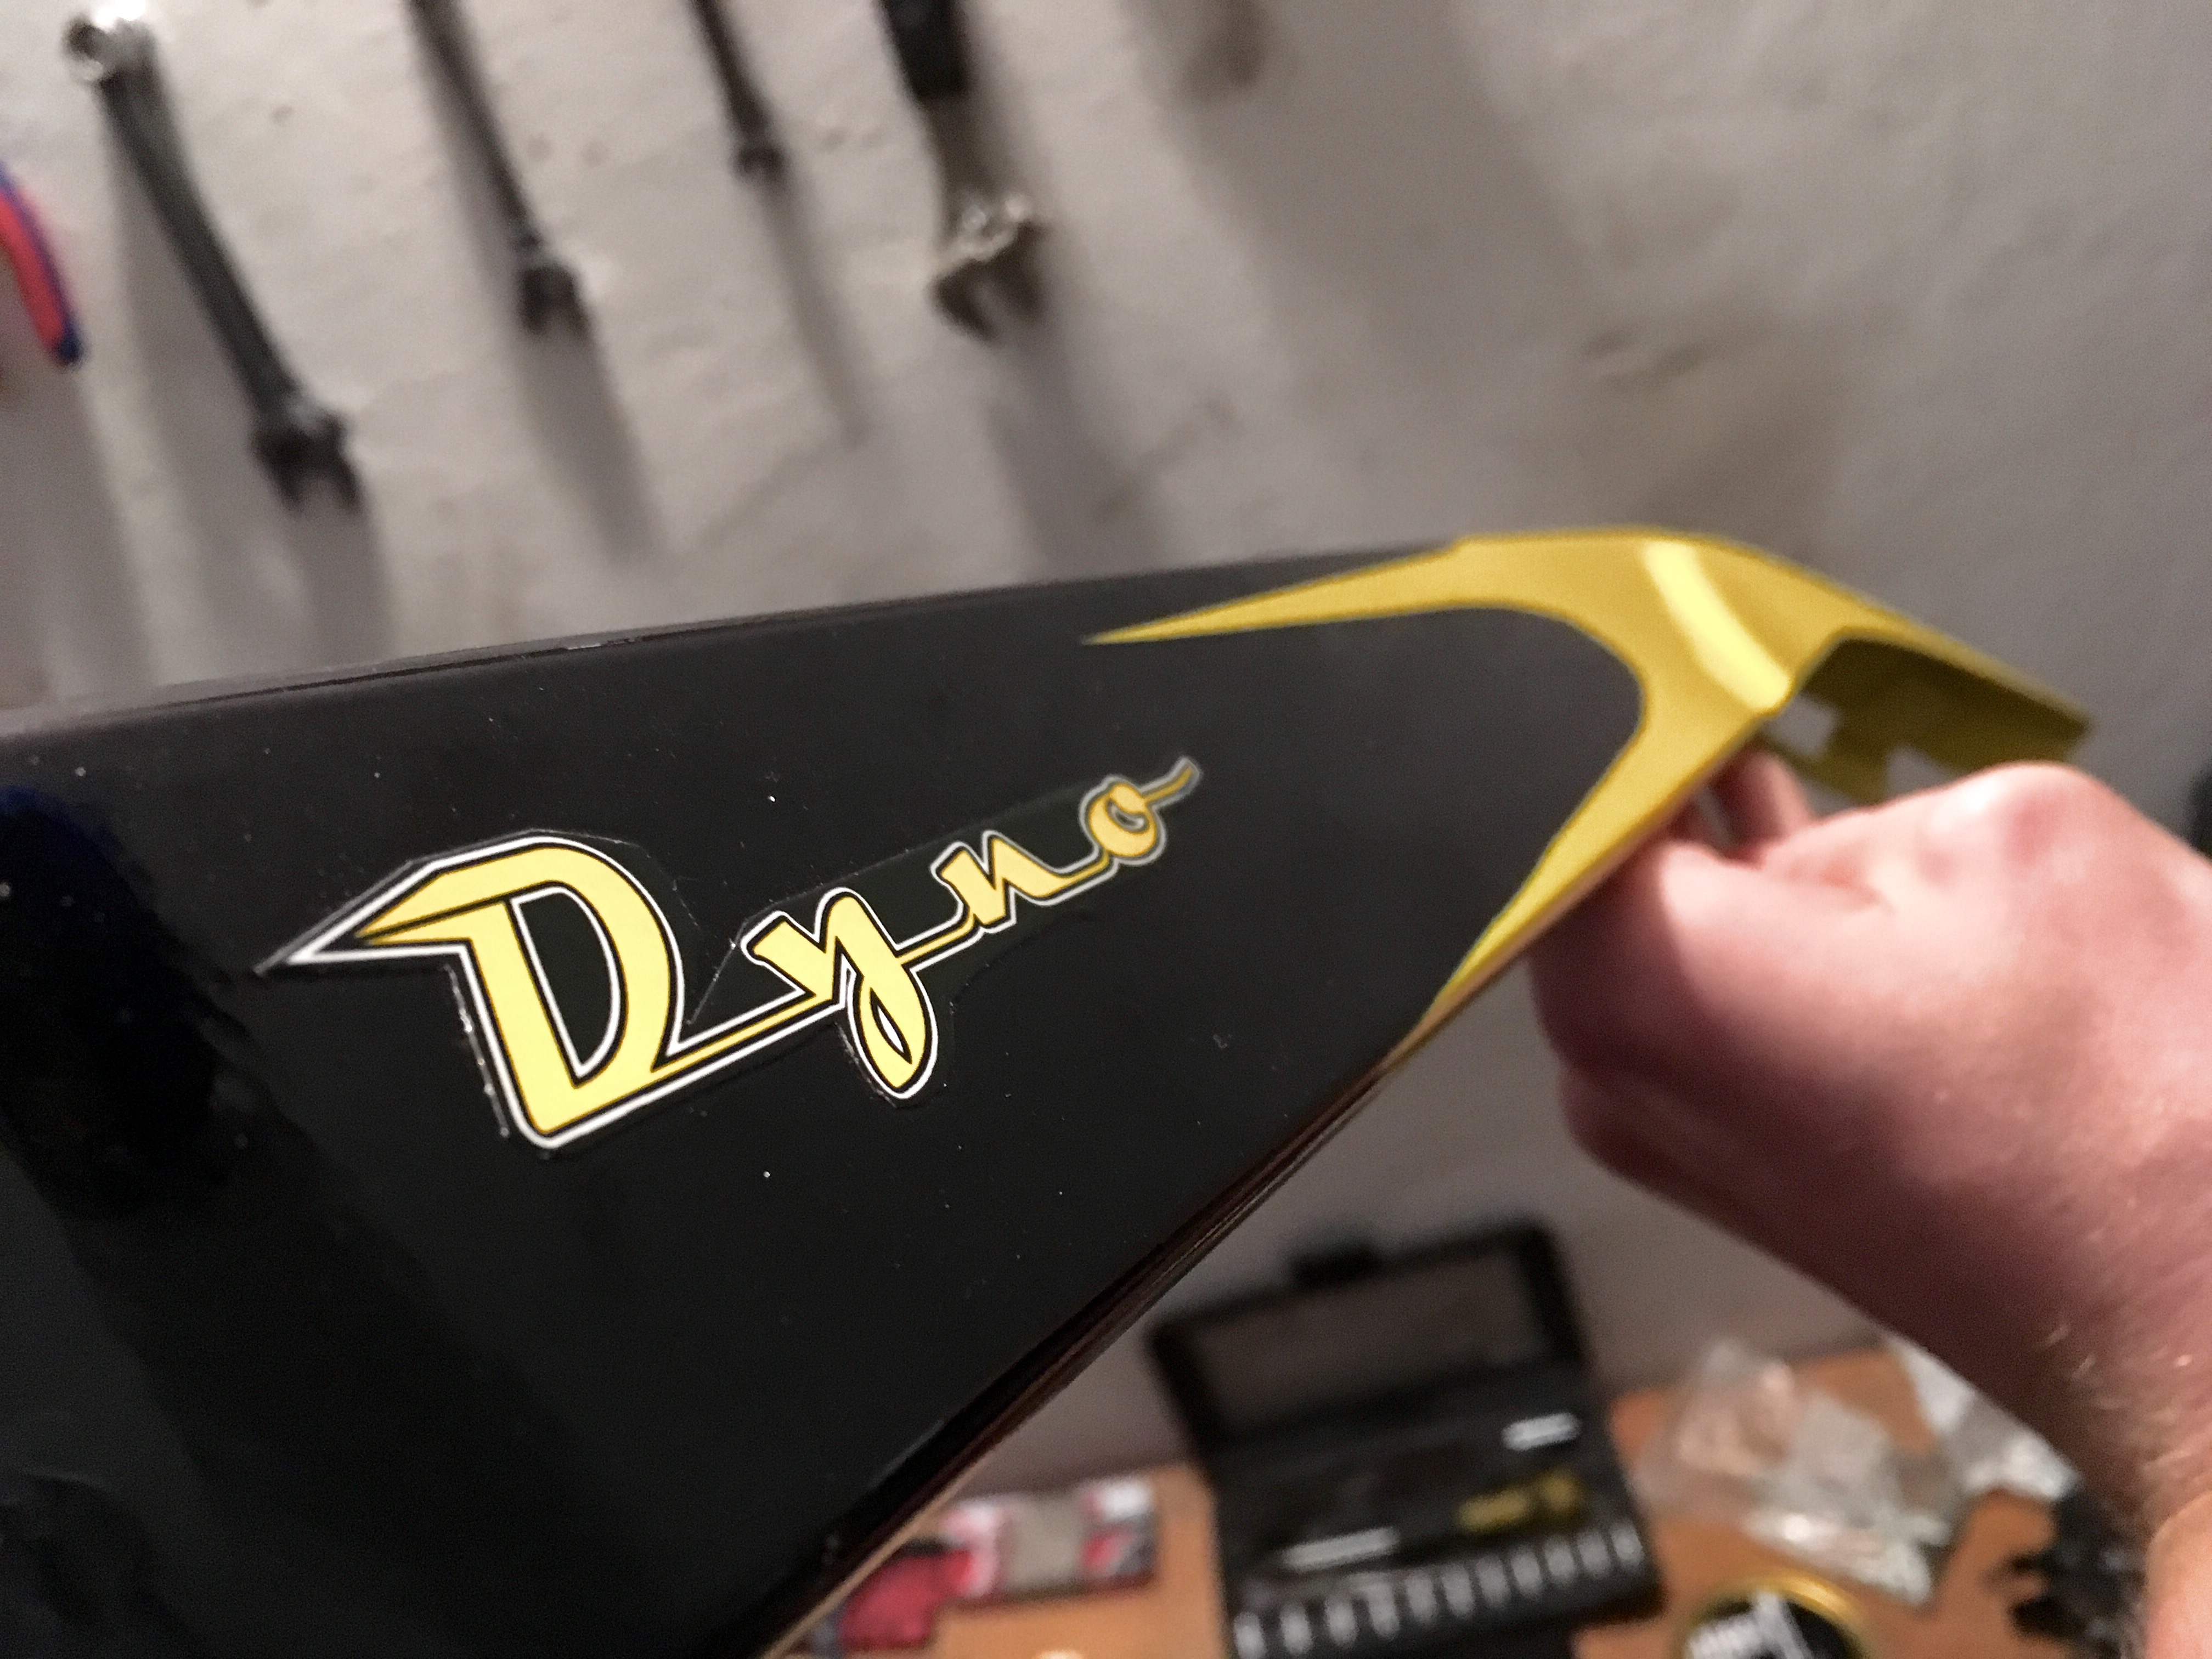
Unfortunately that's not all the sad news. The worst expectation have been proven real - the sticker material i have used is not good for lying it under the clear coat. The print shop offers hi-end quality stickers on oracal film, but the minimum order is square meter and the price starts from about 20 bucks (70zł). That is kind of a lot for just few little stickers, so i have decided to try their medium quality option, that is also a film but it goes in a4 size and costs like 1$ to make. They said they did not try it under the clear coat, but i have decided to experiment, and so i did. Of course not when so much effort and time is put in that bike i'd prefer to overpay a little but get the best quality possible, but it is too late. Anyway, that is a good experience for me, making me think of searching for the other print shop to work with, who can make hi-end stuff in smaller sizes and cheaper.
https://armarium.org/u/2018/03/17/aa5926bc5acc60a282c7b37cd25e817f.jpg
As you see the decal have changed the color, and the edge of it became a bit white. It also got a little wrinkle. On the other side it is not so bad, but it is visible. Not perfect, as i expected after putting them on paint.
https://armarium.org/u/2018/03/17/6d7a7fcaccc4ad86164dfce3e83abcf4.jpg
Anyway, i have to deal with it now somehow, since this is low-budget build and redoing the paint job again would cost to much time for me, and if i want to meet the deadline i better leave it as it is. In the end it is not so bad from a little distance and i almost learned to forgive this little imperfection to myself and that bike.
https://armarium.org/u/2018/03/17/4dc62a50f6596b8837bac731f5c4ca35.jpg
Apart from the sticker on the side the paint job looks great! There are some minor issues like little dots on the surface (i've been told those are hard to avoid when you do powder coating) and tiny paint imperfections on the bottom side of the frame with the colors border, but those are really minor. Even the round sticker on the seat tube went out great, though being made of same material as the yellow one.
https://armarium.org/u/2018/03/17/1cc875a88594354ab0037c68ca633e46.jpg
So, i got the bike to my garage and it is back to my home-brewed the building stand. I had some free time yesterday evening, so i have decided to start building it up until i have changed my mind. Here goes the headset and the BB cups. Cleaned up the original ones this bike had, it ended up pretty well.
https://armarium.org/u/2018/03/17/b972630980e49f156221a3431c3aa821.jpg
I have started with assembling the wheels and cleaning the old tires up. First i have given them a good rub with white-spirit (terpentine). They had a lot of dirt over them, also a lot of rust everywhere, especially over the seam, since the wheels were all rusty and ugly inside when i got this bike. In between the tire and inner tube and rim it was like a orange-brownish awful smelling jelly! After two good touches with terpentine i have given them some silicone spray, applying it with soft sponge, then cleaning out with paper napkins. In the end they are almost as shiny as new ones! I am so proud of myself giving those beautiful tires a new life.
https://armarium.org/u/2018/03/17/0af8d7eb44cbe9729d4efec52e2d1eb0.jpg
I have also tried to use some bleach over the white lettering, but honestly it did not work so well and i gave this idea up. Here is a close-up.
https://armarium.org/u/2018/03/17/2b6249de1e1a0baf7d40a5eacca6fe00.jpg
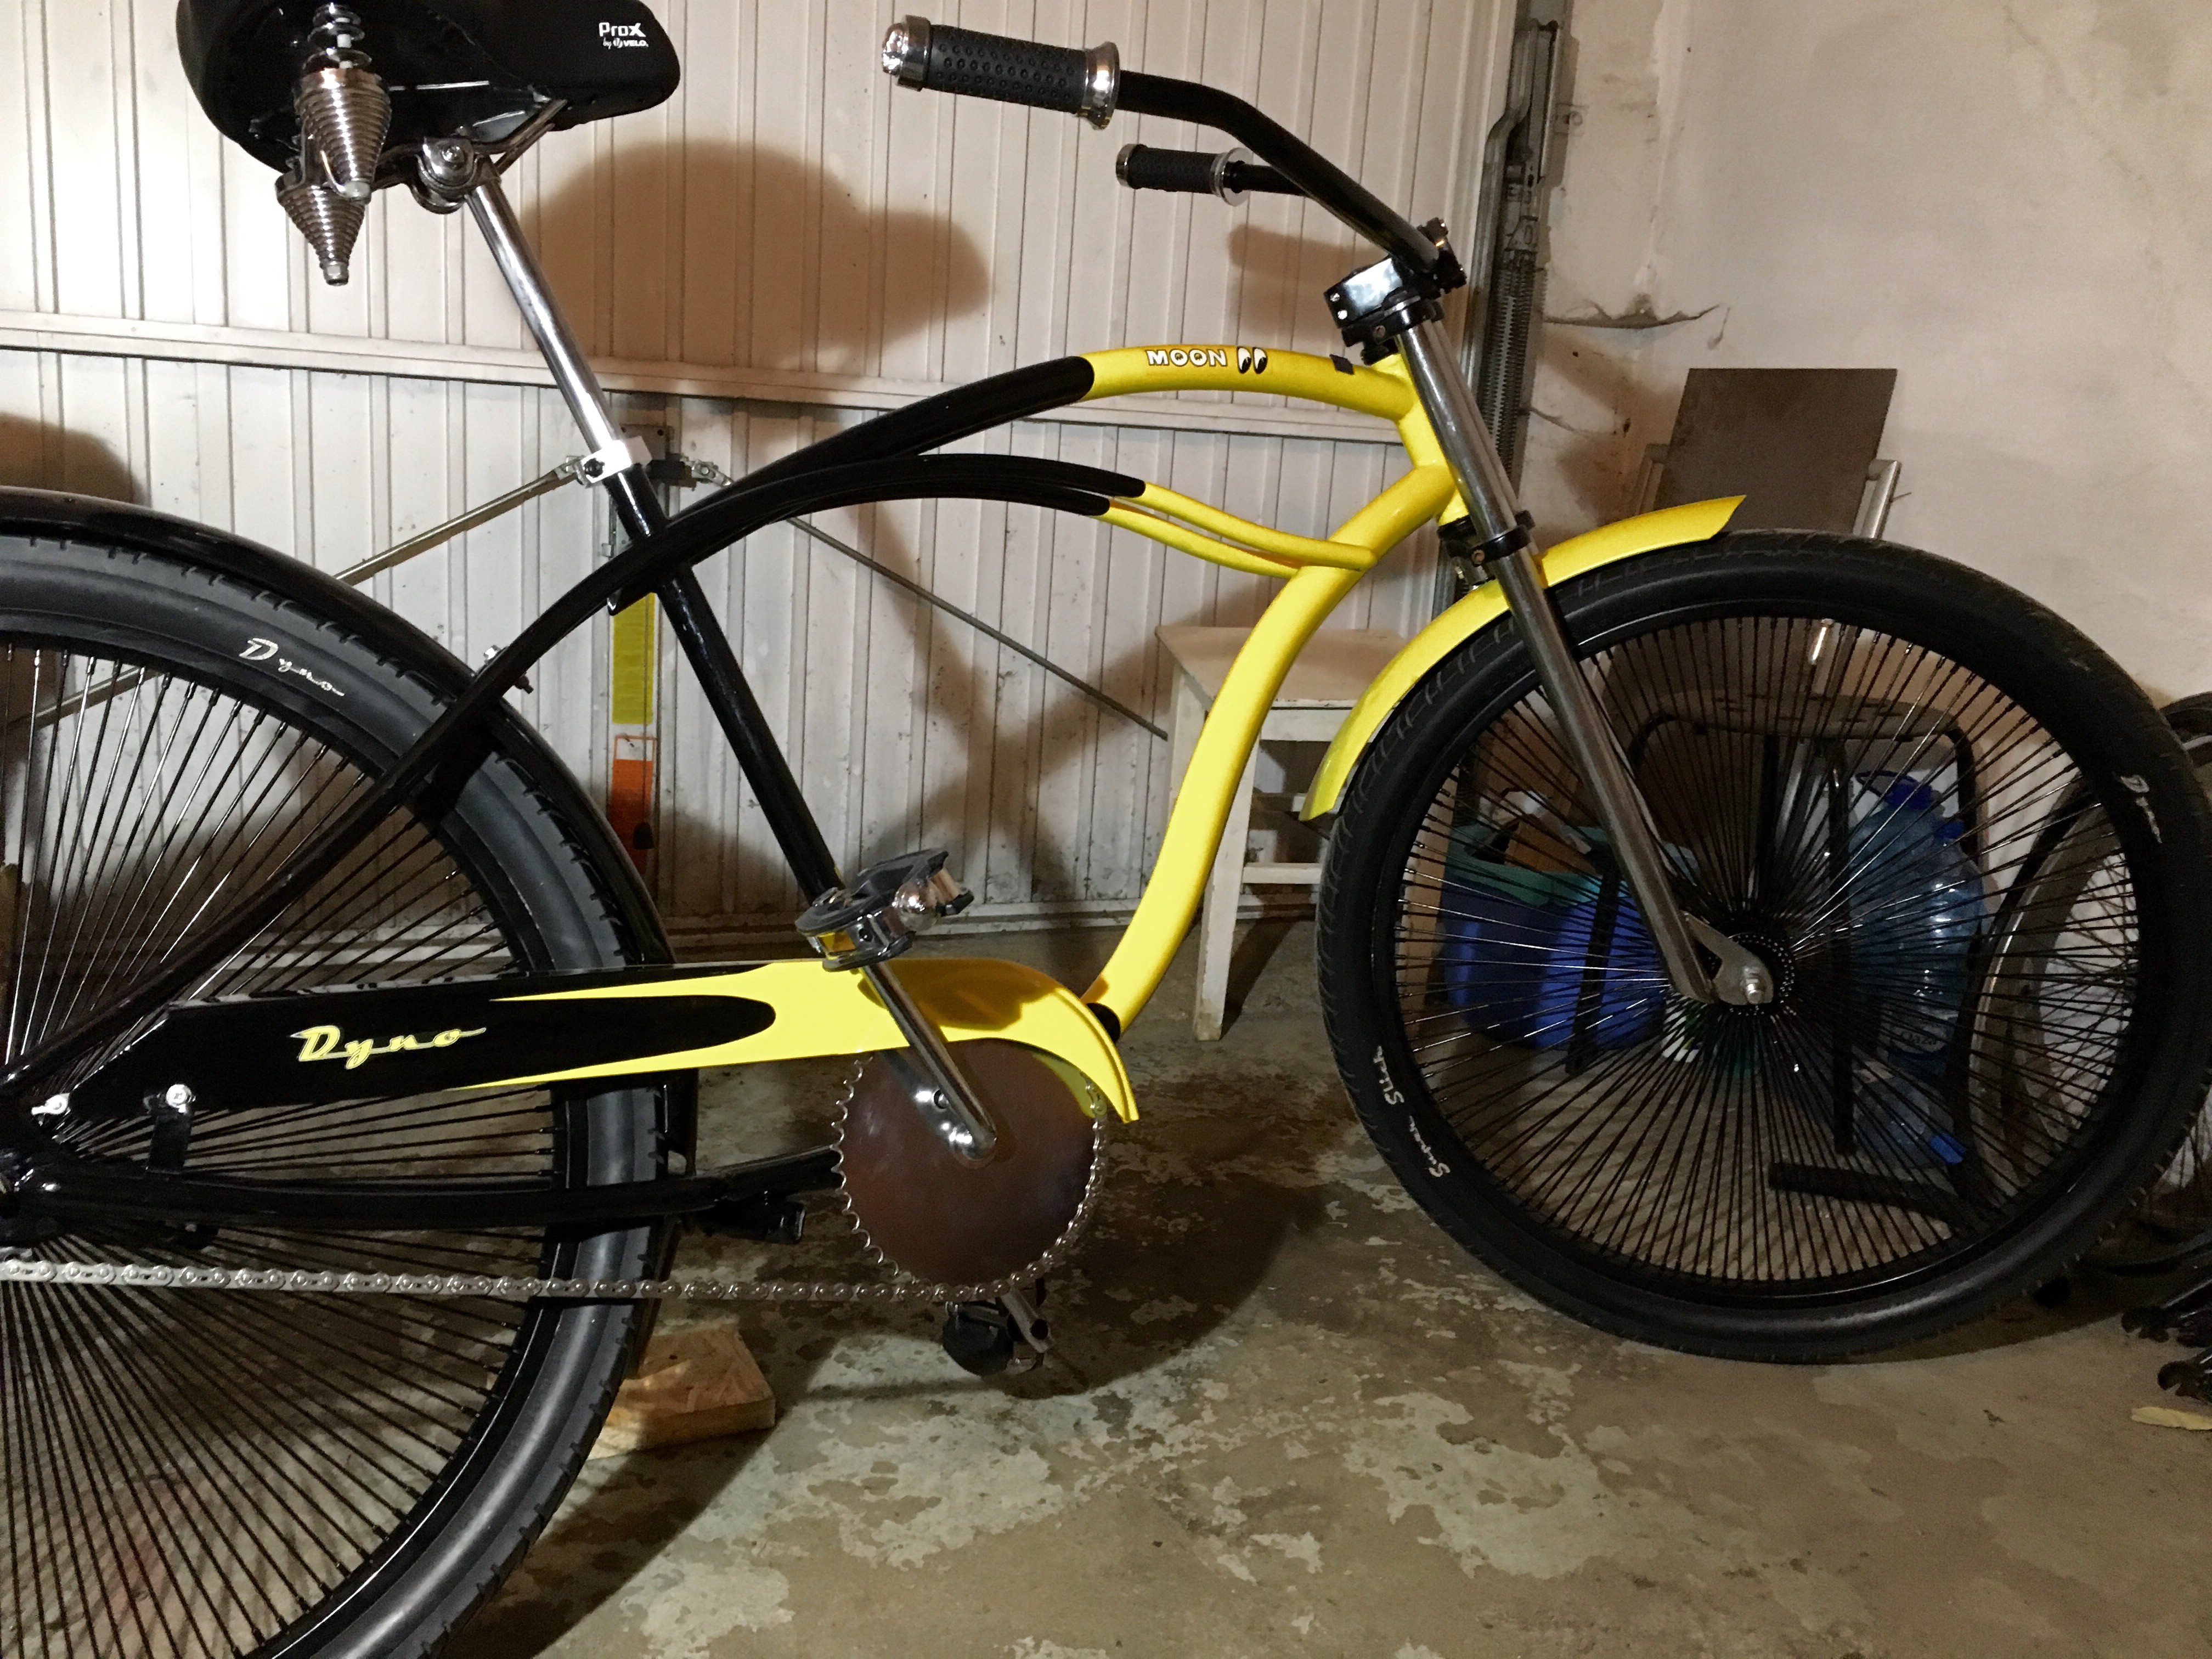
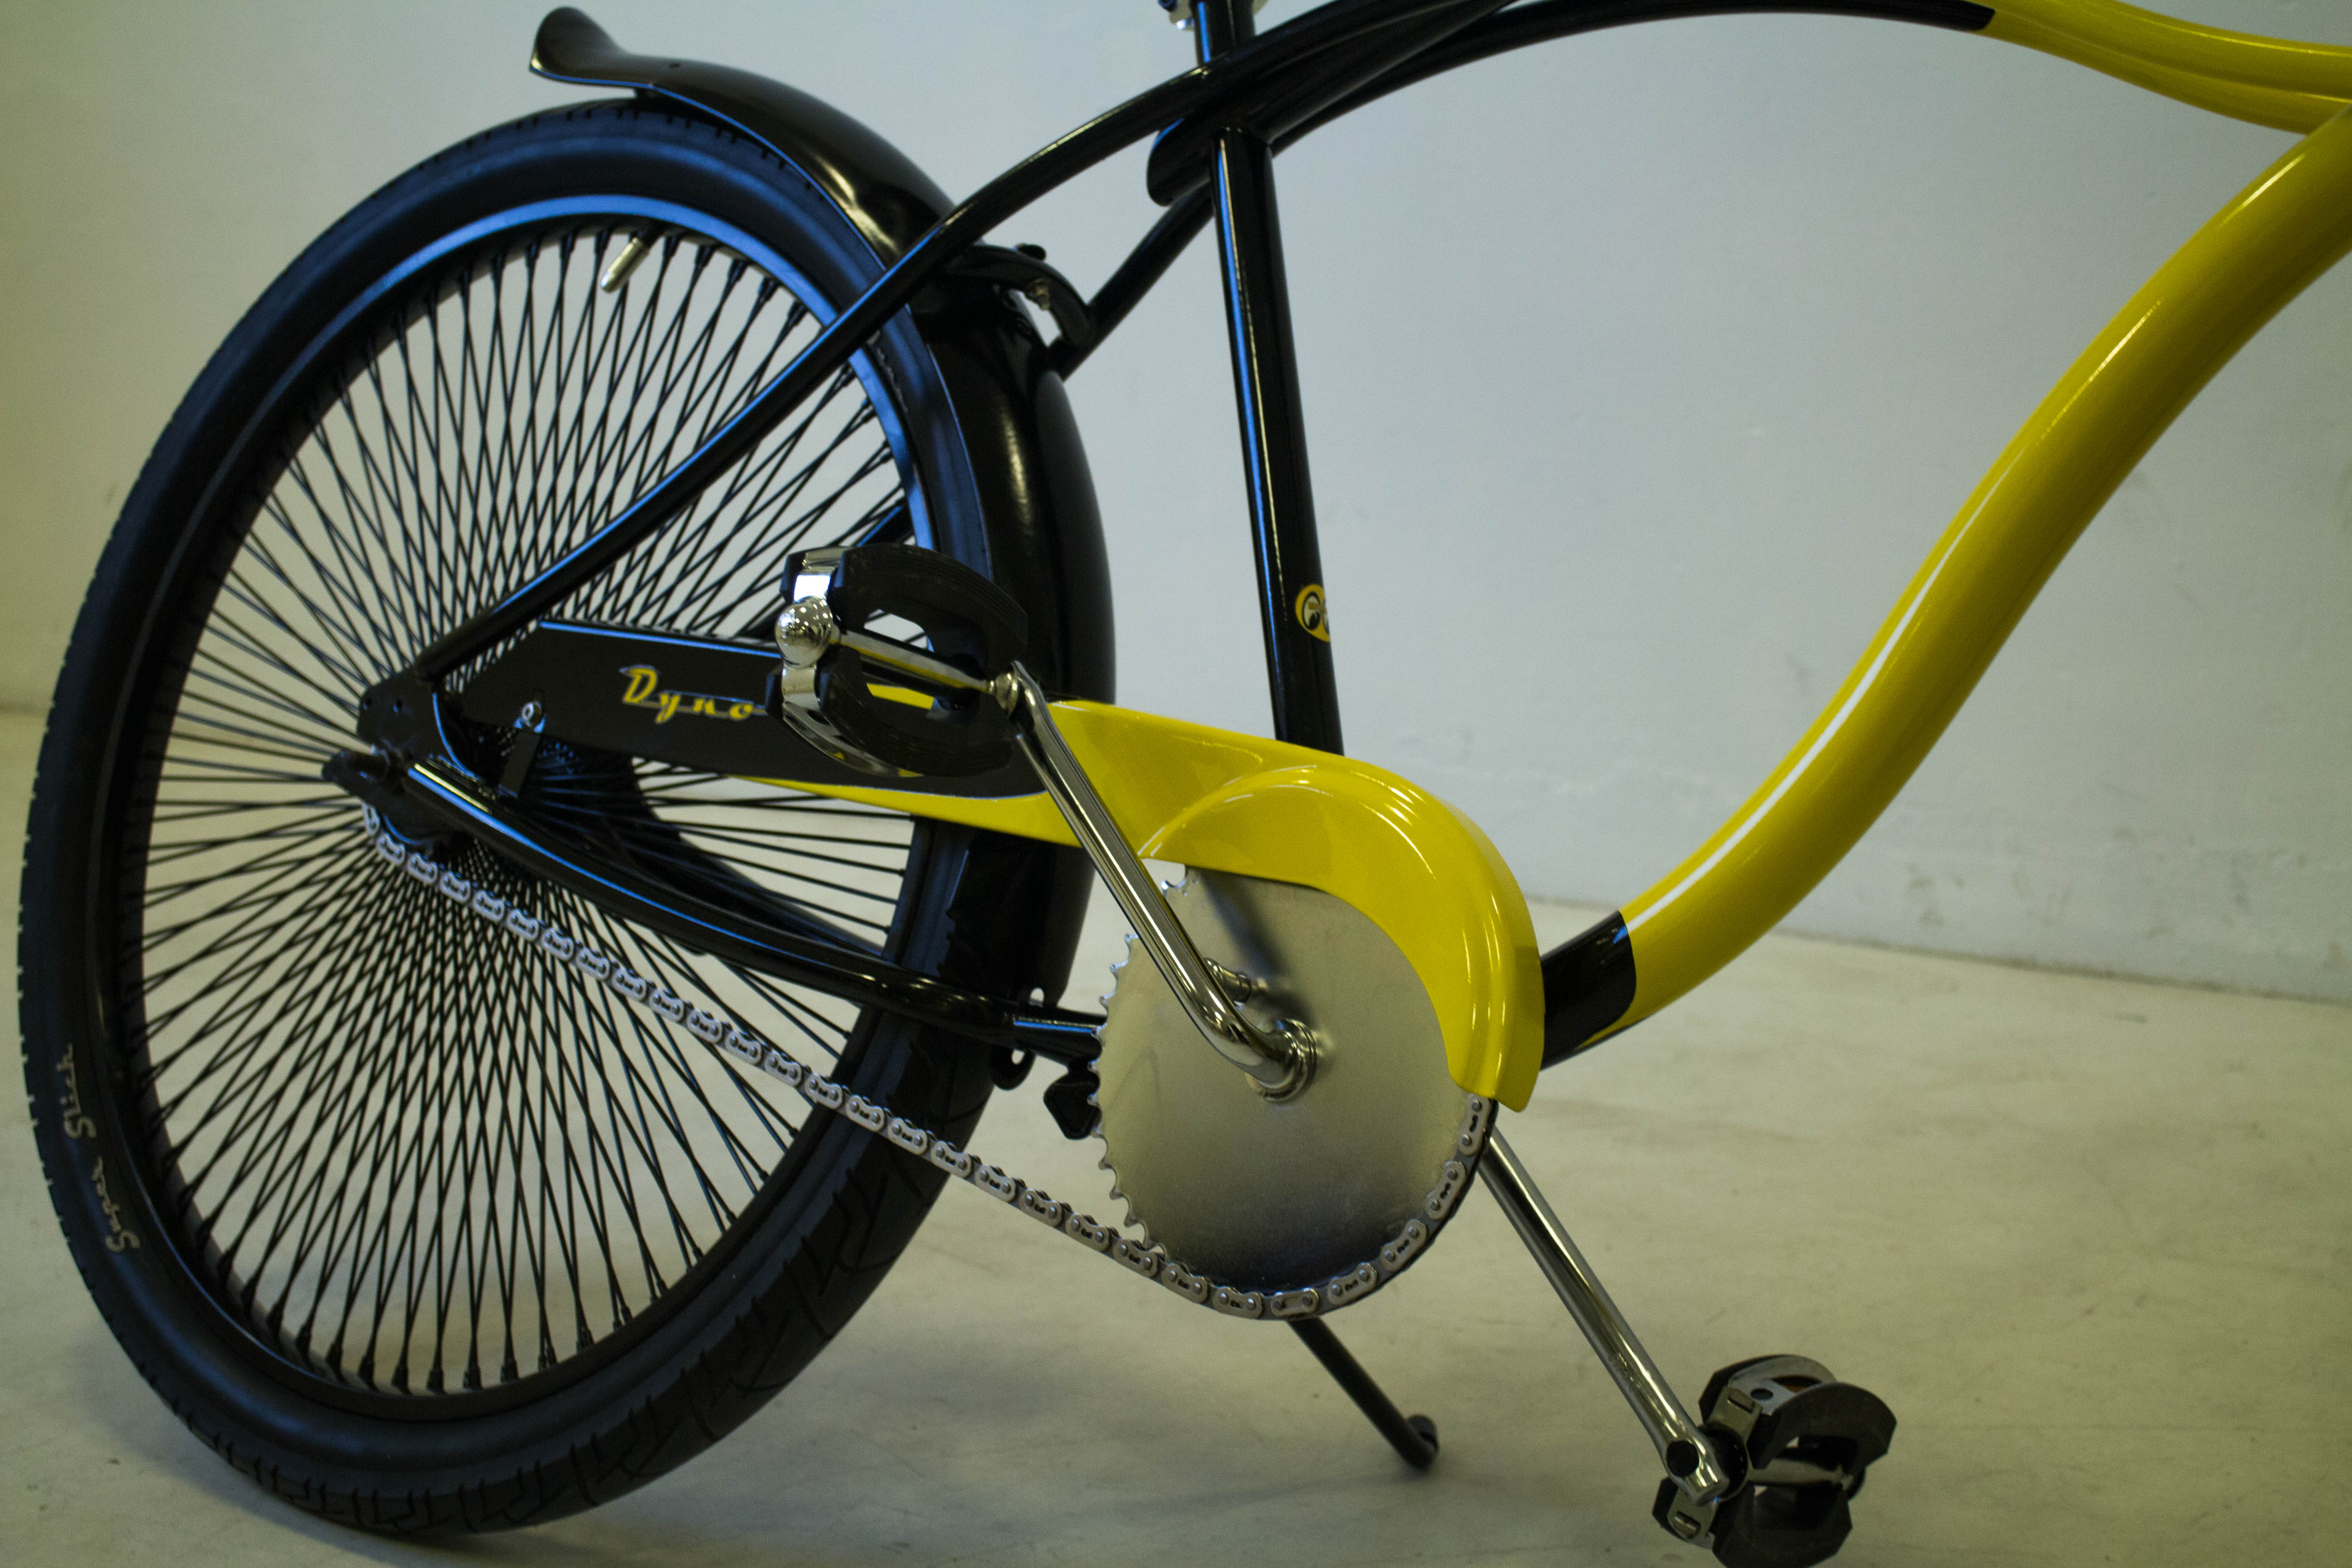
After that i have mounted a rear fender, the wheel, the crank set, original Dyno forks i got from one Deuce i have fixed up and sold last year and GT piston stem that i got from this bike and cleaned it up. At this point i got a little problem with the wheel. For some reason i got stiff after i pressed the nuts. Chances are that one of the components of the hub would need replacement, the left cap was a bit bent when i have reassembled it. Anyway, i got the wheel out, loosen the locknuts a bit and it became fine again, but with those hubs you only know for sure when you test-ride it.
https://armarium.org/u/2018/03/17/4bfa4cc0061a7f8157b1d8ce37c1aae0.jpg
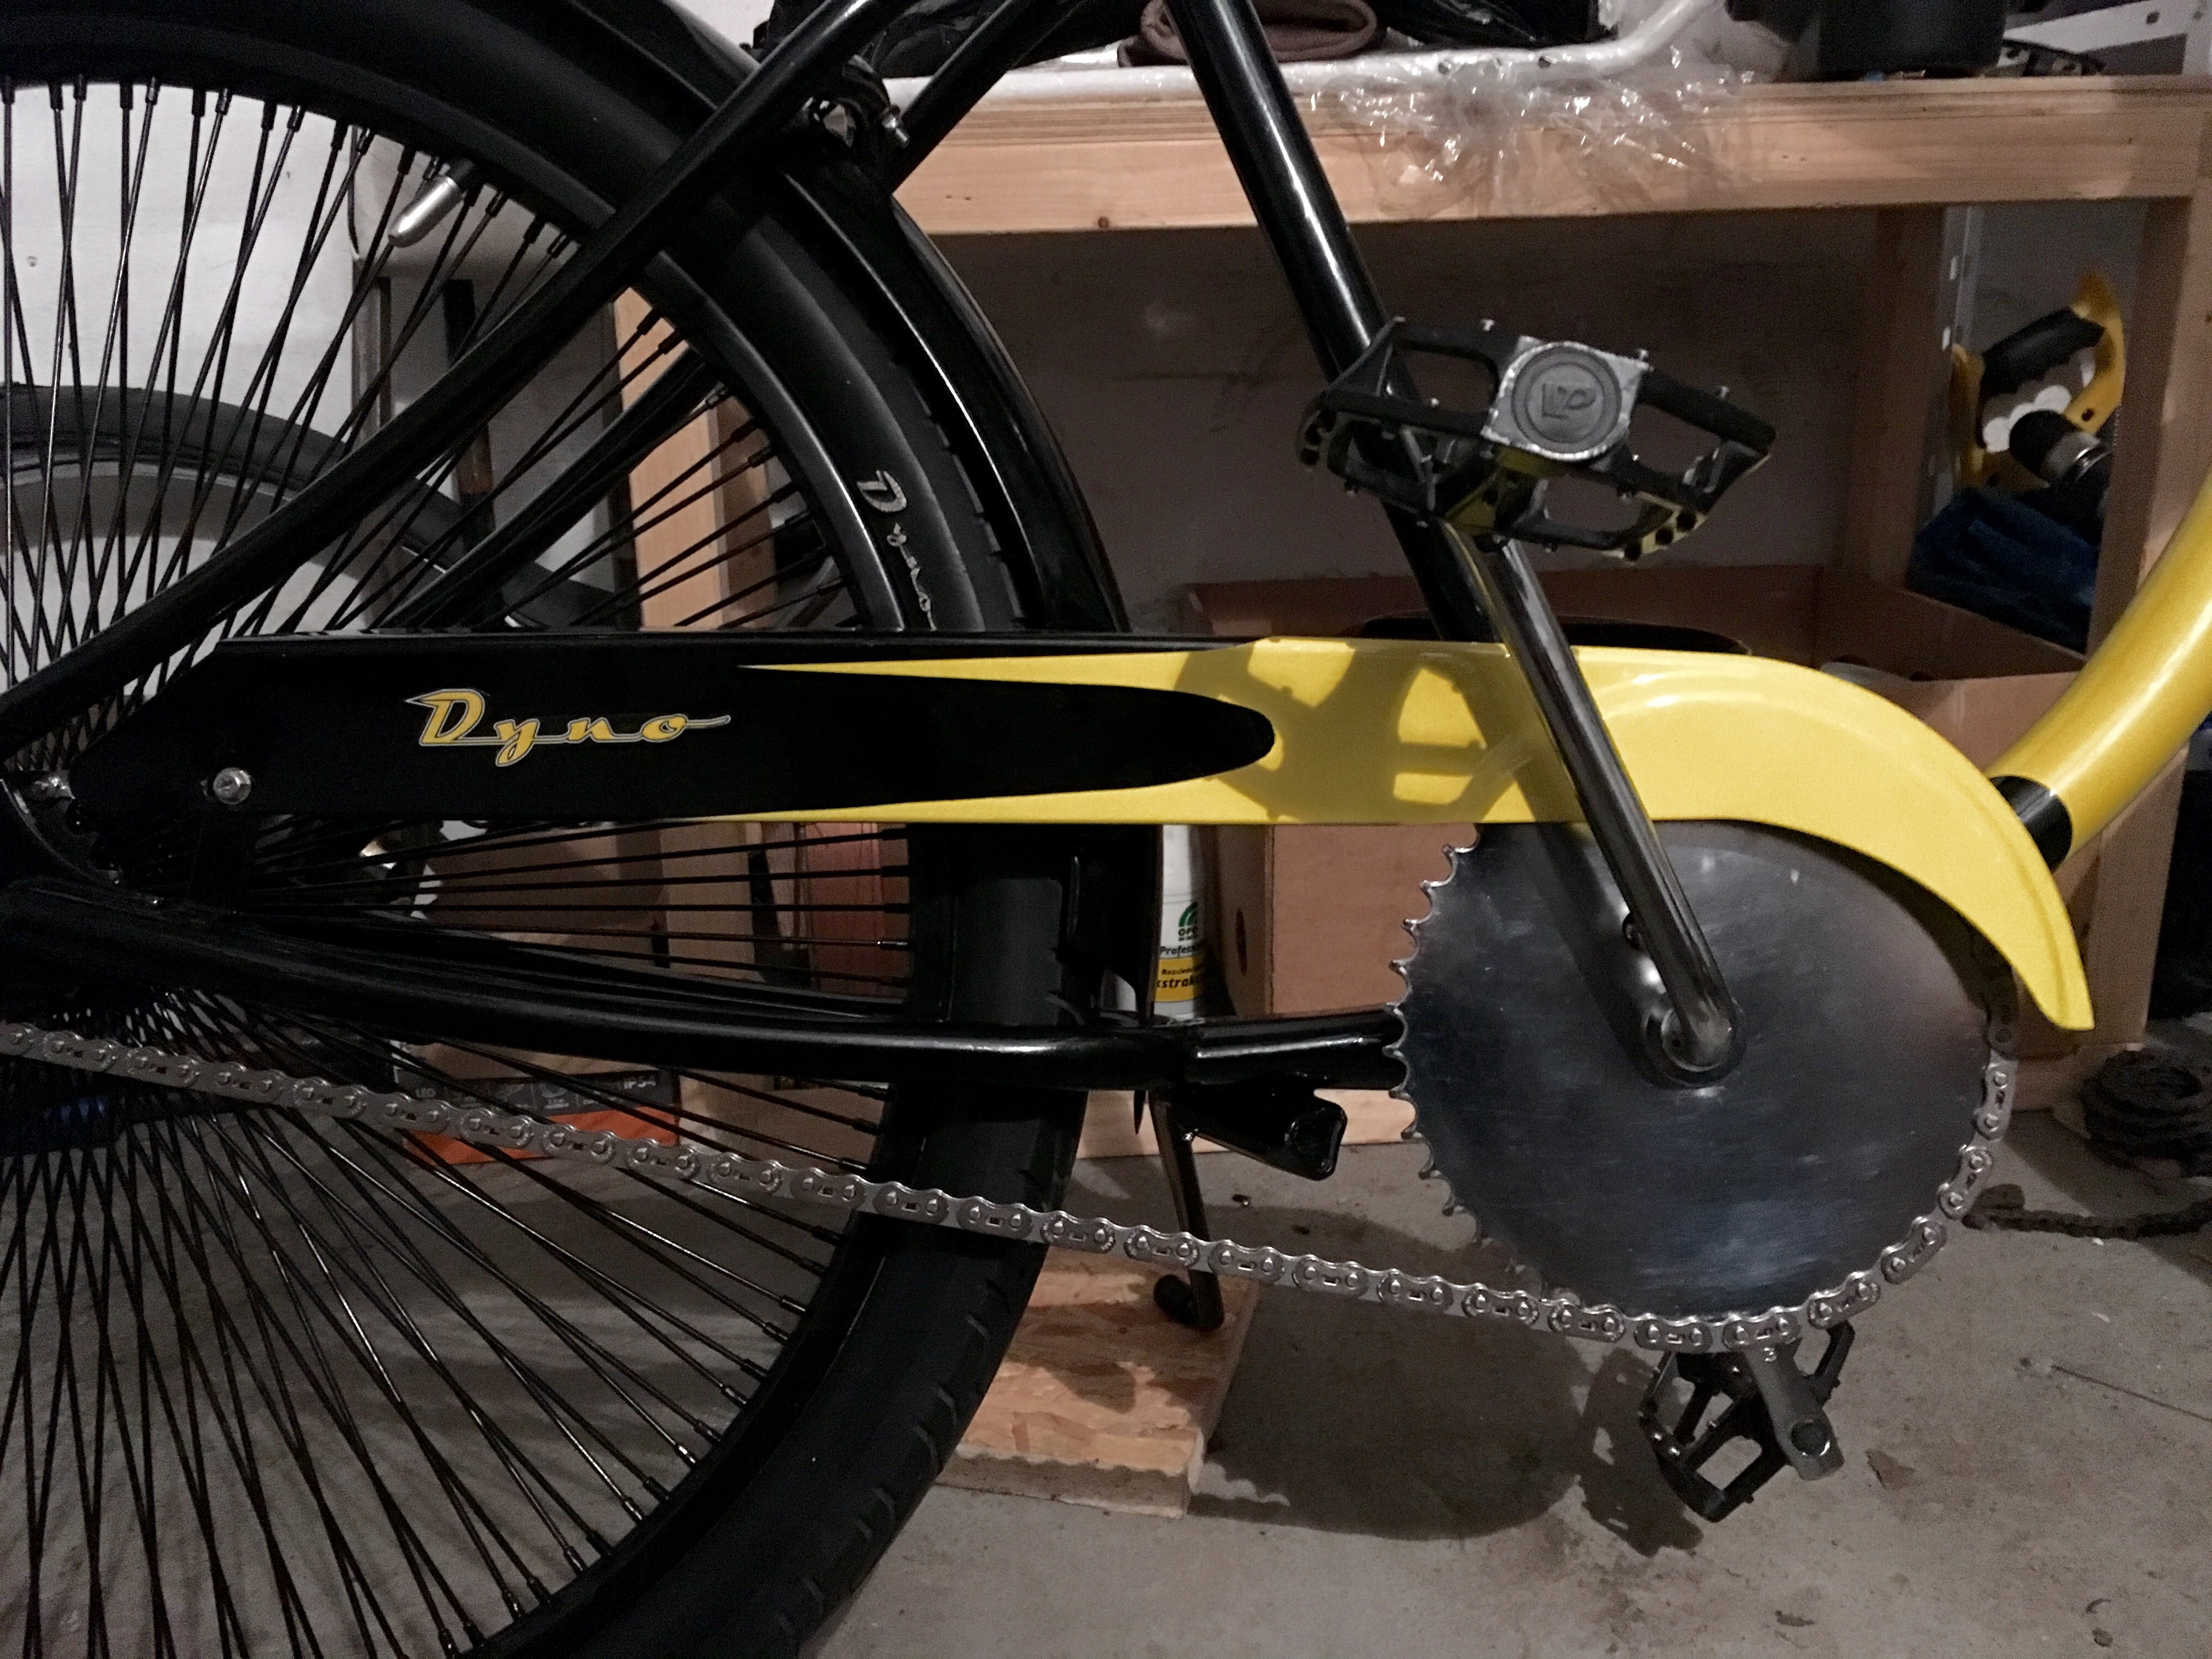
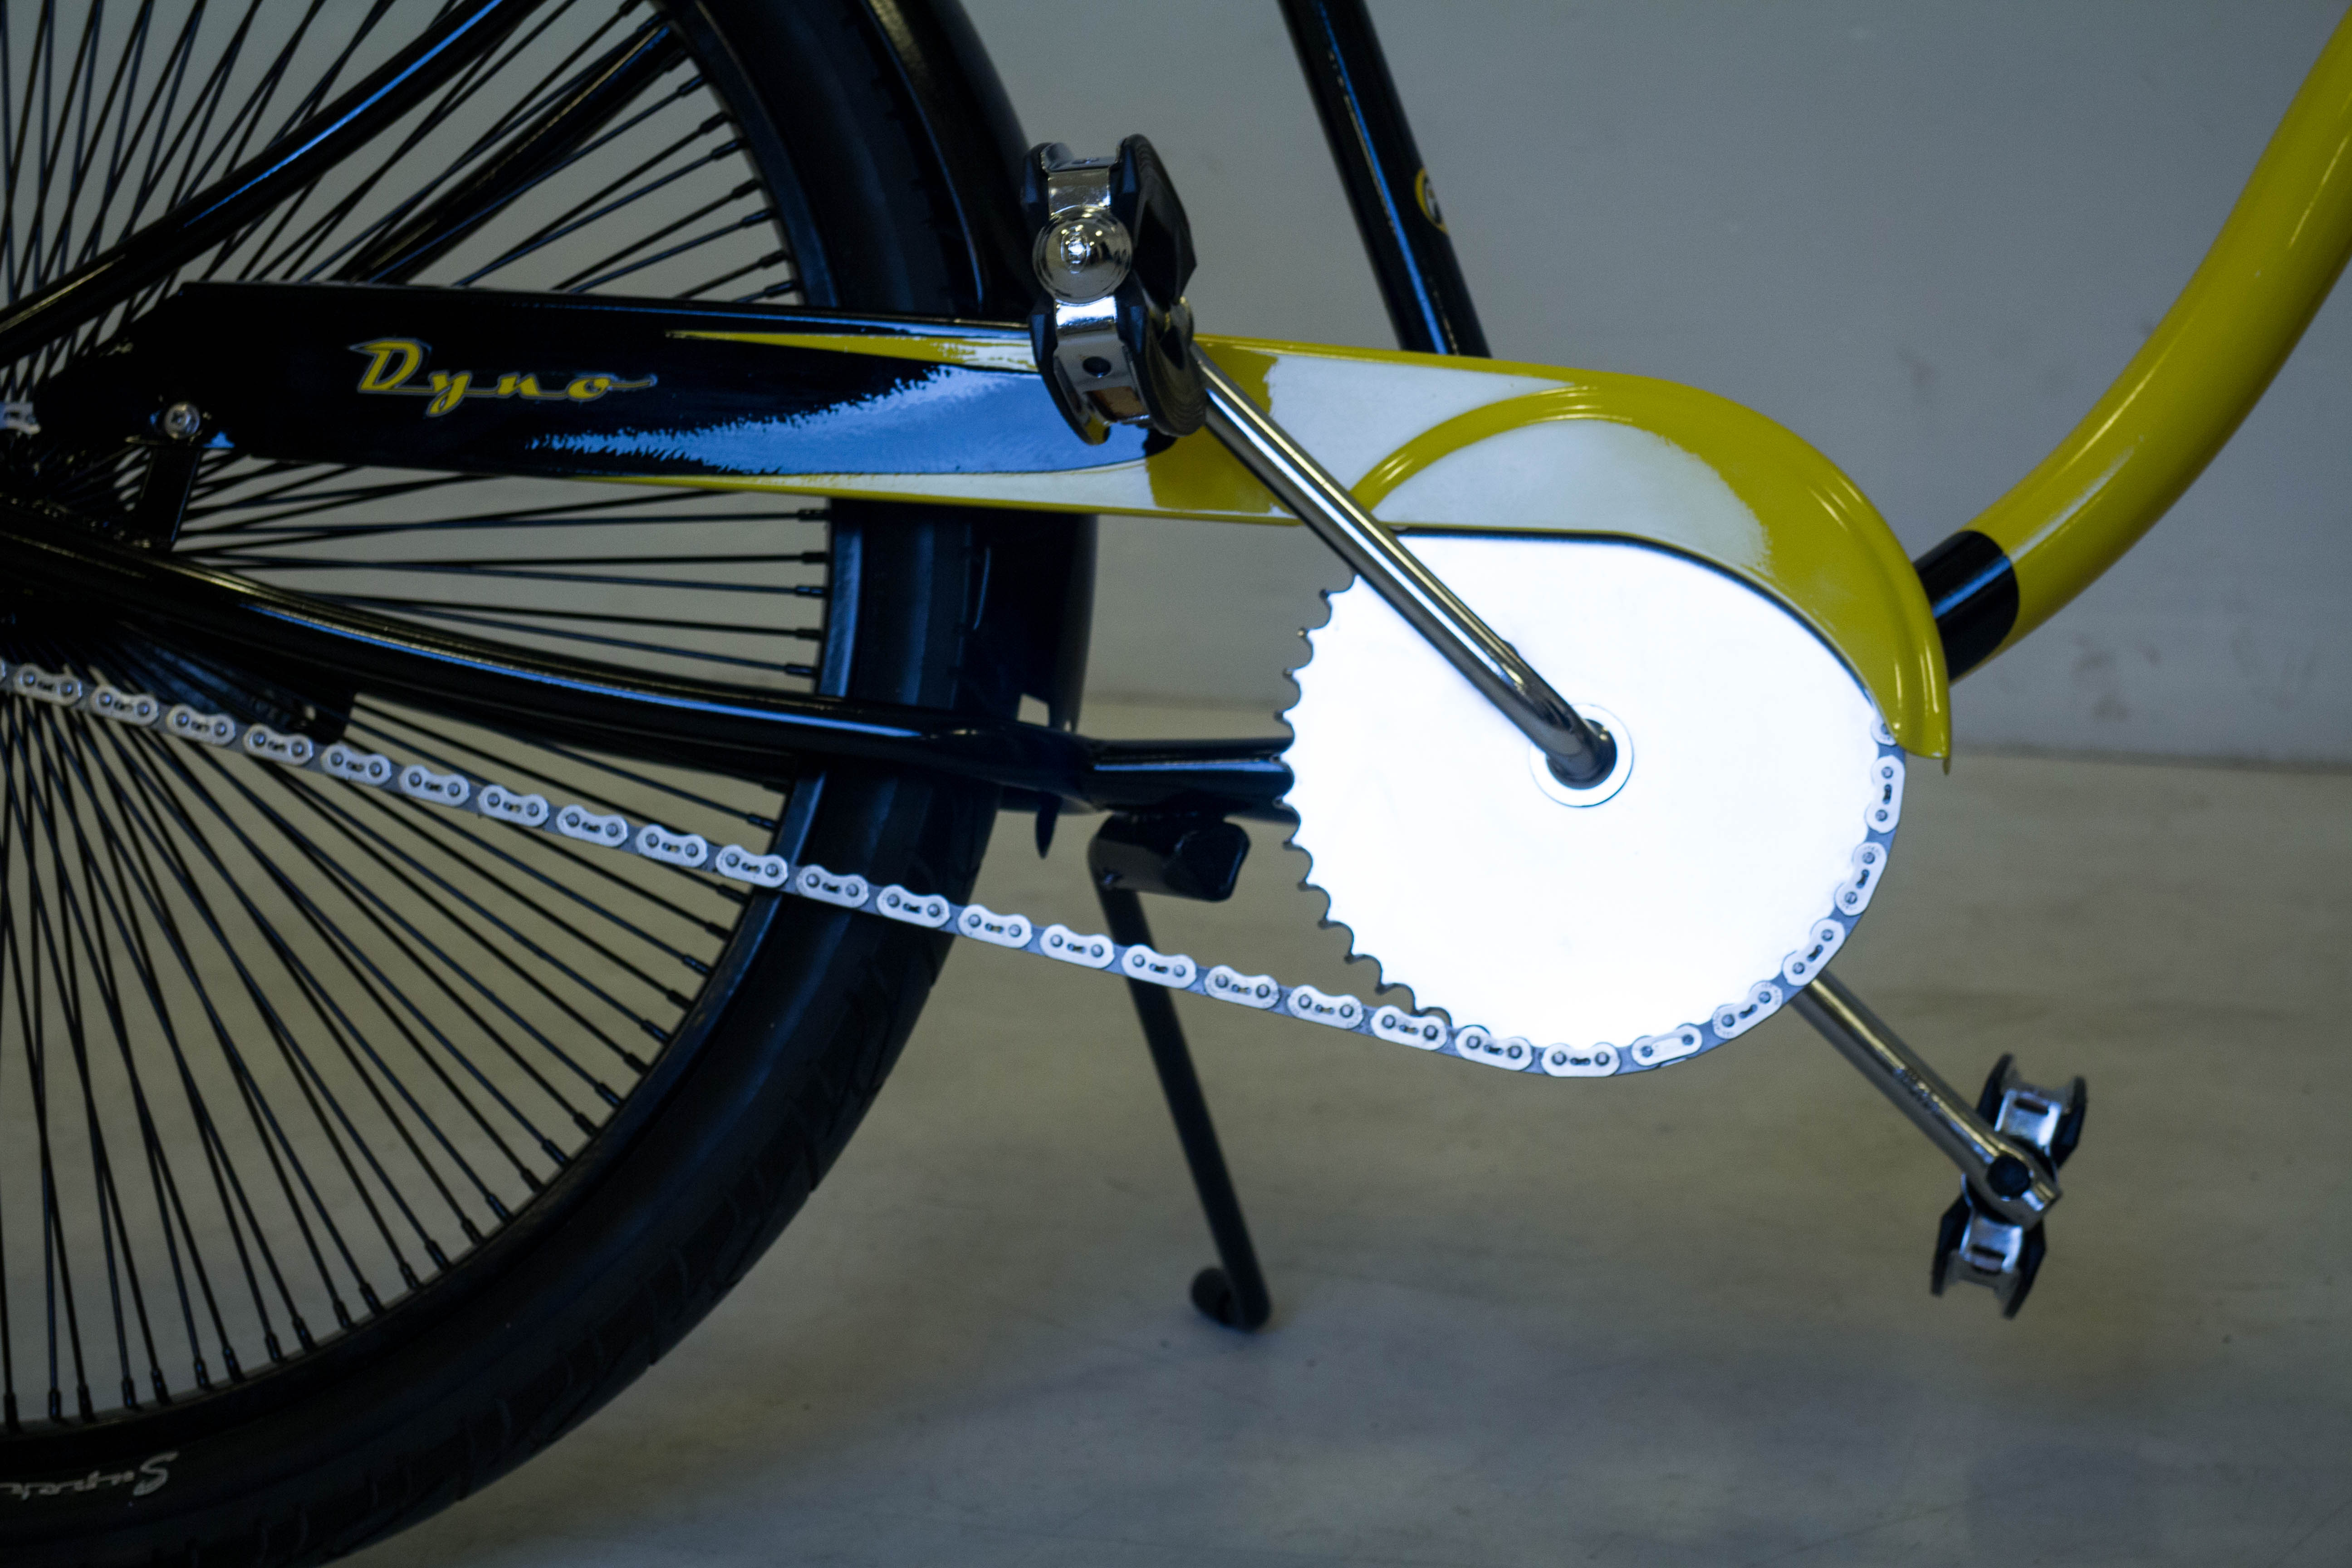
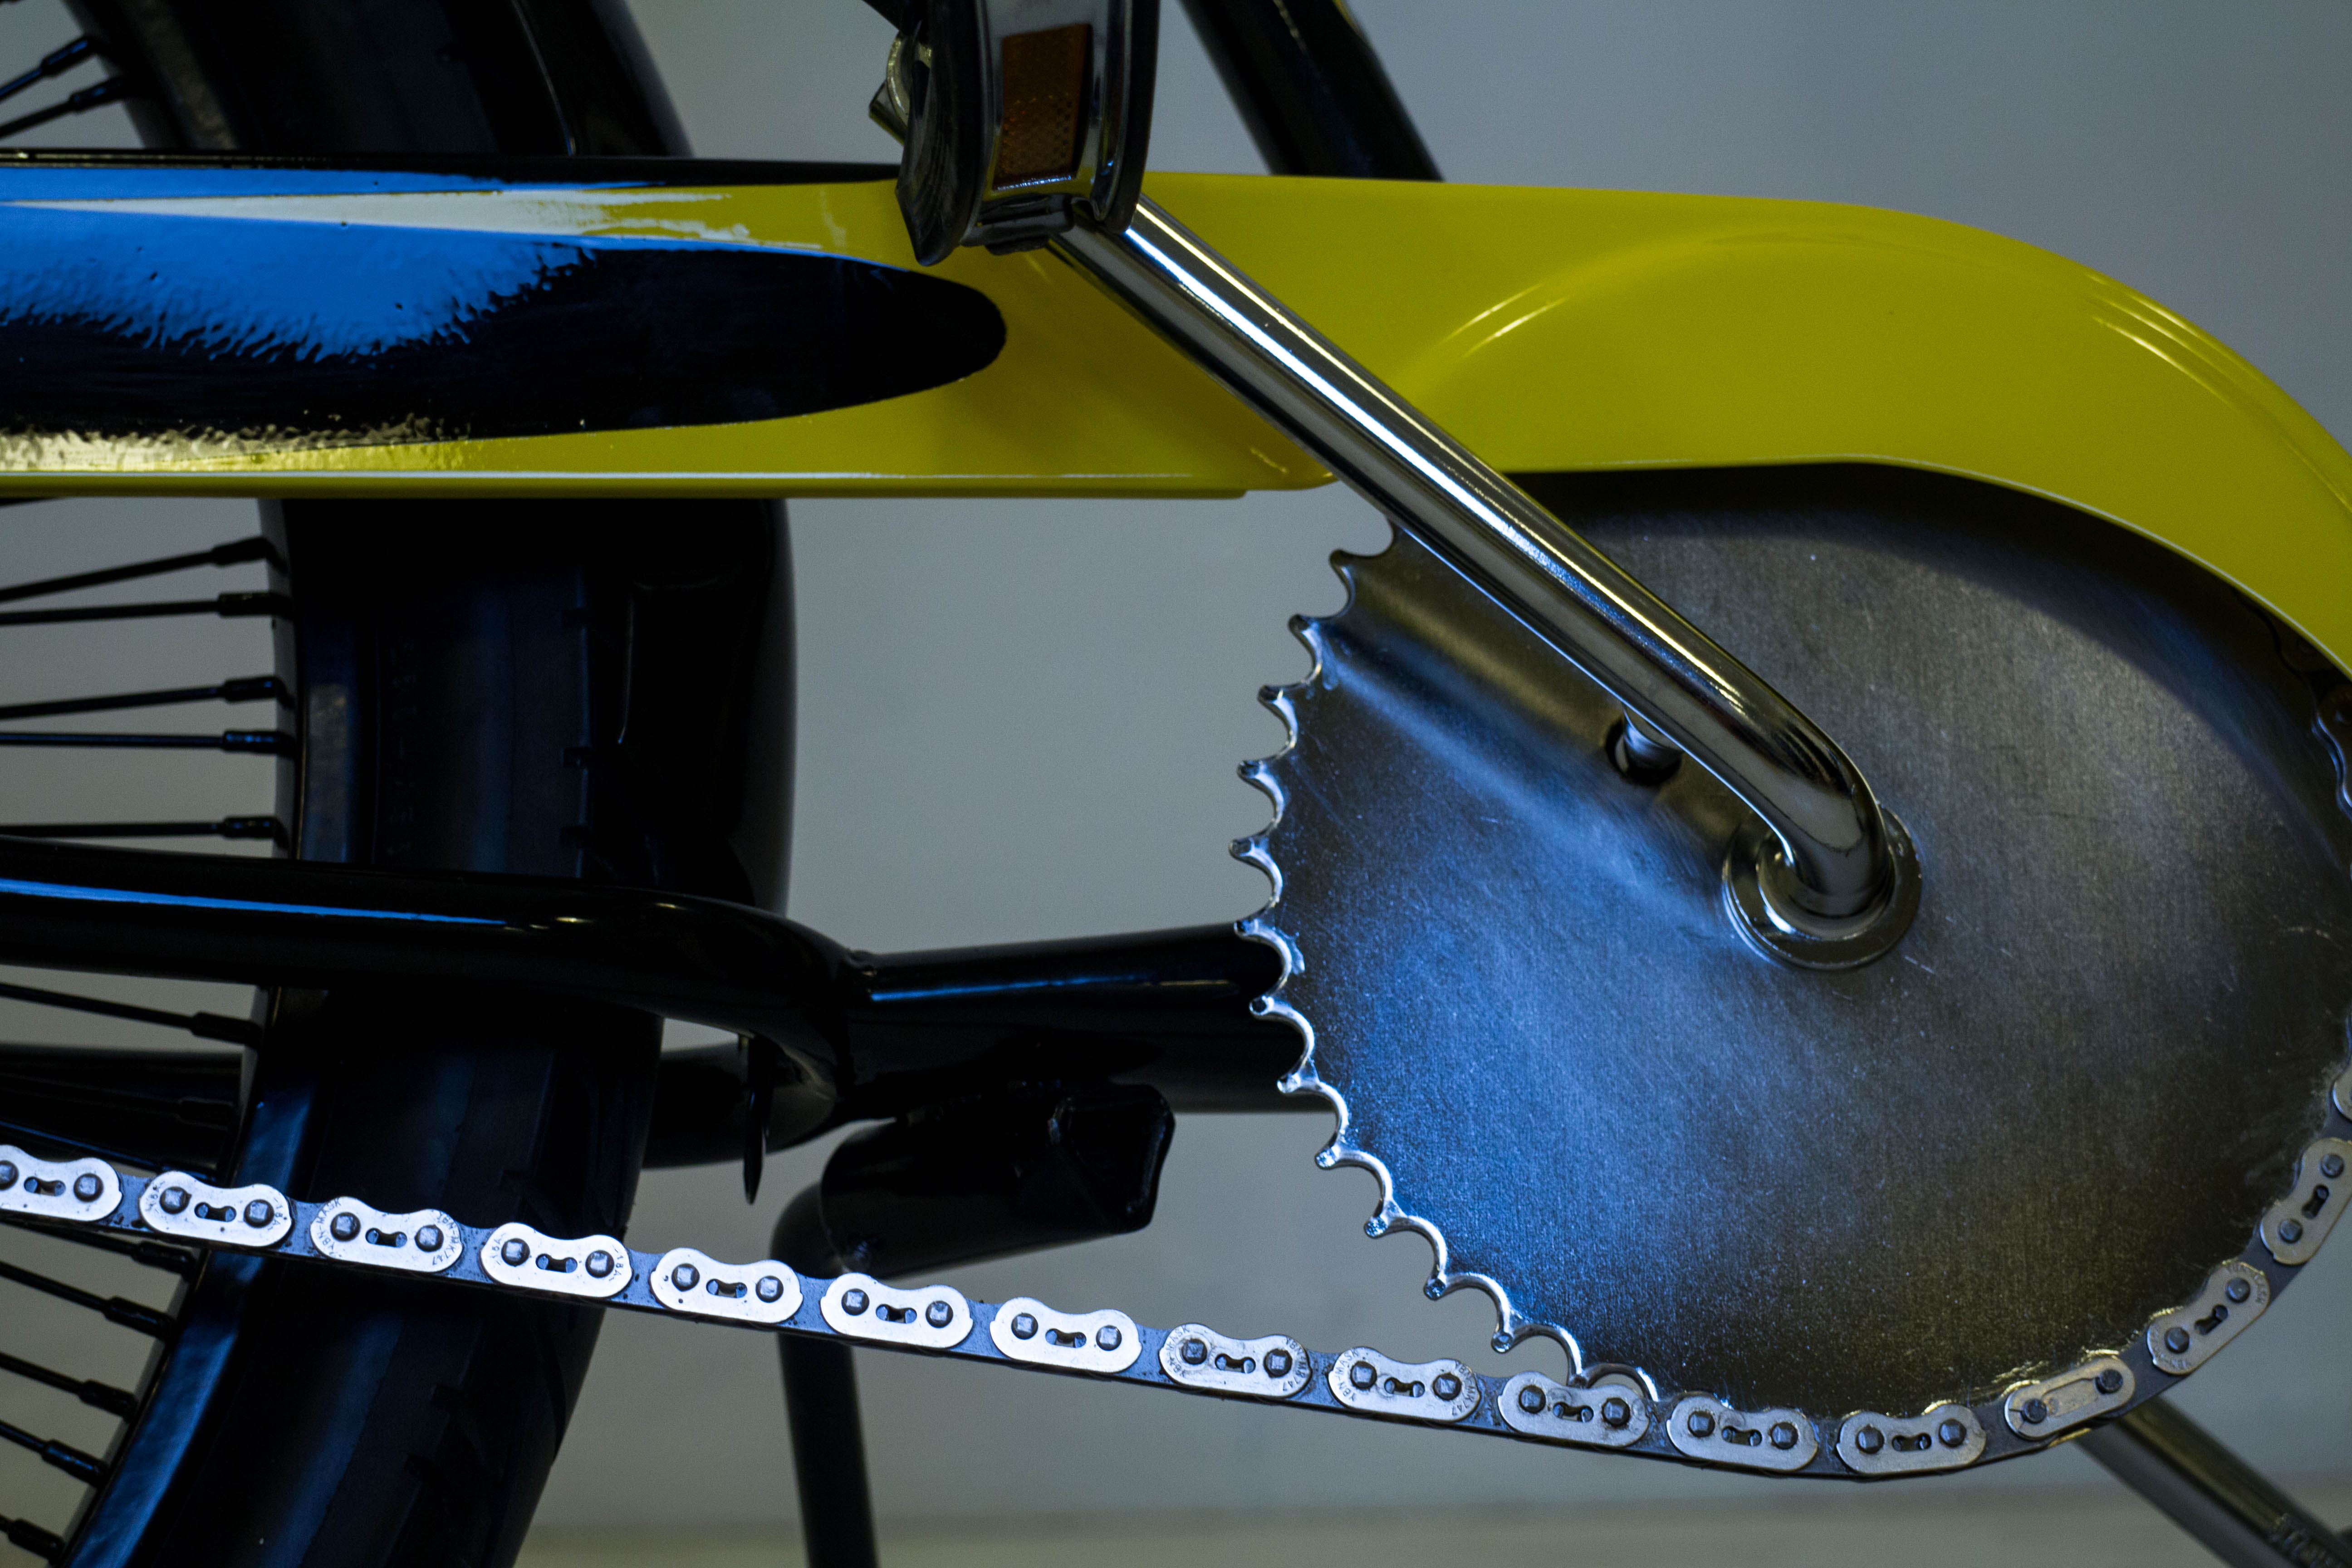
The project 346 pancake sprocket i have polished a little looks great on that bike! The high-polished nice new crank arms too. I think i might try to add more chrome parts to this bike than just those, to look more harmonious. May be couple of chromed nuts on the rear fender, to cover the holes it got, what do you think? Mooneyes had a fender with two mounts on the frame, tiki taboo had an extra fender bracket. I am thinking not to use it to get closer to original look, especially considering the fact that the fender sits there pretty stiff.
https://armarium.org/u/2018/03/17/492fc629285a2c73afa761b8c9c2e165.jpg
However by that point it was late and i got quite tired, so i have decided to call it a day. The problem with the head set was that the crown race on the fork got a bit worn out - not enough to feel it before tightening, but enough to make it a little loose. On the second day i have tried to just replace few bits of the head set, but on the third day i have replaced the cups, bearings and crown race with new ones, that i got from one incomplete new headset i had lying around in the garage. But lets come back to the chronological order. When i got the kickstand from Electra i have compared the parts of my old one and the parts of the new one, and since i have already powder-coated the old one, i have decided to recover it rather then use a replacement. I have found out that the little rod that holds the spring inside is almost identical diameter to m4 bolt. So i have made a new bit out of the old rusty bolt i had, you may see it on the bottom of the picture.
https://armarium.org/u/2018/03/21/c2c6516e242a846c068352aa33d6a1d4.jpg
Then the little piece that holds the assembly in the frame and that is really hard to recover once you lost it. I have made a similar piece out of what i had left from that bolt, grinding the head of the bolt by a little grinder. Perfect match! All that happened on friday, when i have picked up the kickstand from Electra dealer. But then i realized i forgot to ask the guy called Sebastian who works there to land me a kickstand replacement tool! I know there are few ways to extract it with what you have, but i really did not want to scratch it too much, especially considering the fact i was not sure if it would fit well after powder coating, so the next time i have been working on that bike was this monday, when i got the extractor from Sebastian. I also asked him to order one from Electra for me, because those tools are not easy to get here in Europe.
https://armarium.org/u/2018/03/21/39b0b19068355c8492cdb69156d44630.jpg
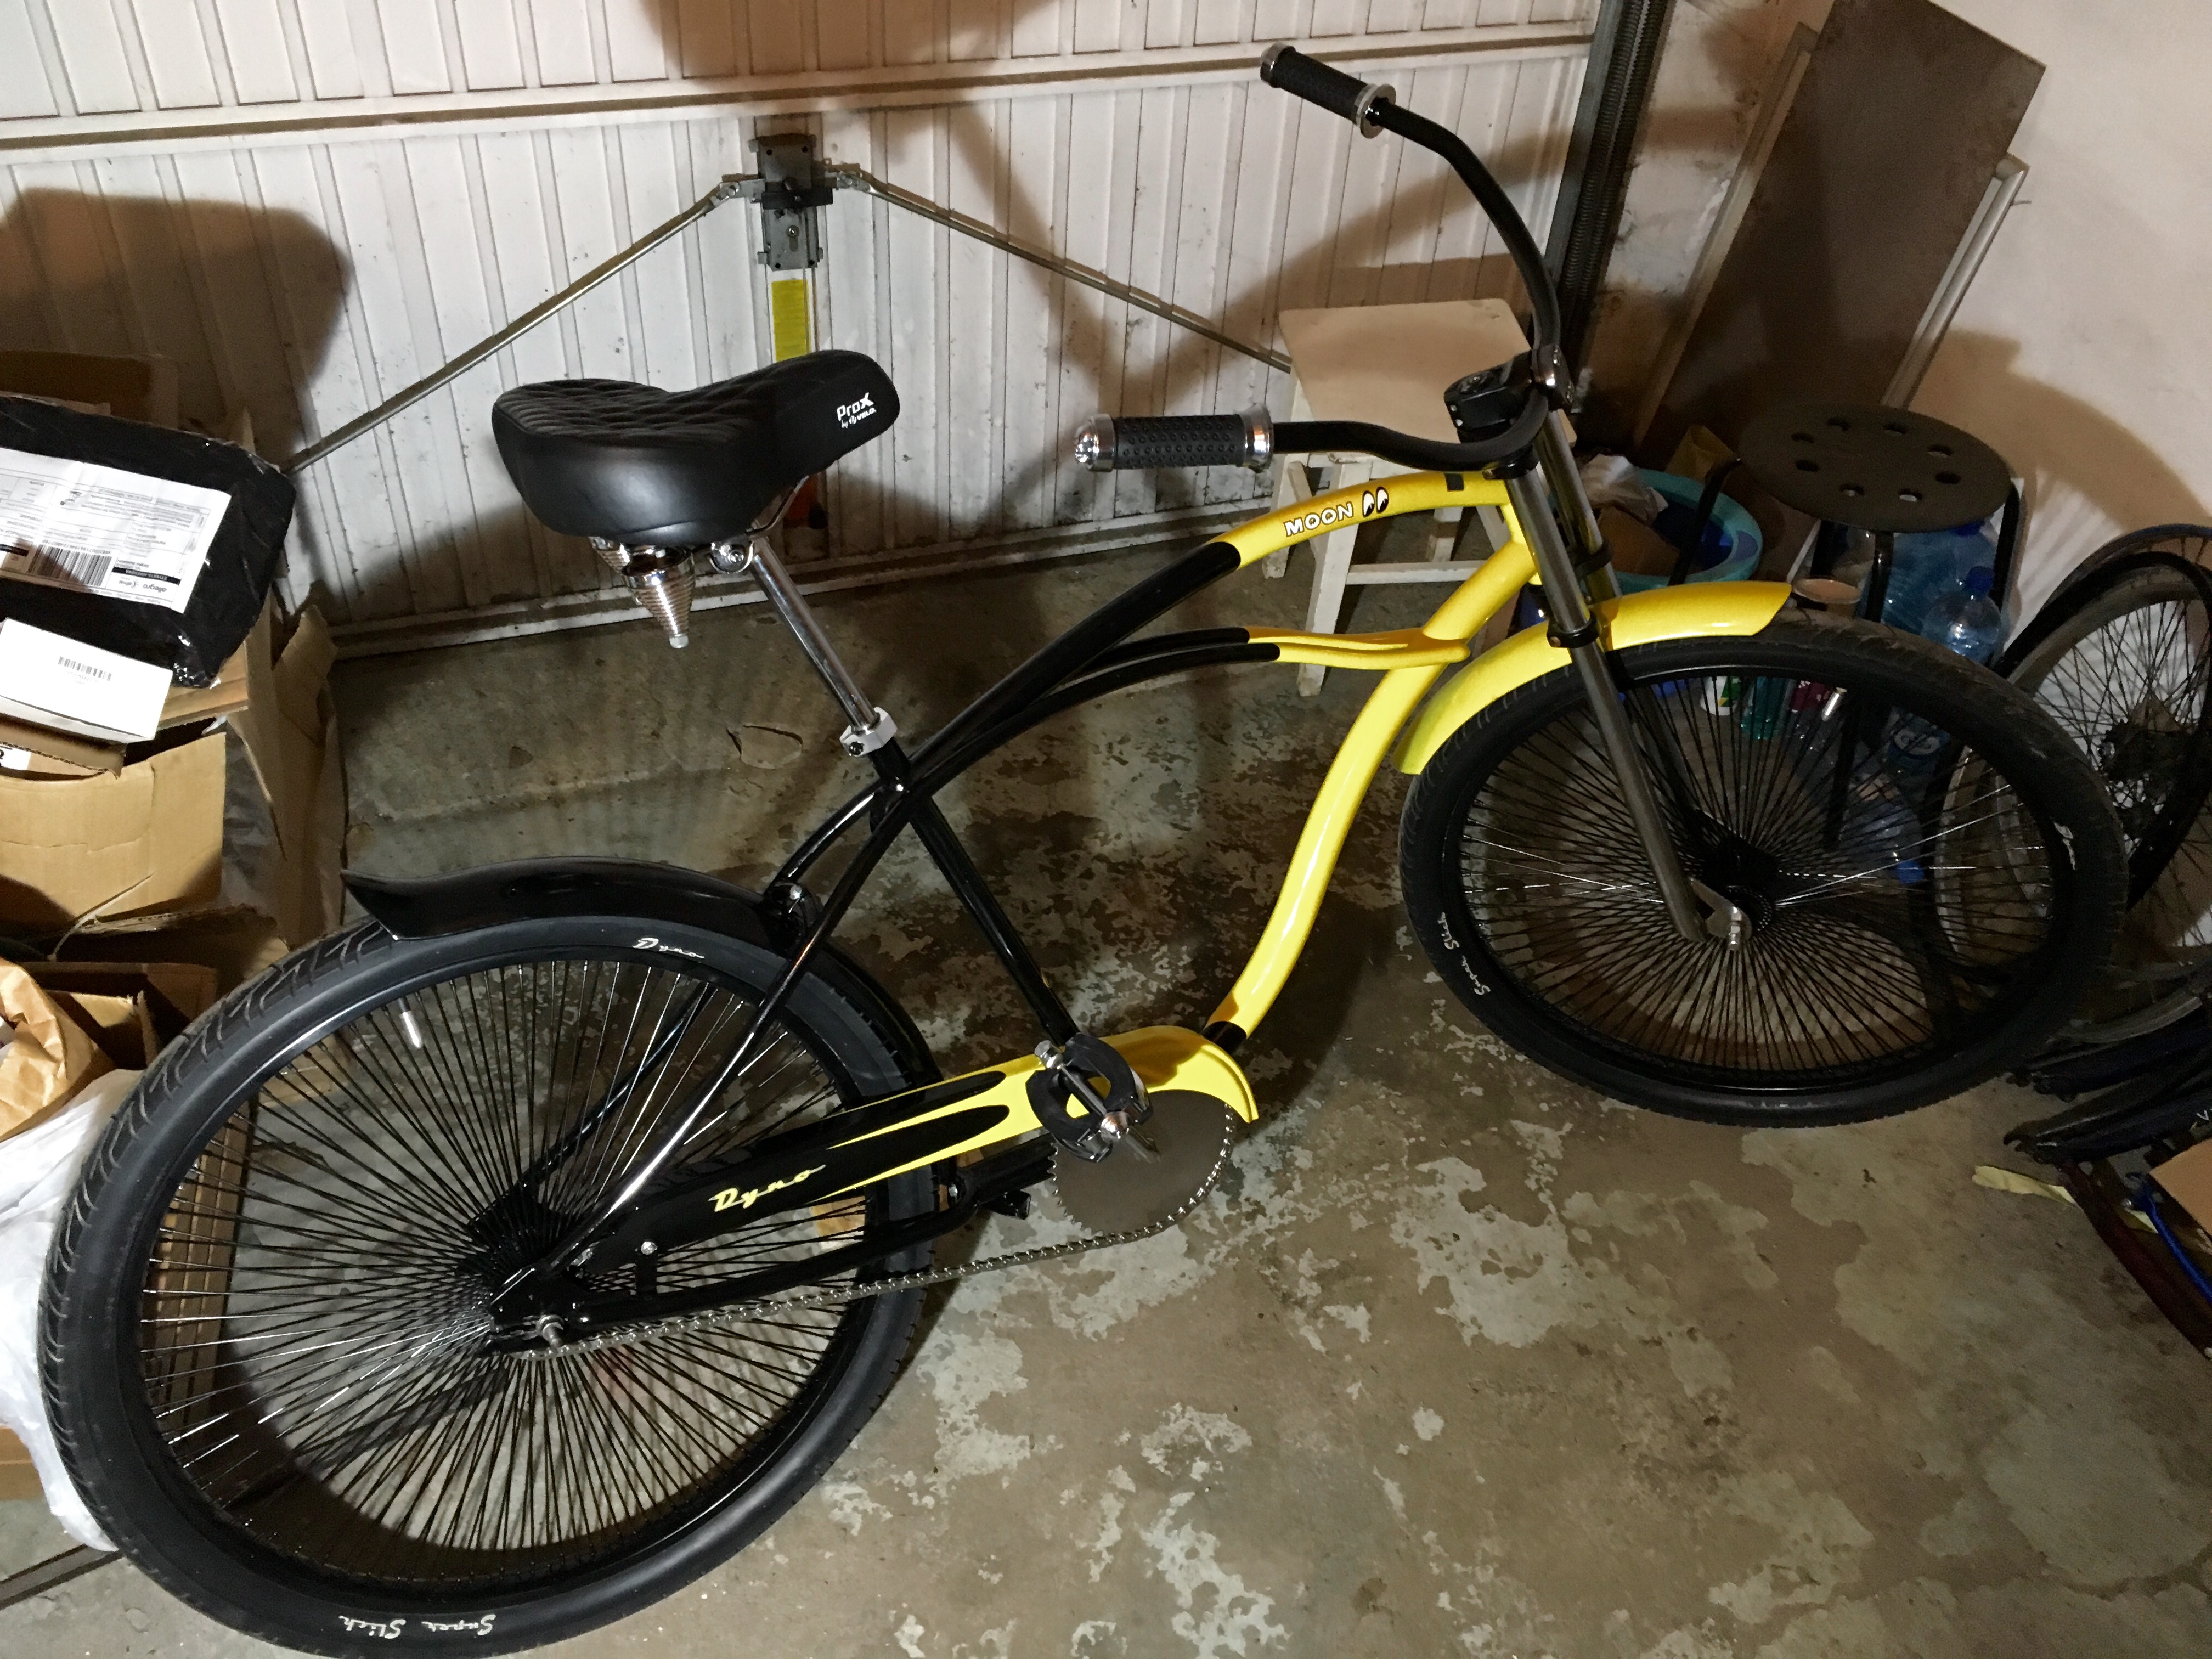
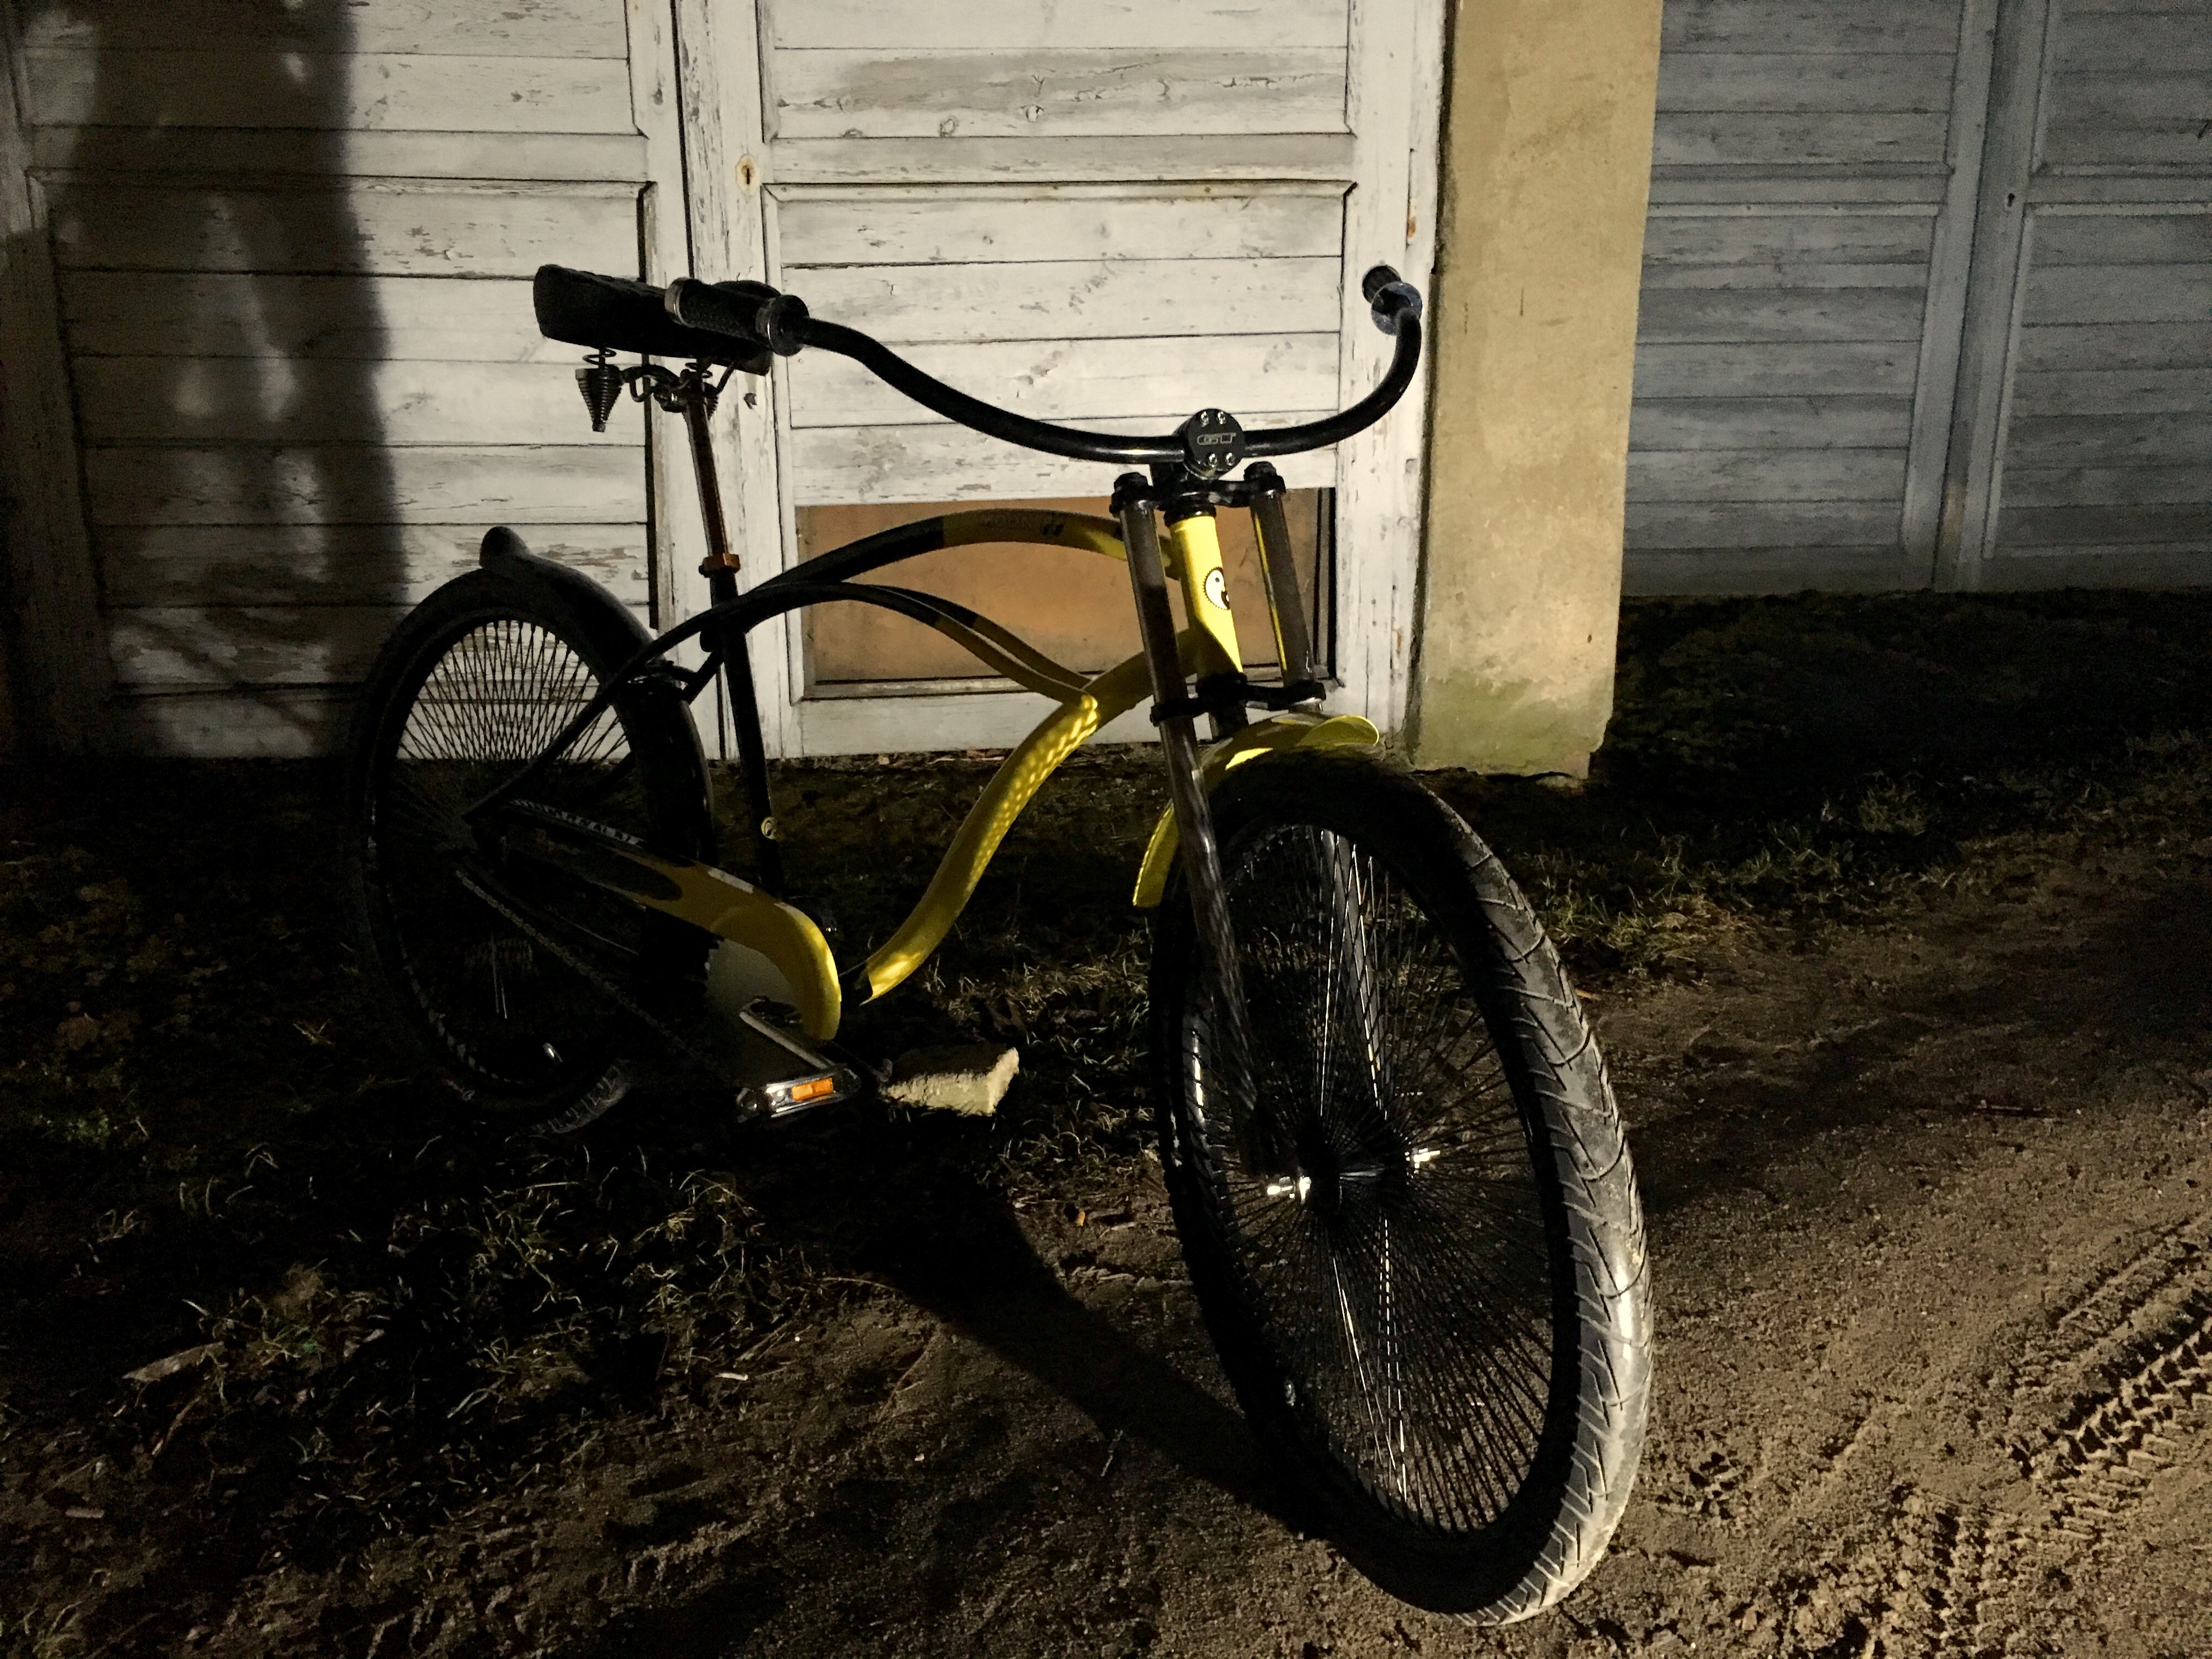
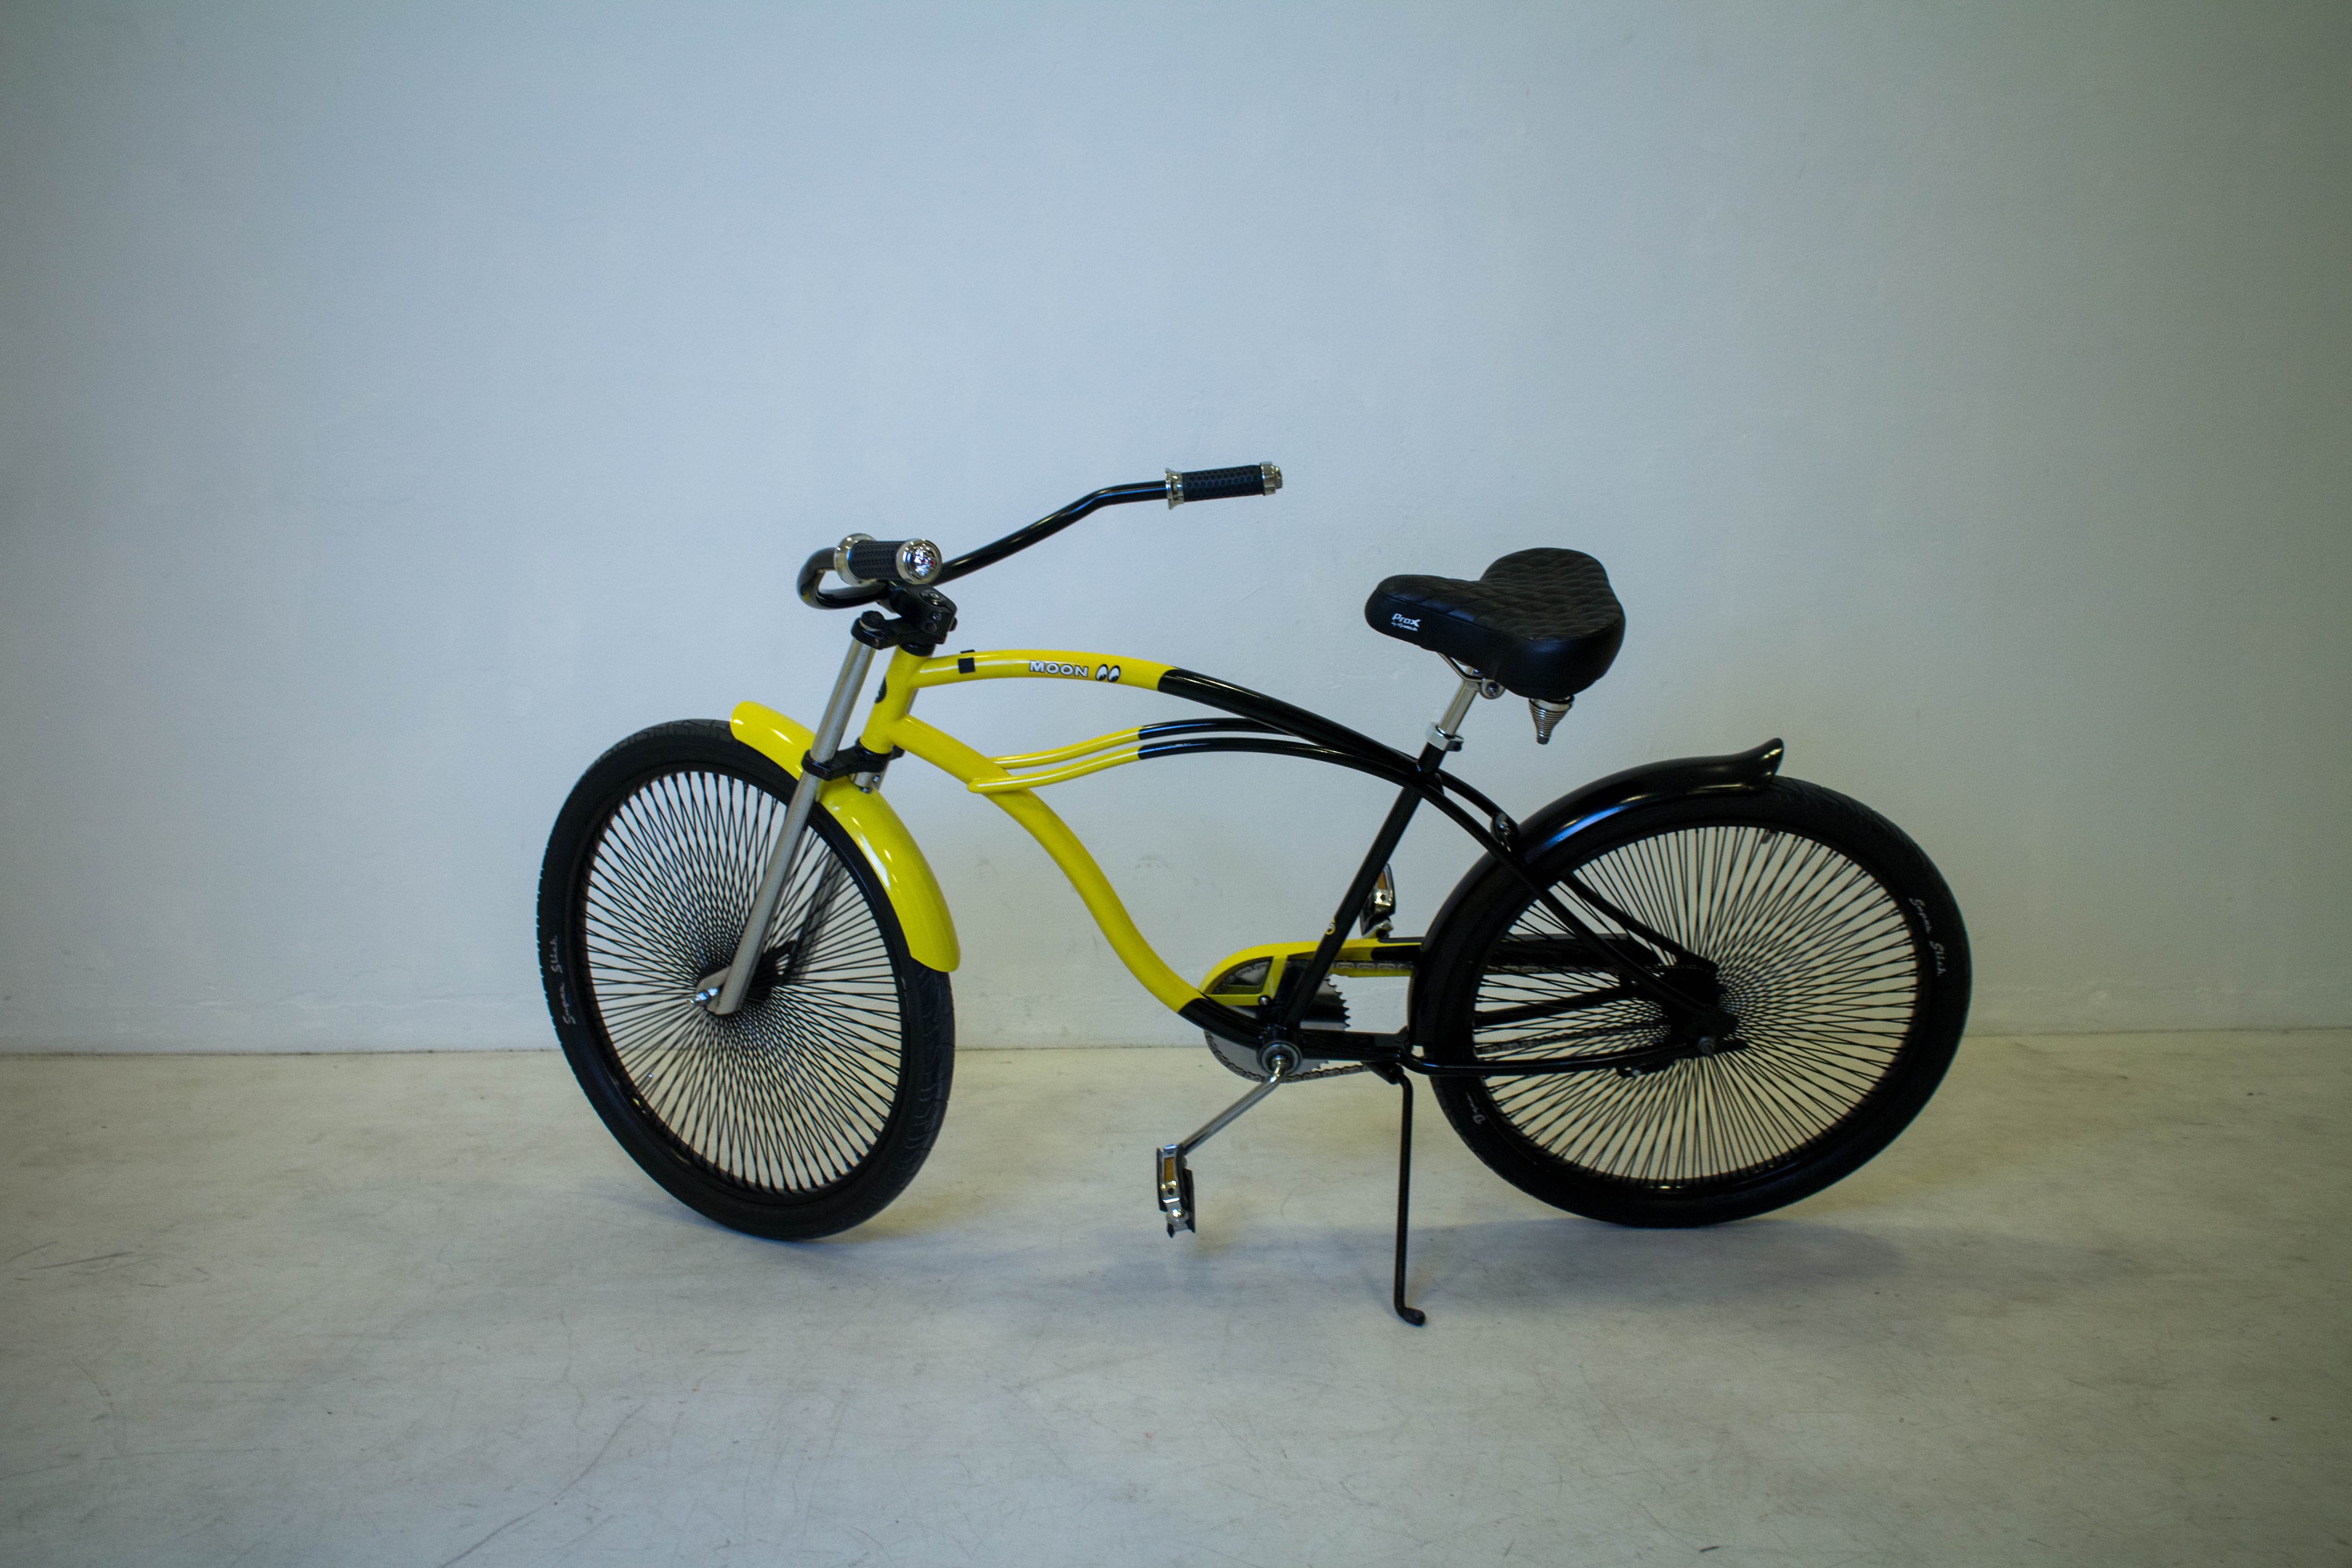
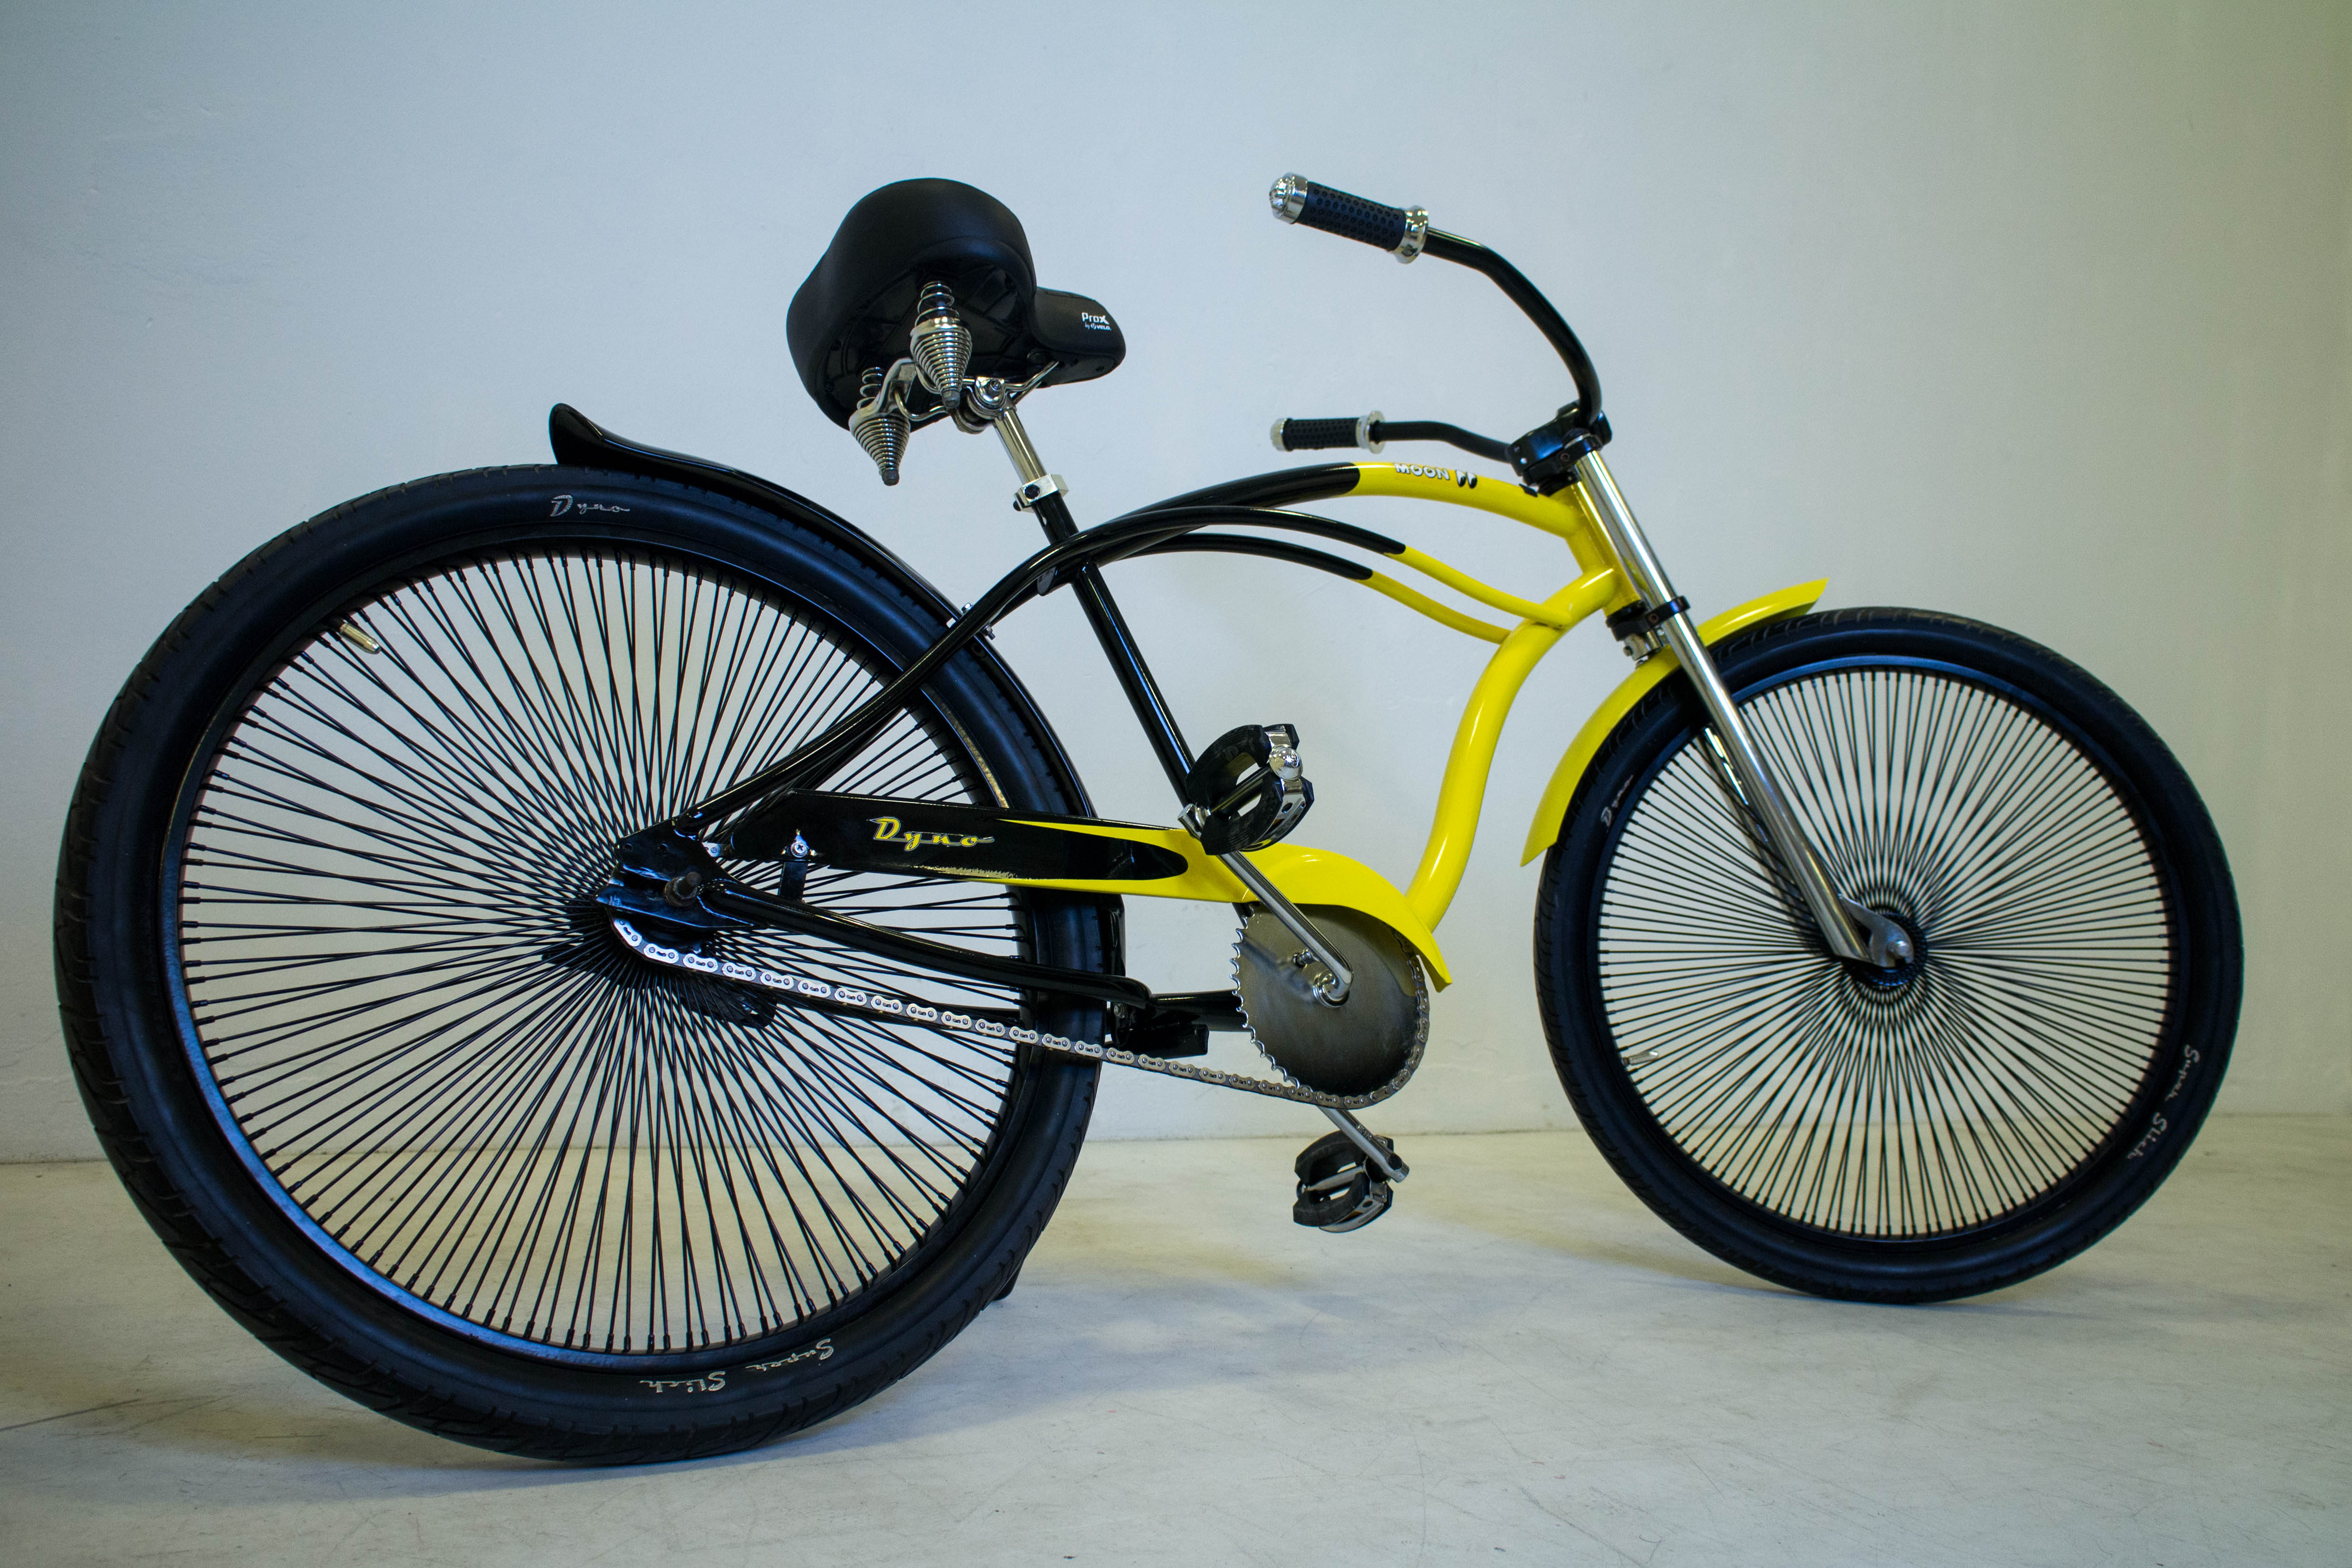
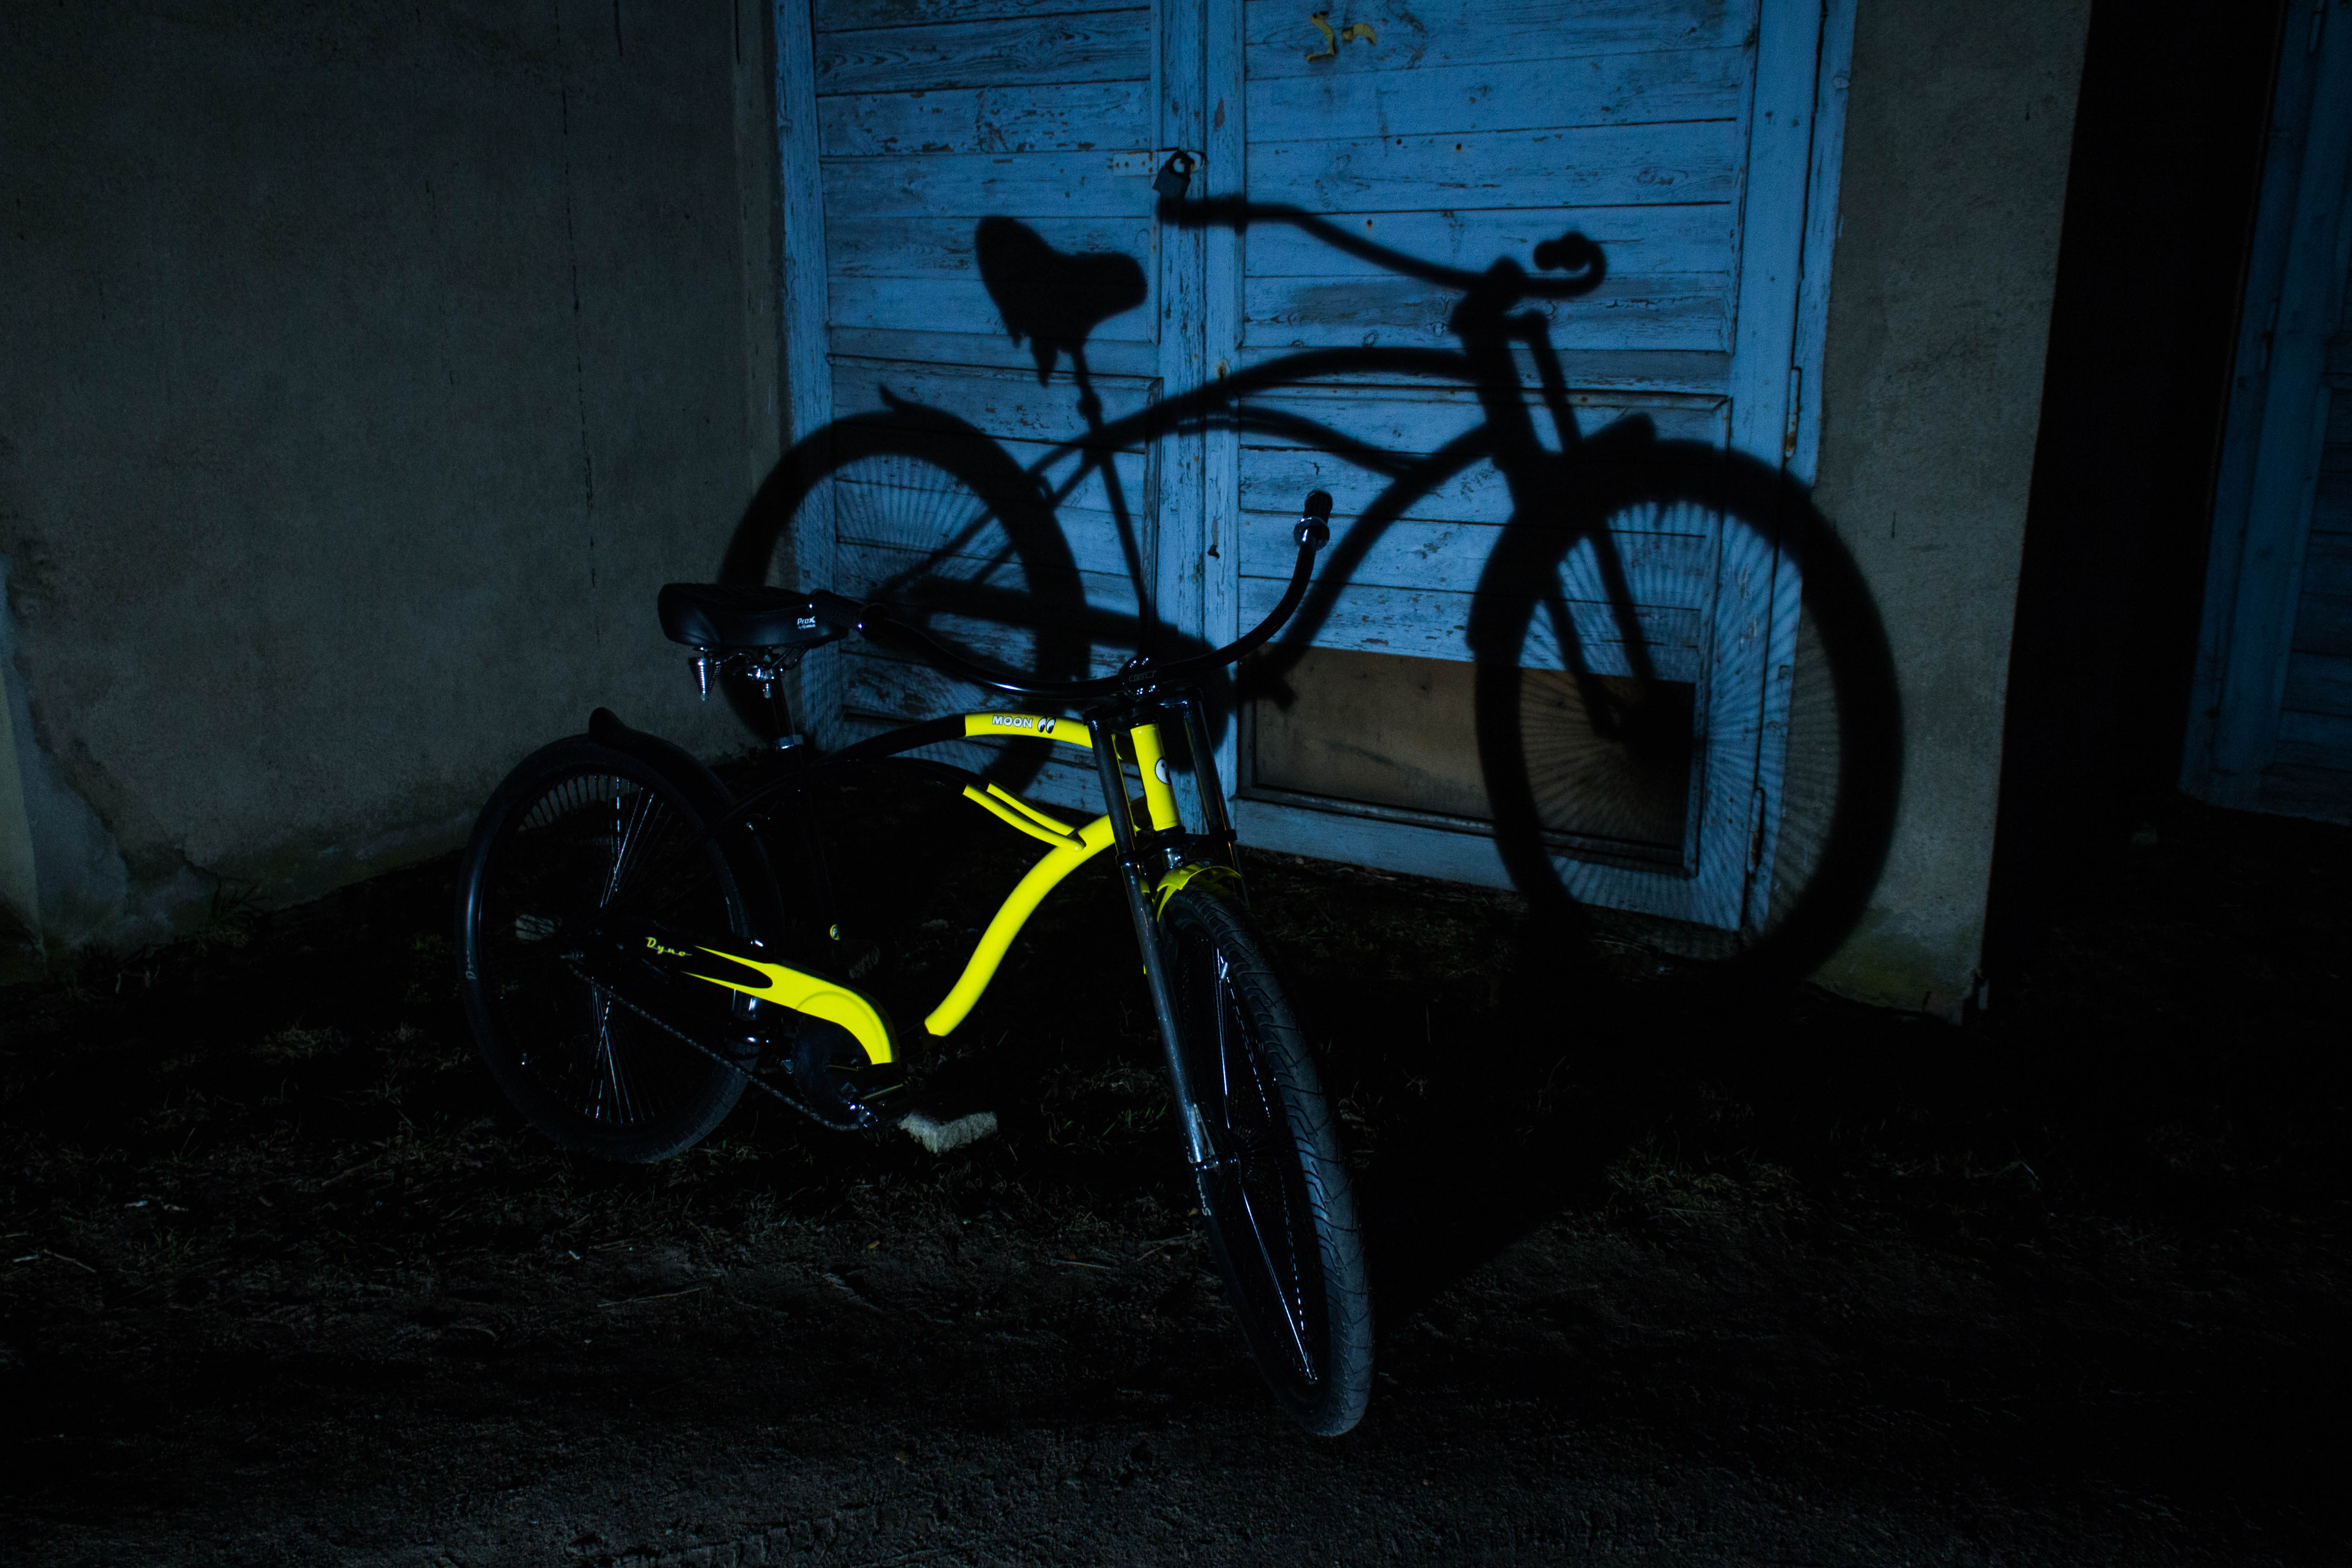
So, i managed to rebuild the kickstand i had with the bike (i doubt it is original, because the bike sits quite low on it, from the exact same length as one i got i guess it is also replacement from Electra) and now it could stay by its own! I also put the original handlebars i had with this bike. Kruez, as the owner of mooneyes bike, could you please tell me, is the size of moon bars on it same as one tiki taboo had? On the pictures the tiki one appears a bit shorter. I was doubting if i should change the bars, but now when i have them on the bike i kind of like how they look. The black color fits well with black wheels. I guess i change the name of the build to "dark side of the mooneyes" because of how all those black elements look together.
https://armarium.org/u/2018/03/21/d17797776618ea0ec8a977ff218cd0c1.jpg
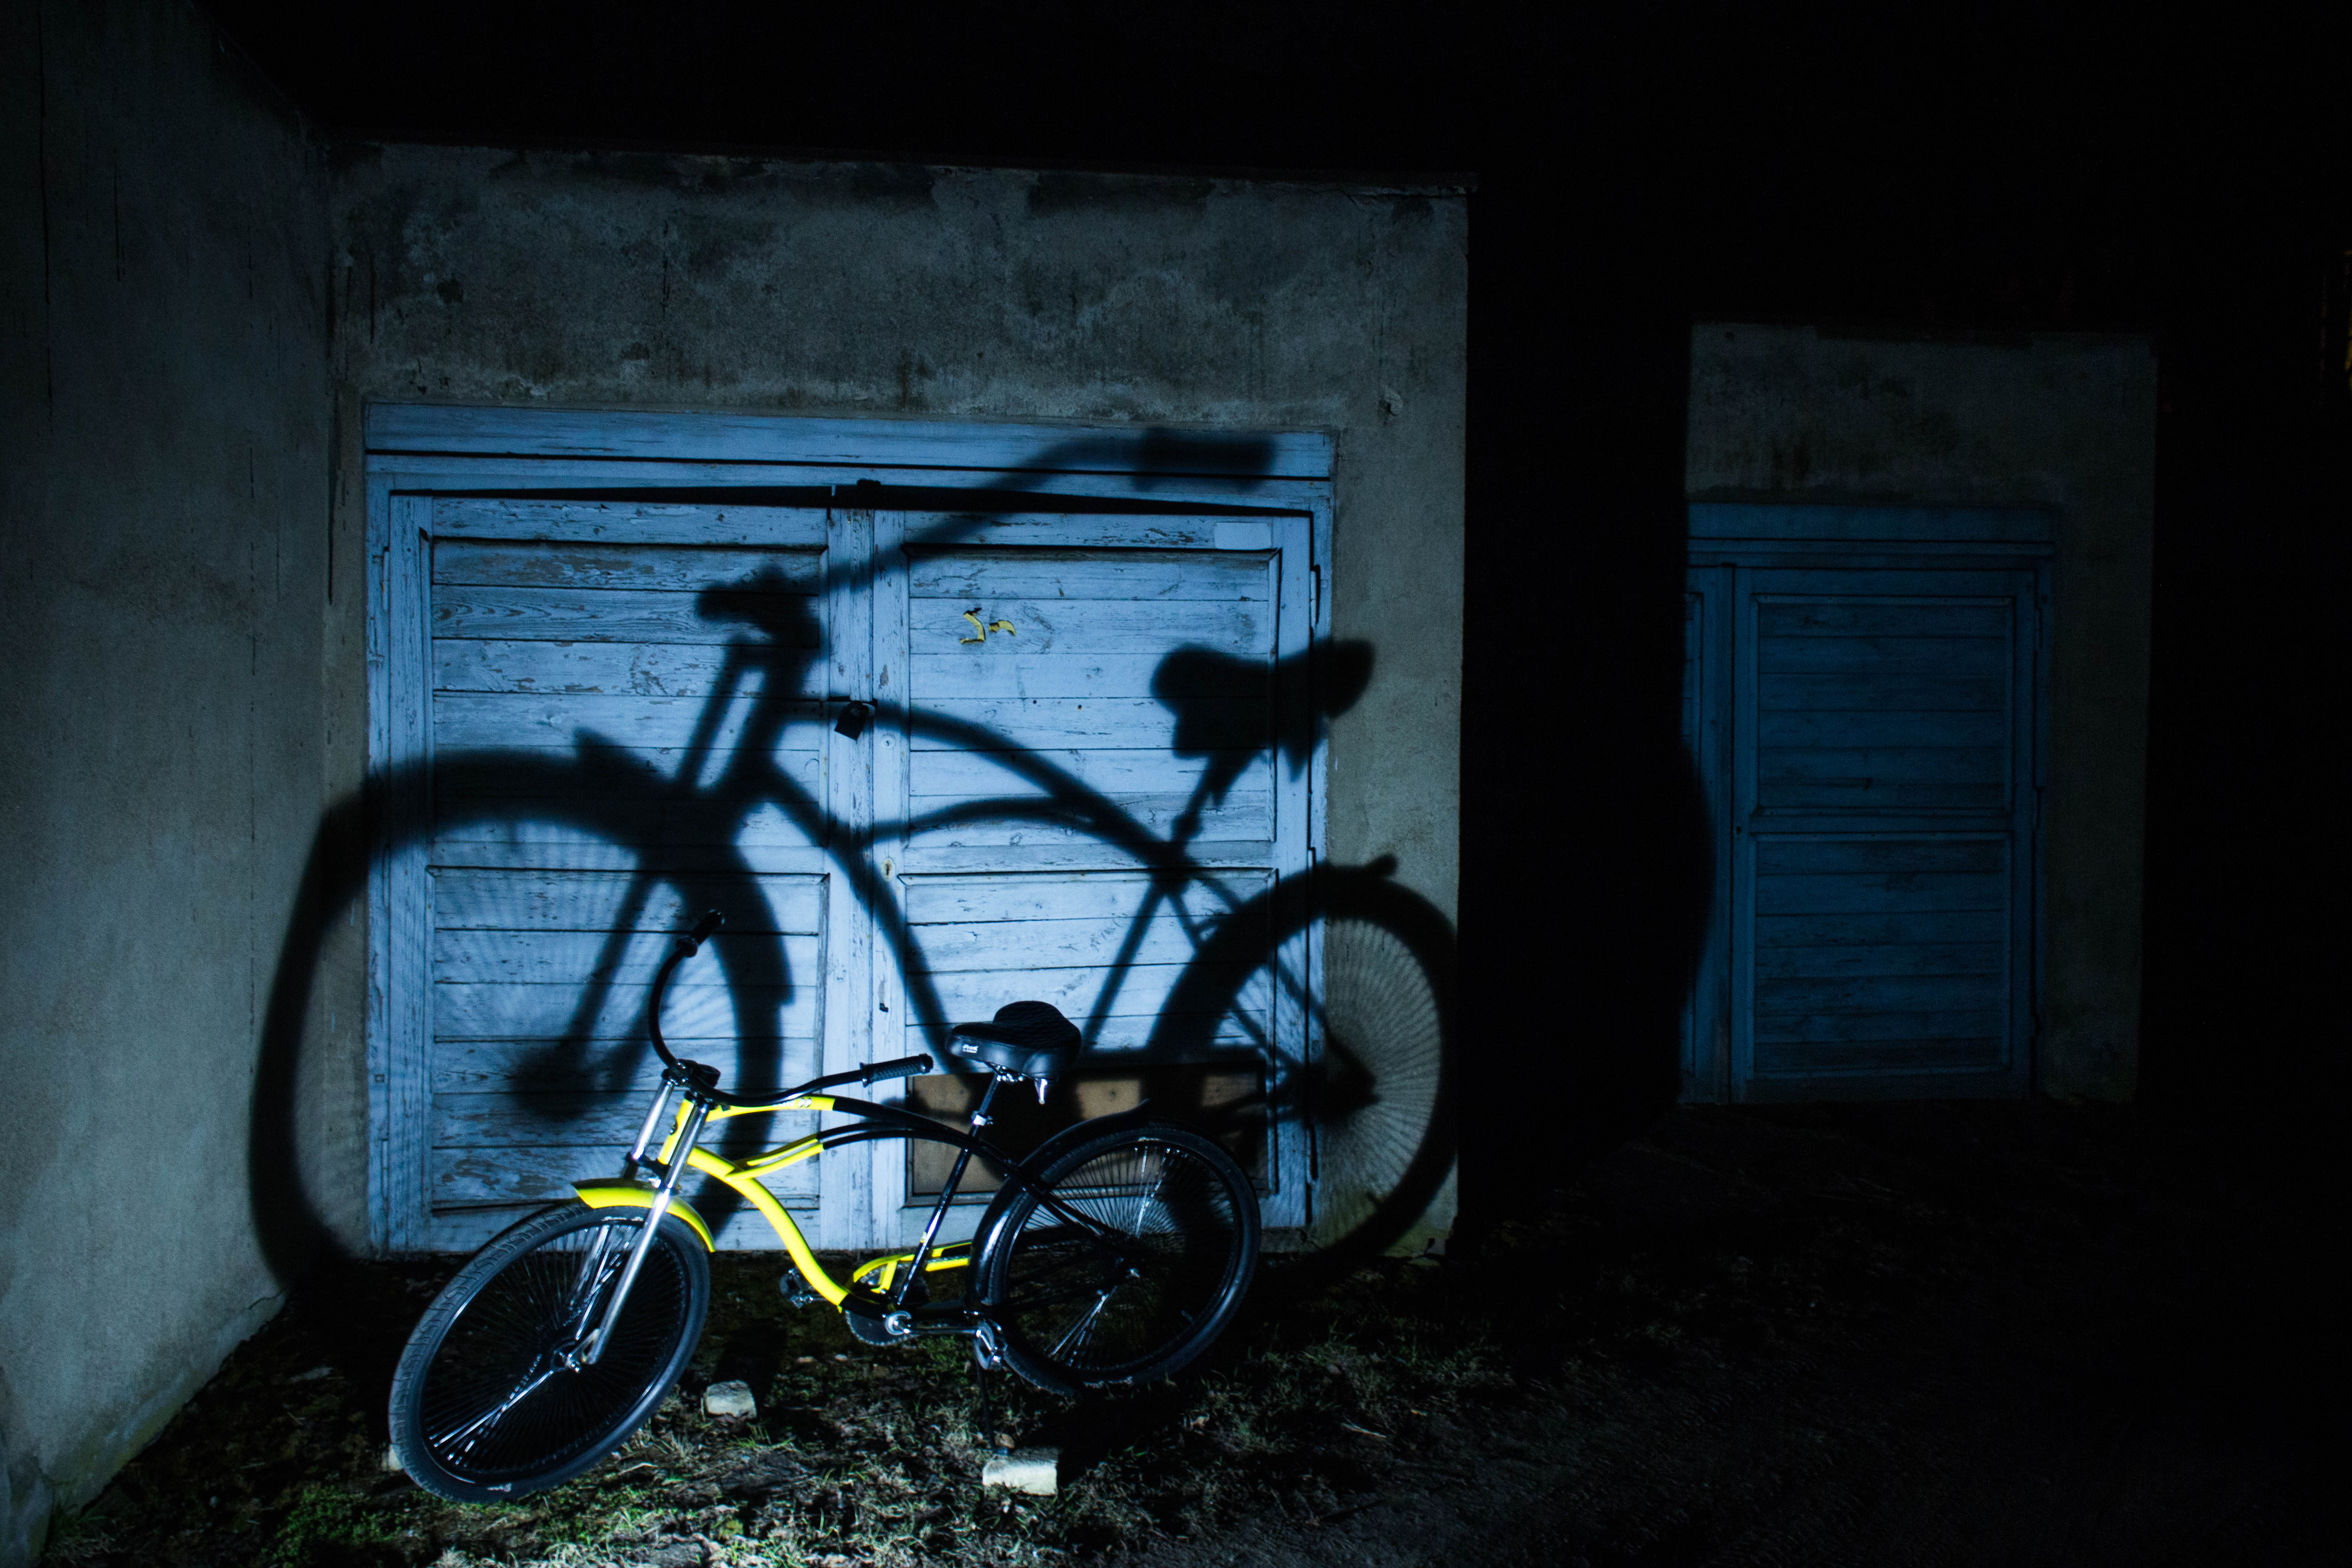
Tried to put the block pedals i've ordered for that bike, but surprisingly found out they are 9/16 not 1/2! Strange so, i had enough of them already in that size, probably i was not careful enough when ordering or the seller shipped the wrong ones. However now i have ordered another pair and i am waiting for them to arrive shortly. They are same as originals, apart they don't have "D" stamped on the side.
https://armarium.org/u/2018/03/21/b9741dbc1435bd51b7864b5228877d7c.jpg
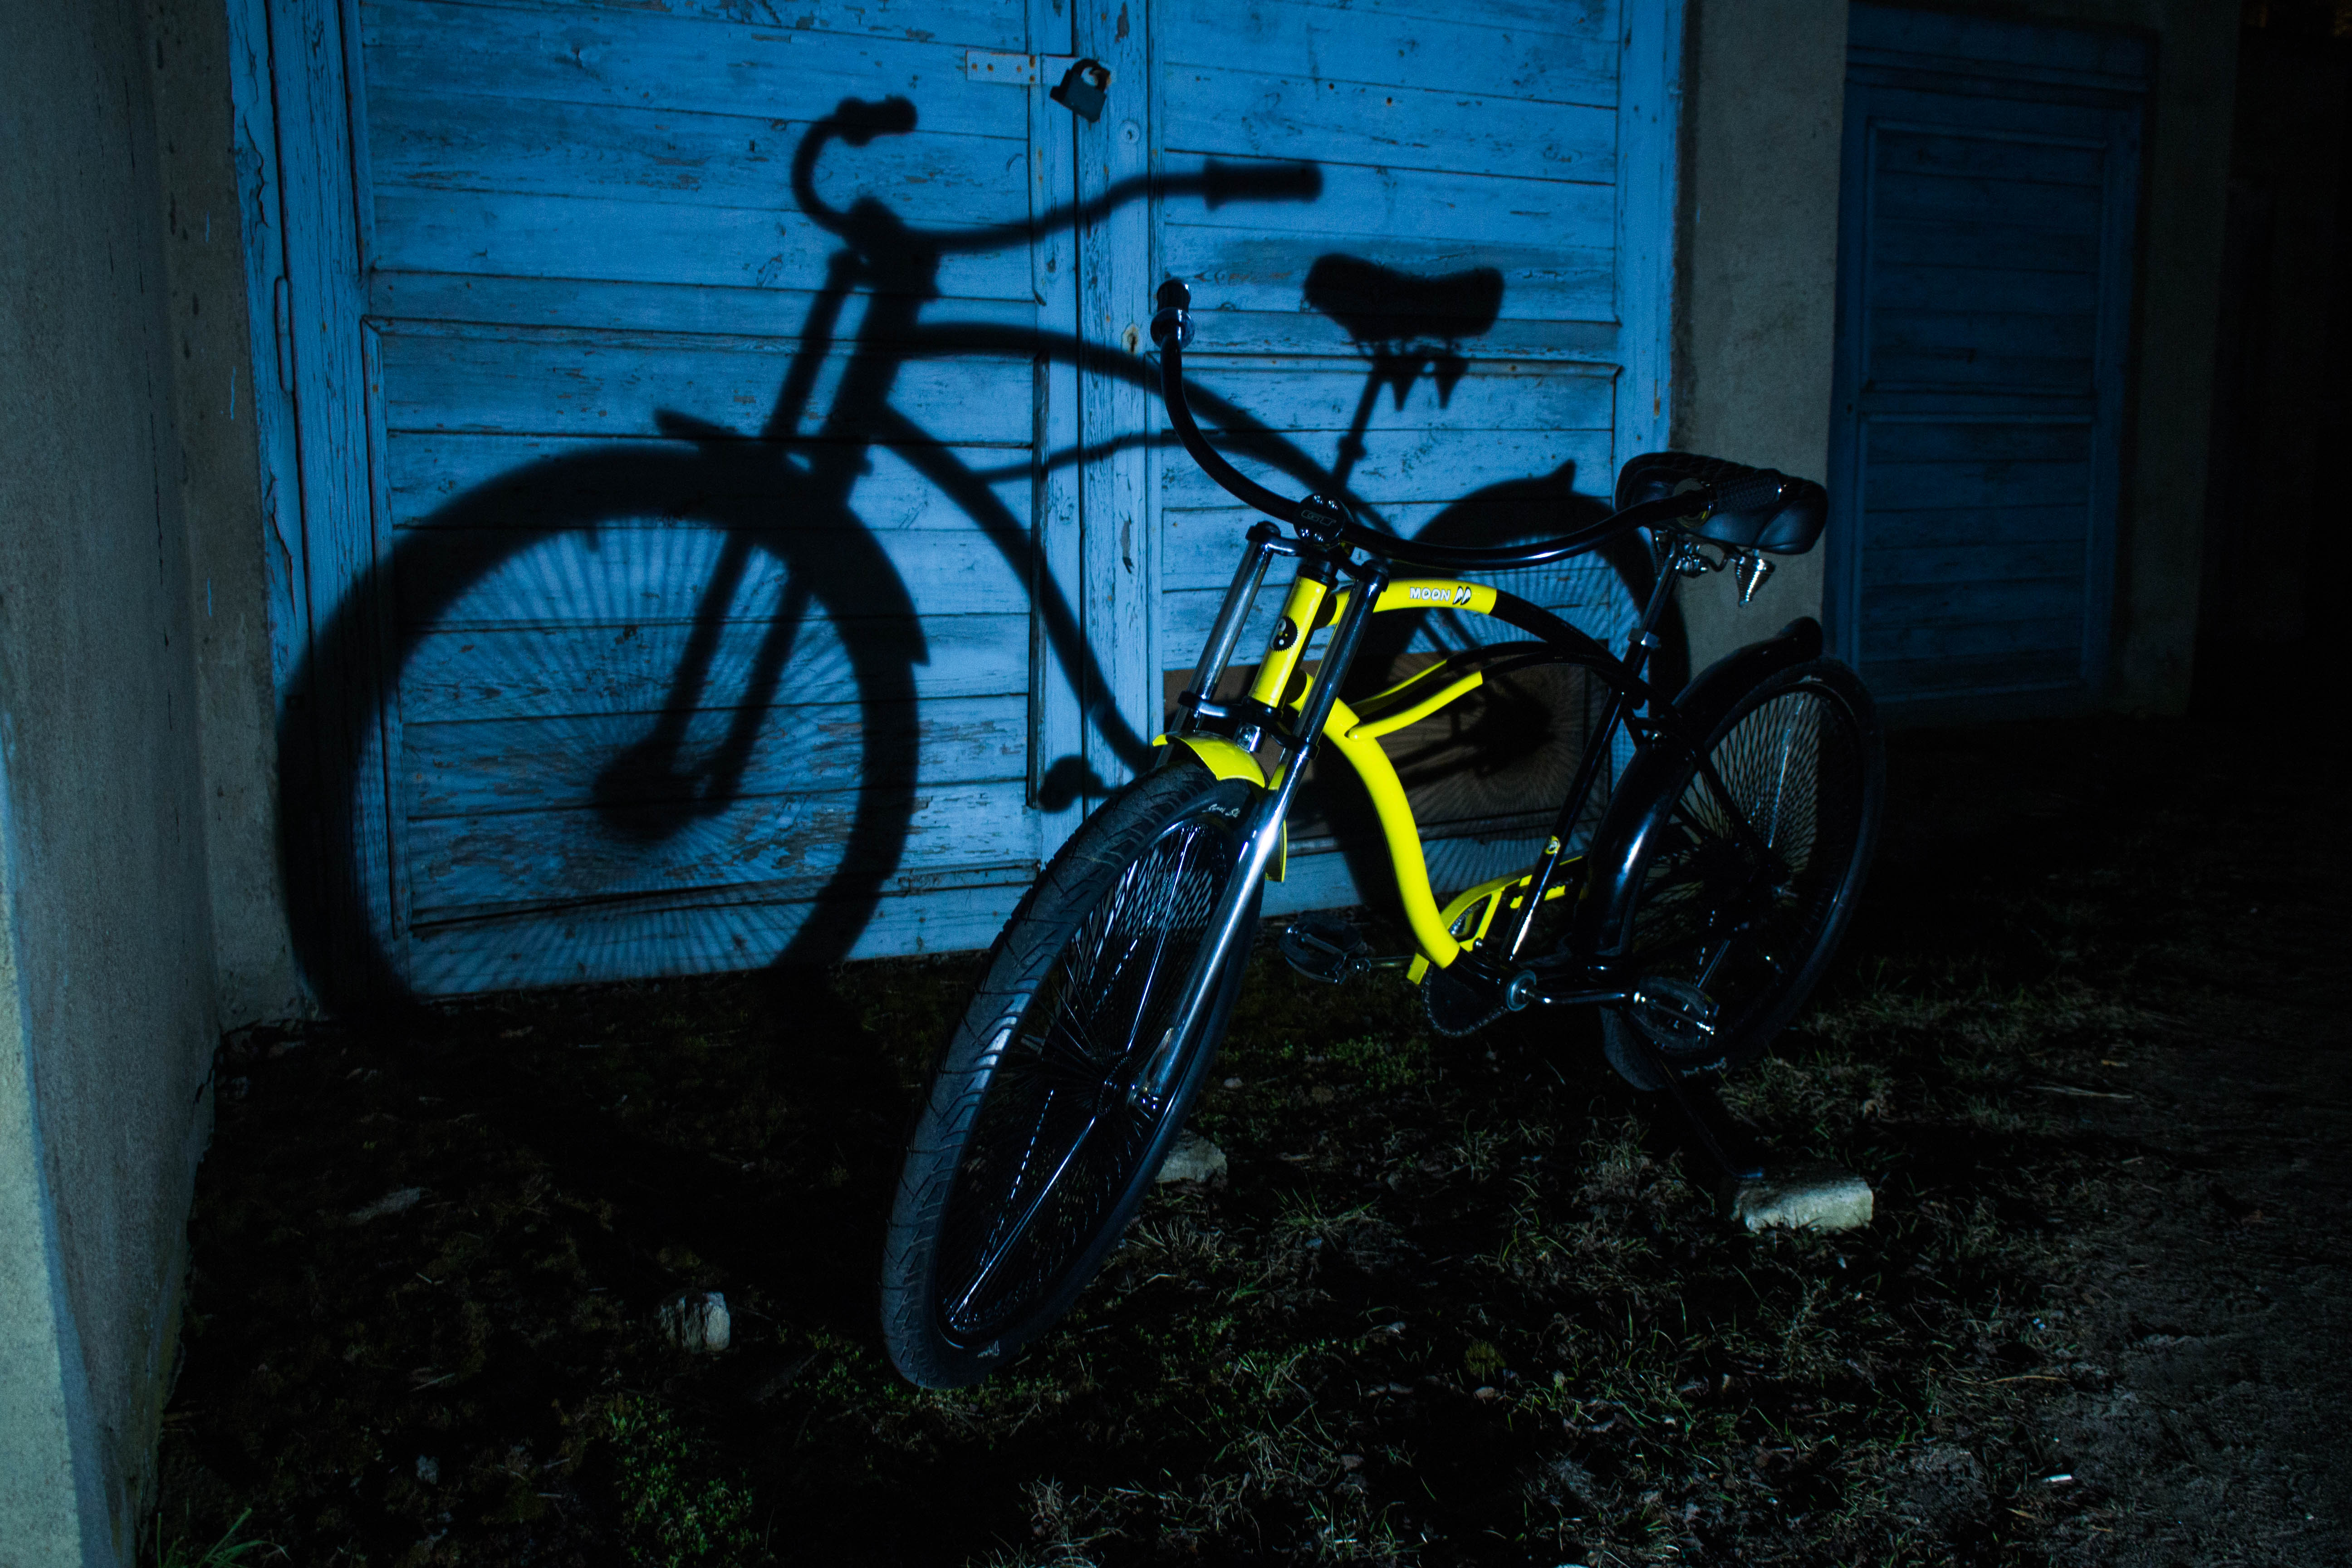
So while i wait i have put the used black platform pedals on it. I have also ordered a nice shiny chain to put.
https://armarium.org/u/2018/03/21/1e8a27a7836e0a796b0d9165a911c247.jpg
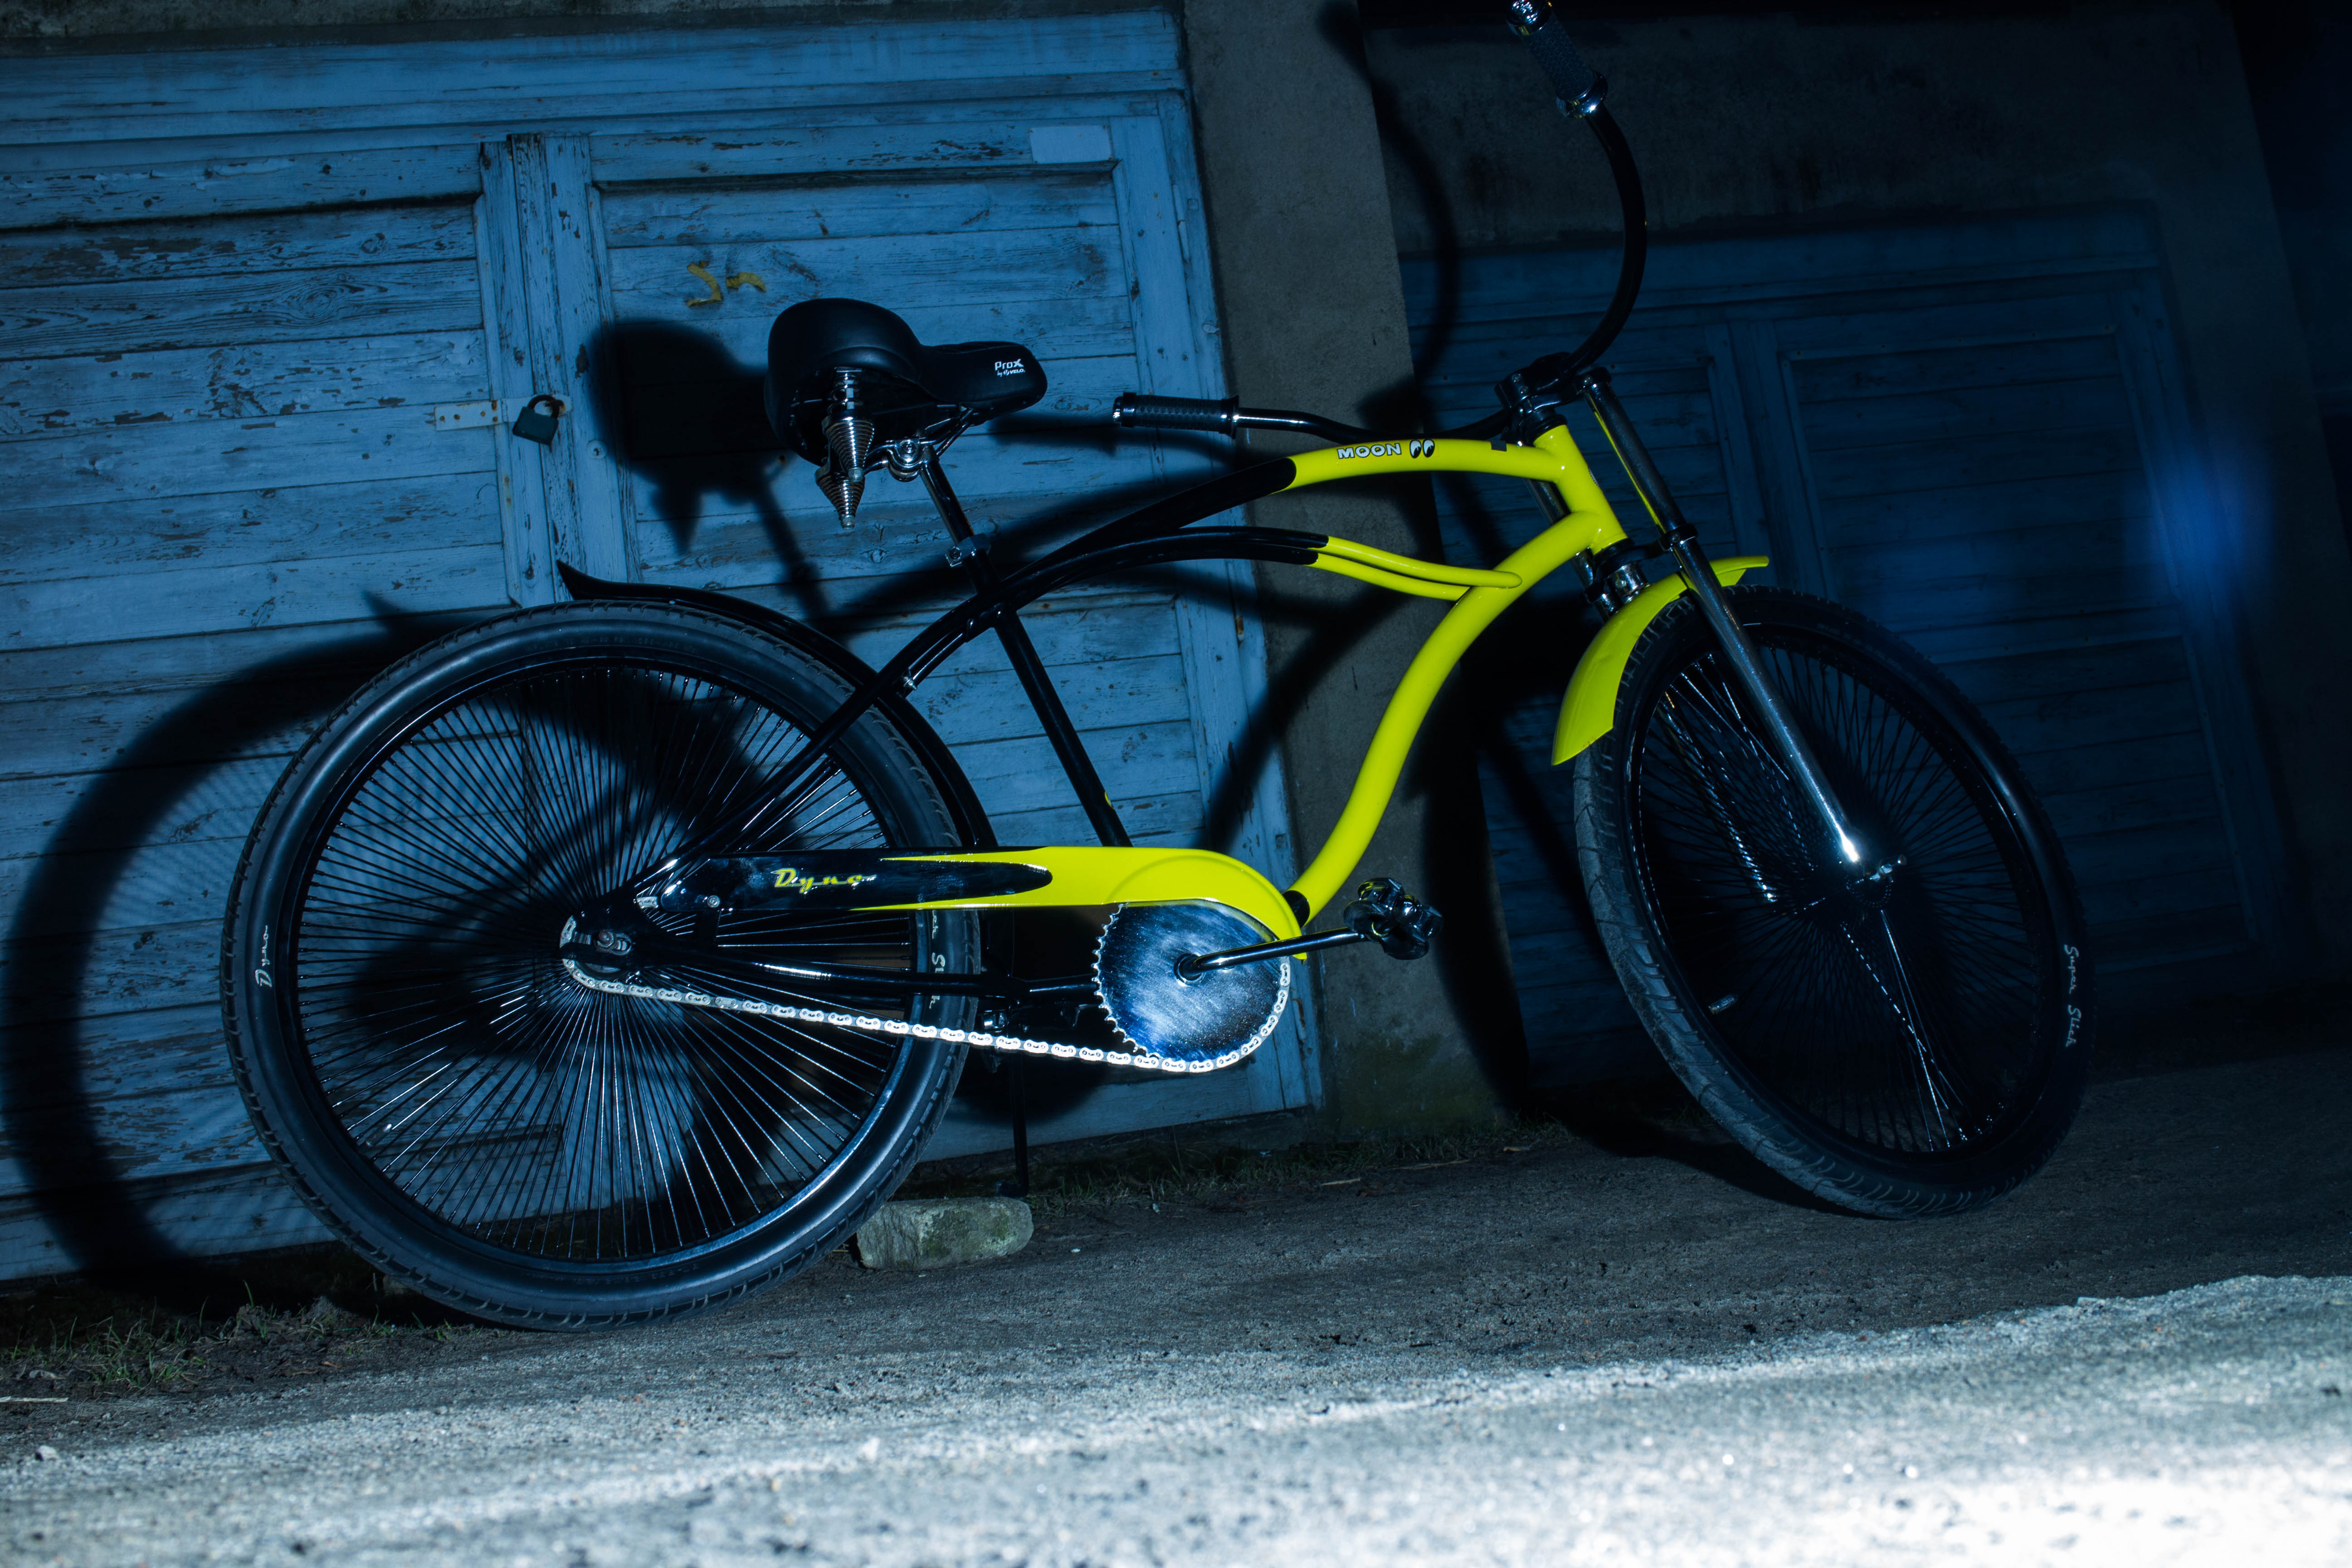
Now time for the grips. I have put this ones, they were an option for Dyno bikes those days, though the Mooneyes had come with the other ones, i have posted earlier. The thing is that both ways they had bar-ends with "D" logo on them, not skulls like the modern ones (or i believe you could buy ones with skulls from Dyno too, but originally i only saw skull bar ends on Deuce, not on other models). As an option i also have similarly designed grips with checkerboard print over aluminium, or ones with plain ends and foam over plastic body instead of rubber. I figured that checkerboard, even though it fits the colors of this build, does overload it visually a little. Original knurled alu do seem light contasting with the bars. I might still swap them around. The ones with plain ends are also an option i might try. The best thing, of course, would be to 3d-print the grips in black color and with "D" logo, but that is a lot of work to finish the surface of a print to be nice and shiny, and i only might do it if i have a lot of time to work on that bike. Probably after build-off deadline, so it is not on my list yet.
https://armarium.org/u/2018/03/21/57cde267c9f12e7030b8b25a1bb917fb.jpg
For a valve caps my initial idea with yellow spheres does not work so well, because the tone of yellow of those caps is completely different to one of the frame. For now i have put old Electras long bullets. Might swap them later too.
https://armarium.org/u/2018/03/21/608ec3c27b12795c0b16bcbc010b5395.jpg
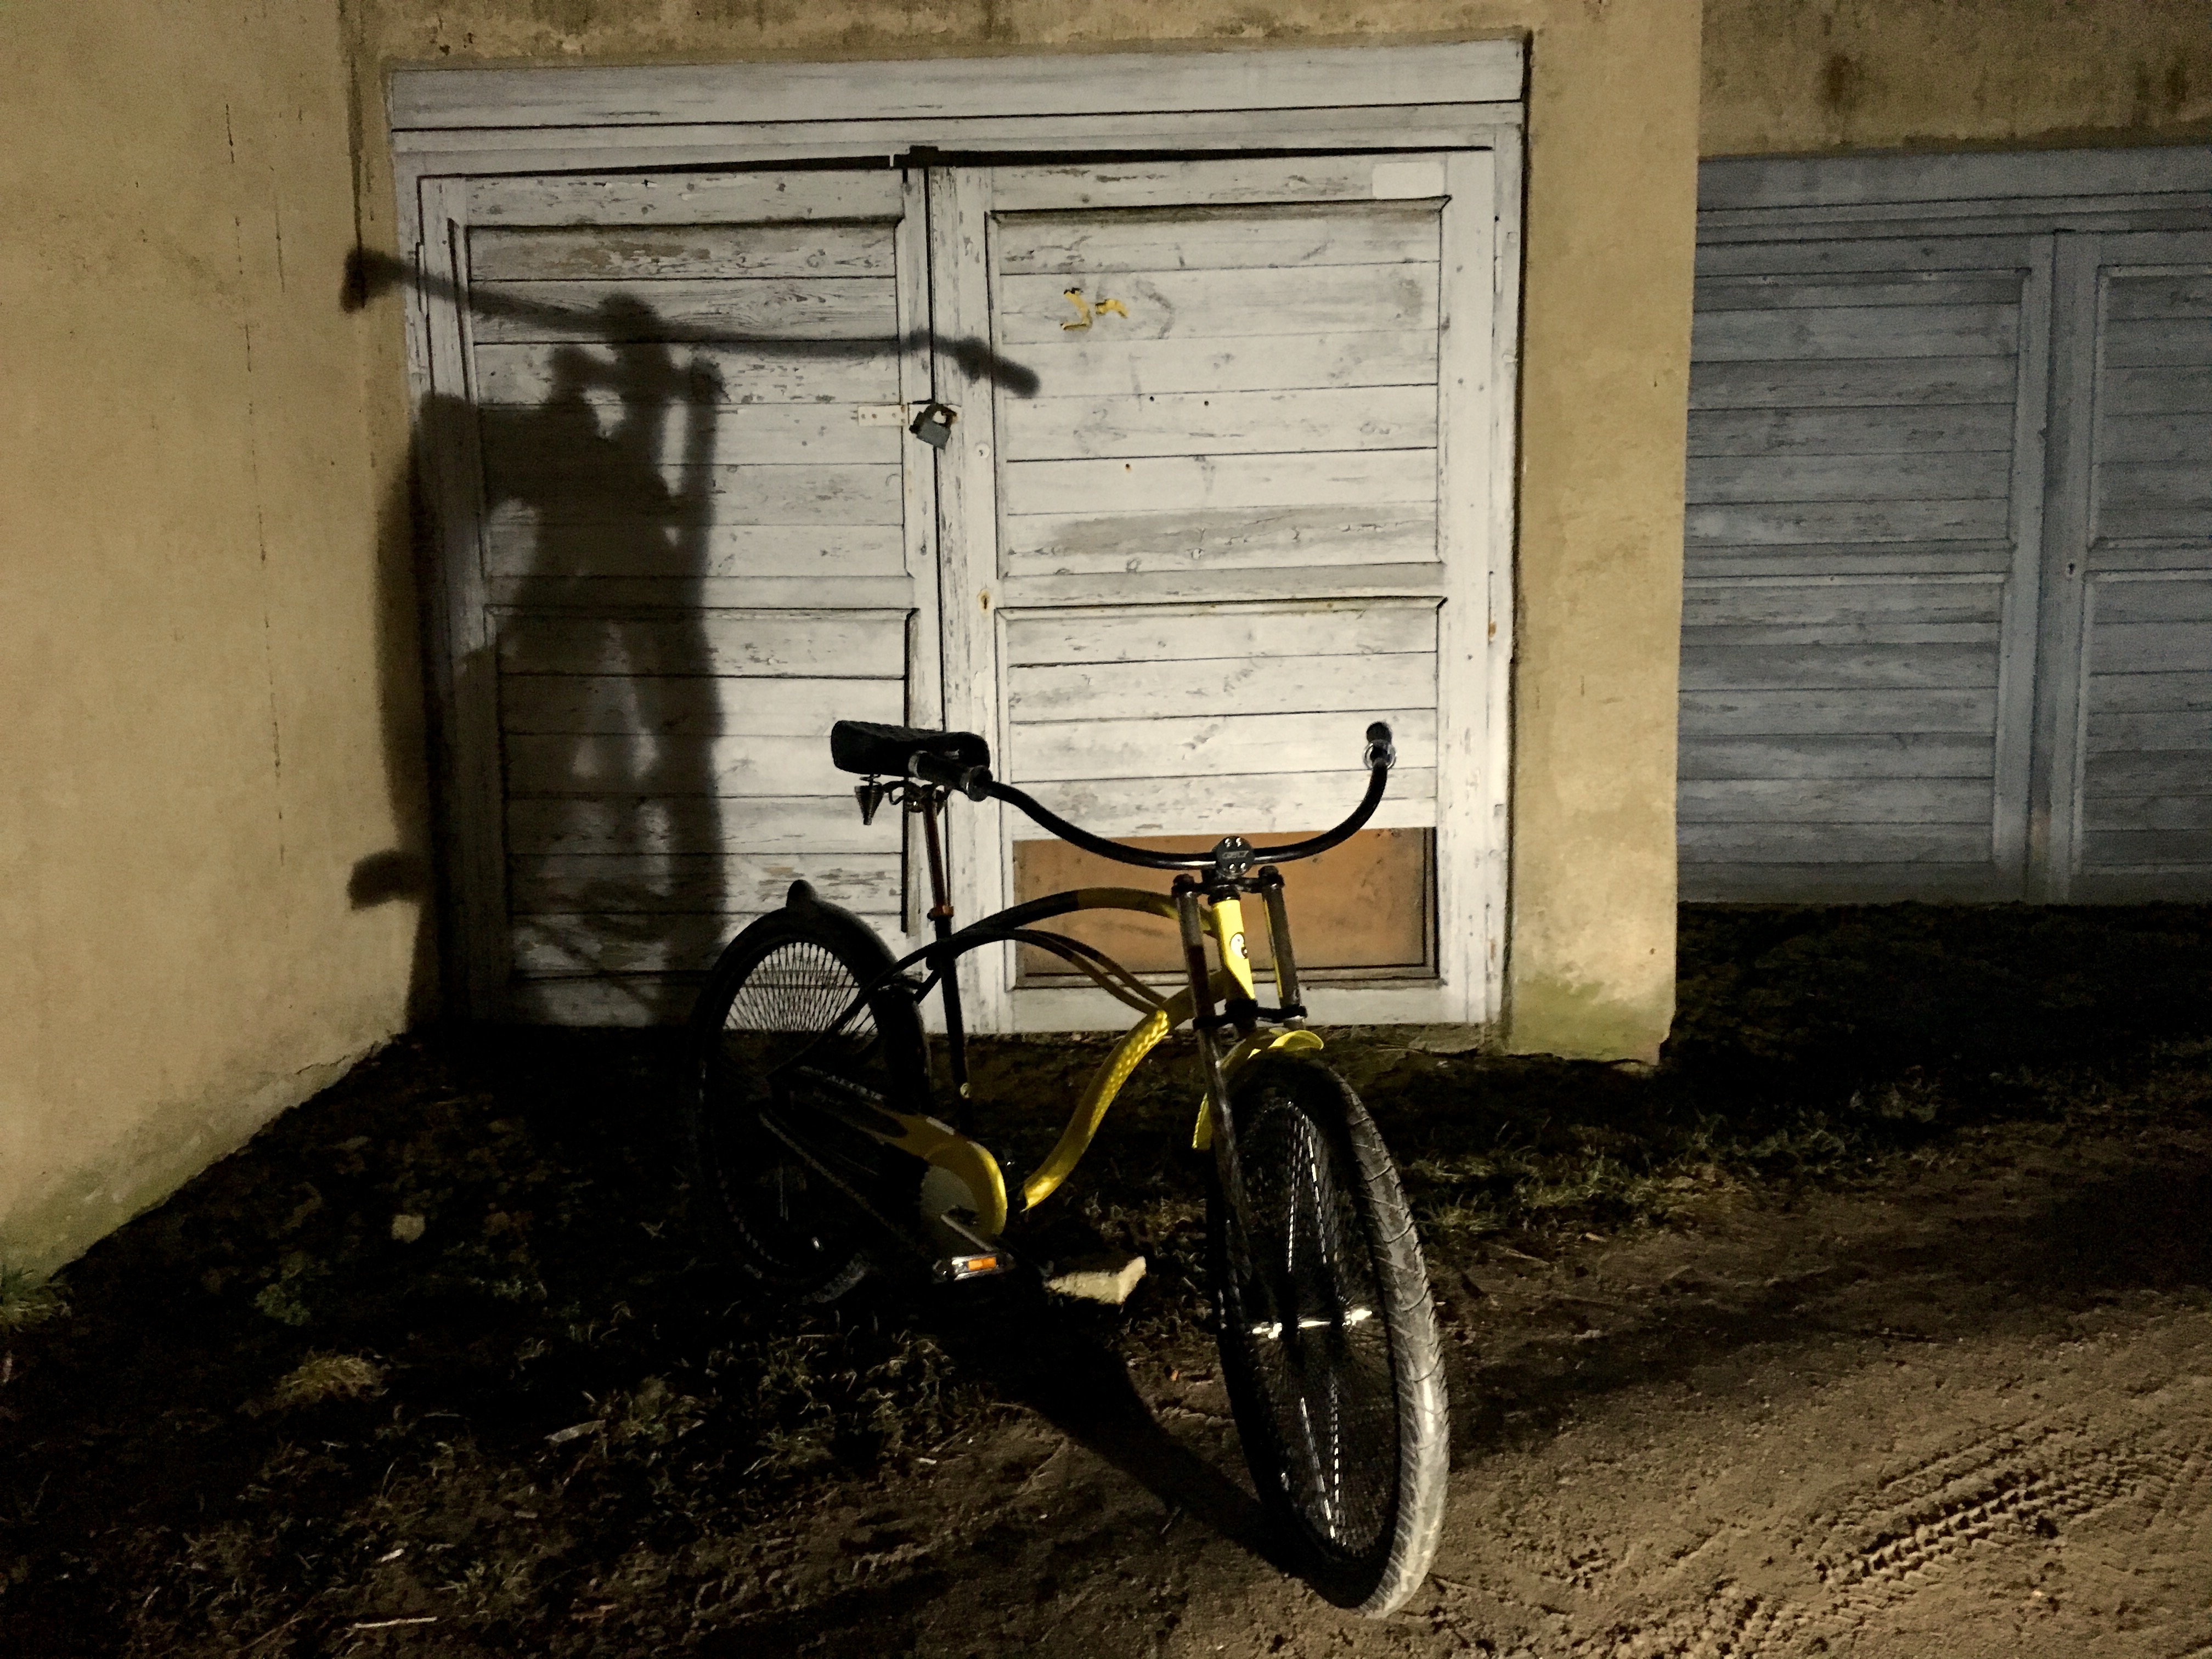
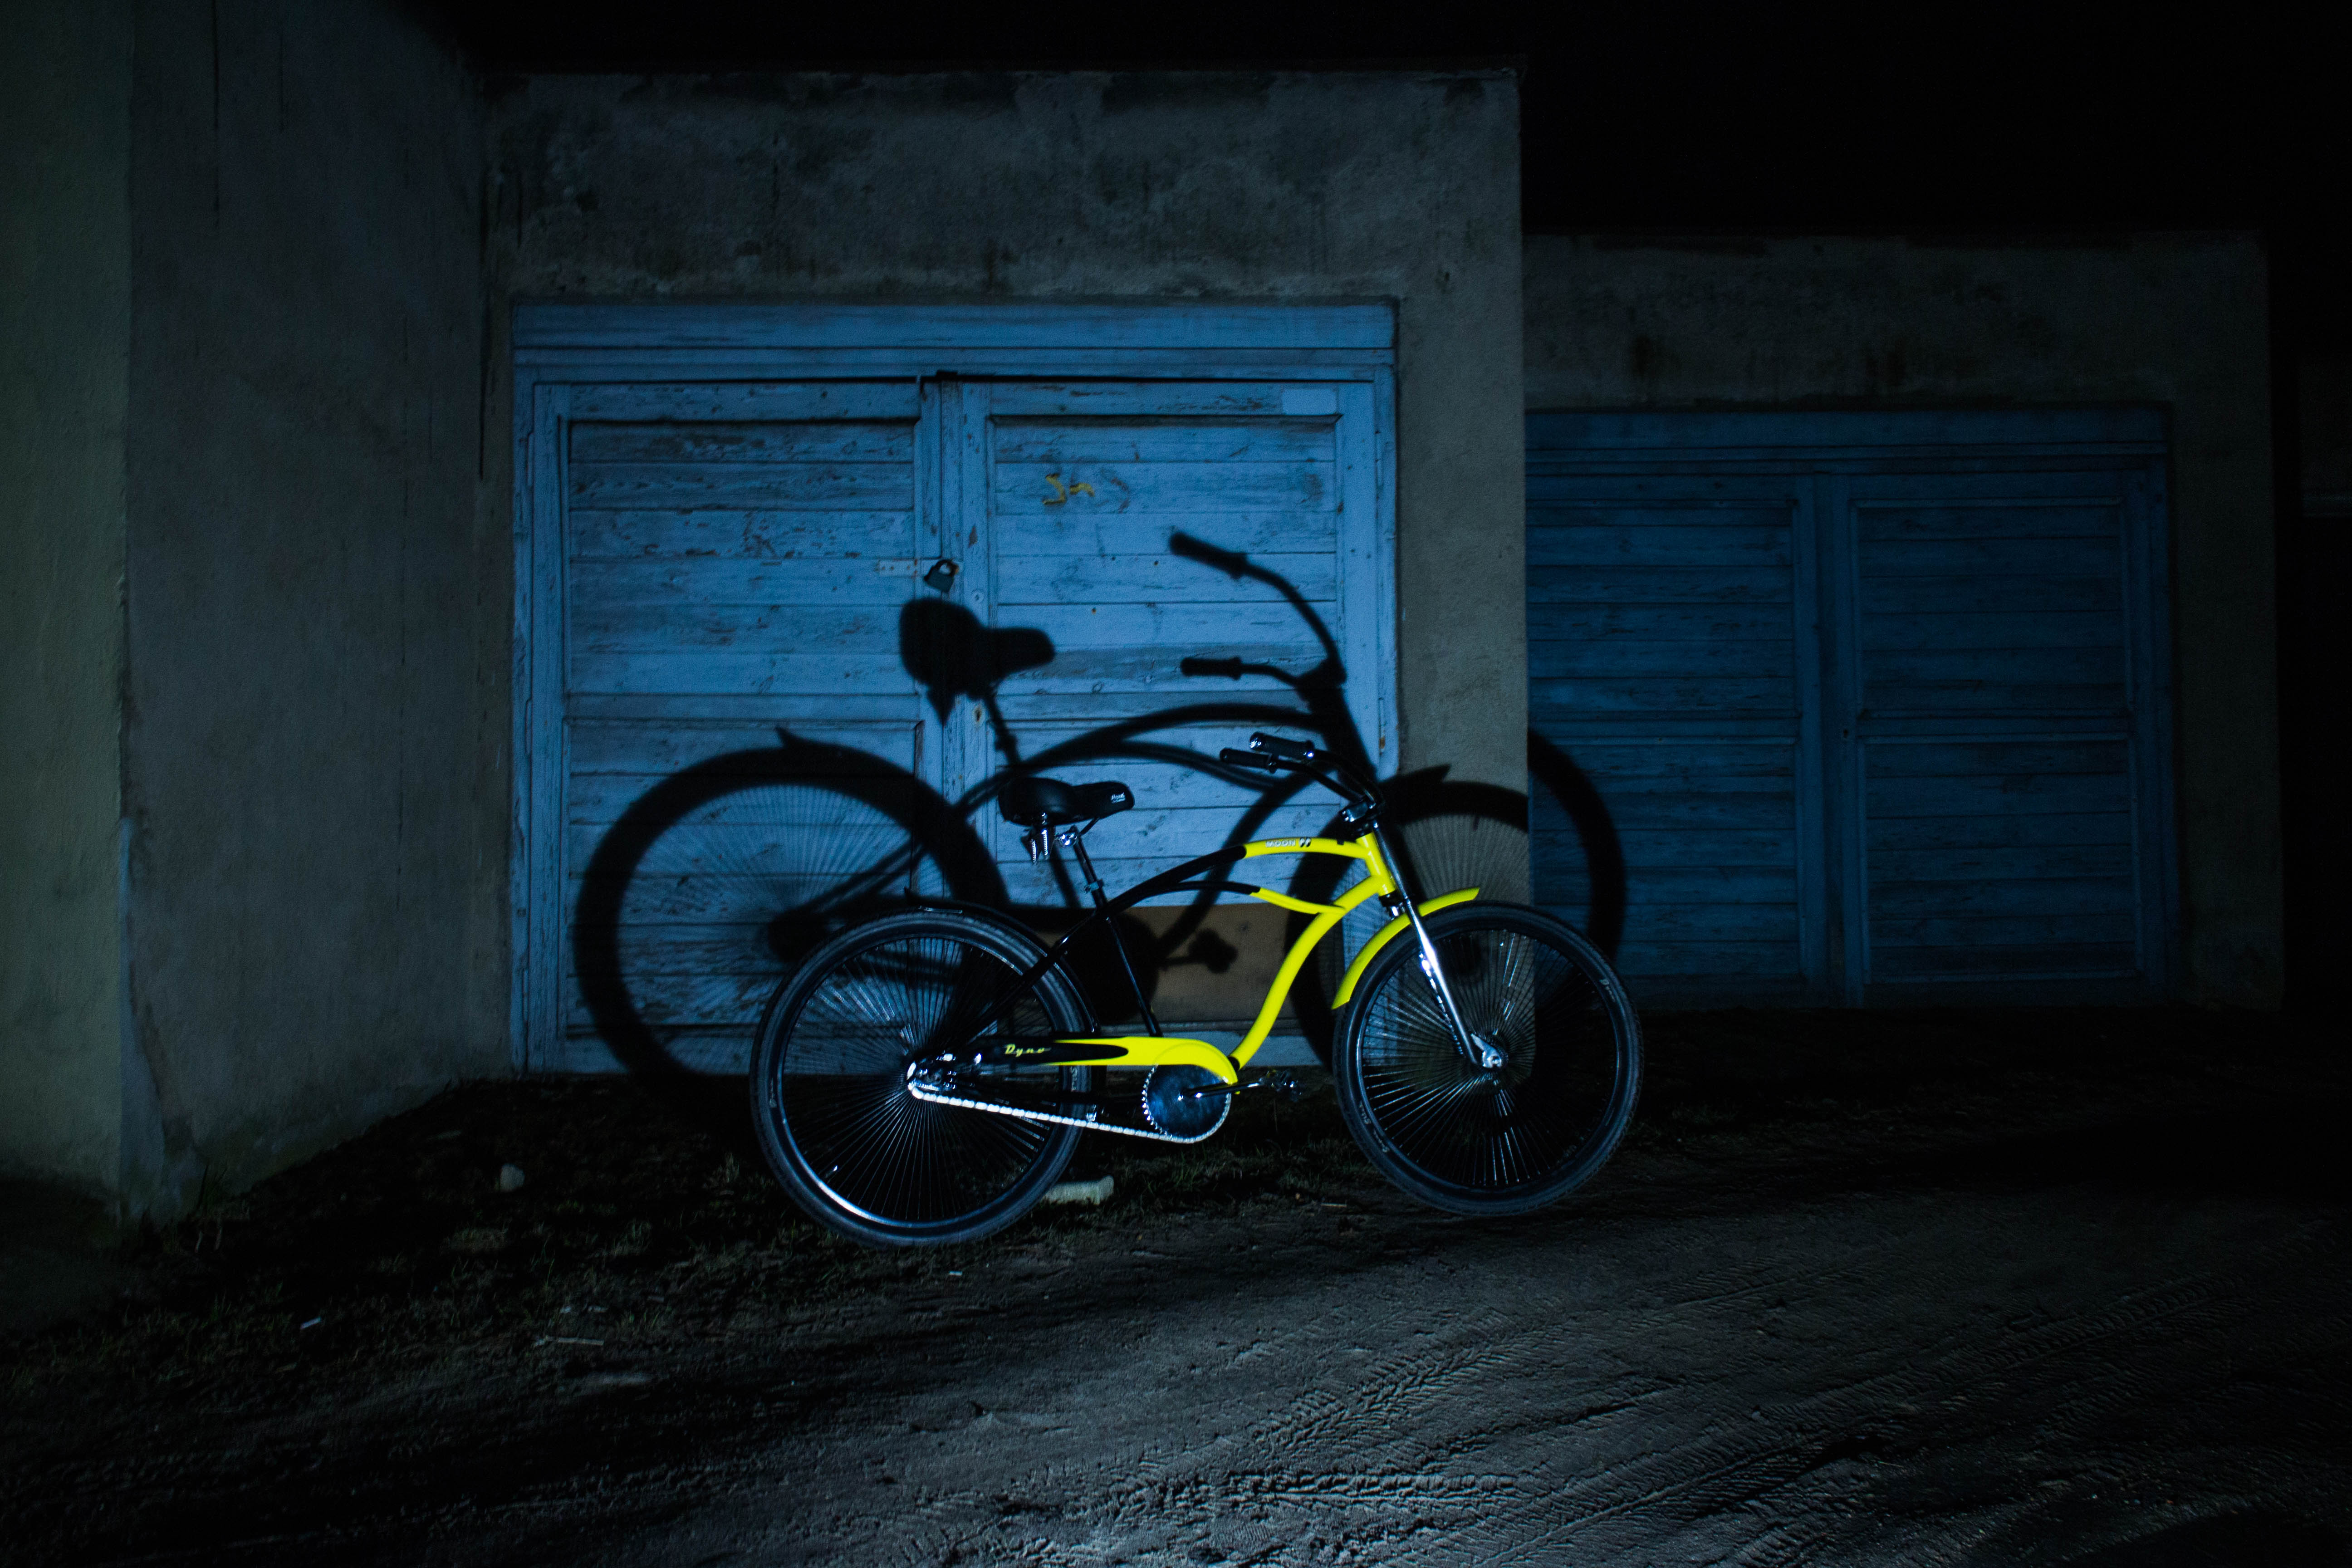
I really like how it have turned out! Can't wait to get the front fender and chain guard finally finished this friday and to install them on the bike to have a first ride. The chain and pedals i have ordered might be delivered by that time too, so i guess the bike would be finished soon. I still have got options on how to improve it though and few thoughts on what i can do extra.
https://armarium.org/u/2018/03/21/0ce5c579b47ab953b8fb9390a2e959df.jpg
https://armarium.org/u/2018/03/21/27c6c58ca7fc1ab0f181af510644fa4a.jpg
https://armarium.org/u/2018/03/21/b20551dc27c31aa83199fe76aaa34452.jpg