


So this is how all this build got started. We were in Las Vegas for a NASCAR race. We took two of my 4" Fat tire bikes to ride around.
A guy that was parked by us was talking smack to us. Telling us that he is bringing a bike with 8" wide tires next year. I was like "OK",
" I'll see you next year." I hope he is ready in March.
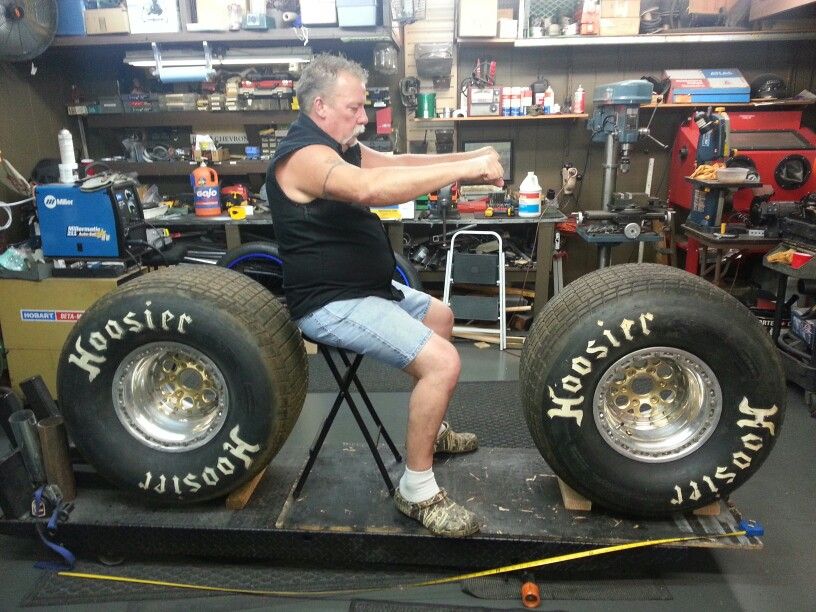
So the first thing I needed were some ridiculous tires and rims. Found some a friend had and got them on the cheap. Now to figure
out how to build this thing.( My first from scratch bicycle build ever)
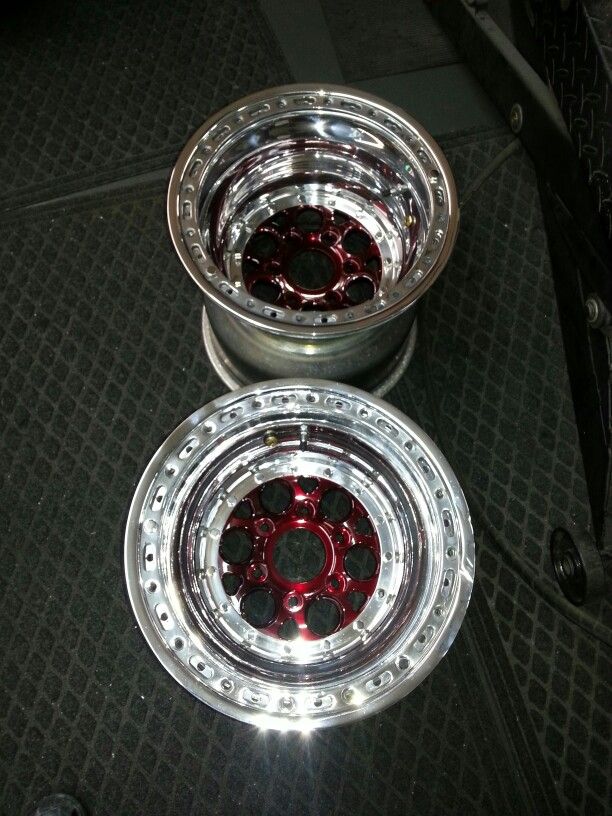
First thing I had to do was get rid of those ugly Gold centers on the rims.
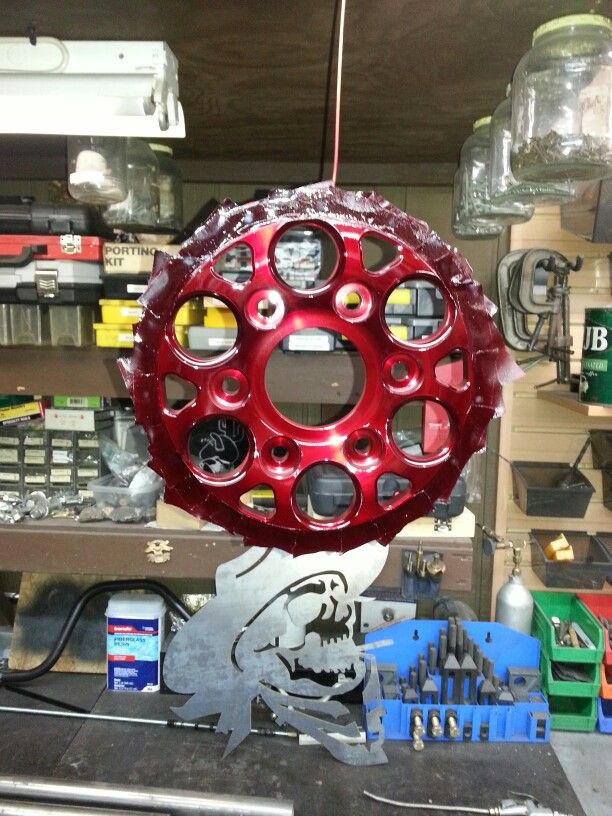
So I Painted them a Candy Apple Red. Then polished out the rims and remounted them.
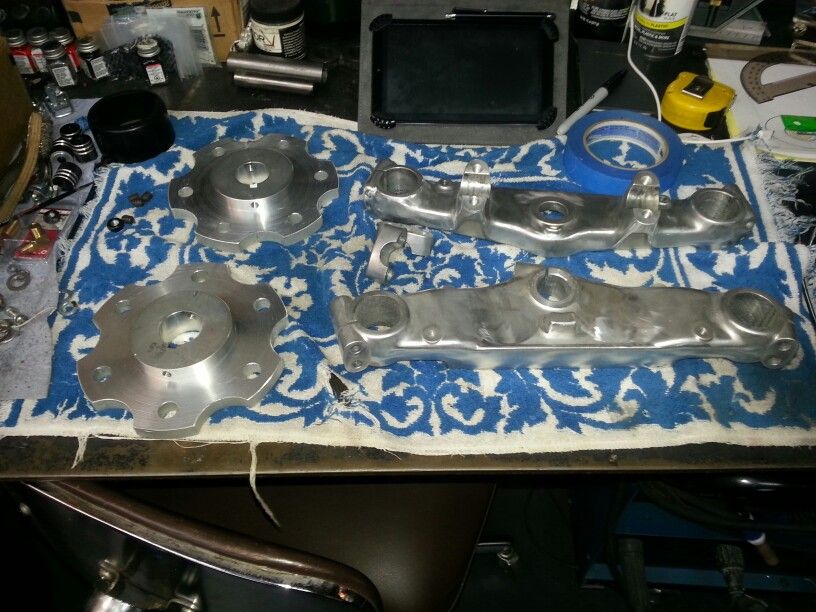
Next I had to make some wheel hubs and figure out the front end. So off to the waterjet guy and the bone yard.
Found a front end off an old Honda 250R . Once I got the Hubs back, a little machining and we were ready to go.
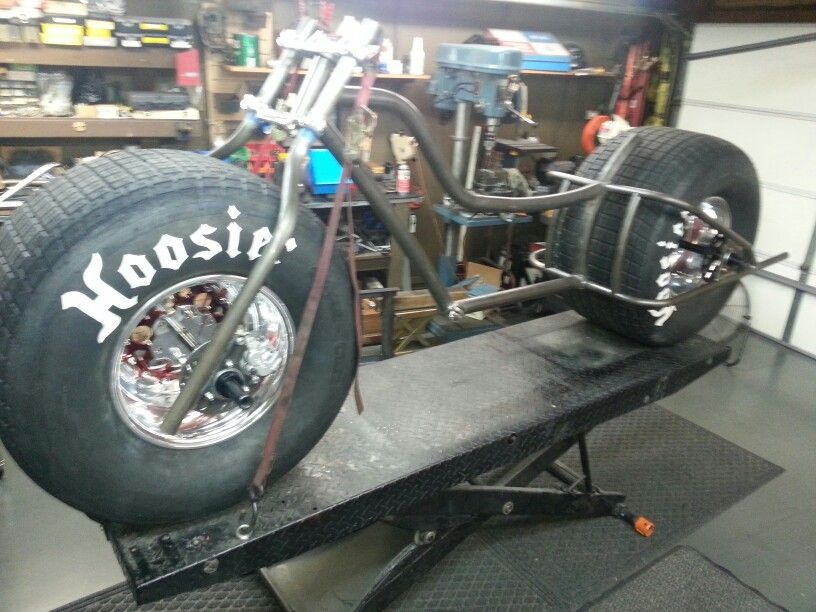
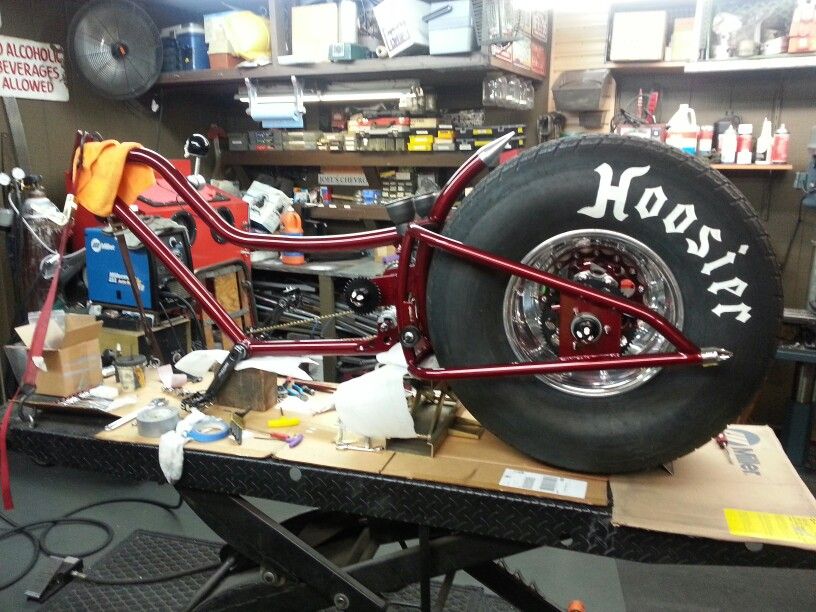
I then started to figure out how I was going to lay out the frame.
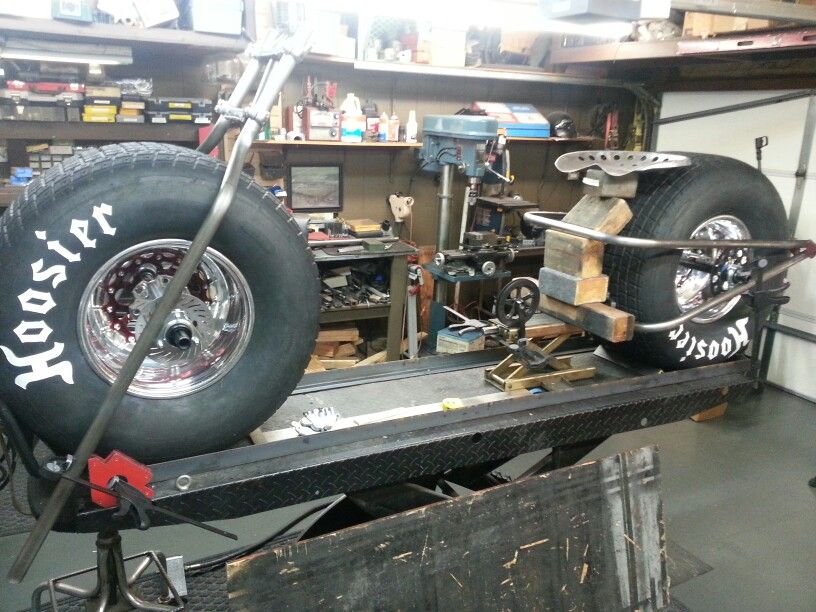
After a few drawings. This is what I ended up with as a ruffed in frame . (2" and 1 1/4 " Moly .065 wall)
At this point I wanted to get a ride height on the seat and figure out the mounts. A friend had some Air bags sitting at his
house forever ( he was going to put the on a generator mount to reduce the vibration) and he gave them to me for nothing.
so that's were the Air ride seat came in.
I then started to figure out and setting up the gearing and mounts.
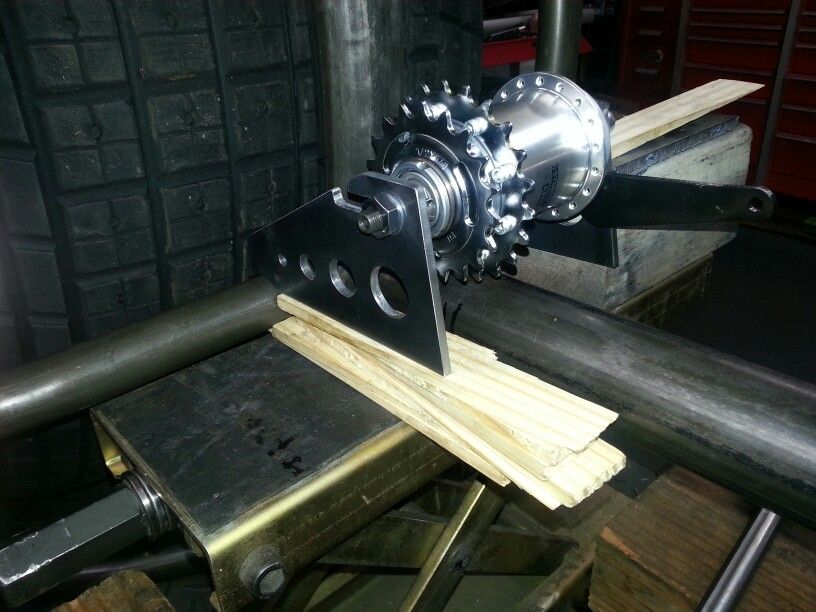
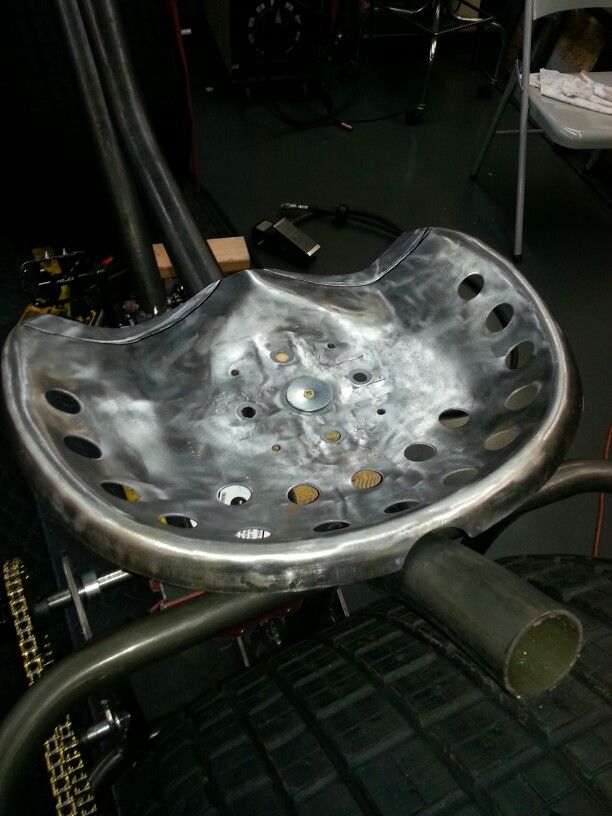
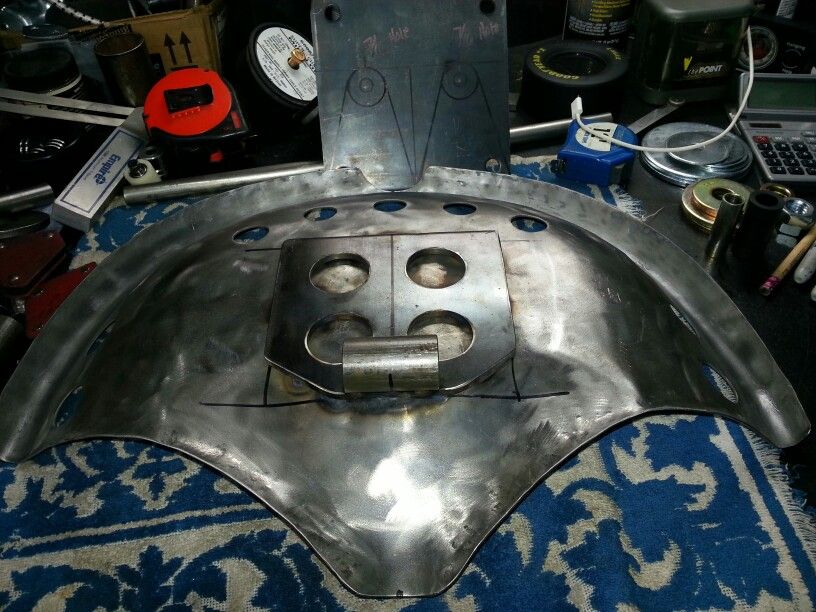
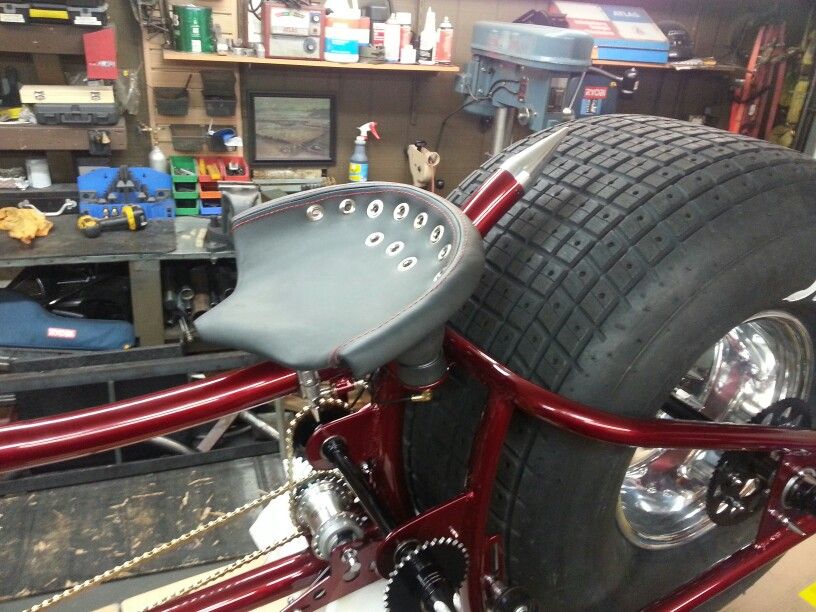
When that was done and the Jacksaft was installed. I went back to finish the seat. Since I had a 2" tube to mount to.
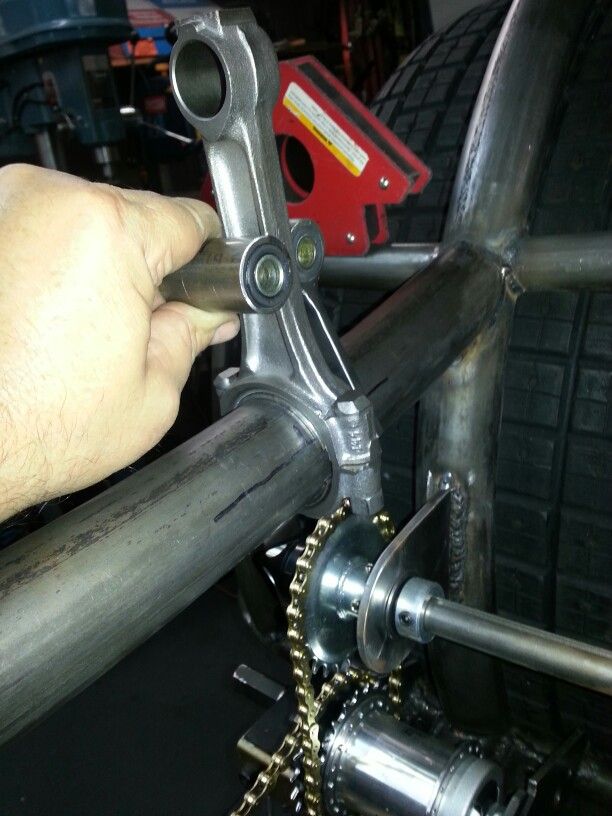
I picked up a old small block Chevy piston rod and cut it to the height I needed.
Then make the front pivot and rear air bag mounts.Then weld them to the seat pan.

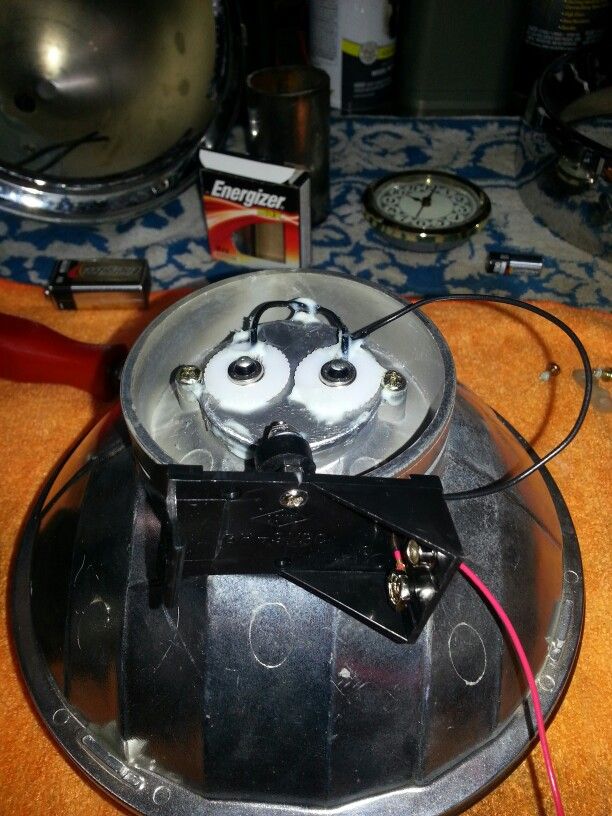
I the had to find a big enough headlight to match the size of the bike. A friend had a old Harley Davidson Fat Boy headlight
that would work Great! Now I have to change it over to some LED lights. I got two LED lights and a volt battery holder
and modified the light bulb .
After installing the light into the bucket and mounting a on-off switch. I finished up on the frame.
Welding in the air bag mounts, shifter mount .Made a headlight bracket and front brake caliper bracket.
and a set of handlebars.
When that was all done, I took it all apart and sent it out to chrome and powder coat. After a MONTH ! (It will be
ready in two weeks...ya ok) I got the parts back and started to put it back together.
I put the front end on and mounted the Shifter and Shifter knob I painted.
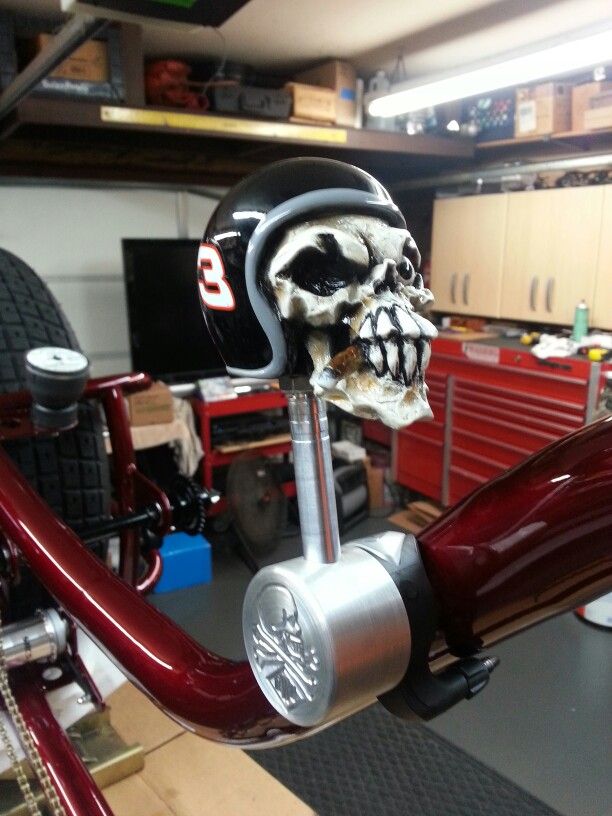
Mounted the Aluminum spike I machined ( thank God my Buddy J.O. has a bad ... machine shop at his house. )
got the seat back( thank you Craigs Custom Upholstery in PHX.AZ) and mounted the air bags and lines.
All that was left was the skull fork caps. Install the handlebars, Grips and front brake master cylinder and lines. Them put on some
really cool skull mirrors I found on Amazon. Last but not least. Install the Beer koozie holder.
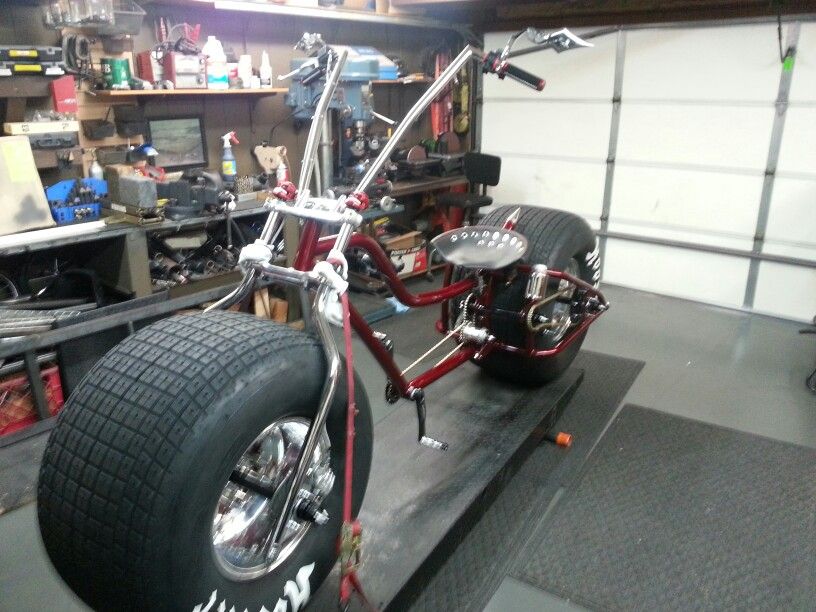
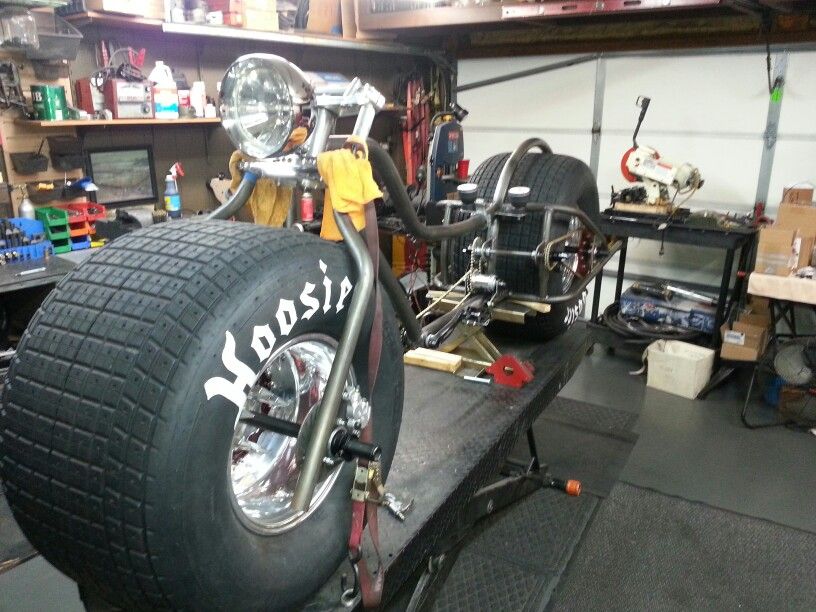
All that was left ,was to take it for a ride.
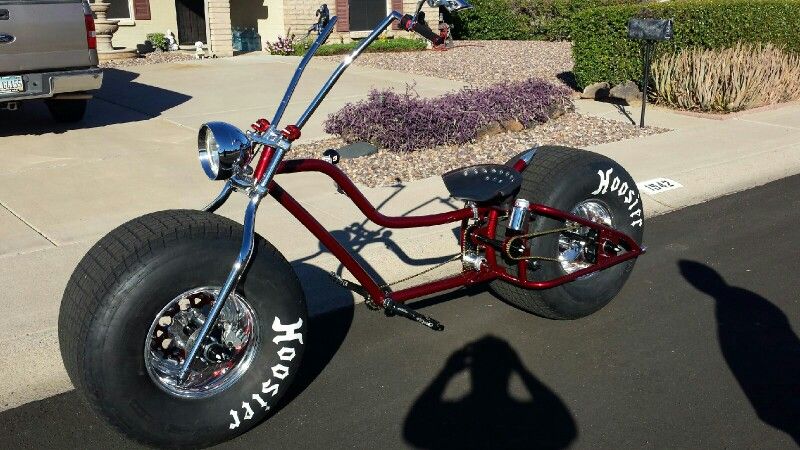
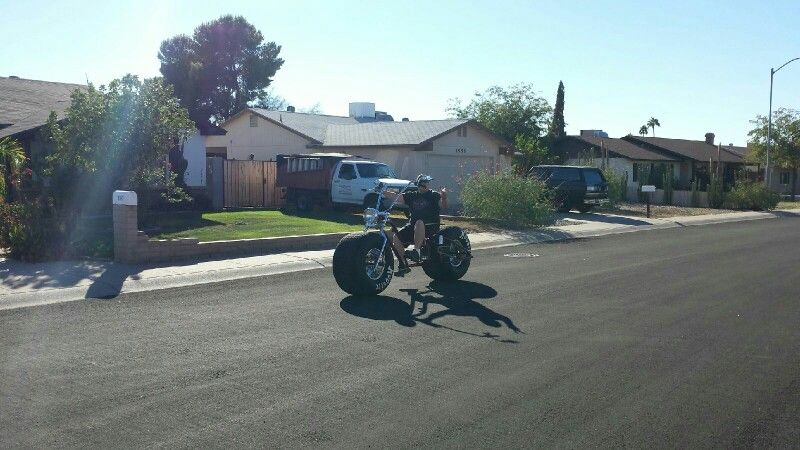
Had a lot of fun making my first scratch up build. Hope everyone enjoys the pictures.
Thank you, Joel
JW Desert Customs
A guy that was parked by us was talking smack to us. Telling us that he is bringing a bike with 8" wide tires next year. I was like "OK",
" I'll see you next year." I hope he is ready in March.
So the first thing I needed were some ridiculous tires and rims. Found some a friend had and got them on the cheap. Now to figure
out how to build this thing.( My first from scratch bicycle build ever)
First thing I had to do was get rid of those ugly Gold centers on the rims.
So I Painted them a Candy Apple Red. Then polished out the rims and remounted them.
Next I had to make some wheel hubs and figure out the front end. So off to the waterjet guy and the bone yard.
Found a front end off an old Honda 250R . Once I got the Hubs back, a little machining and we were ready to go.
I then started to figure out how I was going to lay out the frame.
After a few drawings. This is what I ended up with as a ruffed in frame . (2" and 1 1/4 " Moly .065 wall)
At this point I wanted to get a ride height on the seat and figure out the mounts. A friend had some Air bags sitting at his
house forever ( he was going to put the on a generator mount to reduce the vibration) and he gave them to me for nothing.
so that's were the Air ride seat came in.
I then started to figure out and setting up the gearing and mounts.
When that was done and the Jacksaft was installed. I went back to finish the seat. Since I had a 2" tube to mount to.
I picked up a old small block Chevy piston rod and cut it to the height I needed.
Then make the front pivot and rear air bag mounts.Then weld them to the seat pan.
I the had to find a big enough headlight to match the size of the bike. A friend had a old Harley Davidson Fat Boy headlight
that would work Great! Now I have to change it over to some LED lights. I got two LED lights and a volt battery holder
and modified the light bulb .
After installing the light into the bucket and mounting a on-off switch. I finished up on the frame.
Welding in the air bag mounts, shifter mount .Made a headlight bracket and front brake caliper bracket.
and a set of handlebars.
When that was all done, I took it all apart and sent it out to chrome and powder coat. After a MONTH ! (It will be
ready in two weeks...ya ok) I got the parts back and started to put it back together.
I put the front end on and mounted the Shifter and Shifter knob I painted.
Mounted the Aluminum spike I machined ( thank God my Buddy J.O. has a bad ... machine shop at his house. )
got the seat back( thank you Craigs Custom Upholstery in PHX.AZ) and mounted the air bags and lines.
All that was left was the skull fork caps. Install the handlebars, Grips and front brake master cylinder and lines. Them put on some
really cool skull mirrors I found on Amazon. Last but not least. Install the Beer koozie holder.
All that was left ,was to take it for a ride.
Had a lot of fun making my first scratch up build. Hope everyone enjoys the pictures.
Thank you, Joel
JW Desert Customs


