iDood's Board Track Racer...

Rat Rod Bikes Bicycle Forum

Help Support Rat Rod Bikes Bicycle Forum:

This site may earn a commission from merchant affiliate links, including eBay, Amazon, and others.
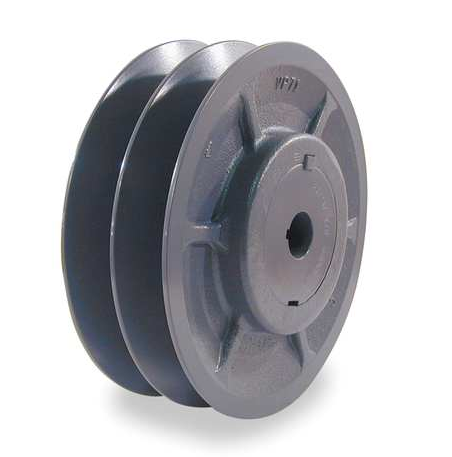
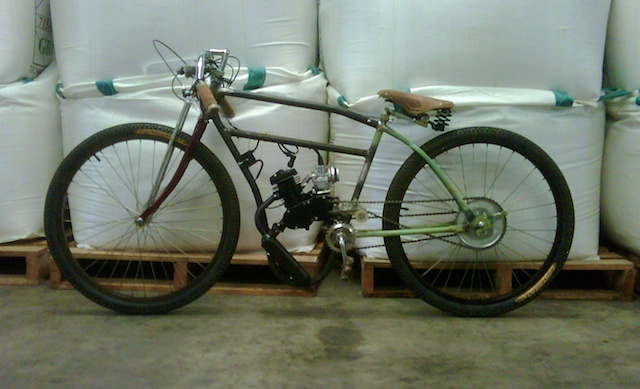
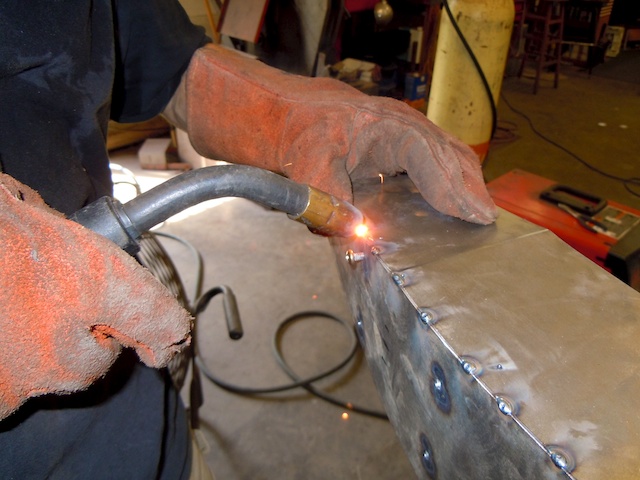
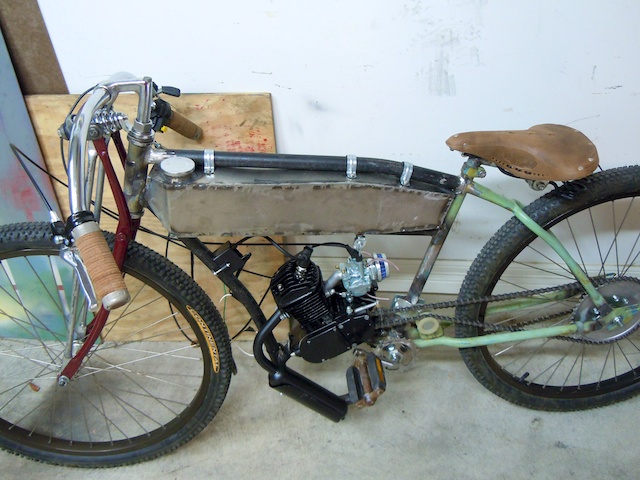
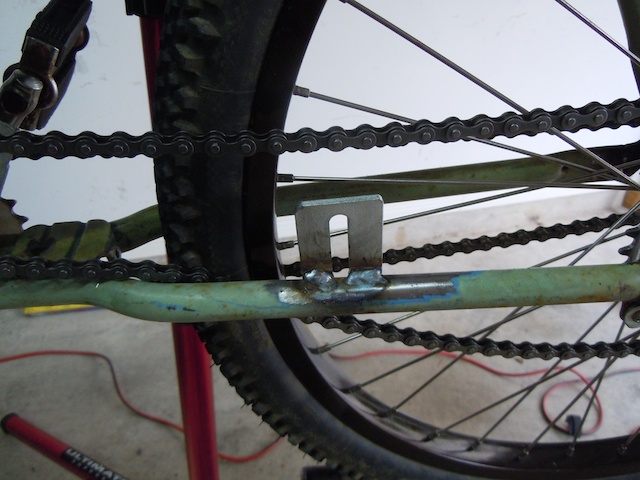
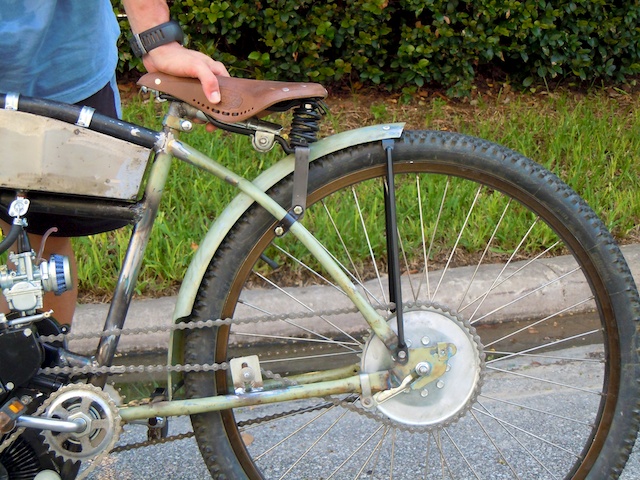
So in the design I'm sorta basing my design on, the gent used a couple of sheave wheels as a faux oil tank. He used a large sheave wheel as the main part then used a smaller sheave wheel to run a chain around. It looks like he used a tractor pin in the middle. Looks like this on the left side...

31AUG2010_4_.jpg


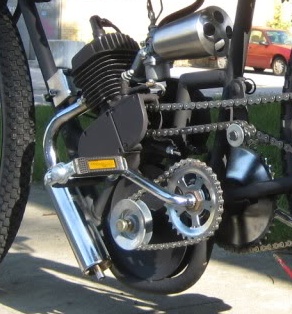
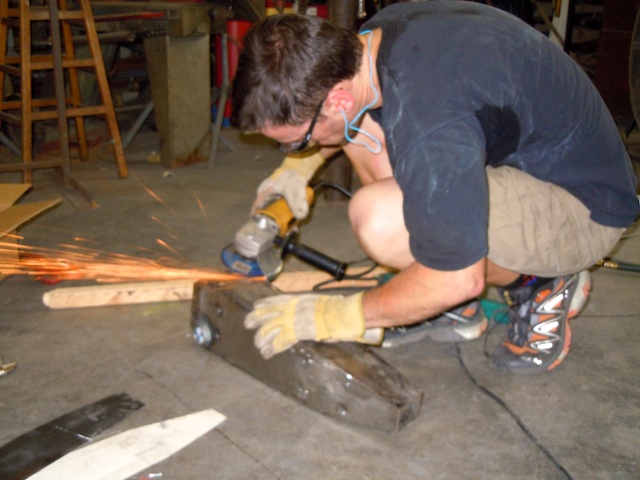
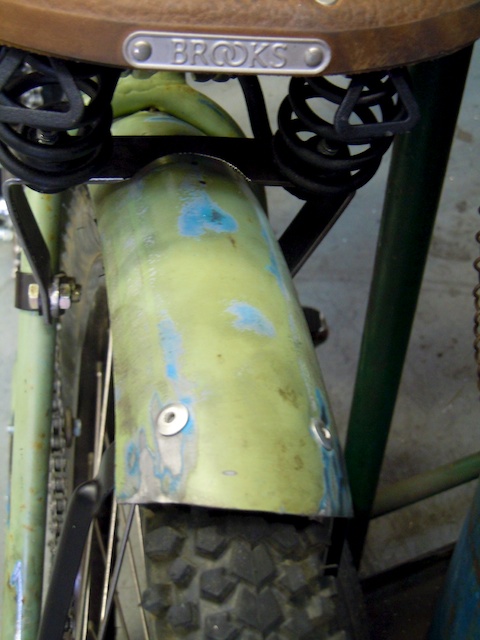
And this on the right...

31AUG2010_3_.jpg


Pretty darned clever if you ask me!

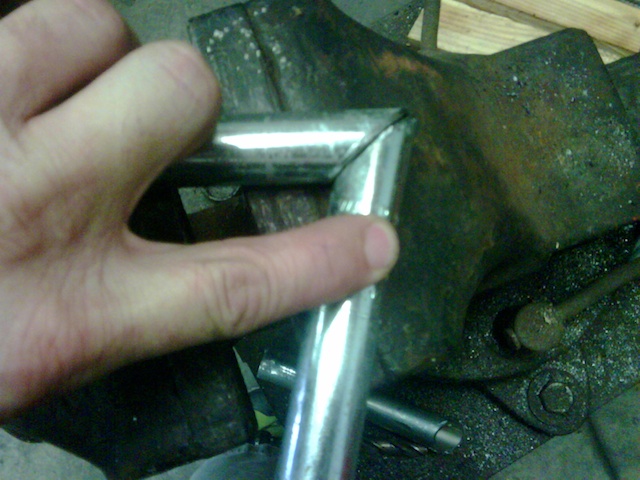
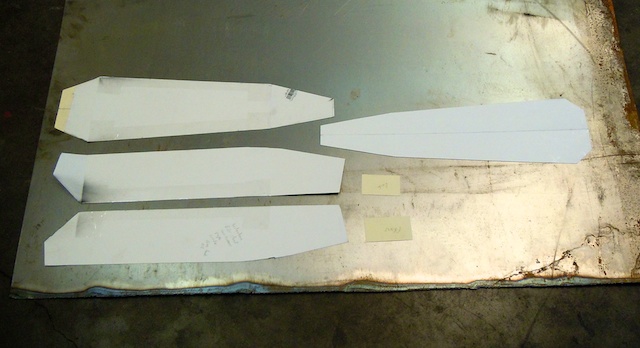
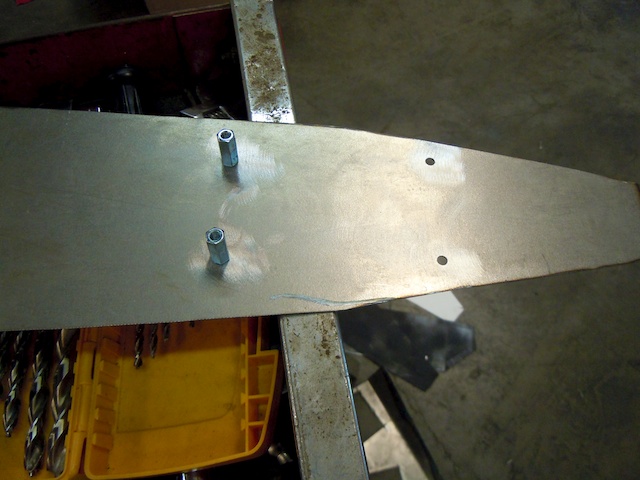
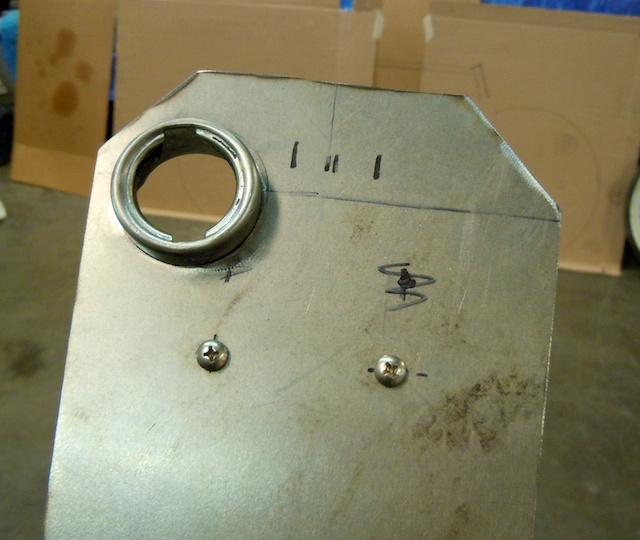
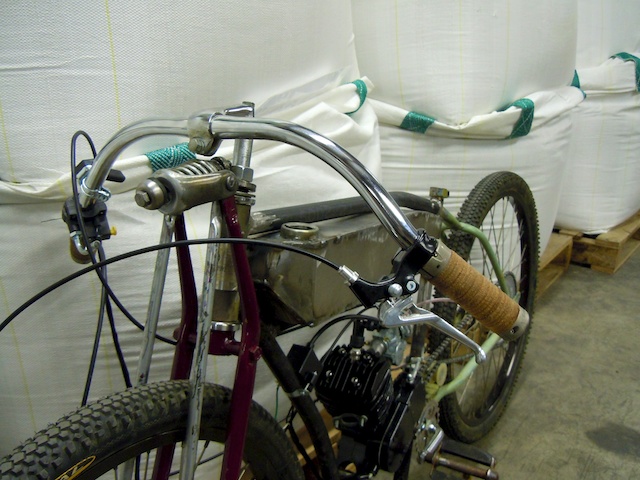
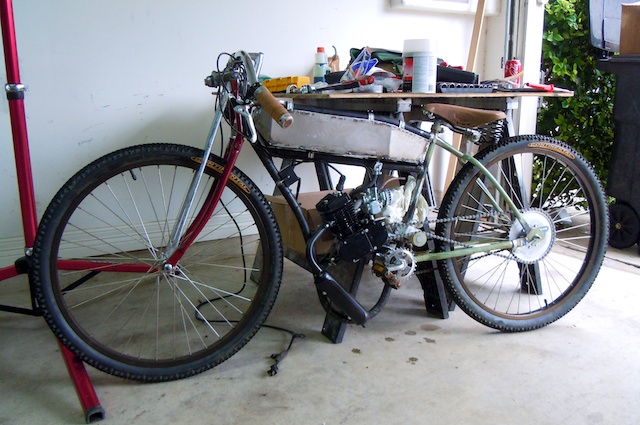
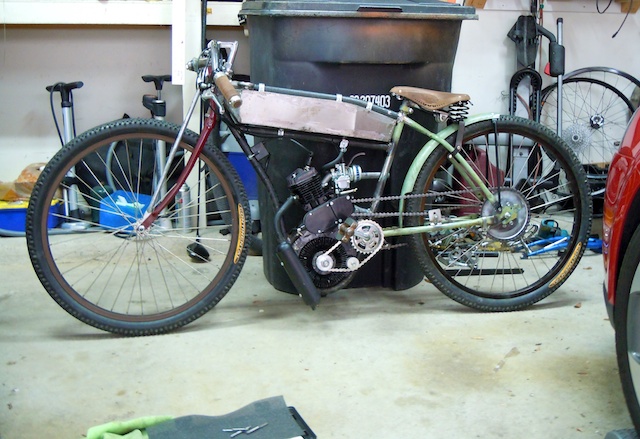
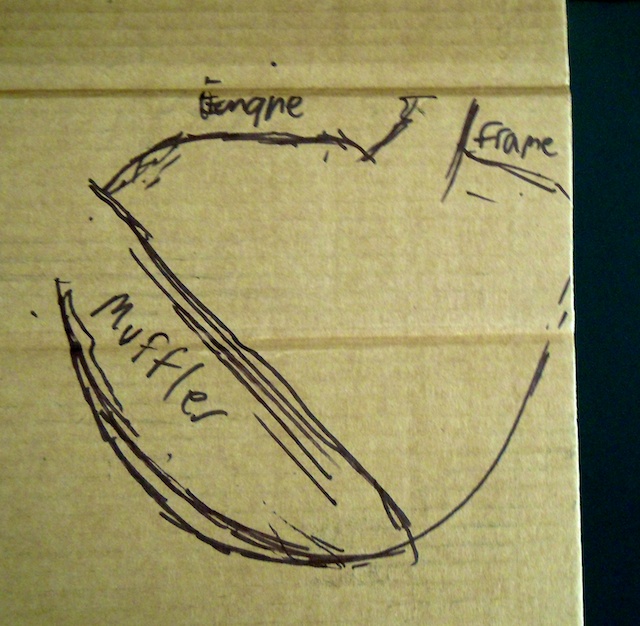
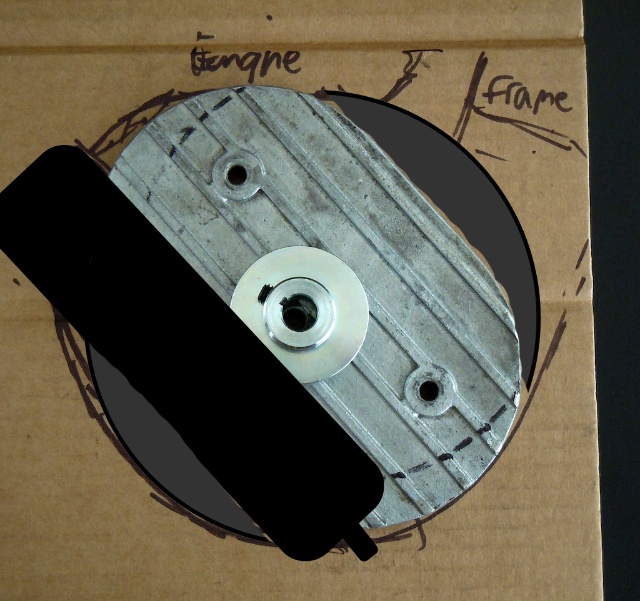
But I want to do something a little more representative of the period. Not sure what yet, but I'm thinking... So I took a piece of cardboard and traced out the opening. Here's the opening below the engine...

31AUG2010_2_640.jpg


And here's my tracing...

31AUG2010_22.jpg


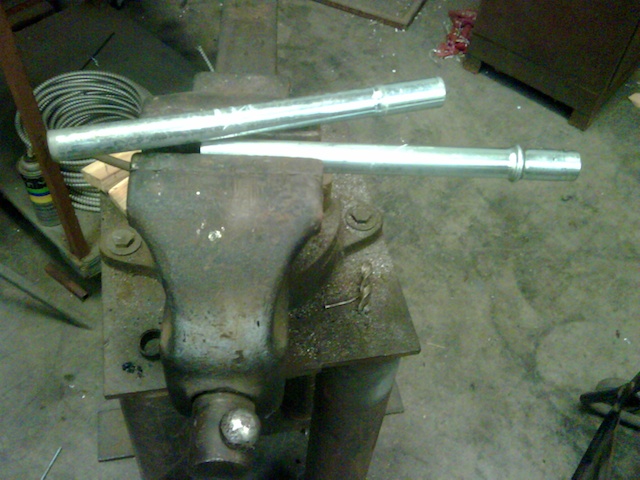
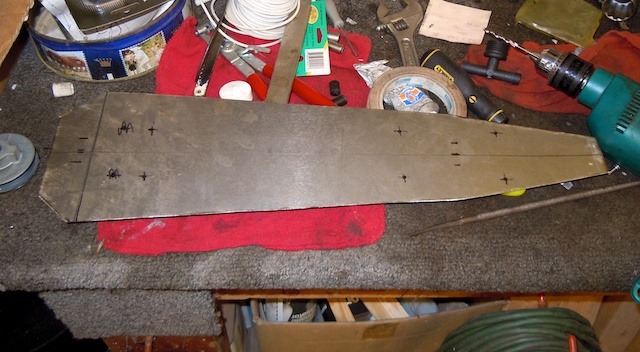
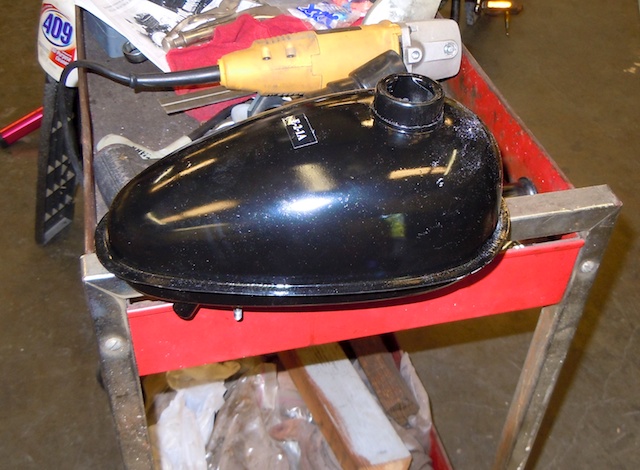
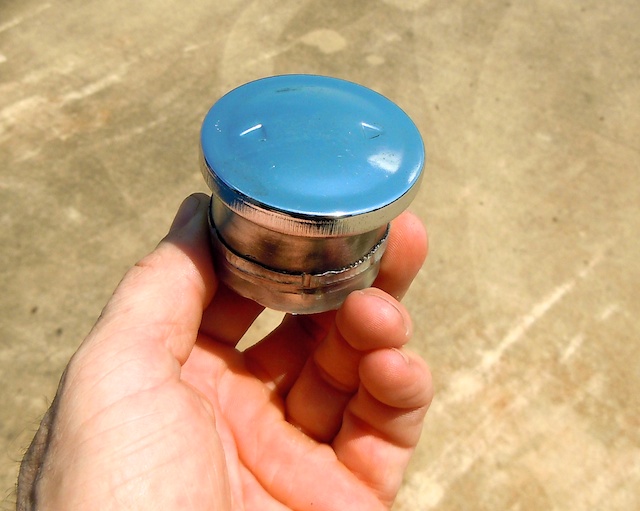
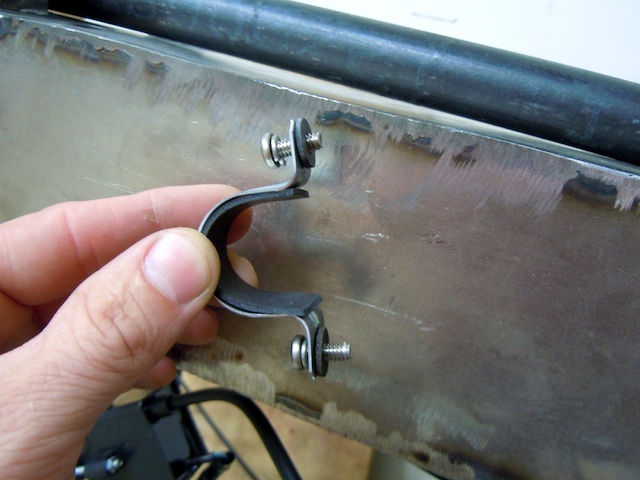
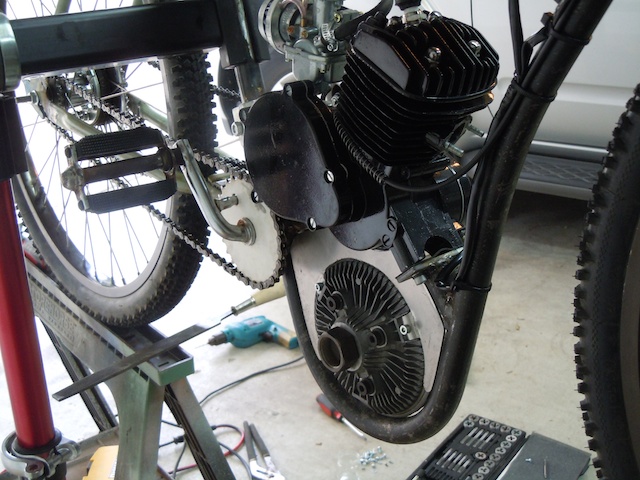
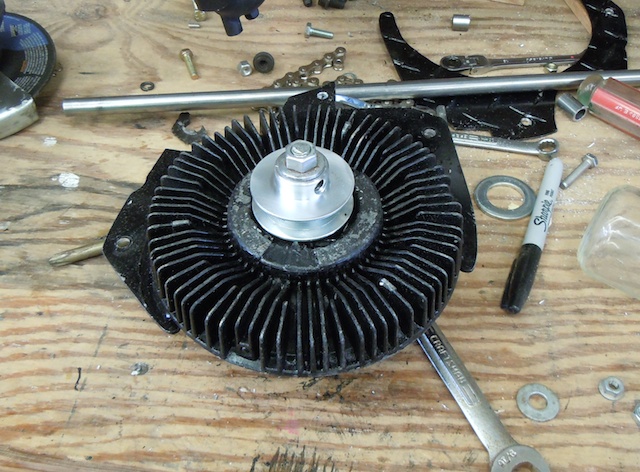
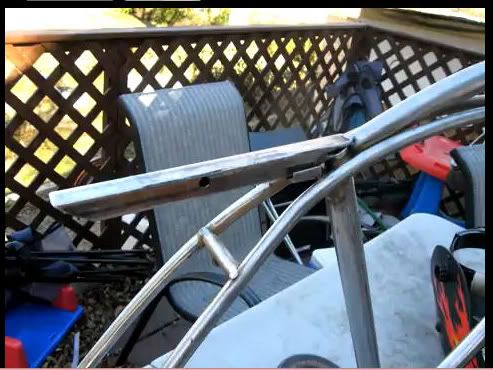
So today I went to Northern tool to find anything round with about a 6-3/4" diameter. I mostly struck out--I did find the smaller sheave wheel. But, my buddy Serg gave me a part off an old BMW that houses the air filter. It's quite "mechanical" looking; and I think if I combine it with something else, it might work. Here's what I'm talking about...

31AUG2010_21.jpg


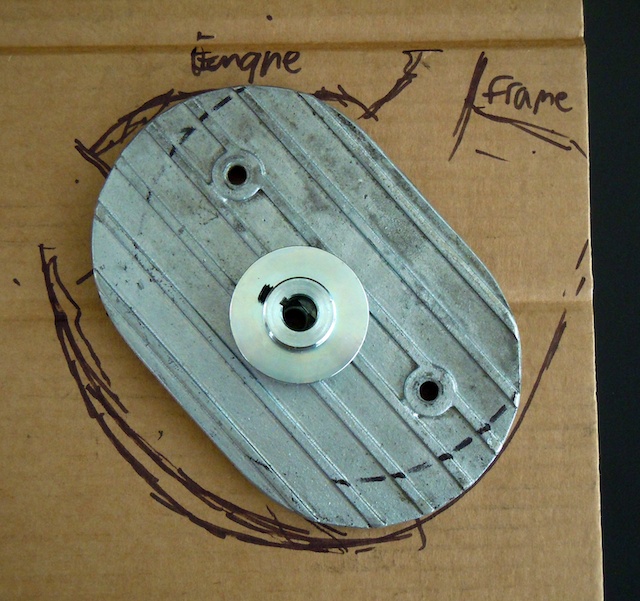
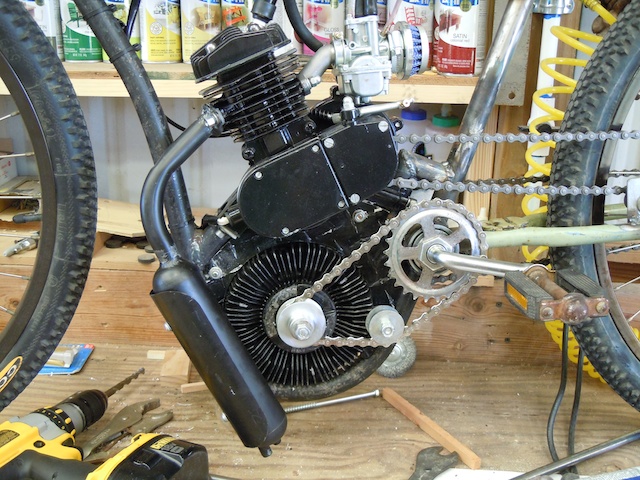
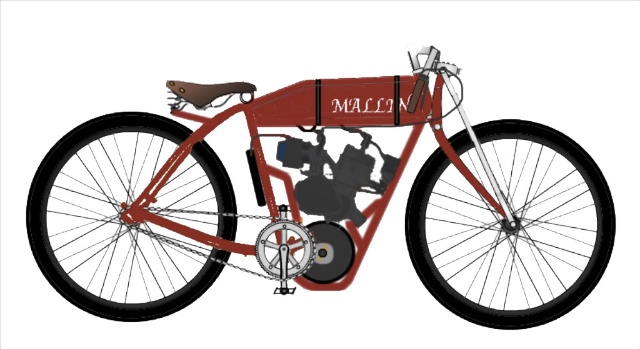
So you have to imagine something behind the these two pieces with the muffler in front. Maybe a larger Sheave wheel at the back...I dunno yet...I'm still looking for something. And you have to image the cast piece in the picture above painted black...basically it would look something like this...

31AUG2010_6_.jpg


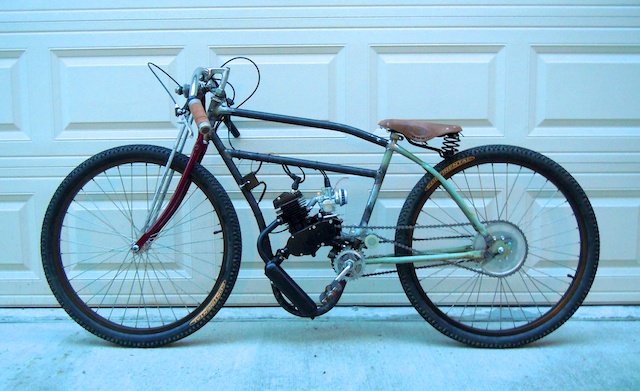
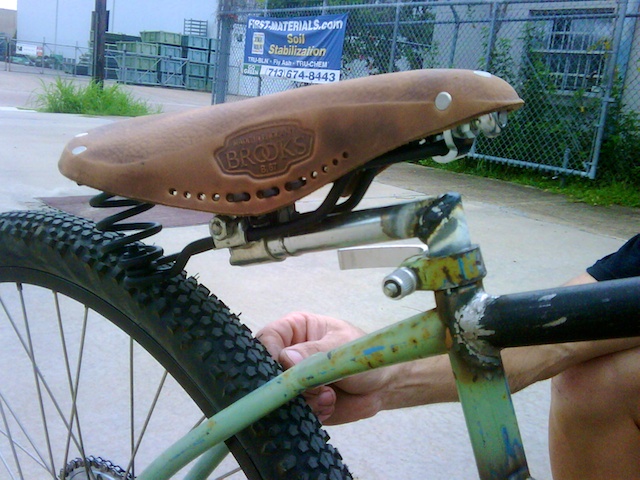
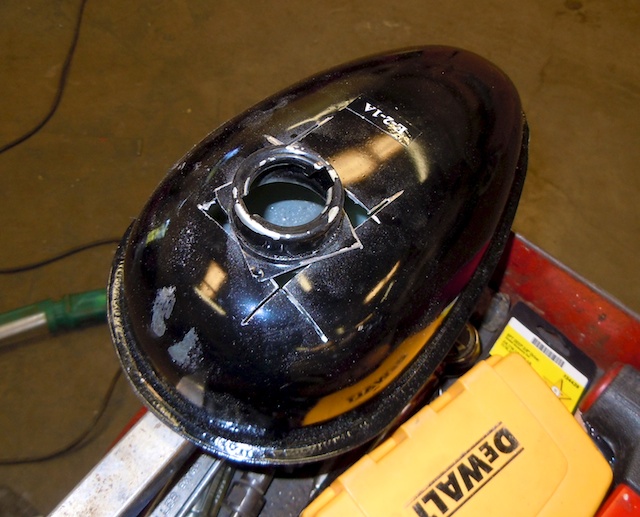
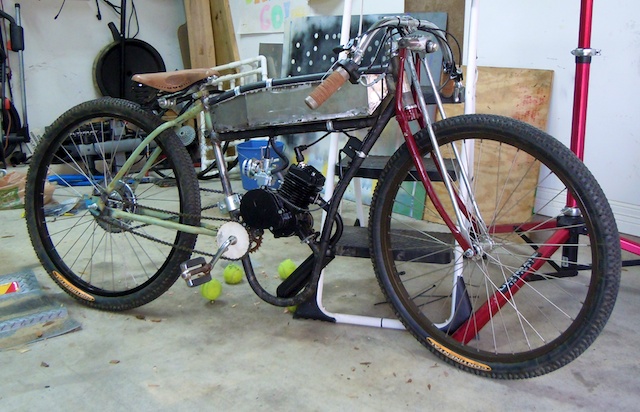
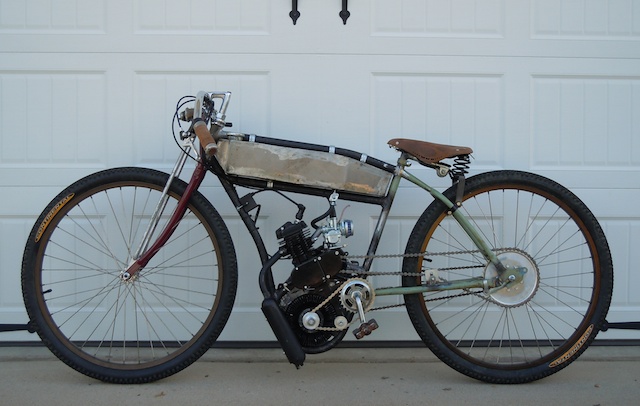
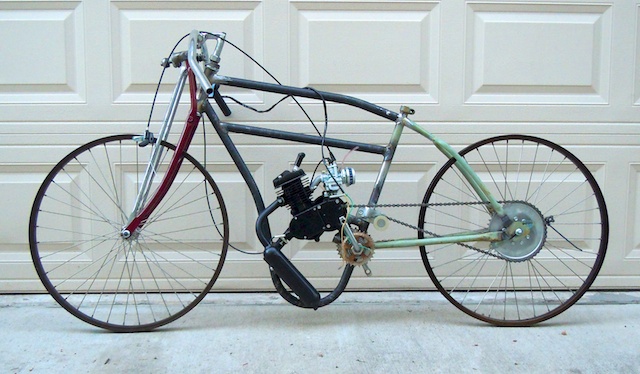
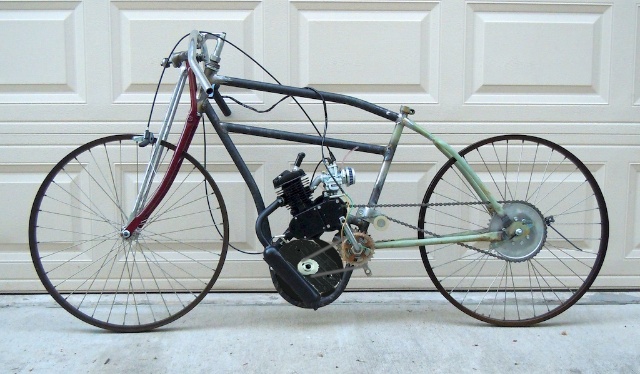
or like this on the bike (with it painted black)...

31AUG2010_4_1.jpg


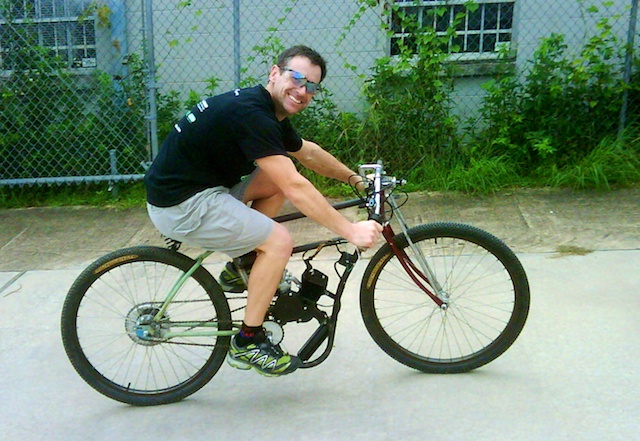
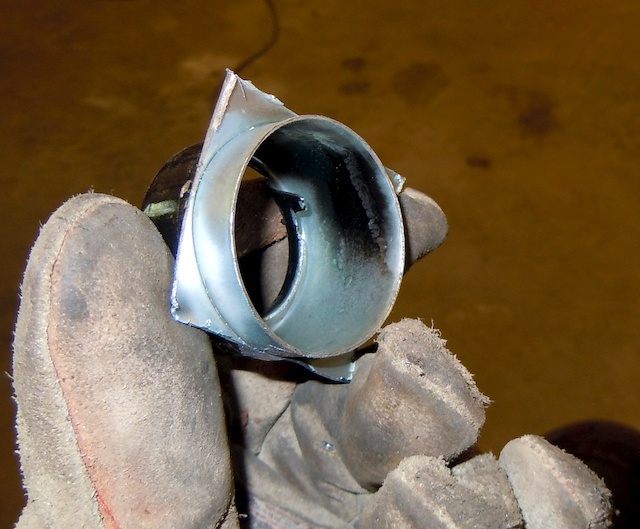
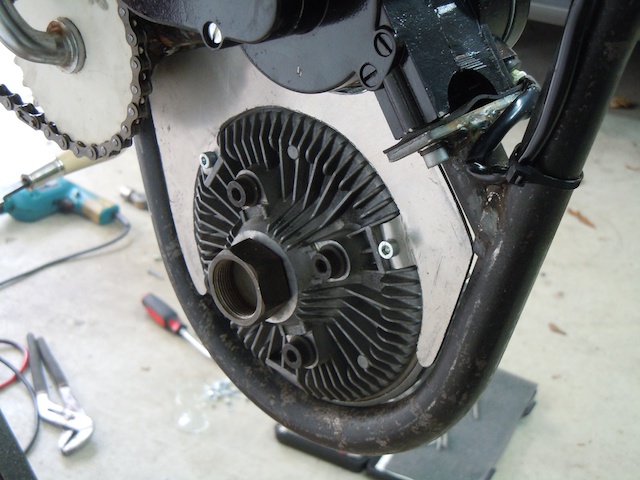
And I guess on the back side it would look like this (in the mockup) if I did a sheave wheel...

31AUG2010_4_2.jpg


Anyway...just thoughts. If you have any ideas, I'm listening...

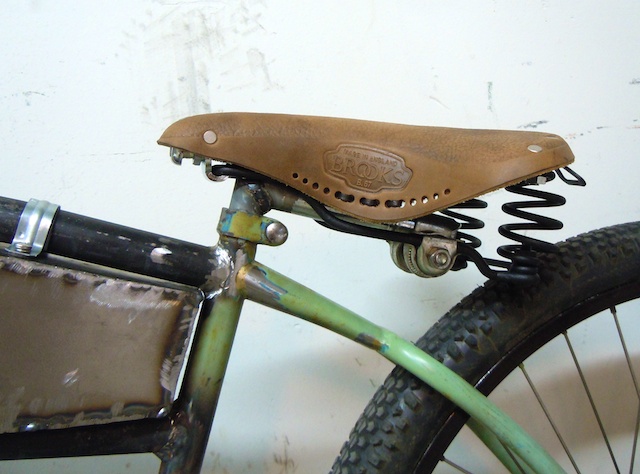
By the way...did you see the toothbrush holder in the first two images? That guy is pretty darned ingenious!

And thanks for all of the kind words!
 
icyoud2? he is! you should message him for help! im sure hed be glad to. :D
 
Well...I found something...maybe. It's a high-dollar variable pitch sheave wheel from browning that has been discontinued...

Pulley.png


I got it fo' next to nothing because it has been replaced by new version.

It's O.D. is 6.5 inches...should fit nicely and certainly looks the part... and maybe it combined with the other bits and pieces will work? (doesn't hurt to try I reckon.) It'll be here Tuesday.
 
Well, look what showed up today! Clearly the new grips and seat aren't permanently mounted yet, but with them sitting in place...oh yeah...sexy!!!

2SEP2010_.jpg


So this weekend I don't know how much I will get done...probably small things that won't really make a huge visual impact, but I do love attention to detail! We'll see...
 
kinks said:
nice work Bill... I need a tank welded, is your friend doing that for you , If I make a mock up can he assit , i'll pay of course
I talked to Serg...he said he'd weld up the tank for you if you cut all the pieces (have everything ready). Serg has actually purchased several parts and pieces to build his own board track racer...so he's into it!
 
I got a little done today, but a lot of time was spent going here and there getting parts and whatnot...plus, I only wanted to spend part of the day on the project...the other part of the day is family time!

And by the way...I was able to get the right grip installed so that it controls the throttle. That was challenging...I though it would take about 20 minutes...an hour and a half later...UGH!

Anyway... today Sergio and I went to Triple S Steel and purchased some metal. I got some 18 gauge steel for building my fuel tank (it came in a 4' X 10" sheet, so I reckon I can screw up several times), and Sergio got some tubing for his very own board track racer project. After loading the steel, we went to Cox Hardware and Lumber (only the greatest hardware store on the planet!) and purchased various bits and pieces for our projects. And we finally ended up at our friend Lance's shop--a warehouse where Lance lets Sergio keep some of his tools...and Lance is also kind enough to let his friends use the shop for random projects. Thanks Lance! By the time all the running around was done, it was lunch time, but I at least wanted to get the seat on the bike before calling it a day...

I got a couple of seatposts to accomplish the task...

4SEP2010_1.jpg

Sorry about the picture quality...all I had was my cellphone camera...I forgot the digital camera...
And after some measuring and figuring, I proceeded to cut them into pieces :)

4SEP2010_2.jpg


I had to do some grinding here and there to get the angle just right. This (picture below) wasn't the final angle, but you can see where I was heading...

4SEP2010_3.jpg


Once I got it right, Sergio stepped away from his bike and welded the two pieces together for me...

4SEP2010_4.jpg


Here's the raw product product...

4SEP2010_5.jpg


Clearly the weld needs to be grinded and cleaned up...
...and the seatpost itself will be chromed by another buddy who owns a coating business...
...and I will also lower the nose of the seat a bit...
...and I'm also going to fab some brackets to attach to the back of the seat...
...and that seatpost clamp is not the one I'm using...I just forgot the bolt, so I used that quick release to get by...
...so over look all that for now...
:)

Here I am testing riding (pedaling) the bike with the seat installed...

4SEP2010_6.jpg


Sergio even used my cell phone camera to record the first ride. (That link is to YouTube...it doesn't appear that I can embed a video on here).

So here's where the bike is right now...

4SEP2010_7.jpg


Tomorrow I've got big plans and should be able to get a lot done. Hopefully I'll have the fuel tank build (of course the welds will not be cleaned up until later), and I should be able to put fuel in the bike and take it out on the first ride. There's a lot of work between now and staring the motor. I have to tighten cables...clean up wiring...actually fabricate the tank and install it...yada yada...but I should be able to do it all tomorrow unless something goes wrong...which typically does...

Anyway, that's all for now...
...until tomorrow!
 
Mission accomplished, but it took a lot longer than I expected...

I started out by placing all of my templates onto the sheet metal and tracing them out...

5SEP2010_1.jpg


Then with my cut-off wheel, I went to work...

5SEP2010_2.jpg


Next I needed to mark out everything. I wanted to mount the tank to minimize external hardware, so I decided to weld some coupler nuts inside the tank so I could screw the tank to the frame in a more professional manner. Here's the layout of the six of them...

5SEP2010_3.jpg


Then I screwed them to the sheet metal in preparation for welding...

5SEP2010_4.jpg


Next I needed a gas cap. Since the tank that come in the kit had one, I decided to use it. Before...

5SEP2010_5.jpg


After... :)

5SEP2010_6.jpg


Here's a few other views...

5SEP2010_7.jpg


5SEP2010_8.jpg


5SEP2010_9.jpg


5SEP2010_10.jpg


Here's what the coupler nuts look like welded onto the inside of the tank...

5SEP2010_11.jpg


And here's yours truly welding and grinding the new tank...

5SEP2010_12.jpg


5SEP2010_13.jpg


5SEP2010_14.jpg


So here's the tank on the bike...

5SEP2010_15.jpg


5SEP2010_16.jpg


It took a long time to build the tank, and when I was done... I was done! Clearly the tank needs more grinding and sanding, but it's all welded up. I'll pressure test it at some point in the next few days.

Aside from that, I still have a ton to do. I don't really like the way the seat is mounted to the bike; I'm going to do something different. I still need to clean up some wiring. I want to use copper line instead of rubber hose for the fuel line, so I got to figure that out. I also need to fabricate an "oil pump" and incorporate it into the design...and on and on...but I'm getting there...slowly...

I don't think I'll be working on it tomorrow, but I'll piddle a bit during the week...

That's all for now...
 
Well you´re getting there, and in great shape!
Don´t forget to document your progress the way you´ve been doing it, I feel is going to be very helpful for some of us here soon :wink:
 
Gdcast said:
Well you´re getting there, and in great shape!
Don´t forget to document your progress the way you´ve been doing it, I feel is going to be very helpful for some of us here soon :wink:
Well...I have some more documentation for you... :D

I didn't plan on working a whole lot on the project today, but it was raining, so I piddled in the garage...

The first thing I did was to mount the tank to the frame. Here's the hardware I used...I lined the inside with rubber and used rubber washers on the tank...

6SEP2010_1.jpg


I've got four brackets on the tank...this is what it looks like mounted on the bike...

6SEP2010_2.jpg


Remember me saying I didn't like the way the seat looked on the bike...well I fixed it! I like this a lot better...

6SEP2010_3.jpg


I'm going to fabricate some brackets to go from the seat stays to the bottom of the seat. It will look a lot like an Indian from the era, but I don't have the metal to make it right now...it can wait. But doesn't that look a lot nicer than before?

I guess you can see all the wiring and extra-long clutch cable flopping about in the picture right before the seat...so I went ahead and cleaned up all of that...

6SEP2010_4.jpg


Muchas better!

After I checked to ensure all of the bolts were tight and double checked everything else, I put some fuel in the bike to see if it would start. The first thing I noticed was that I had a pinhole leak in the tank. I guess my welding isn't as good as I thought, but it wasn't too bad...I'll fix it later. So after dealing with that...I started up the bike and went for my very first ride on it! Omar was outside with his wife and kiddo...I gave him the camera to film the inaugural ride!

Like before, I don't think I can embed the video, but here's a link to it on YouTube: http://www.youtube.com/watch?v=Ziip2WsVG9I

I was so fast I was a blur as I buzzed the tower!

6SEP2010_6.jpg


And here's the bike after the ride!

6SEP2010_5.jpg


I guess the pinhole leak in the tank was a little worse than I though...no problem...I'll fix it.

My first ride was awesome! I'm still grinning.

There's still a lot left to do. I did fix the seat, but I have to make some brackets for the rear of the seat. There's also a lot of little details, but the big thing is to fabricate an "oil pump" and finish my gas tank... and all the other yada yada I've mentioned before.

I'm pretty jazzed about the bike starting so easily and running so well. Super fun!

More later....
 
I had some time this afternoon to do a little work on my project. As I've mentioned several times, I needed something to fill the area where the oil pump used to be on the turn-of-the-century board track racers. Well…I finally found something! I went to see my buddy Vic at The Rover Shoppe…he let me wander around a bit and within a few minutes I found it--a fan clutch out of an old Land Rover…perfect!

I spend some time drawing and subsequently cutting out a bracket to hold it. I need to weld in a couple of bracket to bolt it to the frame, but this is what it looks like right now…sans paint, etc., but you get the idea…

9SEP2010_1.jpg


9SEP2010_4.jpg


I have to make another bracket for the other side, weld on the brackets (like I mentioned before) and then install a shaft and gear for the chain that will run to it…yada yada… but at least it's taking shape!

I've also mentioned how I wasn't happy with the seat, so I fabricated a bracket and a way to mount it to the seat and the bike…looks nice and will support the back of the seat…

9SEP2010_2.jpg


9SEP2010_3.jpg


And then one other thing I was able to accomplish was to weld a tab to the frame to mount the chain tensioner. I had this bolt-on thing that looked like crap, so I cut it up and was able to use a piece of it to accomplish the mission. And actually, I was going to weld it, but Sergio (I was at his shop) welded it while I was working on my seat bracket. Thanks Sergio…but you only welded one side…now I got to weld the other!

9SEP2010_2_.jpg

hmm...gonna need to clean up those welds :)
So not much time, but it feels good to knock out a few piddly things.

Mas later…
 
A clutch!!?? Great Idea!!! I´ll start looking for one of those, but I prefer Jeep they were here first :wink:
 
So this is another one of those times where it doesn't look like a lot was done, but it took a long time to do it!

I worked on my faux oil pump today…and also welded the pin-hole leaks in my gas tank. The tank welding was easy…the oil pump…a little challenging. I mean, even to get to here took entirely too long...

12SEP2010_1.jpg


But eventually I got it installed. I had to fabricate another piece of aluminum for the other side…then figure out how to mount a chain tensioner…blah blah blah. Seriously…I know it doesn't look like a lot, but dang it…what a pain!

12SEP2010_2.jpg


When you step back and look at it all together…tis nice, no?

12SEP2010_4.jpg


Hopefully my tires will get here this week; I need to install those...and I want to move the choke elsewhere...and I have a lot of finish work to do--like grinding welds, installing the rear fender, filling all the scratches from the grinding, installing some copper tubing, yada yada...

Anyway, it's coming along...
 
Mas progress!

I got the rear fender installed, but like everything else, it wasn't without a few challenges. This had to be ground down; that had to be drilled; this over here had to be bent…

Anyway, here are a few shots of the fender…

14SEP2010_1.jpg


14SEP2010_2.jpg


14SEP2010_3.jpg


I think it looks nice!

More later…
 
Look’s Nice?? :roll: I think it looks Amazing!! 8) I so want to build one but I’m not sure if I could build a two seater so that my divorce attorney could ride with me!! :lol: So for now I will set back and enjoy your build!

You are really doing some unbelievable work my friend! Keep it up! 8) HL
 
hey man nice bike! Great job on everything, looks fantastic.
I had an idea about the seat mount. I saw this video on youtube,
think it's called (zoombicycle). This guy Barry cut his seat tube and
welded some steel there for a seat mount. Really cool idea and i will
probably do this to my bike when I learn how to weld.
Cheers


aSEATmount.jpg
 

Latest posts

Back
Top