Hi yall. I know I'm new and this is my first post, but I have been lurking for a long time. And I'm making this first post about my wagon I just built to show gratitude and say thanks to Hooch for posting his build of Allie's Christmas Hot Rod Radio Flyer wagon found here. viewtopic.php?f=11&t=49680&st=0&sk=t&sd=a&hilit=radio+flyer#p476188 I have never seen anything like that done before and was inspired to build my own. His is truely and awesome piece, but I didn't want to copy it. I wanted to build one taking his idea, but building it with my own style. I am not posting this to compete with him and his wagon, I only post to share my creation and like I said, to say thanks for sharing his and inspiring me to build one of my own.
Onto the wagon, started life as a 1950s era Radio Flyer, only since it was repainted years ago I started out not knowing it was a genuine RF.

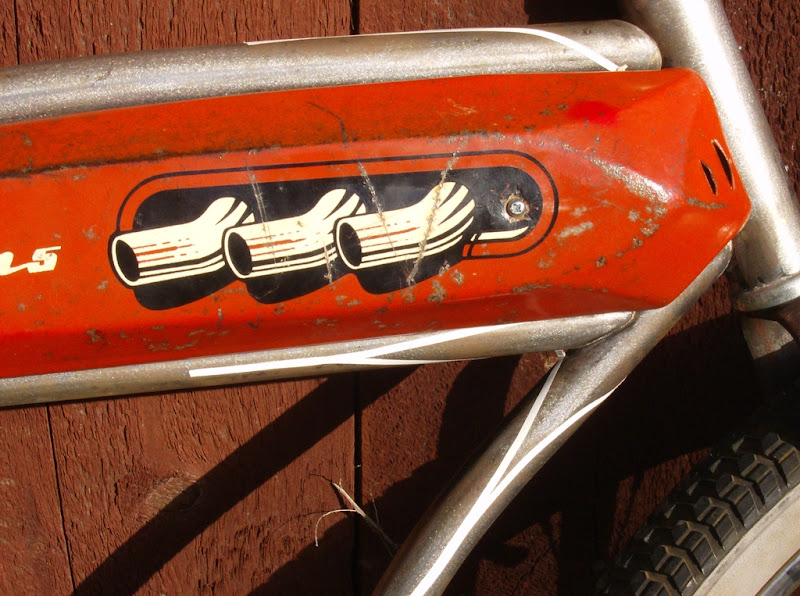
once I discovered it was a RF I gently sanded off the layers of repaints with some fine grit automotive paper untill the original logo was visible again.

Did a bit of mock up and once I was happy I measured out it and make some 1:1 scale drawings out on some graph paper to use as blue prints / templates. The chassis is square tube in 1/2" and 3/4" for the axles. There is also a piece of 1/2 solid square stock for the front pan crossmember and a piece of 5/8 square stock inside the rear axle. This was done so the bolts that hold the pan one would have something to thread into. I fabbed everything from scratch. including the axle "C" and the front spindles. Spindles are made from a couple union nuts and bolts with some square tube added for the steering arms.


Completed rolling chassis. Rear wheels are the original 50s RF wheels, fronts are the back wheels of a Roadmaster tricycle


I drilled the rear with 2 different holes so I could raise or lower the stance.

For the front I can flip the knuckles and swap sides to raise or lower the front end.

Currently the rear is raised and the front is lowered and that is probably how it will be kept. I like the stance of it.
During mock up I figured I wanted and engine also, and seen my old cooler sitting there. Figured just a little work I can make it into and engine and keep the function of the cooler for kids juice boxes etc.

For the cabin, I did all the woodwork myself also and used all wood I had laying around. Only thing I had to buy was a piece of 1/4" oak to use for the floor and cowl.

Here is the completed engine and painted/stained cabing along with the wooden grill I made and the seat pad witch is 2" foam covered with large terry bath towl I got at target. I stacked a few pices of wood and cut it out to the shape of a blower hat from a street rod or dragster then carved out the recesses for the butterflies. I did use the same head lights as Hooch. they were just too perfect and nothing else comes close.

Also I hinged the cowl to have a small storage compartment at the front of the pan. It will hold an MP3 player or cell phone to play music for the kids via the speakers in the dash. eventually I may hold a battery or 2 to power working lights.


And no rat is complete with out rust IMO. So I sprayed the chassis down with a vinegar, hydrogen peroxide, and salt mixture that took it from a shiny new steel to this in about an hour.

And the finished wagon, note the panda bear speakers in the dash, and cooler is still functional. I did not mods to the original pan. There are 4 bolts, 2 front, 2 rear that originally held the axles on, hose holes now are used to hold the pan to the chassis. These are what the solid bar stock described above was used for. Then the other 3 holes in the pan that were for the braces on the original axle are now used with carriage bolts through the floor of the wooden cabin and through the pan to hold it all together. I also used 4 small screws through the crossmembers that support the engine/cooler to keep the cooler in place.


and the kids out on the first test drive.

Thanks for checking it out and please leave comments, all, good and bad. If you don't like something about the wagon, mention it. i may agree and change it. I don't get offended by constructive criticism.
Ron
Onto the wagon, started life as a 1950s era Radio Flyer, only since it was repainted years ago I started out not knowing it was a genuine RF.
once I discovered it was a RF I gently sanded off the layers of repaints with some fine grit automotive paper untill the original logo was visible again.
Did a bit of mock up and once I was happy I measured out it and make some 1:1 scale drawings out on some graph paper to use as blue prints / templates. The chassis is square tube in 1/2" and 3/4" for the axles. There is also a piece of 1/2 solid square stock for the front pan crossmember and a piece of 5/8 square stock inside the rear axle. This was done so the bolts that hold the pan one would have something to thread into. I fabbed everything from scratch. including the axle "C" and the front spindles. Spindles are made from a couple union nuts and bolts with some square tube added for the steering arms.
Completed rolling chassis. Rear wheels are the original 50s RF wheels, fronts are the back wheels of a Roadmaster tricycle
I drilled the rear with 2 different holes so I could raise or lower the stance.
For the front I can flip the knuckles and swap sides to raise or lower the front end.
Currently the rear is raised and the front is lowered and that is probably how it will be kept. I like the stance of it.
During mock up I figured I wanted and engine also, and seen my old cooler sitting there. Figured just a little work I can make it into and engine and keep the function of the cooler for kids juice boxes etc.
For the cabin, I did all the woodwork myself also and used all wood I had laying around. Only thing I had to buy was a piece of 1/4" oak to use for the floor and cowl.
Here is the completed engine and painted/stained cabing along with the wooden grill I made and the seat pad witch is 2" foam covered with large terry bath towl I got at target. I stacked a few pices of wood and cut it out to the shape of a blower hat from a street rod or dragster then carved out the recesses for the butterflies. I did use the same head lights as Hooch. they were just too perfect and nothing else comes close.
Also I hinged the cowl to have a small storage compartment at the front of the pan. It will hold an MP3 player or cell phone to play music for the kids via the speakers in the dash. eventually I may hold a battery or 2 to power working lights.
And no rat is complete with out rust IMO. So I sprayed the chassis down with a vinegar, hydrogen peroxide, and salt mixture that took it from a shiny new steel to this in about an hour.
And the finished wagon, note the panda bear speakers in the dash, and cooler is still functional. I did not mods to the original pan. There are 4 bolts, 2 front, 2 rear that originally held the axles on, hose holes now are used to hold the pan to the chassis. These are what the solid bar stock described above was used for. Then the other 3 holes in the pan that were for the braces on the original axle are now used with carriage bolts through the floor of the wooden cabin and through the pan to hold it all together. I also used 4 small screws through the crossmembers that support the engine/cooler to keep the cooler in place.
and the kids out on the first test drive.
Thanks for checking it out and please leave comments, all, good and bad. If you don't like something about the wagon, mention it. i may agree and change it. I don't get offended by constructive criticism.
Ron