Monark springer repair questions

Rat Rod Bikes Bicycle Forum

Help Support Rat Rod Bikes Bicycle Forum:

This site may earn a commission from merchant affiliate links, including eBay, Amazon, and others.
Joined
Jan 21, 2013
Messages
52
Reaction score
18
Rating - 0%
0   0   0
I hope this is the right place for this. I have a 24" Monark SD rat that I'm finishing up. I had actually performed what I hoped was the final assembly a few days ago, but for some reason the springer on the front didn't seem to be behaving correctly. When I did a full mock-up prior to paint, it seemed fine. It rode fine, no issues at all that I could tell. Then after paint and final assembly not only did the spring feel loose/sloppy, but the bolt on my front light bracket, that I have mounted to the front fender mount (bottom of fork), rubbed the front tire when I rode. It didn't do that at all during my initial mock-ups!

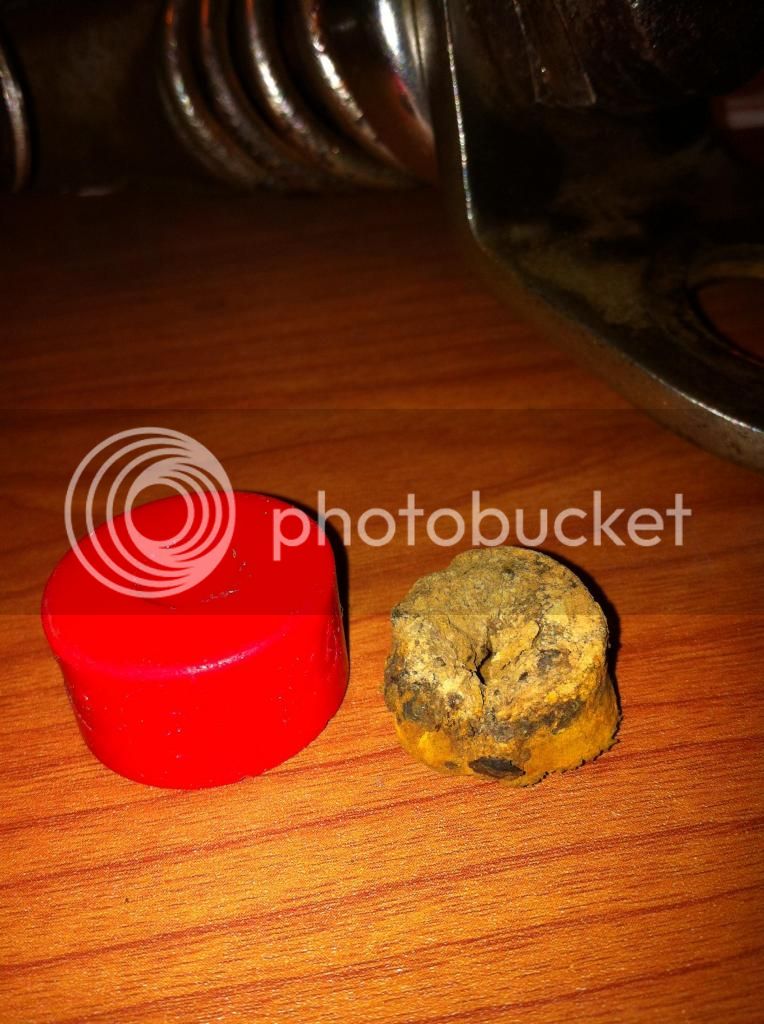
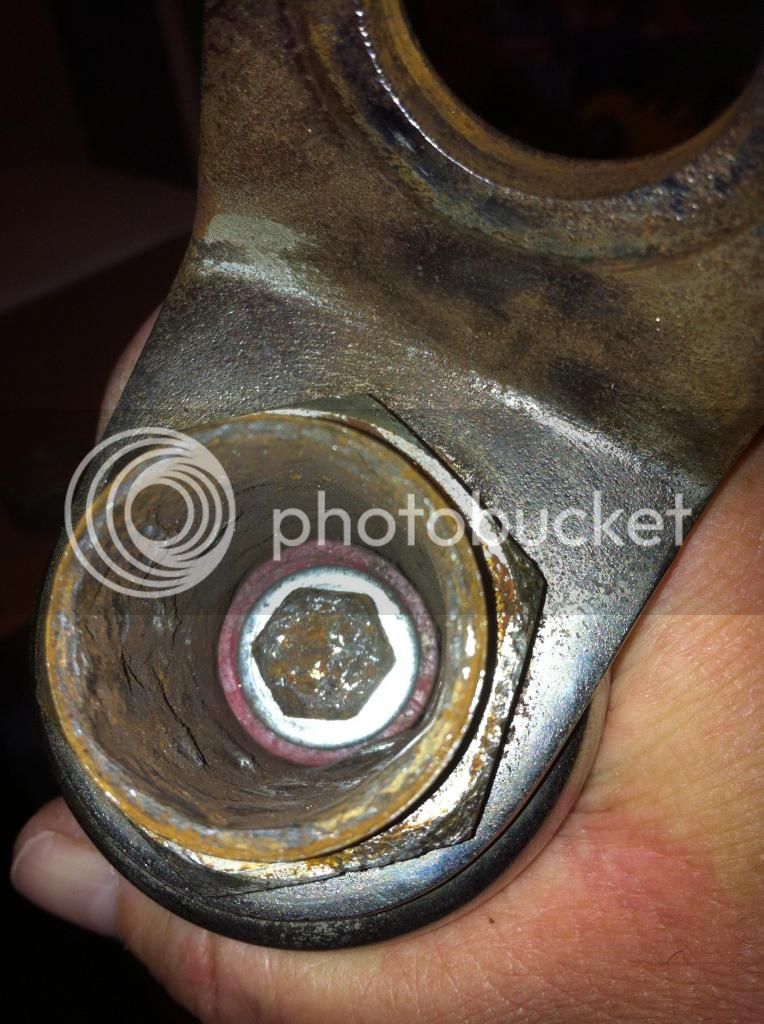
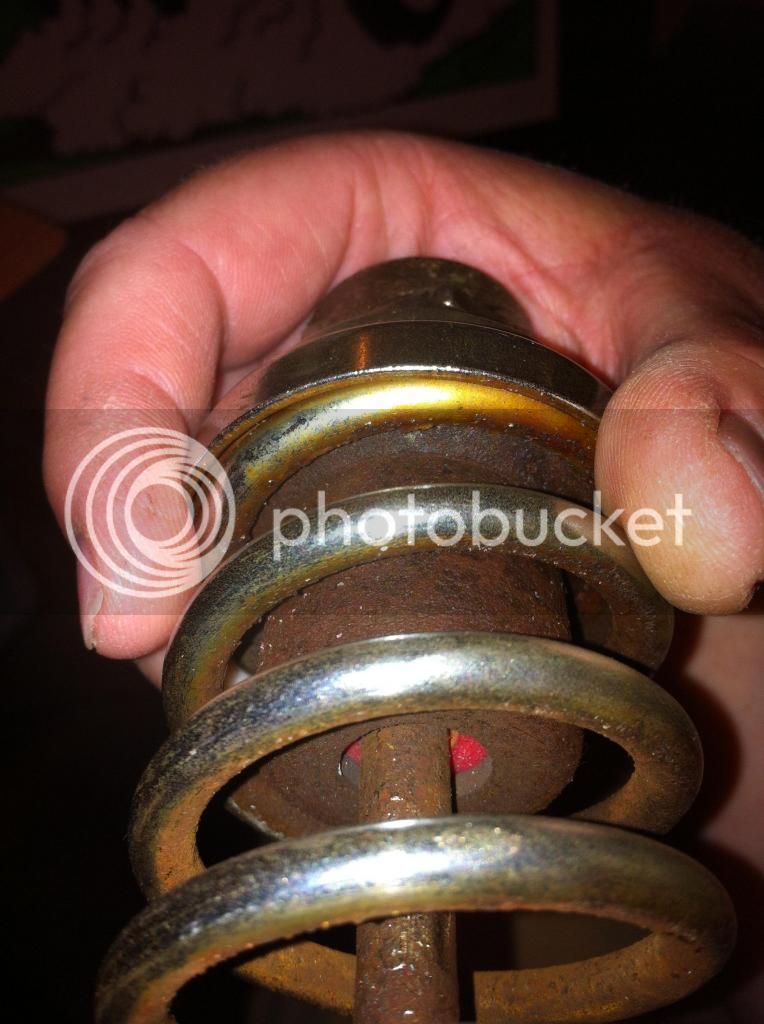
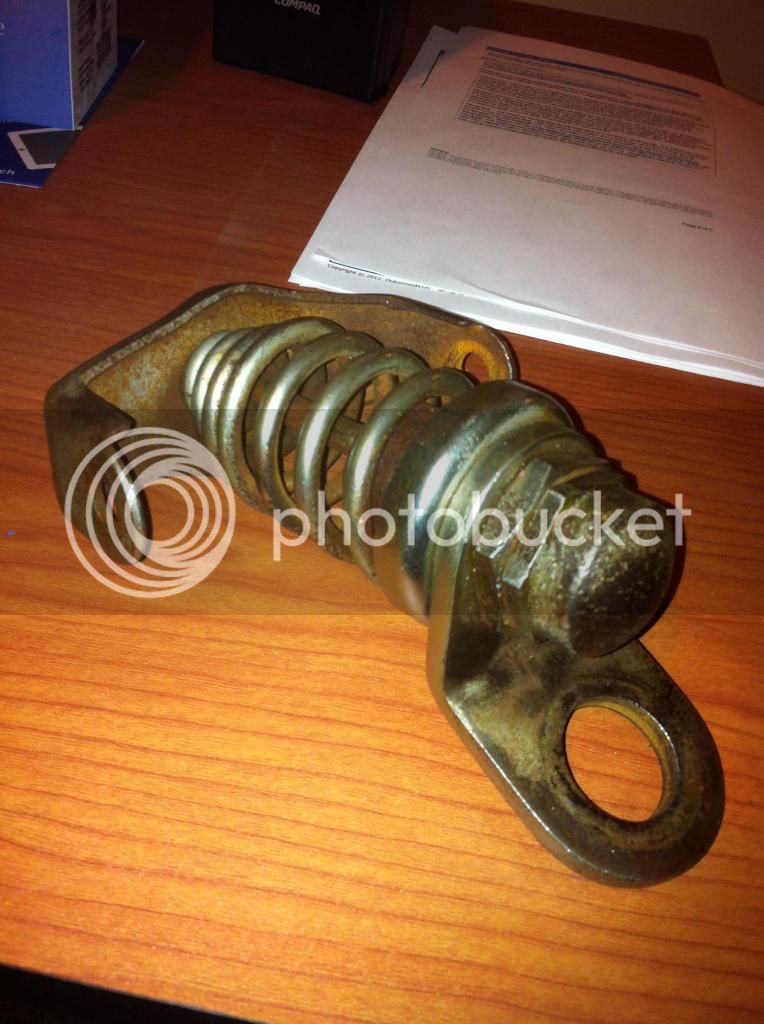
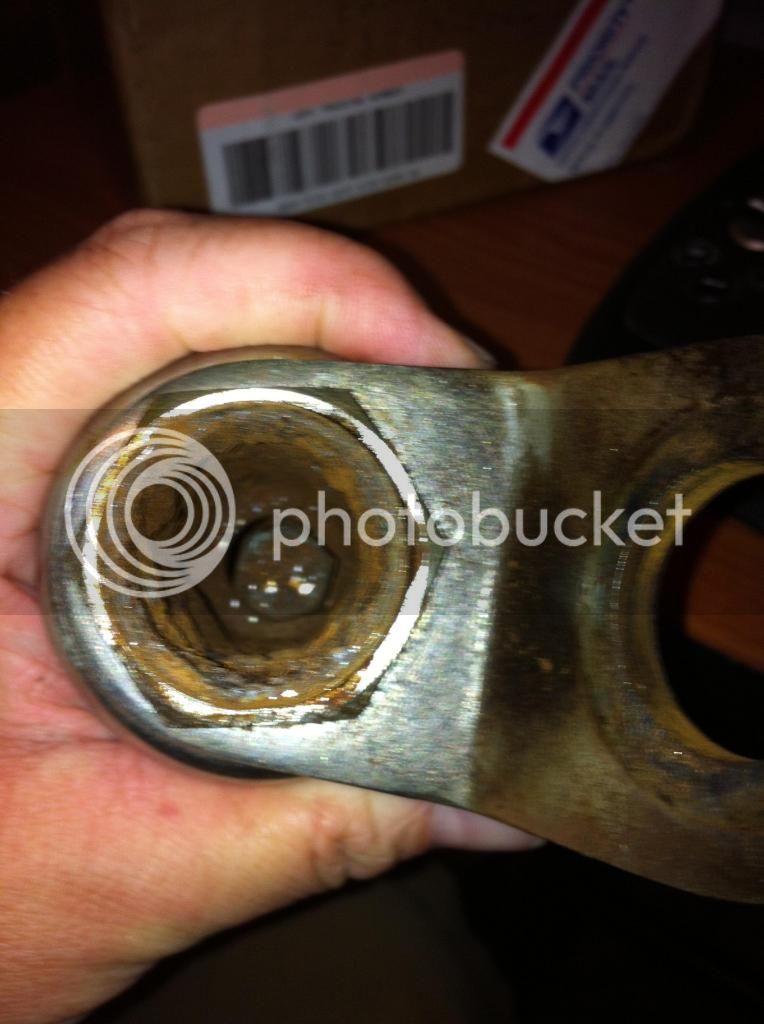
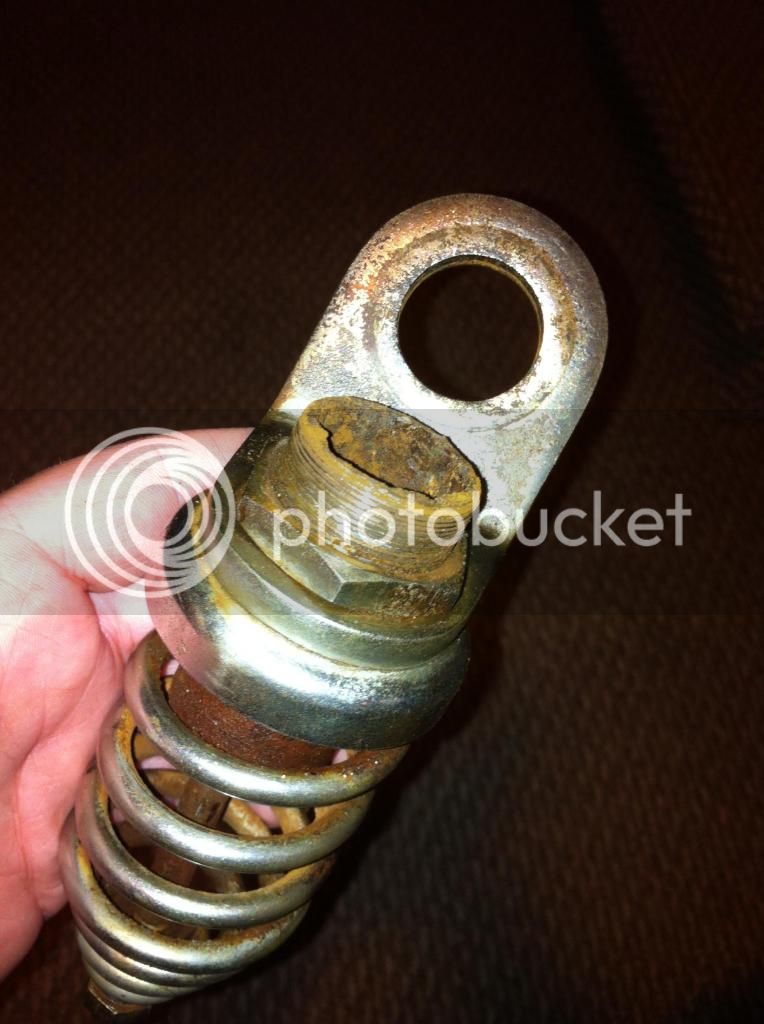
So here's my question...or questions. I took the springer apart, and when I finally got the large retainer cup off the top, a small "chunk" of rubber, pathetic as it was, fell out (see pics, the rubber fell from the chamber sealed by the large retaining cup that resides just under the neck of the bike). Did there used to be, or should there be, a rubber "bumper" of sorts in the chamber to cushion the springer action? How large was it? Are there any replacements available out there? (I bet I know the answer to that last one...lol). I did find some skateboard bushings that look like they will fit perfectly with little or no modification, so I can go that route if need be. I can use one or several stacked up if I need to fill the entire chamber if need be.

My only other question would be, if there wasn't a rubber bushing in that chamber, is there a way to adjust the tension on the spring to tighten the ride up a bit?

Pics below as visual aids! Thanks a million to anyone who can help me out!!

Jay H.
OK

image3.jpeg


image4.jpeg
 
Also, I should mention, the bolt head you see in the bottom of the chamber is the one that runs through the spring, all the way out to an acorn nut on the outside of the yoke. There are no more threads remaining on the shaft inside the spring where the other nut resides behind the yoke. So I don't see any way to make adjustments there.

Also. it should be said here, I'm a heavy dude (245lbs), so maybe it's just not in the cards for a gentleman of "healthy" proportions such as myself, to be riding a bike designed to support no more than 100lbs or so....:oops:
 
OK, although I hear nothing but crickets in this post (thanks for the vote of confidence Walker), I went ahead and pulled my springer apart and implemented a "fix" for it on my own. Since it seems these may be largely uncharted waters, I thought I might pass on what I came up with.

I honestly had no idea what was inside the springer housing when I started out. As I explain above, the one large bolt that passes through the spring and up into the housing felt very loose and I feared it had rusted through and broken off inside. I pulled the large retaining cup off the top of the springer assembly (actually had to use an impact wrench to get it loose) and as soon as I did, besides a hand-full of rusty mess, out fell a small piece of what I can only assume was a rubber bushing or what used to be rubber (see pics below, it's the shriveled up lump next to the skateboard bushing). The bolt was, to my surprise, still perfectly intact.

Now, I didn't see any way to adjust the tension on the spring. I needed it to be tighter/more firm, but the acorn nut on the outside of the yoke, and the nut on the opposite side of it inside the spring had no more threads left on the bolt for adjustment. So, the only place I had to turn was inside the cup at the top under the bolt head. If I could space the bolt up with a new "bushing" it would force me to pull the spring together slightly more to get the retaining nuts on and thus tighten the spring and give a firmer ride. I found a bag of $4 skateboard bushings at my local bike shop that seemed like they would fit the bill perfectly! I bought them and went to work. The bushings were slightly too big around to fit into the tube, so I had to carve a small amount of the outside of the bushing down with an Xacto knife, then give it just a bit of sanding on the belt sander until it fit down into the tube with a firm fit. The hole in the center of the bushing was already the exact size for my bolt to pass through. Once the insides of the tube were cleaned of its rust and gunk, the bolt, with a new washer, were slid perfectly into place (pics below).

I proceeded to put the whole springer mechanism back together and...voila! The perfect tension was back on the spring. The bushing offered the right resistance in the tube and keeps the bolt from "bottoming out" in the tube. I can only assume you could put more than one bushing in the tube if you had to. They could even be cut down in thickness to accommodate different applications. I purchased the "hard" bushings, but I believe they come in like 4 different "stiffness" ratings, so a softer bushing may be better for certain repairs.

Hope this helps anyone out there looking to effect repairs on a similar type of springer! Hope that all made sense...LOL!

Jay H.

springerfix3.jpeg


springerfix4.jpeg


springerfix2.jpeg


springerfix1.jpeg
 
deorman said:
Is this stickied yet? :idea: Why not? :?


Hey deorman, how does one "stickie" the post? And forgive my ignorance, but what benefit does that give? :oops: Does it show up in another list of topics for all to see? Thanks,

Jay H.
 

Latest posts

Back
Top