Good work! Now hurry up so i can stare in amazement!
You are using an out of date browser. It may not display this or other websites correctly.
You should upgrade or use an alternative browser.
You should upgrade or use an alternative browser.
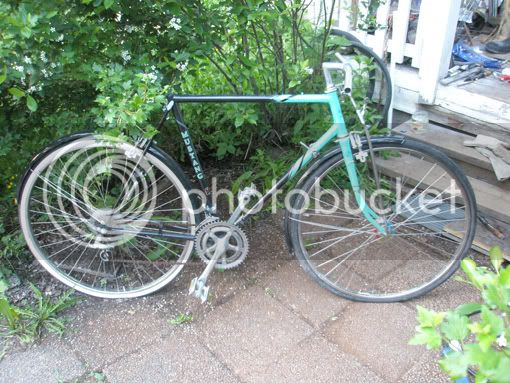
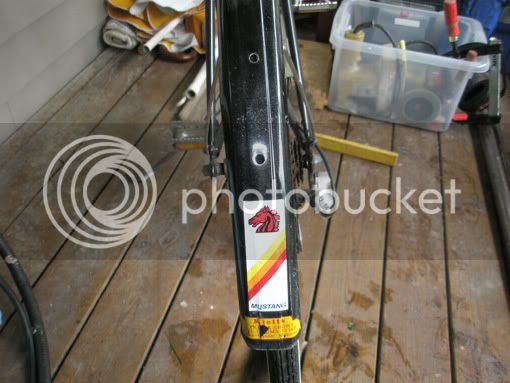
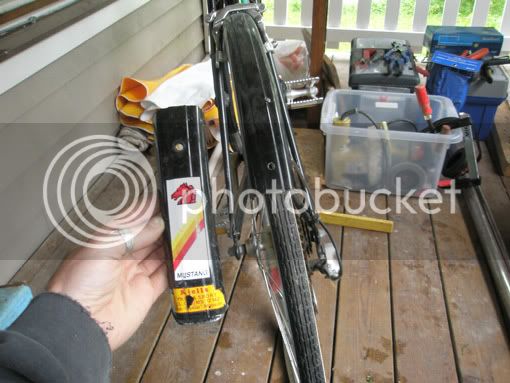
Mustang
- Thread starter Galtbacken
- Start date


Help Support Rat Rod Bikes Bicycle Forum:
This site may earn a commission from merchant affiliate
links, including eBay, Amazon, and others.
Thanks! 
Hey I'm hurrying I'm hurriyng!! :lol:
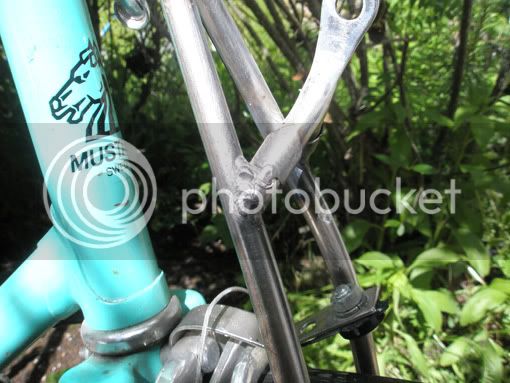
Done some more work today!
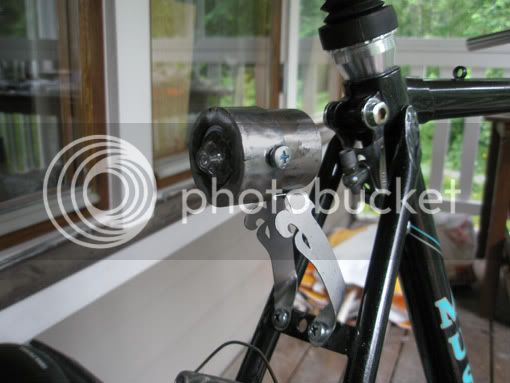
I might have said it already but I like things I put on a bike to have a function (although I like some stuff just for looks too, but everything you put on a bike adds weight and it's your own legs that will pay the price...or someone elses legs for that matter if it's their bike... :wink: ), and since these trusses aren't there to support the fork I wanted to give them another purpose. Besides looks that is...
Here's what I've done:
This piece I actually started on yesterday, but I finished it today.
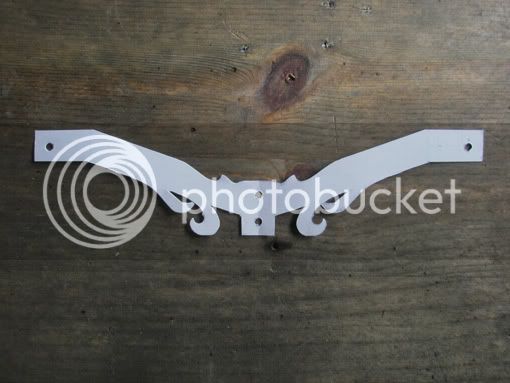
Some more "lugs".
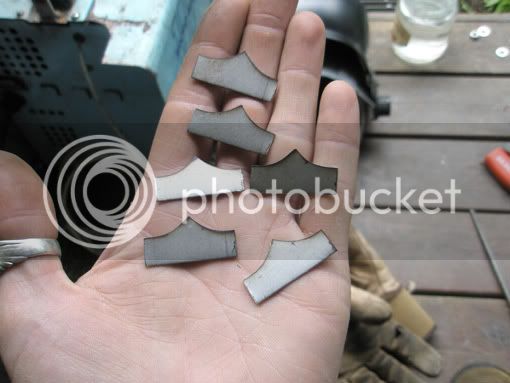
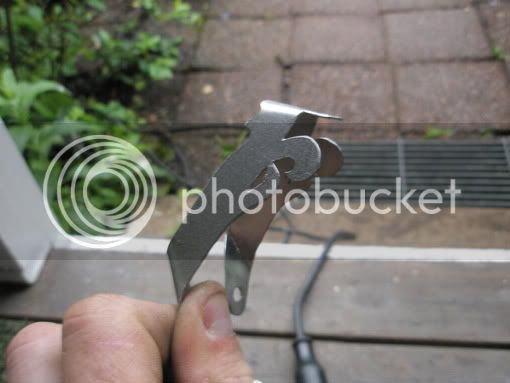
I spotwelded the little pieces that will make the fake lugs on and then wrapped them around the other piece and welded them on the back.
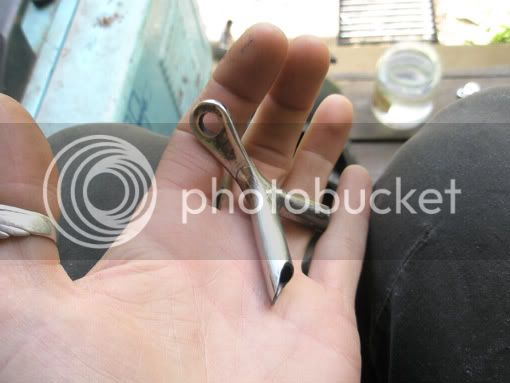
A while ago I bought these in case they'd come in handy someday and today they were good help when I was wrapping the fake lugs around the tubes.
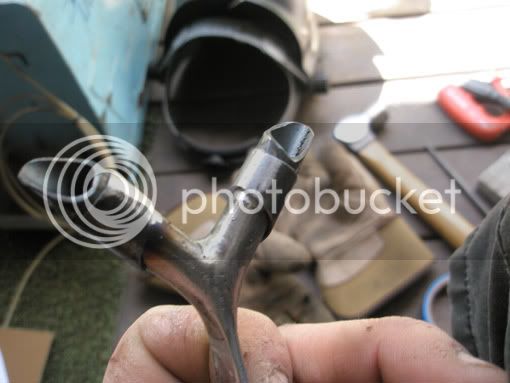
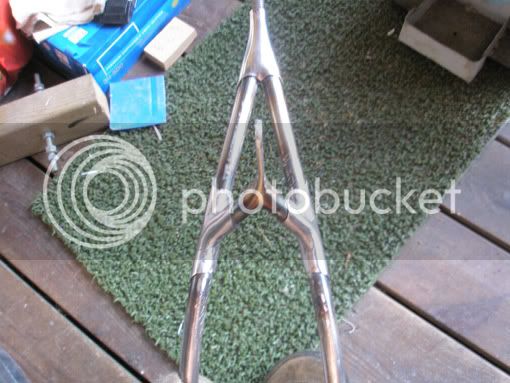
Joined with the trusses.
Then I welded on the rest of the lugpieces to the trusses and then filled the gaps between all those pieces with welds. Then some grinding and filing. Still some pits to be filled...
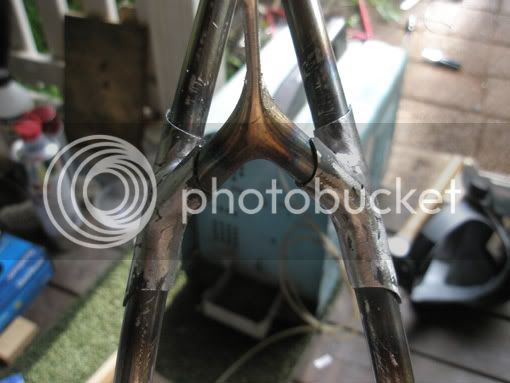
So I filled those with welds and then some more grinding and filing. Still some minor pits in the surface but I don't think they'll be visible after it's painted. I'm going to finish this bike without any filler. Just because I don't like sanding filler.
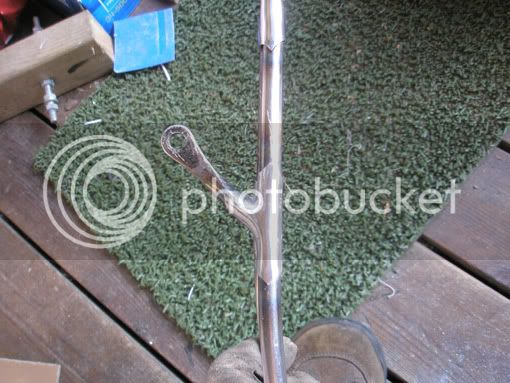
So what's the function of this part? Ladies and gentlemen, I present to you the world's largest lightbracket!!
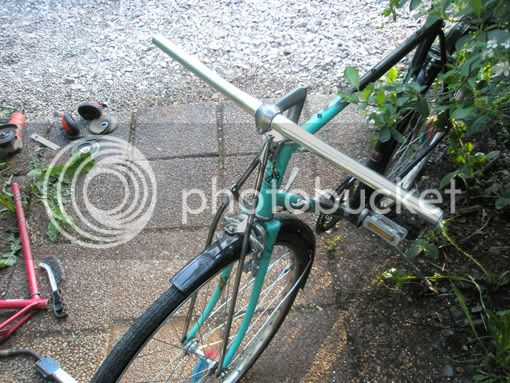
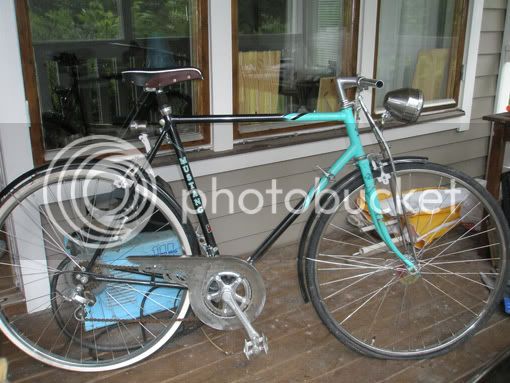
Here it is on the bike with the bars I'll be using.
I'll shorten the bars a couple of centimeters, they're a little bit too wide to look good I think.
I'll be back with more pics as soon as I've made any more progress!
Hey I'm hurrying I'm hurriyng!! :lol:
Done some more work today!
I might have said it already but I like things I put on a bike to have a function (although I like some stuff just for looks too, but everything you put on a bike adds weight and it's your own legs that will pay the price...or someone elses legs for that matter if it's their bike... :wink: ), and since these trusses aren't there to support the fork I wanted to give them another purpose. Besides looks that is...
Here's what I've done:
This piece I actually started on yesterday, but I finished it today.
Some more "lugs".
I spotwelded the little pieces that will make the fake lugs on and then wrapped them around the other piece and welded them on the back.
A while ago I bought these in case they'd come in handy someday and today they were good help when I was wrapping the fake lugs around the tubes.
Joined with the trusses.
Then I welded on the rest of the lugpieces to the trusses and then filled the gaps between all those pieces with welds. Then some grinding and filing. Still some pits to be filled...
So I filled those with welds and then some more grinding and filing. Still some minor pits in the surface but I don't think they'll be visible after it's painted. I'm going to finish this bike without any filler. Just because I don't like sanding filler.
So what's the function of this part? Ladies and gentlemen, I present to you the world's largest lightbracket!!
Here it is on the bike with the bars I'll be using.
I'll shorten the bars a couple of centimeters, they're a little bit too wide to look good I think.
I'll be back with more pics as soon as I've made any more progress!
Nice job on the truss rods. I wondered how you did all the metal wrapping until I saw the hammers. I wish I had more hobby time, need to get busy with Sweet Liberty again.
top notch work yet again!id buy those if they were for sale! :wink:
If i lived next door to you I would be at your house every day.
Thanks guys!
Yeah I'm lucky to have a few weeks off from work now!
That's a great compliment, thanks! But now you know how to make them yourself, no need to buy them from anyone!! :wink:
You'd be very welcome! After a while I might have put you to work though... :lol:
TommyTwoTime said:I wish I had more hobby time, need to get busy with Sweet Liberty again.
Yeah I'm lucky to have a few weeks off from work now!
stretch said:id buy those if they were for sale! :wink:
That's a great compliment, thanks! But now you know how to make them yourself, no need to buy them from anyone!! :wink:
Dan Jose said:If i lived next door to you I would be at your house every day.
You'd be very welcome! After a while I might have put you to work though... :lol:
Oh man, those homemade lugged parts look awesome!
Didn't expect it but I think I'm even more interested in this build than I was in your scratchbuilds. (...if that's possible...) Just different pro's and con's to deal with when building. I don't think I will ever be able to build a bike from the ground up. Therefor I hope, with your skills and styling, your Mustang will come up with some inspiring touches too, that'll set your bar just a wee bit lower, making us, mortals, set our bar just a wee bit higher...
But in the end I think this will be another awesome Galtbacken creation that leaves us biting your dust once again...
Good luck!
(as if you need it...)
Thanks!
herr_rudolf: I'm not that surprised if you're more interested in this build than the other's I've done! I guess this one might feel closer to your own builds? As for me, I get curious when I see someone doing something that I'm into myself to see if I can pick up ideas and ways to do things, then at the same time I can draw inspiration from things that doesn't seem to have anything to do with what I'm doing. And just to have it said: I'm absolutely certain that you could build a bike from the ground up if you'd try your hand at it!!!
herr_rudolf: I'm not that surprised if you're more interested in this build than the other's I've done! I guess this one might feel closer to your own builds? As for me, I get curious when I see someone doing something that I'm into myself to see if I can pick up ideas and ways to do things, then at the same time I can draw inspiration from things that doesn't seem to have anything to do with what I'm doing.
And just to have it said: I'm absolutely certain that you could build a bike from the ground up if you'd try your hand at it!!!Galtbacken said:Thanks!
herr_rudolf: I'm not that surprised if you're more interested in this build than the other's I've done! I guess this one might feel closer to your own builds? As for me, I get curious when I see someone doing something that I'm into myself to see if I can pick up ideas and ways to do things, then at the same time I can draw inspiration from things that doesn't seem to have anything to do with what I'm doing.
That's probably true, ...but not quite. For me the 'hotrod-philosophy' is much more important than 'just' fabricating a beautiful bike. Creating something out of what other people considder a pile of trash. RE-styling, instead of styling. It's just another part of your creative brain that get's to work. Using a defined base for a project has it's advantages, but it also has it's disadvantages. I'm just curious how you're cope with that and how you put you're experience from your other builds into this bike. And vice-versa in the near futer ofcourse!
And for the inspiration part: I hear ya. I'm an illustrator/artist/graphic designer, so I HAVE to be inspired by other things, otherwise I'll be making the same thing over and over again. For me, it's the same with bikes, although a lot of my inspiration comes from basic design principles and old-timey hotrodding and customizing. I just try to build bikes that look like hotrods and yet, stay original.
And just to take away any confusion: I absolutely love your bikes!
Please do another update...
; - )
herr_rudolf: I hear ya! And I'm actually starting to like to hod rod an existing bike! I've got comissions to build two cruisers for some people around here that have seen my bikes, and I think I'll make both of them by modifying a couple of bikes I've got and fabricate and add some of my own stuff to them. But I guess I'll keep on scratchbuilding bikes too... :mrgreen:
I really only wanted to object a little when you wrote
Soooo, I took a break from painting the house yesterday and did some work on parts for the bike! But that's only half the truth, cause I took a break from painting the house today as well, and finished a couple of those parts!
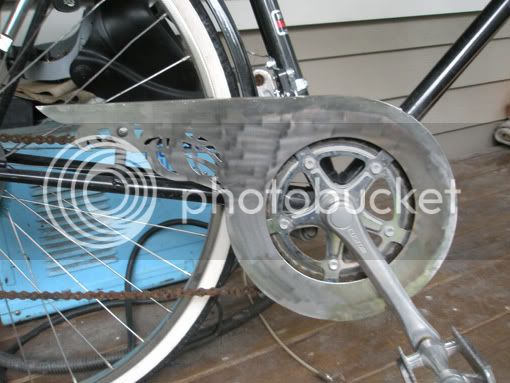
The chainguard:
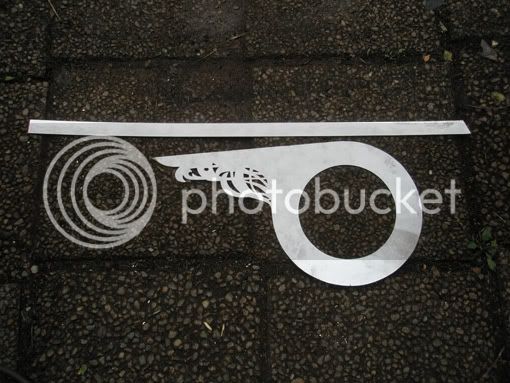
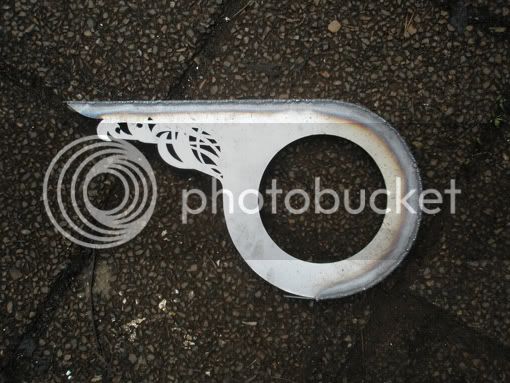
I didn't cut everything from the original design, because I didn't have a small enough drill... :roll: Anyway, there's just some minor things left to do on it before I can start painting it. I figured I'd better get started on that since it's gonna be the part with the most elaborate paint design on the bike.
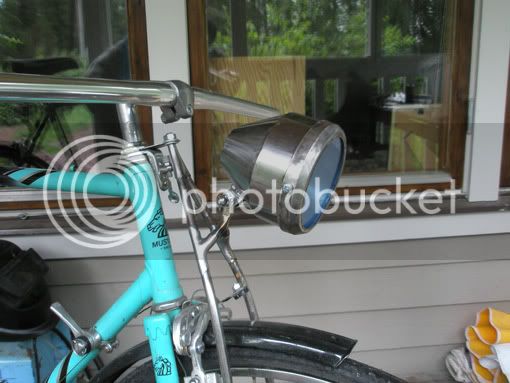
The head light:
I used some of the templates from the J.B.40 headlight, and made a couple of new ones. I might actually use some filler on this (boooooring!!) even though I've planned not to. I could weld and grind and weld and grind but that would take longer and I don't have that much time right now...
I also saw a cool thing once that I'll try on the rear light. Stay tuned!
And I'm actually starting to like to hod rod an existing bike! I've got comissions to build two cruisers for some people around here that have seen my bikes, and I think I'll make both of them by modifying a couple of bikes I've got and fabricate and add some of my own stuff to them. But I guess I'll keep on scratchbuilding bikes too... :mrgreen: I really only wanted to object a little when you wrote
because I'm sure you're very much able to do it if you'd like to! But hot rodding is all good to me too!herr_rudolf said:I don't think I will ever be able to build a bike from the ground up.
Soooo, I took a break from painting the house yesterday and did some work on parts for the bike!
But that's only half the truth, cause I took a break from painting the house today as well, and finished a couple of those parts! The chainguard:
I didn't cut everything from the original design, because I didn't have a small enough drill... :roll: Anyway, there's just some minor things left to do on it before I can start painting it. I figured I'd better get started on that since it's gonna be the part with the most elaborate paint design on the bike.
The head light:
I used some of the templates from the J.B.40 headlight, and made a couple of new ones. I might actually use some filler on this (boooooring!!) even though I've planned not to. I could weld and grind and weld and grind but that would take longer and I don't have that much time right now...
I also saw a cool thing once that I'll try on the rear light. Stay tuned!
I hate it when I get to the end of the thread !!!!! I just have to wait till the next episode of Galtbackens Garage :lol: :lol:
Man, I love that chainguard. It's got a really "flowy" look to it.
Thanks!
Here's the next episode of Galtbackens Garage :wink: :
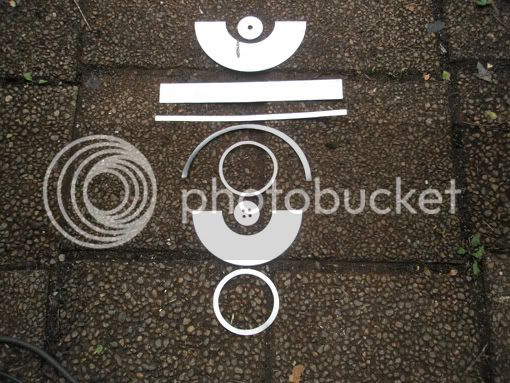
I saw a little trick on Biker Buildoff on the Discovery channel a couple of years ago and wanted to try it for the rearlight. What they did was to heat plexi and push with a cocke bottle in the midddle of it.
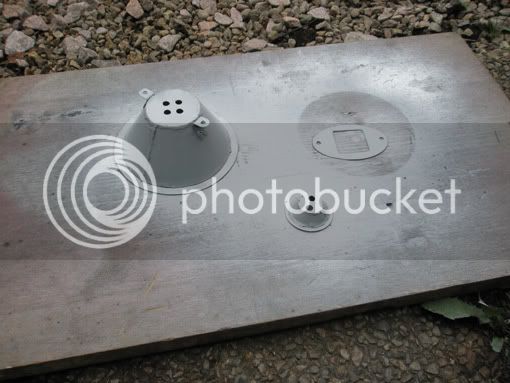
Here's what I used:
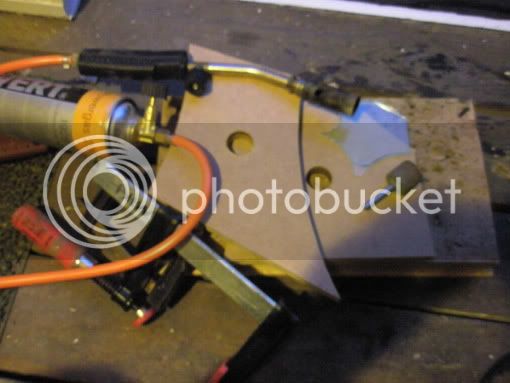
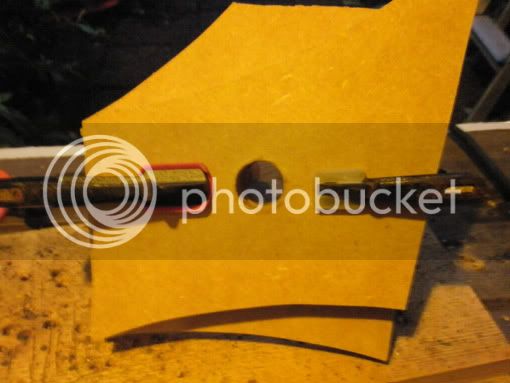
A piece of plexi in between two scrap pieces of mdf board with holes drilled through. Then apply heat with a torch and press in the middle with the back end of that grind tool for the electric drill.
The first two attempts didn't come out to my satisfaction. When the plexi gets too hot small bubbles form on the surface. Don't want that! And they're crooked.
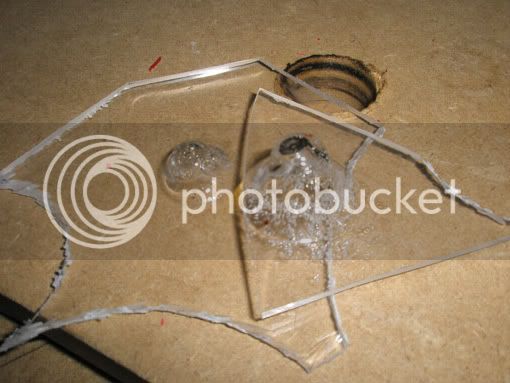
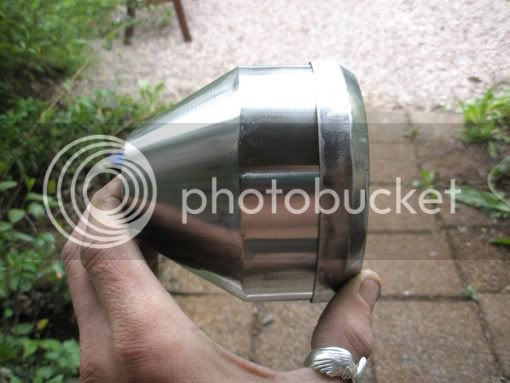
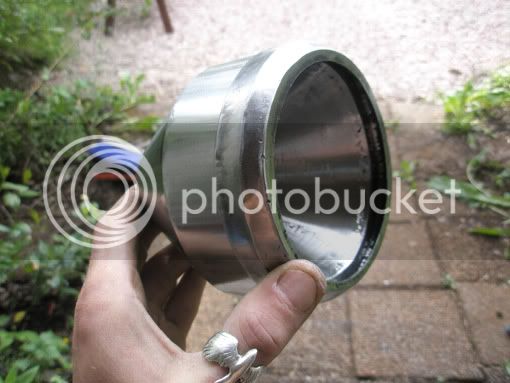
For the third one I was careful to not overheat it. I heated a little and then pushed a little, heated some more and pushed some more until I thought it looked ok.
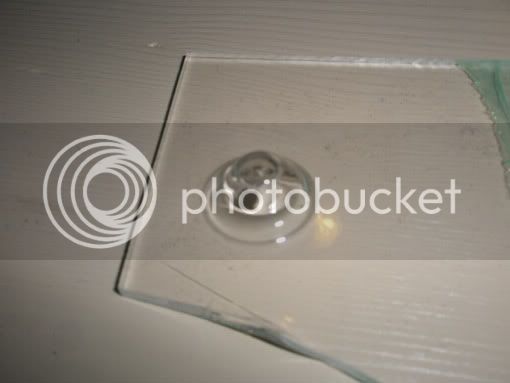
Cut to shape.

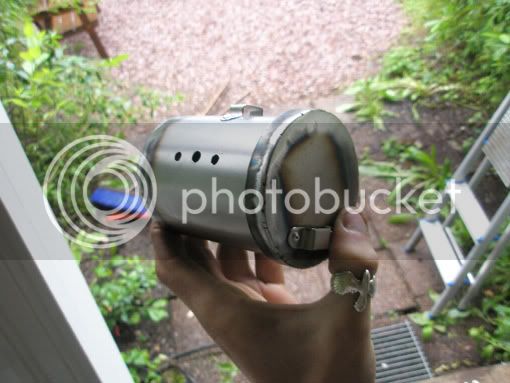
The rearlight.

Also cut the rear fender. I'll round off the edges later.
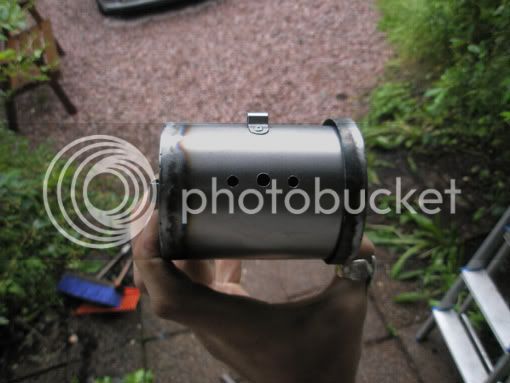
Template for the rear light bracket.
That's all for today!
Here's the next episode of Galtbackens Garage :wink: :
I saw a little trick on Biker Buildoff on the Discovery channel a couple of years ago and wanted to try it for the rearlight. What they did was to heat plexi and push with a cocke bottle in the midddle of it.
Here's what I used:
A piece of plexi in between two scrap pieces of mdf board with holes drilled through. Then apply heat with a torch and press in the middle with the back end of that grind tool for the electric drill.
The first two attempts didn't come out to my satisfaction. When the plexi gets too hot small bubbles form on the surface. Don't want that! And they're crooked.
For the third one I was careful to not overheat it. I heated a little and then pushed a little, heated some more and pushed some more until I thought it looked ok.
Cut to shape.
The rearlight.
Also cut the rear fender. I'll round off the edges later.
Template for the rear light bracket.
That's all for today!
Stop it !!! your overloading my brain :lol:
woah! you should try with a different color plexiglass, like red or somethin.
Very nice...thanks for posting how you did it. I always love learning new thing :idea: I can't wait to see the finished bike!
Very creative!
you know...
Even your templates are pieces of art themselves...
I had the same problem you had with the plexiglass. Too hot, too close too the fire. Except my 'glass' was a 'vintage' frontlightlense that I couldn't replace... Well I did replace it with a different not to mention red lense making it even better then I could have imagine. Yours looks very neat btw...
Thanks everyone!
Gold Street Customs: Good! :lol:
stretch: Haha, yeah red is good! :lol: I'll use red rear light paint to tint the lense...patience my friend!!
vibr8shun: You're very welcome! I learn so much from all you guys here, so if I come up with something that works well for me I don't want to keep it to myself. You get and you give!
herr_rudolf: Oh, the bad feeling in your stomach when something goes wrong like that!! Good thing something nice came out of it though!! It seems to do so in many cases!
Now let's add to the overload Gold Street, and everybody else that would like to see what I've been up to since yesterday.
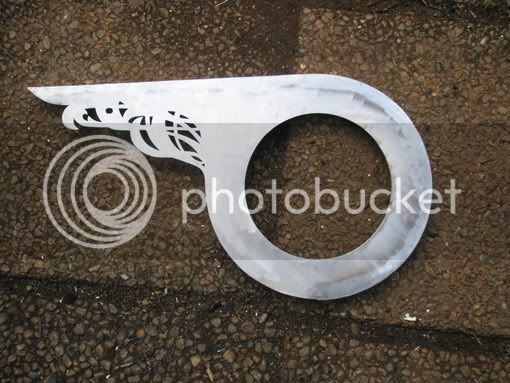
How the rearlight bracket tured out:
A mock up.
Rearlight.
Chainguard.
Headlight.
Here's a batterybox that will sit between the seatstays and seat tube. It'll be attached with the same bolts as the rearlight. I'll make a strap that will hold it together.
Soon pretty much of the fabrication work on this bike is done, so it'd better stop raining and I'll start painting stuff!
Thanks everyone for showing interest in this build and for all your kind words, I really appreciate it! I'm sorry if I'm not following all your builds as much as I'd like to, but I promise to try and be a better man when I'm not quite so short of time!
Gold Street Customs: Good! :lol:
stretch: Haha, yeah red is good! :lol: I'll use red rear light paint to tint the lense...patience my friend!!
vibr8shun: You're very welcome! I learn so much from all you guys here, so if I come up with something that works well for me I don't want to keep it to myself. You get and you give!
herr_rudolf: Oh, the bad feeling in your stomach when something goes wrong like that!!
Good thing something nice came out of it though!! It seems to do so in many cases! Now let's add to the overload Gold Street, and everybody else that would like to see what I've been up to since yesterday.
How the rearlight bracket tured out:
A mock up.
Rearlight.
Chainguard.
Headlight.
Here's a batterybox that will sit between the seatstays and seat tube. It'll be attached with the same bolts as the rearlight. I'll make a strap that will hold it together.
Soon pretty much of the fabrication work on this bike is done, so it'd better stop raining and I'll start painting stuff!
Thanks everyone for showing interest in this build and for all your kind words, I really appreciate it! I'm sorry if I'm not following all your builds as much as I'd like to, but I promise to try and be a better man when I'm not quite so short of time!
Haven't done so much today, just shot some primer and some other minor things.
Looks like better weather is coming in! Hope to be able to paint some more tomorrow now that all fabrication is done.
Looks like better weather is coming in! Hope to be able to paint some more tomorrow now that all fabrication is done.