Ok, well I did a little intro, and I've been lurking since, so I figure I should post this. I am 26 this summer, and I started this build in grade 11. yeah.... so I'm a bit of a procrastinator. To be fair, I haven't really had suitable shop space since high school, and now that I have settled in to my house (with garage, woo hoo!) I can conclude this project...
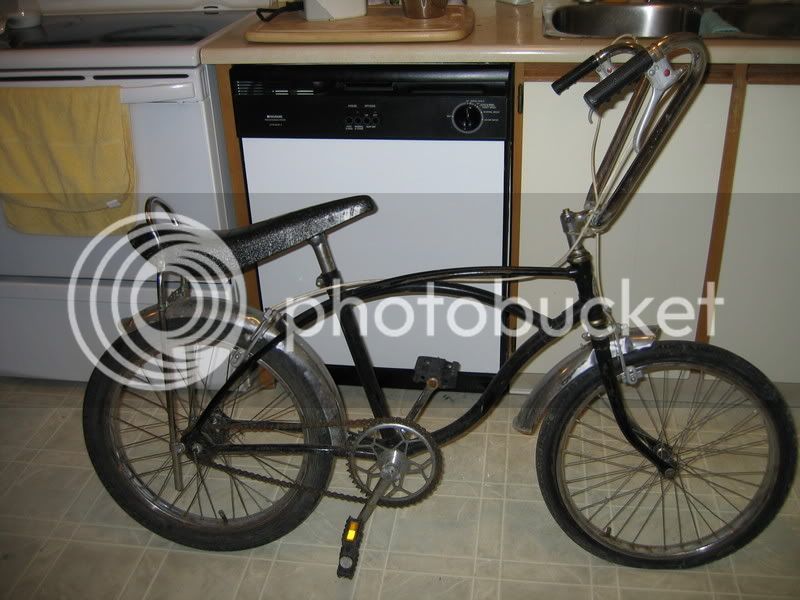
The bike started out as an Eaton's Glider muscle bike. I don't know much about it other than that, it was painted white and orange, had a painted, bobbed rear fender, banana seat, integrated kickstand, English thread BB (aka 'euro') and was otherwise incomplete and rusted up, found on a scrap pile. the seatstays go all the way up to the head tube, and the full size tube forms the bottom of the "tank" the chainstays curved upwards, but I fixed that... Unfortunately I have no idea where the oldest build pictures are, so the pictures will start pretty far along, but I'll try to just write out the beginning for you...
I had built one lowrider already, in a mild custom style, and I started reading the associated magazines... nothing in there really did anything for me, but I got lots of ideas.... they were all, for lack of a better term "Mexican-style" bikes, and I like trad rods & kustoms, so I set about building a lowrider under those guidelines. I wanted an integrated seat on the fender/frame junction, and it needed to be LOW.... almost nothing other than handlebars above the tops of the wheels. In contrast to the lowrider style, I wanted to have a minimum of accessories - the light will be the only one. simplicity is one of the best things about bicycles, so why not build on that? I also didn't like the look of un-raked head tubes on the really low bikes, and I already knew that would handle terribly.... so the frame chopping began.
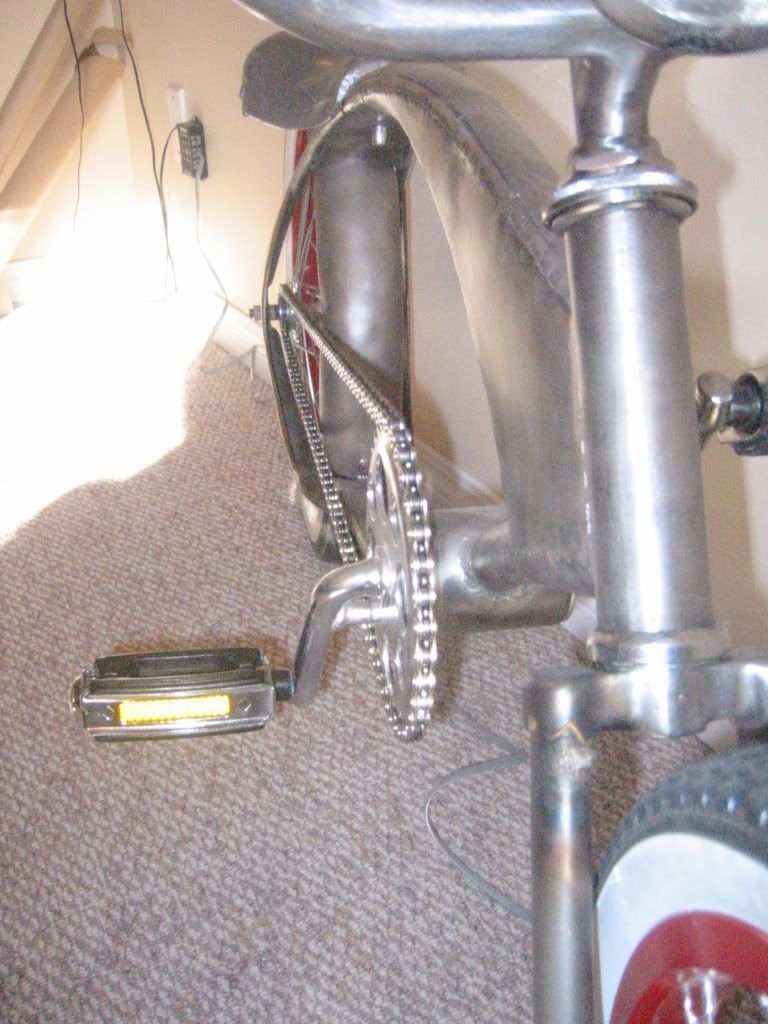
To get that low I would have to move the BB to still be able to pedal it. at one point, the biggest intact piece of the frame was the seatstay/toptube/tank piece. I chopped the headtube, BB, and seat tube out.I heated and un-brazed the chainstay assembly so it could be flipped over for better lines. I made a hardwood hammer form, and made a yoke where the bb used to be out of sheet metal, and welded it up out of 2 pieces. Being in Machining class, and my dad being the automotives teacher, I had access to a lot of shop space after school. I made myself a brand new BB and head tube on the lathe, taking the chance to switch to a 1 piece crank ( I knew I wanted a lucky 7 sprocket and krate style pedals). I cut the downtube midway, and welded the BB in there. between that and the new yoke further down, I had enough length for a real nice rake on the head angle without any extra material on the downtube. I made tank sides, which are pounded out to have some contour. the way the tubes sit give it a nice twist to underneath... I was stoked on how it looked! I made a top filler with quite a crown to it, so it will flow into the seat nicely. For skirts I did a few things differently. I made them bigger toward the bottom to almost 'mirror' the look of the tank and keep the eye moving around the bike. I bulged them out so that they would look good from all angles, and give a bit of a scoop look.the edge is finished with a piece of rod brazed on. I re-curved and chopped a 10-speed fork to tuck the front wheel right in.
without further adieu:
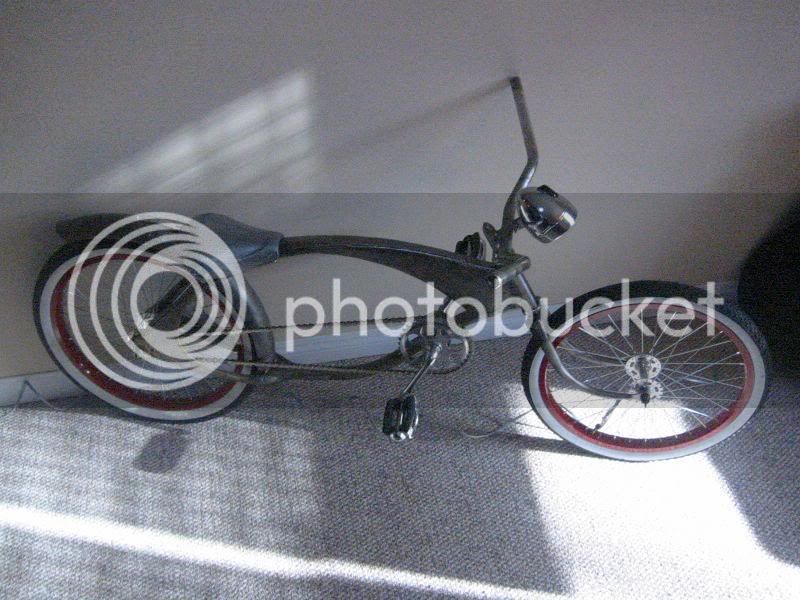
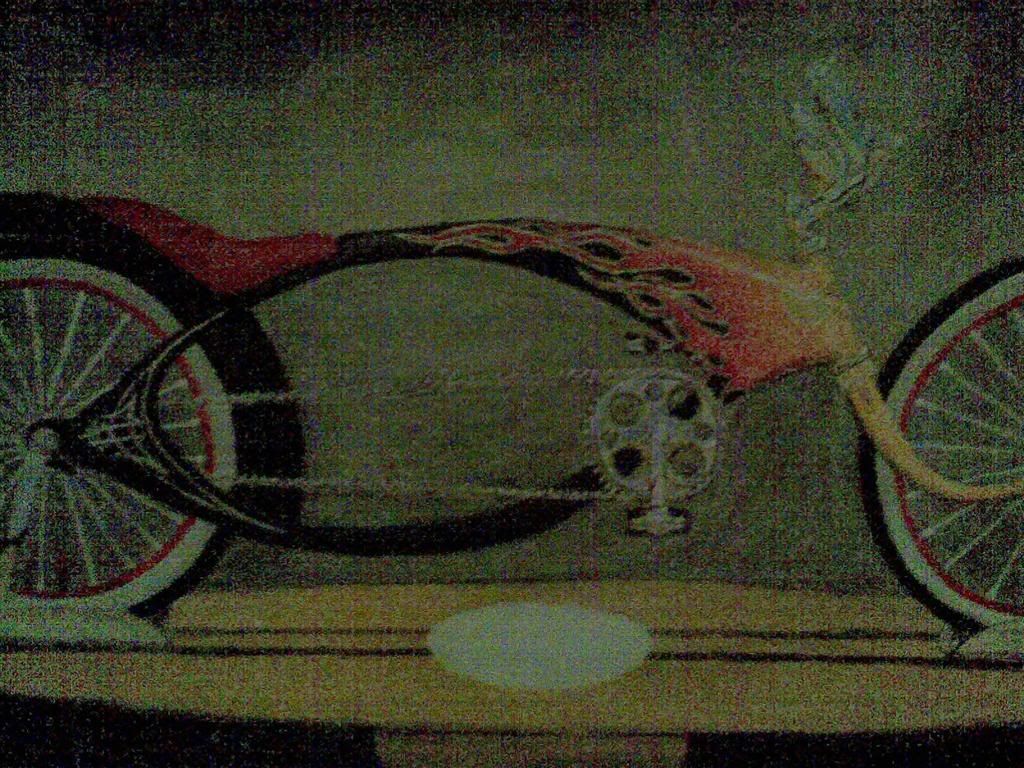
the side view:
Front closeup, you can see the fork chop, scooped skirts, etc:
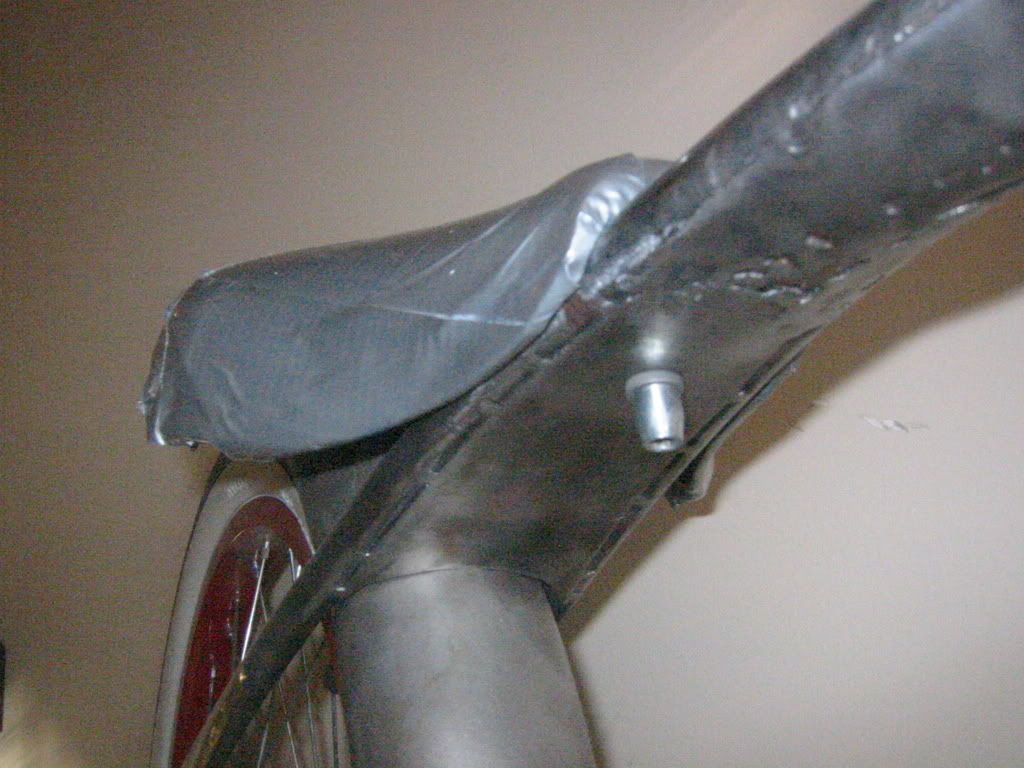
Here we see underneath the seat cluster... part of the original frame tube still pokes out the middle, and you can see how the tank sides have twisted completely underneath and horizontal at this point. the bolt holds the seat (final version will sit reacessed) the seat is just some trash parts taped together for now to go for a spin.
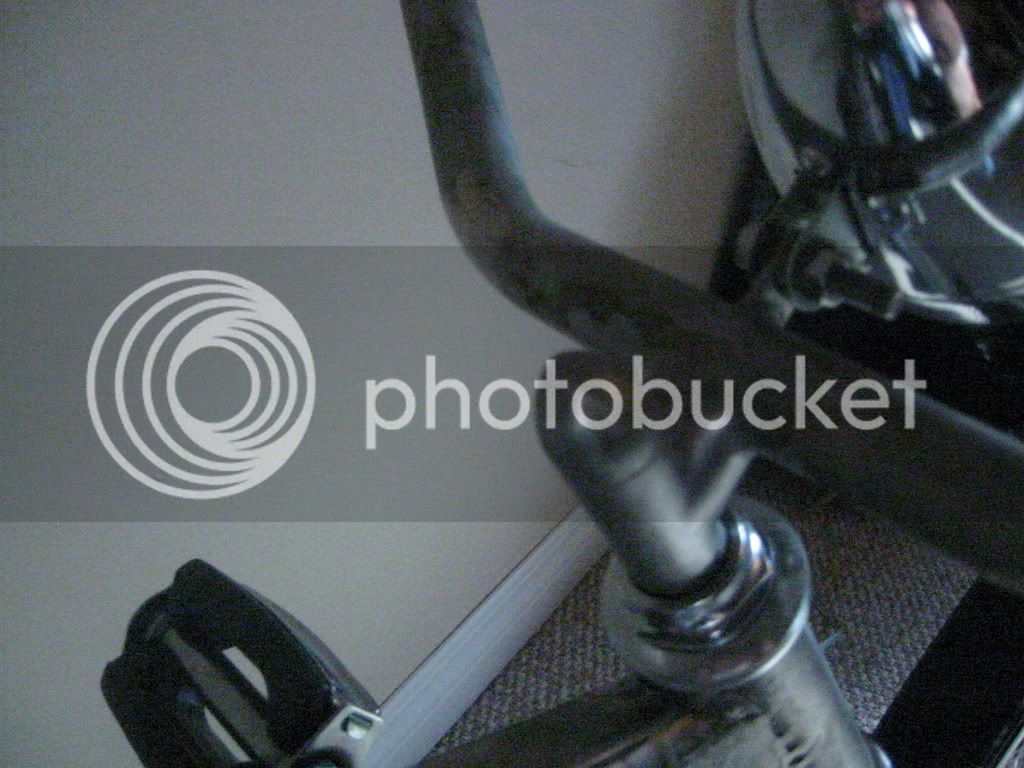
The bars are off an old motocross bike, with a couple inches sectioned out of the rise, and cross-bar removed (they had to be wide because my knees pass between my arms when riding! the bike is wider than it is tall, by an inch or two. I welded the bars to a shortened MTB stem, and made an itegrated tab to mount the light. I made the bullet cap in machine shop, which is threaded internally, and soldered in. the wedge is drilled out, and then the bolt reversed (tightened through the bottom of the fork with the wheel off)
end caps are welded in. they are pressed on some dies my dad made for his Kookie Kar project.

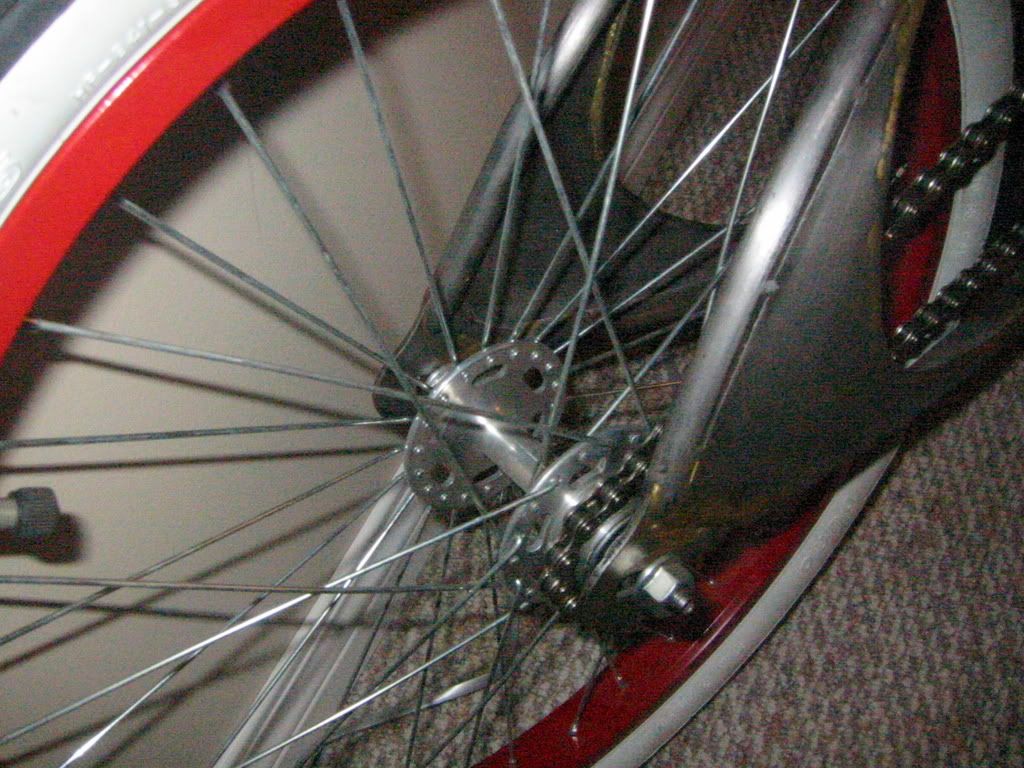
I made the wheels while working at my bike mechanic job. Alex 303 alloy rims, laced to 70's era high flange hubs. 3x on the drive side, radial everywhere else. 13T cog is off a cassette, from the short period where they threaded the last cog instead of having a lockring. It is put on as a "suicide fixed gear" so named because it won't have the proper left hand thread lockring like a track hub, so it could come off in a decelleration situation, but on a lowrider I'm not at all worried. besides, having a part refered to as "suicide" is VERY hot-rod. I need to machine a custom lockring to clear the chain, a bb lockring will only fit for this setup if you have a 14T, and I need the 13T to get as much chain/frame clearance as I can get. Rims were (successfully!) painted while leaning off my apartment balcony. Ya do what ya gotta do...
A few more pics:
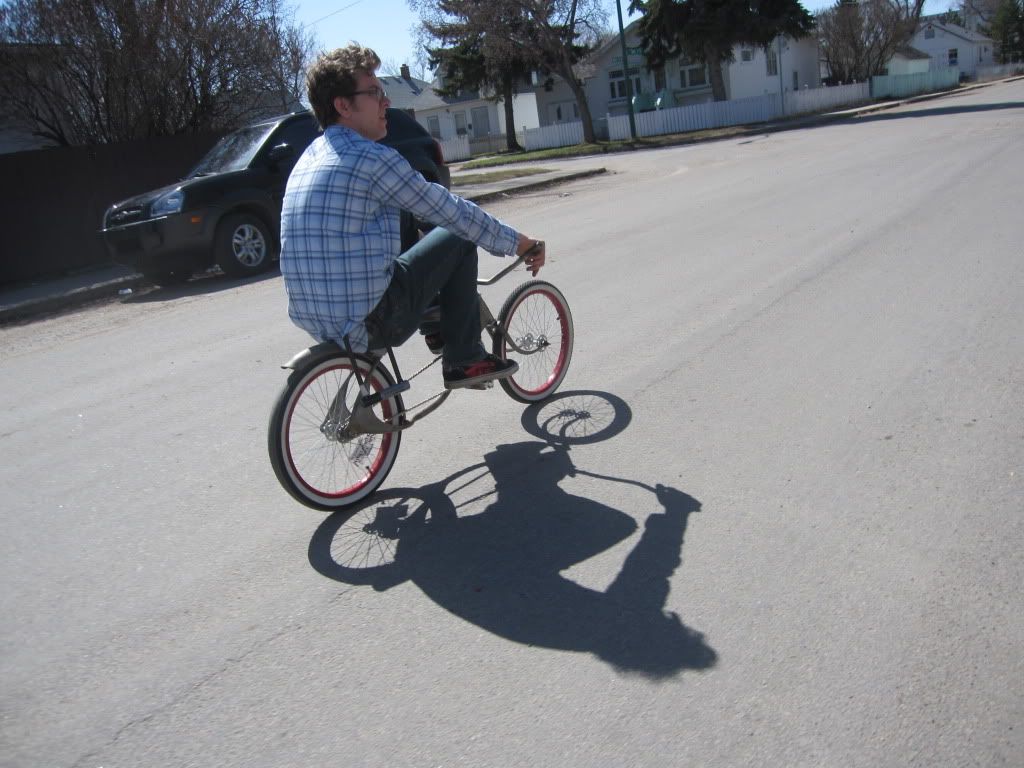
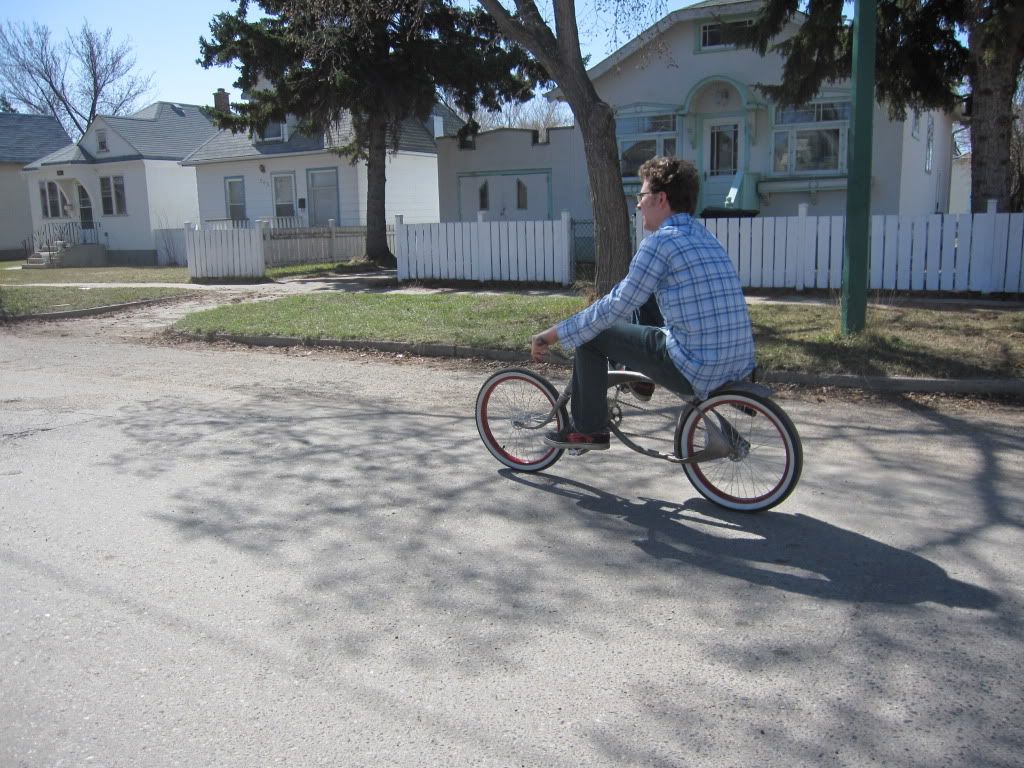
Riders view:

Concept painting I did in grade 11 art class:
Well, that's where it sits at the moment.... just waiting for some nicer spring weather so I can work in my un-heated garage. In the mean time... let me know what you think.
The bike started out as an Eaton's Glider muscle bike. I don't know much about it other than that, it was painted white and orange, had a painted, bobbed rear fender, banana seat, integrated kickstand, English thread BB (aka 'euro') and was otherwise incomplete and rusted up, found on a scrap pile. the seatstays go all the way up to the head tube, and the full size tube forms the bottom of the "tank" the chainstays curved upwards, but I fixed that... Unfortunately I have no idea where the oldest build pictures are, so the pictures will start pretty far along, but I'll try to just write out the beginning for you...
I had built one lowrider already, in a mild custom style, and I started reading the associated magazines... nothing in there really did anything for me, but I got lots of ideas.... they were all, for lack of a better term "Mexican-style" bikes, and I like trad rods & kustoms, so I set about building a lowrider under those guidelines. I wanted an integrated seat on the fender/frame junction, and it needed to be LOW.... almost nothing other than handlebars above the tops of the wheels. In contrast to the lowrider style, I wanted to have a minimum of accessories - the light will be the only one. simplicity is one of the best things about bicycles, so why not build on that? I also didn't like the look of un-raked head tubes on the really low bikes, and I already knew that would handle terribly.... so the frame chopping began.
To get that low I would have to move the BB to still be able to pedal it. at one point, the biggest intact piece of the frame was the seatstay/toptube/tank piece. I chopped the headtube, BB, and seat tube out.I heated and un-brazed the chainstay assembly so it could be flipped over for better lines. I made a hardwood hammer form, and made a yoke where the bb used to be out of sheet metal, and welded it up out of 2 pieces. Being in Machining class, and my dad being the automotives teacher, I had access to a lot of shop space after school. I made myself a brand new BB and head tube on the lathe, taking the chance to switch to a 1 piece crank ( I knew I wanted a lucky 7 sprocket and krate style pedals). I cut the downtube midway, and welded the BB in there. between that and the new yoke further down, I had enough length for a real nice rake on the head angle without any extra material on the downtube. I made tank sides, which are pounded out to have some contour. the way the tubes sit give it a nice twist to underneath... I was stoked on how it looked! I made a top filler with quite a crown to it, so it will flow into the seat nicely. For skirts I did a few things differently. I made them bigger toward the bottom to almost 'mirror' the look of the tank and keep the eye moving around the bike. I bulged them out so that they would look good from all angles, and give a bit of a scoop look.the edge is finished with a piece of rod brazed on. I re-curved and chopped a 10-speed fork to tuck the front wheel right in.
without further adieu:
the side view:
Front closeup, you can see the fork chop, scooped skirts, etc:
Here we see underneath the seat cluster... part of the original frame tube still pokes out the middle, and you can see how the tank sides have twisted completely underneath and horizontal at this point. the bolt holds the seat (final version will sit reacessed) the seat is just some trash parts taped together for now to go for a spin.
The bars are off an old motocross bike, with a couple inches sectioned out of the rise, and cross-bar removed (they had to be wide because my knees pass between my arms when riding! the bike is wider than it is tall, by an inch or two. I welded the bars to a shortened MTB stem, and made an itegrated tab to mount the light. I made the bullet cap in machine shop, which is threaded internally, and soldered in. the wedge is drilled out, and then the bolt reversed (tightened through the bottom of the fork with the wheel off)
end caps are welded in. they are pressed on some dies my dad made for his Kookie Kar project.
I made the wheels while working at my bike mechanic job. Alex 303 alloy rims, laced to 70's era high flange hubs. 3x on the drive side, radial everywhere else. 13T cog is off a cassette, from the short period where they threaded the last cog instead of having a lockring. It is put on as a "suicide fixed gear" so named because it won't have the proper left hand thread lockring like a track hub, so it could come off in a decelleration situation, but on a lowrider I'm not at all worried. besides, having a part refered to as "suicide" is VERY hot-rod. I need to machine a custom lockring to clear the chain, a bb lockring will only fit for this setup if you have a 14T, and I need the 13T to get as much chain/frame clearance as I can get. Rims were (successfully!) painted while leaning off my apartment balcony. Ya do what ya gotta do...
A few more pics:
Riders view:
Concept painting I did in grade 11 art class:
Well, that's where it sits at the moment.... just waiting for some nicer spring weather so I can work in my un-heated garage. In the mean time... let me know what you think.
 I have a garage now, but no heat :? . so yeah I guess I have enough patience to wait until spring... and bike building will commence!