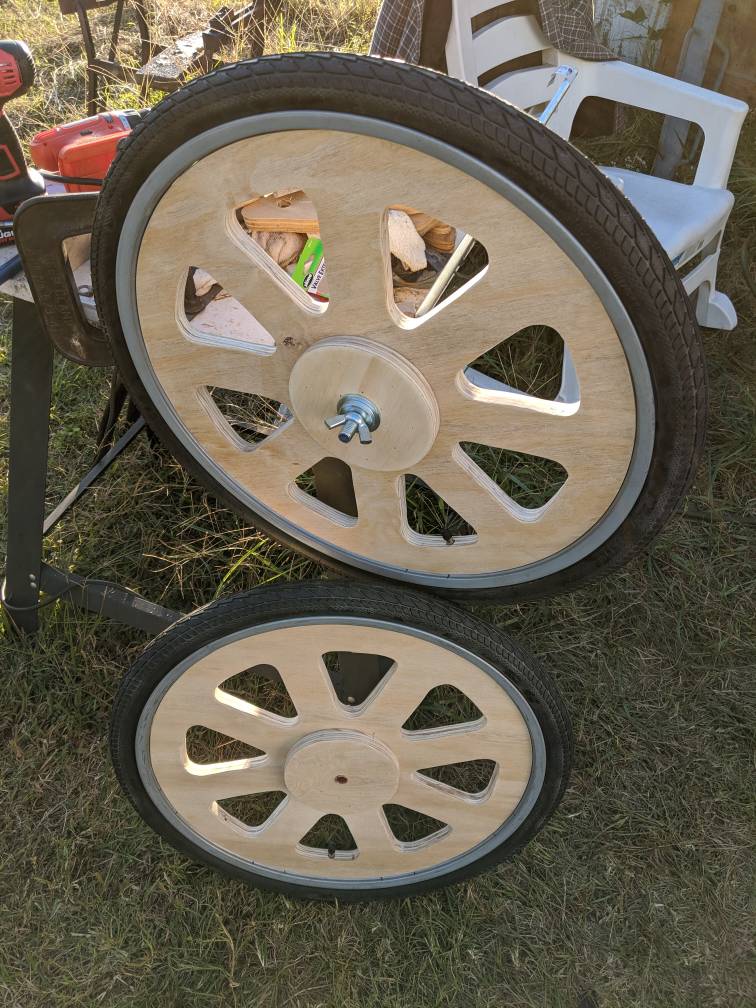
Yeah, but not for a bike. They're for the display cart I promised to build my daughter-in-law.
Sent from my Pixel 2 XL using Tapatalk
Sent from my Pixel 2 XL using Tapatalk


 That's priceless Rust Buzzard!
Yep. Woke up in the middle of the night last week with this on my mind. Then after a half hour or so, I thought of this...Haha ^ "Charlton Heston drifting one in the movies" !
Handy, these wooden spoked wheels are awesome! Really great job on this. One question, how deep is the spoke flange that the rim will be drilled to? Have you thought about access to the air valve with a pump head?
An easy solution would be to make a notch in one of your openings so you can get a pump head down close enough to fill the tire. It will likely be unnoticeable once the cart is all put together.
You can barely notice the dip in these bmx mags where the valve comes up. Everyone will be staring at your awesome cart instead!
View attachment 107262
Wood mags on a bike would be off the chart cool....Yeah, but not for a bike. They're for the display cart I promised to build my daughter-in-law.
Sent from my Pixel 2 XL using Tapatalk
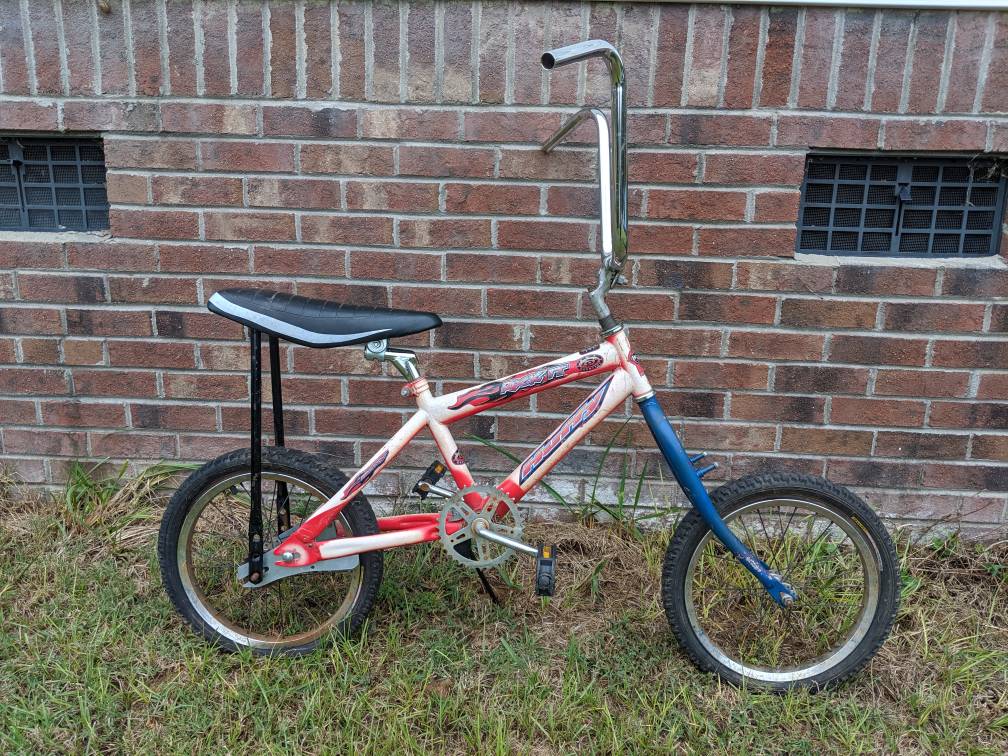
That comes whenever I get around to building a wooden bike!Wood mags on a bike would be off the chart cool....
")


Okay. Wasn't sure if that bikes only. Thanks.The Builds forum on the Forums home page would work Andy.


Enter your email address to join: