


I know this project isn't quite up to the amazing vintage building and restoration stuff that so many of you guys do (and do so well) but this forum has inspired me to start swapping parts and figuring out new ways to bolt things onto a bicycle frame and thus sort of "build" something new. After reading this thread I started wondering if it wouldn't be possible to convert a Grip Shift shifter into a "stick shift": http://ratrodbikes.com/forum/index....hifter-mount-and-stickshift-conversion.66386/
...and it was!
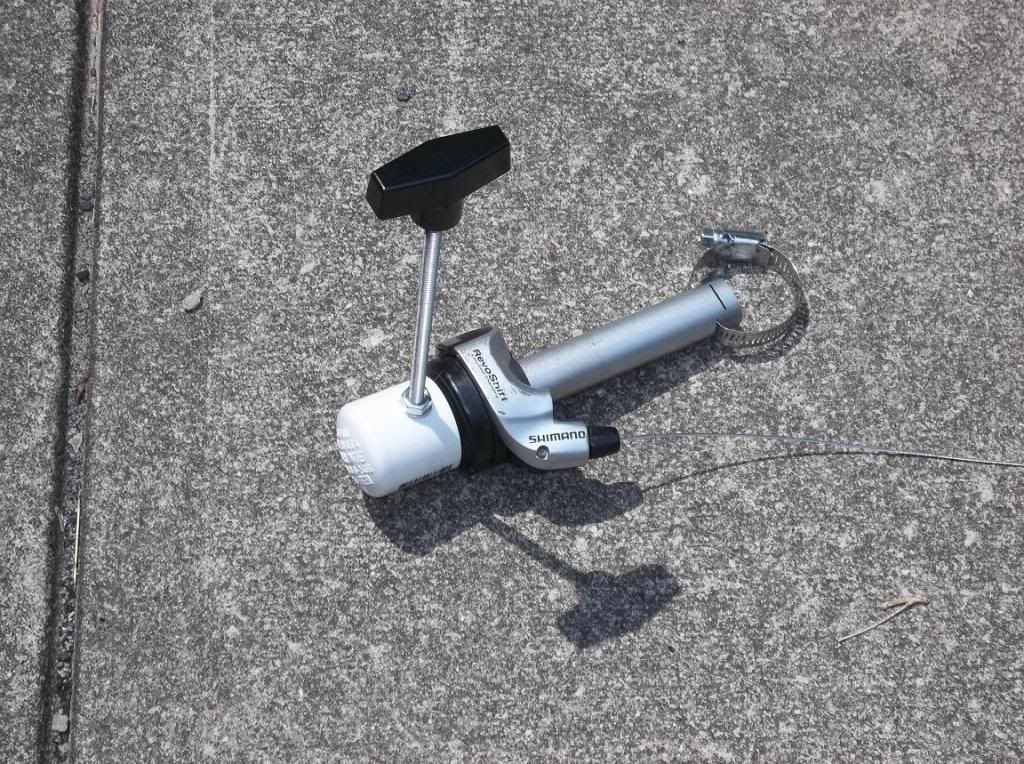
I started off chasing around to two different bike shops in search of used 7-speed Grip Shifters and discovered that there are apparently two different "cable pull ratios" to take into account, and that (luckily) both shops had 2:1 shifters laying around. The SRAM Grip Shift is what was on the bike originally, but the Shimano Revo Shift had some bigger, heavier-duty flanges hiding under the rubber grip portion -- just right for wedging a ground-down bolt between!
(I was more excited about building this contraption than taking step-by-step pictures along the way, unfortunately.)
I took my Revo Shift to the hardware store and got a 1" PVC cap, a long bolt for the "shift lever," some nuts and washers, and found an older guy working there who used to do a bit of hot-rod building (with cars) years ago. He started getting excited about this project as well, and we hunted around the store and found some sort of replacement appliance "knob" for a T-shifter handle and some 1/4" fuel line to cover up the threads on the bolt.
I came home, started grinding the sides of the bolt so they were no longer hexagonal, and two sides aren't even perpendicular any more -- they make a sort of "keystone" shape to fit between the shifter flanges. I also had to grind down the head of the bolt so it's slightly concave to match the inside curve of the rubber grip so it fits over the part of the stock shifter it contacts.
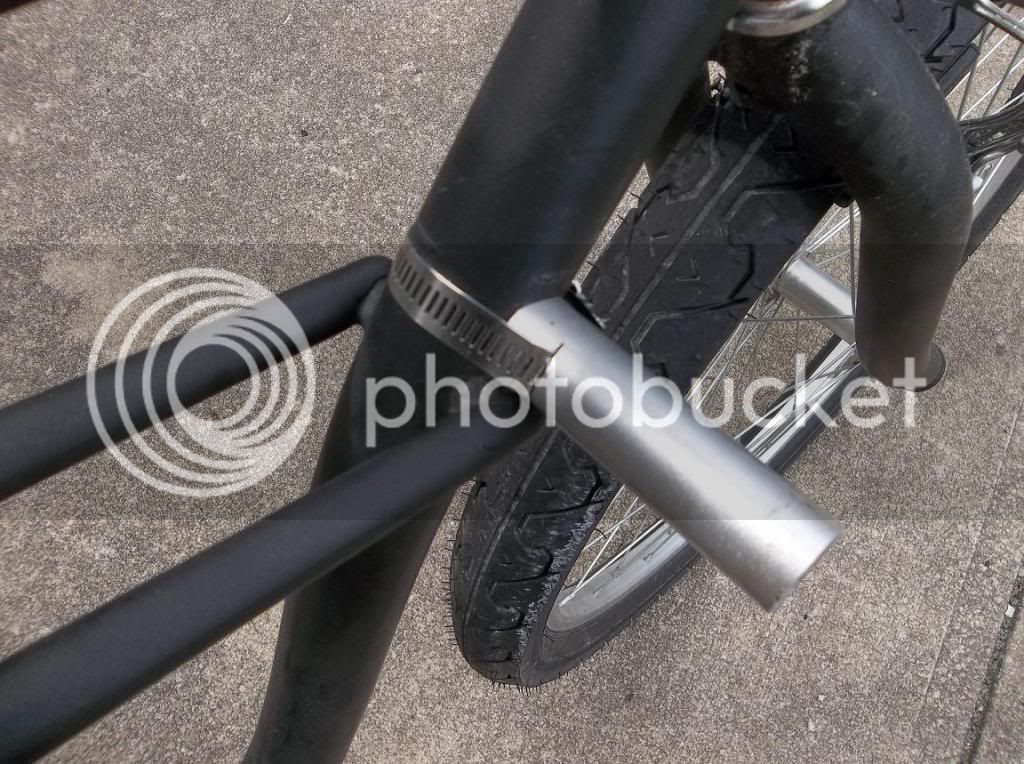
Then I took an old Next bicycle and chopped off part of the handlebar and again used the grinding wheel, this time trying to put a curve into the end of the handlebar. I was trying to put a recess of the same approximate diameter of the tube I was mounting it to, and I then used my Craftsman rotary Dremel knock-off to cut slots for a hose clamp.
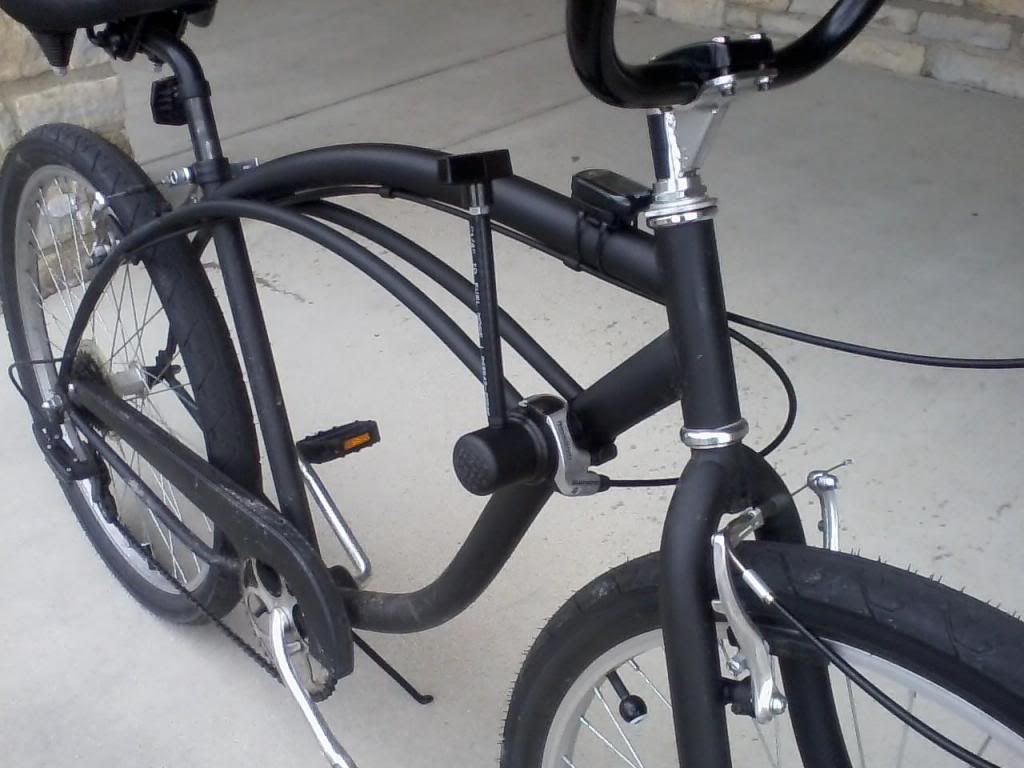
Then it was just a matter of drilling a hole in the side of the PVC cap so the modified bolt head would slide tightly between two of the flanges, putting the bolt through the hole and putting washers and nuts on to hold it, adding the hose and handle, and then mounting the whole thing on the bike! There was a little waffling as I tried to decide exactly WHICH flanges to put the bolt head between, since that would affect the final position of the lever in high and low gear. After that it was pretty simple to re-route the new shifter cable and housing to the derailleur and get the cable tension just right. (I'm still working on that last part, but I think I've got it pretty much dialed-in after an 11 mile test ride yesterday.)
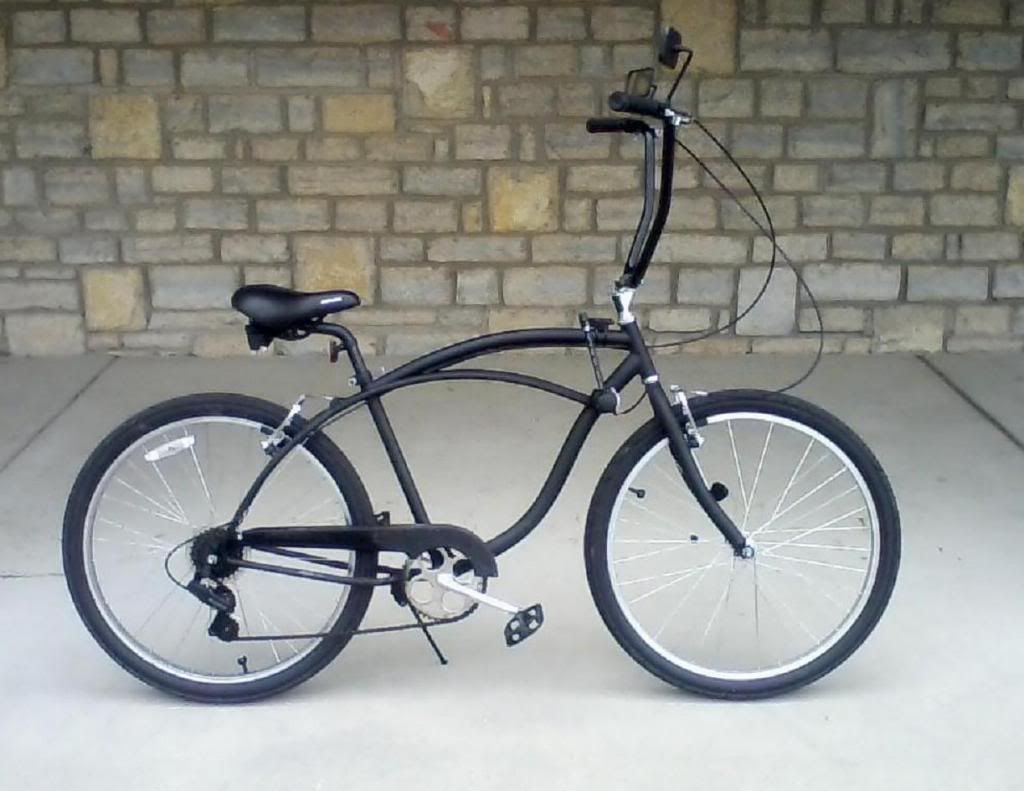
I'm happy with the way it looks, and even happier that this new shifter makes the job of swapping handlebars VERY easy! I have the apehanger cruiser bars pictured, as well as a set of 25" super tall bars, each attached to its own 7/8" x 22.2mm BMX stem at the correct angle. All I have to do now to swap bars is to detach both brake cables at the levers' quick releases, loosen the stem binder bolt, pull out the stem and then repeat the process in reverse!
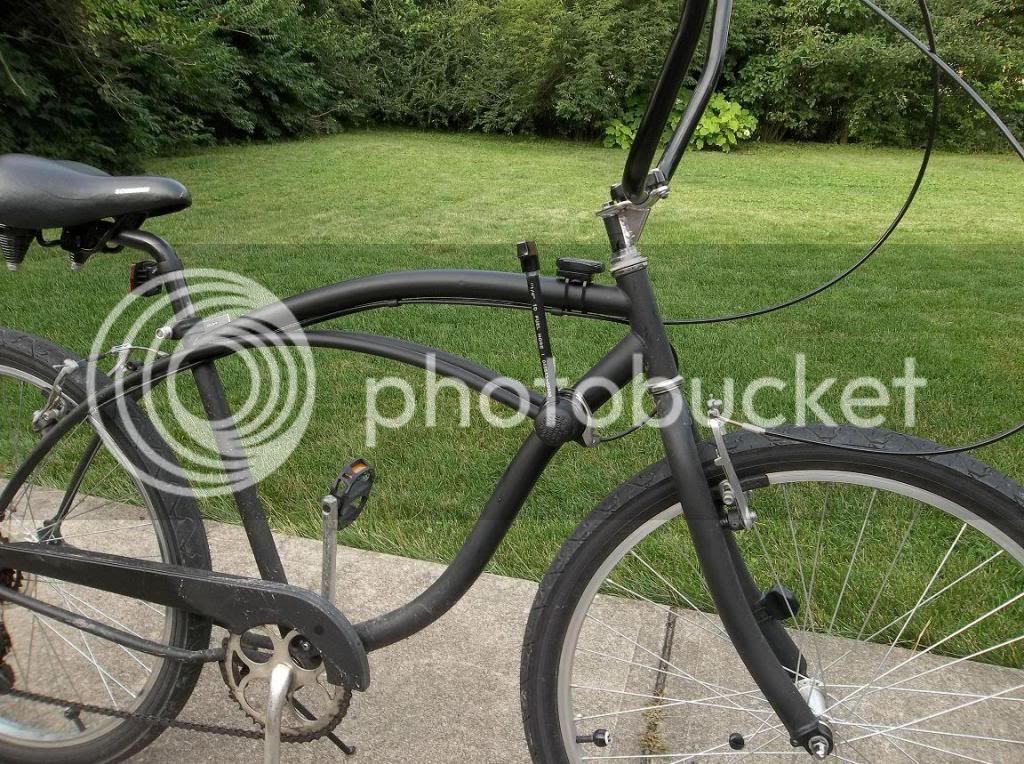
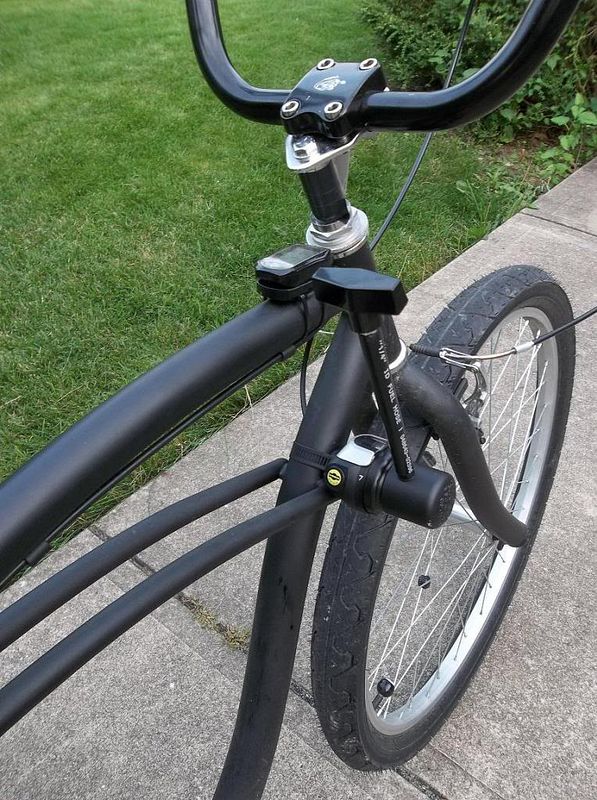
Potential downsides to this modification: the shifter rotates more than 90 degrees as it goes from first to seventh, which means the shift lever is almost horizontal in first gear and the handle actually sits in front of the head tube in high gear. Since the shifter sits beside the frame, it's easy to bump it when pedaling in low gear, especially when standing on the pedals. I'M willing to trade cool looks, convenience, and the sheer novelty value for a small lack in pedaling efficiency...but not everybody might be.
I'm also VERY glad that I have such a lightweight shifter knob -- I can shift up or down with one finger now because of the mechanical advantage that comes from using a lever, and was a little worried about the shifter shifting on its own when I hit a bump. I didn't have any trouble on my test ride, though, even when I accidentally hit one pothole hard enough to jar my mirrors out of alignment and make me worry about bending the rim, or when I found myself briefly "off roading" in my local park. I can certainly see how guys who use heavier knobs and beer taps might have a problem, though!
The last thing I need to do is glue the PVC cap to the shifter flanges. Right now it's just kind of "friction fit" on there, which means that a lot of the shifting forces are only going through the raised parts of the plastic. Eventually they COULD start wearing down and putting all the force on the two flanges surrounding the shifter lever "bolt head," and those two flanges might eventually break off. In a perfect world those forces could be evenly distributed all the way around the shifter with some thick epoxy glue, attaching both the flanges and the "valleys" between them to the inside of the cap.
Thanks again to this forum for giving me these ideas and "how-to's!"
...and it was!

I started off chasing around to two different bike shops in search of used 7-speed Grip Shifters and discovered that there are apparently two different "cable pull ratios" to take into account, and that (luckily) both shops had 2:1 shifters laying around. The SRAM Grip Shift is what was on the bike originally, but the Shimano Revo Shift had some bigger, heavier-duty flanges hiding under the rubber grip portion -- just right for wedging a ground-down bolt between!
(I was more excited about building this contraption than taking step-by-step pictures along the way, unfortunately.)
I took my Revo Shift to the hardware store and got a 1" PVC cap, a long bolt for the "shift lever," some nuts and washers, and found an older guy working there who used to do a bit of hot-rod building (with cars) years ago. He started getting excited about this project as well, and we hunted around the store and found some sort of replacement appliance "knob" for a T-shifter handle and some 1/4" fuel line to cover up the threads on the bolt.
I came home, started grinding the sides of the bolt so they were no longer hexagonal, and two sides aren't even perpendicular any more -- they make a sort of "keystone" shape to fit between the shifter flanges. I also had to grind down the head of the bolt so it's slightly concave to match the inside curve of the rubber grip so it fits over the part of the stock shifter it contacts.
Then I took an old Next bicycle and chopped off part of the handlebar and again used the grinding wheel, this time trying to put a curve into the end of the handlebar. I was trying to put a recess of the same approximate diameter of the tube I was mounting it to, and I then used my Craftsman rotary Dremel knock-off to cut slots for a hose clamp.


Then it was just a matter of drilling a hole in the side of the PVC cap so the modified bolt head would slide tightly between two of the flanges, putting the bolt through the hole and putting washers and nuts on to hold it, adding the hose and handle, and then mounting the whole thing on the bike! There was a little waffling as I tried to decide exactly WHICH flanges to put the bolt head between, since that would affect the final position of the lever in high and low gear. After that it was pretty simple to re-route the new shifter cable and housing to the derailleur and get the cable tension just right. (I'm still working on that last part, but I think I've got it pretty much dialed-in after an 11 mile test ride yesterday.)
I'm happy with the way it looks, and even happier that this new shifter makes the job of swapping handlebars VERY easy! I have the apehanger cruiser bars pictured, as well as a set of 25" super tall bars, each attached to its own 7/8" x 22.2mm BMX stem at the correct angle. All I have to do now to swap bars is to detach both brake cables at the levers' quick releases, loosen the stem binder bolt, pull out the stem and then repeat the process in reverse!


Potential downsides to this modification: the shifter rotates more than 90 degrees as it goes from first to seventh, which means the shift lever is almost horizontal in first gear and the handle actually sits in front of the head tube in high gear. Since the shifter sits beside the frame, it's easy to bump it when pedaling in low gear, especially when standing on the pedals. I'M willing to trade cool looks, convenience, and the sheer novelty value for a small lack in pedaling efficiency...but not everybody might be.
I'm also VERY glad that I have such a lightweight shifter knob -- I can shift up or down with one finger now because of the mechanical advantage that comes from using a lever, and was a little worried about the shifter shifting on its own when I hit a bump. I didn't have any trouble on my test ride, though, even when I accidentally hit one pothole hard enough to jar my mirrors out of alignment and make me worry about bending the rim, or when I found myself briefly "off roading" in my local park. I can certainly see how guys who use heavier knobs and beer taps might have a problem, though!
The last thing I need to do is glue the PVC cap to the shifter flanges. Right now it's just kind of "friction fit" on there, which means that a lot of the shifting forces are only going through the raised parts of the plastic. Eventually they COULD start wearing down and putting all the force on the two flanges surrounding the shifter lever "bolt head," and those two flanges might eventually break off. In a perfect world those forces could be evenly distributed all the way around the shifter with some thick epoxy glue, attaching both the flanges and the "valleys" between them to the inside of the cap.
Thanks again to this forum for giving me these ideas and "how-to's!"

Last edited:
")

