Vinyl decal how-to

Rat Rod Bikes Bicycle Forum

Help Support Rat Rod Bikes Bicycle Forum:

This site may earn a commission from merchant affiliate links, including eBay, Amazon, and others.
Joined
Aug 3, 2009
Messages
313
Reaction score
114
Location
Houston, Texas
Rating - 0%
0   0   0
I recently restored a Murray Jet-Fire (see build thread; viewtopic.php?f=21&t=35534 ), before I got started I knew that I would be repainting the bike and would need replacement decals.
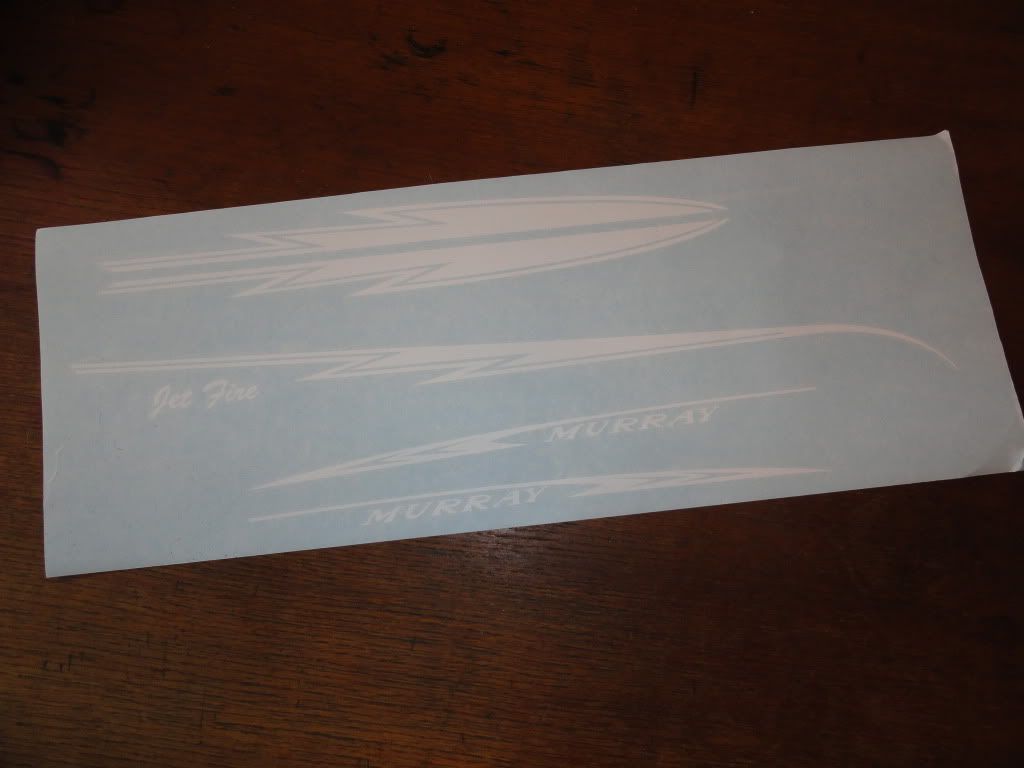
I looked high and low and no one makes or reproduces decals for this particular bike, so I decided to have some custom made at a local sign shop (Houston Sign Company).

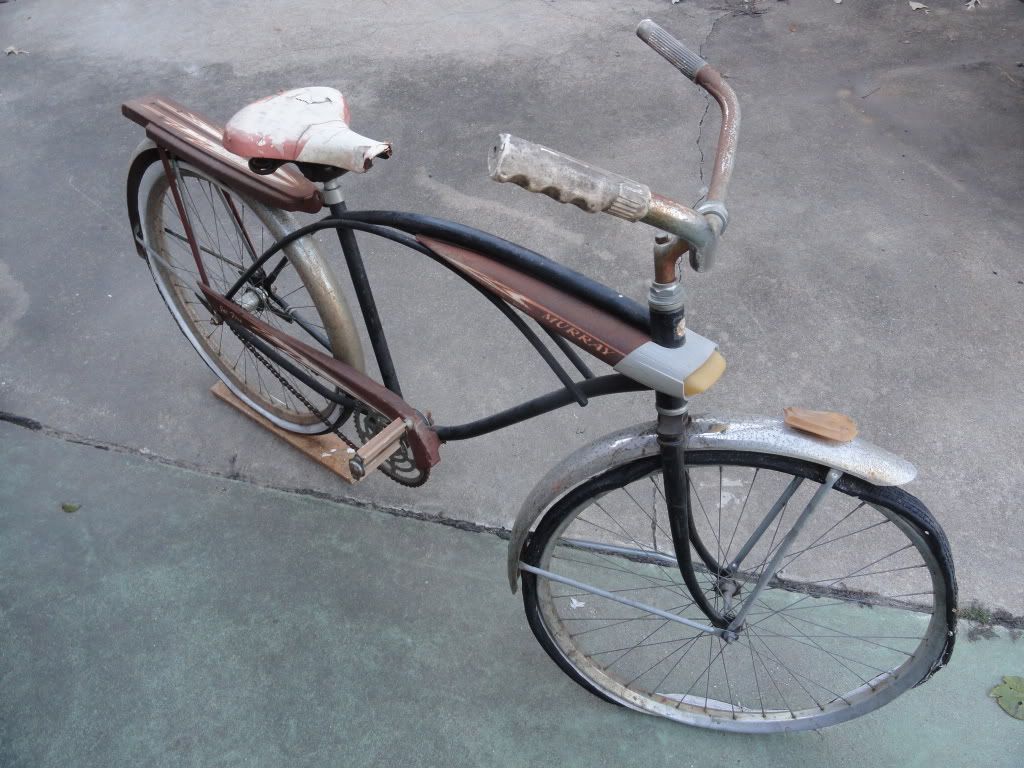
Here is the subject bike in it's 'before' condition.
DSC01818.jpg


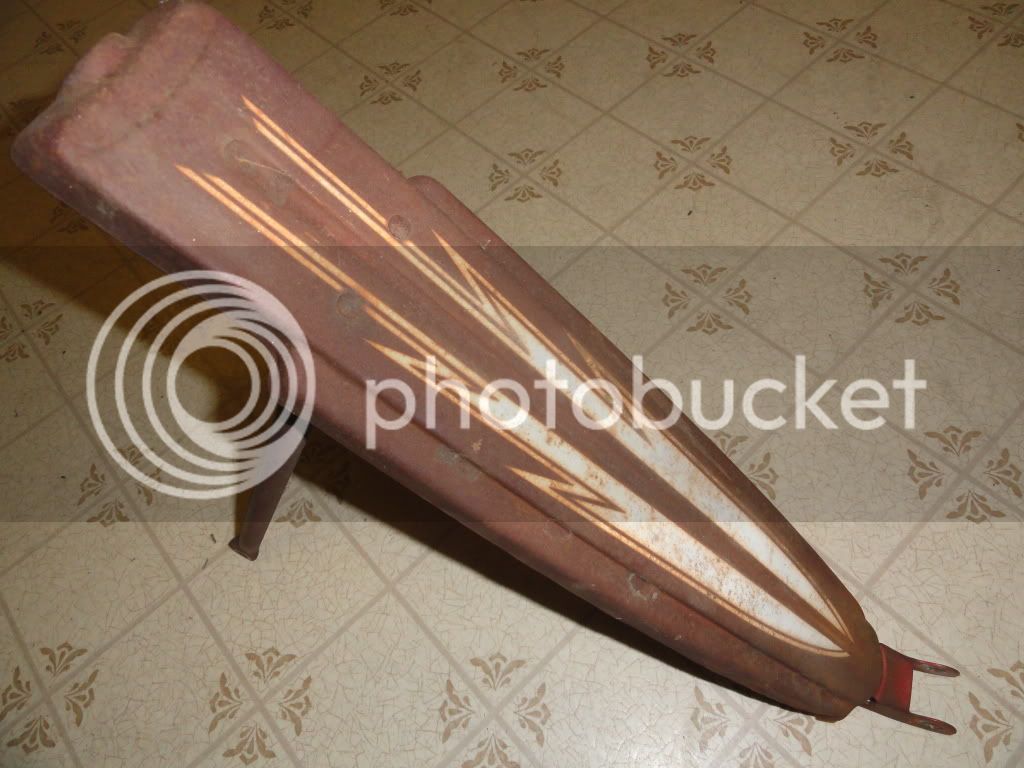
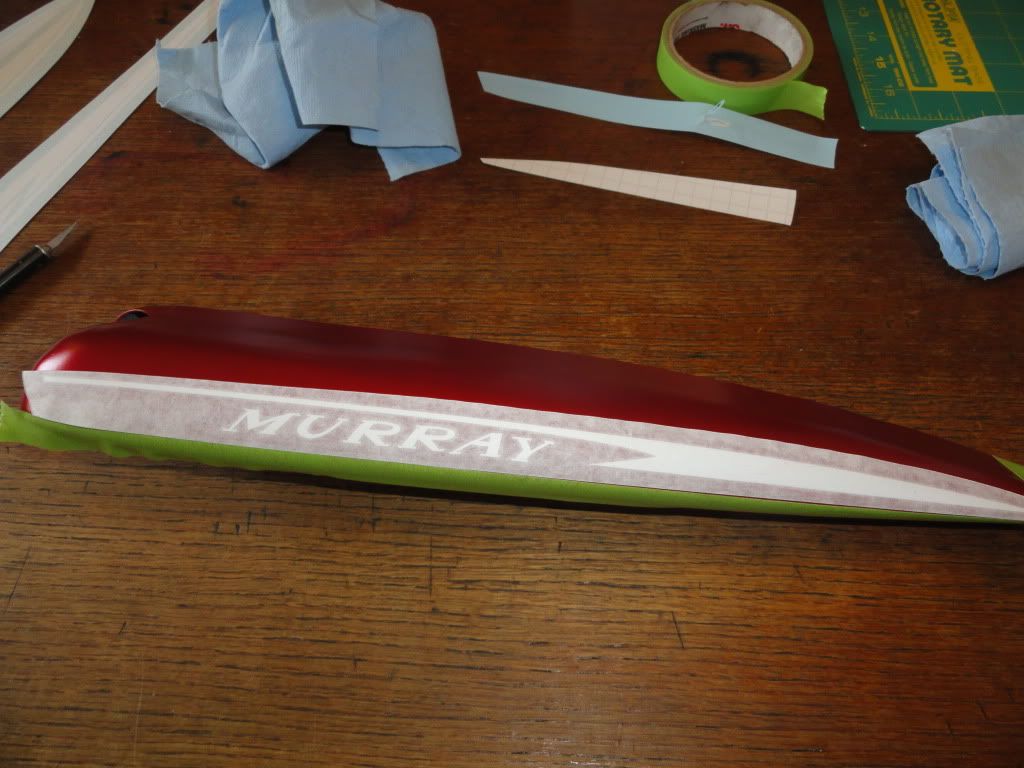
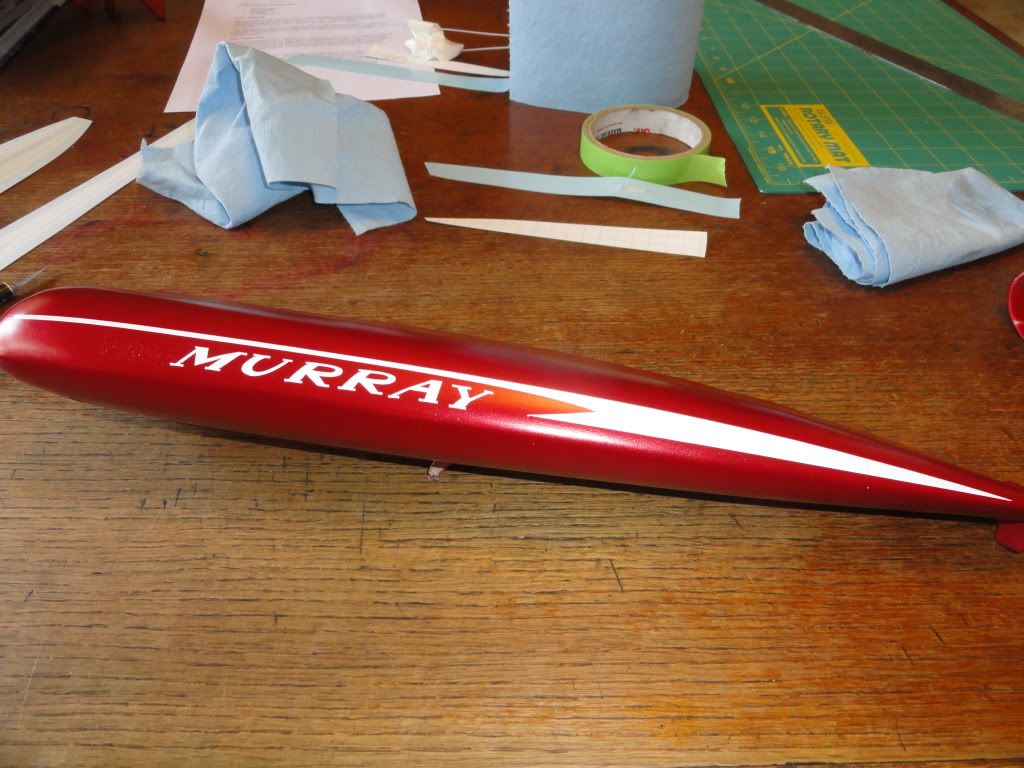
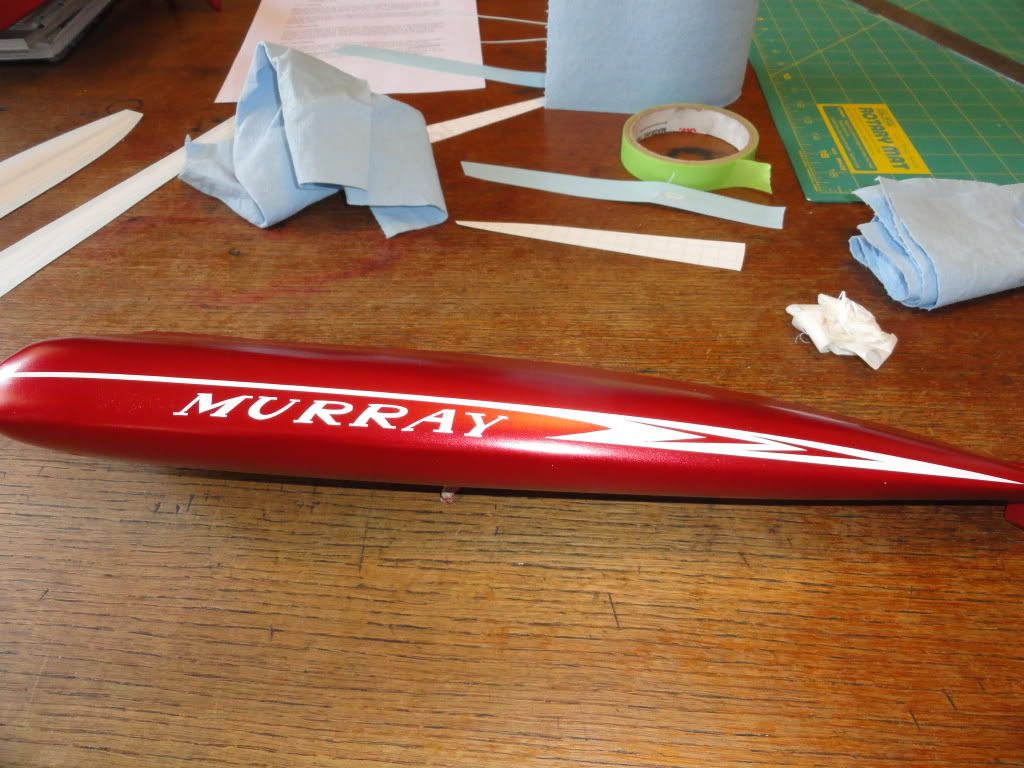
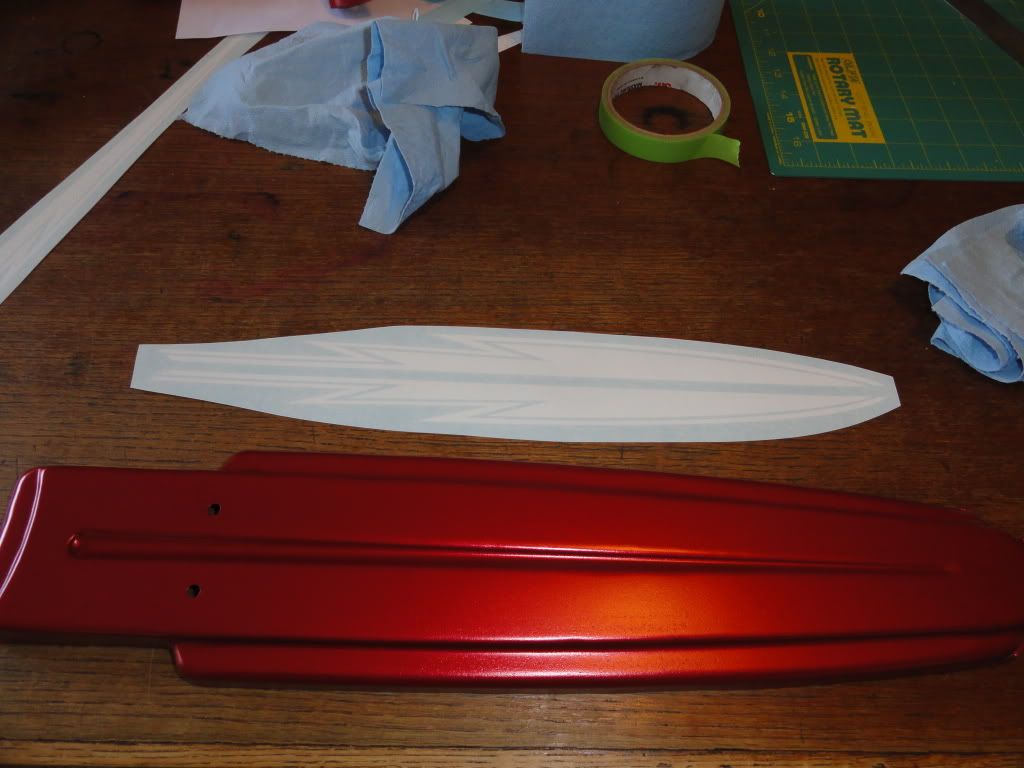
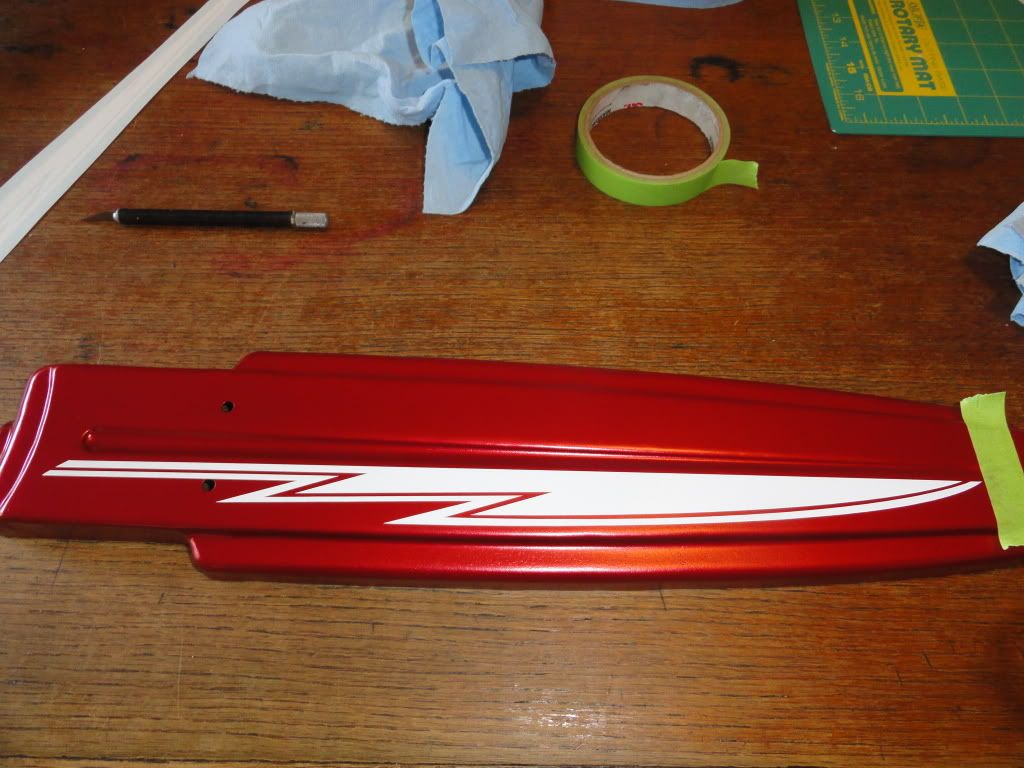
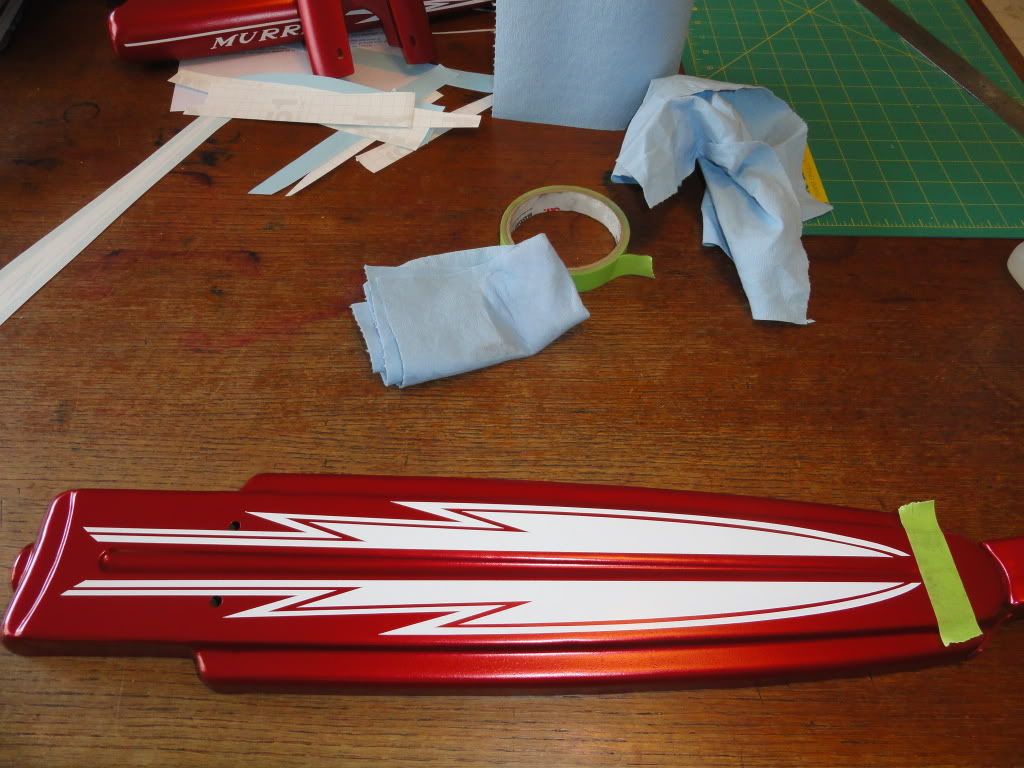
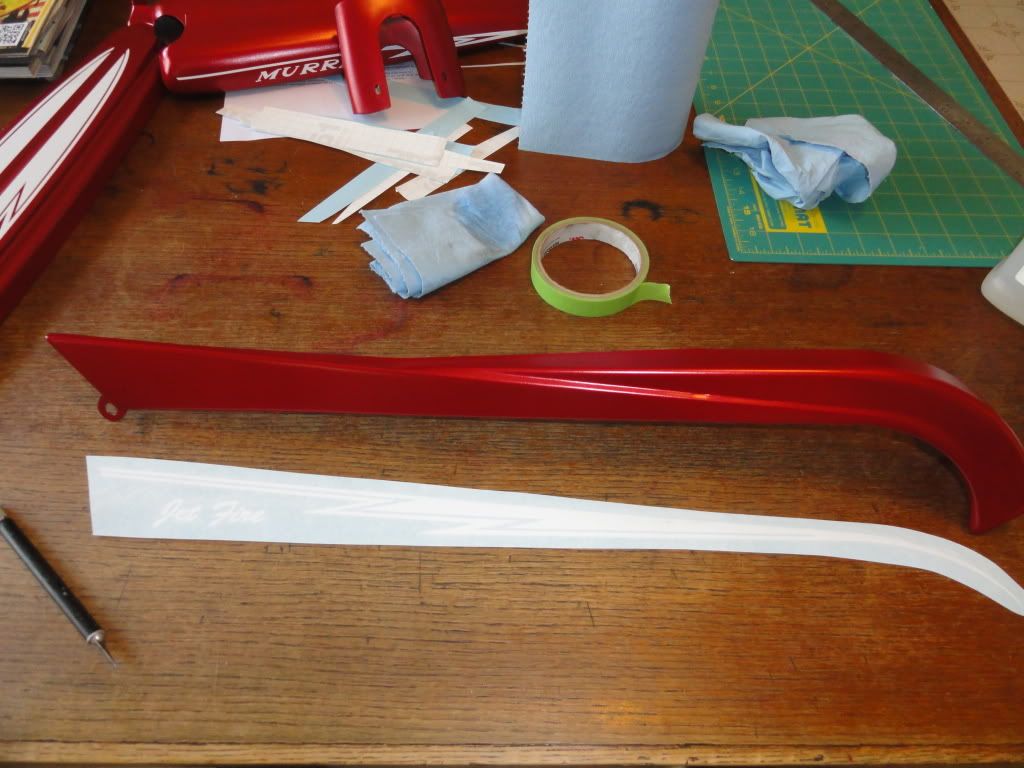
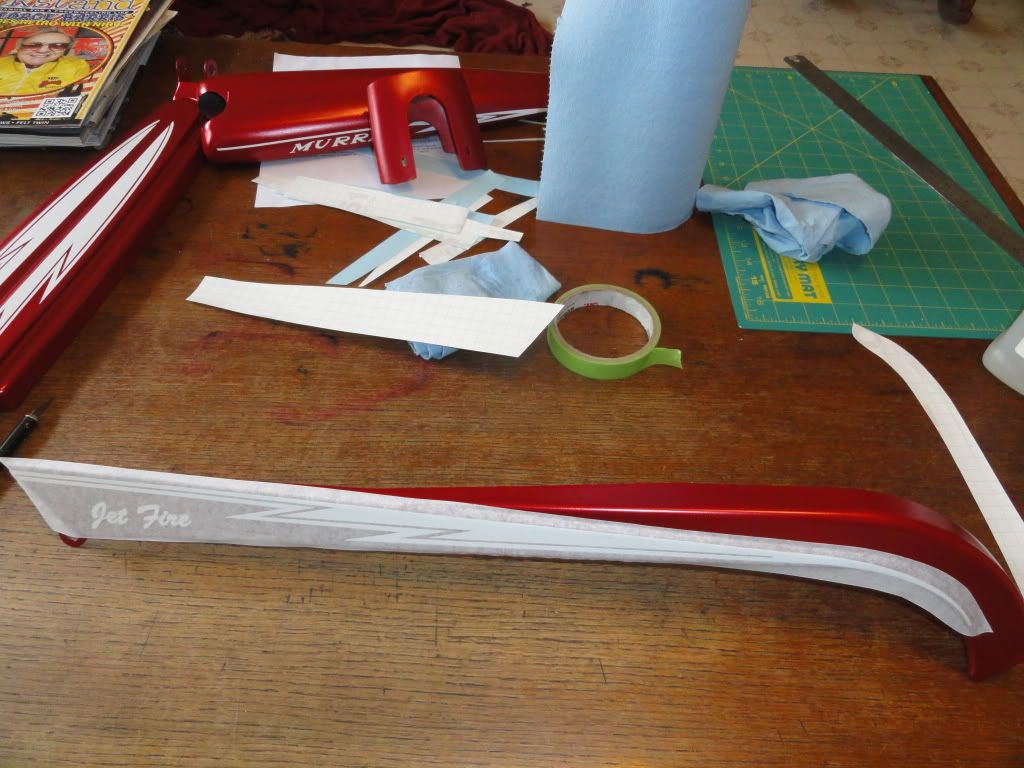
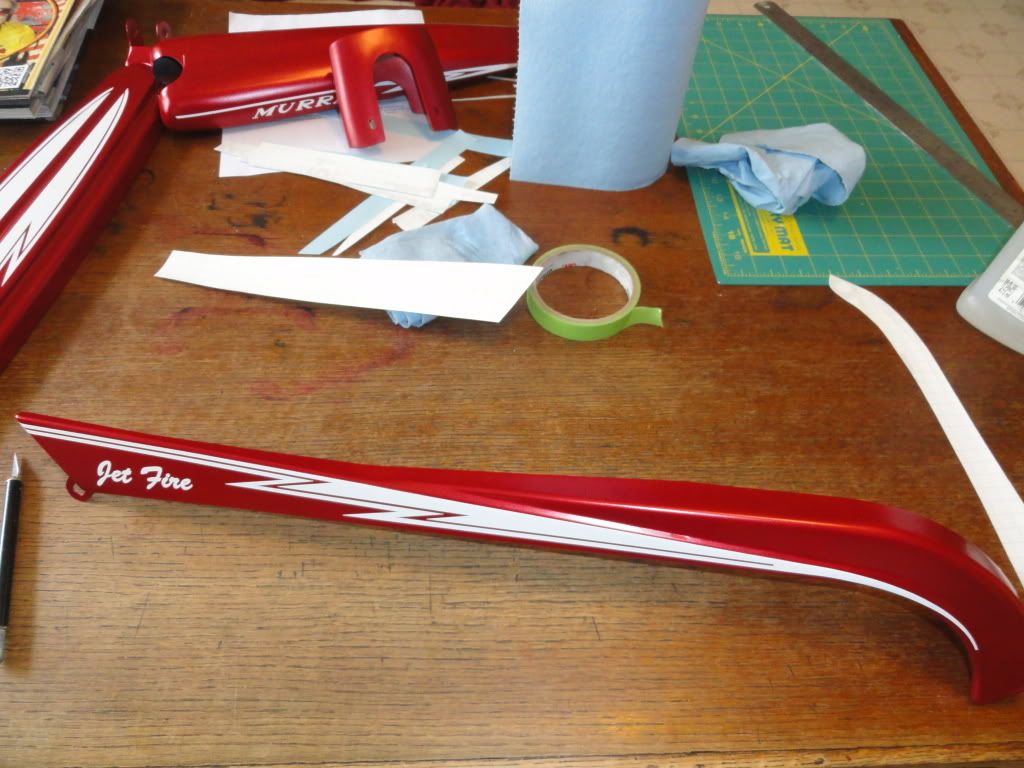
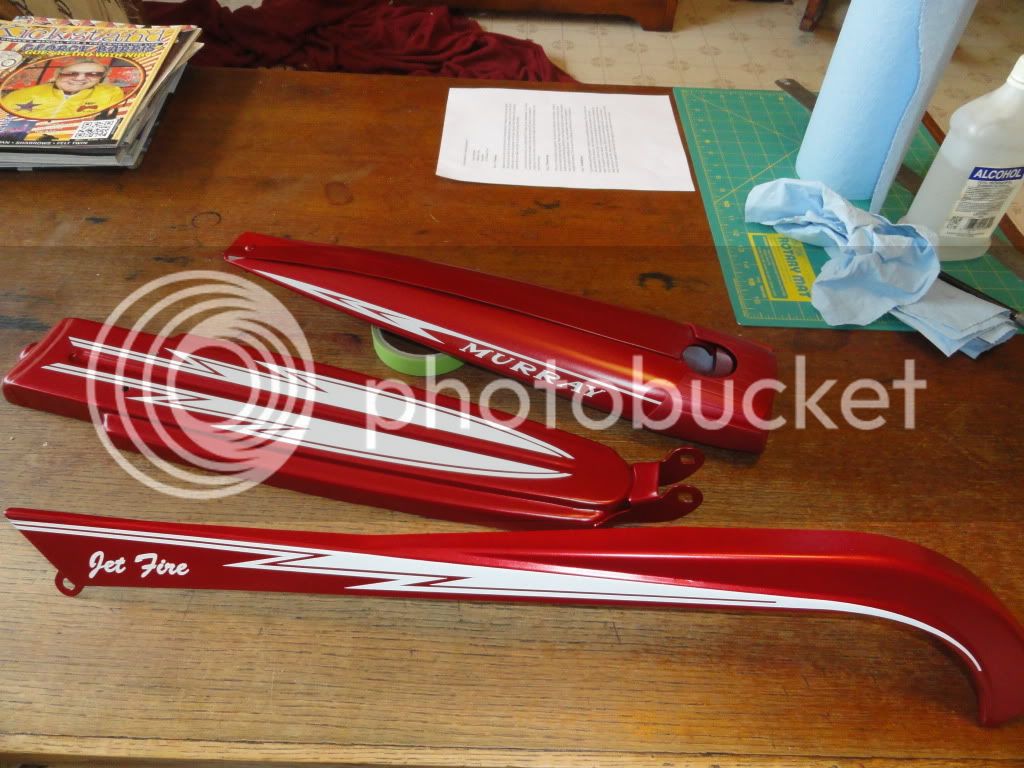
I dropped the tank, rack and chainguard off at the sign shop to let them do their thing, which only took a couple of days.
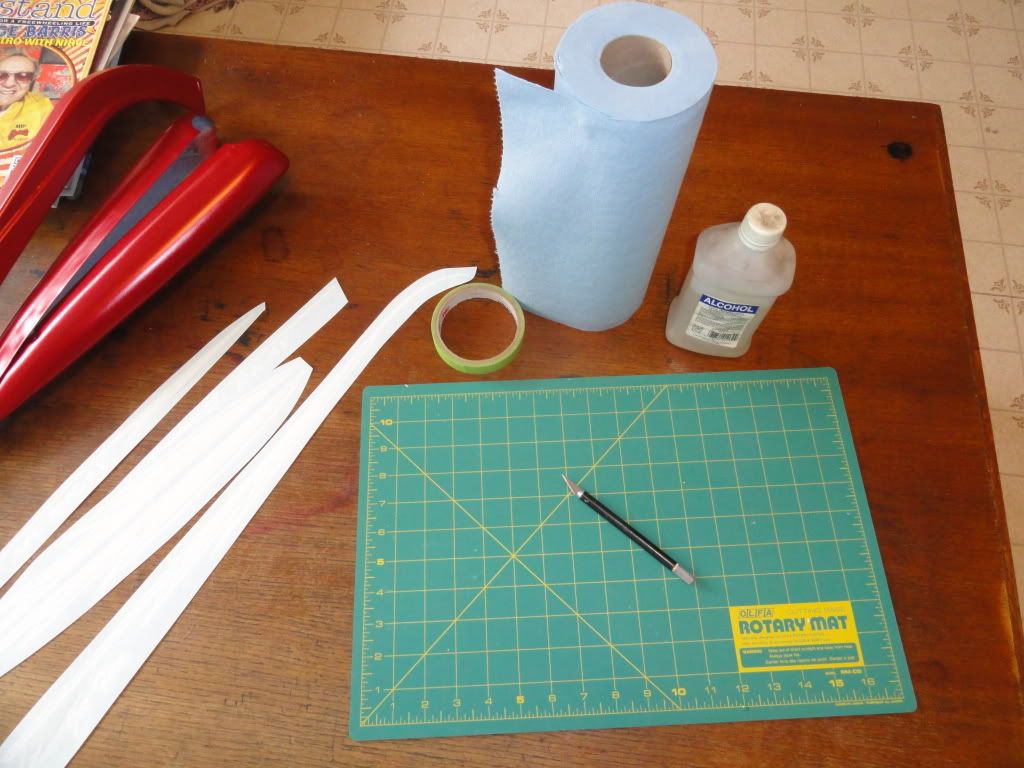
It's a good idea to take several pictures before hand so you'll know how the decals are positioned on each part.

DSC01941.jpg


DSC01946.jpg
 
These are vinyl decals like you see on practically everything these days, they are pretty thin but not as thin as waterslides would be.
The good thing about vinyl is that you can clear coat over them which helps hide the edges as well as protects and also prevents them from peeling off in the future.

This is what the sheet looked like straight from the sign shop...
DSC02563.jpg


I roughly trimed each piece down to size. According to the sign shop, it's best to leave a little extra around the edges (I left about 1/2").
DSC02564.jpg


I used to build model cars so I had these supplies/materials already, but I'm sure you can figure out what works best for you.
DSC02565.jpg
 
First thing to do is wipe the part down with rubbing alcohol to get any greasy finderprints off.

I used the green tape to lay down a 'sight' line that follows the body line on the tank. This is where pictures come in handy for laying out the new decals!

At this point, I had already removed the paper backing and loosely applied the decal. You can move them around a few times but I tried to keep that to a minimum.
Once you have the decal positioned correctly, you need to rub firmly over the decal before removing the protective paper (I used a credit card for this step).

DSC02568.jpg


First time doing this and it came out pretty good, at least good enough to give me the confidence to go on!
Still need to remove the 'darts', which are hard to see here but you'll see in the next picture.
DSC02570.jpg


'Darts' removed. I'm guessing the sign shop used lasers to cut these with as the lines for the darts are nearly microscopic!
DSC02571.jpg
 
Same procedure as before. This time I decided to separate the two decals to make applying them easier.
DSC02572.jpg


The trick to laying down the longer graphics is to leave the backing paper on, position the decal, tape it in place, in this case I placed a piece of tape pretty close to the middle of the decal. Then lift one half of the decal and cut the backing paper (but not the decal itself!), then remove the packing paper and apply that half of the decal. Next remove the tape holding the decal in position, pull up the other half of the decal and remove the backing paper and carefully lay down the other half of the decal. This is where it's handy to be able to reposition the decal. Once everything is set then rub the decal to set it in place and remove the protective paper.
Hopefully this isn't so wordy that it's getting confusing (I'm also wishing I'd taken more pictures!).
DSC02573.jpg


Finished rack!
DSC02574.jpg
 
I saved the hardest part for last. Because this piece has so many curves...it was a little scary at first!

It seems this is the only pic that really shows what the decal looks like with the backing paper on.

The next pic shows the decal initially applied and that the protective paper is somewhat 'see-thru'.
Same procedures as before and it turns out this piece really wasn't as bad as I thought it would be.
DSC02576.jpg


DSC02577.jpg


DSC02578.jpg


All of the finished pieces were clear coated to protect them from the elements and to keep them 'locked in' and prevent them from peeling back off for some reason.
DSC02579.jpg


I was pretty intimidated at first only because I'd never worked with this type of decal before but overall it was pretty easy.
On a related note, I could have made my own water-slide decals but did not have the printer, scanner or program needed to create them (I didn't really want to invest in a lot of equipment for what may be a 'one-time' thing).

More finished bike pics here...http://www.ratrodbikes.com/forum ... 21&t=35534
 
Another helpful tool to have for the bigger decals is a spray that they sell for DIY window films. Spray the part down and apply the decal while it is wet. The spray allows you to slide the decal to where you want it. Once it is in place use your credit card to squeeze the liquid out from under the decals. Allow 24 hours for the spray to evaporate. It doesn't effect the adhesive once it has dried.
 
When I open my bicycle factory I will hire you to do all the decals. :) I would also like to see pics of the bike when you get it finished. Very nice job and a useful tutorial. Gary
 
I put larger ones on wet as well. Just a cap full of dish soap in a large spray bottle of water is all it takes. Use a rubber squeegee to work any bubbles out and let things dry before removing backing. Get a bubble or wrinkle in it dry and it's there to stay. Learned this process after goofing too many stickers up on trailers, trucks and snowmobiles.

Nice job on the Murray stuff. Looks great!
 
I hope the sign company (or you) saved the computer file(s) that created these cut-outs. I am very familiar with this process, and the hardest part was creating the templates in the first place. Now that that part is done, the sign maker could cut out these for countless bikes to look identical to yours. I thought about doing the same thing with my wife's Columbia, but was in a bigger hurry to complete the revitalization, now I'm sorry. Oohhhhhh to have a database, or collection of these files every time someone did what you chose to do! The next bike I will do just as you did.....then there will be TWO templates (yours, and whatever my next bike might be)!
 
BehindBarsInc said:
Looks great!

Did they scan the decals to reproduce them?

I've got a vinyl machine and can do this if anyone needs the same service.

Email me: [email protected]

Thanks,
Dominick

I need some for a bike I'm doing, how much would you want to do a chainguard,headbadge and a rack like the one above, in flat/satin black? I can do the art, i just need em cut.
 
Crisp clean sparkly new graphics nicely applied. I'm not positive how well it works, but a friend of mine runs a window tinting shop and he says most stickers can be floated on with some soapy water misted on the surface from a Windex bottle. You just squeegee off all the water you can and allow the stickers to dry.
 
CoastalCruiser said:
Crisp clean sparkly new graphics nicely applied. I'm not positive how well it works, but a friend of mine runs a window tinting shop and he says most stickers can be floated on with some soapy water misted on the surface from a Windex bottle. You just squeegee off all the water you can and allow the stickers to dry.
this is how i do it, the more soap the more time you will have to wait to remove transfer tape!!

http://img189.imageshack.us/slideshow/p ... 51zdn.smil
 

Latest posts

Back
Top