(WBO) Pathracer

Rat Rod Bikes Bicycle Forum

Help Support Rat Rod Bikes Bicycle Forum:

This site may earn a commission from merchant affiliate links, including eBay, Amazon, and others.
CTppSB.jpg

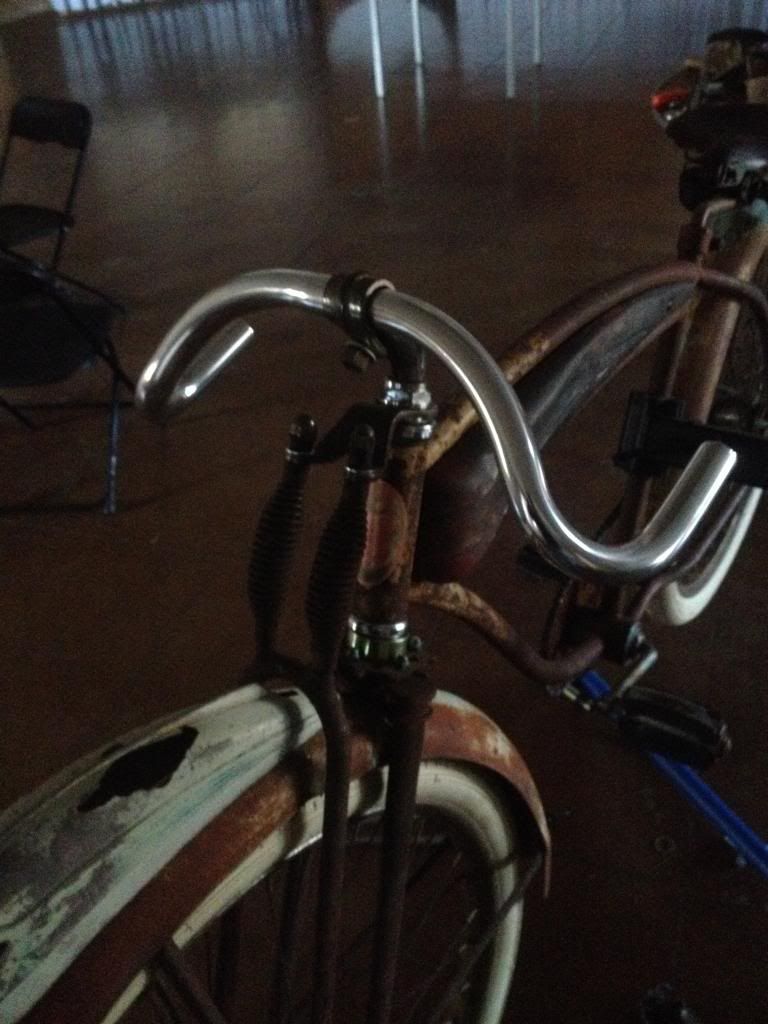
Waiting for the epoxy to dry gives me time to think about handlebars. I don’t want to just turn a set of roadster handlebars upside-down. I would prefer a set that was purposely built for racing. I’m a big fan of Major Taylor (as seen in the photo) and the handlebars he used would look perfect. A Canadian company called Massy Harris which later was dissolved into CCM, sponsored Major Taylor on multiple occasions when he was racing in Canada and Australia. It would be great if I could find a pair of his trademarked adjustable handlebar stems as well, but considering they normally sell for upwards of $300 I think my bike will have to go without them.

Soma Fabrications does make a convincing replica of his handlebars though, and they come in different widths allowing for a custom fit to the rider. They should also cost considerably less than the real thing. i may order one sometime this weekend.
More handlebar inspiration for you from the local turn of the last century bike club.

 
More handlebar inspiration for you from the local turn of the last century bike club.

these photos are great! thanks. nice bike by the way, i really like the wooden hand grips and the wing nuts. i'll have to do some research on the handlebars and see if i could get a pair shipped to Canada for a reasonable price. thanks again
 
search drop handlebars on eBay...
I knicked the pic from there.

Carl.
 
these photos are great! thanks. nice bike by the way, i really like the wooden hand grips and the wing nuts. i'll have to do some research on the handlebars and see if i could get a pair shipped to Canada for a reasonable price. thanks again
A couple of years ago I scored two pair of turn of the 20th century wooden handlebar grips on Ebay. I used one set on my bike in the picture. I still have a pair remaining sitting somewhere in one of my good parts boxes. I could be persuaded to sell them to you if you need a set for this project. Where in Canada are you? I am 180 miles west of Sault Ste. Marie Ont. but in Michigan. I am from the Soo originally and get back there a few times a year. I might be able to get them to you somehow. The wing nuts are some I had and they are not all the same, but similar. I have them on both wheels, but they are just for the "look" on the rear wheel as wing nuts would never hold a coaster brake in place. They didn't make them in rear axle threading, but you can convert front ones to rear threading. I had to drill out front wing nuts and thread them to fit the rear axle. They are on top of the real axle bolts on the rear. You can buy these wing nuts on Ebay but avoid the aluminum ones, brass is what you want or steel but steel ones are usually much older and cost more and you are going to drill them anyway.
 
There is something else I almost did. I used the picture of the guy on the left of the picture of the track bikes being held for a start for inspiration. I did a mock up with regular cow horn type bars turned upside down and I almost went with that, but they were a little wide for my taste. I did think about cutting about 2 inches off each side. It was a real hard decision, especially as I already had the bars and could save $13. Here is a picture of the mock up.
 
nice bikes! i can't afford anything on eBay though, shipping to Canada is extremely expensive (not to mention the Canadian dollar is low). i am limited to what i find at local bicycle shops and what i find at the local scrap yard. i did find a set of rims and a Major Taylor steel handlebar downtown though, so it was a pretty good day.
we had a warm flash today so i took advantage of it and finally got a coat of primer and paint on the frame! I’ll do another coat once this coat is cured. I really like the rich colour of the black, I used and oil based spray primer and paint that I picked up at the local hardware store. The hardest part now will be finding a compatible clear coat. The best part is that you can’t see when any of the holes were, so I’m pretty happy about that.
DVGMmc.jpg
 
Last edited:
In last years winter build off I used a set of Major Taylor drop bar copies. Made of aluminum. Found them on ebay. Nice bars but were too shiny for this build so, I faux rusted them.


how did you do that? looks great!
 
hR0GXV.jpg

the spokes are caked with rust, but the chrome rims and 3 speed hub are in decent shape at least.
 
j4OMCr.jpg

This is one of the decals I will be using; it was designed in paint program and then sent off to a decal printing company. I thought about it for a while and have decided to customize this bike by putting my name on each side and making a custom head badge decal for the front. I decided to do my name in an art nouveau style to match the desired era of inspiration for the bike. I’m happy with the way they turned out but the hard part is getting them on the frame, they are incredibly thin and therefore unbelievably fragile. these are far thinner then the decals you usually get in airplane model kits, They are very much like working with wet tissue paper; they tear extremely easily so getting them on the frame is a slow and tedious process.
 
Great decal design, this will be a very nice build with that kind of attention to detail.
 
I used to do some model railroading. There is a spray you can use on old decals before you get them wet, sprayed right on the sheet, that thickens them up a bit so they will slide off better... I can't remember what it is, but Google is your friend.

Carl.
 
12mPxK.jpg

I got the decals on without many major problems. Once on I very lightly sanded the surface and the edges of the decals with extremely fine automotive sand paper. This will make the decal “edgeless” and remove any tattered edges. I then lightly sanded the entire frame and fork to promote adhesion of the varnish. Time to clear coat the whole frame.
 
I used to do some model railroading. There is a spray you can use on old decals before you get them wet, sprayed right on the sheet, that thickens them up a bit so they will slide off better... I can't remember what it is, but Google is your friend.

Carl.
that's a good idea if i ever do this again in the future, i got impatient and stuck them on without it though lol. only ripped one to shreds, (i'm glad i got duplicates)
 
Akg9yR.jpg

Now that the decals are varnished I think it really looks like they were painted on by hand, the gold and silver really give off an iridescent glow under the light and look like real precious metal leaf. Over all I’m pretty happy with the result. Once everything has cured overnight I will pound the bearing races back into the frame and start thinking about parts and accessories that would suit this bike.
 

Latest posts

Back
Top