GYSOT! - Get You Some of That! - She's a Rider - heading to the Finished Bikes forum soon.

Rat Rod Bikes Bicycle Forum

Help Support Rat Rod Bikes Bicycle Forum:

This site may earn a commission from merchant affiliate links, including eBay, Amazon, and others.
Thanks for the comments, guys. I'm pretty pleased with the look so far - and the patina is pretty killer (I think). I've been wandering around the house, thinking about what else I can spray the patina on :) (the wife is not excited about that).

Back from my trip, so I should be able to more done this weekend. Would love to get that engine running.

A quick comment/word of warning about Gasbike.net. They were supposed to ship a high compression head with this engine, but didn't. I have called three times, emailed 5-6, even tried their online chat. I have yet to speak with anyone about it. My next step is a chargeback on the credit card, which I'm not happy about doing.
 
Yeah, I had one of thos Gyes saddles and it is the most comfortable seat I have ever had, well toe to toe with my brooks. You will love it. I had mine on a motorized and you really need something like that because bouncing around for a good part of a day will wreck you with the wrong seat. Great choice once again!
 
One more piece of inspiration. As we all know, if you are building something fast and loud, then it probably has to be green, right? So how about a nice Jaguar Meadow Green from a 1969 E-Type?

1969-Jaguar-XKE-Roadster-800x373.jpg


Order placed with 66autocolor.com, which means it's time to get prepping the frame and pulling together other parts.

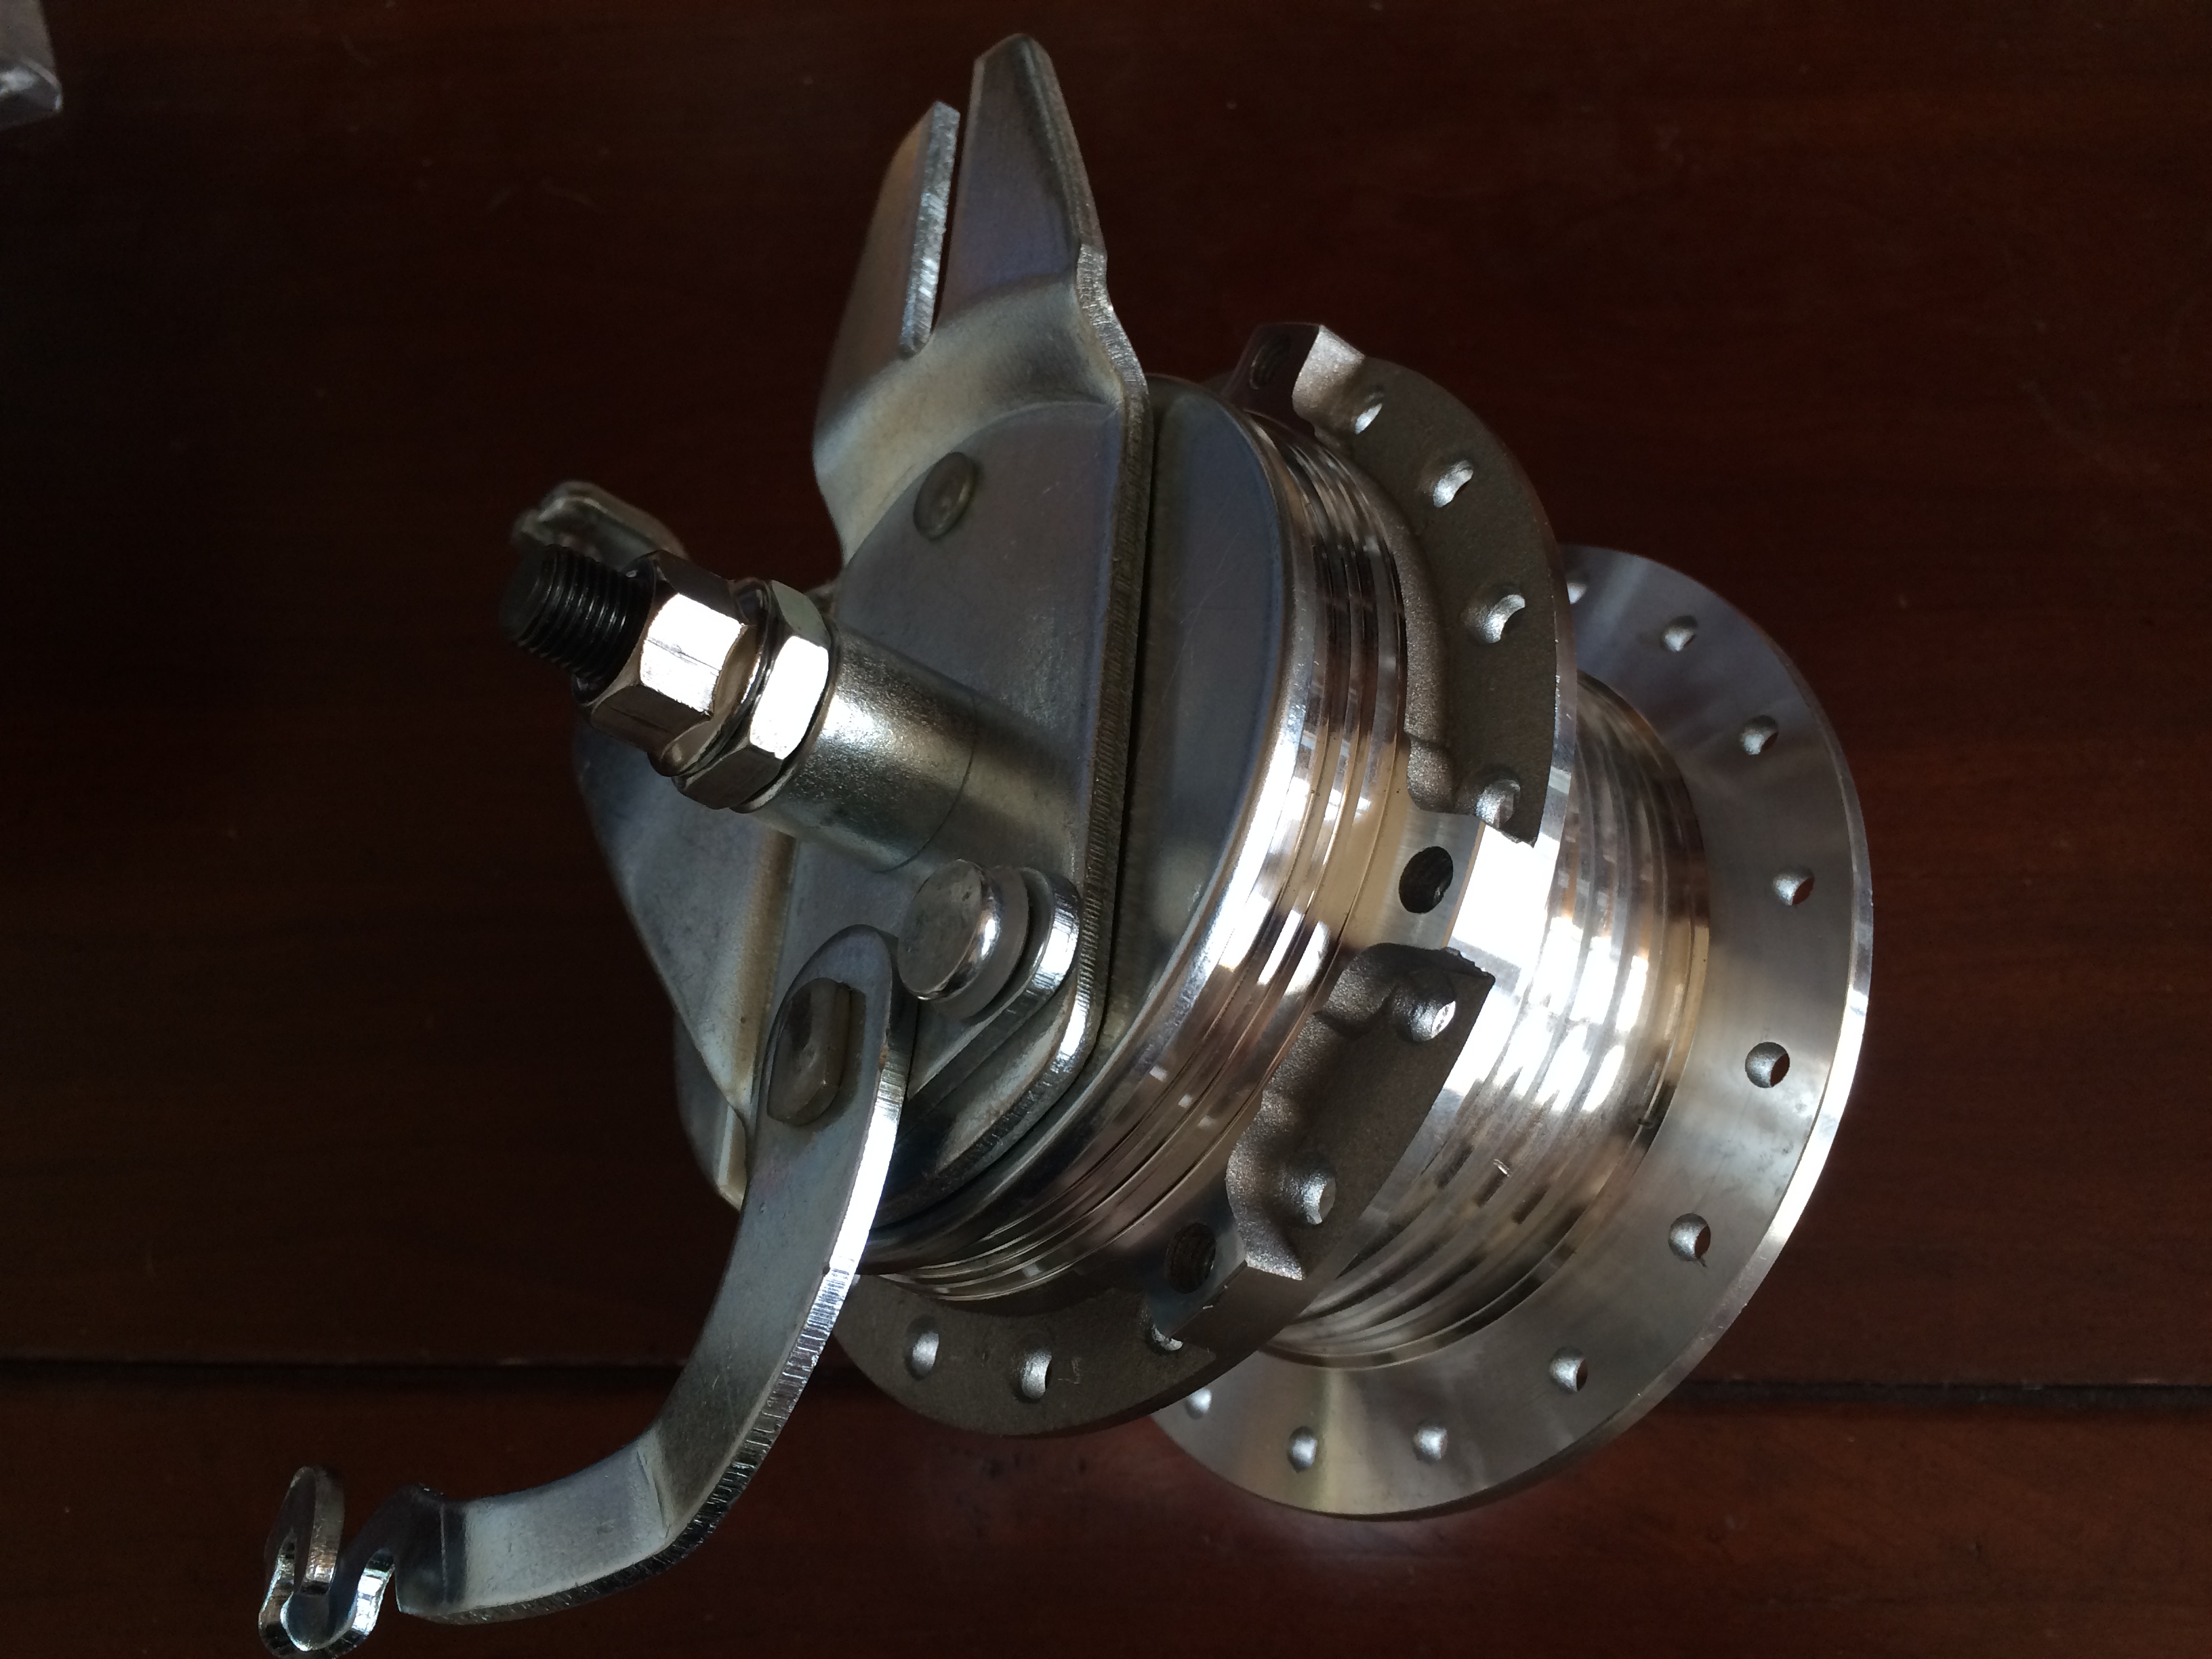
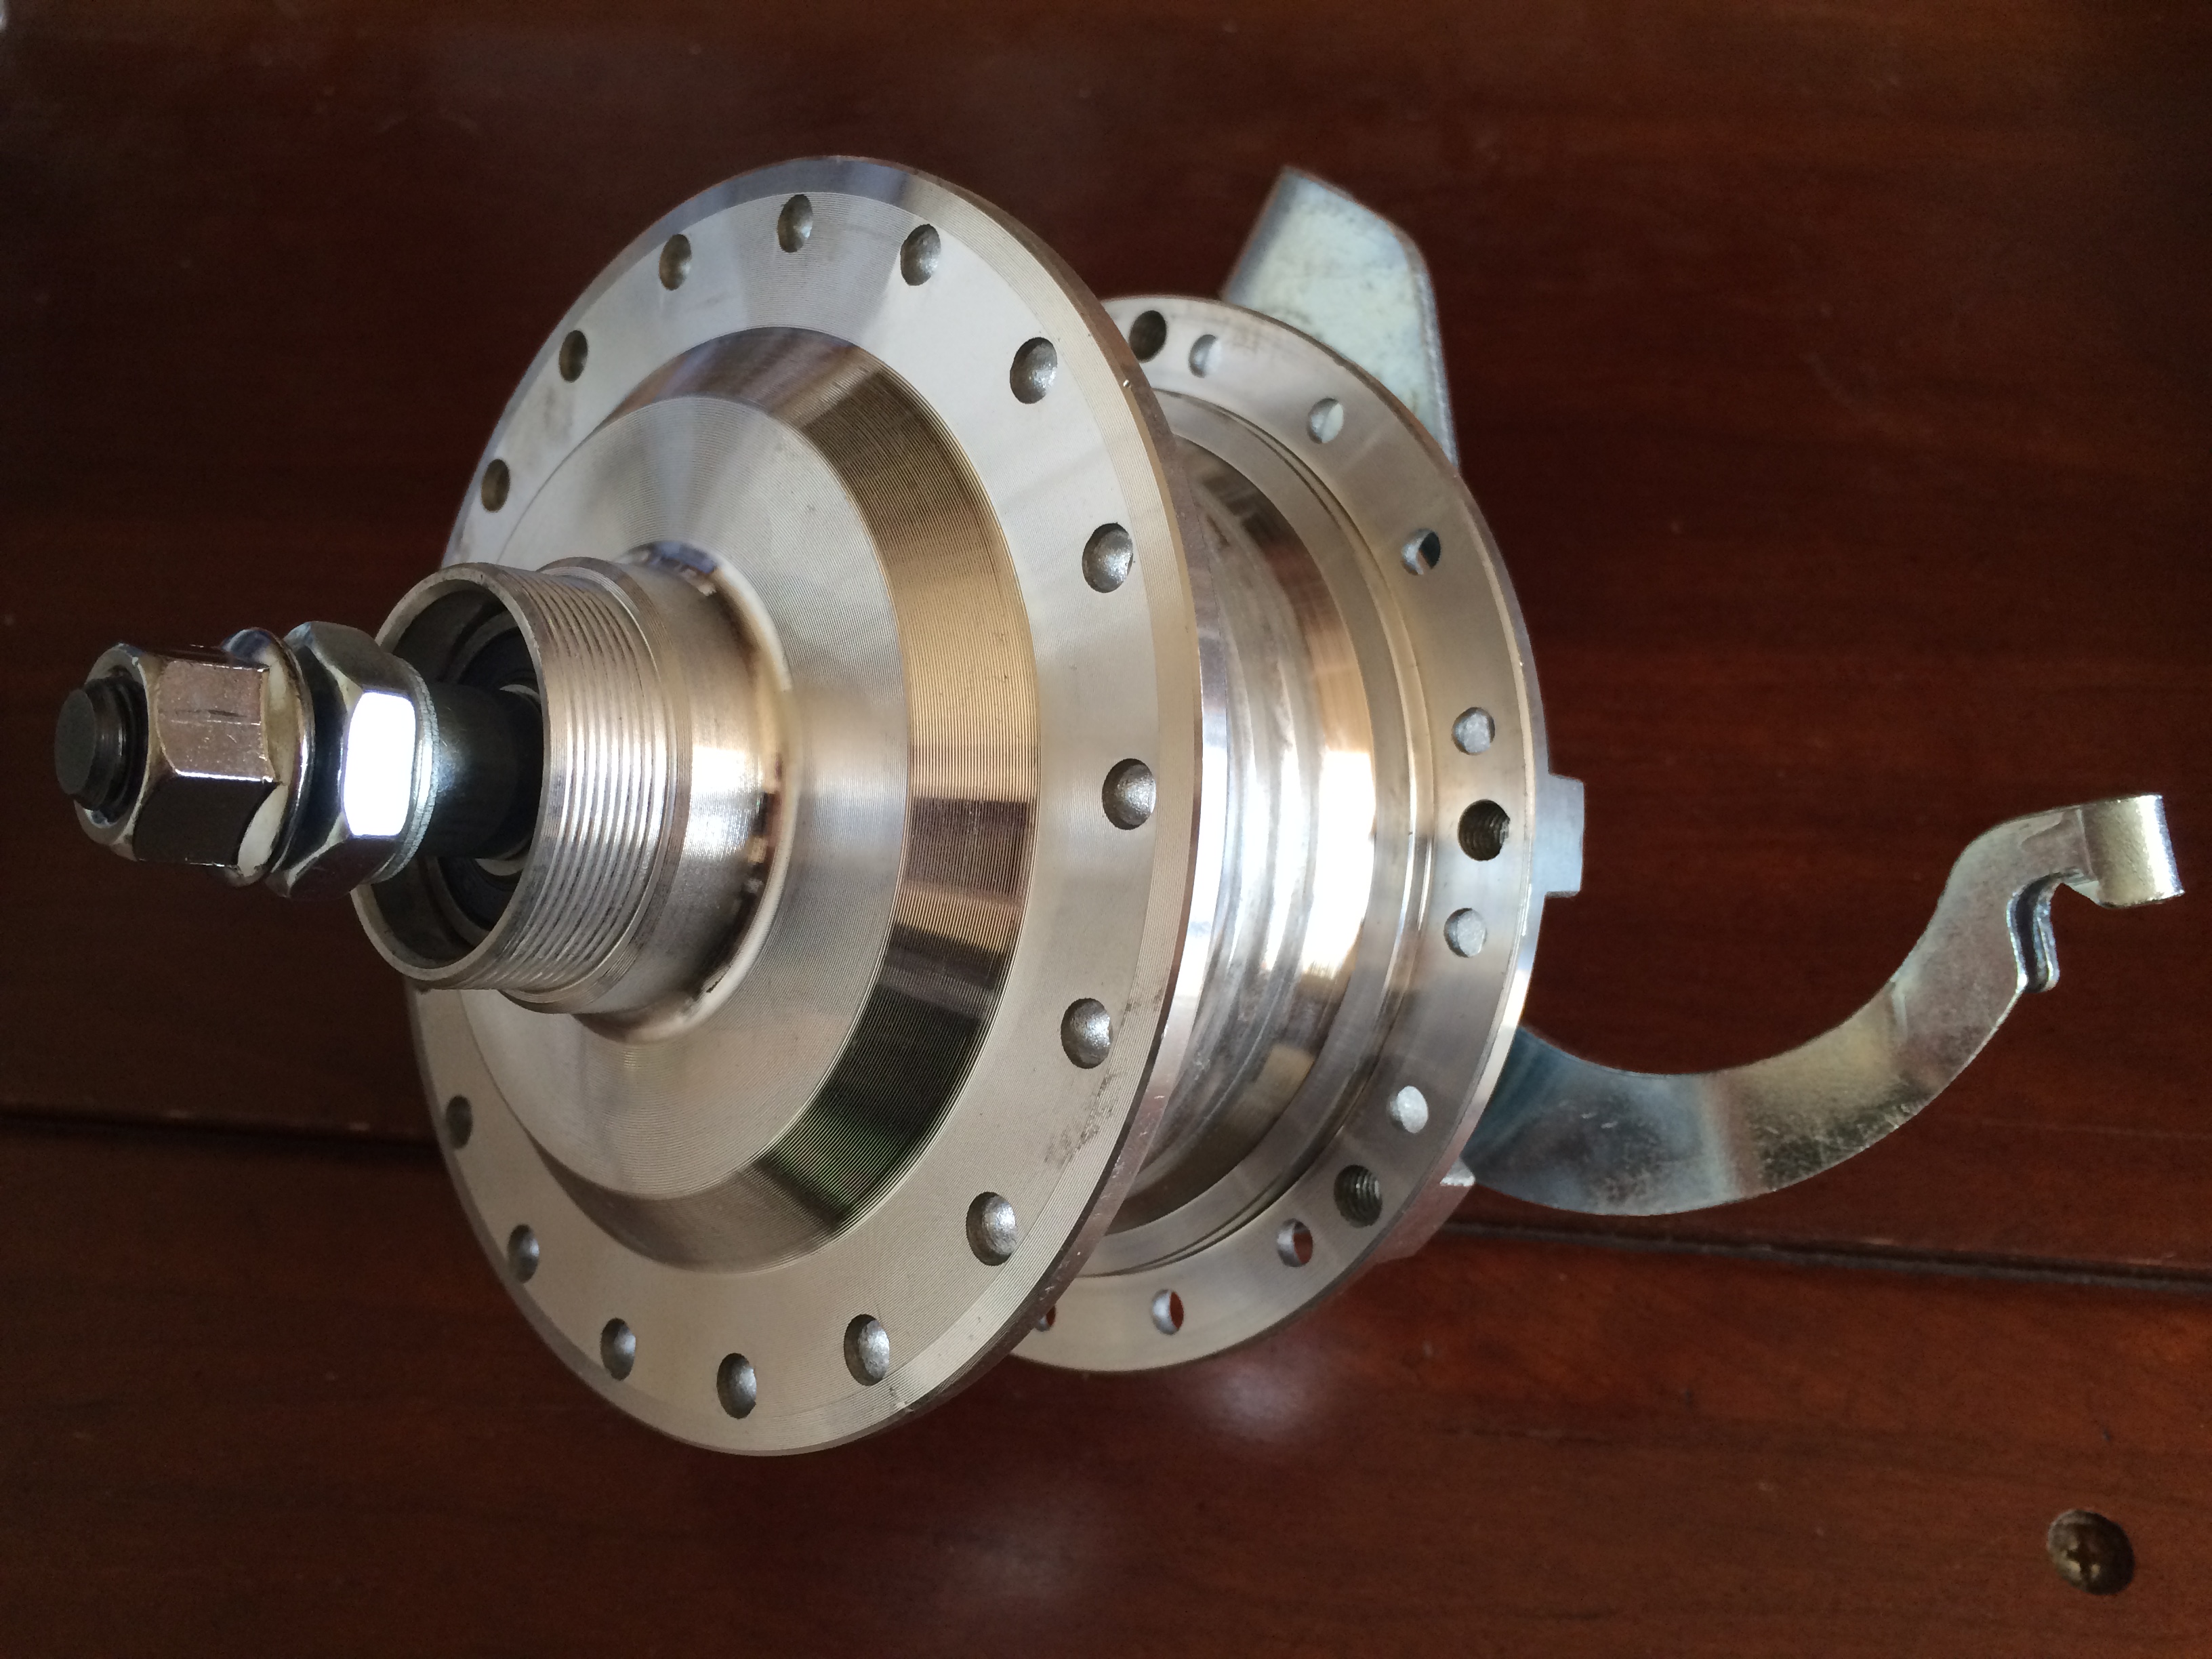
Now, I know I'm getting a bit ahead of myself, because we all know that stories about barn finds, or field bikes start with the bike, and then the components, but I'm impatient. Here's a sneak peek at the rear hub.

2015-05-06%2015.10.36.jpg


This is a big ... drum brake off of a moped. Now, I'm no expert here, but those spoke holes look pretty .... huge. 10 or 11 Gauge maybe?

2015-05-06%2015.17.31.jpg
 
I'm really loving this bike. I am planning on working the patina as well. I'm a total newb at it and you are extremely informative. Everything you are putting out is top shelf. Outstanding job!
 
I thought I already had my votes narrowed down but this build just stole it from someone else lol. Way kool man, I really like this a lot. Great job!!!
 
Well, I have been about as busy as I have ever been with work, and while I have been able to get some work don, I haven't had a lot of time to post the progress. Here are a few updates, and a video from late June. At the bottom of the post is a video from yesterday, and I get the engine started.


There have been more than a few problems that I had encountered up to this point. First was the CDI - it was shot. I ordered up a replacement, and while it worked, the spark plug cable was a piece of junk.

11119670_10153616078984728_8345227739565571080_o.jpg


I couldn't even get it to make contact with the plug reliably. I went down to NAPA and picked up some cable, a clip and a boot and made a replacement.

11033077_10153616079069728_4486668554161376681_o.jpg


This is a motorcycle-style CDI, so I just unscrewed the old cable and screwed in the replacement.

11722475_10153616079079728_3055623462075714097_o.jpg


The spark plugs that come with the stock Chinese motor kits are garbage, so I replaced it with an NGK plug that I also got at NAPA.

11722331_10153616079074728_8722506545577307433_o.jpg


And here's what the finished product looks like. Clips on perfectly. I consider this a required upgrade for any motorized bicycle.

11699067_10153616079314728_8974080935068844094_o.jpg


The gas tank also arrived. It's a spun aluminum one from eBay. Of course, when I went to use the stock petcock in this tank, it wouldn't fit, so I picked up this replacement. I also went ahead and got some upgraded fuel line from the hardware store.

11722389_10153616078989728_4276421804746404518_o.jpg


I also had a little problem with the original chain. It was just too short. Replacement chains were available from the various motorized bicycle sites, but I ended up finding a KMC chain on Amazon for a good price and picked up two of those. Unfortunately, that chain was a little wider than stock.

11728895_10153616078974728_2207294511380673907_o.jpg


And this meant the chain cover/clutch actuator would not fit.

11741069_10153616078994728_560051922078980450_o.jpg


So I hit it with a sanding disc on my angle grinder, and in about 5 minutes, it was ready to go.

11722328_10153616078979728_2700437677298821110_o.jpg


Up to this point, the bike was looking close, but there were a lot more problems that I had to sort out. Chain tension was one of them. I got the bike running, and the chains looked pretty good, but as the chains break in, they get a bit floppy. It was a constant battle between the floppy chain rubbing the tire and my subtle adjustments of the rear tensioners. Finally I decided that I needed to install the stock tensioner. It was a piece of junk.

This is an ongoing theme, BTW... Chinese bike engine kits are junk.

Anyway, I ordered up a part from K&W Machine Works, and while it was made for an aluminum Felt frame, I shimmed it and it fits this frame perfectly with the right amount of offset.

11713856_10153616079169728_6225731362452365589_o.jpg


I also added some small washers between the rear sprocket and the hub to give me a little more clearance on the tire. Chain line looks pretty good now.

11055361_10153616079164728_8833572796135154373_o.jpg


Earlier I was considering replacing the muffler, but decided to keep it for now.

11698775_10153616079084728_7666255427957691212_o.jpg


I did decide to dress it up a little bit, though. I think the exhaust wrap adds a little texture, and brings in the cream from the tires.

11032758_10153616079179728_63005479906066335_o.jpg


And here's what it looked like last night. Almost ready to call her done.

11037306_10153616079174728_3223812923816781692_o.jpg


And here's a video that I shot last night - and at the end of it, I start it up...

 
Well, I have been about as busy as I have ever been with work, and while I have been able to get some work don, I haven't had a lot of time to post the progress. Here are a few updates, and a video from late June. At the bottom of the post is a video from yesterday, and I get the engine started.


There have been more than a few problems that I had encountered up to this point. First was the CDI - it was shot. I ordered up a replacement, and while it worked, the spark plug cable was a piece of junk.

11119670_10153616078984728_8345227739565571080_o.jpg


I couldn't even get it to make contact with the plug reliably. I went down to NAPA and picked up some cable, a clip and a boot and made a replacement.

11033077_10153616079069728_4486668554161376681_o.jpg


This is a motorcycle-style CDI, so I just unscrewed the old cable and screwed in the replacement.

11722475_10153616079079728_3055623462075714097_o.jpg


The spark plugs that come with the stock Chinese motor kits are garbage, so I replaced it with an NGK plug that I also got at NAPA.

11722331_10153616079074728_8722506545577307433_o.jpg


And here's what the finished product looks like. Clips on perfectly. I consider this a required upgrade for any motorized bicycle.

11699067_10153616079314728_8974080935068844094_o.jpg


The gas tank also arrived. It's a spun aluminum one from eBay. Of course, when I went to use the stock petcock in this tank, it wouldn't fit, so I picked up this replacement. I also went ahead and got some upgraded fuel line from the hardware store.

11722389_10153616078989728_4276421804746404518_o.jpg


I also had a little problem with the original chain. It was just too short. Replacement chains were available from the various motorized bicycle sites, but I ended up finding a KMC chain on Amazon for a good price and picked up two of those. Unfortunately, that chain was a little wider than stock.

11728895_10153616078974728_2207294511380673907_o.jpg


And this meant the chain cover/clutch actuator would not fit.

11741069_10153616078994728_560051922078980450_o.jpg


So I hit it with a sanding disc on my angle grinder, and in about 5 minutes, it was ready to go.

11722328_10153616078979728_2700437677298821110_o.jpg


Up to this point, the bike was looking close, but there were a lot more problems that I had to sort out. Chain tension was one of them. I got the bike running, and the chains looked pretty good, but as the chains break in, they get a bit floppy. It was a constant battle between the floppy chain rubbing the tire and my subtle adjustments of the rear tensioners. Finally I decided that I needed to install the stock tensioner. It was a piece of junk.

This is an ongoing theme, BTW... Chinese bike engine kits are junk.

Anyway, I ordered up a part from K&W Machine Works, and while it was made for an aluminum Felt frame, I shimmed it and it fits this frame perfectly with the right amount of offset.

11713856_10153616079169728_6225731362452365589_o.jpg


I also added some small washers between the rear sprocket and the hub to give me a little more clearance on the tire. Chain line looks pretty good now.

11055361_10153616079164728_8833572796135154373_o.jpg


Earlier I was considering replacing the muffler, but decided to keep it for now.

11698775_10153616079084728_7666255427957691212_o.jpg


I did decide to dress it up a little bit, though. I think the exhaust wrap adds a little texture, and brings in the cream from the tires.

11032758_10153616079179728_63005479906066335_o.jpg


And here's what it looked like last night. Almost ready to call her done.

11037306_10153616079174728_3223812923816781692_o.jpg


And here's a video that I shot last night - and at the end of it, I start it up...


Nice work on the upgrades to the motor parts and the overall look fits well!
 
itsalive.jpg
 
I got some go-fast parts in the mail yesterday. A Dellorto clone carb and a high compression aluminum cylinder head. I'll get these installed this weekend.

11411879_10153628089954728_8418265000866199495_o.jpg
To switch out that carb I had to adjust the throttle cable. What you can do is measure out from the stop at the line going into the carb to where you need it and clip the cable to size and use some copper wire from any outlet plug wire and a bit of solder to fabricate a new stop on the cable for the plate inside. It's not difficult but if you find that it is not a plug and play type situation (which I ran into) that is a possible fix. I have never had a problem with that solution for MANY miles riding. Hope that helps. If you have any questions pm me. It is simple for some but frustrating for others. Oh yeah, freakin nice build man.
 
To switch out that carb I had to adjust the throttle cable. What you can do is measure out from the stop at the line going into the carb to where you need it and clip the cable to size and use some copper wire from any outlet plug wire and a bit of solder to fabricate a new stop on the cable for the plate inside. It's not difficult but if you find that it is not a plug and play type situation (which I ran into) that is a possible fix. I have never had a problem with that solution for MANY miles riding. Hope that helps. If you have any questions pm me. It is simple for some but frustrating for others. Oh yeah, freakin nice build man.


Excellent tip. When I started swapping it out, I noticed that the cable was going to be way too short. Fortunately, the Sick Bike Parts throttle had a slot in it so I could give it a little more slack and it fit perfectly.

The difference in quality between the two carbs is huge. I was all set to give it a whirl after in installed it, but I was out of gas...

Pics to come once I'm fueled up...


Sent from my iPhone using Tapatalk
 
So, getting the go-fast parts installed was a little more involved than I thought.

Installing the head and the carb was pretty uneventful. I was out of fuel, so I picked some up at the station, added some oil, and was ready to take it for a ride. I rolled her down the driveway, on to the street, dropped the clutch... And nothing. I checked the spark, it was working. Checked the fuel lines, the were flowing. Still noting. I went to the taqueria and picked up a burrito and a beer, and contemplated my predicament. I was stumped. Hours went by, and the thing would not start.

I was about to pour gasoline all over this bike and burn it in the middle of the street. I could not, for the life of me, get this thing running. Then I figured I would check the float. It was bone dry. I looked at the fuel intake, and noticed the hole where the fuel was supposed to flow was not as much a hole as it was a dimple of metal. Pretty sure this was the problem.

11033075_10153629332784728_4786725635429660262_o.jpg


I flicked it away with a flat head screwdriver, and reassembled. Fuel was now flowing, and it started on the first try.

11709829_10153629332729728_1617909534382489066_o.jpg


So, last thing to do is get the rear brake reinstalled, and then it's off to Shiny Side Up next Sunday for some pics, and off to the Finished Bikes forum.

Here's a little clip of my ride around the neighborhood.

 
That cylinder head is sexy!
 
Just call it battle scars from being locked in the BO-X
 
So, getting the go-fast parts installed was a little more involved than I thought.

Installing the head and the carb was pretty uneventful. I was out of fuel, so I picked some up at the station, added some oil, and was ready to take it for a ride. I rolled her down the driveway, on to the street, dropped the clutch... And nothing. I checked the spark, it was working. Checked the fuel lines, the were flowing. Still noting. I went to the taqueria and picked up a burrito and a beer, and contemplated my predicament. I was stumped. Hours went by, and the thing would not start.

I was about to pour gasoline all over this bike and burn it in the middle of the street. I could not, for the life of me, get this thing running. Then I figured I would check the float. It was bone dry. I looked at the fuel intake, and noticed the hole where the fuel was supposed to flow was not as much a hole as it was a dimple of metal. Pretty sure this was the problem.

11033075_10153629332784728_4786725635429660262_o.jpg


I flicked it away with a flat head screwdriver, and reassembled. Fuel was now flowing, and it started on the first try.

11709829_10153629332729728_1617909534382489066_o.jpg


So, last thing to do is get the rear brake reinstalled, and then it's off to Shiny Side Up next Sunday for some pics, and off to the Finished Bikes forum.

Here's a little clip of my ride around the neighborhood.


I could commute on that all day long! Nice vid!
 
Back
Top