Ok this may be my last build for a while. That other bike is finished ...so its time to start something else. I decided to document how its done...well at least how I do it. Mark/Kram and I were talking and thinking about what I could do to this Schwinn Speedster.We both saw the same bike. Olli the Finnish guy does some outstanding builds ,and he has a bike that is perfect. Now I love the design ,but yall know me ...It has to be stretched.
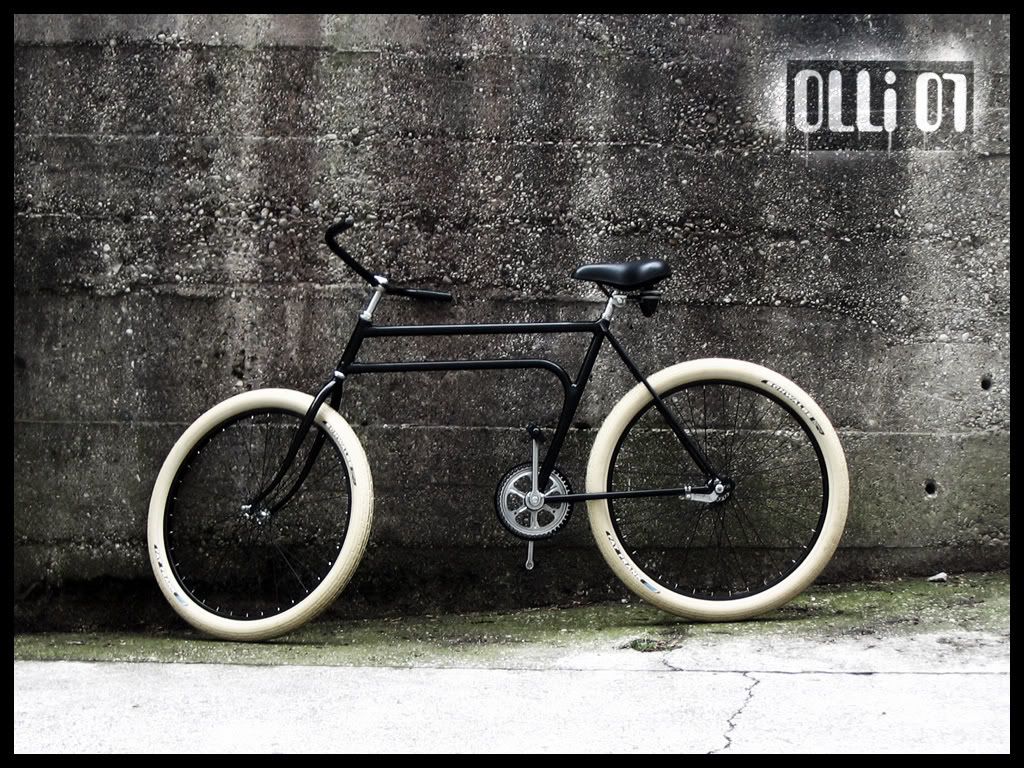
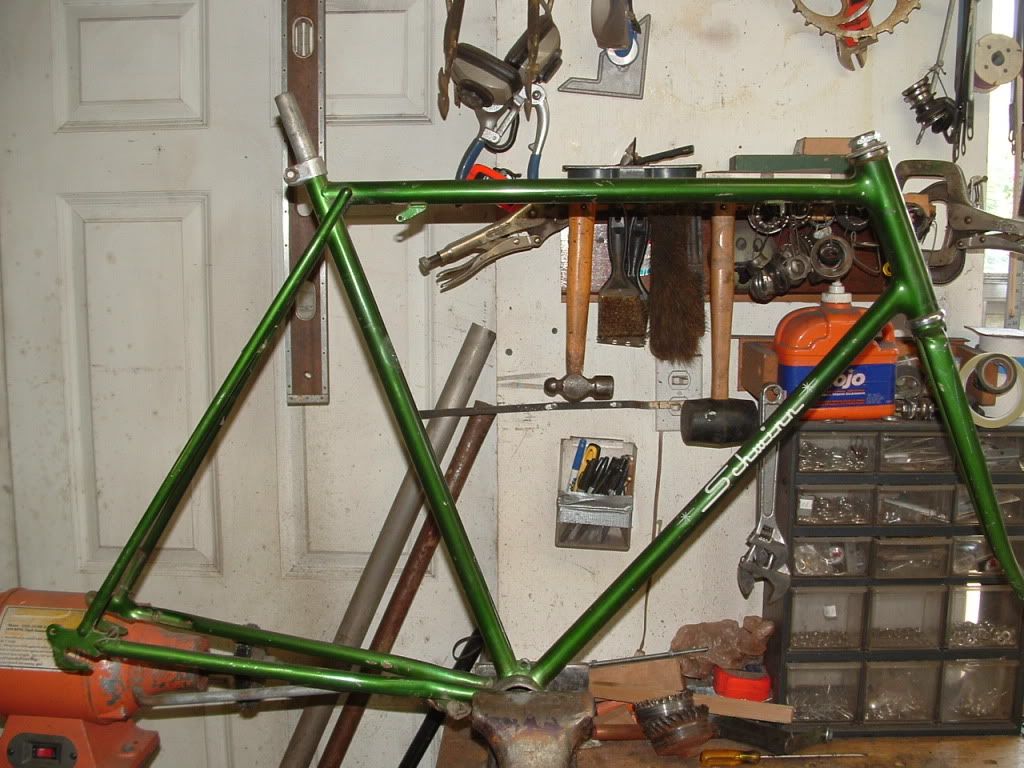
So with a target in sight (helps to know where you are going) and everything cleaned up in my shop here goes. Oh and to the Schwinn purist ,I'm really not cutting this frame. Its like the magic trick where the guy tears the dollar bill in small pieces and then at the end its all back together.
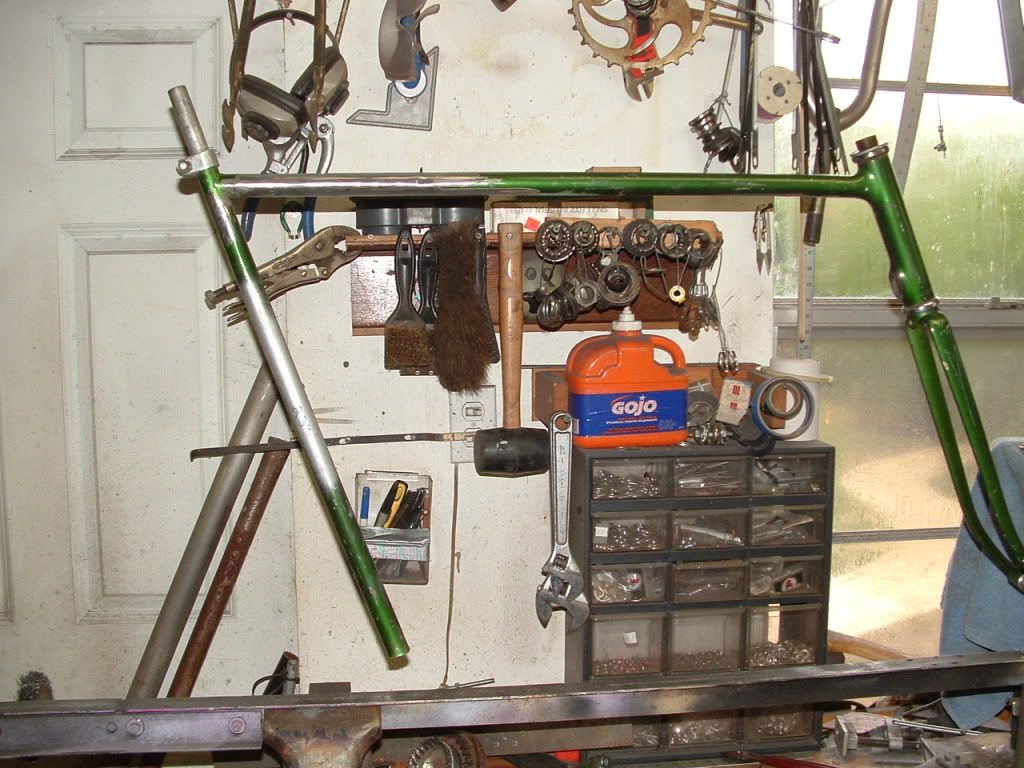
I put blue tape on all the spots I make the cuts. The bottom down tube will be used to stretch the top tube 6''. A distance I found that works the best. Its the same size tube and the stuff I have is a little bigger.
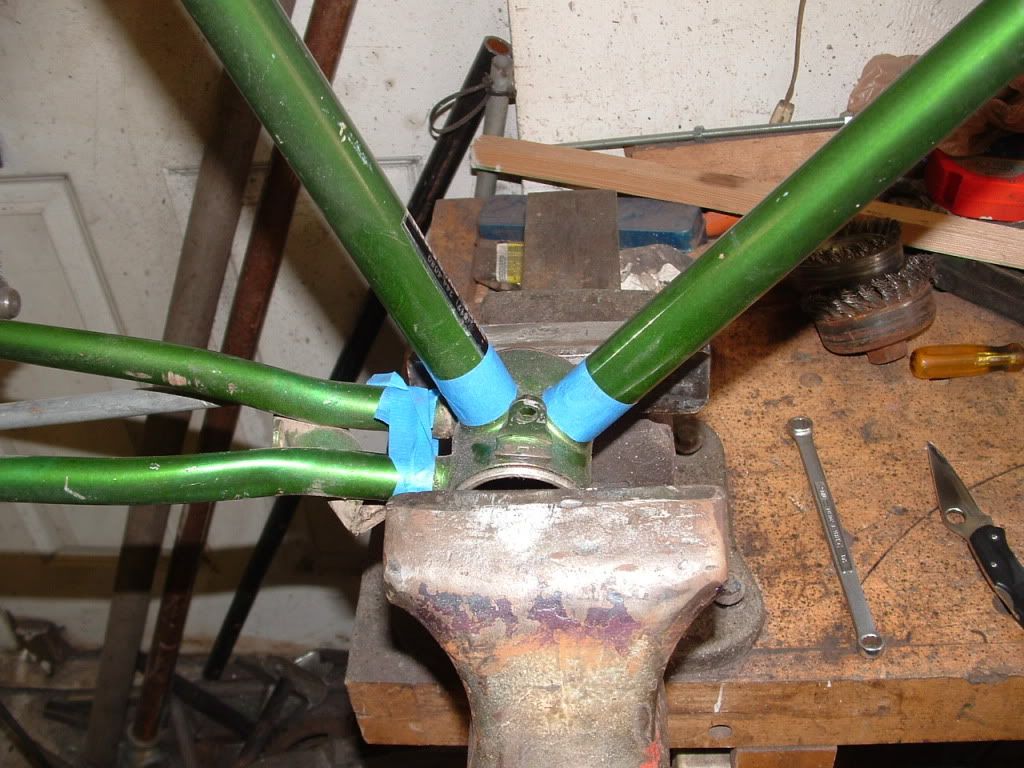
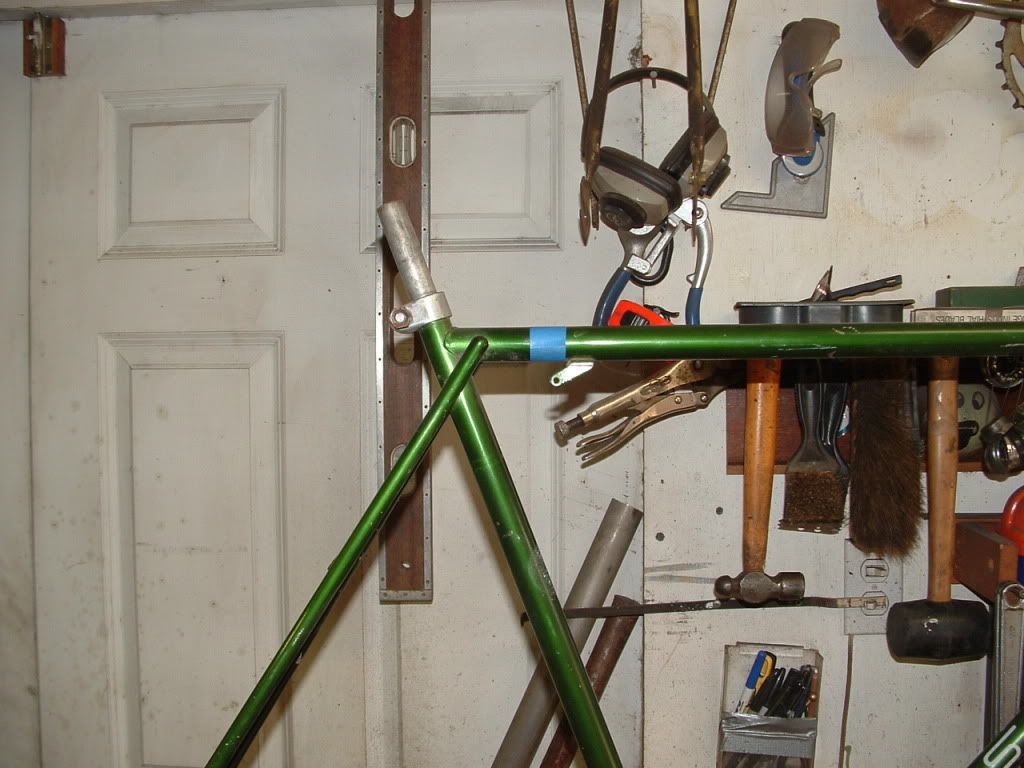
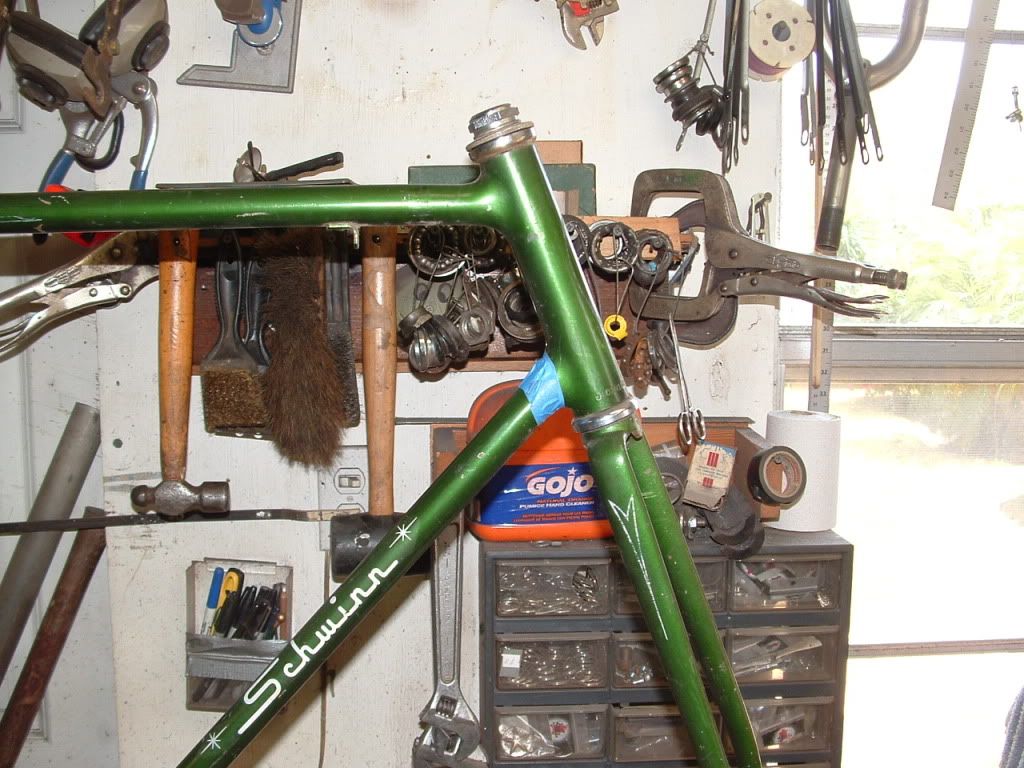
If you leave the down tube and the BB (crank holder) It will keep everything aligned in my jig
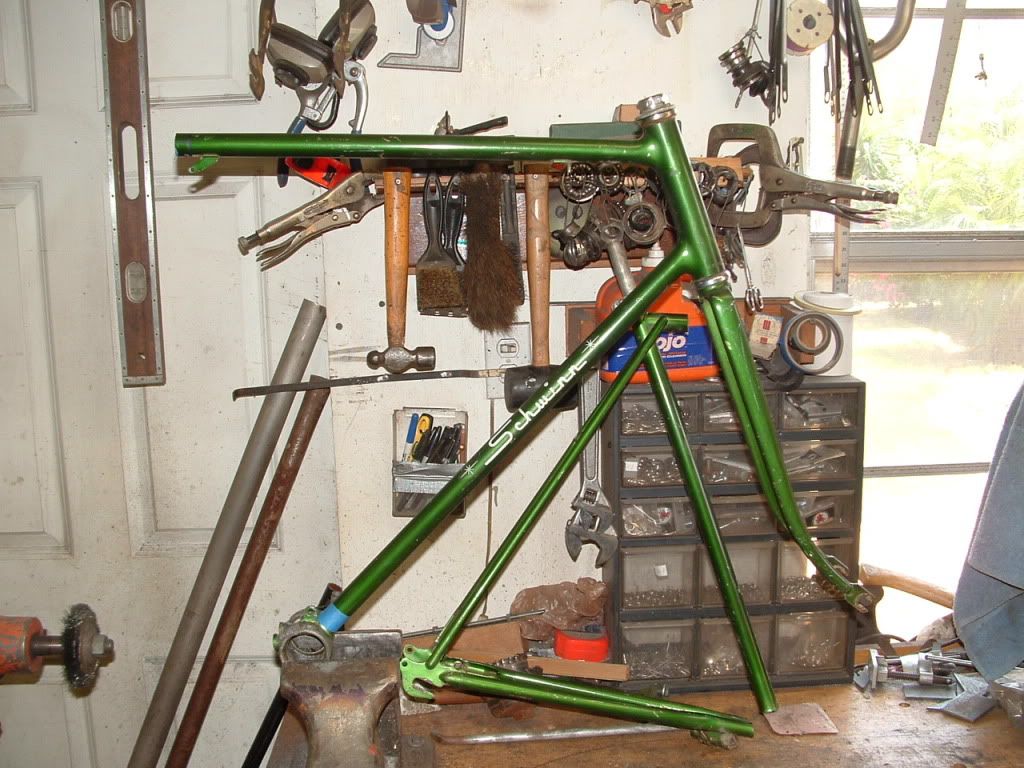
Once you make your first cuts,you need to decide if your going to change the chain stays...like in my case where they are made for a small tire and I will want balloon tires on this build. Also try to find something metal that fits inside the top piece of tubing tight,to line up the 6'' piece your going to add. more to follow.
I'm going to keep posting on the first entry where someone can follow this a little easier
I do want everybody to understand this is my method and I'm not a professional fab person and there are alot of people that do alot better than me. This is just something to look at and get some ideas.
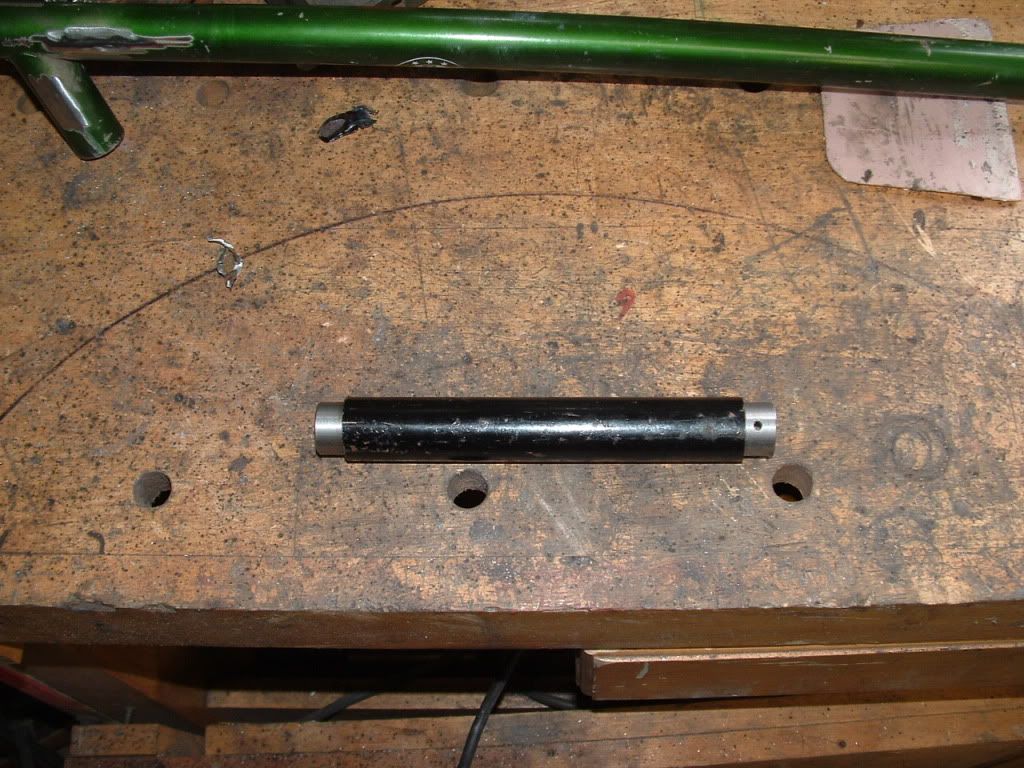
I had a friend of mine turn me some small inserts to fit inside the tubing to keep it straight and make it a little stronger. Everything I weld together has something inside to beef it up . I see people butt welding small tubing together and unless your a really good welder you should strengthen it with something.
The first pic is my 6'' piece with a couple smaller pieces inside
I'm going to rebuild the chain stays and the seat stays so the back was removed. You can build your own or use one from another bike.
this is the seatpost with the small tube inside
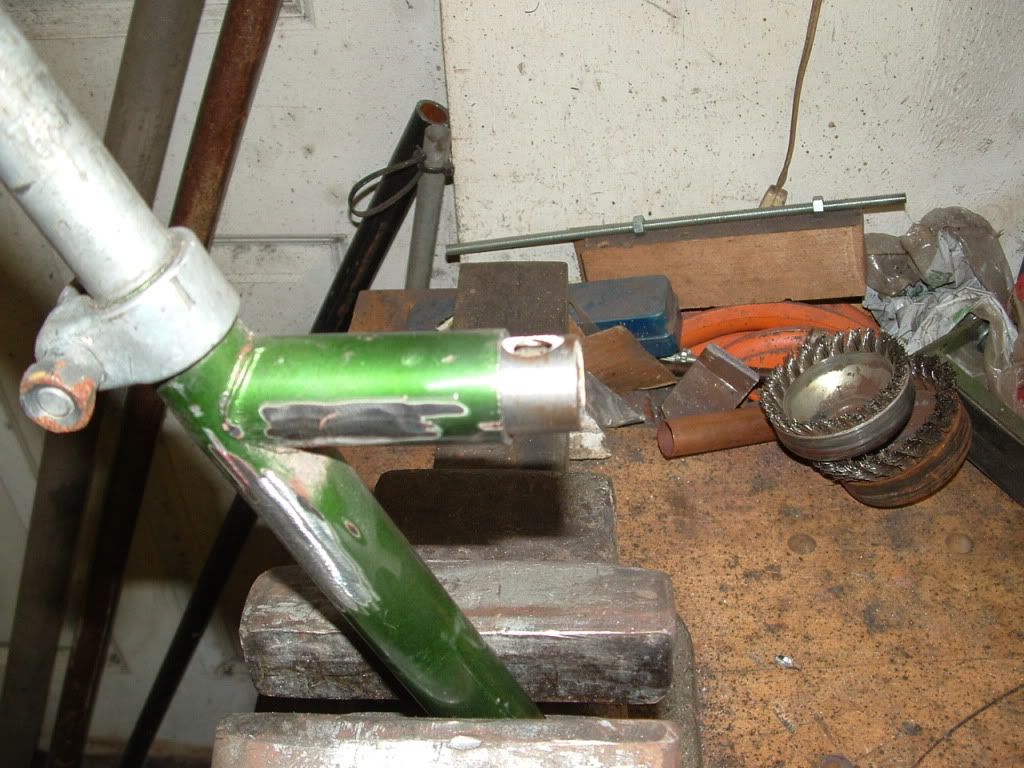
Once you put it together and leave a gap to weld ,it lines up the two pieces of tubing really well.
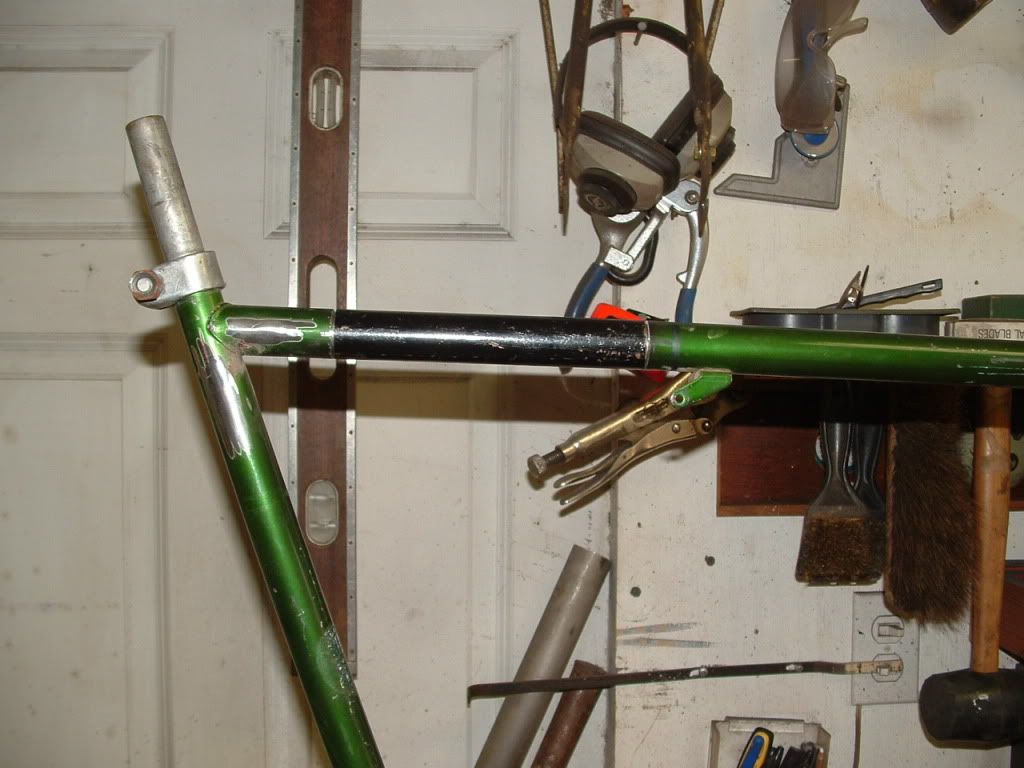
You can see what the stretch will look like on the top tube.
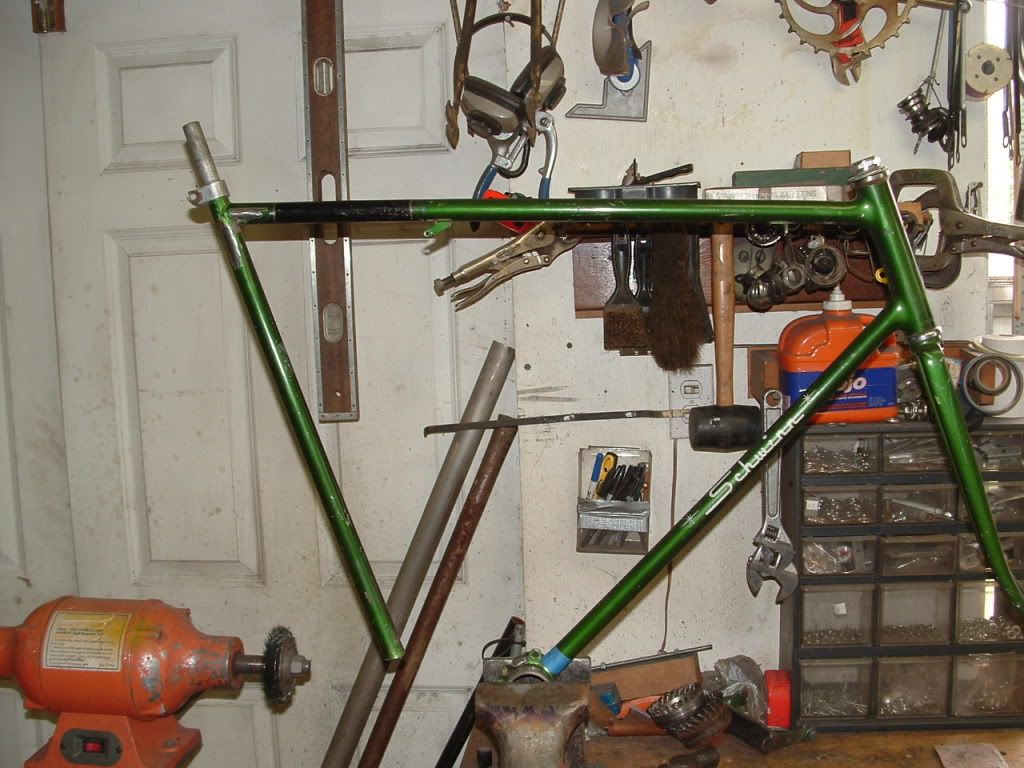
I always put another frame that I know next to what I'm building to make sure I know the rake and the length and seatpost height . This is the front of one of my 6'' stretched clone frames ,and it will give me a pretty good idea of where I am.
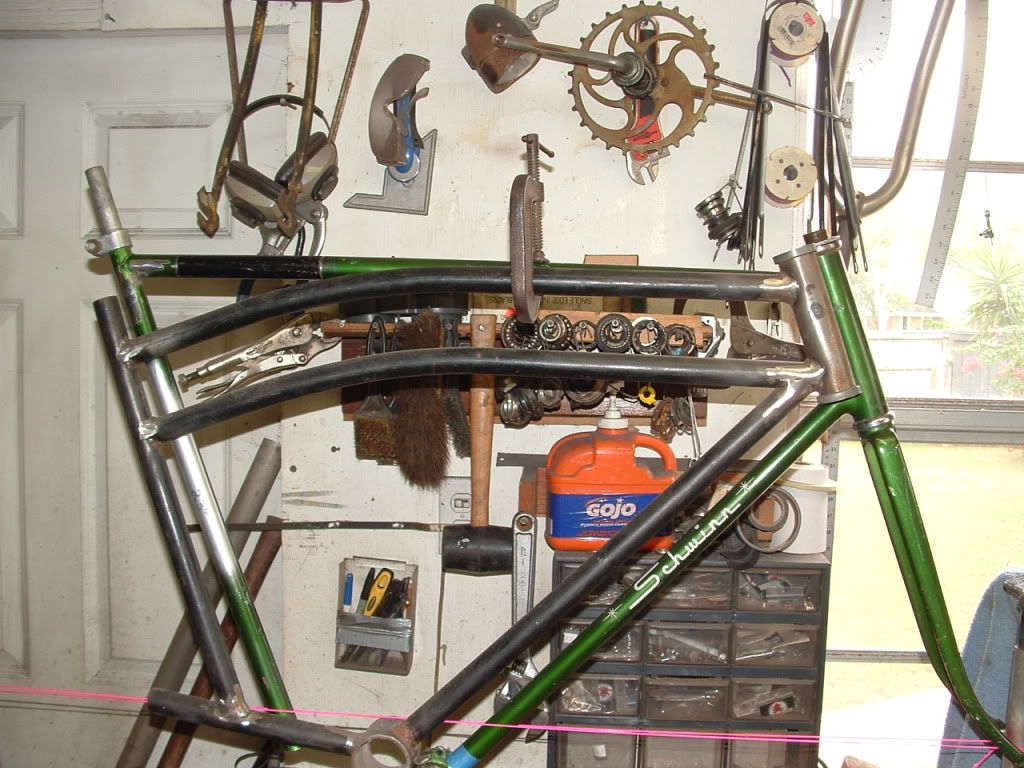
Ok I got the top tube welded and sanded down and the downtube cut off. Will build the bottom bracket and start to get it to come toether.
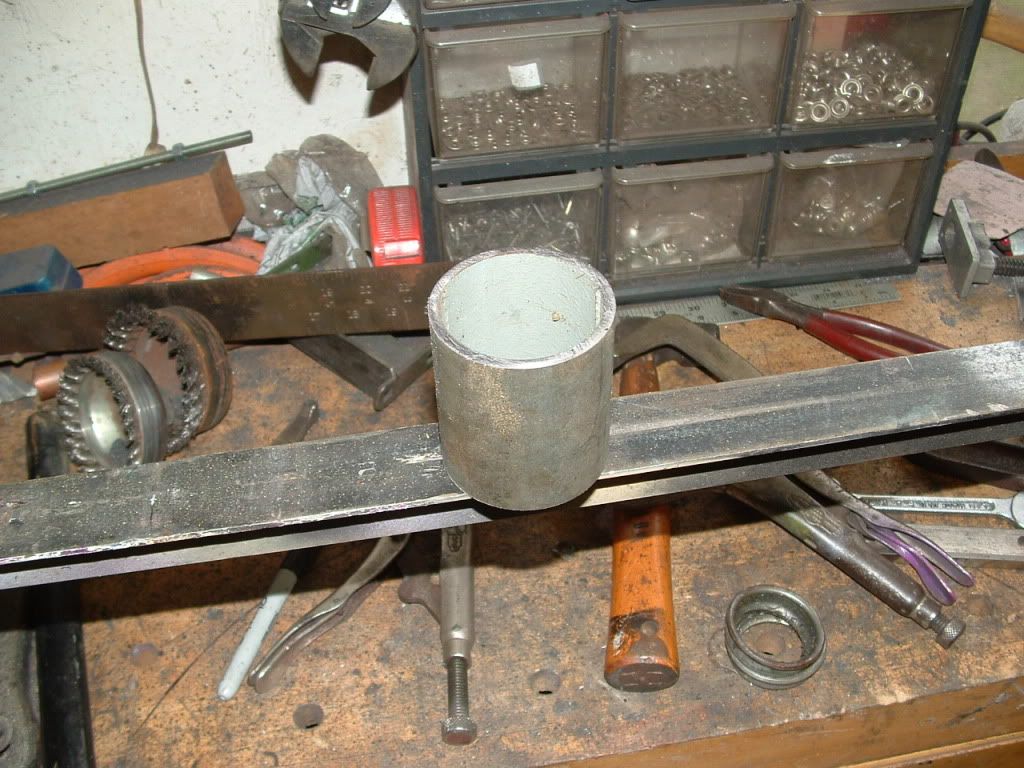
Ok this part is too cool. You take a piece of 2'' water pipe...the same stuff that is holding up your chain link fence corner and cut a piece off that is 2 1/2 to 2 5/8 long. Best done with a pipe cutter where it will be square on both ends. Find a friendly plumber.
Weld it on your build and it becomes your bottom bracket . Now sometimes the bearing cups are a little loose. Go around it with you wire welder and just do a few quick spots....I mean real quick . Like zitt and then move. It will tighten them up. Mine is on a tube and looks like this.
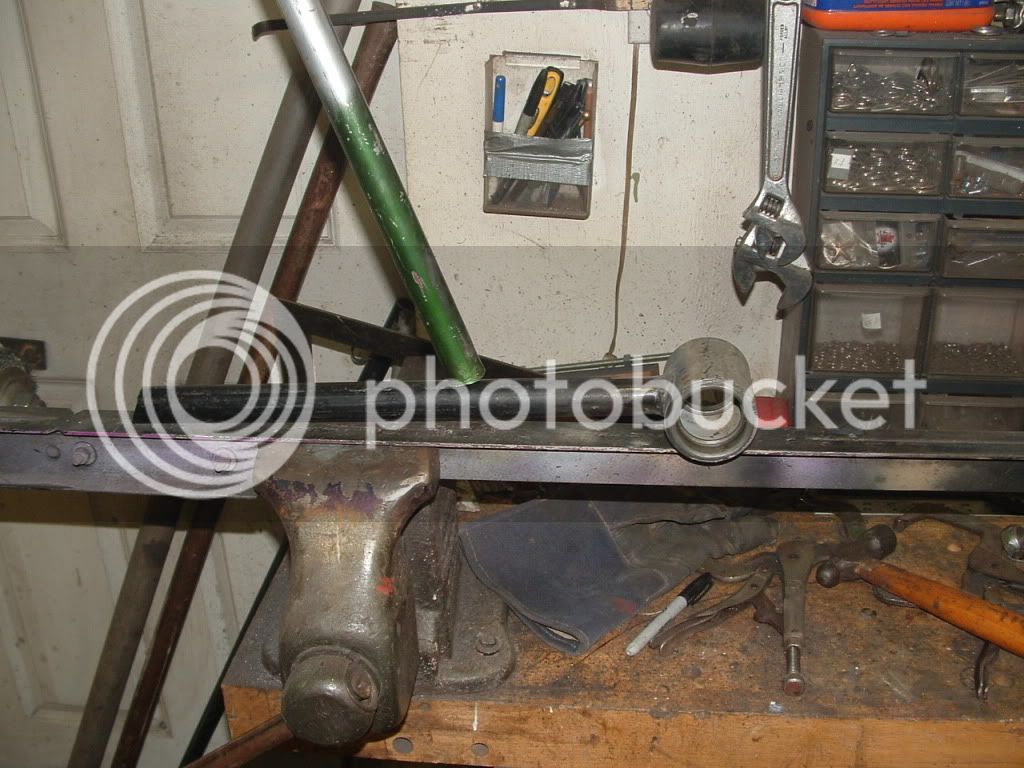
Some decisions need to be made To figure out how this bike will sit. The seatpost is 25'' long. normal cruiser ones are around 18 or 19''. If I weld the chain stay level this will be a really tall bike. May need to cut a couple inches off the bottom of the seat post and rake the neck some to get it to sit lower.
Ok I have the bottom bracket welded to a tube and tacked on the bottom of the seat post. Right now there is no way of knowing how the bike will sit ,so the bottom chain stays and drop outs will have to be on and a tire in to see the angle. I cut 3'' off the bottom of the seat post.
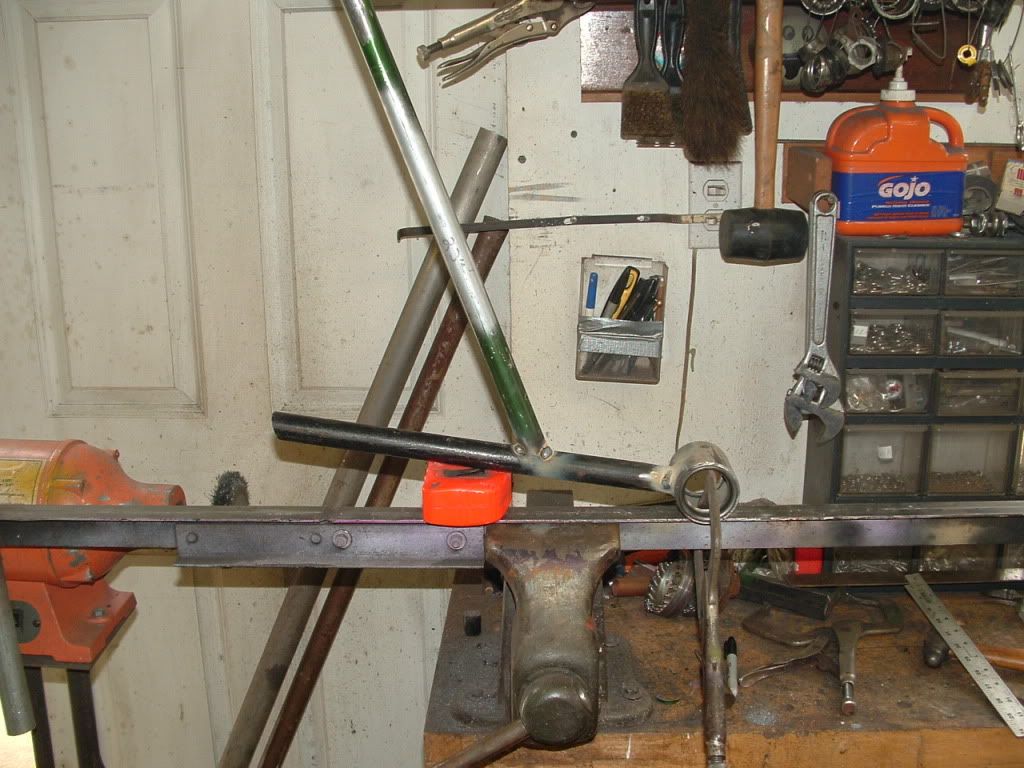
I'm sure the rake would have to be increased to drop the front down to make the bars run level. I was going to show how I raked it but with only one tube it wasnt much to show. I cut a small 1/4'' wedge down to nothing on my tube and then leaned the neck( fork holder) back. I didnt cut all the way through the tube. I left probably 1/2'' at the bottom so it will stay straight. If you were doing a regular one with two tubes ,you would cut a 3/16 slot out of the top and then the 1/4'' v shaped slot in the bottom and then bend it back and reweld both tubes. The cuts will vary depending on how much rake you want.
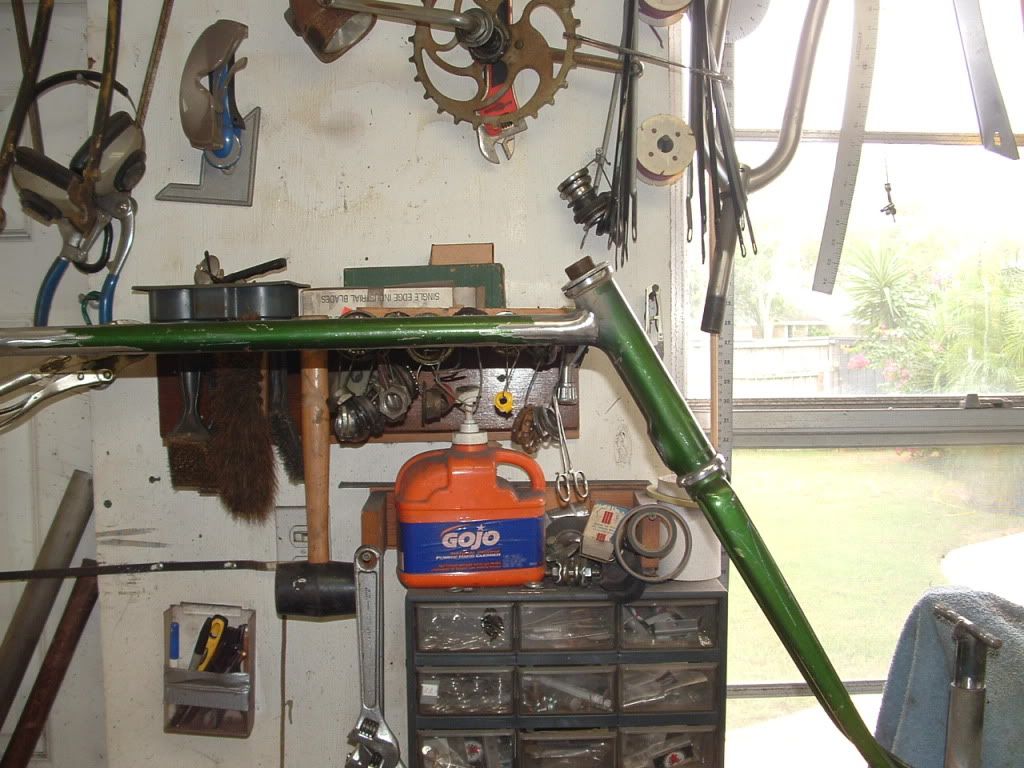
I bent the tube to match the one on the copy bike and welded it in.
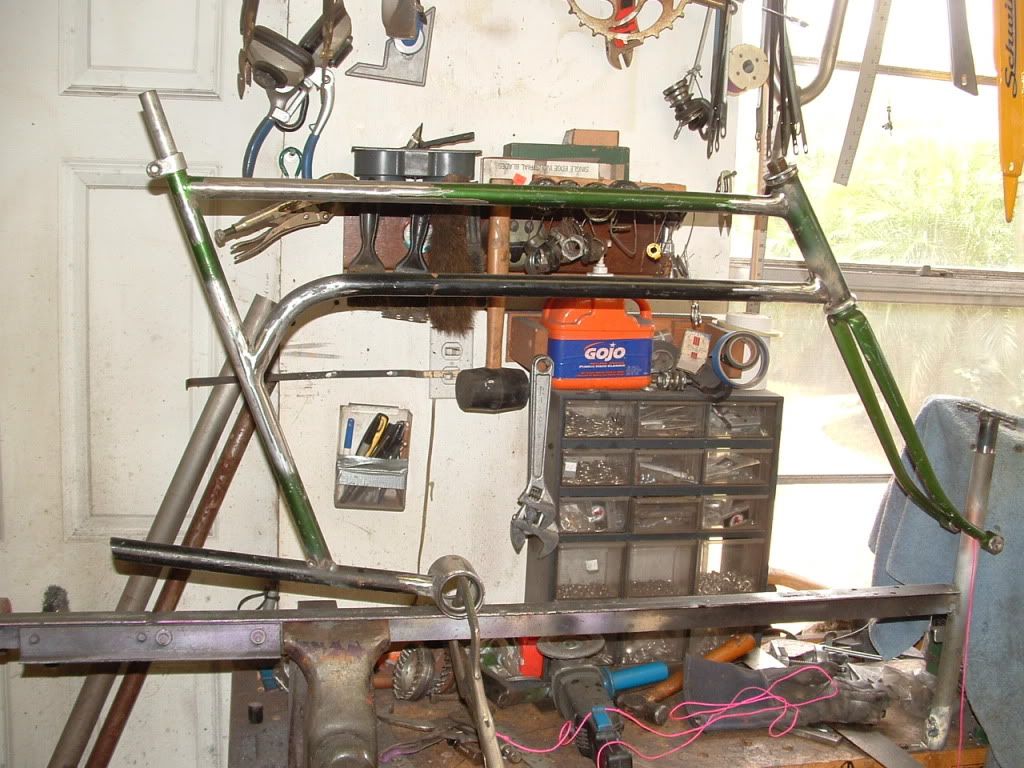
Its funny after I look at this bike I realize that there was no reason to stretch the frame. With the front downtube gone and the BB on a tube ,I had gotten the forward pedal design and really didnt have to do anything else. It would have made, being able to use normal length handle bars, a lot easier. Oh well maybe it will add something to the look by being longer.Ops :roll: :shock:
Ok I built one of the chain stays and put a wheel on so I could judge where the drop outs will be
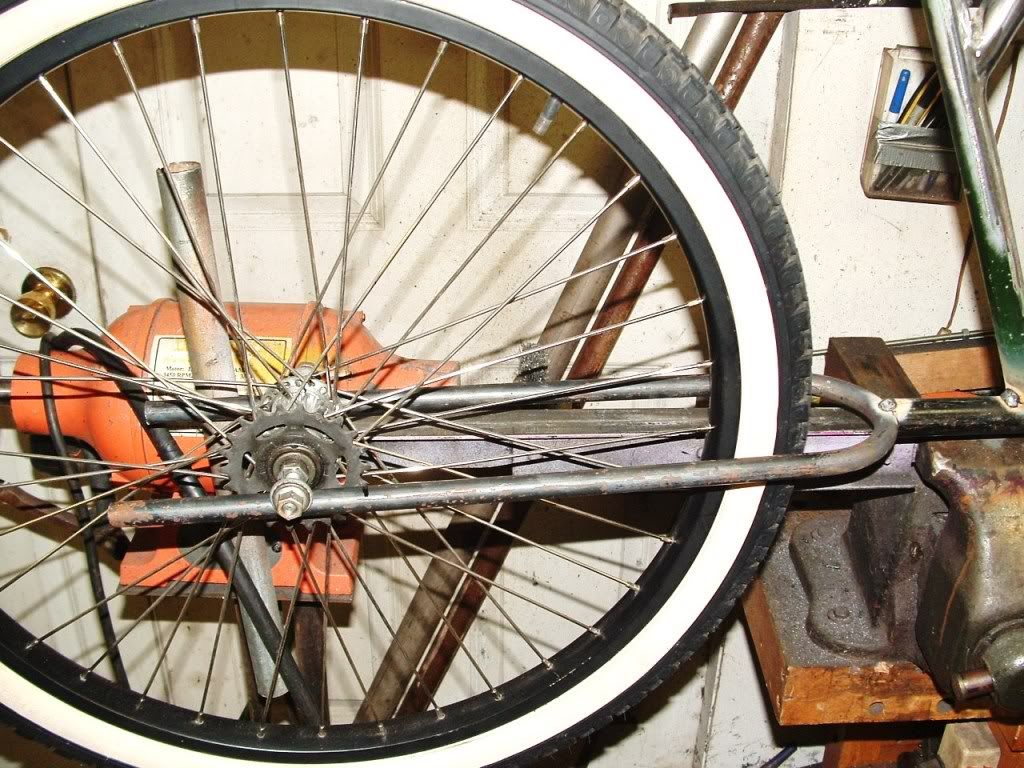
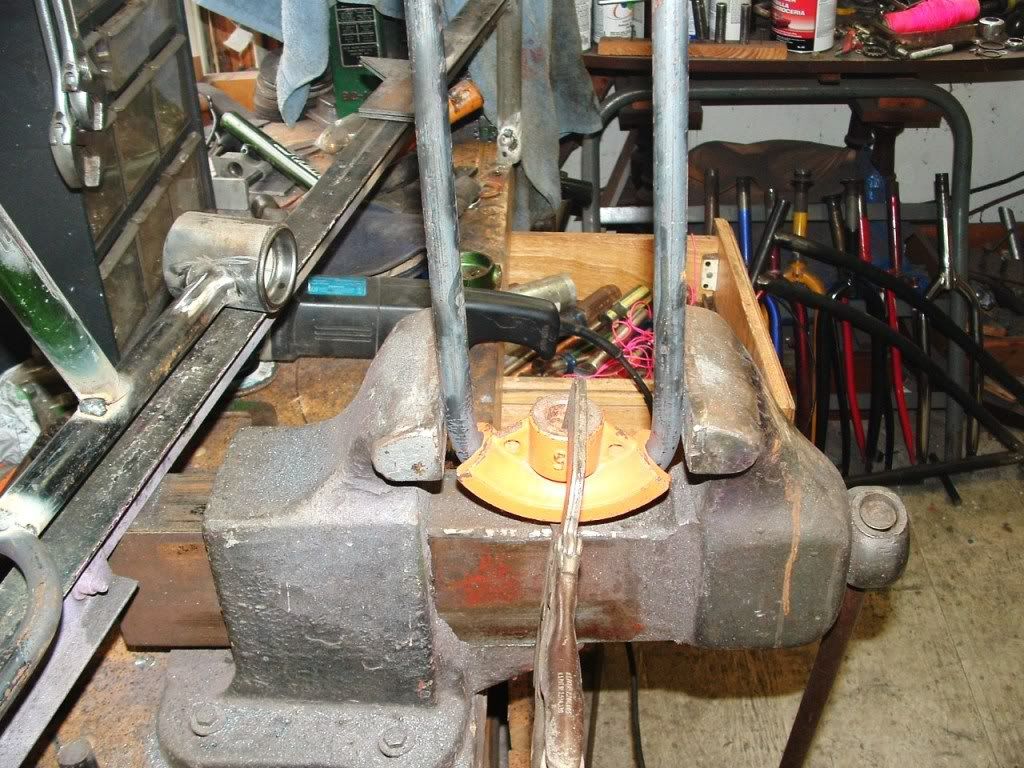
I use my HF bender to make the chain stays. I used 5/8'' solid stock. My bender wont bend the metal completely. I take the part off of the bender and clamp it to the bend.
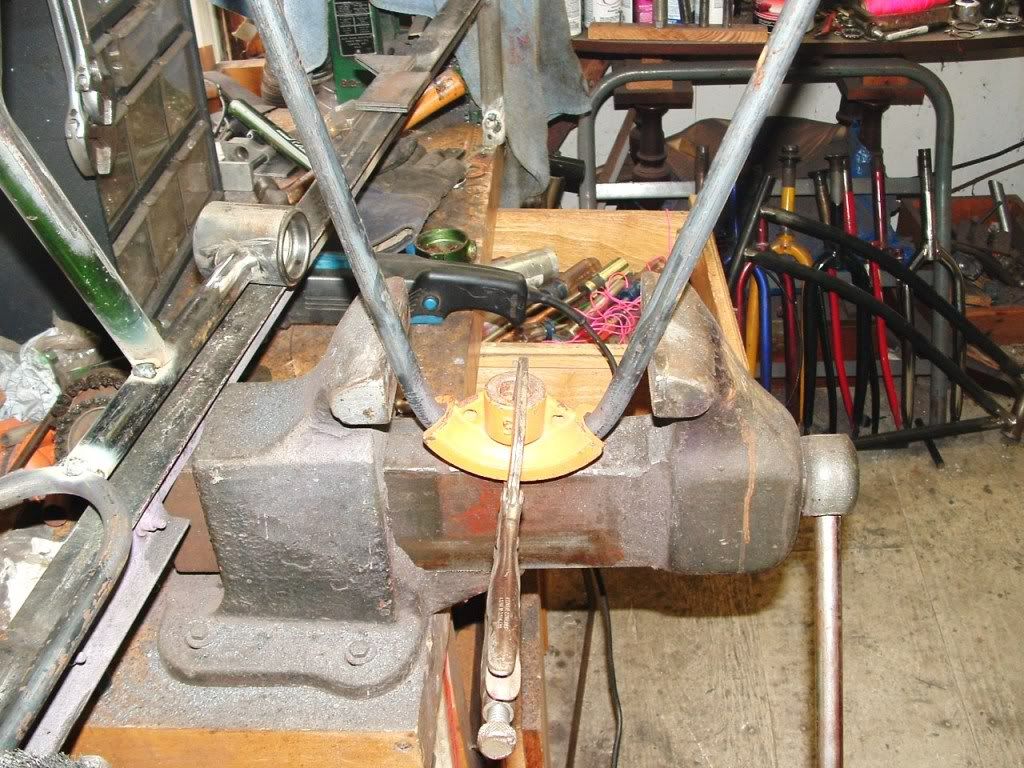
Then I stick it in my vise and finish the bend.
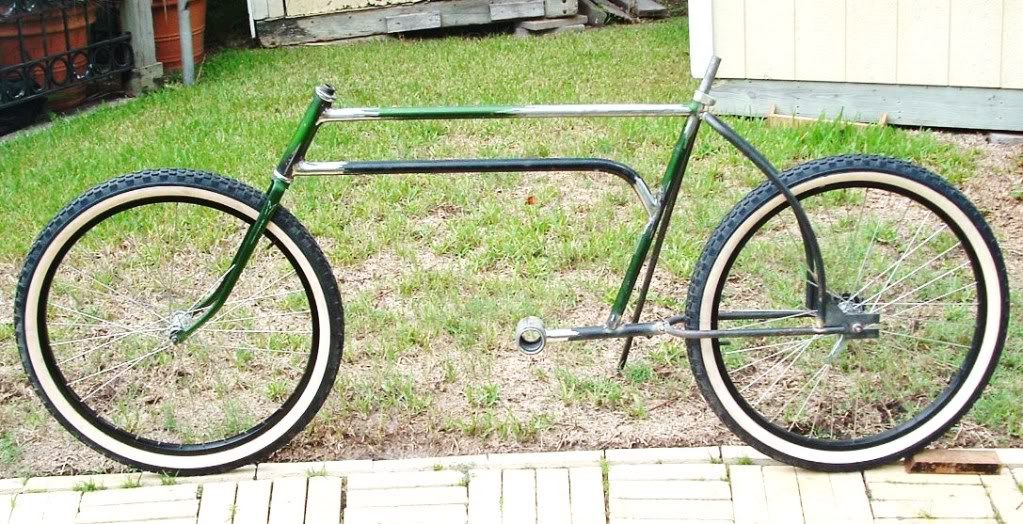
I stuck the wheels on it and leaned it against a pipe for a photo shoot. Its pretty low and the front rake may be a challenge. The bottom chain stay and the seat post stay are all just tacked on. It looks like it will sit right ,so maybe this afternoon I can get it all welded and the welds ground down. I decided to round my seat stays. I felt like the straight ones look so road bikie. :roll:

So with a target in sight (helps to know where you are going) and everything cleaned up in my shop here goes. Oh and to the Schwinn purist ,I'm really not cutting this frame. Its like the magic trick where the guy tears the dollar bill in small pieces and then at the end its all back together.
I put blue tape on all the spots I make the cuts. The bottom down tube will be used to stretch the top tube 6''. A distance I found that works the best. Its the same size tube and the stuff I have is a little bigger.


If you leave the down tube and the BB (crank holder) It will keep everything aligned in my jig

Once you make your first cuts,you need to decide if your going to change the chain stays...like in my case where they are made for a small tire and I will want balloon tires on this build. Also try to find something metal that fits inside the top piece of tubing tight,to line up the 6'' piece your going to add. more to follow.
I'm going to keep posting on the first entry where someone can follow this a little easier
I do want everybody to understand this is my method and I'm not a professional fab person and there are alot of people that do alot better than me. This is just something to look at and get some ideas.
I had a friend of mine turn me some small inserts to fit inside the tubing to keep it straight and make it a little stronger. Everything I weld together has something inside to beef it up . I see people butt welding small tubing together and unless your a really good welder you should strengthen it with something.
The first pic is my 6'' piece with a couple smaller pieces inside

I'm going to rebuild the chain stays and the seat stays so the back was removed. You can build your own or use one from another bike.
this is the seatpost with the small tube inside

Once you put it together and leave a gap to weld ,it lines up the two pieces of tubing really well.

You can see what the stretch will look like on the top tube.

I always put another frame that I know next to what I'm building to make sure I know the rake and the length and seatpost height . This is the front of one of my 6'' stretched clone frames ,and it will give me a pretty good idea of where I am.

Ok I got the top tube welded and sanded down and the downtube cut off. Will build the bottom bracket and start to get it to come toether.

Ok this part is too cool. You take a piece of 2'' water pipe...the same stuff that is holding up your chain link fence corner and cut a piece off that is 2 1/2 to 2 5/8 long. Best done with a pipe cutter where it will be square on both ends. Find a friendly plumber.

Weld it on your build and it becomes your bottom bracket . Now sometimes the bearing cups are a little loose. Go around it with you wire welder and just do a few quick spots....I mean real quick . Like zitt and then move. It will tighten them up. Mine is on a tube and looks like this.

Some decisions need to be made To figure out how this bike will sit. The seatpost is 25'' long. normal cruiser ones are around 18 or 19''. If I weld the chain stay level this will be a really tall bike. May need to cut a couple inches off the bottom of the seat post and rake the neck some to get it to sit lower.
Ok I have the bottom bracket welded to a tube and tacked on the bottom of the seat post. Right now there is no way of knowing how the bike will sit ,so the bottom chain stays and drop outs will have to be on and a tire in to see the angle. I cut 3'' off the bottom of the seat post.

I'm sure the rake would have to be increased to drop the front down to make the bars run level. I was going to show how I raked it but with only one tube it wasnt much to show. I cut a small 1/4'' wedge down to nothing on my tube and then leaned the neck( fork holder) back. I didnt cut all the way through the tube. I left probably 1/2'' at the bottom so it will stay straight. If you were doing a regular one with two tubes ,you would cut a 3/16 slot out of the top and then the 1/4'' v shaped slot in the bottom and then bend it back and reweld both tubes. The cuts will vary depending on how much rake you want.

I bent the tube to match the one on the copy bike and welded it in.

Its funny after I look at this bike I realize that there was no reason to stretch the frame. With the front downtube gone and the BB on a tube ,I had gotten the forward pedal design and really didnt have to do anything else. It would have made, being able to use normal length handle bars, a lot easier. Oh well maybe it will add something to the look by being longer.Ops :roll: :shock:
Ok I built one of the chain stays and put a wheel on so I could judge where the drop outs will be

I use my HF bender to make the chain stays. I used 5/8'' solid stock. My bender wont bend the metal completely. I take the part off of the bender and clamp it to the bend.

Then I stick it in my vise and finish the bend.

I stuck the wheels on it and leaned it against a pipe for a photo shoot. Its pretty low and the front rake may be a challenge. The bottom chain stay and the seat post stay are all just tacked on. It looks like it will sit right ,so maybe this afternoon I can get it all welded and the welds ground down. I decided to round my seat stays. I felt like the straight ones look so road bikie. :roll:


