I have read a lot of threads on here about bending tubing, and people asking for advice on how to do it, so thought I would take some photos along the way while I bent up some frame pieces and fork components for my "Muscle Bike Build Off" bike.
Obviously this is not the best way to do it, a nice roller bender, or a shoe and die bender will work better, but they are out of reach of most home builders simply because of price. More likely for them to get and be able to afford, is the very cheap and nasty Harbour freight style bender. (Super Cheap Auto stocks them here in Australia)
This is the type of bender I am talking about...
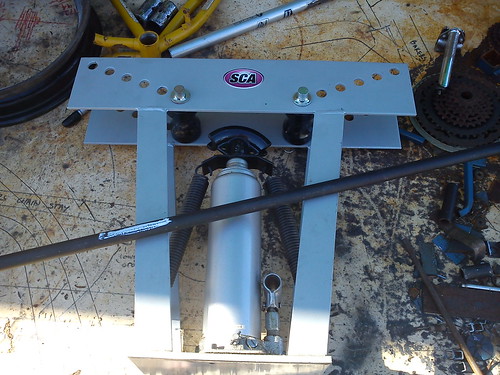
DSC00185 by LukeTheJoker, on Flickr
Now for this "how to" I am using 15mm i.d. medium wall pipe. (Actually measures 22mm out side diameter, and a 2.5mm wall thickness.) I would convert them to inch for you but sizes are different over there anyway, so it probably would not help you much. Basically it is 15/16th o.d. and a wall thickness of 1/10th inch. This is fairly heavy wall tube for building bikes, but I have some reasons for using this pipe, First reason is that it was cheap! Second, I am a big, heavy guy and most of the strength of my frame and forks will be held by this pipe and the welds attaching to it, with the thicker wall I can put down a more substantial weld on areas where it joins the frame. Third reason, and perhaps most important for this how to is that it has a outside diameter to wall thickness ratio of less than 10. (22 devided by 2.5 is 8.8 ) I have found that if you use a thinner wall, you have greater chances of kinking your pipe when bending. This can be reduced however by capping one end, filling it tightly with damp sand (really ram it in there, it must be tightly packed!) and capping the other end. This helps stop the tube from crushing in on itself. But I have found the sand method is not required as much if you keep below that magic 10 ratio of diameter to wall thickness.
When you first get your bender you will probably try it out by inserting some tube in it and pumping away till you get what looks like a nice 90 degree curve, however after removing it from the bender it probably looks more like this...
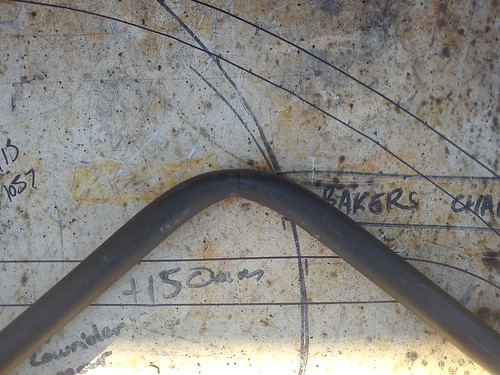
DSC00193 by LukeTheJoker, on Flickr
You can see even with this heavier wall pipe it still kinked in, not only does this not look as good, but it is far weaker than a nice curve as it will have a weak spot right where it is kinked.
The solution is to do more smaller bends to acheive the same angle. For my purposes here I decided that for my approxamatly 30 degree bends needed in 22 o.d. pipe I would spread my bends over 100mm (4 inchs) this is more than I would require for a tight bend but for this job I want a nice flowing curve. My general rule I work to for a tight bend is 10 times the diameter of the pipe for every 90 degrees, so for this 30 degree bend I could have spread them over 75mm (3inchs) for a tighter bend.
You can see the 100mm marked clearly here...
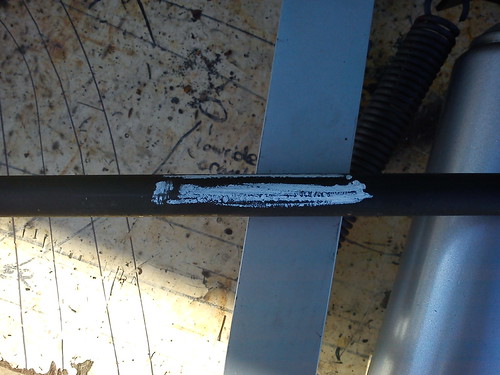
DSC00184 by LukeTheJoker, on Flickr
My first bend will be dead center of the marked area.

DSC00186 by LukeTheJoker, on Flickr
I pumped the bender up till it touched the tube and then gave it 4 more pumps, then released the pump and moved the bend point to one end of the marked area...
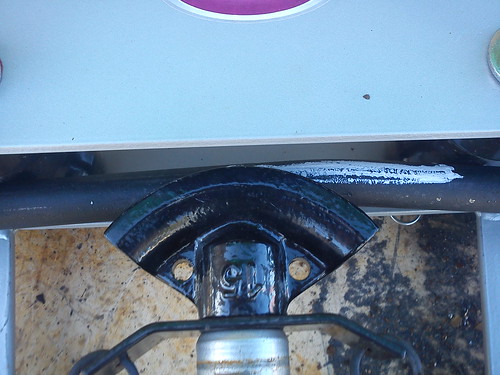
DSC00187 by LukeTheJoker, on Flickr
You can see clearly in the photo the small curve acheived by the first bend, now, 4 more pumps on this end, release the bender and move to the other end...
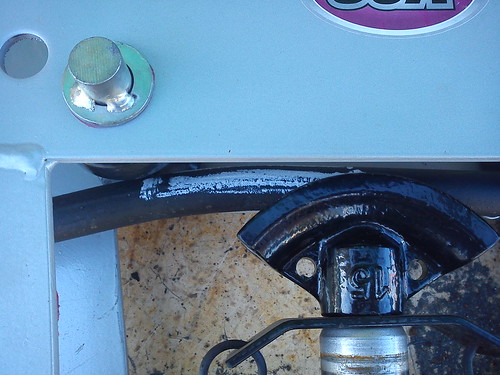
DSC00188 by LukeTheJoker, on Flickr
After releasing the bender and removing the pipe you can see I have acheived some bending but still nowhere near my desired 30 degrees.
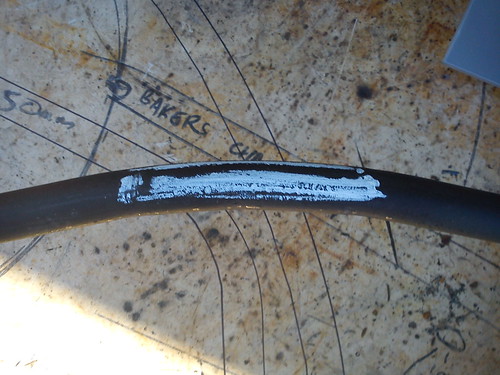
DSC00189 by LukeTheJoker, on Flickr
So, I put the tube back in and put 2 more bends in between the bends I had already done. Resulting in this amount of bending...
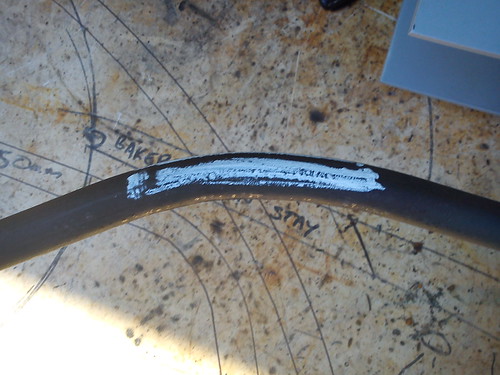
DSC00190 by LukeTheJoker, on Flickr
Still not enough it went back into the bender to put more bends in between the 5 bends so far done, ending in this...
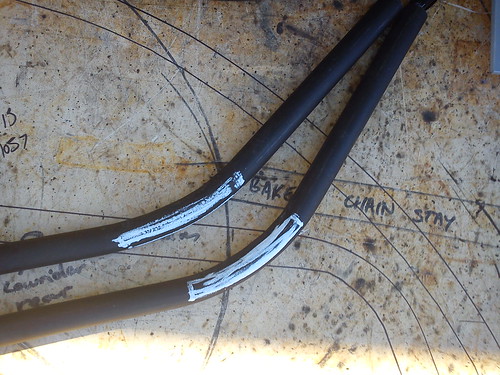
DSC00191 by LukeTheJoker, on Flickr
As you can see it is much closer to the desired bend that I acheived earlier on the other pipe, but I still have more to go, so back into the bender to put more small bends in, by this time my bends were only 2 pumps on the bender and were placed in between any other bends already done. I ended up putting 24 bends into this 30 degree bend, but as you can see at the end, there is no kinking and it forms a nice even curve...
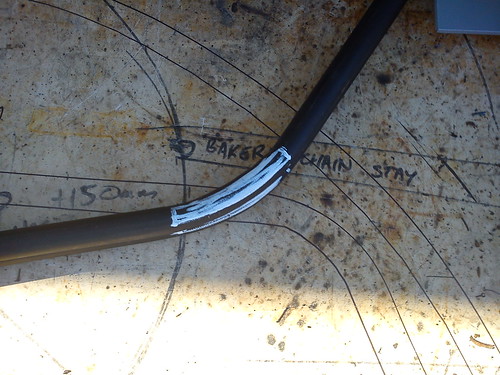
DSC00192 by LukeTheJoker, on Flickr
The photo above is actually two tubes with my newly bent one on top, as you can see they match up very nicely...
UPDATE BELOW! 4th May 2013
Started work on the RRB0#8 Anything Goes entry and thought up another way to do tighter bends on tube and pipe for the chain stays on it.
This method is for times when looks is far more important than weight, in other words, it looks great but it is heavier!
Using the same tube as before, supposedly 15mm i.d. actually measures out to 16mm inside and 22 mm outside, I purchased some 16mm solid round bar long enough to go completely around the bend and have plenty left over each side to go out to the side rollers on your bender. Basically just find a length of round bar that is a reasonably tight fit inside your tubing and cut it too the right length for your individual requirements.
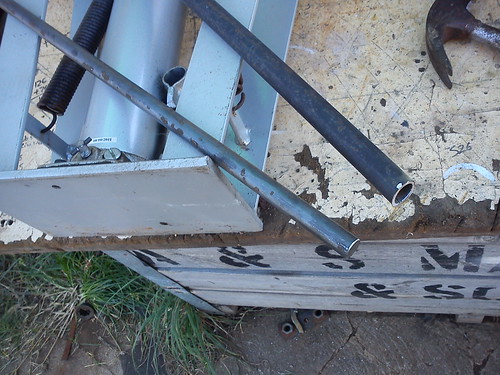
Pretty sure you can guess what comes next, force the bar inside the pipe with a big hammer if you need it... This is it part way in.
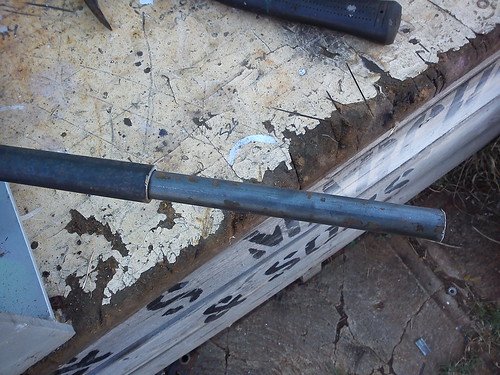
Bend away! You will get a beautiful even, smooth curve like this one:
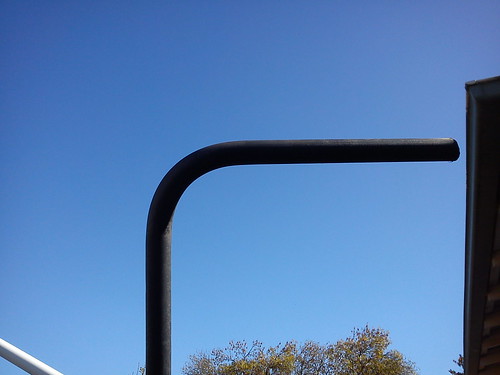
Repeat for any others you want to do until you end up with everything done.
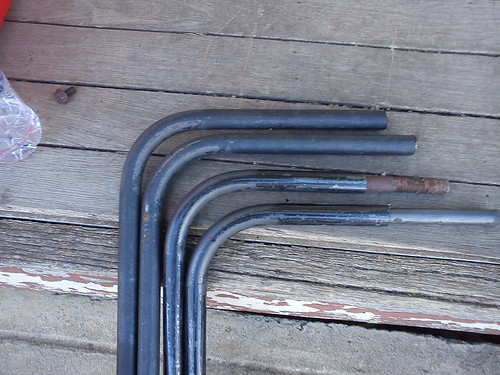
You can see on the last 2 I did, I had worked out I didn't need quite so much bar in the tube. The round bar now stays inside the pipe and adds more strength to the bend, however as I said earlier at the cost of the added weight. Considering the bike these will be used on will weigh in around 70kg (155lbs) I figured the extra 500grams (1lb) was not going to be an issue.
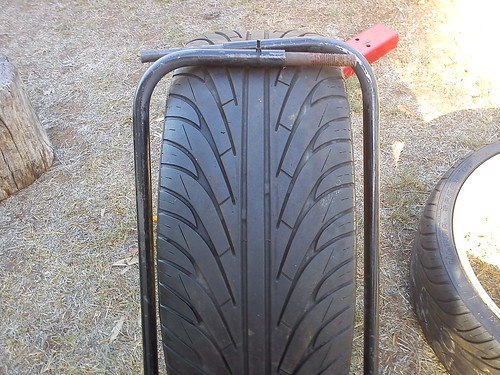
Here is two of them placed on the tire they will be used to locate:
Here is a link to the build these will be used on: viewtopic.php?f=76&t=72017
As mentioned before, there are many ways to achieve a nice bend, these are just some that I use, and felt may have been of help to others.
Luke.
Obviously this is not the best way to do it, a nice roller bender, or a shoe and die bender will work better, but they are out of reach of most home builders simply because of price. More likely for them to get and be able to afford, is the very cheap and nasty Harbour freight style bender. (Super Cheap Auto stocks them here in Australia)
This is the type of bender I am talking about...

DSC00185 by LukeTheJoker, on Flickr
Now for this "how to" I am using 15mm i.d. medium wall pipe. (Actually measures 22mm out side diameter, and a 2.5mm wall thickness.) I would convert them to inch for you but sizes are different over there anyway, so it probably would not help you much. Basically it is 15/16th o.d. and a wall thickness of 1/10th inch. This is fairly heavy wall tube for building bikes, but I have some reasons for using this pipe, First reason is that it was cheap! Second, I am a big, heavy guy and most of the strength of my frame and forks will be held by this pipe and the welds attaching to it, with the thicker wall I can put down a more substantial weld on areas where it joins the frame. Third reason, and perhaps most important for this how to is that it has a outside diameter to wall thickness ratio of less than 10. (22 devided by 2.5 is 8.8 ) I have found that if you use a thinner wall, you have greater chances of kinking your pipe when bending. This can be reduced however by capping one end, filling it tightly with damp sand (really ram it in there, it must be tightly packed!) and capping the other end. This helps stop the tube from crushing in on itself. But I have found the sand method is not required as much if you keep below that magic 10 ratio of diameter to wall thickness.
When you first get your bender you will probably try it out by inserting some tube in it and pumping away till you get what looks like a nice 90 degree curve, however after removing it from the bender it probably looks more like this...

DSC00193 by LukeTheJoker, on Flickr
You can see even with this heavier wall pipe it still kinked in, not only does this not look as good, but it is far weaker than a nice curve as it will have a weak spot right where it is kinked.
The solution is to do more smaller bends to acheive the same angle. For my purposes here I decided that for my approxamatly 30 degree bends needed in 22 o.d. pipe I would spread my bends over 100mm (4 inchs) this is more than I would require for a tight bend but for this job I want a nice flowing curve. My general rule I work to for a tight bend is 10 times the diameter of the pipe for every 90 degrees, so for this 30 degree bend I could have spread them over 75mm (3inchs) for a tighter bend.
You can see the 100mm marked clearly here...

DSC00184 by LukeTheJoker, on Flickr
My first bend will be dead center of the marked area.

DSC00186 by LukeTheJoker, on Flickr
I pumped the bender up till it touched the tube and then gave it 4 more pumps, then released the pump and moved the bend point to one end of the marked area...

DSC00187 by LukeTheJoker, on Flickr
You can see clearly in the photo the small curve acheived by the first bend, now, 4 more pumps on this end, release the bender and move to the other end...

DSC00188 by LukeTheJoker, on Flickr
After releasing the bender and removing the pipe you can see I have acheived some bending but still nowhere near my desired 30 degrees.

DSC00189 by LukeTheJoker, on Flickr
So, I put the tube back in and put 2 more bends in between the bends I had already done. Resulting in this amount of bending...

DSC00190 by LukeTheJoker, on Flickr
Still not enough it went back into the bender to put more bends in between the 5 bends so far done, ending in this...

DSC00191 by LukeTheJoker, on Flickr
As you can see it is much closer to the desired bend that I acheived earlier on the other pipe, but I still have more to go, so back into the bender to put more small bends in, by this time my bends were only 2 pumps on the bender and were placed in between any other bends already done. I ended up putting 24 bends into this 30 degree bend, but as you can see at the end, there is no kinking and it forms a nice even curve...

DSC00192 by LukeTheJoker, on Flickr
The photo above is actually two tubes with my newly bent one on top, as you can see they match up very nicely...
UPDATE BELOW! 4th May 2013
Started work on the RRB0#8 Anything Goes entry and thought up another way to do tighter bends on tube and pipe for the chain stays on it.
This method is for times when looks is far more important than weight, in other words, it looks great but it is heavier!
Using the same tube as before, supposedly 15mm i.d. actually measures out to 16mm inside and 22 mm outside, I purchased some 16mm solid round bar long enough to go completely around the bend and have plenty left over each side to go out to the side rollers on your bender. Basically just find a length of round bar that is a reasonably tight fit inside your tubing and cut it too the right length for your individual requirements.

Pretty sure you can guess what comes next, force the bar inside the pipe with a big hammer if you need it... This is it part way in.

Bend away! You will get a beautiful even, smooth curve like this one:

Repeat for any others you want to do until you end up with everything done.

You can see on the last 2 I did, I had worked out I didn't need quite so much bar in the tube. The round bar now stays inside the pipe and adds more strength to the bend, however as I said earlier at the cost of the added weight. Considering the bike these will be used on will weigh in around 70kg (155lbs) I figured the extra 500grams (1lb) was not going to be an issue.
Here is two of them placed on the tire they will be used to locate:

Here is a link to the build these will be used on: viewtopic.php?f=76&t=72017
As mentioned before, there are many ways to achieve a nice bend, these are just some that I use, and felt may have been of help to others.
Luke.


