You are using an out of date browser. It may not display this or other websites correctly.
You should upgrade or use an alternative browser.
You should upgrade or use an alternative browser.
Indian Board Track Racer
- Thread starter kellis83
- Start date

Help Support Rat Rod Bikes Bicycle Forum:
This site may earn a commission from merchant affiliate
links, including eBay, Amazon, and others.
OOOPPSS!! I thought this bike was going to get an engine, still VERY NICE! with out one but kind of a Bummer with out some go juice,I also am in the finishing stages of a 1911 indian BTR build it's on another forum site titled "Blood Thursty" would post but it's so complicated through this forum.
not complicated at all , just look in the "HOW TO" section there is a thread on on to post pictures :wink:truckd said:OOOPPSS!! I thought this bike was going to get an engine, still VERY NICE! with out one but kind of a Bummer with out some go juice,I also am in the finishing stages of a 1911 indian BTR build it's on another forum site titled "Blood Thursty" would post but it's so complicated through this forum.
- Joined
- Oct 23, 2011
- Messages
- 669
- Reaction score
- 1,055
I know, old thread but very nice build!
Yep I'm a fan of this one as well, this build inspired me to build one!
http://www.ratrodbikes.com/forum/index.php?threads/indian-boardtracker-with-a-twist-or-two.82155/

$99.99
$108.99
Schwinn Toggle Quick Build Kids Bike, 12-Inch Wheels, Smart Start Steel Frame, Easy Tool-Free Assembly, Blue
easiness

$18.99
Old River Outdoors Bicycle/Motorcycle Chain Picture Frame 4" X 6" Photo - Faux Bike Chain
Old River Outdoors (USA Merchant)

$199.99
$229.99
Huffy Stone Mountain Women's Mountain Bike, Gray, 26 Inch Wheels/17 Inch Frame
HuffyDirect

$249.40
$289.67
Kulana Lakona Tide Adult Beach Cruiser Bike, 26-Inch Wheels, 7-Speed, Silver
Amazon.com
- Joined
- Sep 17, 2013
- Messages
- 4,295
- Reaction score
- 9,472
I made my own drop stand from 3/4 inch flat stock. I put braces from the flat bottom up near where it mounts to the frame drops. I made ears that bolt onto the axle that stop the drop stand. It’s easy to make one, if you don’t weld you can even screw it together. Mine looks like the vintage ones.This is my first attempt at building a bike, let alone write on a thread. I have been following this site for a few years now and it was on one visit here that I first saw a board track racer. Ever since I have been wanting one of my own but had been living in Ireland and didn't have a shed so I have just been building in my head. Now that Im back home in Australia its time to get the hands dirty.
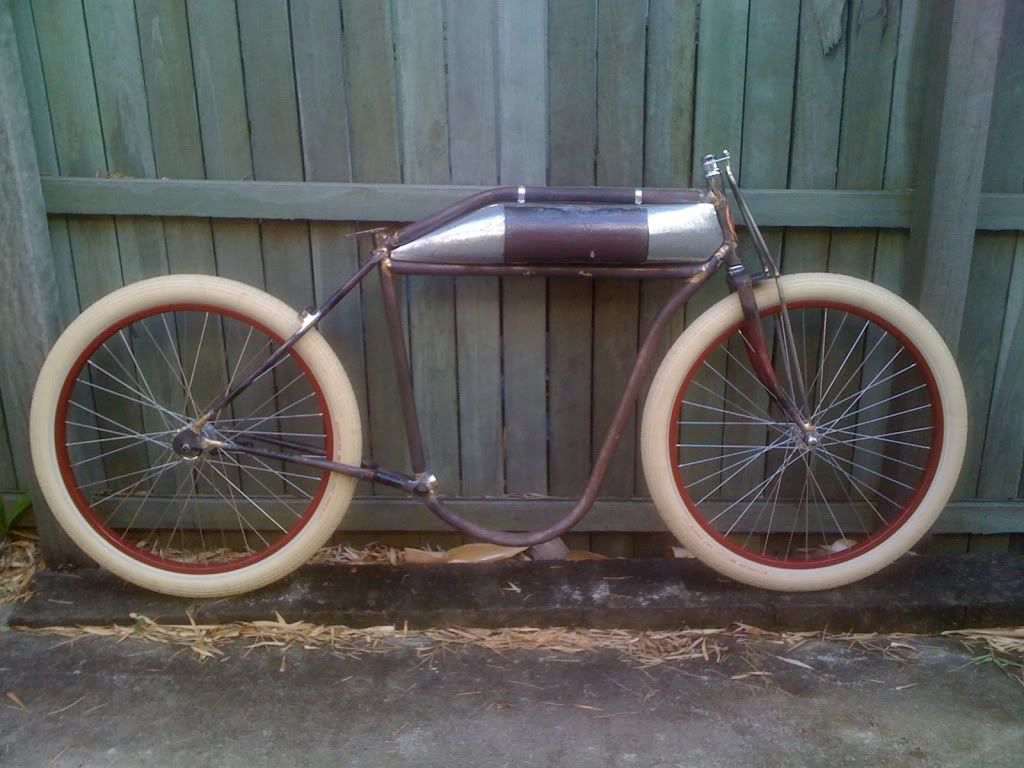
Here is a look at the end product I am looking to acheive.
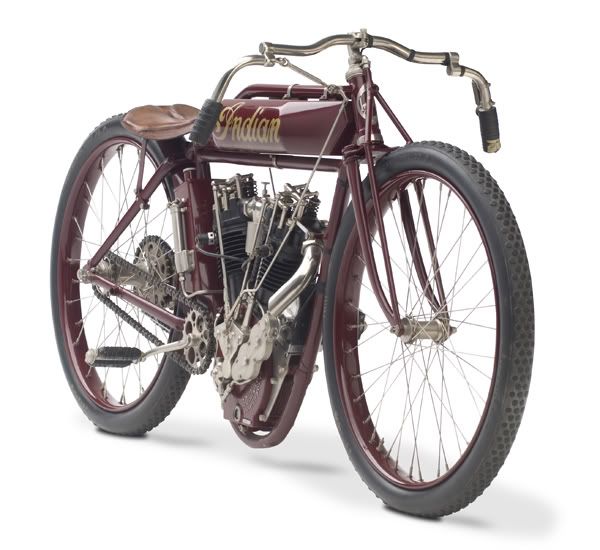
I contemplated building the whole thing from scratch but thought if I had at least the back triangle, head tube and fork I could go from there and save a lot of time and effort but still look close to what I wanted. I really like the old school lug type frames and forks so I reached high and low for one at Bicycle Revolution (an old bicycle recycle centre) at West End Brisbane but none of the road bikes seemed to suit the fat style tyres I want to use. But the owner there was great and pointed out an old lug style Raleigh MTB frame and a crown fork from another bike that was wide enough at the top for fat tires.
Sorry about the crappy phone picture but here is a shot of the frame
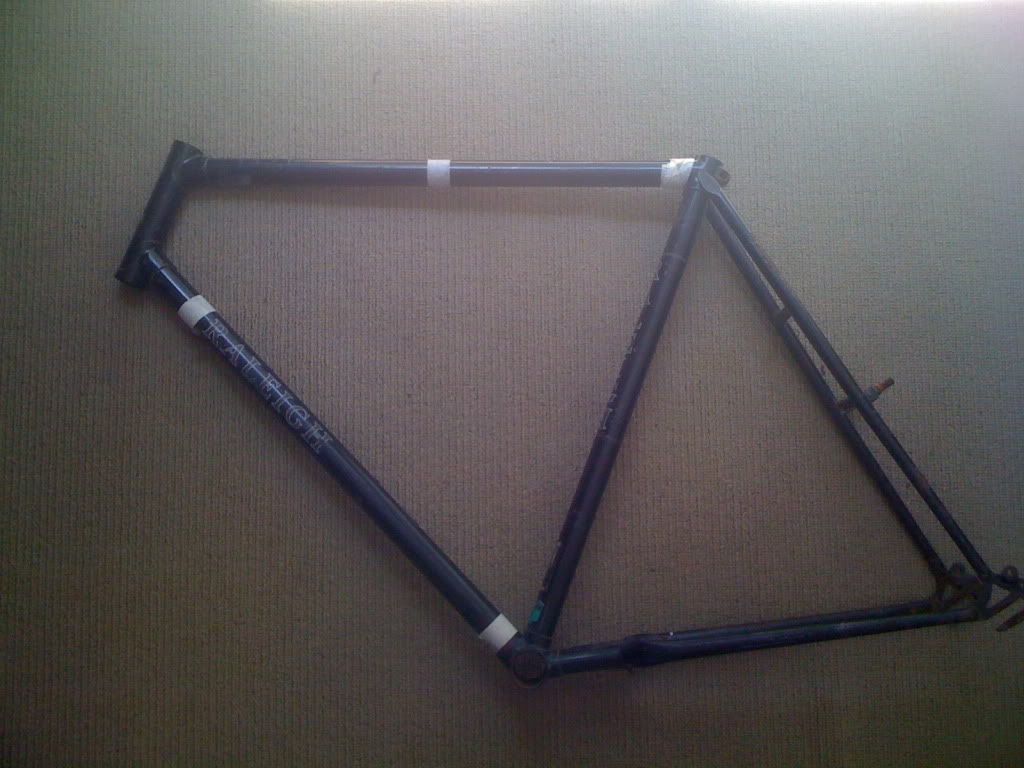
Now to get cracking!
I found a great model of an Indian on Google sketch up and I rescaled the original motorcycle frame down to suit 26" wheels. I think the motorcycle was a 28" frame, I can't remember now.
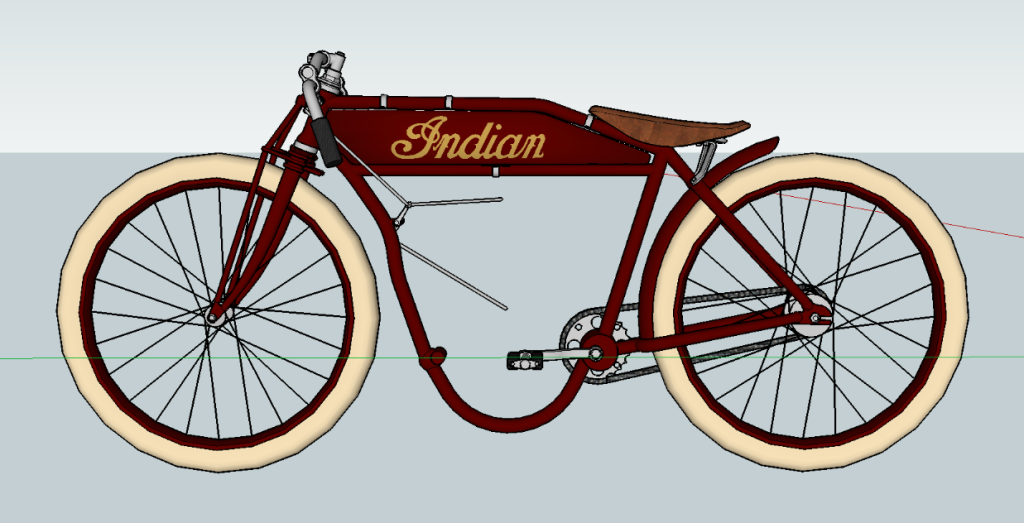
I got my hands on a large piece of butchers paper ready to draw up my frame for reference. I pulled a 26" wheel of my rat fink for a half decent wheel circle. I had to make do with the the fork, head tube and rear triangle as they are set dimensions but for the rest i took measurements from the Sketchup scale model.
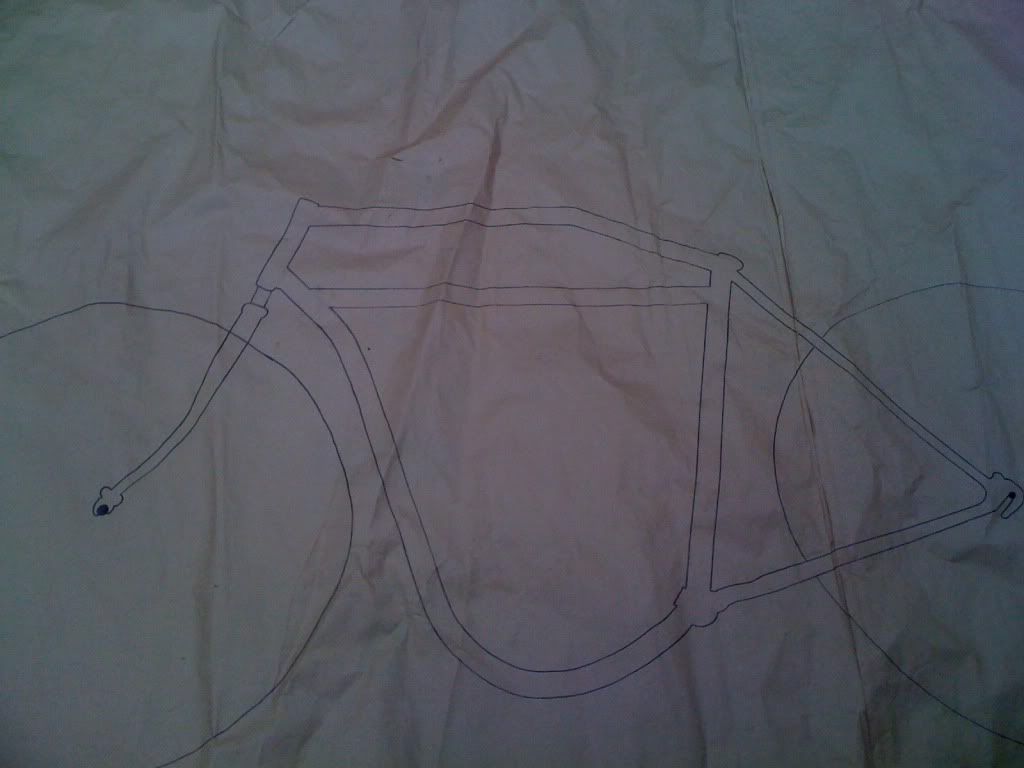
Sorry, it seems any photo i take with my iPhone and put on here loses the right side of the picture.
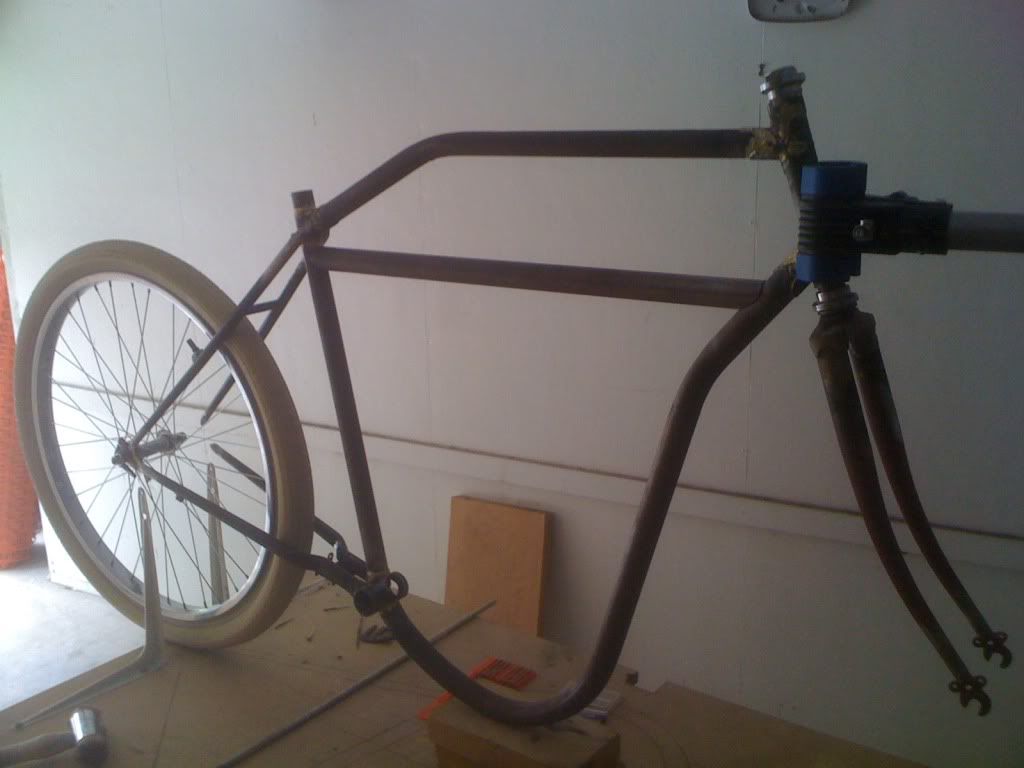
The drawing wasn't looking too bad on the ground but i wanted to see the bike in 3 dimensions. So the other day I finally built up the courage to take the hacksaw to the frame...and it felt great, i had been wanting to do that for weeks. I went down to the hardware store and got some conduit to easily cut and bend up to shape as makeshift tubing.
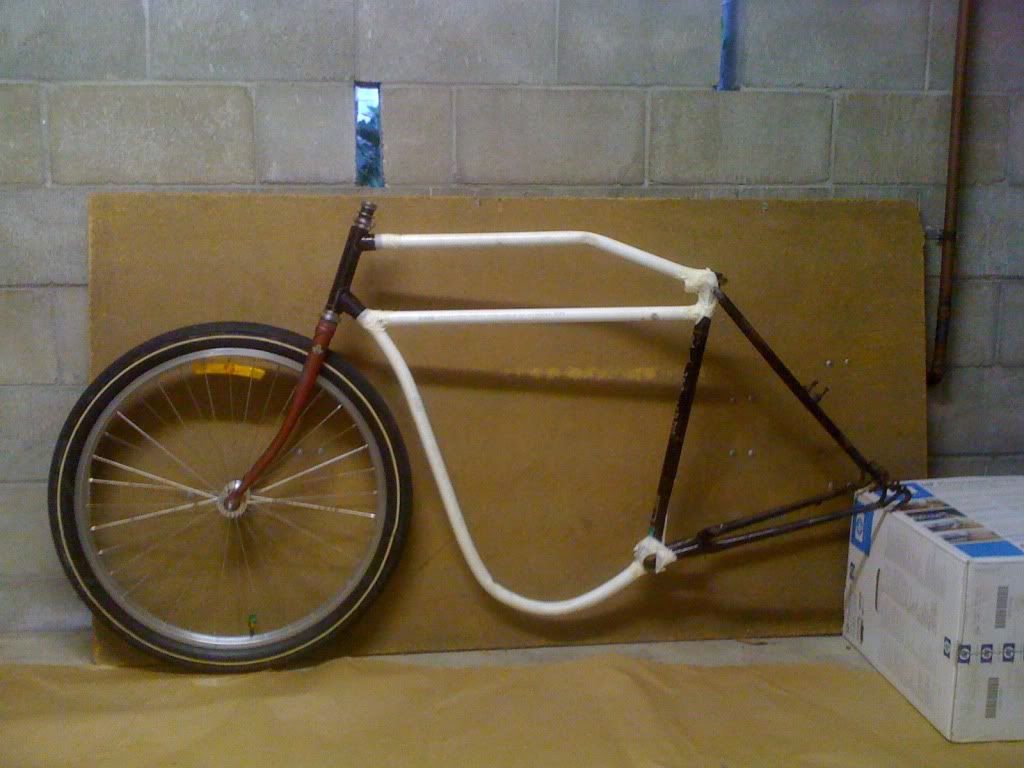
I really want to cut the seat/down tube and continue the frame drop loop forward of the crank boss and up to the seat but I am a bit worried, am I might lose the strength of the rear triangle??? Let me know if anyone else has done anything like this!
I ordered myself a set of Schwalbe Fat Frank 26" x 2.35" tires from the states and they finally arrived yesterday....delighted! But while I was waiting I made myself up a mock tank out of thin card just to try and get a feel for dimensions and look. I just wish I had of got a shot of it before I pulled all the conduit out of the frame.
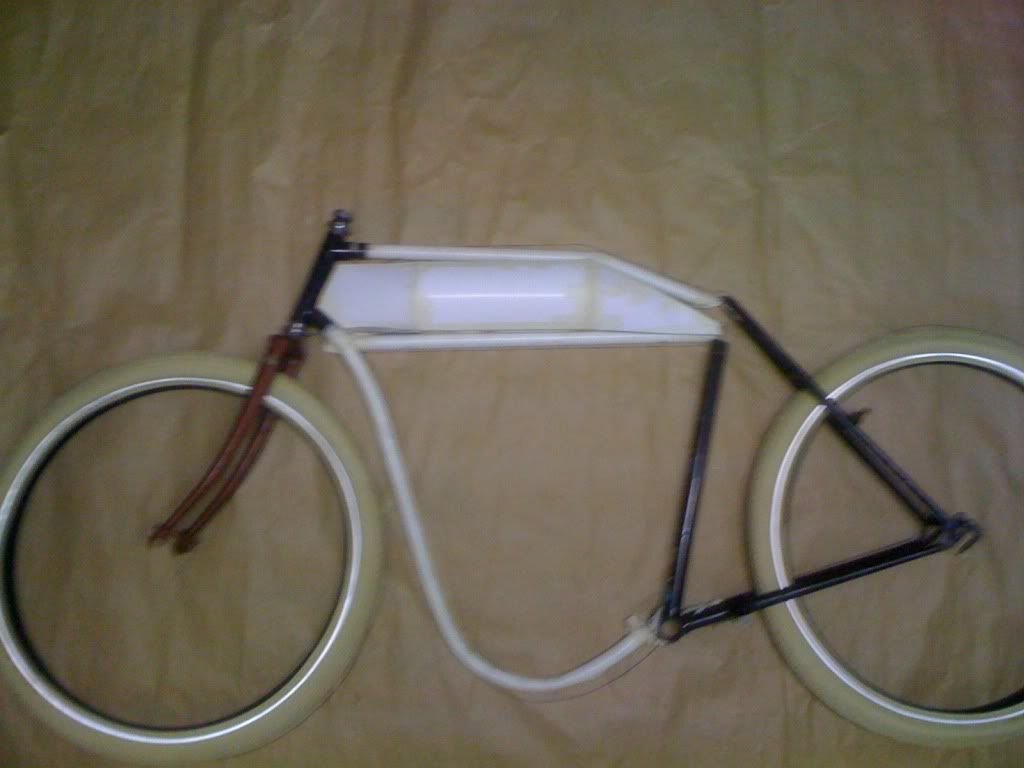
sorry again for the crappy phone photo, I really need to brake out the real camera.
After cutting the frame, Im really not sure how the heck I can get the old tube out of the lugs. I tried heating up the brazing with a heat gun but that didn't work at all. I really want to use these lugs again with the new tubing. Do I need to hit it with an Oxy torch to sweat the tubing out??? If anyone here has any hot tips it would be great. If I can't manage to get it out I might just have to buy some new lugs and start from scratch.
My only other option was to leave a small length of the original tubing sticking out of the lug, inserting a small length of tube down the inside of the tube to act as a strengthener. Then slide the new tube over that to butt up with the original tube and weld them all together. I hope that makes sense! The only worry is the joint will be really noticeable once finished and when the frame bends under load will the internal tube ends damage the outer tube.
Over the last week or so I have been making up this plate to mod my fork. Now to make another plate to accept the rod at the top of the fork and get it all welded up
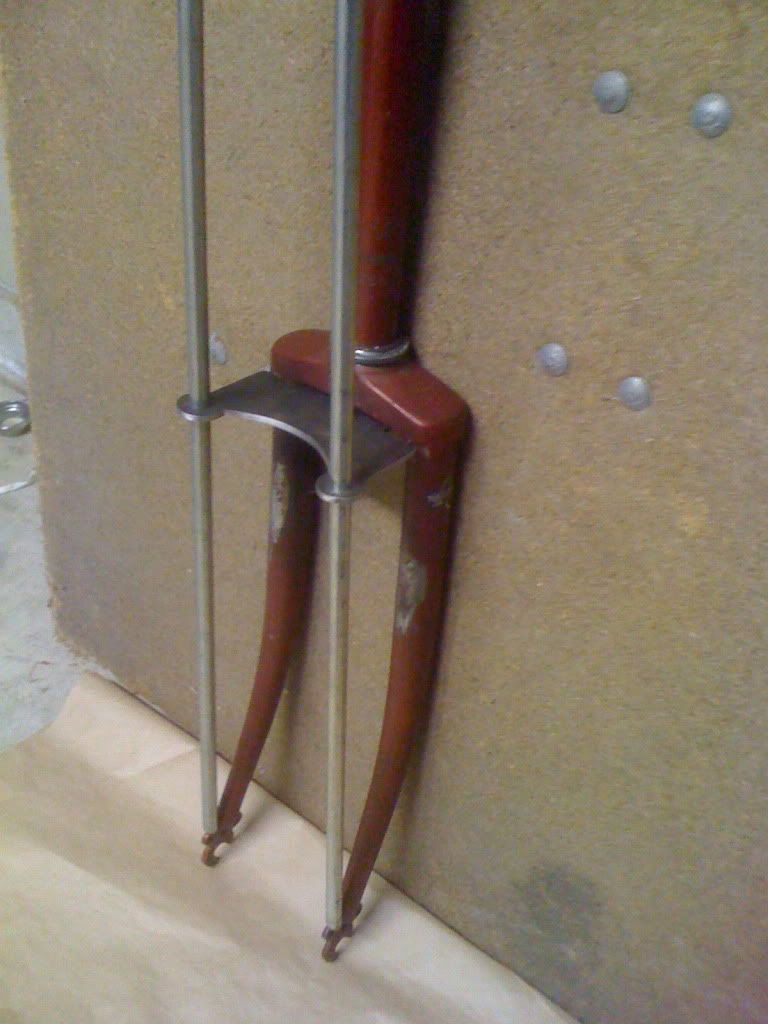
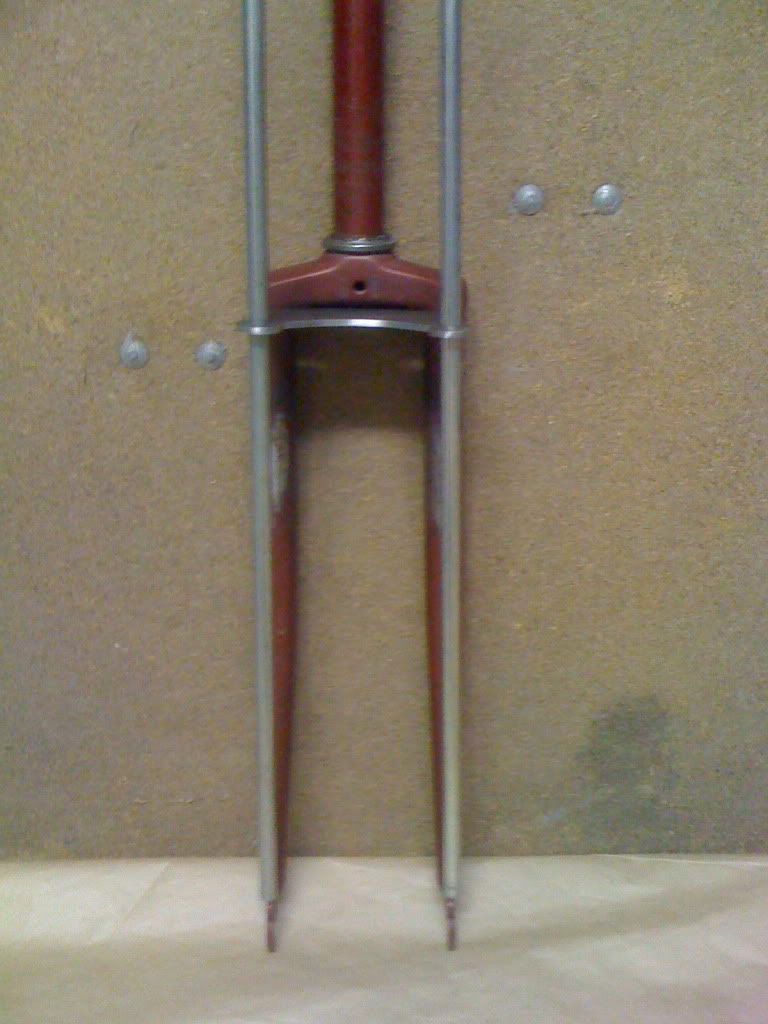
A few weeks back i ordered a set of Indian decals on ebay. They finally arrived all the way from Prague and they are the perfect size for my tank. Im going to have the frame, tank and wheels all powder coated and originally wanted to paint the logo, but I didn't want to scuff back the powder coat, paint the logo and then clear coat. Plus this decal has a nice black pin stripe around the lettering.
A nice sample plate came from dulux powder coats aswell which is a colour very close to what I want.
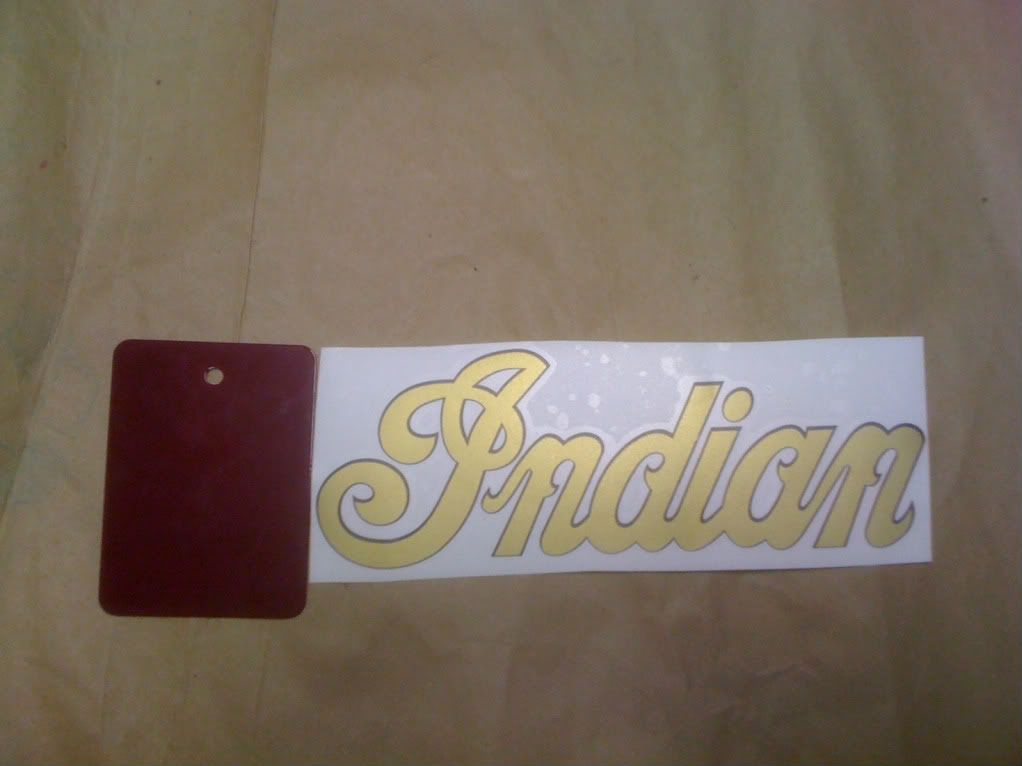
A big thanks to Wolf for giving me some tips on how to stretch the frame. I may very well have to use this method at some stage on this build. I really wanted to use the lugs that were on the frame I bought, but after running around all yesterday I failed to find someone that was interested in putting a heat torch or didn't want to charge me 150 bucks.
So, I feel like I might have gone a few steps backwards here and we and bought myself a really nice set of new lugs. Its going to be a lot easier and cleaner now and these lugs look a lot nicer than the original ones.
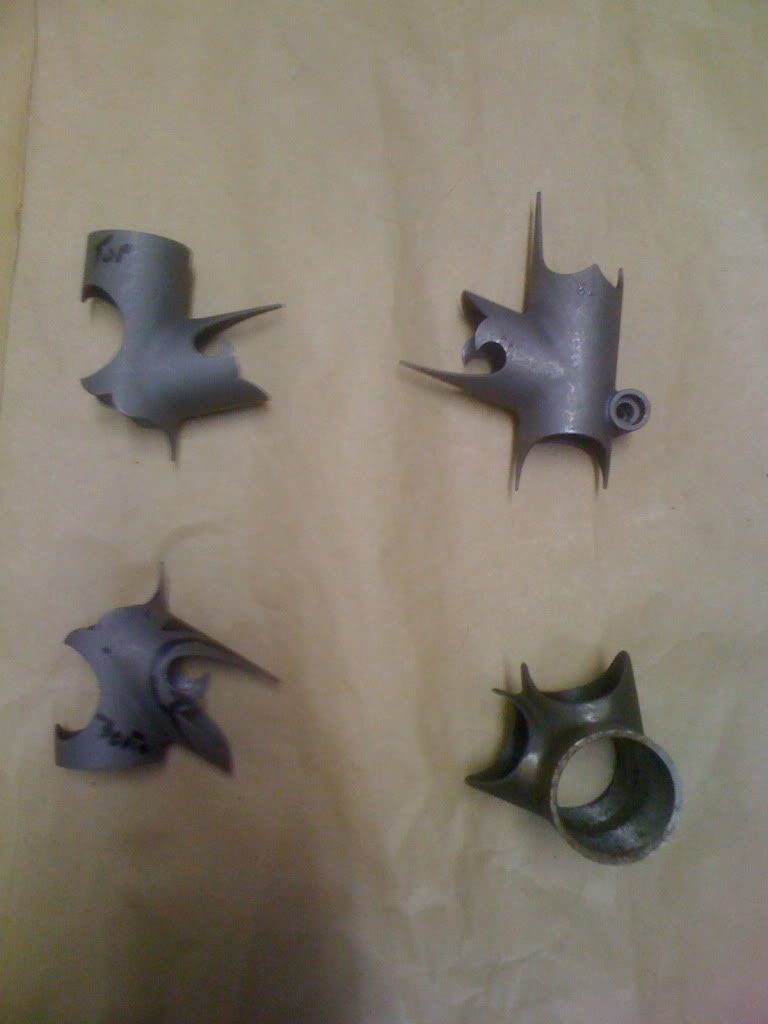
Im going to invert the seat lug so that it has the right upward angle for the top frame tube.
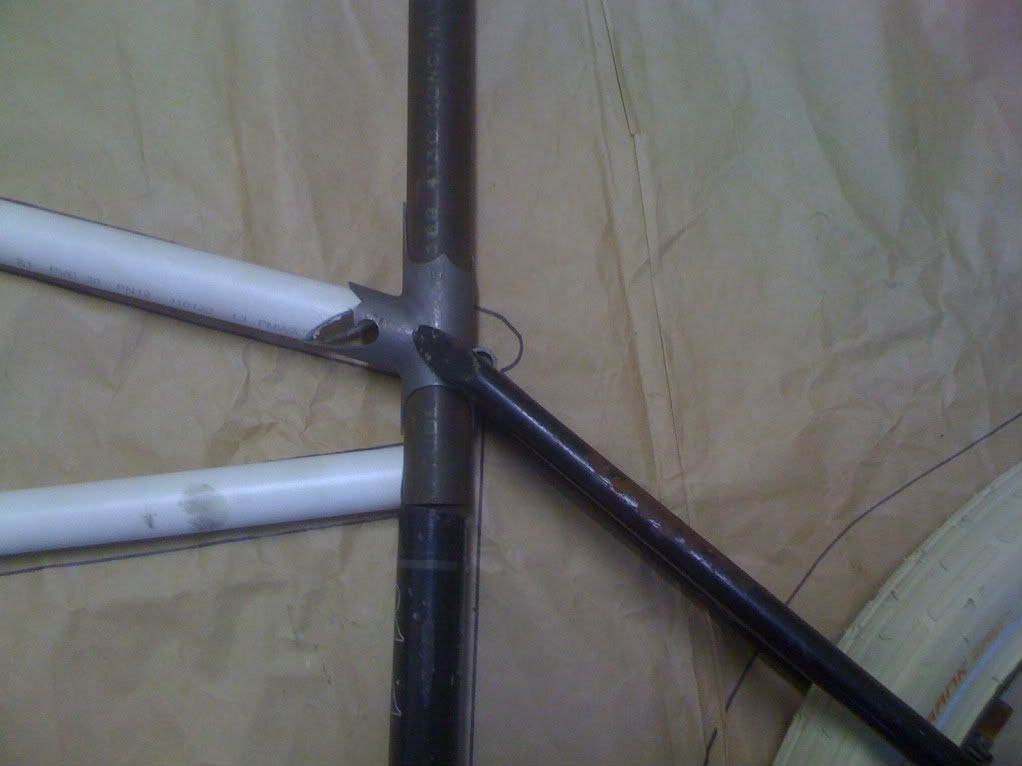
Now to get me some new tubing.
Sorry for the lack of updates but really not much has happened on the bike other than a lot of thinking and playing around. I have finally found somewhere local that sells chromoly tubing which I have been searching high and low for.
Im really excited though because I am starting a three week course in brazing this friday. So hopefully I can learn some good stuff and finally get this frame together....
Just ordered my wheels on ebay, pretty keen to get them in, strip them and send the rims off for powdercoat. Just trying to decide black spokes or chrome???? :?
Well I finished my brazing course and after plenty of practice I have become pretty good at brazing sleeve joints and fillets. I have stocked up on the chromoly tubing of all the sizes and lengths I need. I showed a mate of mine at work the scaled drawing I did. He build his own hot rod from scratch and has done a fair bit of tube bending so I gave him my top tube to bend. All was going well apparently until the top flattened out and the bottom crinkled because the bend was too concentrated for his bender.
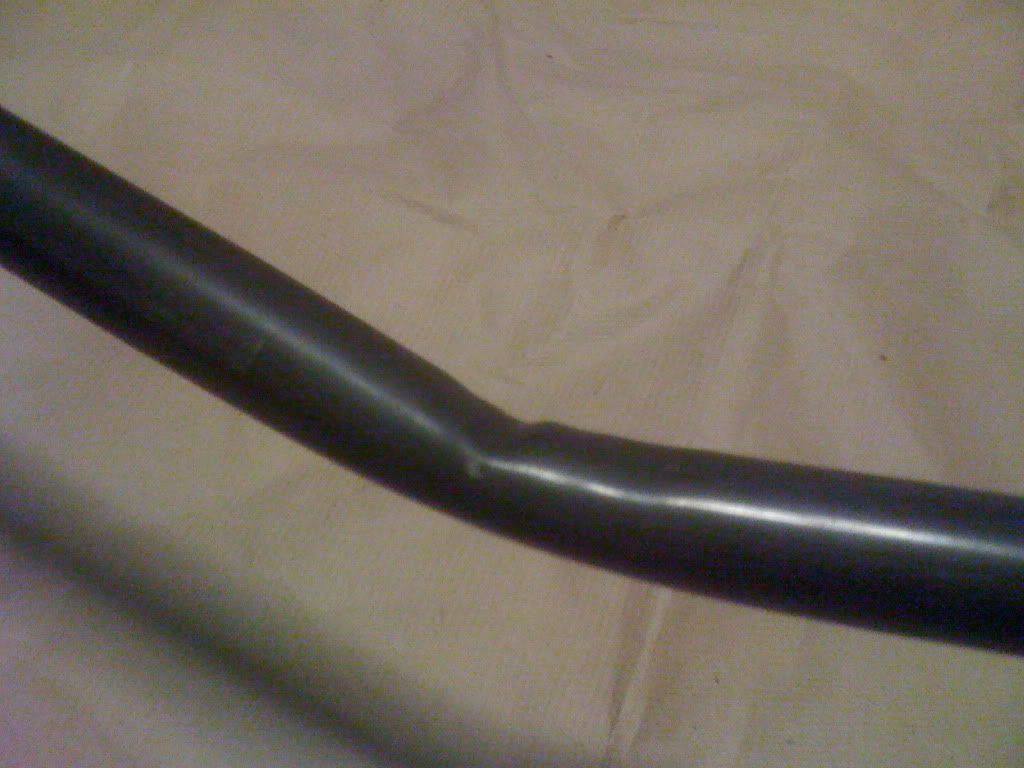
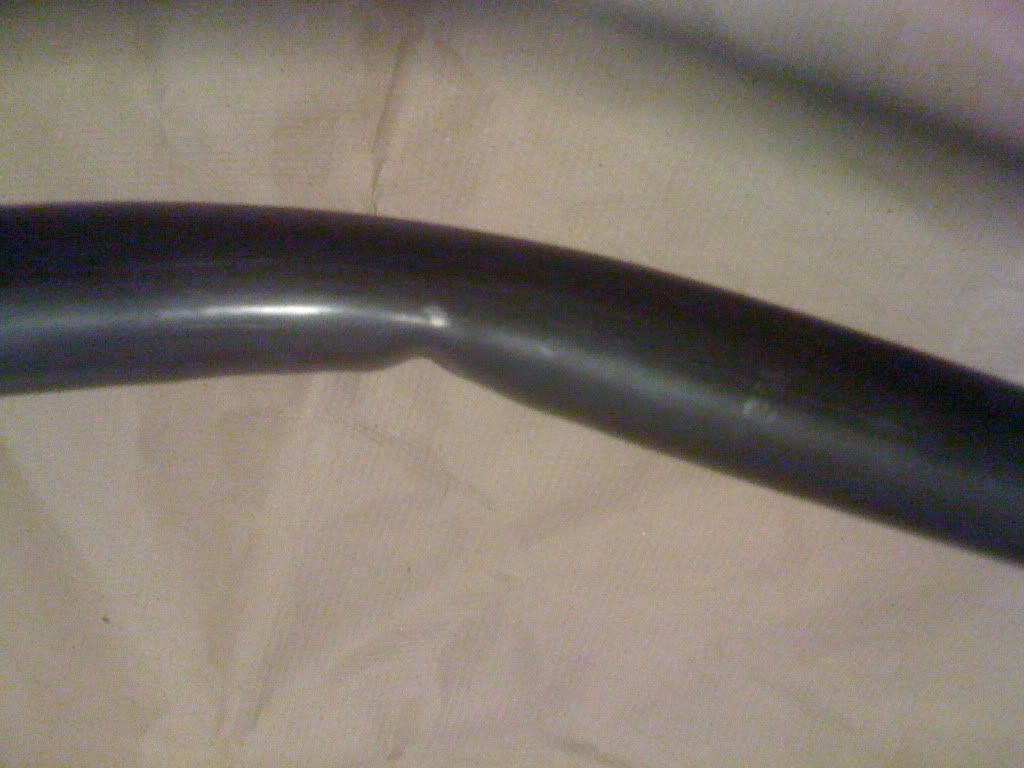
It seems as though I needed a professional with the right tools to do the bends. I did a fair bit of ringing around local metal benders/rollers but that turned out to be useless. Either they were not interested in doing a one off job, wanted to charge a fortune or told me that the angles I were trying to bend were impossible. Everyone was telling me to change the shape so it could be done, but it was the shape of the Indian alone that made me want to build this thing. I was starting to feel like this build wasn't going to happen until I was referred to a bloke called Ken at Advanced metal curving http://www.advancedmetalcurving.com.au/
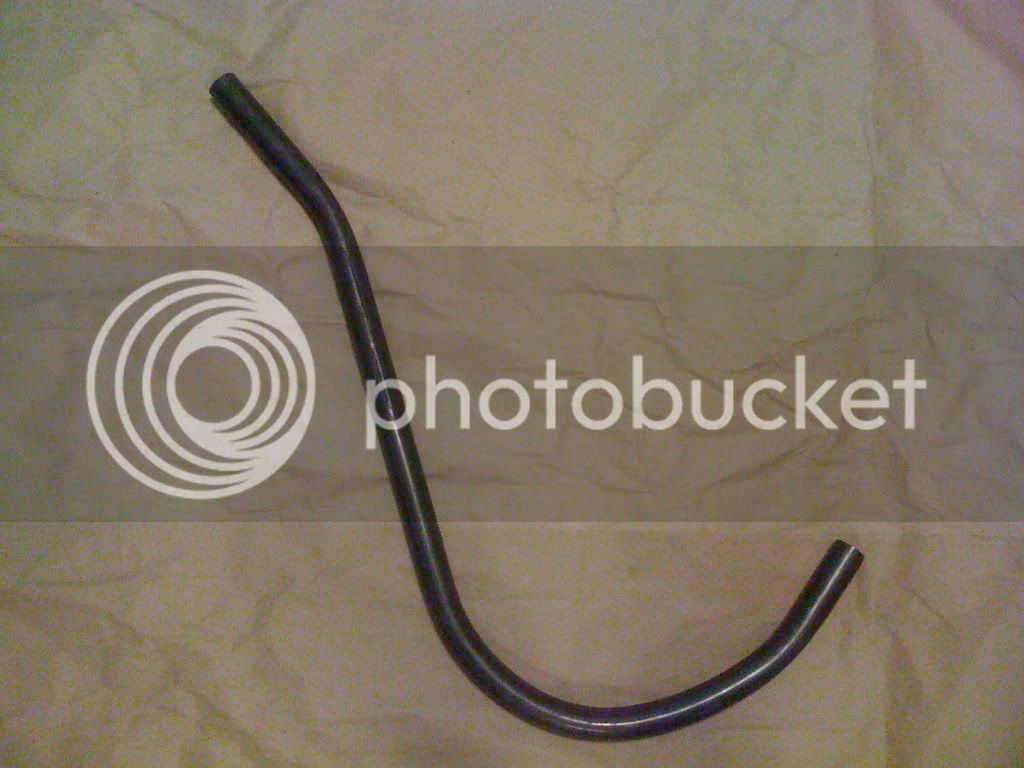
He was an absolute legend who was into old bikes. He was super keen and interested about my build and was too happy to give me some time in the shop. Within an hour he had bent up my top tube and the drop loop tube. He wrapped the top tube tightly with duct tape and packed it with sand but it still crinkled slightly at the bottom being such a tight bend but I can live with it. If I want I guess I could file it a small amount and fill it with braze.
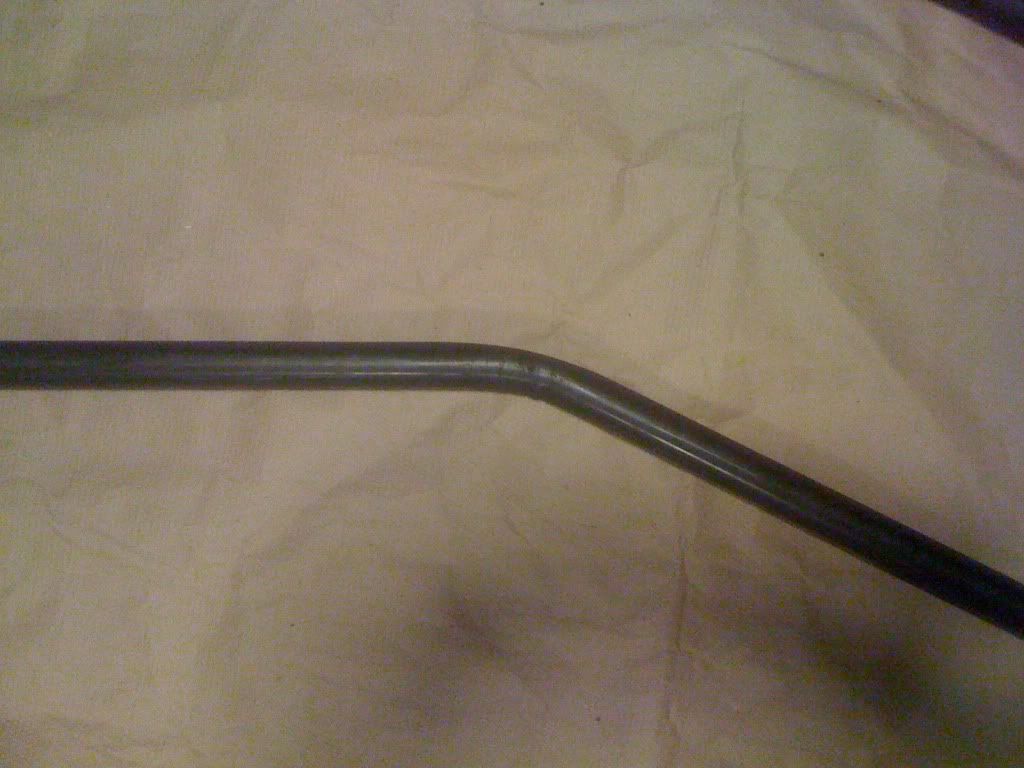
Im delighted with the drop loop tube, its exactly how I had it on my scale drawing. Now I feel like taking it to all the places that told me it couldn't be done and proving them wrong. Thanks Ken
Last weekend was taken up with my dad measuring, cutting and notching most of the frame tubes to fit into their lugs. I did run into a bit of a problem when my Dad pointed out that I might need a little more than half an inch for my pedal clearance. So it looks like I am going to have to alter my back triangle geometry just a little to bring the center of the crank boss up an inch. The hardest bit is going to be cutting the back drop outs off and rotating them slightly as I want the top bar of the bike to be perfectly parralel with the ground. Will put some pictures up as soon as I get the chance.
Sorry for the lack of updates but here are some photos.
I heated up my back triangle and managed to separate the upper and lower links. Once the rest of the frame is together I will braze the upper links to the correct angle.
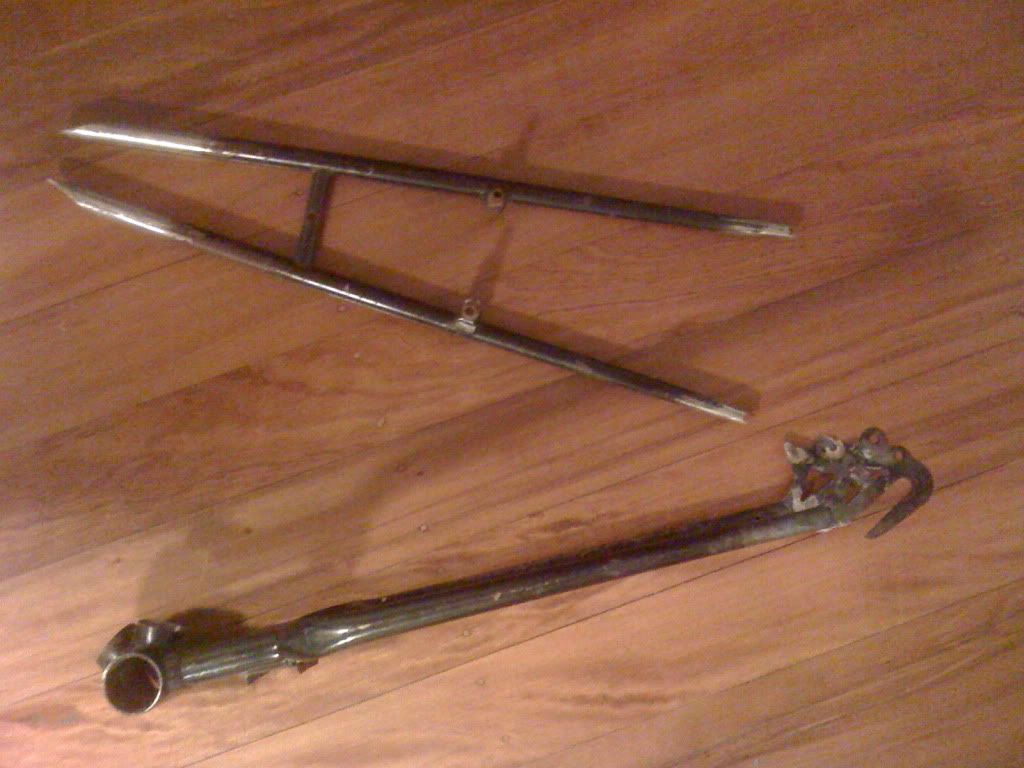
I have been busing brazing the frame in the garage and it seems to be coming along nicely and I managed to keep it all straight and all the angles how I want them.
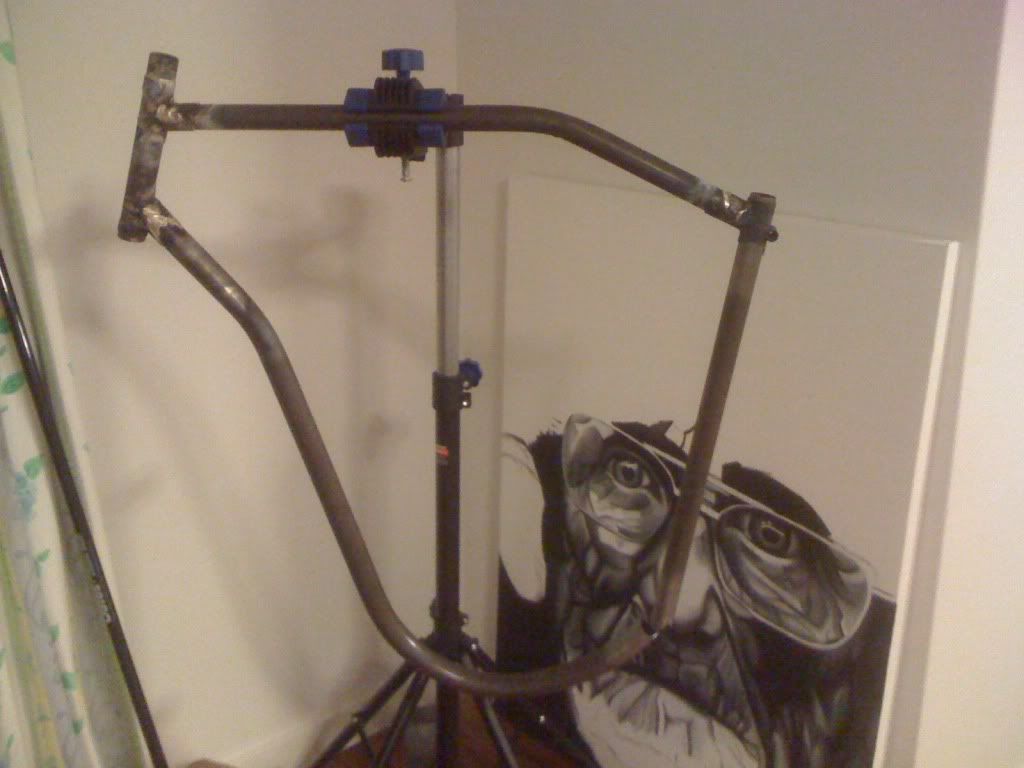
Loving my bike work stand the I got for Christmas, bloody handy! Will try and put some more pics up tomorrow
I was just going to fillet braze the drop loop tube on the bottom of the crank boss but I was given to use an internal lug by my girlfriends father. I had someone weld it properly as I wanted it to be strong enough to handle all of the loads. I slid the drop loop tube over the internal sleeve and drew the brazing rod in-between the two.
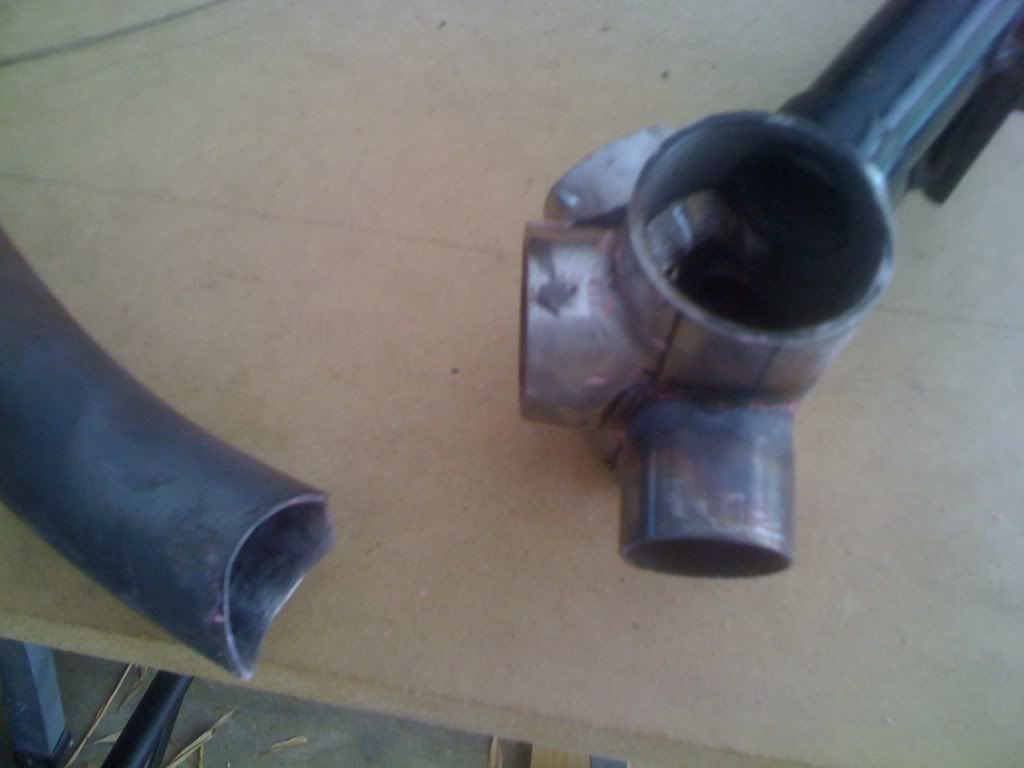
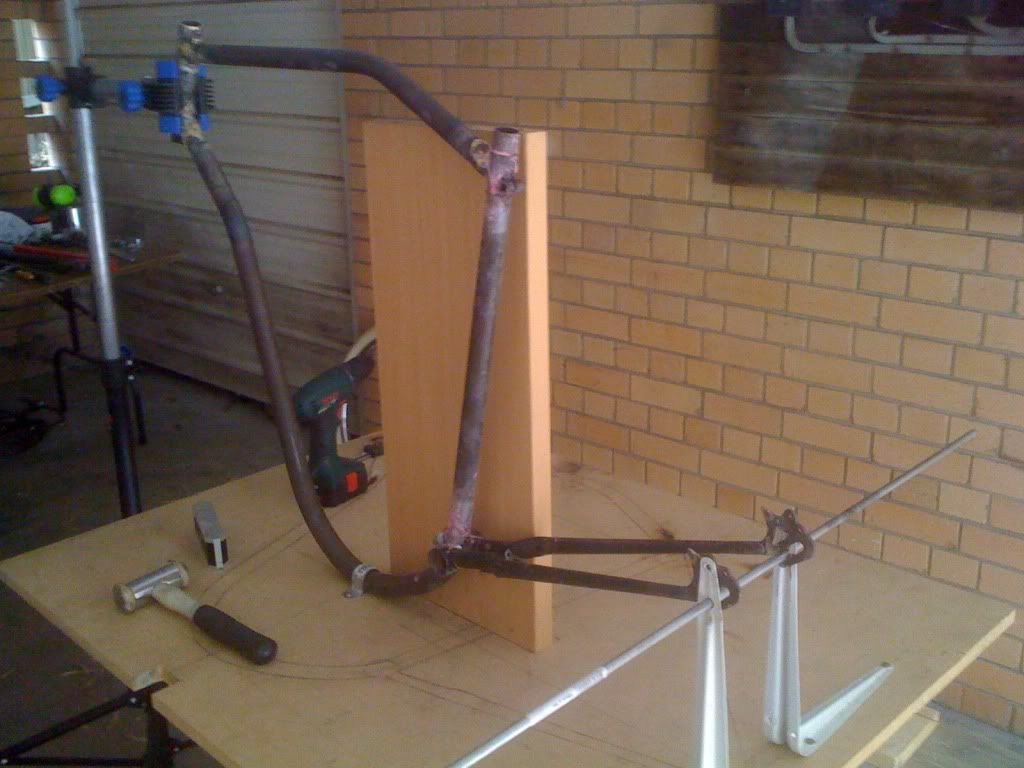
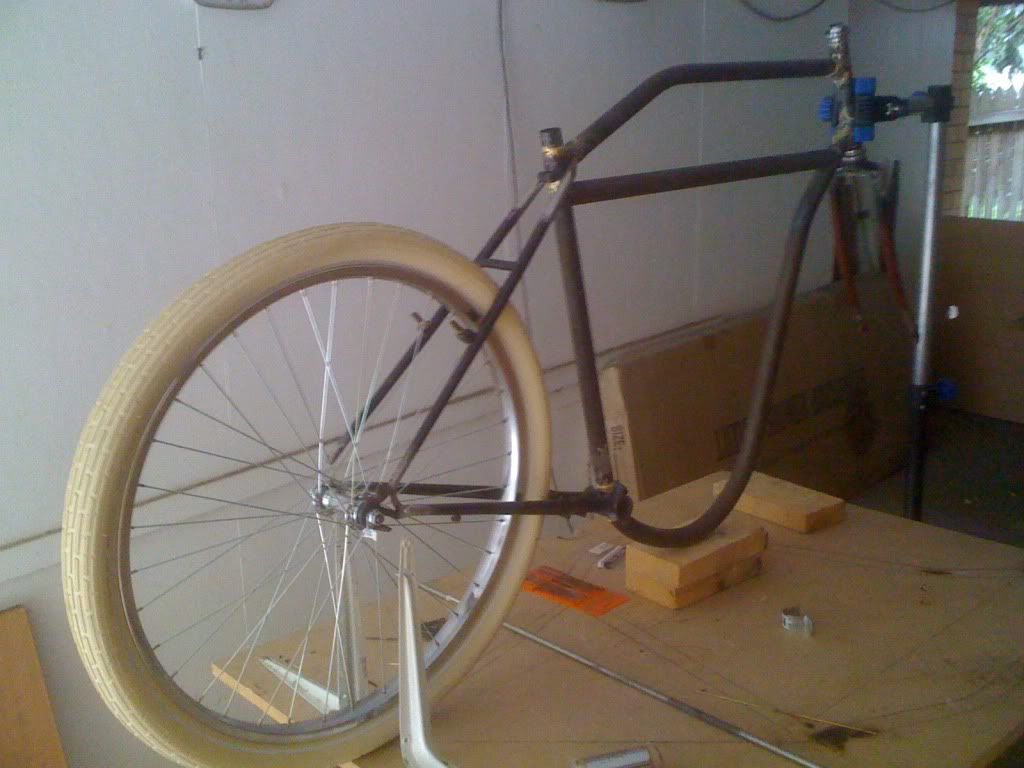
I didn't get the sleeve welded exactly where I wanted, it was a little too far forward. Once I had brazed it all together I realised that this was going to effect the angle of the back drop out. The back wheel was going to sit to high in reference to the rest of the bike causing the drop loop and the pedals to be far to close to the ground. I heated up and separated the drop out on the back stays, made up a make-shift gig to get the right correct hight for the wheel and brazed it all up.
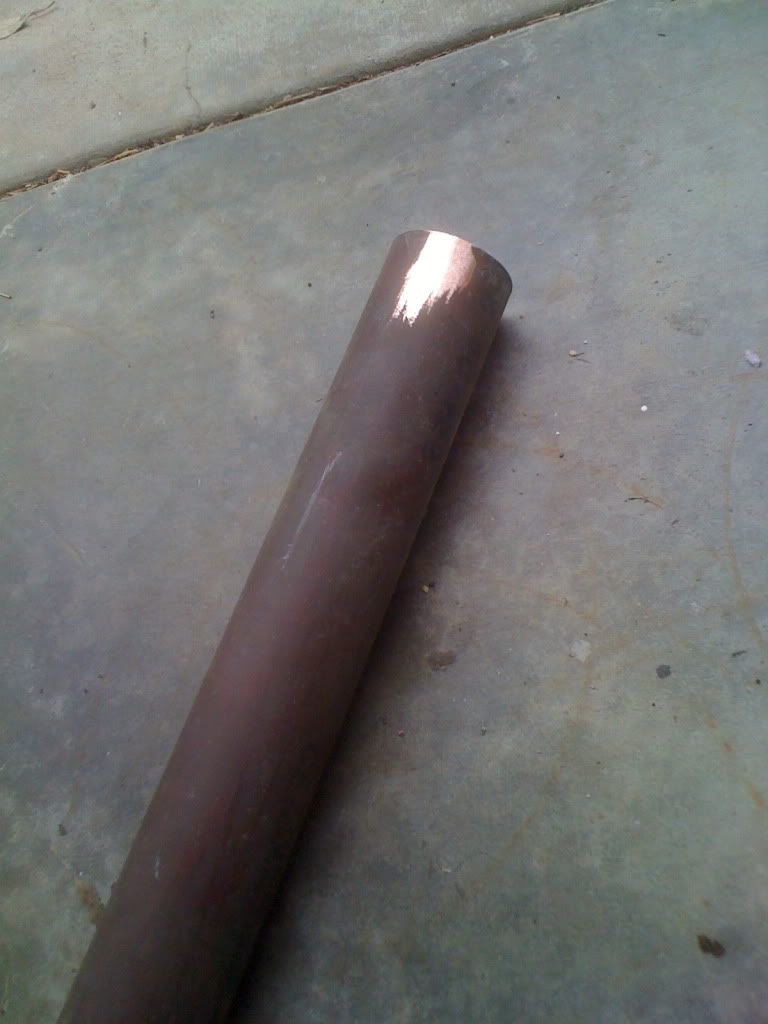
Here is the beginning of what will be my Indian head badge, thanks to my dad for the bit of copper tube he had laying around, was going to be part of the exhaust for our 1961 FB Holden.
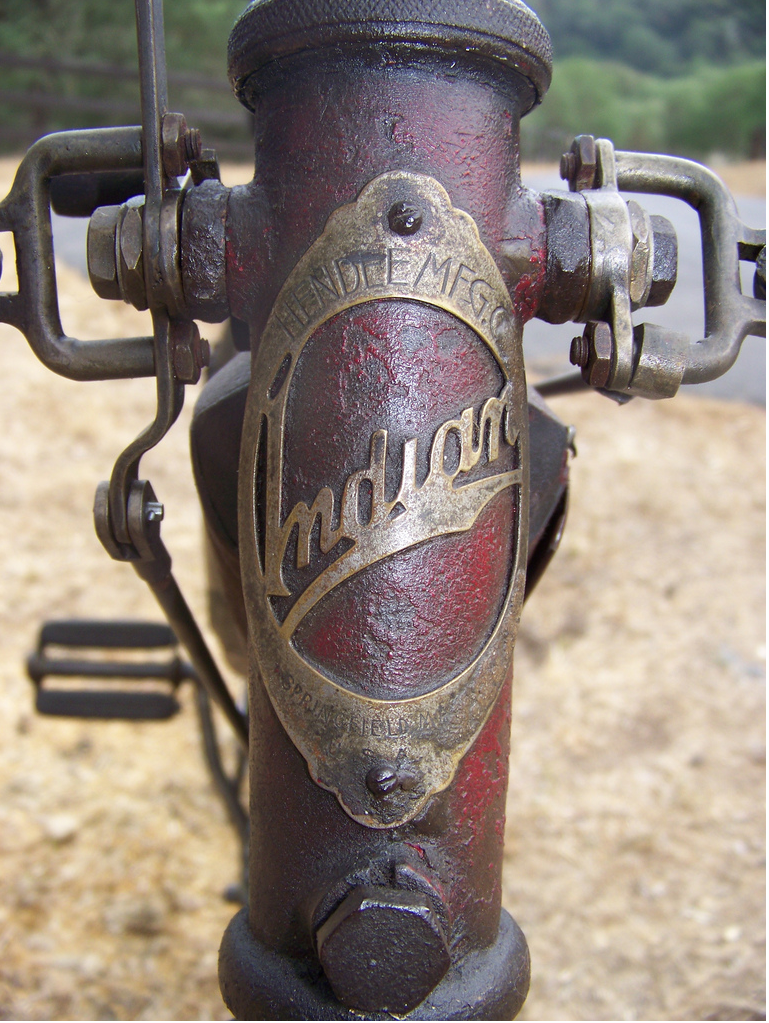
Hopefully its going to look close to this.
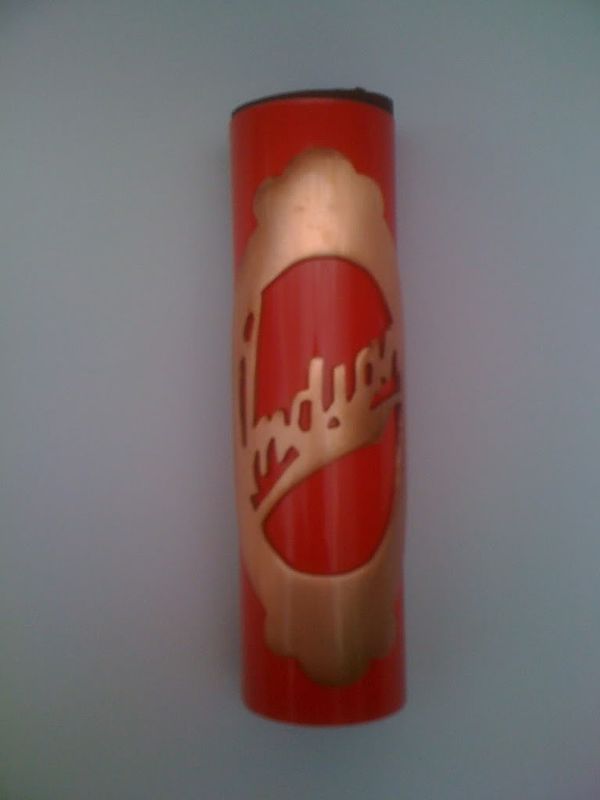
Well, after hours and hours of filing and sanding I finished up my Indian head badge. Gave it a quick clear coat to seal it up, will give it a buff later on. Photo is a little fuzzy but you get the idea.
I finally got myself a set of MTB riser handle bars which are dead straight, these were harder to find then i thought they would be. Also found a nice second hand set of curved bars which i could cut down and use for the gripping part of the bars.
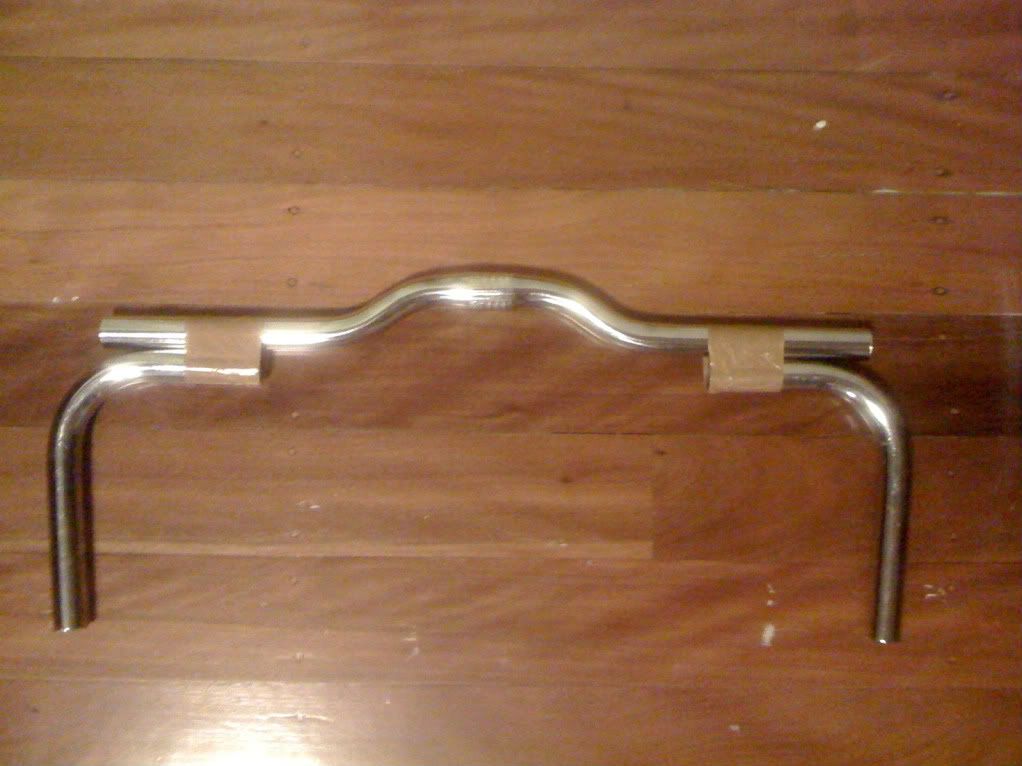
Just need to cut them down a bit more. I also have to get two small billets of aluminium and turn up some dual shaft collars just like these
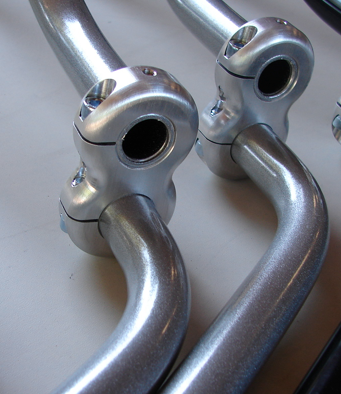
Just dropped off my rims to the powdercoaters, can't wait to see how they look once all built up with the fat franks! Black spokes or just the silver, what do you guys think??? I can't decide.
This week I made up some new dropouts from scratch and slightly bent my back low stays to raise the frame up and give me pedal clearance.
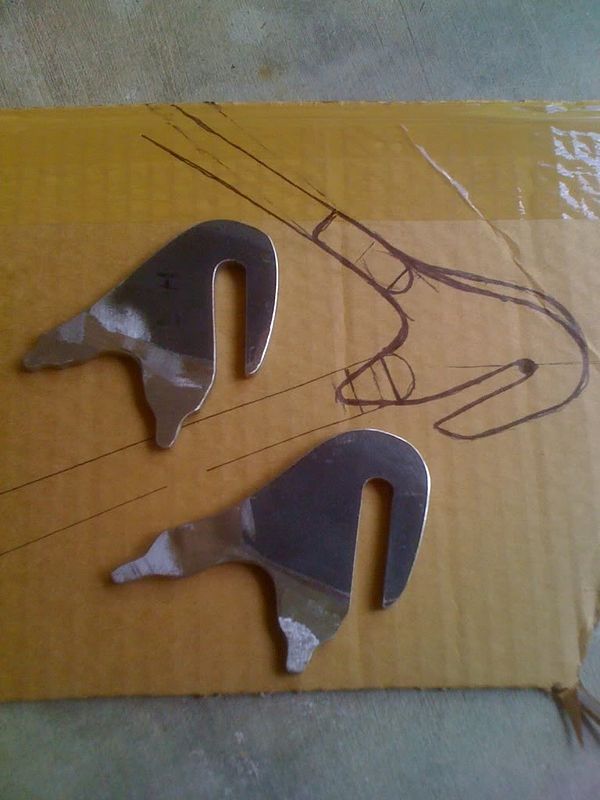
Here they are ready to braze up.
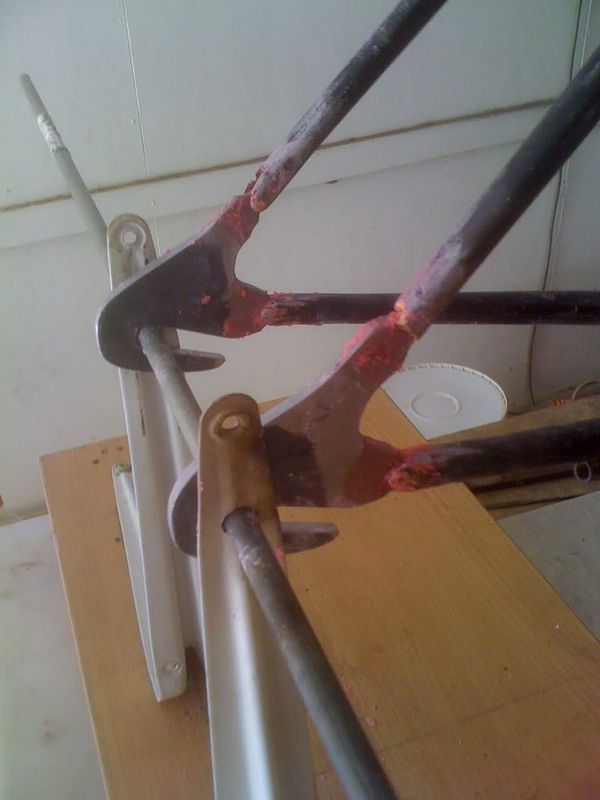
Does any one out there have any good tips or links to check that a frame is all straight? It seems fairly good by eye but I just want to be more precise. Any help would be great, thanks!
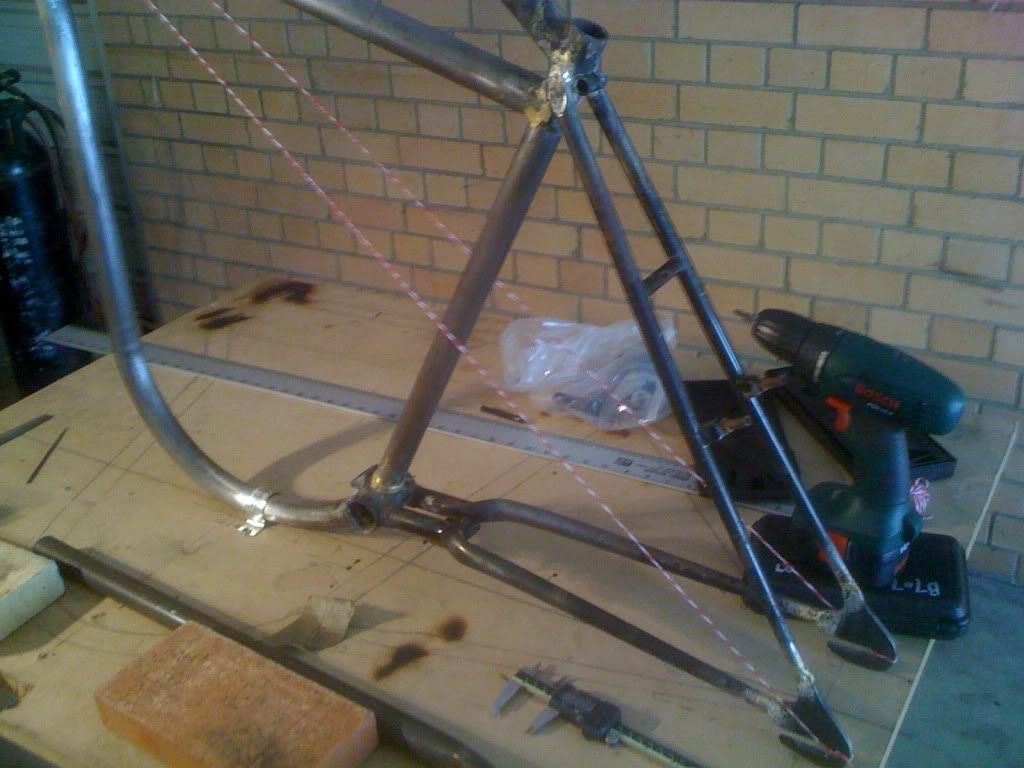
Well I measured the frame up for straightness using a piece of string from the dropouts to the head tube and measured the space between the string and the seat tube. All seems pretty straight, I just need to tweak the dropouts a little bit so that they are parallel to each other.
The crank turned up in the mail today from the UK and its good to know I am finally sorted with my ground clearance issues.
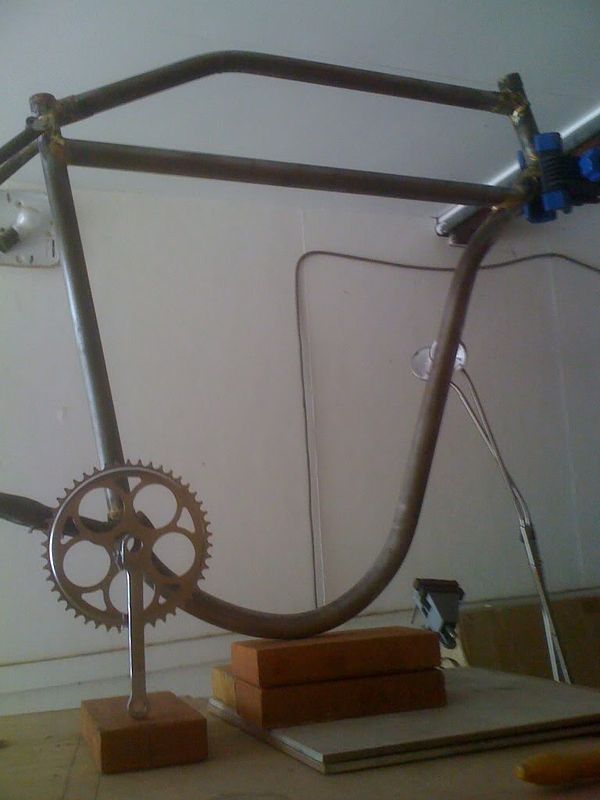
Not a heap to show for the last few days, but I reamed out the internal diameter of the head tube to allow the bearing cups to be pressed in. Other than that, sanding, filing and more sanding of the frame :? My wheels will be finished by the powdercoaters this week, can't wait to pick them up and see how they look. Any body have any tips for the best spoke length calculator?
Got my rims back today and they turned out great.
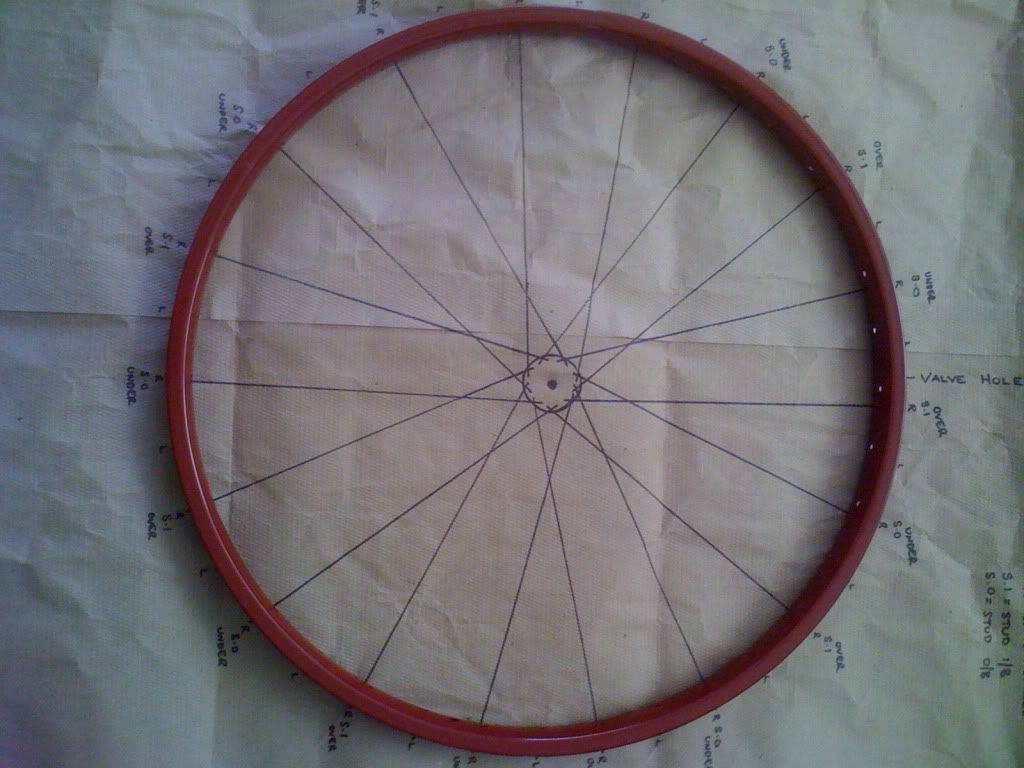
Lacing the front wheel up at the moment. Anybody out there know if its possible to shorten and thread spokes. I don't really want to have to buy a brand new set for my new rear wheel hub if I can get away with it.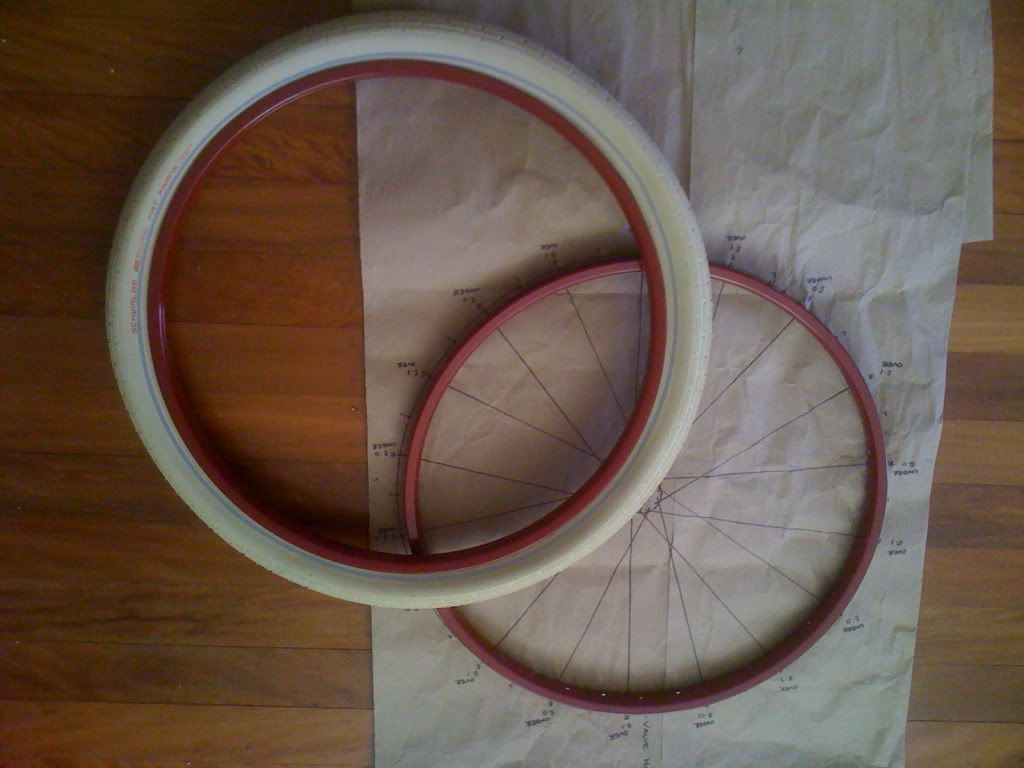
Got the front wheel all laced up. Got some new spokes for the rear wheel so I'm ready to go on that.
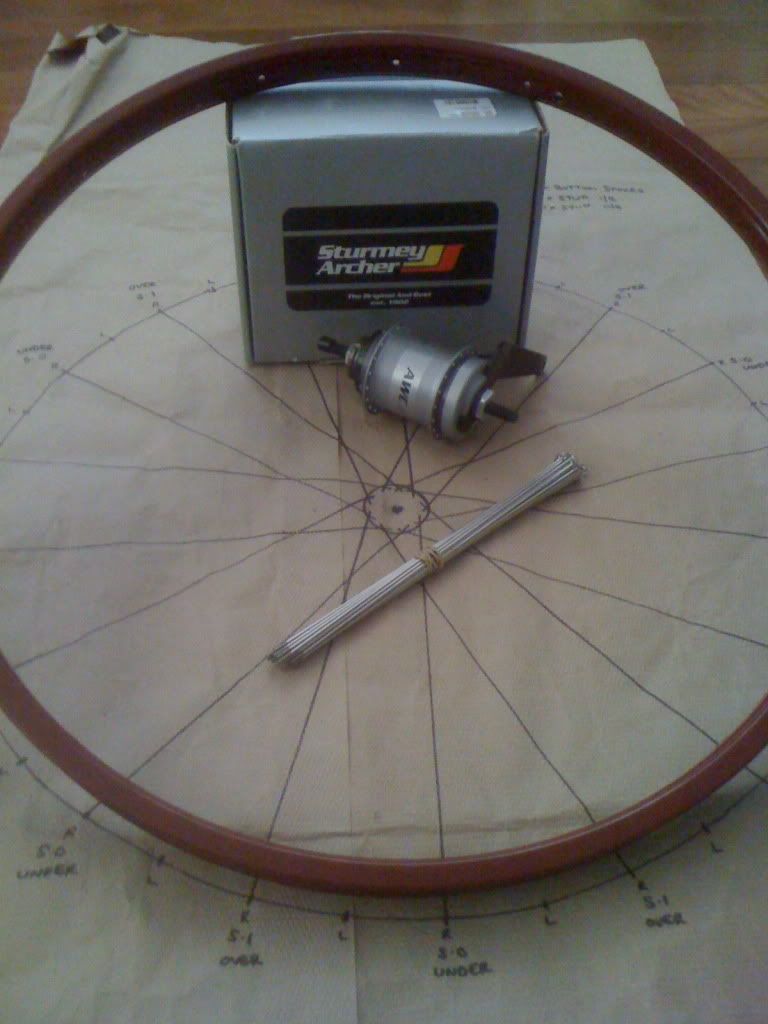
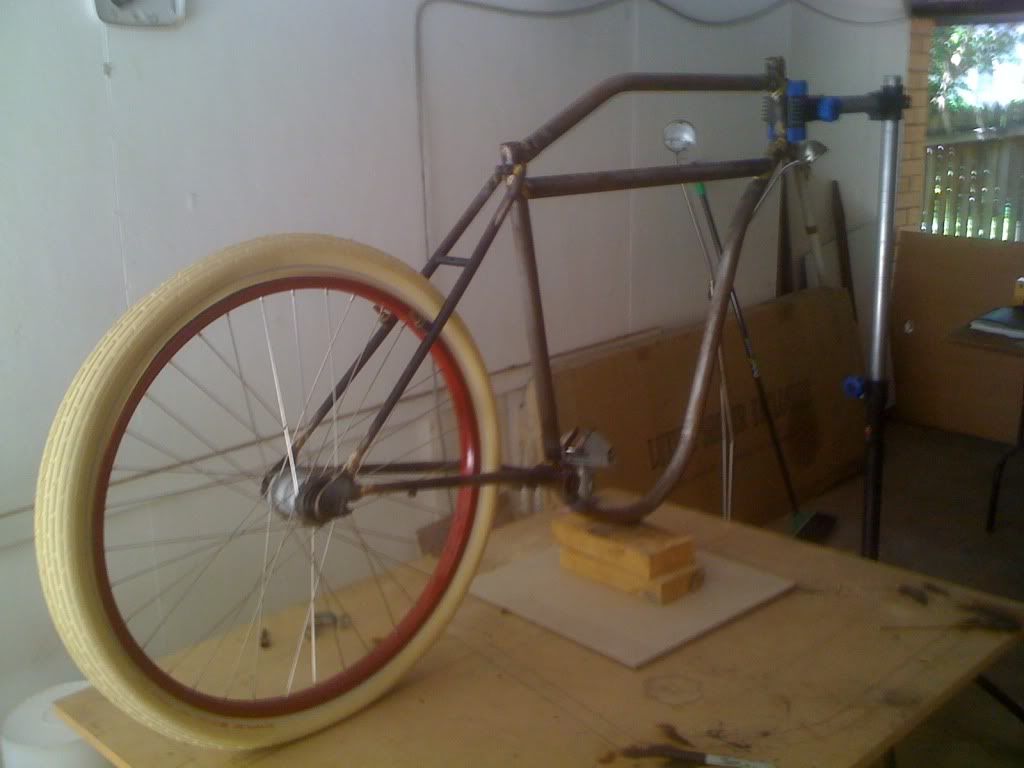
Both wheels done, just did a quick check with the rear wheel and the frame before sending the wheels off for truing. Im not real confident with doing it, especially the rear wheel with the dishing and all.
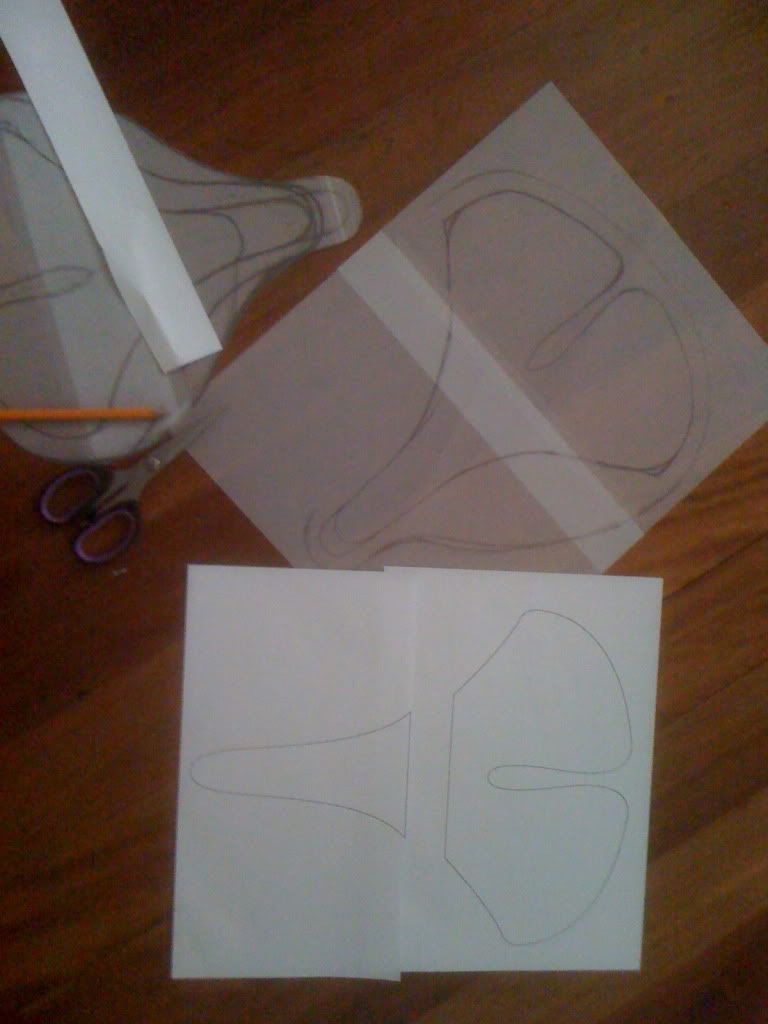
Heres the start of my saddle
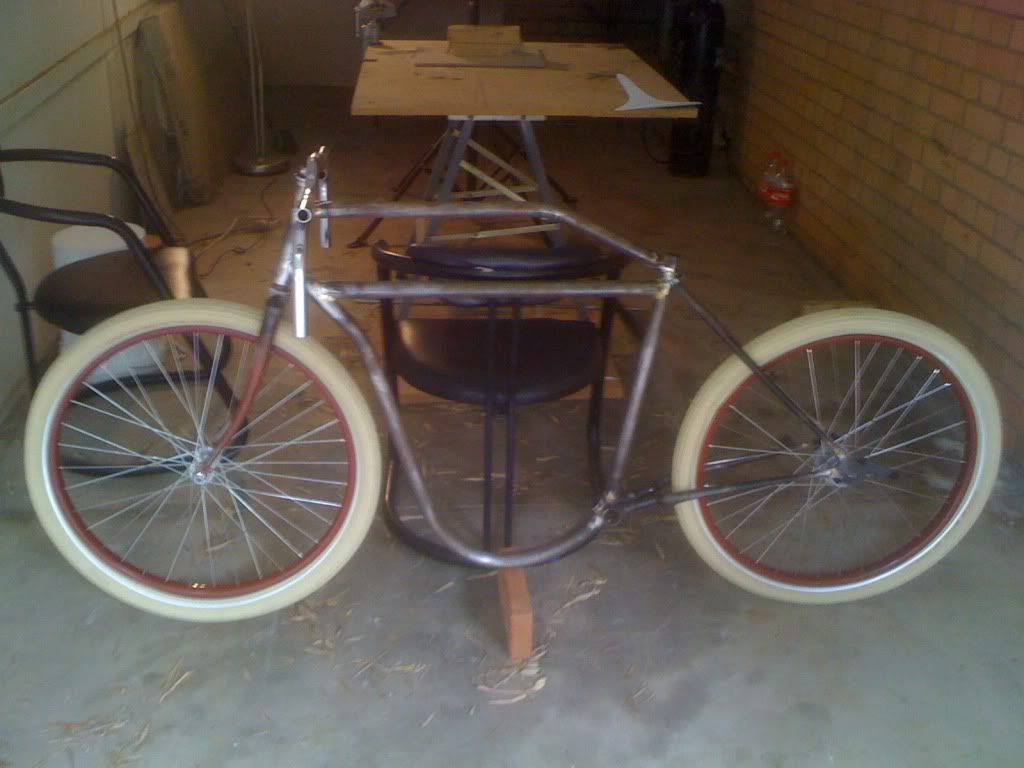
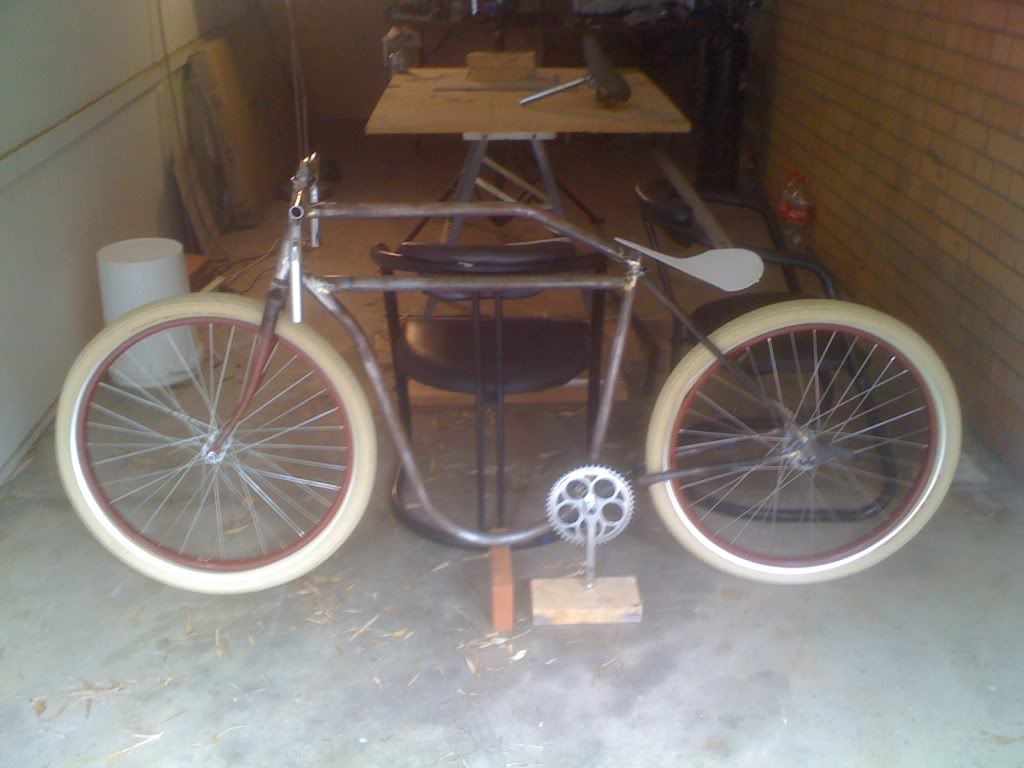
The bike with most parts sitting on just to get the feel of the look.
...and one with the saddle template.
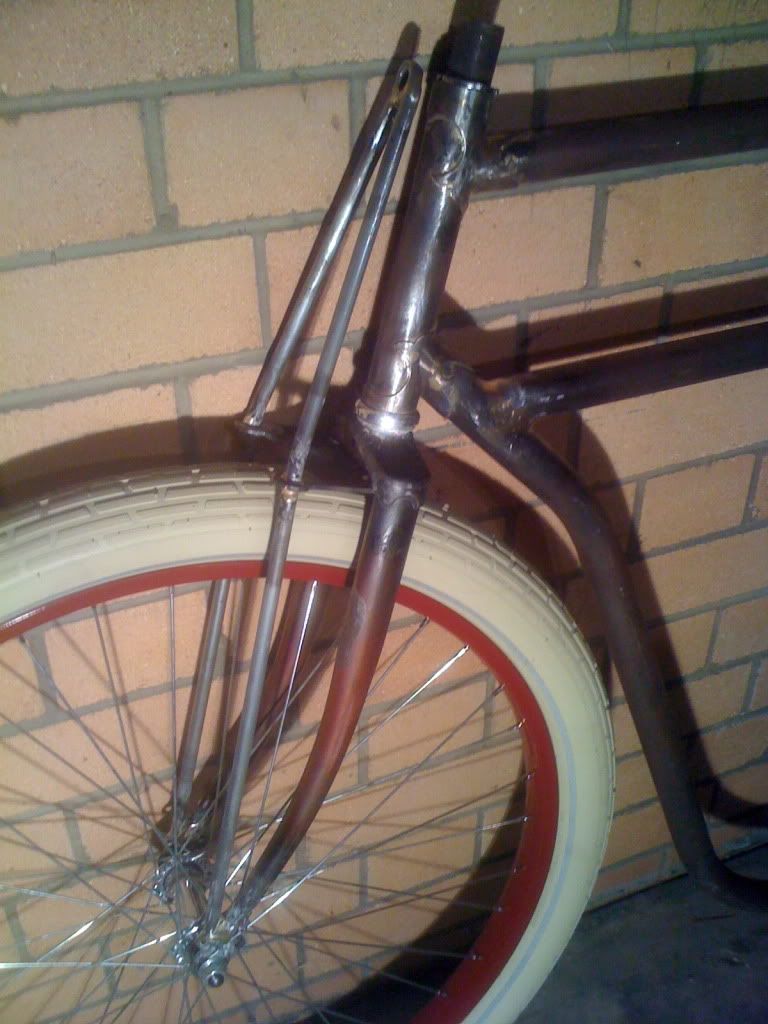
Ive spent a little bit of time working on the front fork stays and there coming along pretty nicely. I need to wait until I have my new headset until I can finish it up. Heres a quick look anyway.
I got the wheels back from the shop and stuck the rear wheel in but its hitting the left upper stay. I had the wheel in there before truing and it didn't hit so Im thinking I need to have the wheel slightly dished to the right to bring it into the centre of the frame.
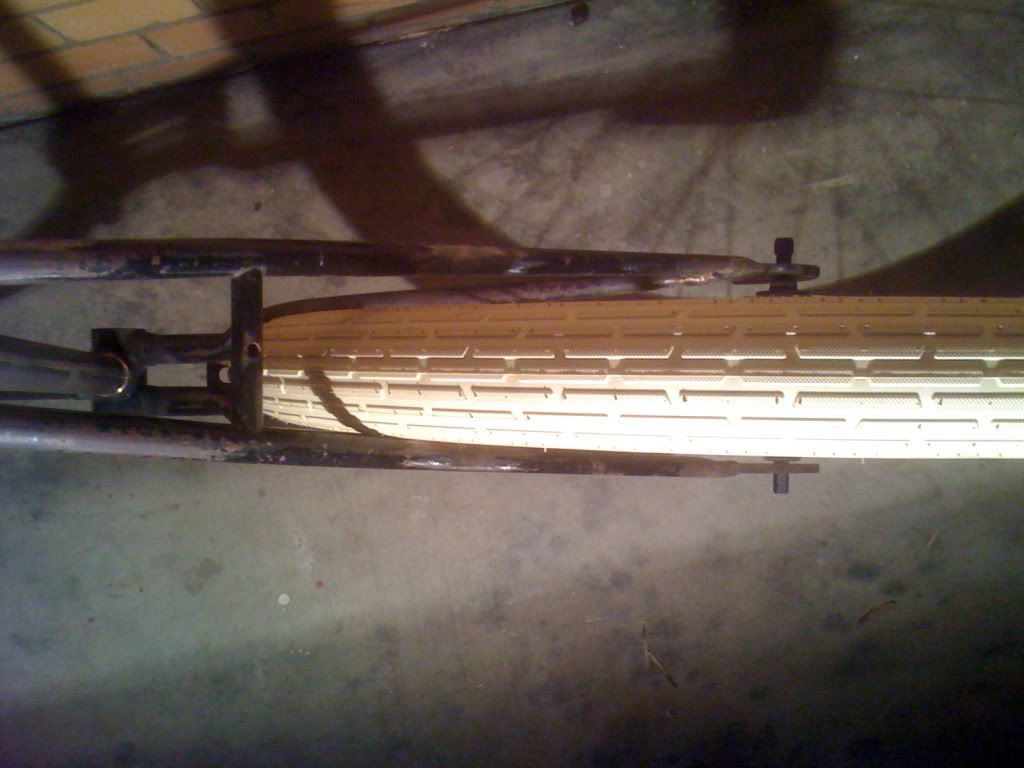
Well it turn out my rear dropouts went perfect and it was affecting my wheel alignment. So some time was spent pulling the right dropout apart and re-brazed it all and and problem solved.
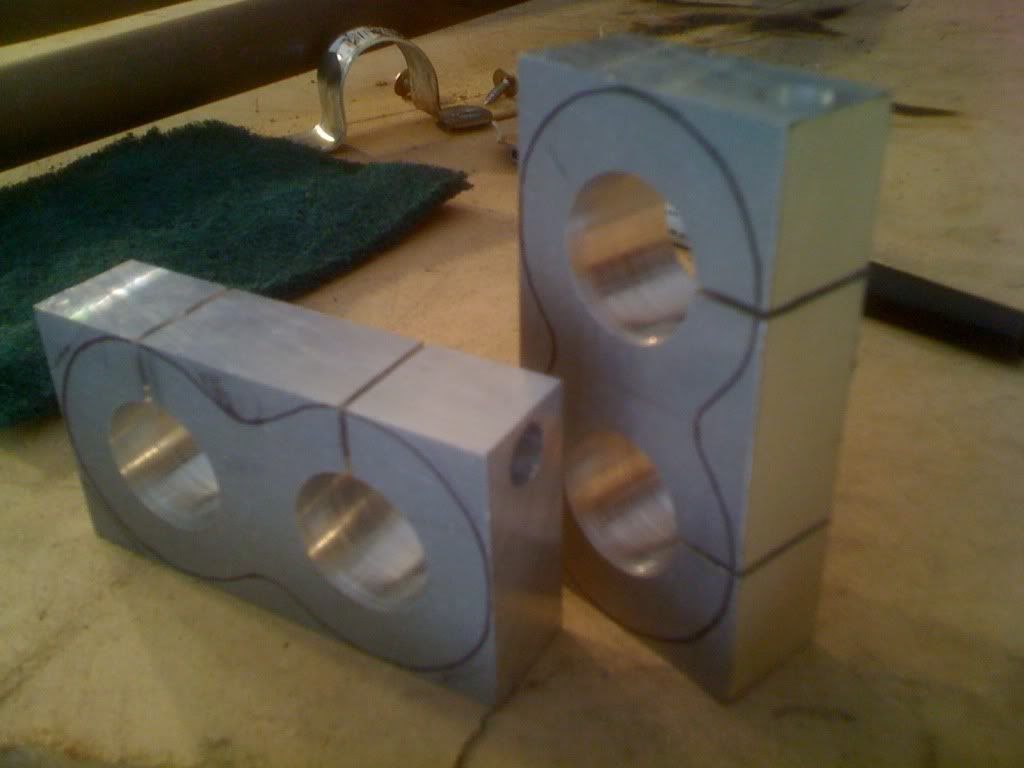
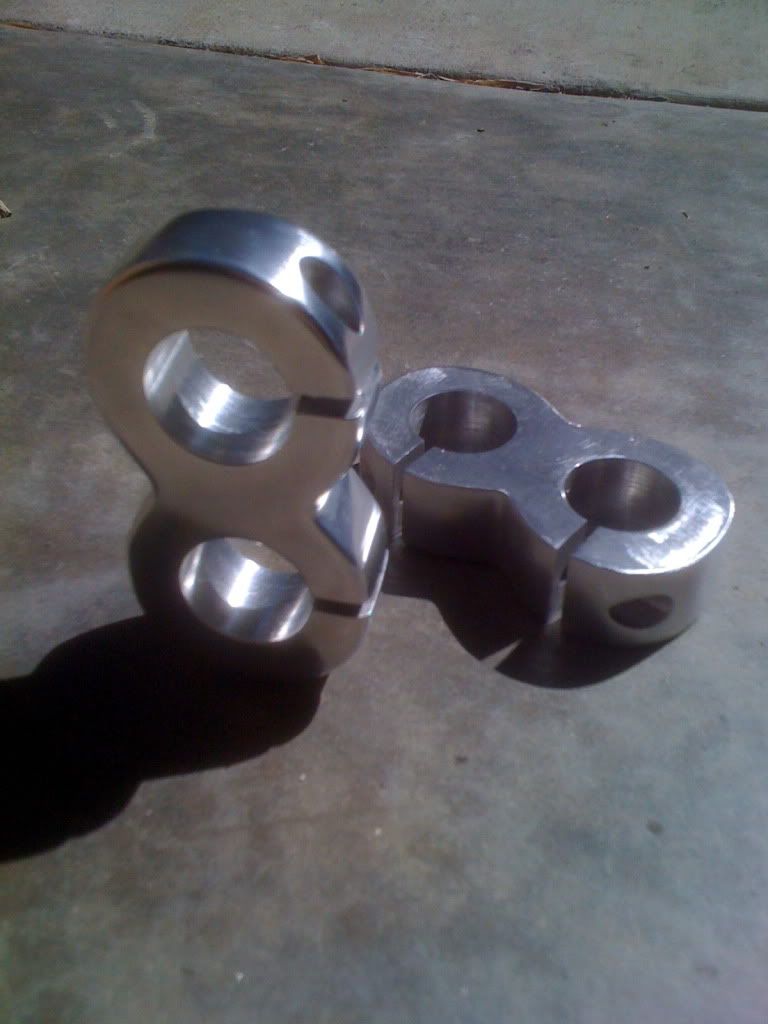
Finally got my hands on some aluminium billets and started turning up my figure eight split shaft collars for the handle bars. They are all drilled, tapped helicoiled and counterboard for the hex head bolts. Just need to open the split in the collar to give it more clamping ability and I need to profile the material to get my figure 8. Should look pretty sweet once there done.
My Dad found an old exercise bike that somebody was throwing out for me knowing that I might be able to make use of some parts.
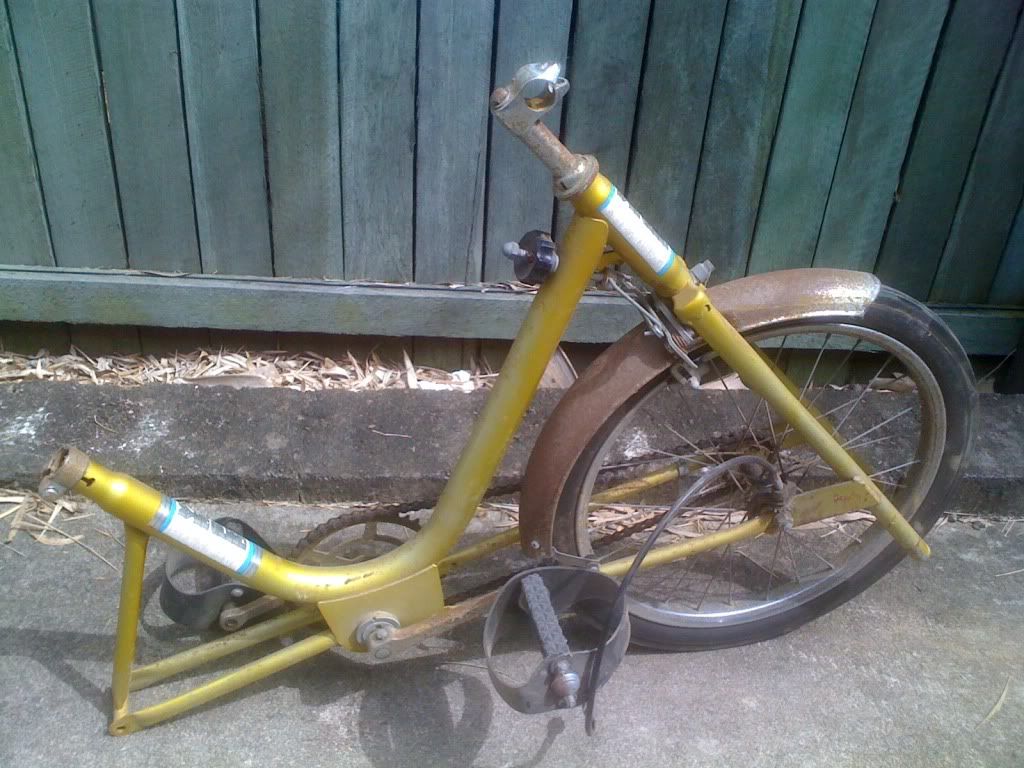
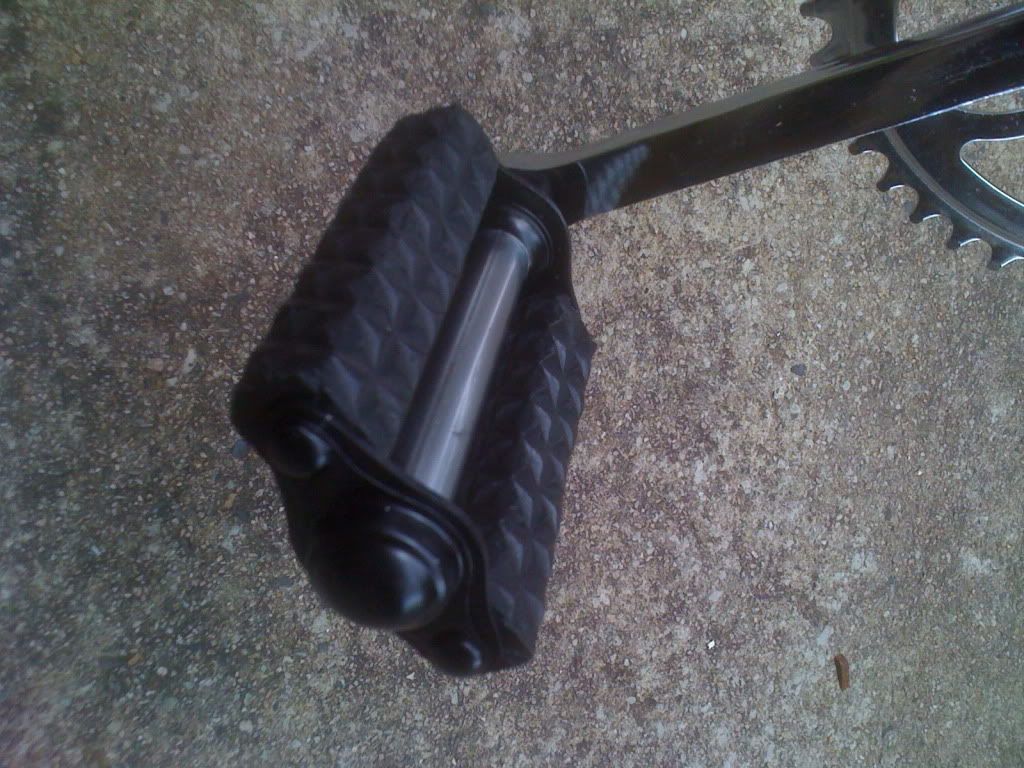
The pedals on this beast are exactly like the old school block type I wanted.
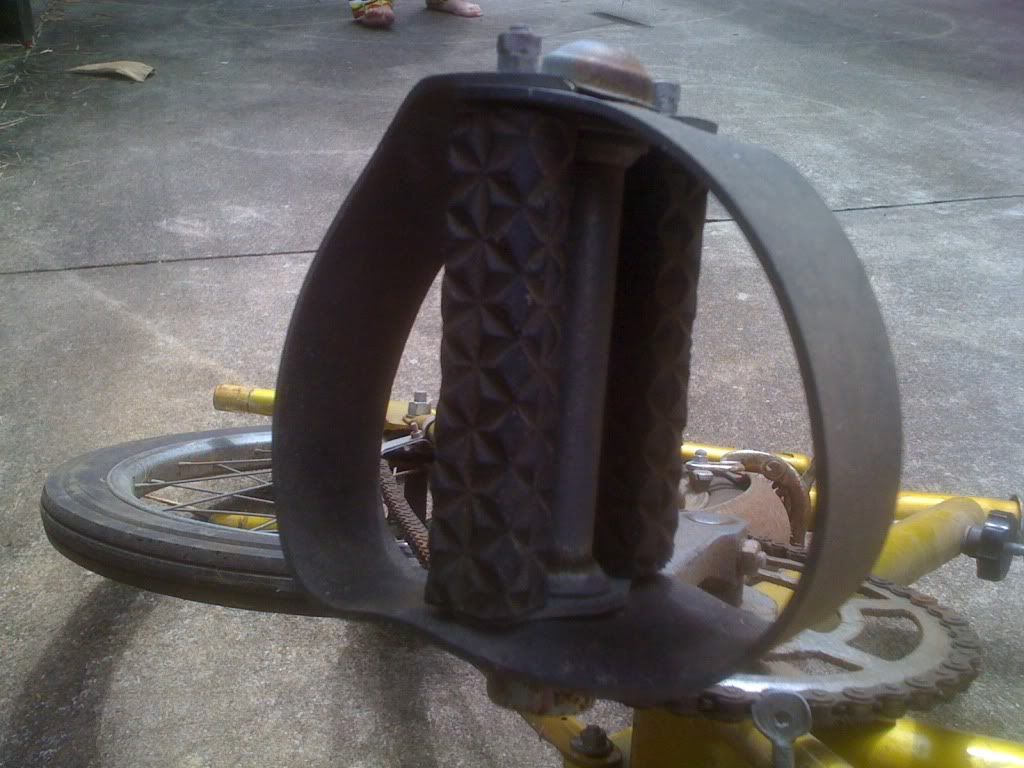
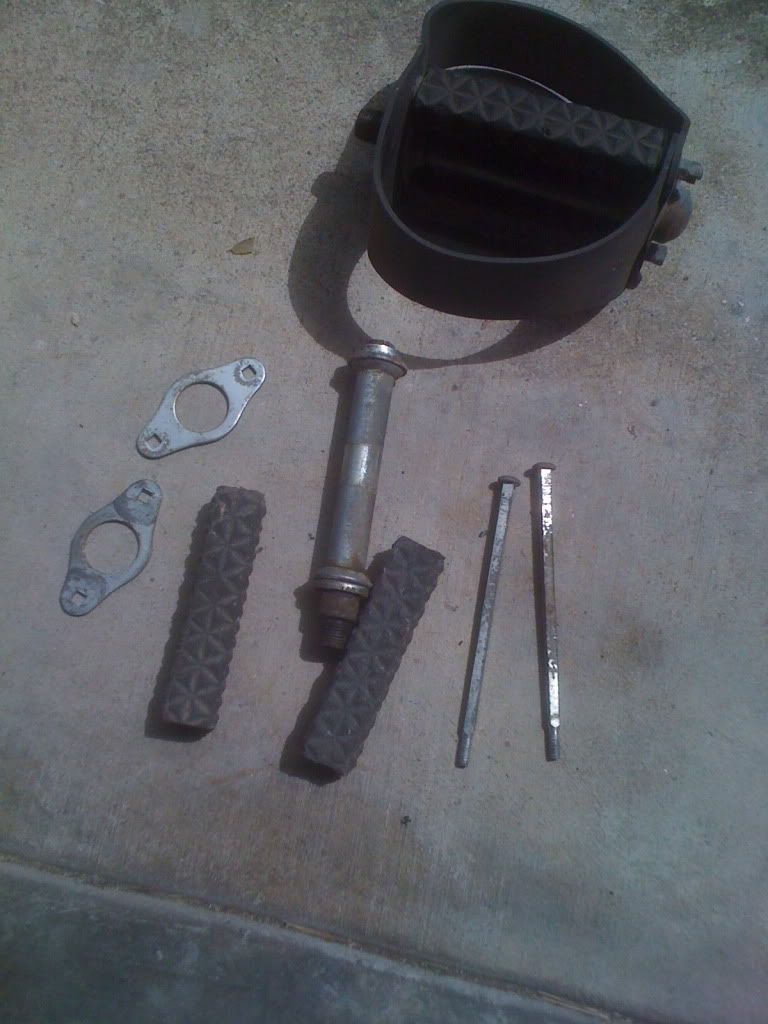
Delighted with these things, pulled them both apart and are all ready to be cleaned up.
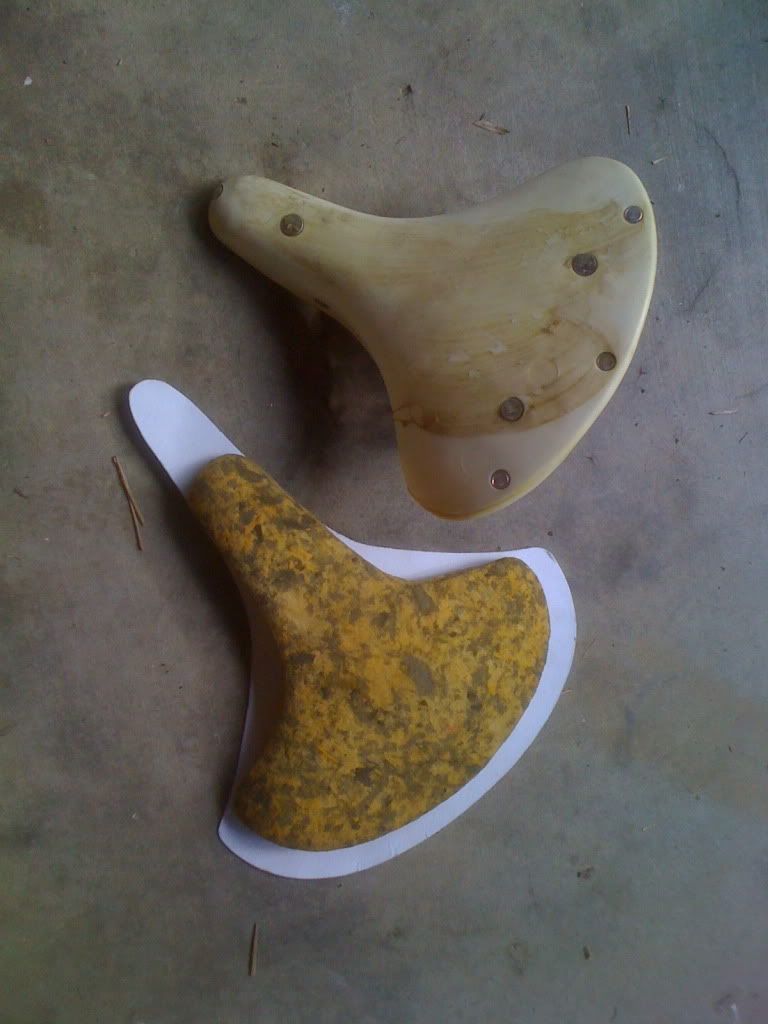
The exercise bike also came with a seat which is similar in size to the saddle I want to achieve. I am going to extend the front, back and sides out with fiberglass.
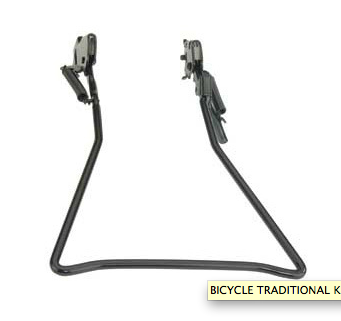
I was wondering if anyone out there could help me out with something. I want to get a drop stand like the one below from ebay as I want to keep the whole look going on the bike including the stand. My question is when the stand is up for riding how high does the stand normally sit? Do they sit parallel to the ground or do they sit up higher towards the seat. I have never seen them before thats all.
A bit of an update. One dual shaft collar all done and another on the way. First one look pretty sweet in person, almost like is chromed.
The saddle is coming along slowly. I have been remoulding the base with plasticine before fiberglass.
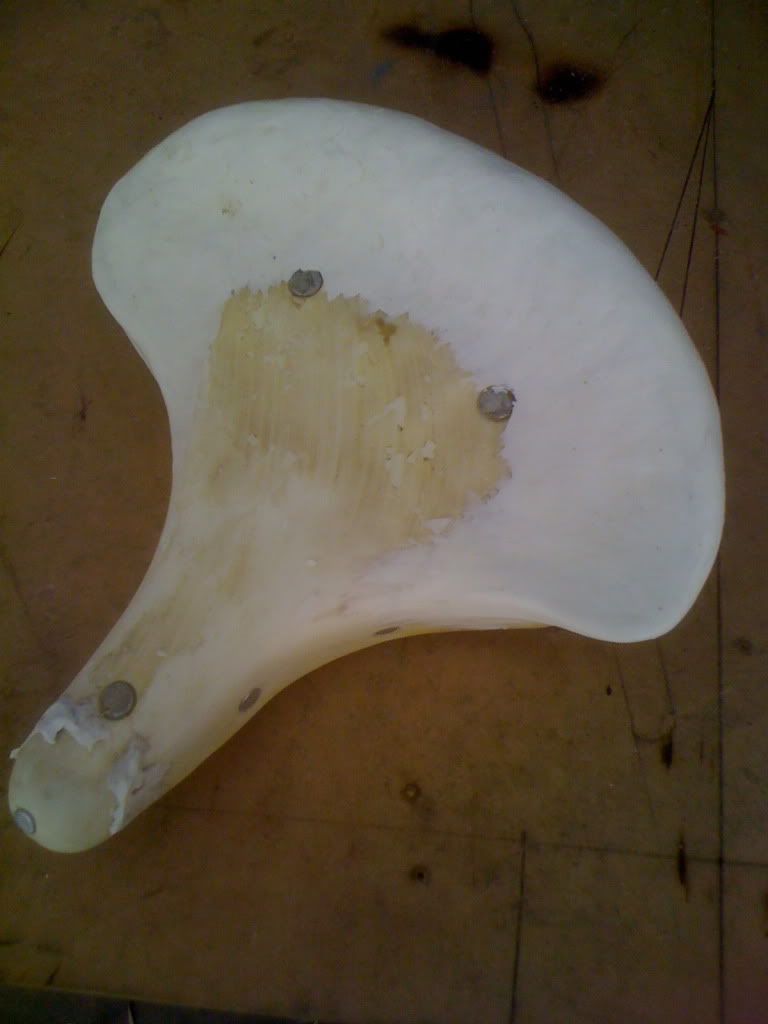
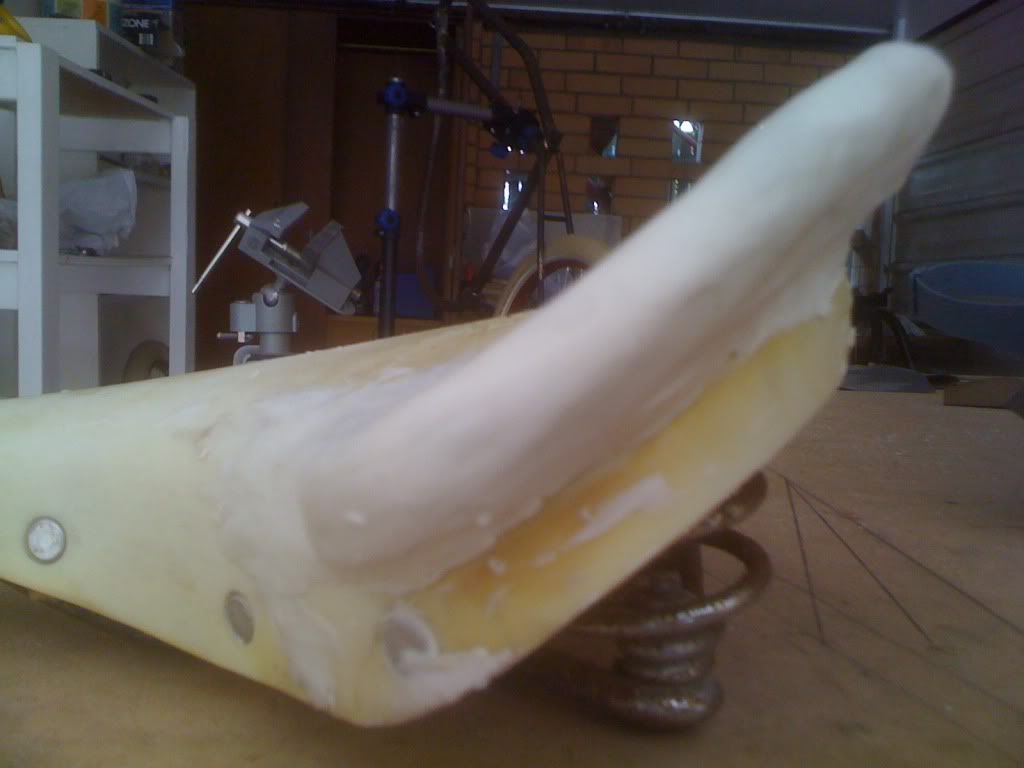
Heres the saddle shaped to the design I want out of plasticine
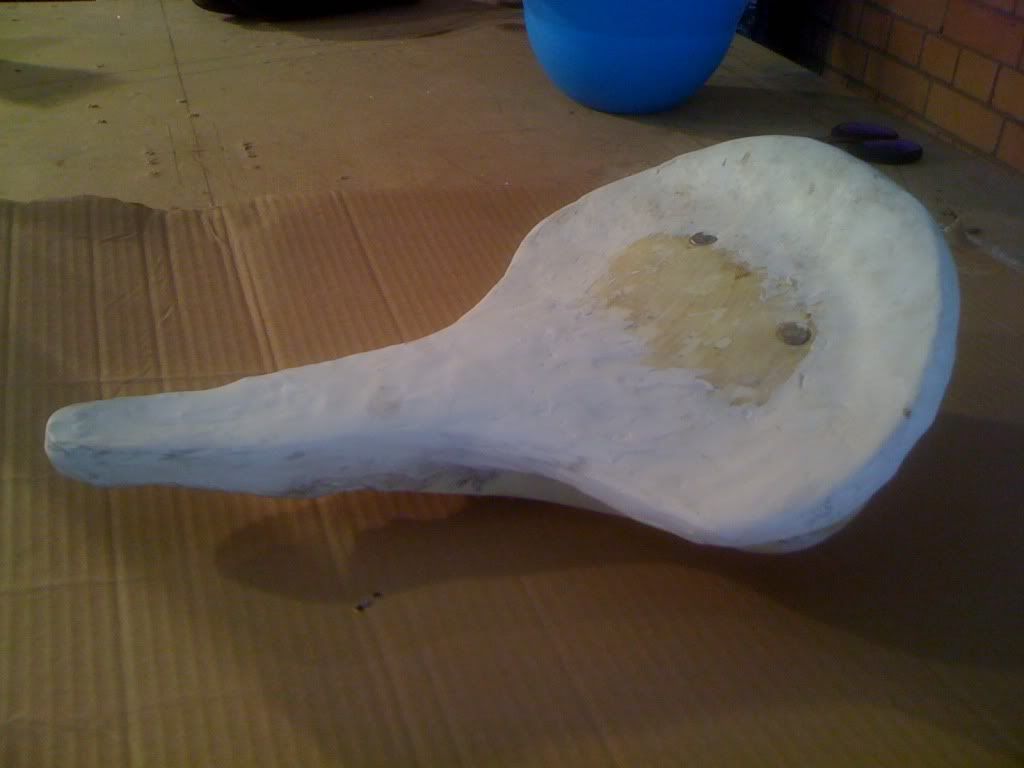
Next up I created a negative mould of the saddle by using plaster bandage. A great idea from my girlfriend. Next step...fiberglass.
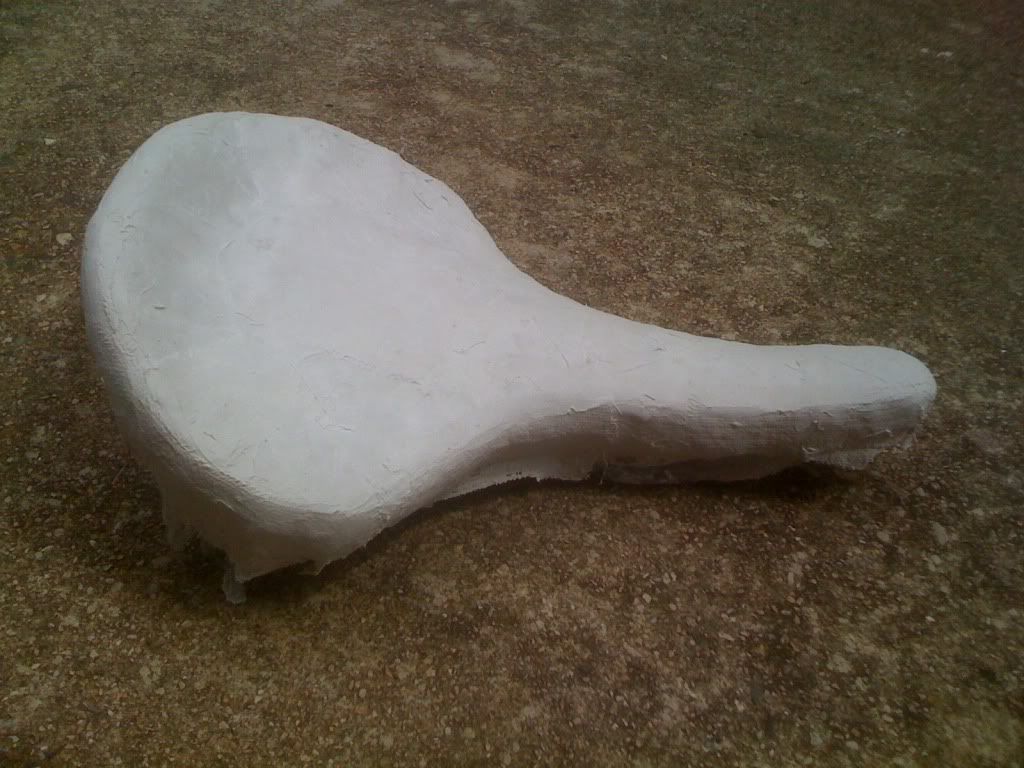
Thanks to my Dad for helping me out with the fiberglass, was great having another set of hands. I saw a guy on youtube use car wax as a release agent for the mould but we were fresh out so I made a quick run down to the shops and got something similar enough.... cooking copha. It worked a treat and the fiberglass came out of the mould no bother.
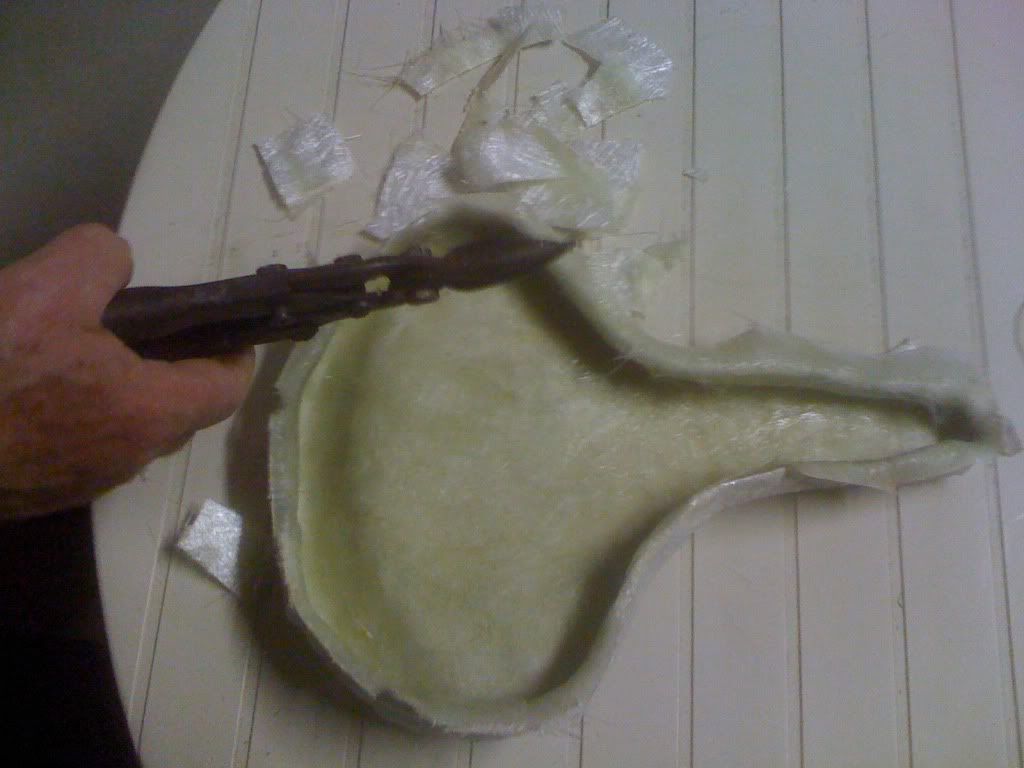
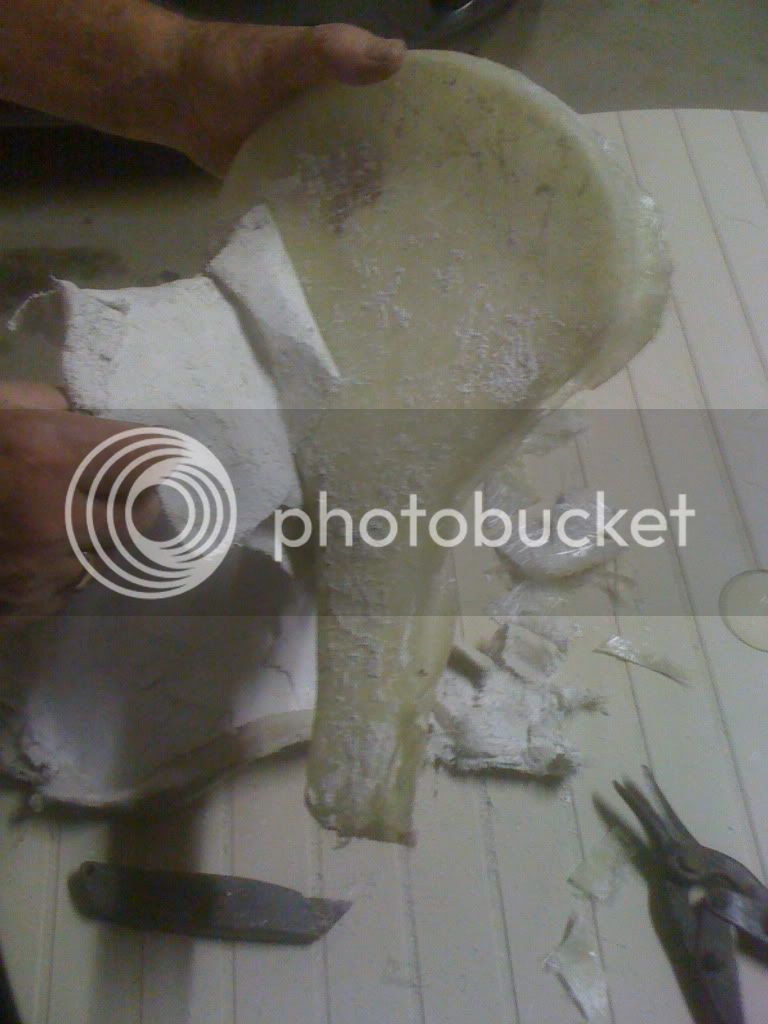
Up to three layers on there at the moment.
I have also been working on cleaning up my old pedals and there starting to look nice
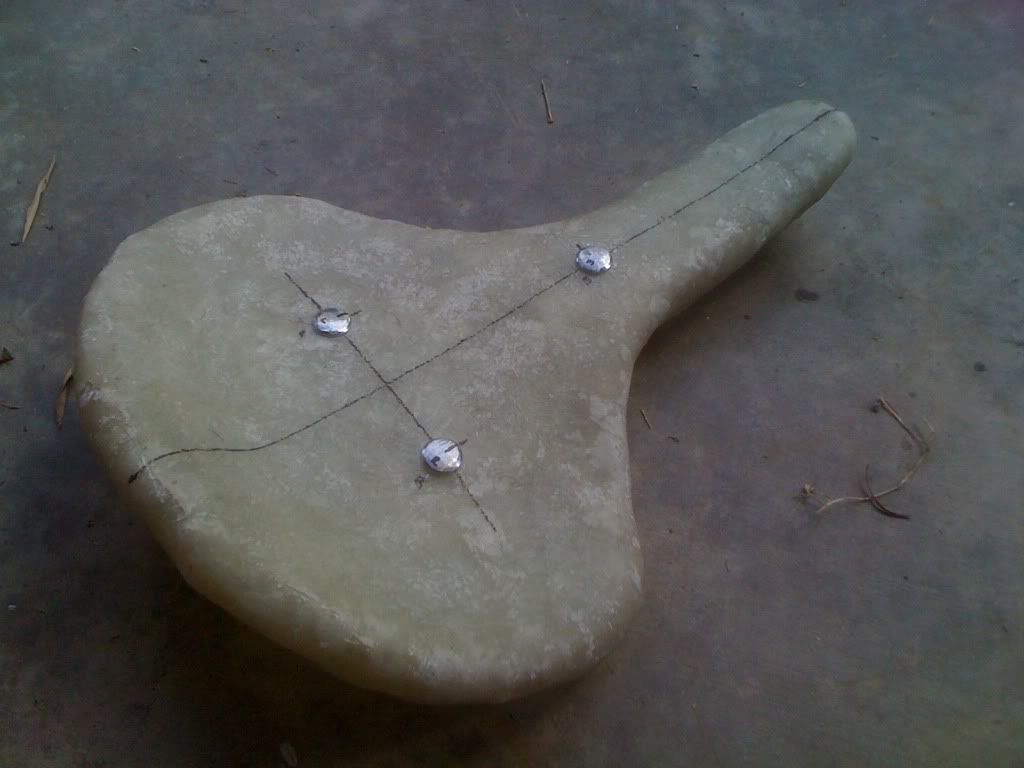
The saddle is coming along a bit more. The mounting bolts are all drilled up and I shimmed them up on the inside of the saddle with the aluminium I removed to make my shaft collars. I knew I should keep them for something.
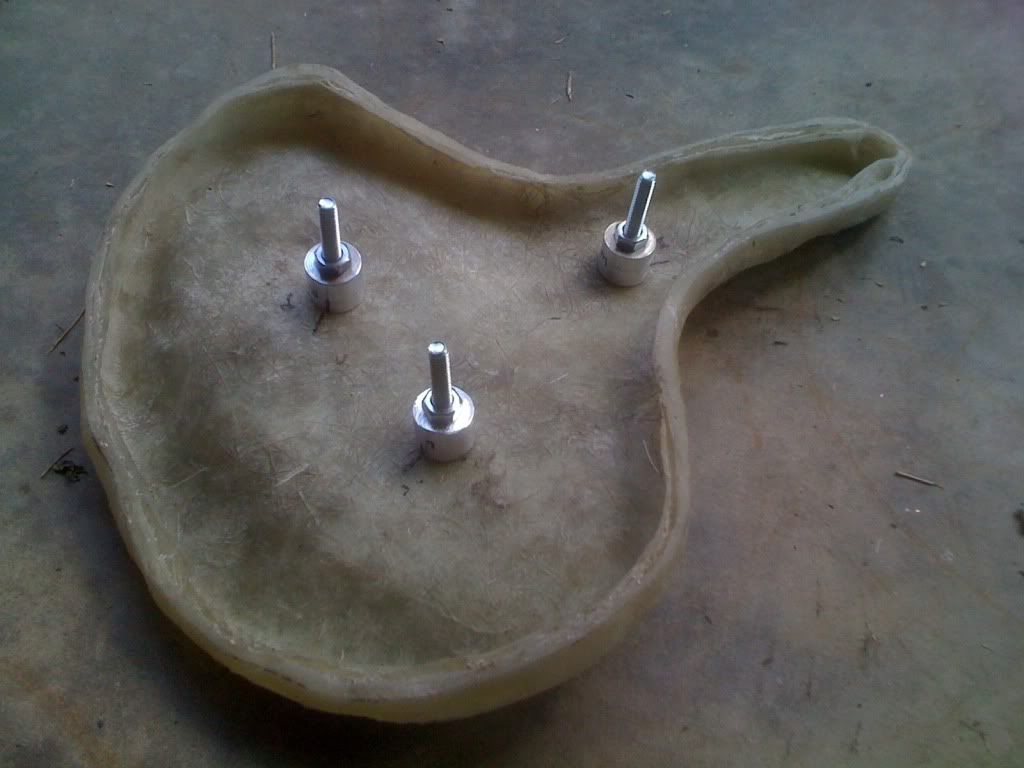
Next up I filled the inside of the saddle with expandable foam, messy stuff that, so I tried containing it with cling wrap.
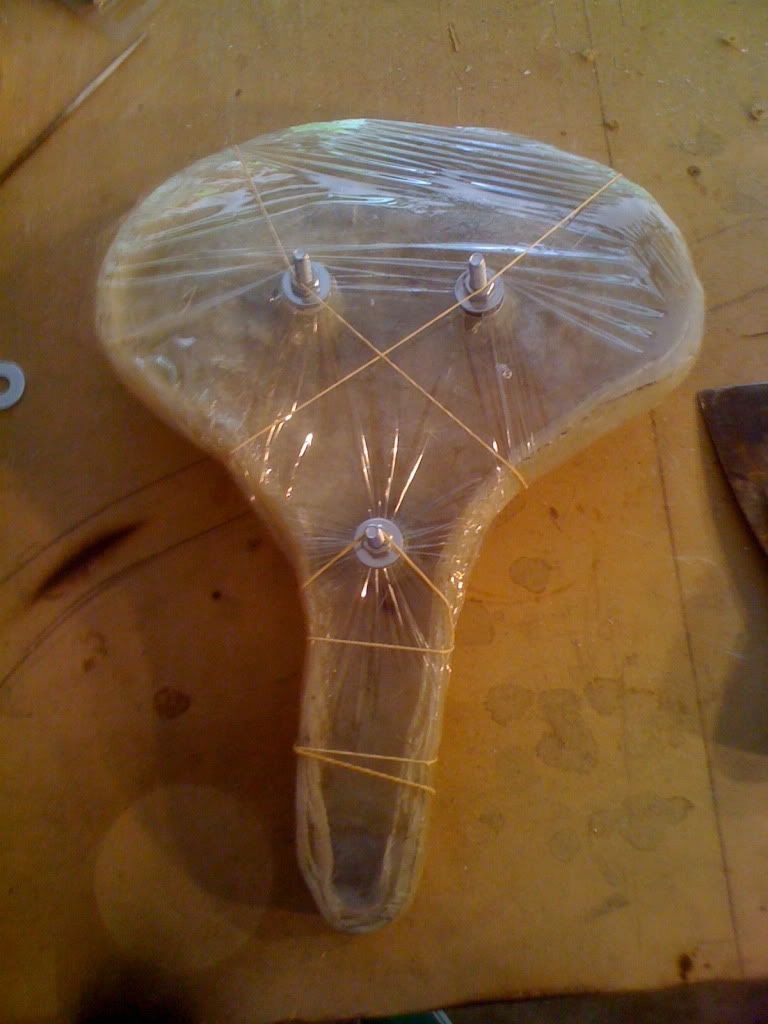
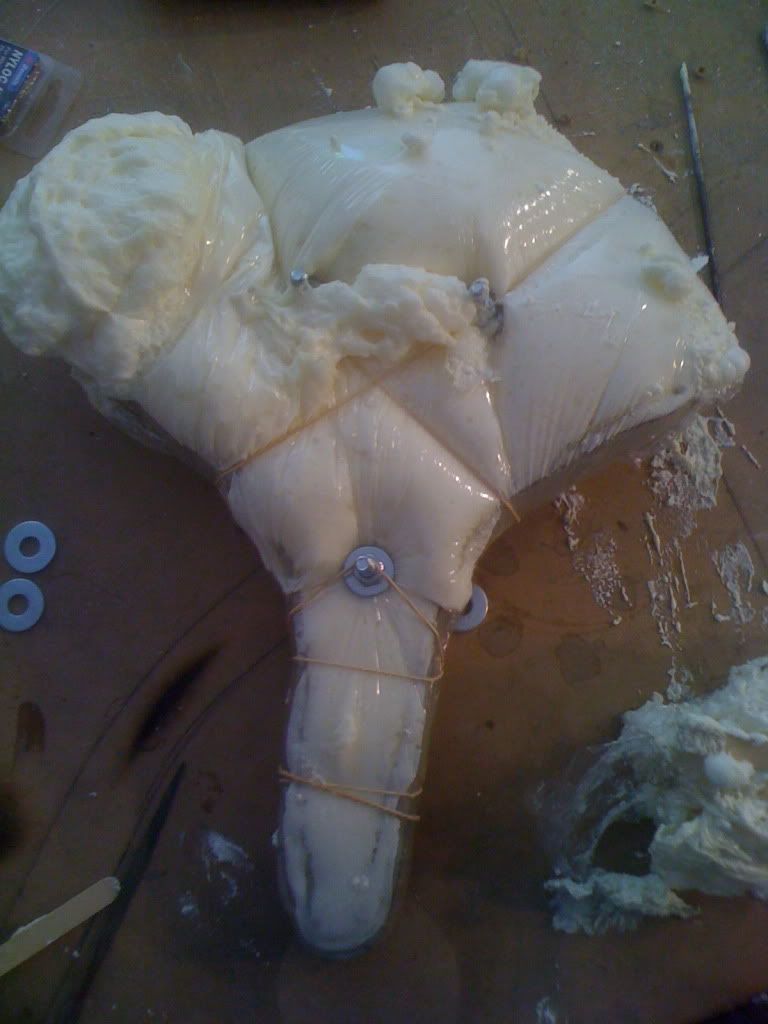
After it had cured I carved and sanded it back until it was all nice and level.
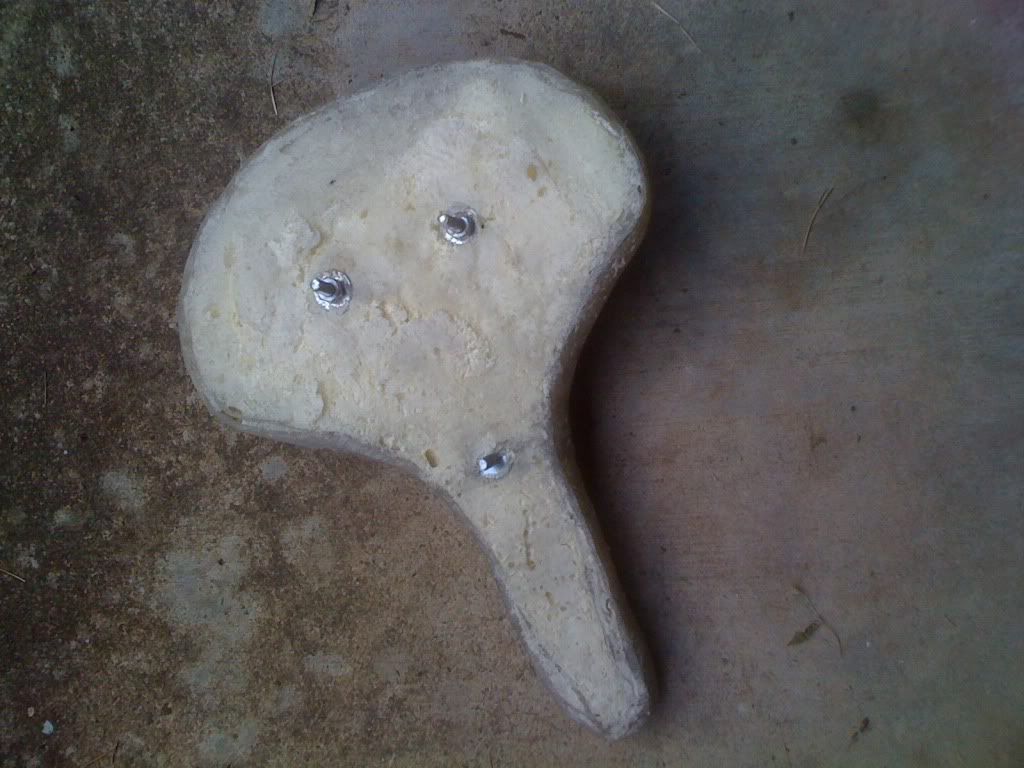
Now its time to run a few layers of fiberglass on the bottom.
I went to a foam/rubber store on the weekend to try and get something similar to what was on the seat I have been working from but I had no luck. There was nothing suitable, they were either to firm or to compressible. Does anyone know what type of foam is best for a seat???
So far this weekend I have brazed an adapter plate to my seat post which my saddle will bolt to.
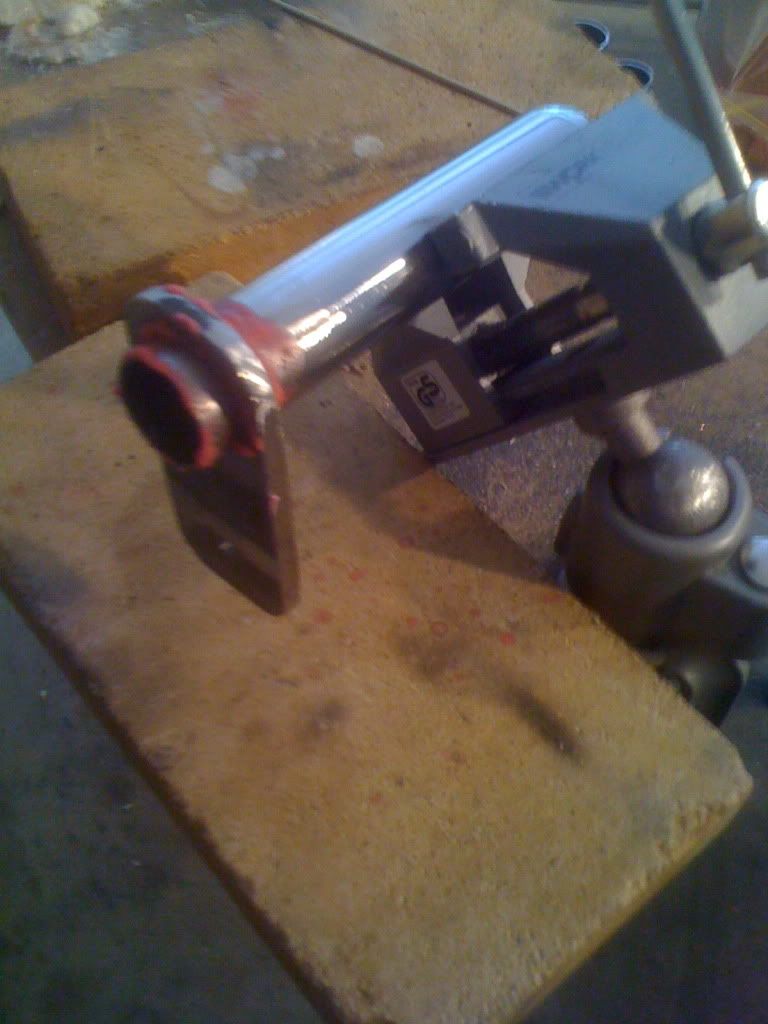
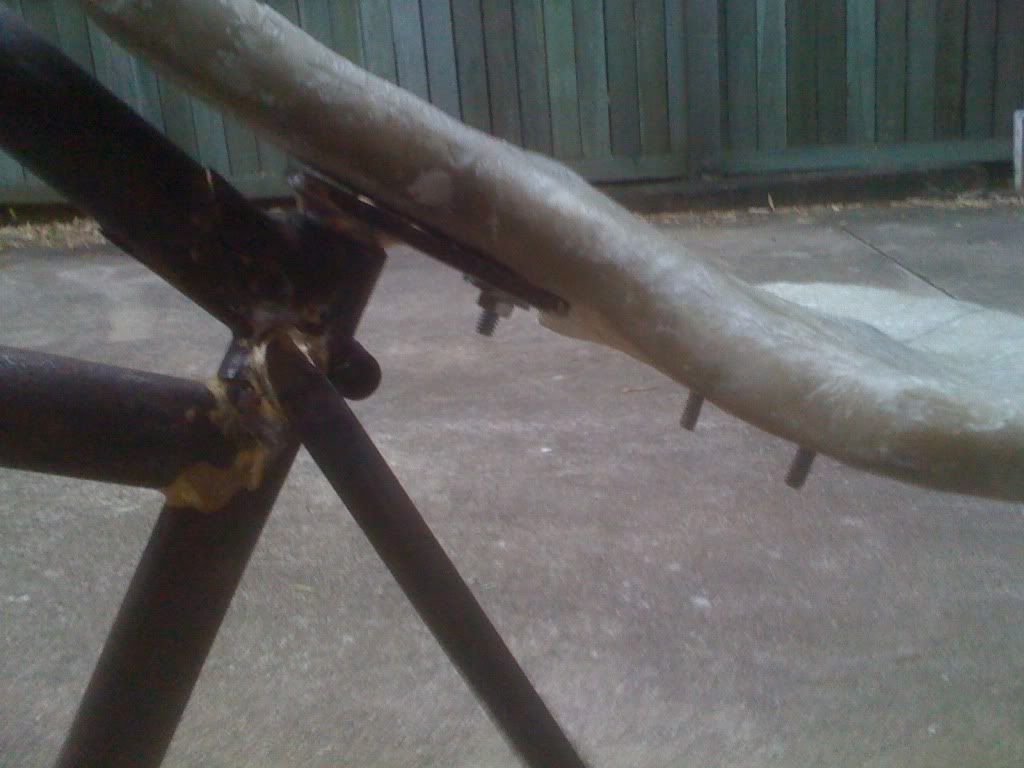
Doing a trial fit of the saddle, now to make up the back seat stays.
I finished up cleaning my dual shaft collars, shimmed them up and my handlebars are now complete.
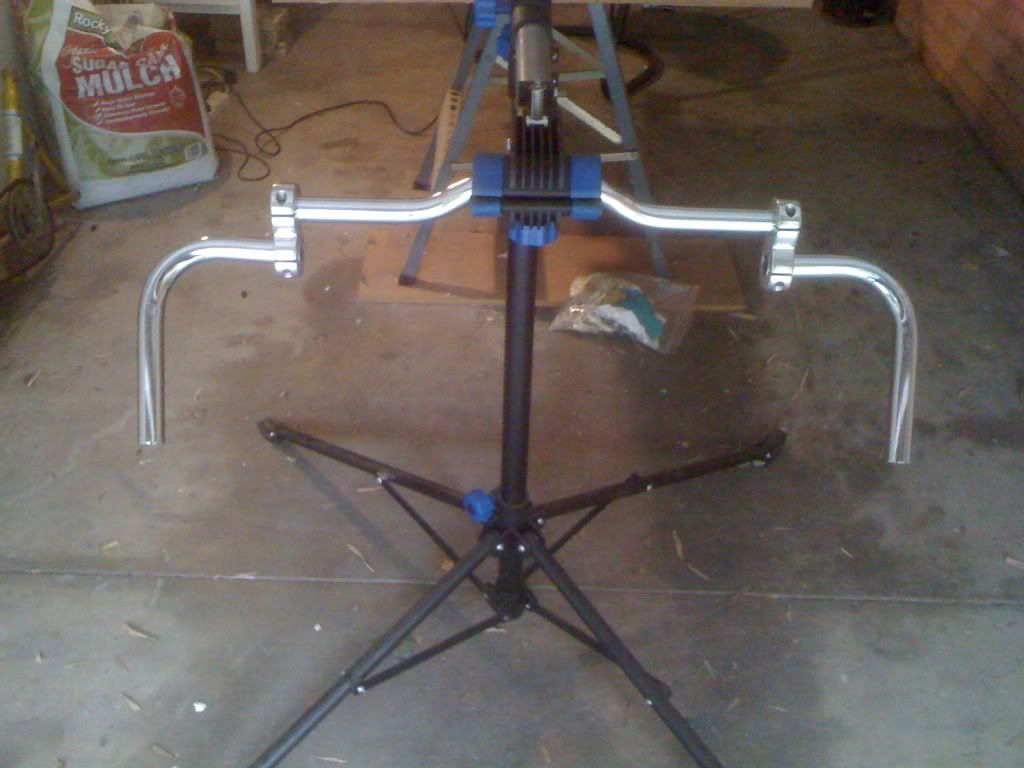
Trial fitting the handlebars with the frame
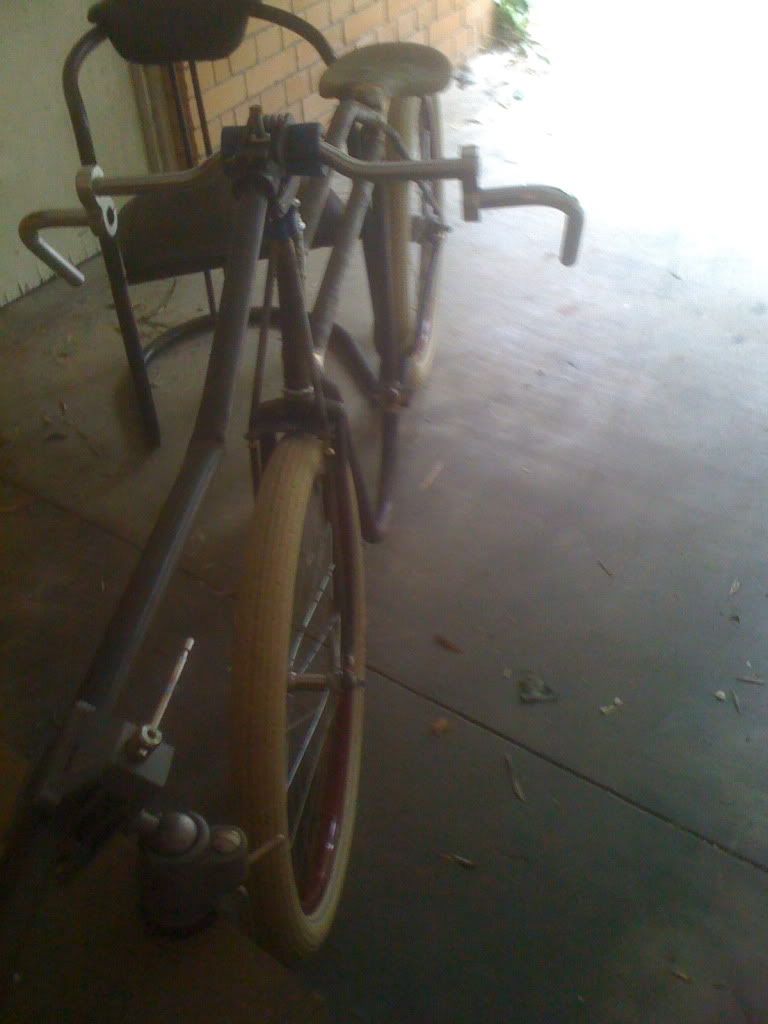
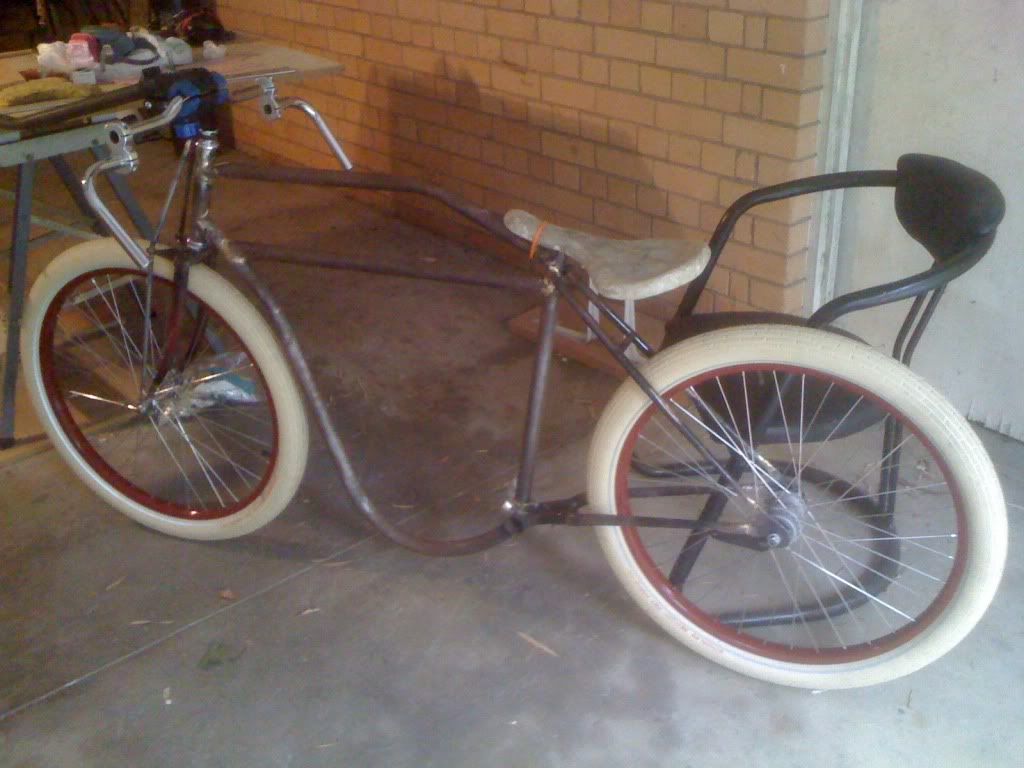
I have been struggling to find a quill stem close to the kind I need, all of the ones I have seen have either had an upward or downward angle. The Indian always had a stem which was at 90 degrees so I had had my heart set on finding one similar. I went off to a bicycle scrap yard and pulled this stem off an old huffy bike. I was delighted with the shape of it and it wasn't too corroded, should clean up nicely.
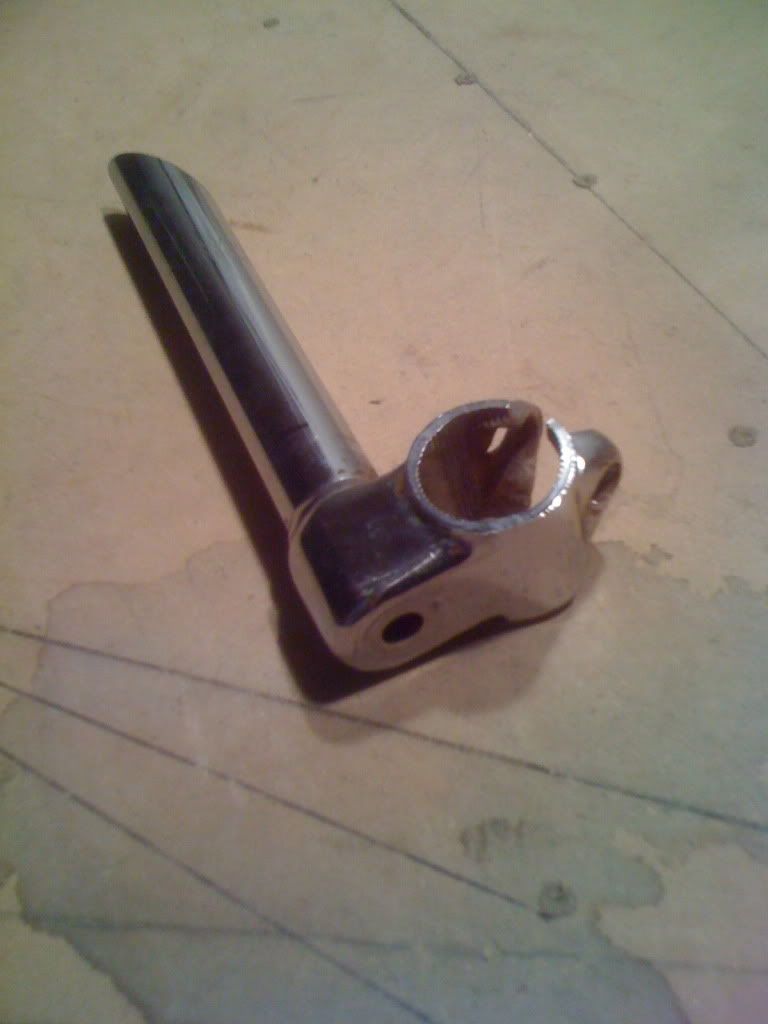
I ran into a problem as soon as I got it home. The stem diameter is 22mm and won't fit inside my steerer tube which is just over 20mm inside diameter.
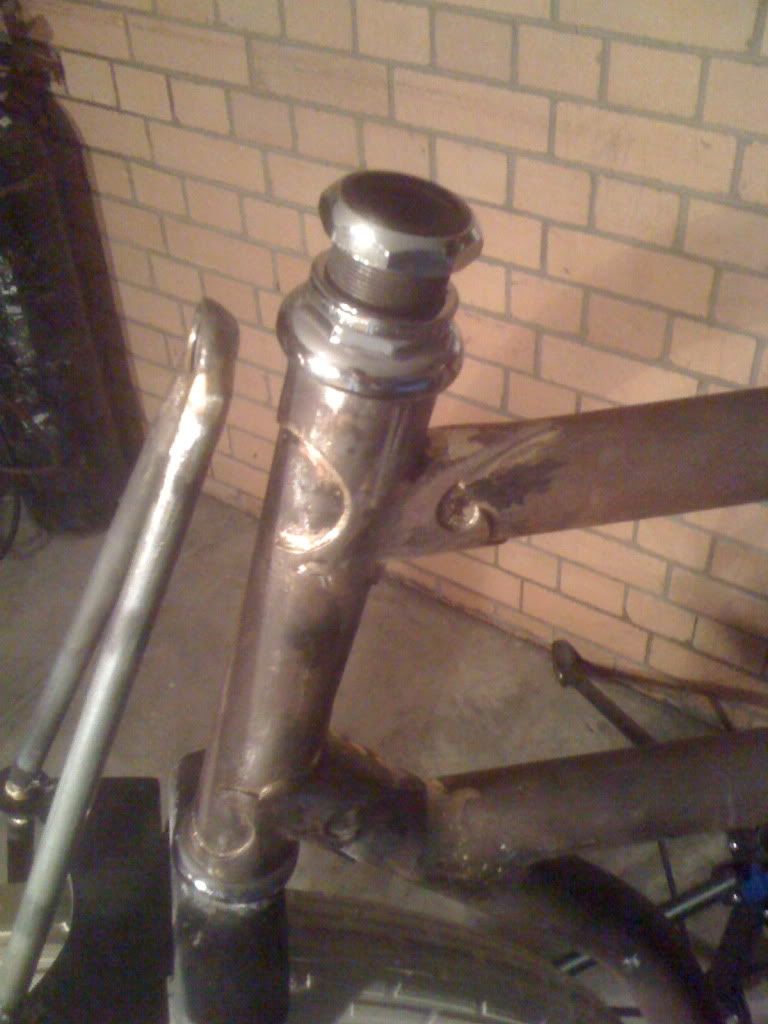
Looks like I am going to have to grid 1mm from the stem for it to work.
I needed some steel strap to make up my back seat stay and I found some in an old clothes hoist laying around the house. I took the hacksaw to it and then bent it up. Here is is.
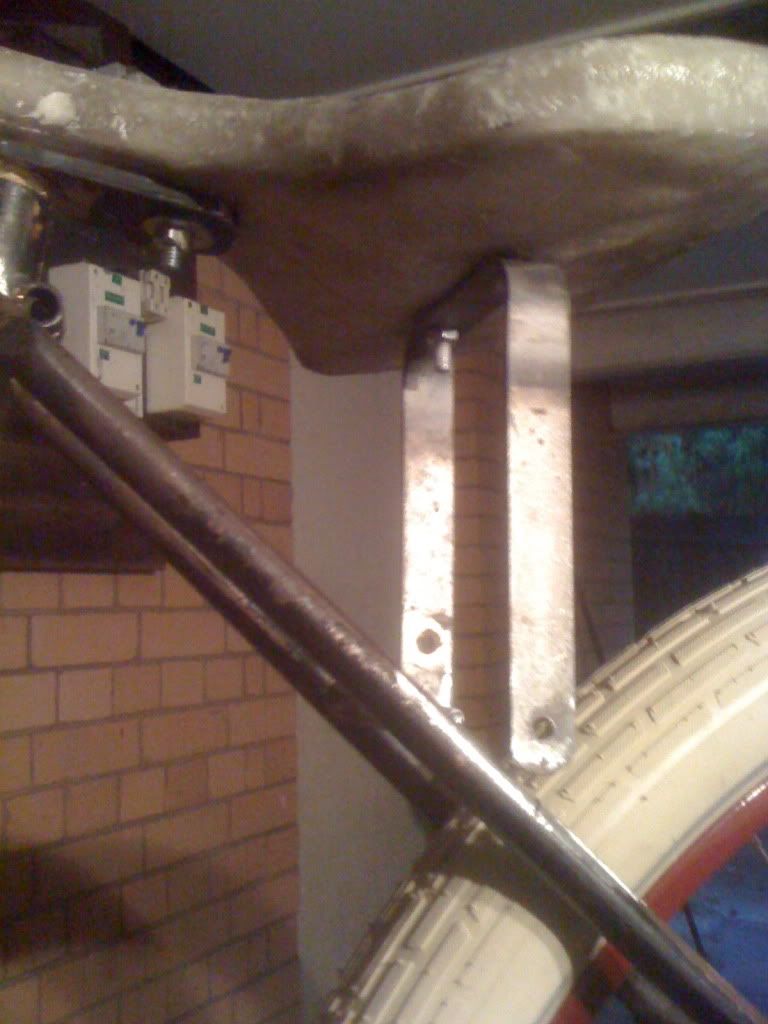
And after brazing up some attach points.
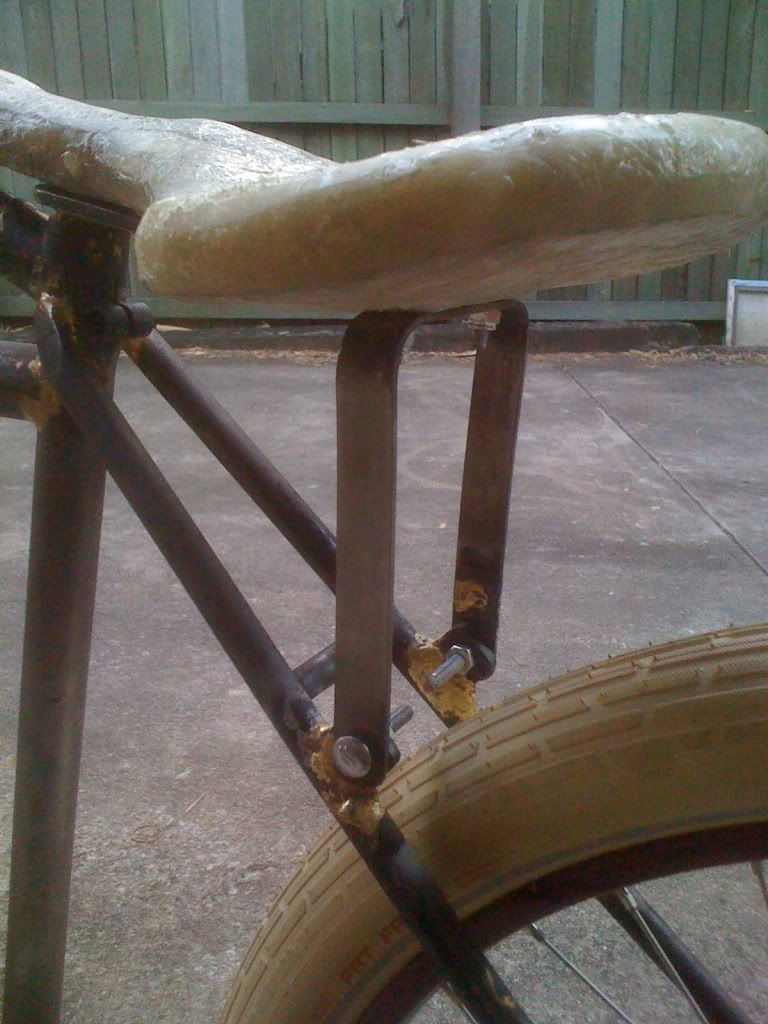
I finally got to have my first sit on the bike. Felt pretty comfortable and I couldn't help but have a small roll down the driveway, would have loved to have gone further but its a little difficult without being able to attach my handlebars at the minute.
Still struggling to find the correct quill stem, but one of the local bike shops is searching for me, fingers crossed.
Have just started work on the tank. First up made a net of the top and bottom of the tank and then transposed it onto some sheet steel. Drilled up the holes for the frame clamps and now ready to guillotine the excess at work.
Here are some shots of the beginning of the tank.
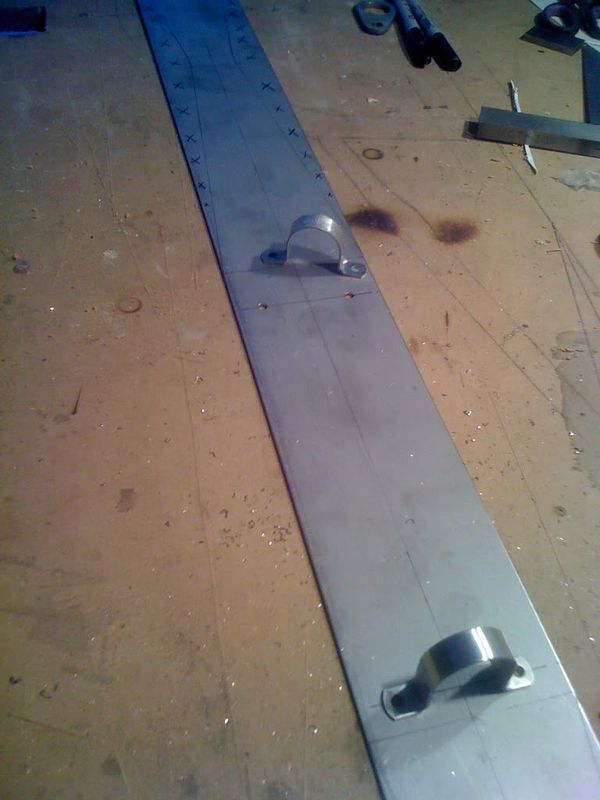
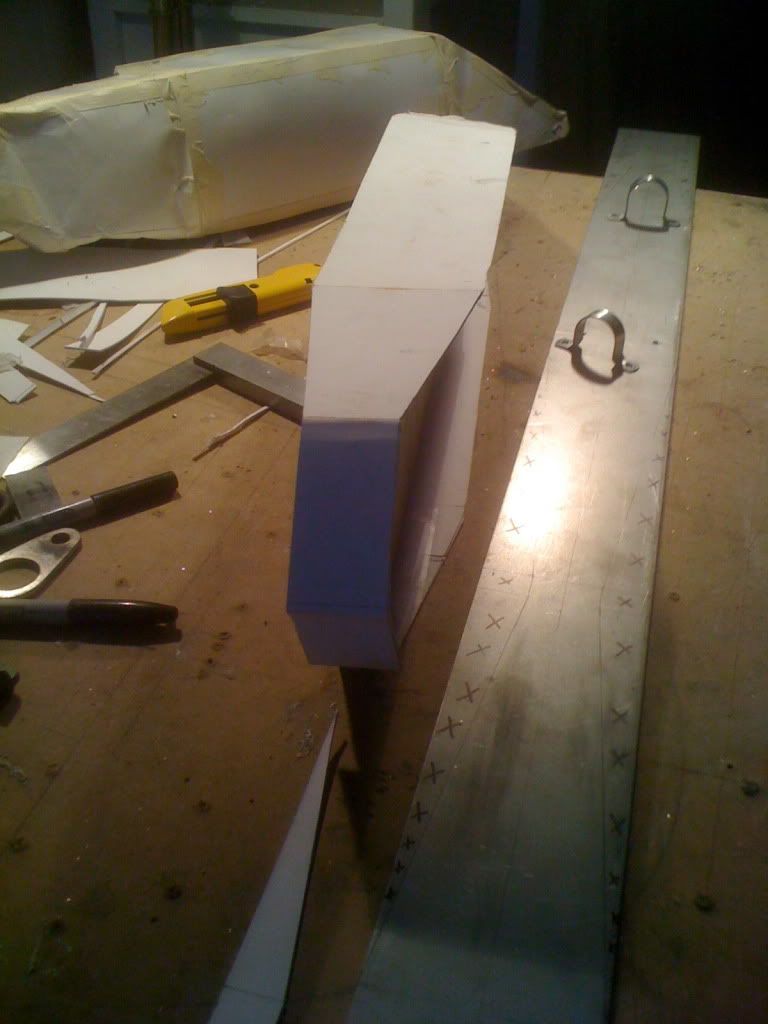
Well I trimmed up the excess on the steel sheet for the top and bottom of the tank. I made a visit to the local steel shop and had them cut some large diameter piping down the guts to give me the sides to the middle of the tank. I had to spread the metal slightly to get the correct size. One sides done and will sort the other side tomorrow and then braze it all up.
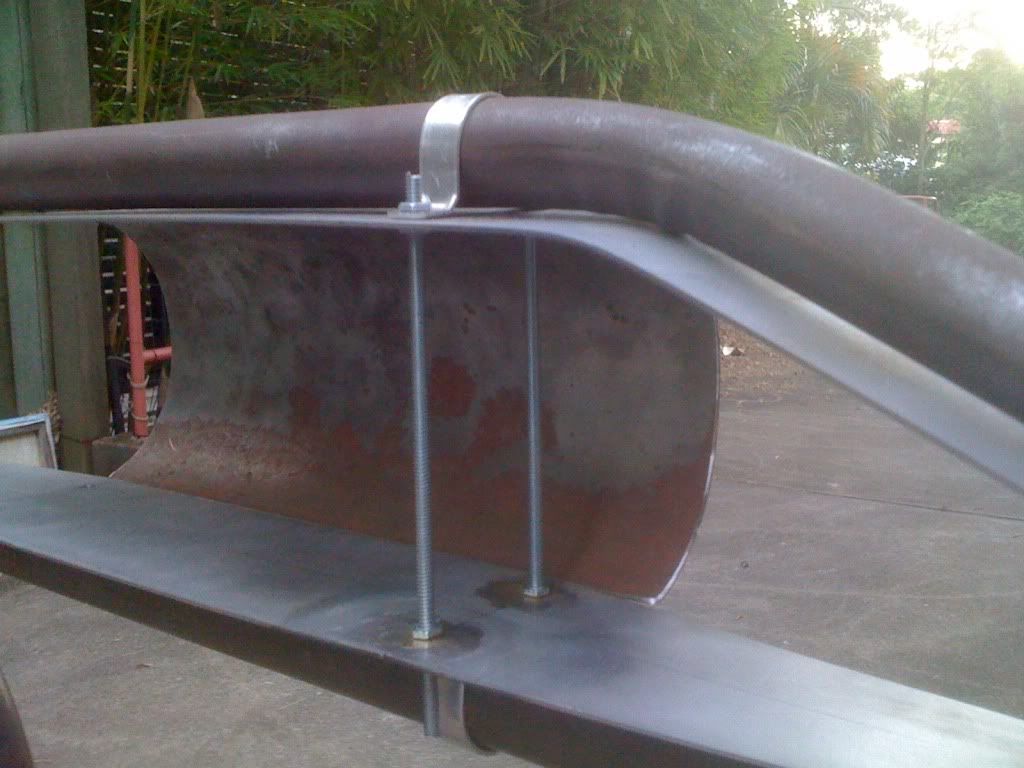
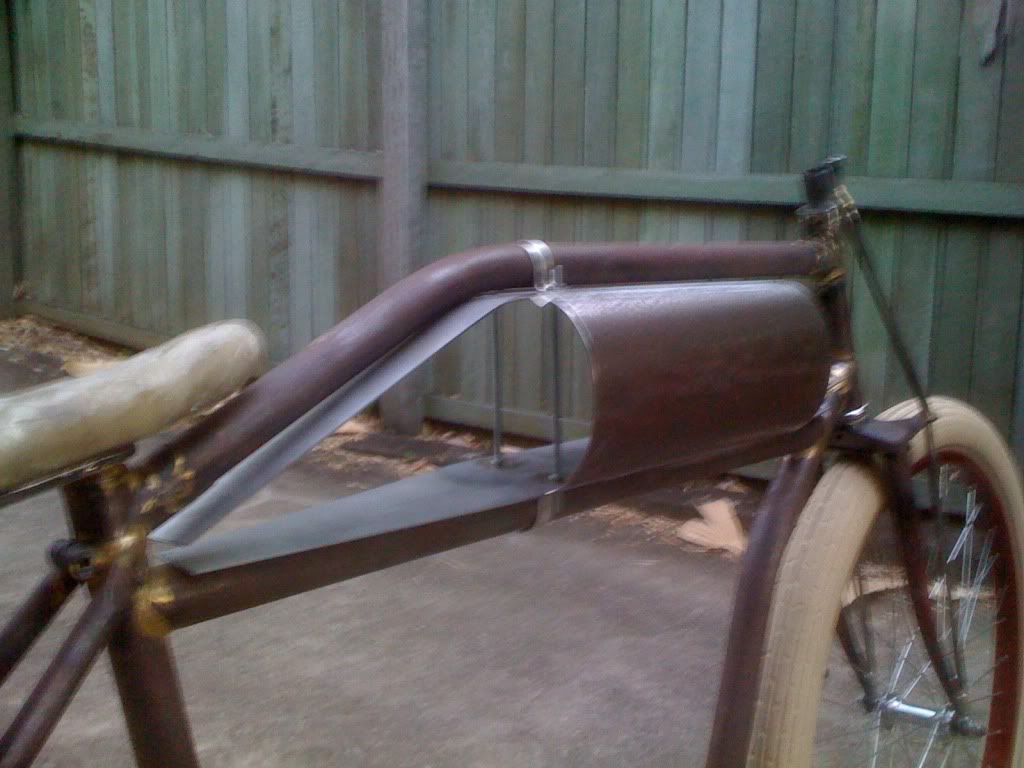
Couldn't help myself and tried the decal on to see what it might look like.
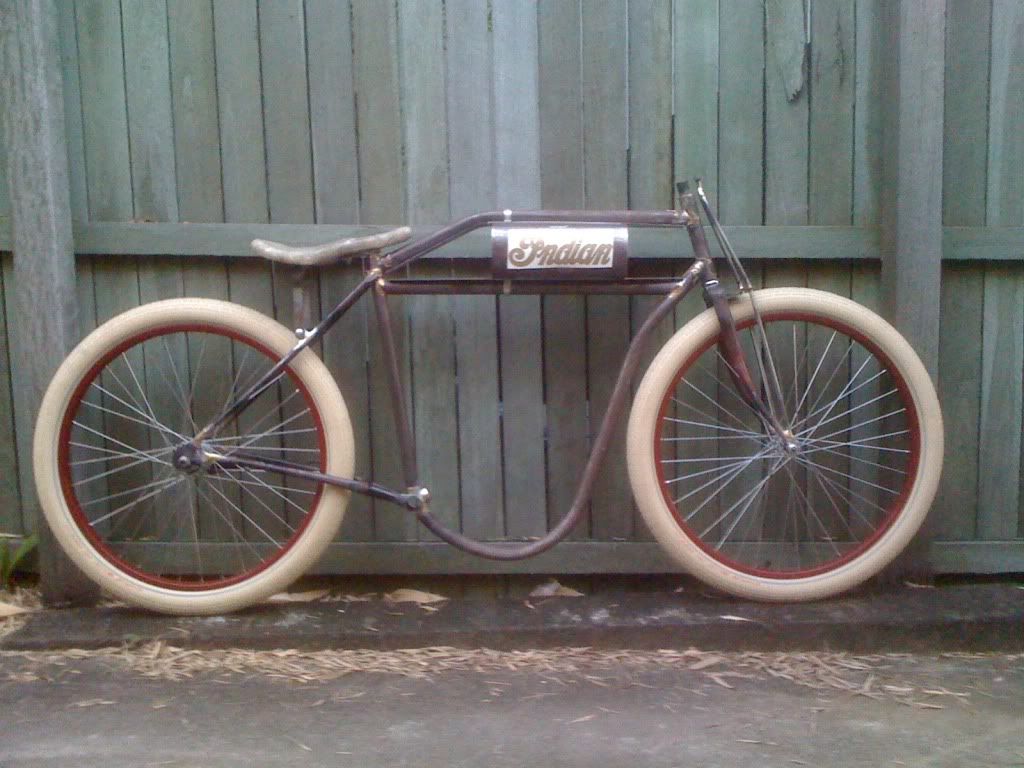
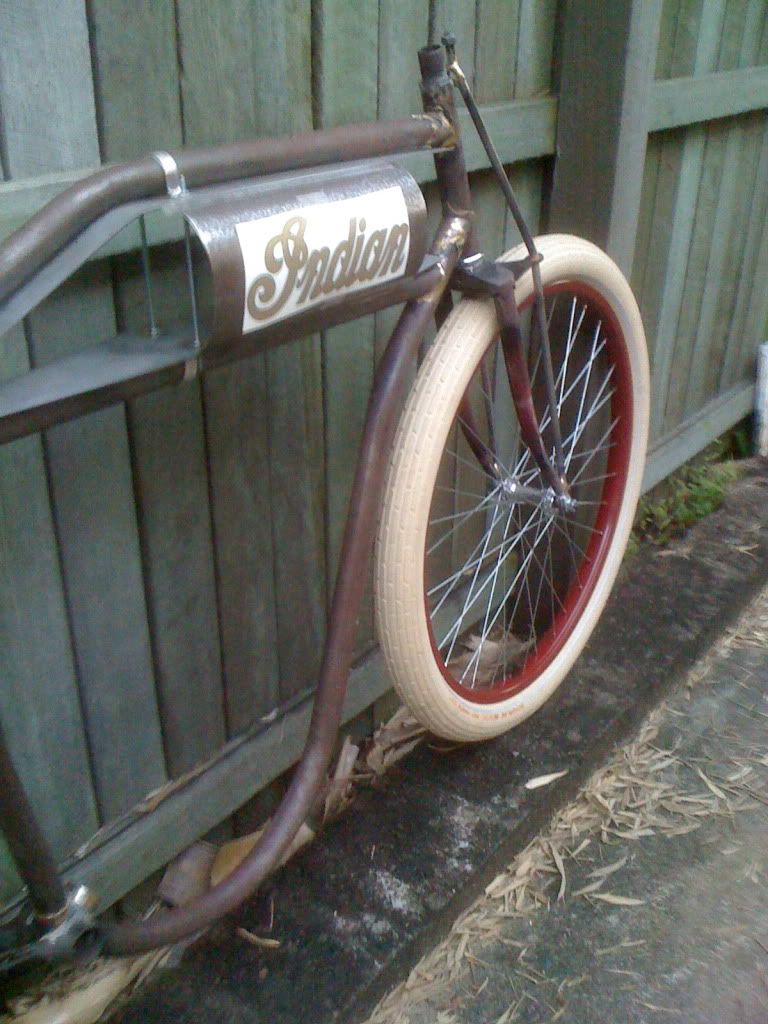
So far, so good but I think the front and back sides are going to be a challenge.
The middle sides of the tank have been brazed on and I spent some of the weekend bashing away some sheet to create the forward and back sides. The challenge was to have the forward and back sides taper from a curved surface down to a flat surface but after some gentle persuasion with my mallet. An anvil or an english wheel would have been perfect to work the metal against but I made do with some large steel tubing.
One side done and ready to weld.
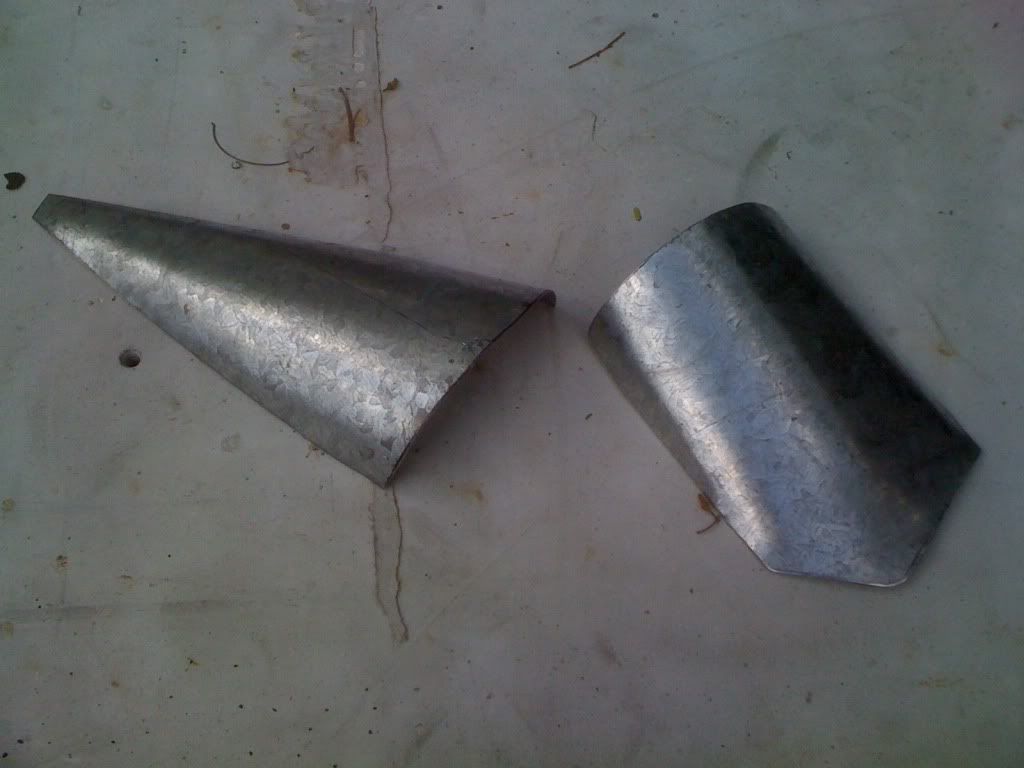
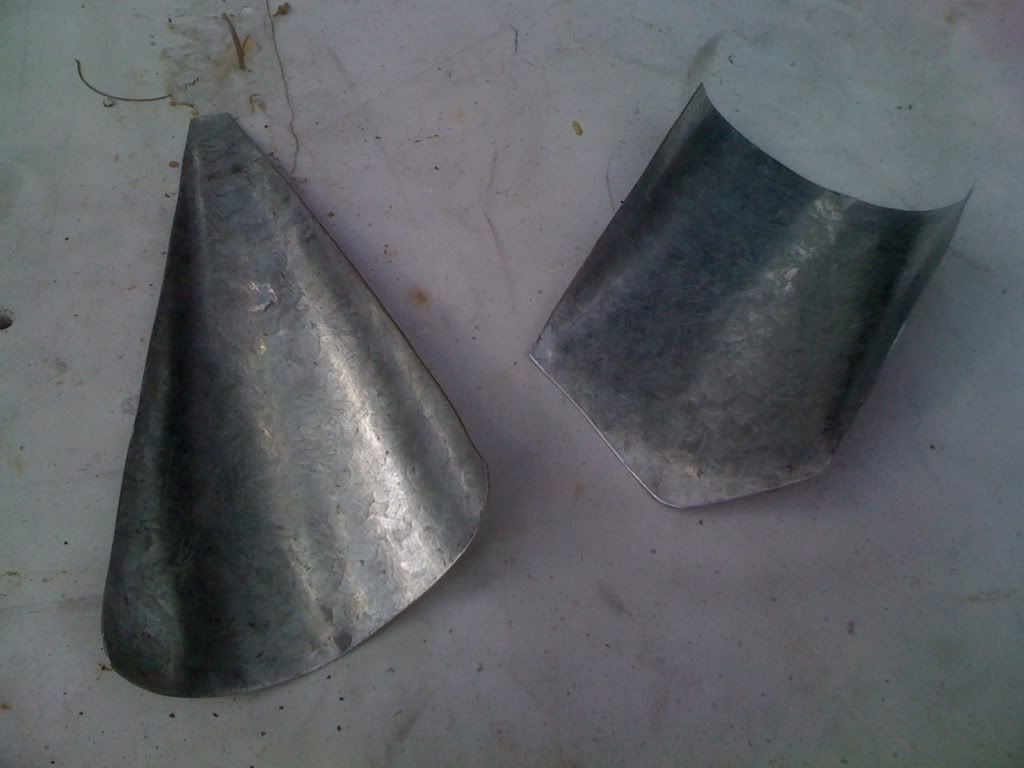
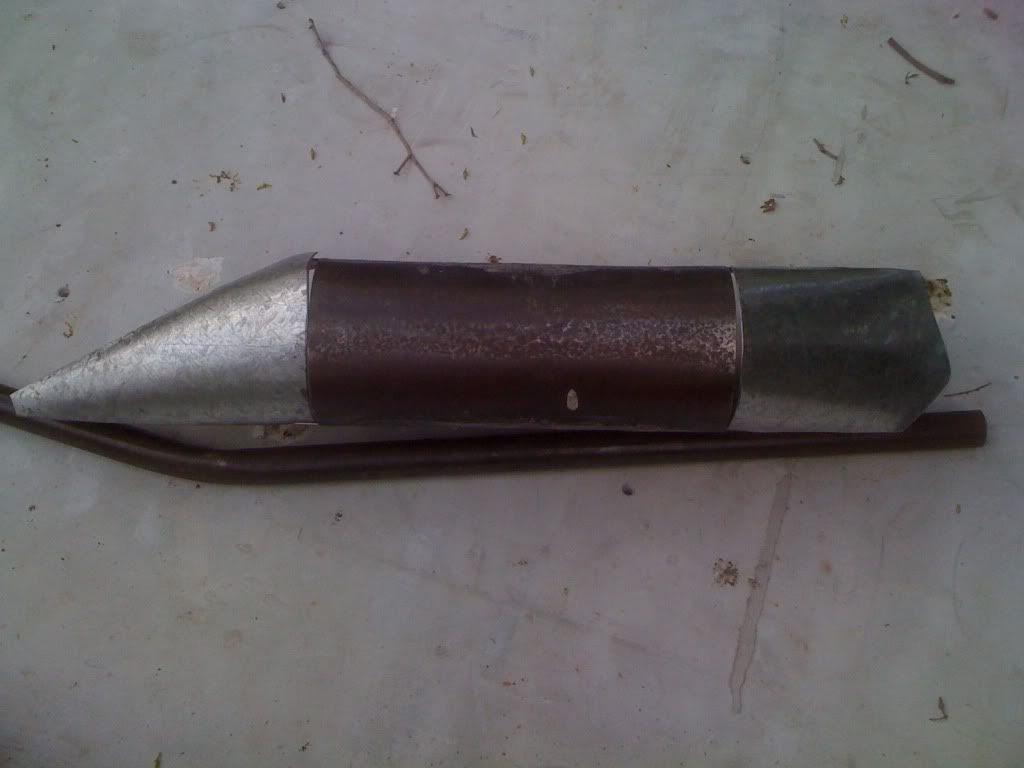
Now to do it all again for the other side.


