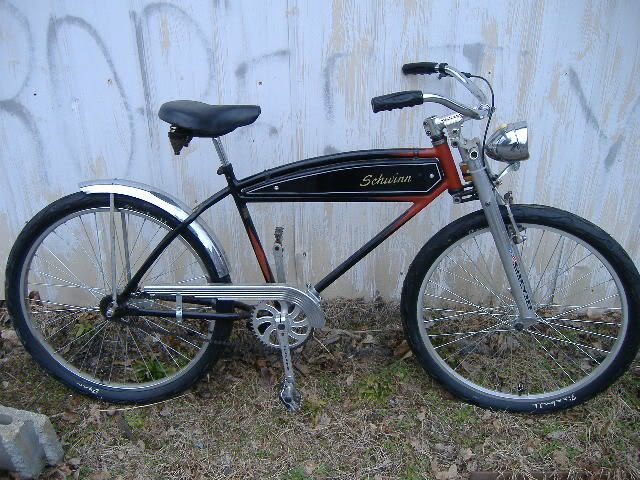
Working in the automotive business, this is the way I learned to package new parts. Of course, now days the parts go right from CAD to rapid prototype. This is the old school method along with wooden mock-ups. First, you need a accurate drawing of the surrounding area, which in this case is the bike frame. Next you need to draw your part (tank) in side view and plan view (top view).
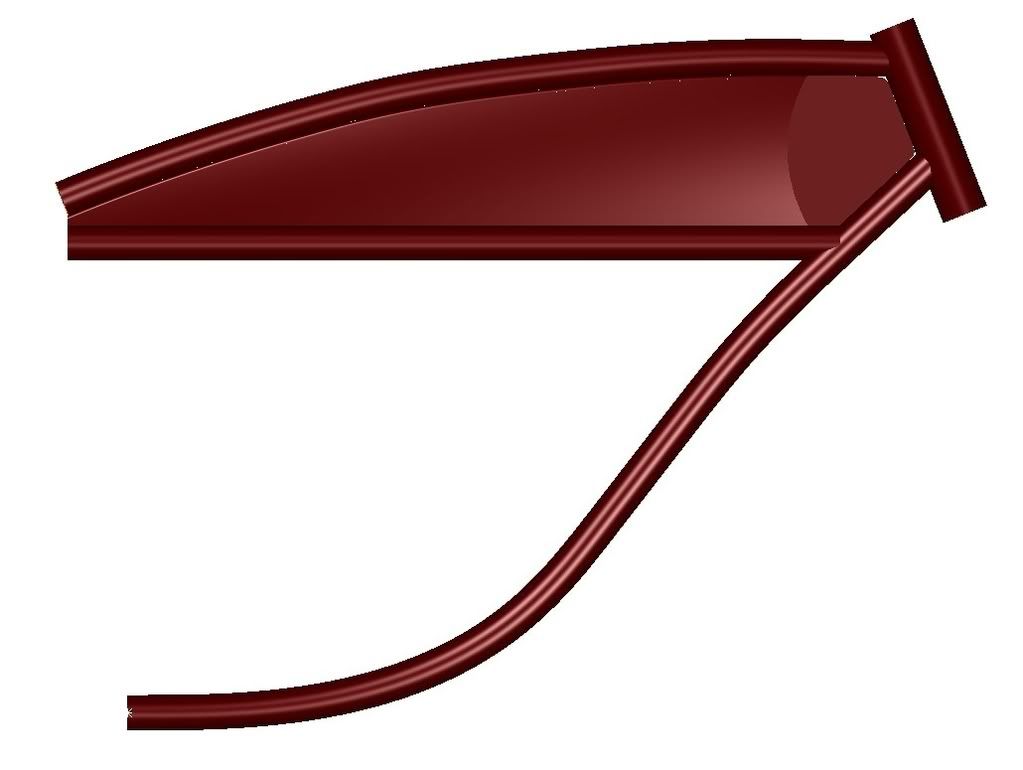
Next you need to decide what a typical section through the tank will look like. Draw this section within the dimensions of your side view and plan view. This is much easier if you have access to a CAD program, but it can be done with a pencil, triangle, ruler and a good eye.
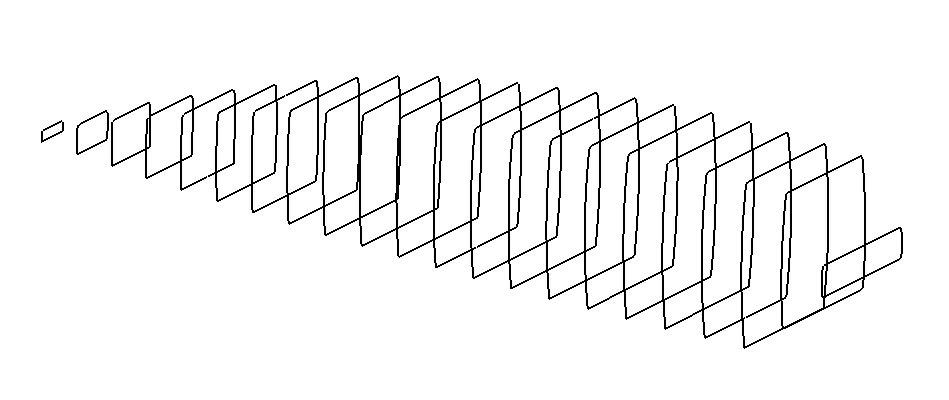
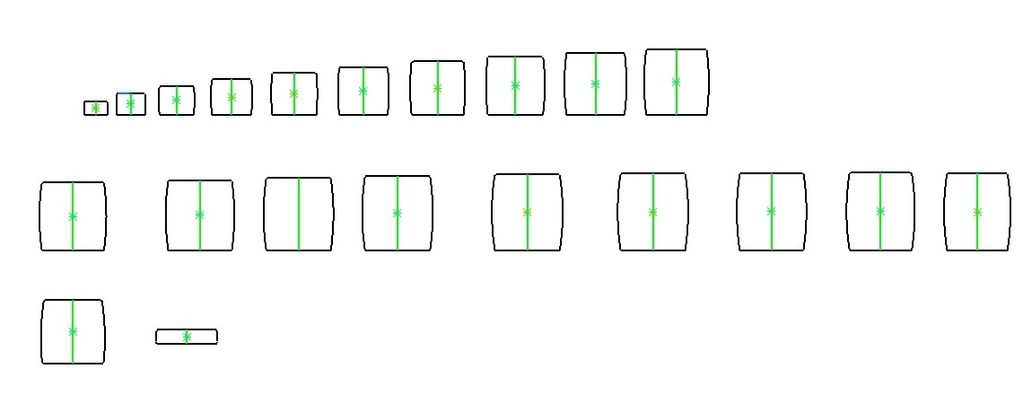
If you are doing this manually, you need to determine how far apart you want your sections to be and start creating boxes that represent the extreme dimension for each section. Now draw the desired section within the confines of each box.
Once you have your sections drawn you can transfer them to a sheet of Foamcore. Foamcore is like two sheets of thin poster board with foam sandwiched in between. This is usually available at your local art supply store. I find that the thinner board is better. While your at the art supply store pick up an Exacto knife and some #11 blades. Now the fun begins!
Cut your side view out of the Foamcore and cut a slot halfway down for each section to slide into.
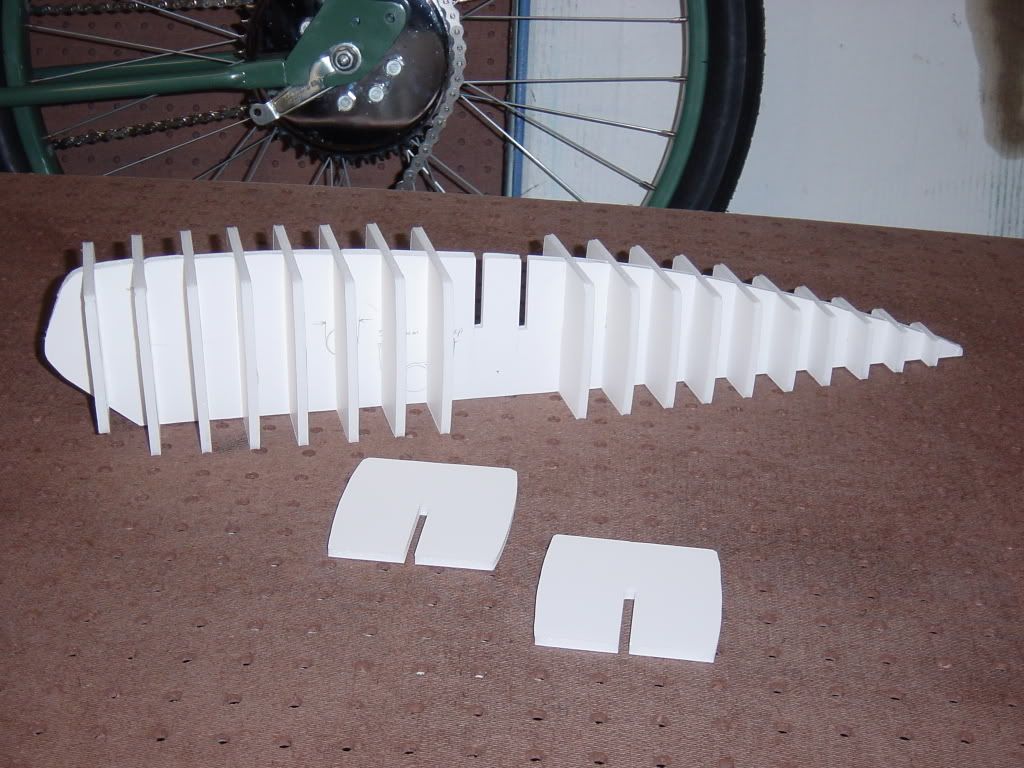
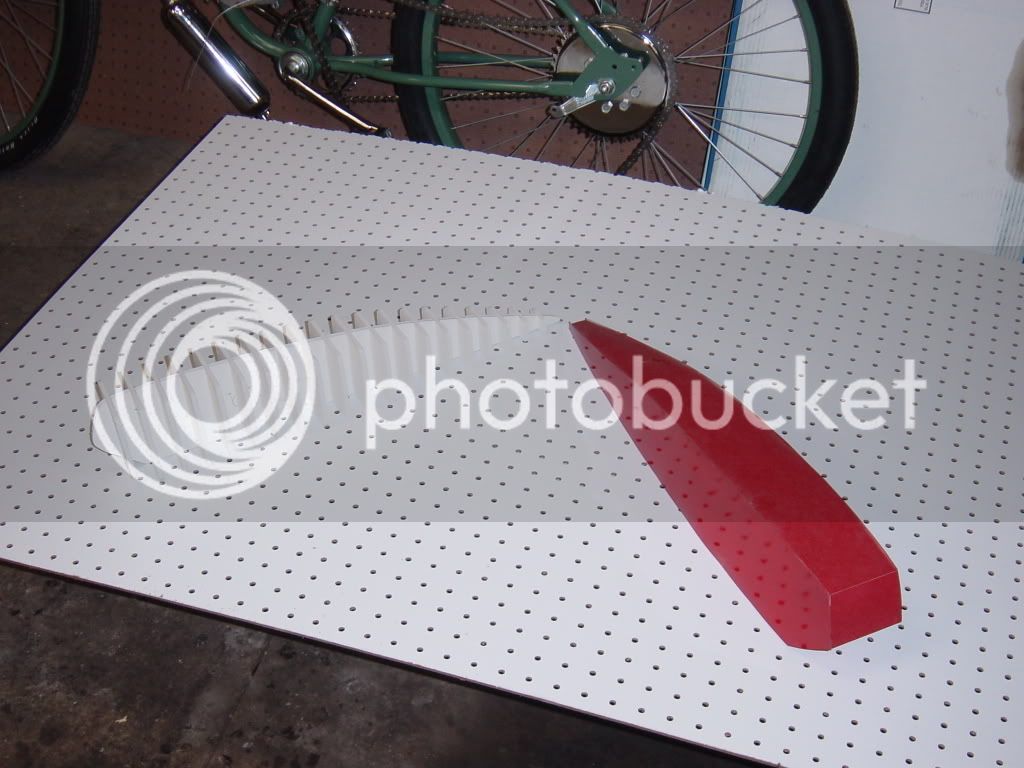
Cut out each section with a slot coming from the opposite direction as on the side view as shown in the picture above. Don't be afraid to use lots of blades I find that they dull quickly and start tearing the Foamcore. Slide them all together and you have your space model.
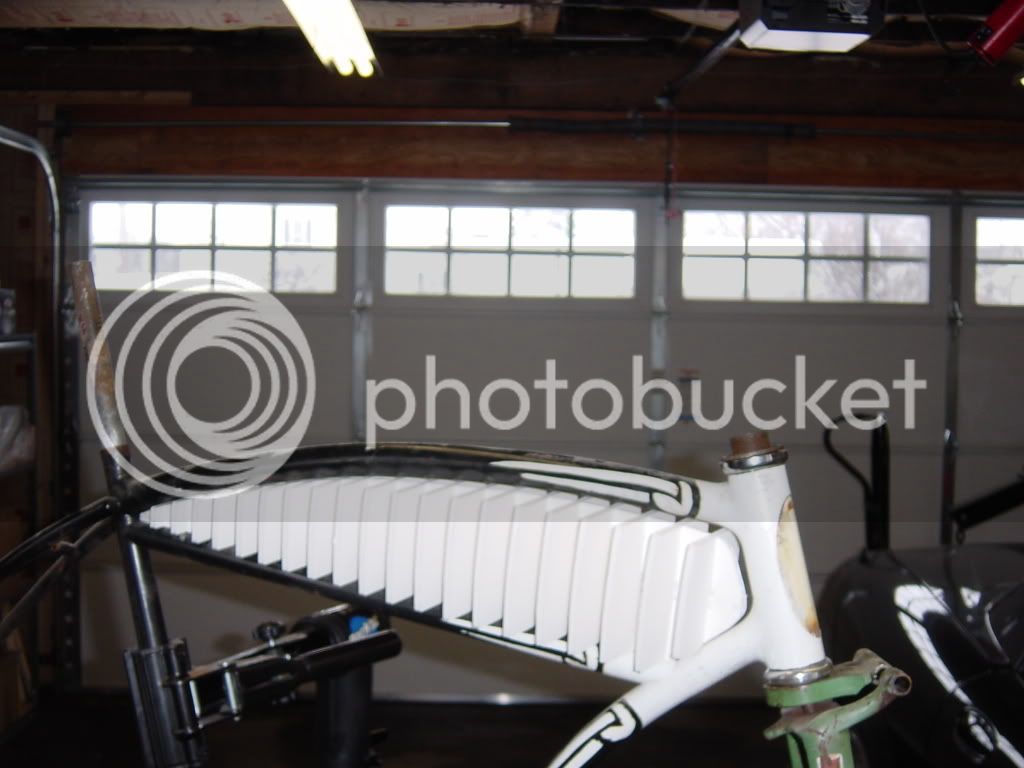
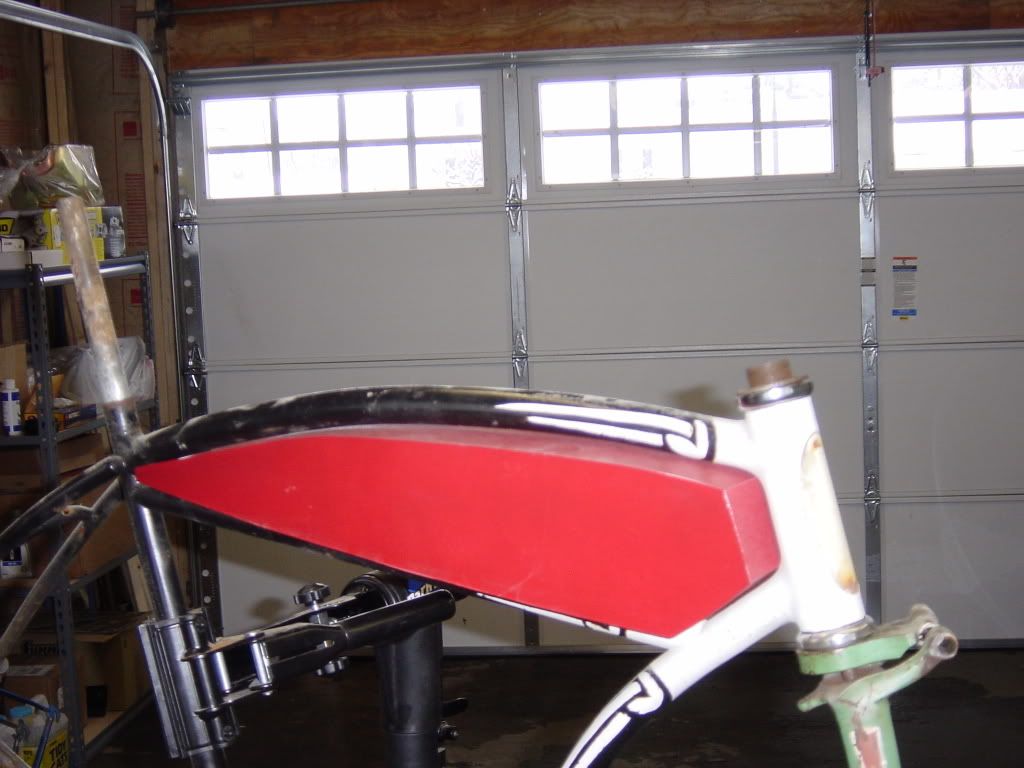
You can now use this to check the look as well as the fit. If you are satisfied you can use your space model to create patterns from. Notice that after I created my models that I went back and added a chamfer on the front of my CAD model (top image) to clear the forks better.
Next you need to decide what a typical section through the tank will look like. Draw this section within the dimensions of your side view and plan view. This is much easier if you have access to a CAD program, but it can be done with a pencil, triangle, ruler and a good eye.
If you are doing this manually, you need to determine how far apart you want your sections to be and start creating boxes that represent the extreme dimension for each section. Now draw the desired section within the confines of each box.
Once you have your sections drawn you can transfer them to a sheet of Foamcore. Foamcore is like two sheets of thin poster board with foam sandwiched in between. This is usually available at your local art supply store. I find that the thinner board is better. While your at the art supply store pick up an Exacto knife and some #11 blades. Now the fun begins!
Cut your side view out of the Foamcore and cut a slot halfway down for each section to slide into.
Cut out each section with a slot coming from the opposite direction as on the side view as shown in the picture above. Don't be afraid to use lots of blades I find that they dull quickly and start tearing the Foamcore. Slide them all together and you have your space model.
You can now use this to check the look as well as the fit. If you are satisfied you can use your space model to create patterns from. Notice that after I created my models that I went back and added a chamfer on the front of my CAD model (top image) to clear the forks better.