The Schwinn Dixie name is killer!!! 
Where else would you get Creamsicles from.
Where else would you get Creamsicles from.


Yeah, that's what I'm thinking on the handlebars, but I can't say I've got any headlights that big at my disposal. I would like to have a headlight on this bike, though. Thanks!Some dropped and pulled back bars, along with a big ol tractor headlight in the front would look good.
Full fenders was def a solid move!


Look for vintage tractor head lights on ebay. They are a perfect size for our rat bike builds. I've used them extensively on my builds, including RaTs GaSs from last year. Tractor light with application of Stained Glass spray paint to make the clear lens yellow.Yeah, that's what I'm thinking on the handlebars, but I can't say I've got any headlights that big at my disposal. I would like to have a headlight on this bike, though. Thanks!

It really isn't that bad of a color. It's just not the color for this bike. Looks too much like a bike I might have seen at Walmart. I would love to revisit this color for another bike down the road, though!I don't hate the pink over crust. Very punk. A little bit of graffiti here and there to mess it up, and you'd have some real middle finger attitude
I definitely like the look of the tractor light, now that I see it on yours. Do you know if they make orange stained glass paint? I might want to try that. I don't know if I want to mess with trying to figure out how to mount a tractor light to my bike, but maybe I could get one of those chrome battery-powered headlights and color the lens on that.Look for vintage tractor head lights on ebay. They are a perfect size for our rat bike builds. I've used them extensively on my builds, including RaTs GaSs from last year. Tractor light with application of Stained Glass spray paint to make the clear lens yellow.View attachment 165706


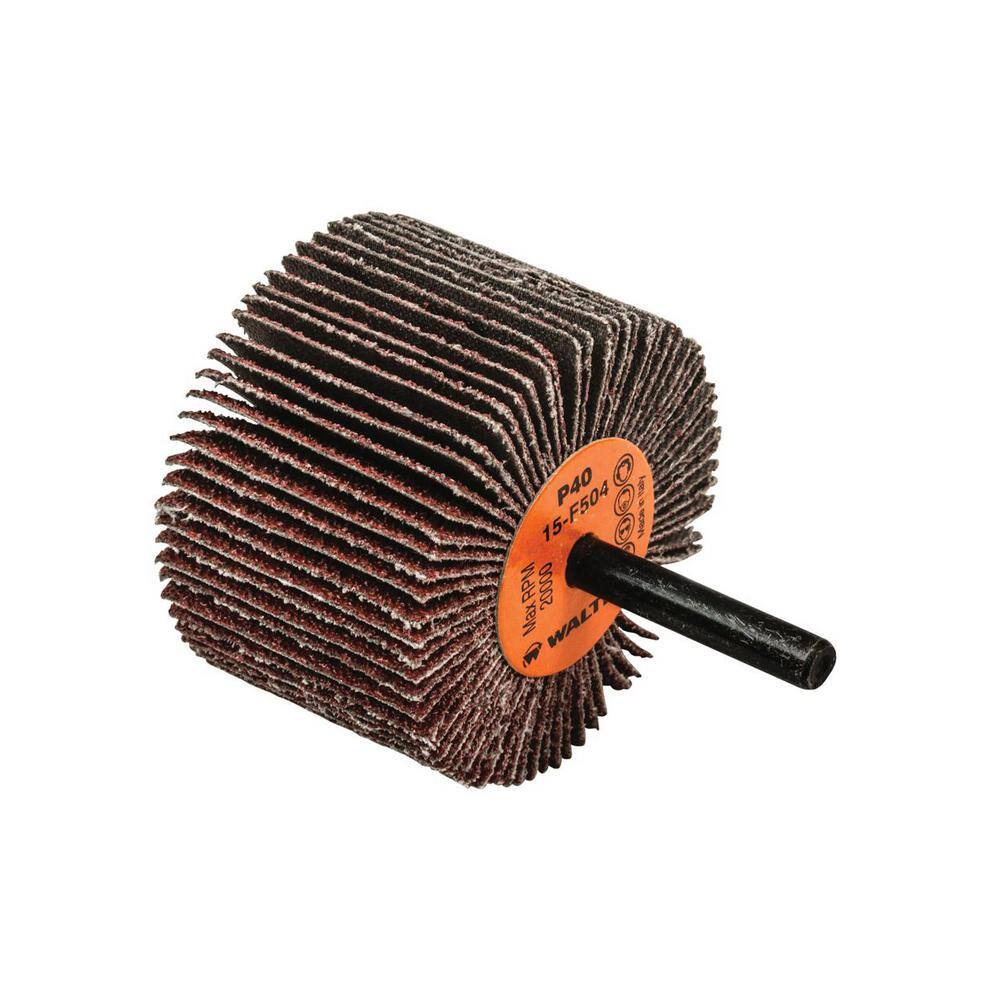
It may just be a build up of crusty metal. I would try a course flap sanding wheel with a drill extension to get deeper down the tube. I have one that I welded a loger rod to it just for seat posts....there are some bumps and imperfections that are in the way. I've got a rat tail filer that I could try using to remove the imperfections, but even then, I'm not sure that will be enough to fix the problem. Anyone have any ideas on how to fix this issue?

Ditto. I have the same setupIt may just be a build up of crusty metal. I would try a course flap sanding wheel with a drill extension to get deeper down the tube. I have one that I welded a loger rod to it just for seat posts.


There's some definite crust going on inside the seat tube. I'm hoping Dad and I can get the new sandblaster end installed so I can blast the seat tube to get a better look inside first. That flap sanding wheel is definitely a good idea! Dad might have one I can use, but if not, I can just buy one and try it out.It may just be a build up of crusty metal. I would try a course flap sanding wheel with a drill extension to get deeper down the tube. I have one that I welded a loger rod to it just for seat posts.

Completely agree.Plenty of grease is always advisable when putting in a seatpost,
i,ve had the same problem several times. sometimes it helps to ¨wriggle¨ (wiggle?) the seatpost in,
pushing it back and forth, side to side, carefully a bit while pushing it in.
Often it is only the top which is too tight.
Be carefull not to damage the top of the seatpost though.
I actually want to use an old layback seat post I've got, but I need an adapter to make it fit. The seat post I want to use is a 5/8" diameter, while the inside of the seat tube, at least up top, is about 13/16" wide. So... how do I know which adapter to get? Are the ones you shared metal, or plastic?If all else fails you could use a smaller size seatpost with an adapter.
View attachment 166075


Enter your email address to join: