Zasada Rides Again

Rat Rod Bikes Bicycle Forum

Help Support Rat Rod Bikes Bicycle Forum:

This site may earn a commission from merchant affiliate links, including eBay, Amazon, and others.
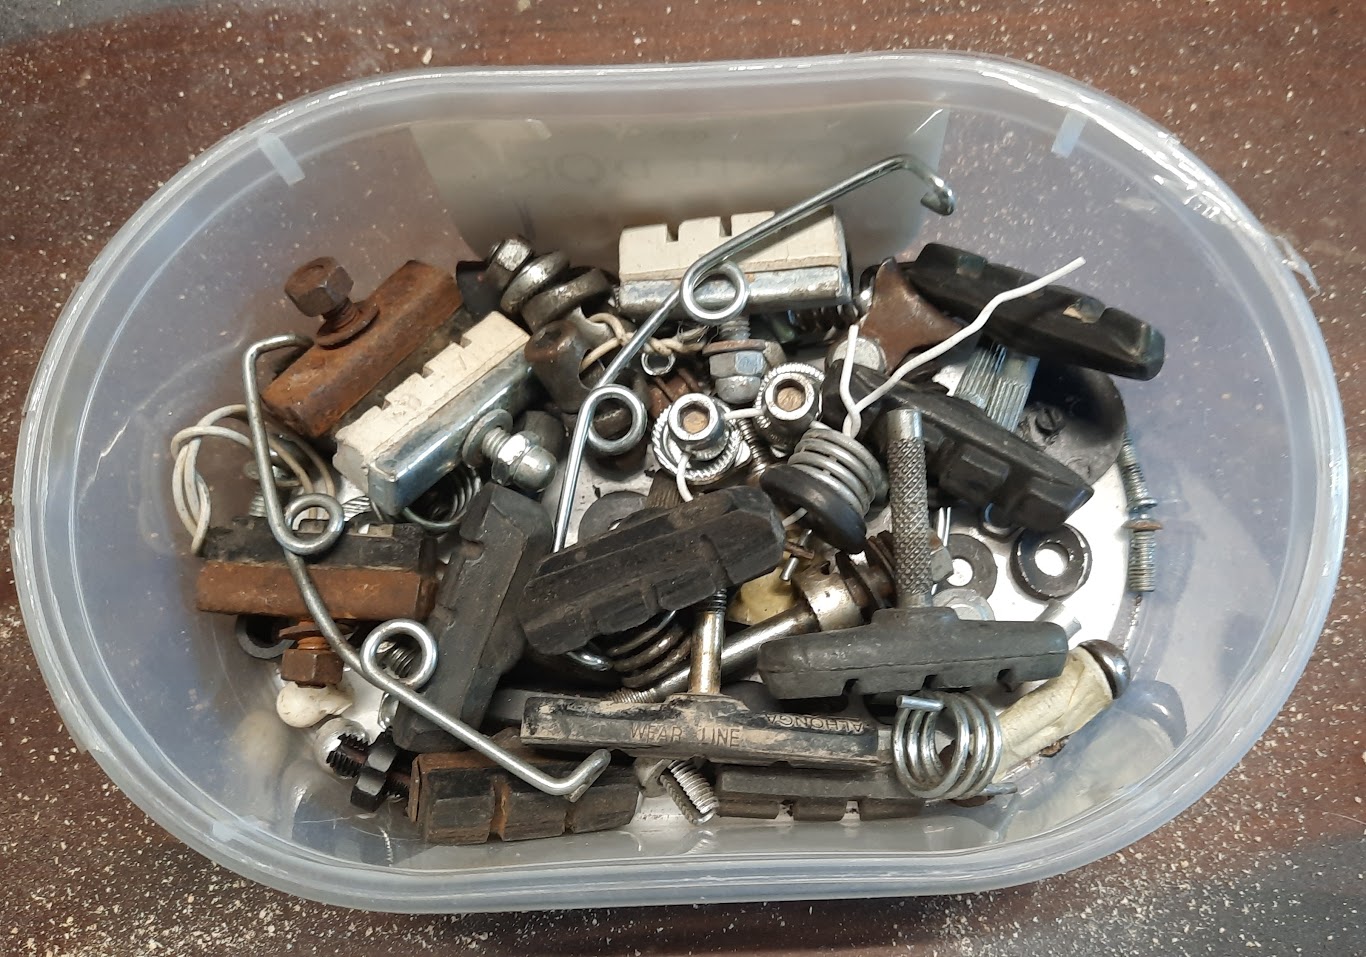
This is my box of smaller brake parts. I strip all of my non-required bikes down to generally smaller or smallest parts, then keep the frames and mudguards in one barn and all the other parts in my warsztat. I am not sure that wifie or our neighbours would appreciate me keeping bike parts lying around outside, and I always like to maximise my choices by avoiding having to go hunt around for stuff. In my mind, the where things came from fades away, and I just look for parts that will fit.

I rather fancy cleaning up that rusty pair of brake blocks, if or when I choose to use this calliper.

AJFCJaW1UHp8tfvwsn5N5eFF3C8OeI2hnqXyvn10akWs4Ncg6ND5LrL5QdIsOq6TmiJ1HHDW7LsZTQVrl02KCz2P3rpsLQdTHQYmqqPcpyPUi04Tiq_g8l3iuHBm9-sUnBpSQ2cAgSTLp6vhny4nIpKvVuVN=w1366-h957-s-no


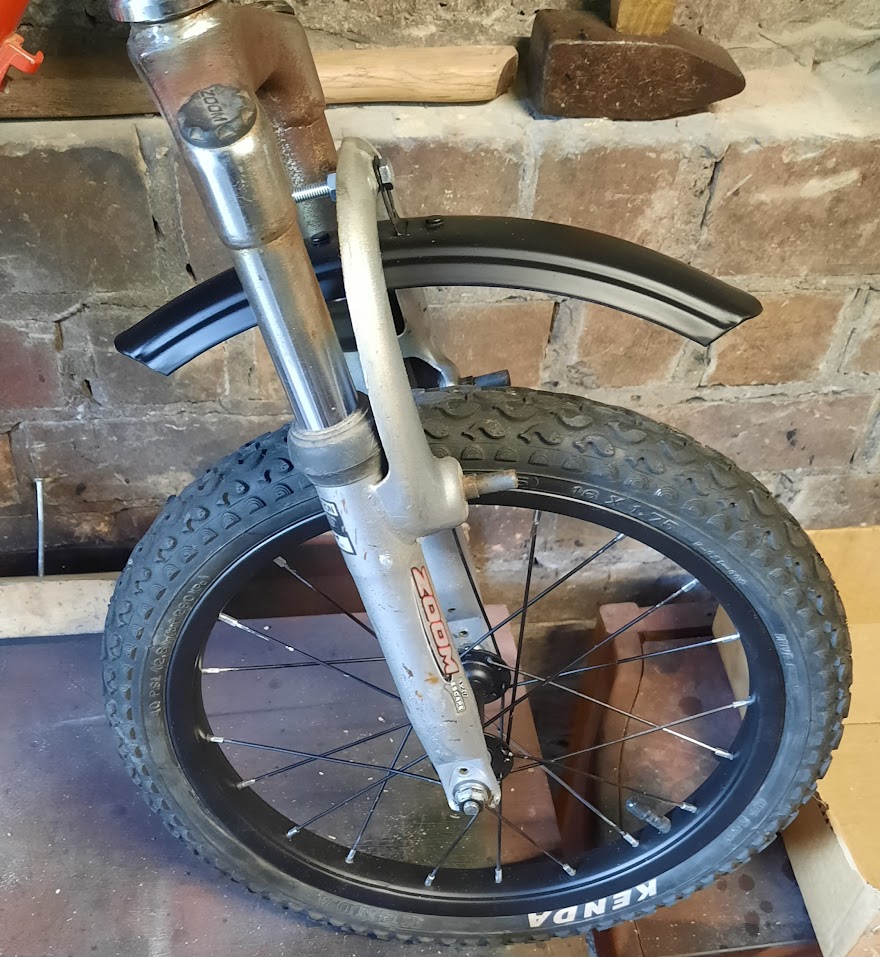
Yes, I know I have fitted th mudguard backwards, I just wanted to see what I needed to mount it, what it looked like and what kind of gap I had between it and the tire.

I think it looks OK! Even the wheel has that slightly battered feel of almost new.

AJFCJaVo4DCA2gf7pxLViQNCQWb0HEIbPJ3hZZQHufLP1Qdjw_o_LduoTz-OEDPc3PJ8PjSO2fVkVocIboUNidRAzOGtgQDKgsKzIBEwBZh70m2x4zt41jgHaVW0i2aGlHWCc1IBt5W2HbatcNKyjAWhtcio=w880-h957-s-no


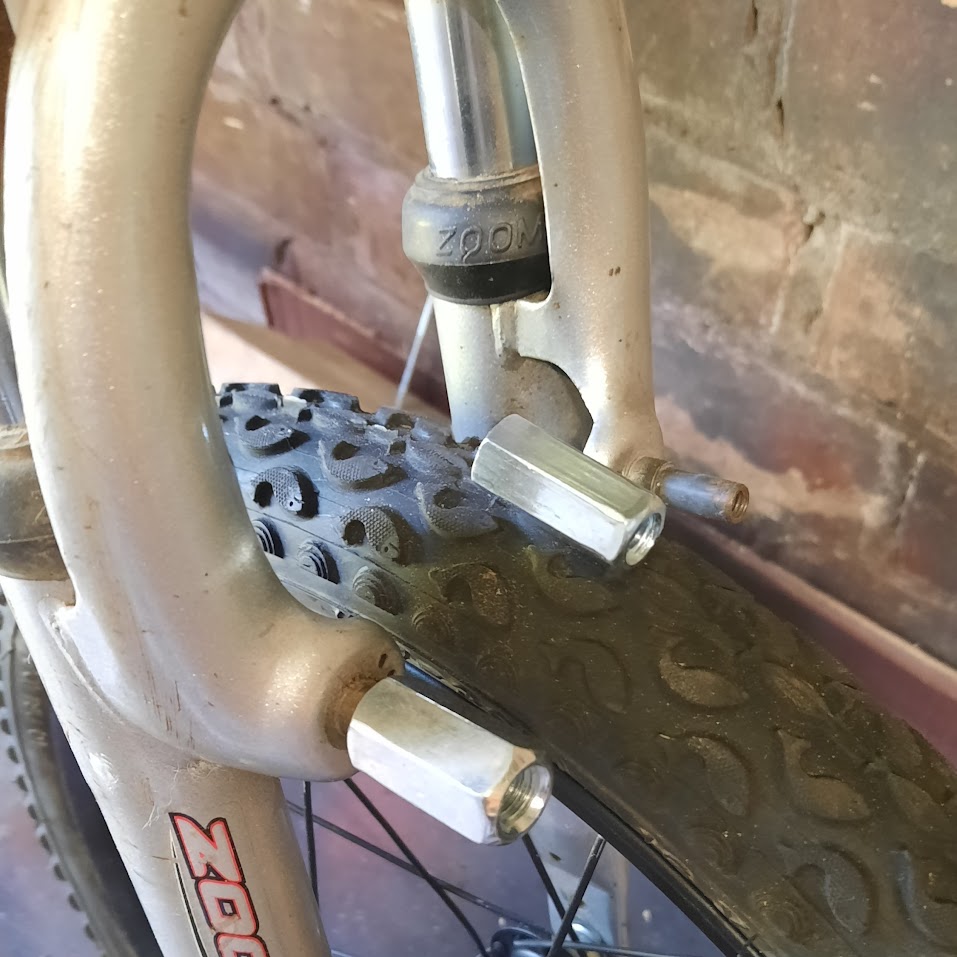
The next question is should I cover up the pre-existing brake mounts, and what with? I could use these long nuts, once I decide on which size, and then I just need to drill them out to fit over the mounts find some kind of appropriate bolts to hold them on - maybe countersunk head types?

AJFCJaVuTu-Fva3q_D6yF_X3WMLpN695jc0IPX7Y511QVyNgI8AKFZHGrbBUZzRA6XRkH1InVcBhyAfDbGfkMSbYIm-I2gDXYWLWrSau5ohLzW0cZagm-2e86waoO5tIV5OTJwGeu8STyn4R3wyWRRHS-qrW=w957-h957-s-no


I still need to work out what kind of brakes I need. To be legal I would need front and back brakes, but I might just go for a set of lever brakes at the back, along with the coaster brake. My 1980s Romet Wigry has never had anything but a coaster brake, so it will be an improvement over that.
 
So I tried the brake out on the rear, and with this larger than standard wheel it might require a little filing to get the brake blocks fully on the rim.

The biggest issue is where do I route the cable?

AJFCJaXuJD8MsN32i2Gq0ALSh0VIHOqNd2S2fuzmiqbJh4p81-dPeXb5yKg1xSaU-DDvNu1XcVfGbhJcUaklGM3arSACFFUxBvW0mJKawjp-WtUPkvdiiOleMmV0dxhHD0oH8oPRMi73pybi0cqPBD9E1vAr=w1039-h957-s-no


I could borrow this rear brake off my last summer's build, as I am currently removing some of the features I put on that bike, such as the seat, handlebars and tank. This has a downpull cable, and is already in my black 'rebuilt' colour. Well, I am in no rush to finish rebuilding the bike, so I could borrow it.

AJFCJaVWgH24l5gsyoyBAJbWbtyI2WJL6b05vchFWGxHFsFOgAx8IBKIuBusNLM2_b1c_h0BHC7GQK7ArJjBGrEhrgeR_zSMUoeLoZgcirwBrbos7D5UOt8hDTSod3ACEKn6_PXXdvAJSp-XKkXZ1Aqamp6M=w836-h957-s-no


Or I could go classically Romet, and rely completely on the coaster brake for all my braking needs - I mean, it is not as if this part of Poland had anything larger than minor hills :)
 
Well it seems like this is coming along steadily. I would definitely like to see you make a seat out of those armrests.

But I’m thinking that the real mystery will be the handlebars.
 
Well it seems like this is coming along steadily. I would definitely like to see you make a seat out of those armrests.

But I’m thinking that the real mystery will be the handlebars.

Yes, it is a tempting idea, and maybe for my next build, as once I have built the bits I need to mount the saddle in place I can reuse them for later seat designs. I already have some ideas for some future seats...

I already know which handlebars I am going to be using, as I need some that are high rise and I only have one pair - off my Zenit Jubilat. I have a box full of bits that I intend using at the back of my Warsztat.
 
Now that I have a pair of wheels on the frame, I can start to work on other things.

I have finally got around to working on my initial seat design again, the first thing meant stripping down the whole backing of the seat back to install this pair of longer mounting bolts. The original pair was not quite long enough to go through the tubing I am using to mount the seat. I have none of those circular metal rivets I could use on the material, and I might have to remove those bolts while I get the cover on.

Ah, future worries...

AJFCJaUQvNBYw3CrxgSKxRcqEE5OomsehdXW99vDAiadp2SUNQ0Wy00q68ZfZFyoJELpArQi195syUIqs175p0C6r6eYyxzfNmtwqlm2nTRFfF8TRDW5iDhHaoni1piF6-i1sIMUR6SmX5O9EX29aLs3j8hp=w742-h957-s-no


Next we have the potential materials to make the front mount for the seat. The brown one looked oddly familiar, but it came out of a drawer full of farm junk that was hiding in the attic, one of a set of drawers that had no framework to be an actual 'set of drawers' - the drawers were just dumped on the floor up there ;)

Later I noticed the same kind of bracket mounted on the doorframe of the cottage, for the lock.

AJFCJaU-Sowea0Y4Bn6loo_QkBAbsGCEwIc-7FuGiIm6Pg1NJRGzTkslfGpjUOx21uQFCXJm_hjE5mFMl6t7UFLmxR9Lv34yPq6j-rrJ2x99pE9Hi18J4k2uhCljXoqRi6oDfeAi7mYrNmdwjQAm3lfhaZZa=w922-h957-s-no


Anyways, I just want a few days to make the choice, just in case I find something else somewhere else that will do the job much better.
 
Today I felt it was time to select tires.

When we first got our initial pair of 'Romet Jubilats' (neither marked up as such) from our local supermarket, they each came with very different tires. As life turned out, they lived in our basement and then our garage for around a decade with only occasional use. One had quite a 'sporty' pair of tires on, see the one at the back in the photo below, that have barely been used and mostly hang in my Warsztat.

The Durospeed came on one from a set of three old Jubilats that we bought much later, although they were hardly a set, more a collection as one was the three-speed Zenit, one actually marked Romet and the other with a different name and a long-dead website address. And the Durospeed tire.

AJFCJaW49ljJTt8aUdEC_aJBMrHzpqvUZfGedVuaxaFChhBu4TtJz-x_09c2o4zkpCW5NUiEA_qawSAcZ2g0x4XjvSvL2XR7mY7370OCUxph9LTJlqIJlCY8eGaDObt54y4r8zVn0gb2m3UsUOVRrDHOv9xR=w1701-h957-s-no


Sadly, since the only 18" tires I have feature these fishy ribs, the semi slick tire was put away again, but I will have to seriously consider some future build that can use those semi-slick tires.

AJFCJaVHttZL72kc8pbbw7m5N1E8NGOAPWYqH6SpemIFAQwsB6QspAg9vHM6DDHa2qprA_ZNxoSCpBZk8Uy88T2P8K1WpATvGDrBPWXsjC-jToB3VL9mE6l7BYpaw8bvCLfM90b5Q4GTcGGgkfzfVxT608_E=w1391-h957-s-no


I still need to clean up these front forks, maybe even respray the silver so they look a little less beaten up.
 
With the tires sorted out, I just had to make up my mind which rear wheel I would be using. Originally I was going to use one of my coaster brake wheels, and I actually managed to assemble one from the old parts I had leftover that had a long enough axle shaft, but that felt a little too easy.

So out came this wheel that I am not sure I have used since I took it out of the Danusia frame.

AJFCJaWXdQfqTfT6v4tN8v1g4I_9-nVcK4ZhanIaH6jYMDk_lusQk_TeTkho6wO1HlGYY-atYe54KRBc9LhhJ73KUw9RmCL7qFDVE0HYYpqXBcIGbZJLu4XlsQspusXgNprym73wSHEjSRKAx-66gFRTfbVI=w729-h900-s-no


So instead I chose to use this other 24" wheel that I rebuilt with a derailleur hub in it, which just so happens to have the tire that I decided to use already fitted.

However, instead of slipping on a 5 or 6 speed derailleur, I came across the single speed hub that I took off the pink kids bike that I am chopping up for bits to support this build, and it just wound straight onto the derailleur hub threads. Getting it back off might be a bit of a problem, and there is nothing to keep the dirt out of the hub bearing inside there.

I also need to find a shorter axle for it.

AJFCJaW_dmVFcMfbY0LBxgzKmfWr5ys6SKZM9KLRF-R13oPJ7fk6kK-UbURuj3ZavHxwMifq-sssScd5-GDqvHrkIQ68-ud_wLMBdJ6kY-pXyNeVxmYUtnGgzBRnahPDxTvFUa5FkjiQqQVh_Topn5_SxcK-=w714-h900-s-no


Without the coaster brake, and with wheels either too large or too small to fit my normal brakes onto, I need to rethink fitting a brake at the front.

I still need to fit the frame, whatever it is called, that will support the rear of the seat. If I had a welder then I would weld it straight onto those rear axle extensions, but I do not. So instead I am considering attaching it to the frame via a pair of those rear axle extension bolts. Or I might take the rear axle support brackets of the pink kids' bike frame, and bolt them on using those two mudguard mountings.
 
Around here there’s a thing known as “trail welding”, And it’s how you fix your broken Jeep in the wilderness. You need a welding rod and some jumper cables and two 12 V car batteries in series (24 volts). No one will have a welding helmet, so Two pairs of sunglasses are worn at once.

If you don’t have a genuine welding rod, borax paste and a wire coat hanger. Real flux is gonna have aluminum chloride in it too but nobody’s gonna have that out on the trail.

But if you just need to weld a small piece of tube to some brackets at home, it’s entirely possible.

Where I live it is not possible to run a forge. If it were, I would be set up here to do some forge welding. But it wouldn’t be safe, and my neighbors would all want to hang me.
I've had a couple of "bush weld" repairs over the years of working in and around Mexico. Even after years of welding and inspecting it was new to me the first time the guy hooked jumper cables to a ratty generator and proceeded to fix our winch mounting plate in the middle of nowhere
 
Pink kiddie bikes….
Both from China?
View attachment 236510
View attachment 236511
(I found this tiny Huffy Seastar, cast off in the street.)

I imagine so, I have never really looked at closely, it is just pink-painted steel to me ;)

I'm liking all of your creative work arounds. No welder? Find new uses for nuts and bolts. Wide fork spacing? Make a longer axel work.

MacGyver has nothing on you! :thumbsup:
I am actually quite good at welding, and I have been on more welding courses than I can remember, but I have done none in the last 25 years, since I moved to Poland. I might buy a welder this summer, though, once I sold a couple of my bikes.

Where I live it is not possible to run a forge. If it were, I would be set up here to do some forge welding. But it wouldn’t be safe, and my neighbors would all want to hang me.

My neighbours are mostly farmers, so if I really wanted a forge I could build one and no one would complain ;)

So I began to build up the front of the bike a bit, because soon I need to make the decisions related to the seat.

I am hoping that I do not have to shorten the bars holding the back of the seat, otherwise it will be hard to get it to fit a larger frame in the future. I ought to finish getting the joint between the two bars fitting better, as I will need to bolt or rivet it together - I have not decided which yet. I have some rivets, it would be nice to get them out and use them.

It would also be nice to move the front wheel a bit further forward.

AJFCJaVAFndLA5DNERY5AKfVVoW0PiDpcrZFUcNrUsYkpGkvBFcCVph6zL36OK_pHl6wm4xIwQPxIrjhDt6XLuqiBnZKOcLf08EV6-Nr8mwmFEWvj7e1yz4Xk6Abz5Ceig7KVdf7b6IaVVtAORQ3bO2CTtcr=w963-h900-s-no


I finished cutting and drilling the bracket, and once I paint it then I will be able to mess around with washers and such to get everything to fit.

AJFCJaVWkToTURfr_8oQR8X9SYpVMsOjhkLm_arWoPgWcUUIdcCpCXtTwmtKIOmrwMTa2oLYv86EX1xNse4nWkDGkiw1rzEMrGj4nCxZF_GLyDz6GAMlDIdS_SrKn2ApPmkcrye1YyuAd28sZiKL-vq6EFAo=w870-h900-s-no


Ah well, it is time I got out there again!
 
I have been thinking about what to do with the front wheel. Initially I was going to just conceal those front brake mounting pins, by drilling out some long nuts and then just bolting them on. What I might be able to do is move the front wheel forward in a similar way to how I have moved the rear wheel backwards. I have had to fit a longer front axle with nuts inside the fork to space the wheel, but if I can find a bit of suitable steel then I could do something similar at the front, with a pair of bars coming up to the old brake mounts to keep everything secure.

AJFCJaXGE-2S97FnPb6r7Ko7w_eelVp9JXb3eEBMrbOQUQhPL-ovayvLzRRPsXwruVYvEQkX7_T1NpgEXvZtGDJTqVfCJ9vNjRDVY-Yf5FxRGRv0XLzS1msuH11539txSHJZv2Mv5G9NDuHsIjBbwSrqU_tY=w885-h969-s-no


I have progressed with the front seat mount, it just needs a top coat sprayed on now. I still need to figure out how high I need to mount the seat and also a good way of fixing the the rear mount. Once that it all done I can get around to wrapping the seat in foam and then making a cover for it.

AJFCJaV62vTAf1BVEKp_YZ5GhshtZWBm48TXXKUmupT50ZTOSrkFXSVtDneLpn2NnTRDyXv9YFmmN13jsf8HbmigGULGKe3tI8ftrFIkP2ZlKbDf69J27ZB_JKqL3aJ2OYm-Y7fzKycyJUOPU-yU-0beXEu5=w791-h969-s-no


Many years ago I used to make motorcycle seats in a similar way, based on some timber I found abandoned at a local building site. Since making this seat I have obtained some wider wood from an old sofa bed that our neighbours were throwing out, which is wide enough for the whole seat, rather than the strip down the middle that this one uses, which means that eventually I can make a replacement seat for this bike - or the next one.
 
Well here is the bike looking for the first time like a bike. Sure, it is lacking certain details, like the rear mount for the seat, a seat cover and pedals, but this is the first time that it has looked like what it will look like.

One of my next tasks is installing the rear frame for the seat, which I did hold in position - and it was only then that I realised that the back part of the seat will actually be behind where the rear seat mounting frame will be. I never had the material for that frame when I built the seat, but that is OK because the seat was only ever my first ever exploration of this type of seat. If I were to build another seat, I now have some better (i.e. wider) wooden boards from which to make it, allowing me to actually give the seat a better outline. There are also some other things I will do better next time, like not having the rear mounts go through the seat cover material. However, it is a good first attempt using just the materials that come to hand.

Seats have to be comfortable and practical, and I have redesigned the seats on my motorbikes once I have ridden them. I could order lots of things by mail order, but building things yourself from what you have around you can be more educational and challenging, if that is what suits you.

AJFCJaW7-JAzDopXmedC5f7YfYcQ0zyyCR2te5-XjiufDcKWGP_5BjdEkmf6qGGgHQSOkPgXAmMe9k9HyZTPF5S62mHxZVeDvCmq1kejeH5Gnurlk-uh5iisV0w-F6QDKXYTUqwgCTjzeAOns0gOobTQzDl8=w1723-h969-s-no


I also fitted the seat clamp that goes with this frame, and you can see here how narrow the wooden board in the seat is.

AJFCJaVu_9KBVh_JLW6p1AA39QLWNhU4U4m1faBt2y2nwvPdQpQxbyjbyeA1CRRInzlYGCu2pyaqtQz13dqwokvw0lCvdAaZbk4mITiMHwS40OZUElHrfH9pGzK1ihgGkHfWXmyxgD8eK5BvrQi2G7bd3GlB=w612-h969-s-no


When I picked up the bike to move it, I was surprised by how light it is. Sure, it is still missing the crank and chain, but that Zasada frame is very, very light, and I am so glad that I chose it when I bought it for the wheels and tires instead of the other bike on offer. Both were about 30 km away, but in different directions, so visiting both would have been impractical. I chose this one mainly because they included a spare set of tires.

I am tempted to change the seat stem, because it is a typical steel one - and heavy. While I was sorting through my seat stem collection I found an aluminium one, and while it is too narrow I can always make a shim out of a plastic tube to allow it to fit. If it is going to be a light bike, let's make it as light as possible.
 
So I tried the brake out on the rear, and with this larger than standard wheel it might require a little filing to get the brake blocks fully on the rim.

The biggest issue is where do I route the cable?

AJFCJaXuJD8MsN32i2Gq0ALSh0VIHOqNd2S2fuzmiqbJh4p81-dPeXb5yKg1xSaU-DDvNu1XcVfGbhJcUaklGM3arSACFFUxBvW0mJKawjp-WtUPkvdiiOleMmV0dxhHD0oH8oPRMi73pybi0cqPBD9E1vAr=w1039-h957-s-no


I could borrow this rear brake off my last summer's build, as I am currently removing some of the features I put on that bike, such as the seat, handlebars and tank. This has a downpull cable, and is already in my black 'rebuilt' colour. Well, I am in no rush to finish rebuilding the bike, so I could borrow it.

AJFCJaVWgH24l5gsyoyBAJbWbtyI2WJL6b05vchFWGxHFsFOgAx8IBKIuBusNLM2_b1c_h0BHC7GQK7ArJjBGrEhrgeR_zSMUoeLoZgcirwBrbos7D5UOt8hDTSod3ACEKn6_PXXdvAJSp-XKkXZ1Aqamp6M=w836-h957-s-no


Or I could go classically Romet, and rely completely on the coaster brake for all my braking needs - I mean, it is not as if this part of Poland had anything larger than minor hills :)
As tempting as it is, I make it a point not to pull parts off of completed or fully functional bikes. I know you’re in a unique spot, but I’d leave last years build out of the equation! :cool2:
 

Latest posts

Back
Top