1953 Hawthorne Tank Bike Project

Rat Rod Bikes Bicycle Forum

Help Support Rat Rod Bikes Bicycle Forum:

This site may earn a commission from merchant affiliate links, including eBay, Amazon, and others.
Joined
Dec 2, 2010
Messages
147
Reaction score
49
Location
Minneapolis, MN
Rating - 0%
0   0   0
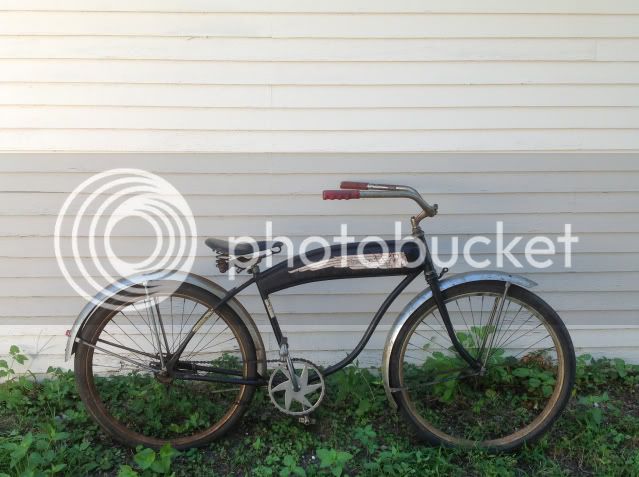
I've owned many old bikes over the years but I'd never owned a men's tank bike. I really wanted one. I came across this bike a few months ago listed locally on Craigslist. Less than 24 hours after seeing the ad it was mine.

The backstory on the bike is kind of strange. When I called the seller he told me that his father-in-law had recently passed away. Apparently the bike had been hanging in his garage for the last 40 plus years untouched. When the kids cleaned out the estate they grabbed it with the intention of reselling it.

When I arrived to look at the bike I met the a nice older couple. The woman told me that the bike had belonged to her brother and that he had gotten it for his tenth birthday in 1963. The bicycle even still had the 1963 bicycle registration sticker on it. It didn't occur to me until later that the numbers didn't seem to add up right. The serial numbers on the bike indicated that it was built in 1953. That would mean that if her brother got it for his tenth birthday in 1963 that the bike was already ten years old at that time. I guess it is possible that he might have been given a used bike but that seemed a little odd. Little did I know at that time that I would soon find even more odd things about this bicycle.

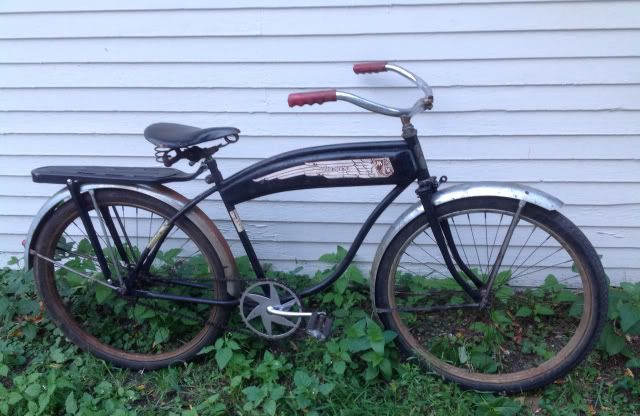
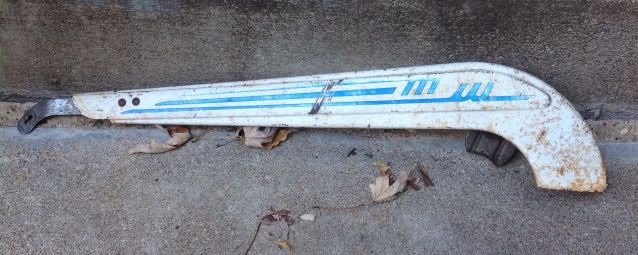
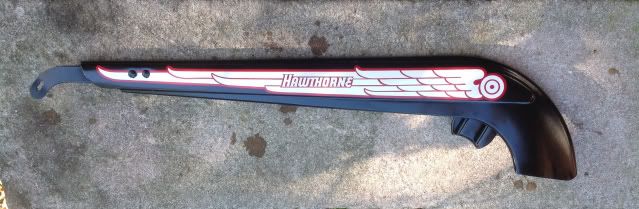
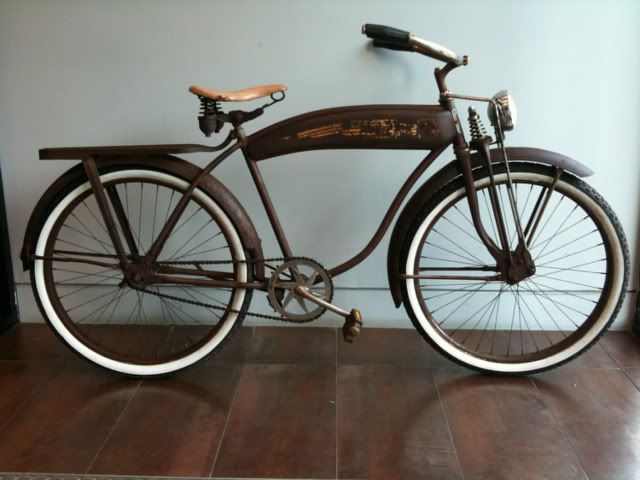
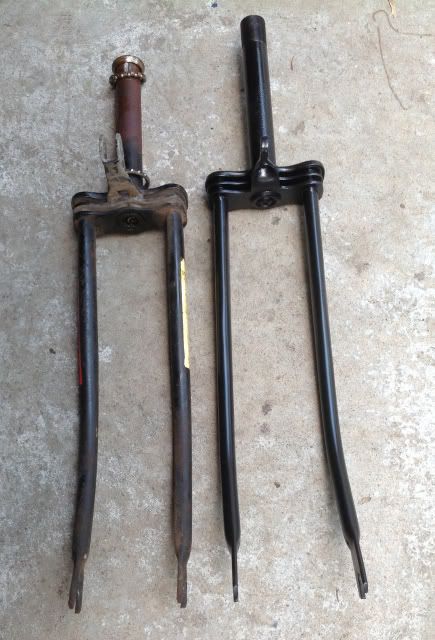
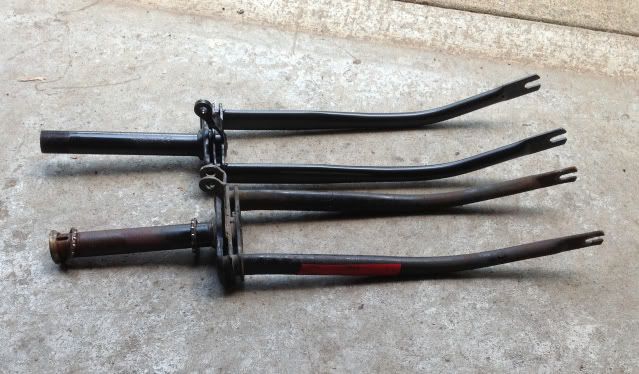
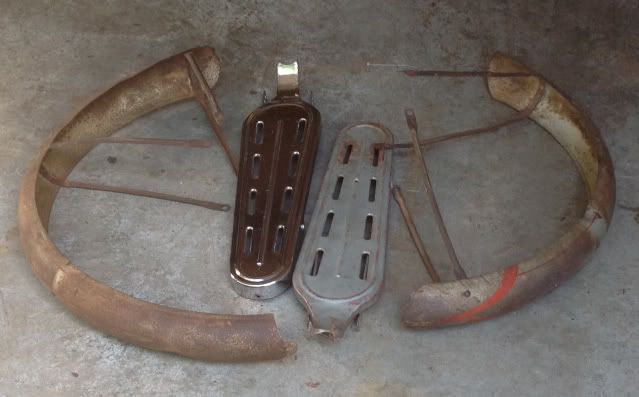
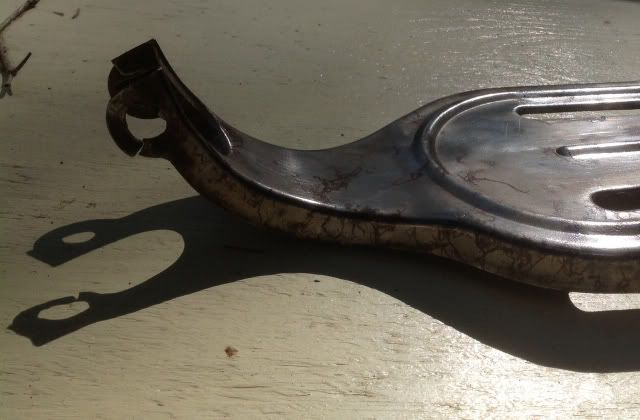
Just from looking at the bicycle at their place I could tell it was in pretty rough shape. Starting at the front I could see the fork was bent pretty badly. The handlebars were also bent/ kinked in one spot and the grips were torn through. Something about the chrome fenders seemed off to me as well. The back wheel was badly bent and rubbed on the frame while turning the wheel. The chainguard was there (although not installed) but was just a cheapie aftermarket model. Even with all of those big negatives working against it I had to have it. They had been asking $100 for it. I told them they could maybe get that if they parted it out but that I thought a fair price would be $75. They agreed to that on the condition that I would get it fixed back up. I was very pleased and proud that night as I drove home with it strapped to the back of my Jeep.

Once I got home I began to do some research and inspecting. That was when I started to see what a real mess I had come into. I quickly learned that the wheels, crank and sprocket were off of a much older bike. The rear hub was a Morrow brand and the sprocket appeared to be mid 30's Hawthorne item. I assumed all of those pieces had probably come off of the same "donor" bike. Then I noticed the seat was a ladies Troxel seat. At that point I began to wonder if the donor bike had possibly been a ladies model. It was later pointed out to me that the handlebars were also incorrect although I never was able to definitively tell what they were from. Another weird thing was that the chain was very loose despite the wheel being all the way in the rearmost position. It almost seemed to loose to even be rideable.

The whole concoction was very odd but I assumed the original bike had probably been wrecked in some capacity and had been cobbled back together using whatever old junk was lying around at he time. Probably wasn't that strange after all. I had no intentions of doing a full restoration on the bike but I did want to bring it back to some of its original former glory. So that was my new plan.

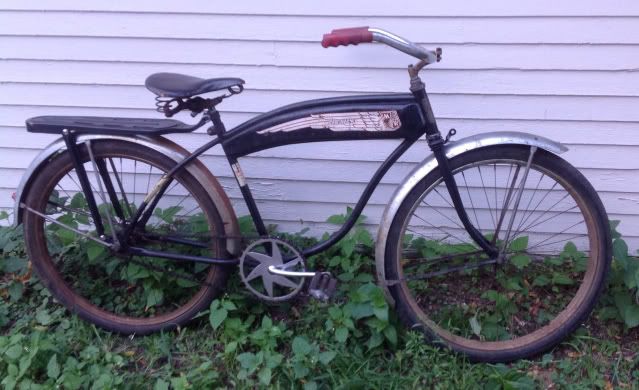
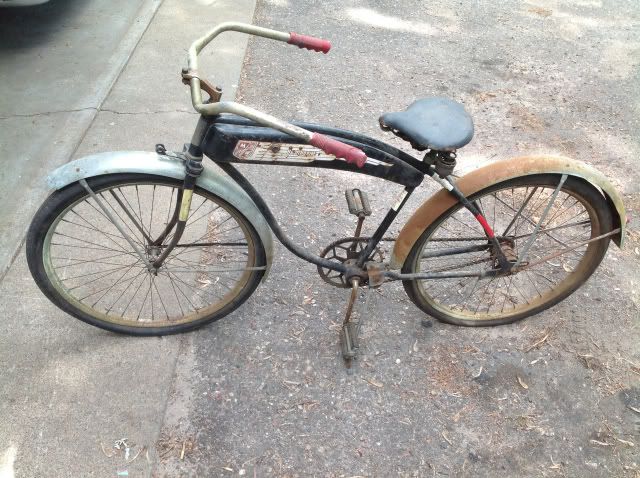
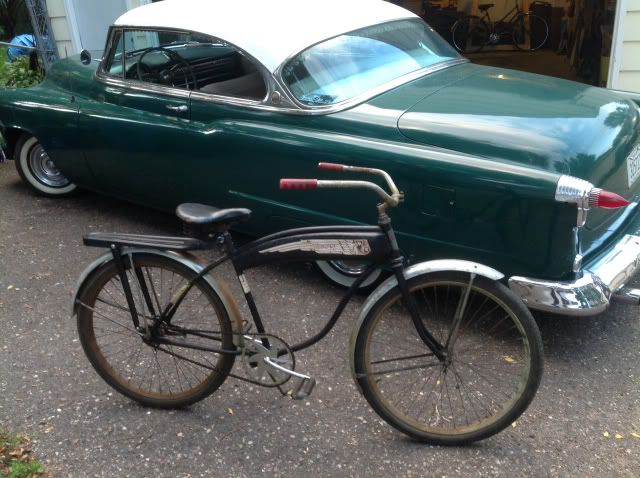
A coupe of photos from the night I got it.

e113d4f7bad4b31db5ee60b032c824c0_zps44643674.jpg


8ea9461e0640e6db9548f6c121d58147_zps097739cc.jpg
 
While doing some research and coming up with a plan for the bike I learned a few things. One being, this is not a particularly uncommon or valuable bike. That was fine with me. I was not rebuilding it for profit but for my own personal enjoyment. Also the fact that it was fairly common was kind of a plus in that there were still a decent amount of parts available for it at reasonable prices.

I'd previously done a lot with older Schwinns and although the Hawthornes are no where near as common there was still a lot of information available online. The main problem however was proving to involve finding examples that had remained fairly original over their 60 plus years of service to use as a guide.

I did several searches. One lead to this old Montgomery Wards advertisement which came up when I searched under 1953. The other photo is an example of a nice version of this bike that I'm trying to emulate.


1a0cf4416a1e6f8f48e4269588cf69ba_zps945f83c7.jpg


That looked pretty close to what I was going for although I preferred the headlight and truss rods/ springer on this model.

6be7b45d0d3f3cefa7026563eb526527_zpsb3224d59.jpg


I wasn't necessarily committing to the springer but at least wanted to do the less rounded truss rods and headlight I had seen some of the models had. I also really liked the look of the handlebars on the one in the lower image as opposed to the ones in the advertisement.

The parts list now included; Troxel men's seat, fork, handlebars, sprocket, chainguard truss rods, headlight, peaked fenders and rear rack. When taken as a whole it probably far outweighed the value of the bike but it didn't all have to be done at once and could gradually be pieced together as parts and money allowed.

I'm not going for a 100% correct restoration here, just a nice collection of fairly correct period parts to make a fun rider out of.
 
Looks like a challenge for sure. Good luck!
 
My first move in the project was to put some 'feelers' out there in the form of several wanted ads on a few websites.

One of the first successful replies I got came from someone right here in my home state. He was able to hook me up with a correct era fork at a very, "Minnesota nice" price. Although it wasn't the exact same light mount it did have one which I had seen on some of the models I had looked at.

I spent a couple hours one afternoon stripping, priming, painting and cleaning/ swapping headsets. One problem I found during the painting process was trying to match the 60 year old black paint. Gloss black was way to shiny but flat black looked to dull. I ended up spraying a a couple of coats of each on top of each other while still wet and came up with a finish I liked.

Here are the two forks next to each other after painting. You can see the wicked bend on the original fork. Although the original fork might be able to be straightened I haven't had good luck doing that personally. I will save it though at a minimum as a source of the correct light mount if not for later complete restoration.

442bbe4e3a1a6f43bae8e9e7eb42c601_zps990f762d.jpg


b8ae4b23b8d5b19f82bf05eabc857874_zpsde6a064c.jpg


I was also able to find an original 26 tooth sprocket that was more correct for the timeline my bicycle was made. Coincidently it came from the same fellow I bought the fork from and again I was given a very good deal on it.

Pre-cleaning of sprocket.

fb8cd273ccf3dcecd24ae7dea0d21cab_zps02ec2fe4.jpg


I had been looking on Ebay for a complete crankset with sprocket to swap out but kept getting beaten at the end so I decided to just buy a sprocket and swap that. Unfortunately after cleaning the sprocket and disassembling my current crankset I found that the sprocket would not fit on correctly. The hole for the 'pin' was about a quarter inch off. I was pretty bummed about that. Then I gave it some thought and hit up the old parts pile. I found an old skip tooth Murray crank set up and decided to see if this sprocket would work with that crank. It did! I was very pleased as I had only paid $5 for the Murray unit with very nice bearings. I cleaned and re-lubed everything and put it back together.

I have to say that I absolutely love the interchangeability of old bicycle parts. I was trying to explain this to my wife and I told her it would be like if you bought a 35 Ford and could just pull the old flathead out and drop in a Buick nailhead and bolt it in with absolutely no modifications to either.

Here is a photo of the bike with new fork and crankset.

9561c4c12a6be30dfed81d13a724bcb2_zps359f7e98.jpg


You can see that the chain looks very slack in this photo. The rear wheel was adjusted all of the way back so I'm not sure what was going on with it. The replacement sprocket was the same diameter as the one that was on the bike when I got it. I ended up pulling one link out of the chain last night and it now fits much better.
 
Looks like a good plan! Nice looking bike...
Those bars that are on it are pretty cool in their own way, be perfect on someones stretch cruiser, you may well find a buyer on here for them that could help cover the cost of your new ones...

Luke.
 
LukeTheJoker said:
Looks like a good plan! Nice looking bike...
Those bars that are on it are pretty cool in their own way, be perfect on someones stretch cruiser, you may well find a buyer on here for them that could help cover the cost of your new ones...

Luke.

That was kind of my hope as well. With the seat post facing forward and the handlebars being that long there isn't much room for a guy my size on there.
 
One thing I had really never cared for on the bike was the look of the ladies seat. After doing some research I believed that I wanted a Troxel brand 3 spring seat to replace it with. Although thy are not uncommon the ones I was finding were selling for as much as or more than I bought the entire bike for. I eventually stumbled across one on Ebay that the seller wasn't sure of the brand on. After looking at their photos I was 80% convinced it was a Troxel seat. It had a very worn circle still on the top where the Troxel logo normally was and the underside of the seat looked exactly like a known Troxel I had photos of, although it appeared to maybe be missing a couple of small parts. I decided to gamble and purchased it.

When the seat showed up it looked pretty good for its age. I hit it with a little Brooks Proofide and let it sit or a few days. Then I said good riddance to the old ladies seat and put this one on. It was definitely better looking but still seemed a little off to me. The seat looked to far forward still even with it positioned all of the way back on the post. Today I decided to flip the seat post around 180 degrees and I think it really made the bicycle look a lot better. I measured before and after switching the seat post around and it ended up moving he font of the seat back about 2.5 inches. Big improvement IMO.

4de5533fd83a49e83e350a6a8e22bf45_zps6f8e362f.jpg
 
I recently had several parts show up in the mail!

I had been looking for a long list of pieces for the bike. I placed a few wanted ads and found a seller with an original set of fenders and a couple of racks that I could possibly use.

c7c2e5f8dca7d42455c5eaed314888fb_zps3a0f2224.jpg


I was pretty excited about the rear racks. The chrome-plated rack was in really nice shape but I wasn't sure I wanted something that flashy for this build. The other rack was painted and not quite as nice. It had some rust starting to come through the finish on the bottom and also one of the mounting tabs at the front of it was torn through. I figured I would take a stab at fixing this one and if it didn't work out well I could use the chrome one instead.

I began a mild restoration of the painted rack. First I used some chemical stripper, a flat blade screwdriver and a paint scraper to remove all of the original paint. The rust really wasn't that bad underneath and cleaned off with a bit of sandpaper. Then with the rack naked I addressed the torn mounting tab. I grabbed a big washer and tack-welded it in a couple of spots to the outside of the mounting tab. I figured the washer would give the rack some strength and help hold it together. I also imagined that once it was all painted black and mounted on the bike that the repair would be fairly invisible.

a23edf344fdc5f8bdfde8259a1660428_zpsee91e692.jpg


Stripped but pre-repair to mounting tab. You can even see how it was broken in the shadow.


3b7817ce1f2ebf6bc673bd6429628693_zpsaefe2abd.jpg


Repaired and painted.

Again, I painted the replacement parts a mix of the flat and gloss black paints. I was pretty satisfied with how it turned out.

When I installed it on the bike I wasn't immediately thrilled. In fact, given the amount of work I had into it I was pretty disappointed. The rack seemed to sit at a funny angle. Even with it sitting flat on the top of the fender it looked crooked like it was tilting down toward the front of the bike. Definitely not cool. I realized with the rack mounting to the seat post clamp the angle was way wrong. This really puzzled me because I had photos of several examples of similar bikes with this rack and they were far more level. I ended up trying a couple of different clamps I had around but none brought it up enough to where it looked right.

The temporary solution I came up with involved a trip to Home Depot. In the electrical department I found a thick plastic sleeve that fit snugly over the seat post. I cut it so it was about two inches long. I put it on the seat post above the original seat clamp and then placed a second seat clamp around the top of the sleeve. I then fastened the front of the rack to that and the rack sat a lot closer to where I wanted it.

1ee45e35a9cd8a2d72699a9123d199aa_zps198e7e8c.jpg


I'm not sure why the rack didn't fit right without all of the modifications and screwing around. I wondered if this bike might have originally been a 24" model? The frame measures around 18.5" at the seat tube so I don't really know. That measurement would seem pretty consistent with other 26" bikes I have from this era. For now I will call it acceptable and move on to the next part.
 
excellent project! Thanks for sharing all of the specifics that have come up. Very helpful and informative. It's a great looking bike....keep it up!
 
The handlebars that were on the bike when I bought it were really cool. Unfortunately they were not right for the bike and even more unfortunately they were bent. :( 
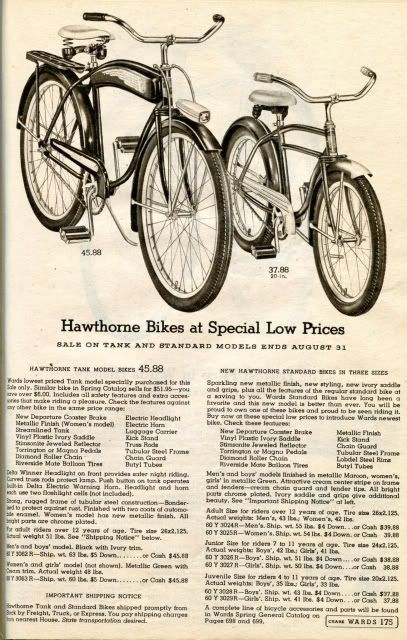
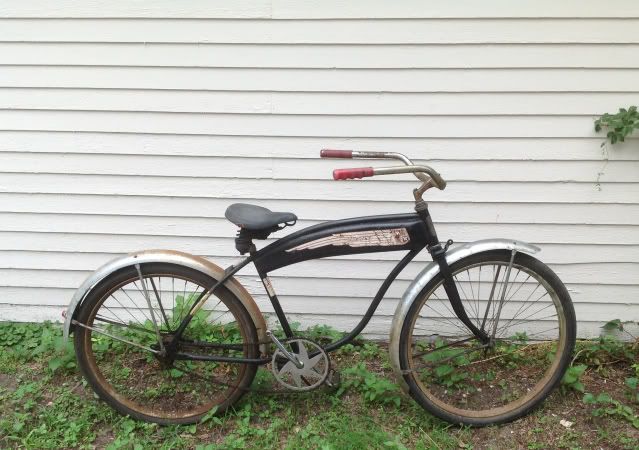
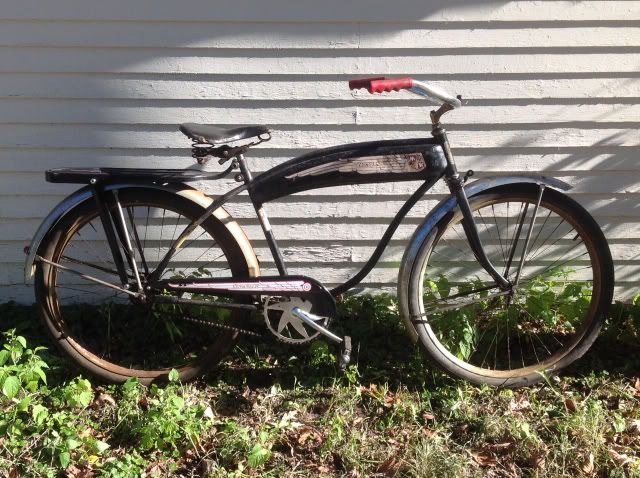
I liked the look of the rounded bars like in the photo of my "example" bike several posts above and found some for sale online. Once I got them installed I wasn't sure I liked them.

d0433ba7c4acac99abd6c1d8d1ed519e_zps8ed05e60.jpg


74c857557c27580b499ff04ba6a721b4_zpsb0aca38e.jpg


I know technically they are a little older than what would have been on my bike originally, but I kind of liked that look better...until I installed them. Now I'm not sure but have decided to live with them for a while to see if they grow on me.
 
Probably the main part I'd been having the most trouble tracking down was the chainguard. I'd posted wanted ads online for months with no bites. I was also checking Ebay on a daily basis with no luck there as well. It was especially frustrating because just a month before I bought the bicycle one had sold on Ebay for under $20! Since owning the bike. I couldn't find one anywhere.

One day I happened to be doing my regular online Hawthorne parts search when I came across one on Ebay that looked pretty close to what I was looking for. The paint was completely wrong but I had studied several photos of the part I needed and this one looked pretty close aside from that. There were no dimensions listed for the chainguard and even if there would have been I couldn't have checked to see if it would fit because the bike was 4000 miles away as I was on a Hawaiian vacation at the time. I decided to gamble on it and bought it.

A few days later this was at my door.

a370009cfce54851b19ad9b0324ef923_zps3a73c20a.jpg


I went out to the garage to give it a 'test fit' and much to my delight it was EXACTLY a perfect fit! :mrgreen: :mrgreen: :mrgreen:

So, with the knowledge it was going to work I ordered up a $20 reproduction decal for it from Ebay.

f0972df1c80bb6daf2d8491c942da23d_zps5e614960.jpg


I was impressed with the quality of the decal when it arrived. There's no substitute for the original painted look but this would do until I could find an original.

I stripped, sanded, primed and painted the old chainguard and then very cautiously applied the decal. One trick I had learned from a co-worker that used to do a lot of custom car work was to spray the adhesive back of the decal with soapy water. When the decal is wet it will slide around easily into position and you can work folds, bubbles, etc. out of it without it sticking first. It worked like a charm which was great because I didn't want to ruin a $20 sticker. I also decided not to use the weathered paint look I'd been doing to the other replacement parts I'd installed incase I chose to sell this later if I ever found an original to replace this one with.

I think it turned out pretty well.

024f2fd0f516b58bee84c86a5e08d821_zpsdbd753f0.jpg


Unfortunately now it really stands out compared to the rest of the bike and almost looks too good. :mrgreen:

1c45d6ac5c322bb732cb33dd3a00473c_zpsb477ea7f.jpg
 
The bike is looking good. The fork and chain ring I sold you look like they turned out okay. Did you attend the bike swap in Andover last Sunday? I was set up there.
 
Crassly said:
The bike is looking good. The fork and chain ring I sold you look like they turned out okay. Did you attend the bike swap in Andover last Sunday? I was set up there.

Yes,they worked out really well for me and I appreciate the excellent parts and service you helped me out with.

Yes, I was at the swap. I probably bought parts from you. :mrgreen: Were you set up by the main door?
 
LukeTheJoker said:
Looking great! I wonder if the rack may have been off a 24" bike? That may be why it sits lower?
Luke.

Thanks, Luke. I wondered that also. I got another rack with the one I used. I should compare measurements on it to see if it is the same as this one. I've looked at several other versions of this bike and the racks always seem to fit correctly so I can't really understand why mine is so ill fitting.

I wonder what the differences (if any) there would be between a 24" and 26" rack?
 
Yes, we were to the right as you walked in. My chunky friend had a bunch of head badges, and I had a bunch of parts and a couple dozen bikes.
 
Crassly said:
Yes, we were to the right as you walked in. My chunky friend had a bunch of head badges, and I had a bunch of parts and a couple dozen bikes.

I definitely bought some parts from you. At one point I bought a white, thick padded Troxel seat, I think for $10. And then before I left I bought a pair of gooseneck sand some grips for $19. I was thinking how smart it was of him to display the headbadges on the wooden banisters like he had it.

Small world, wish I would have known it was you.
 
Back
Top