


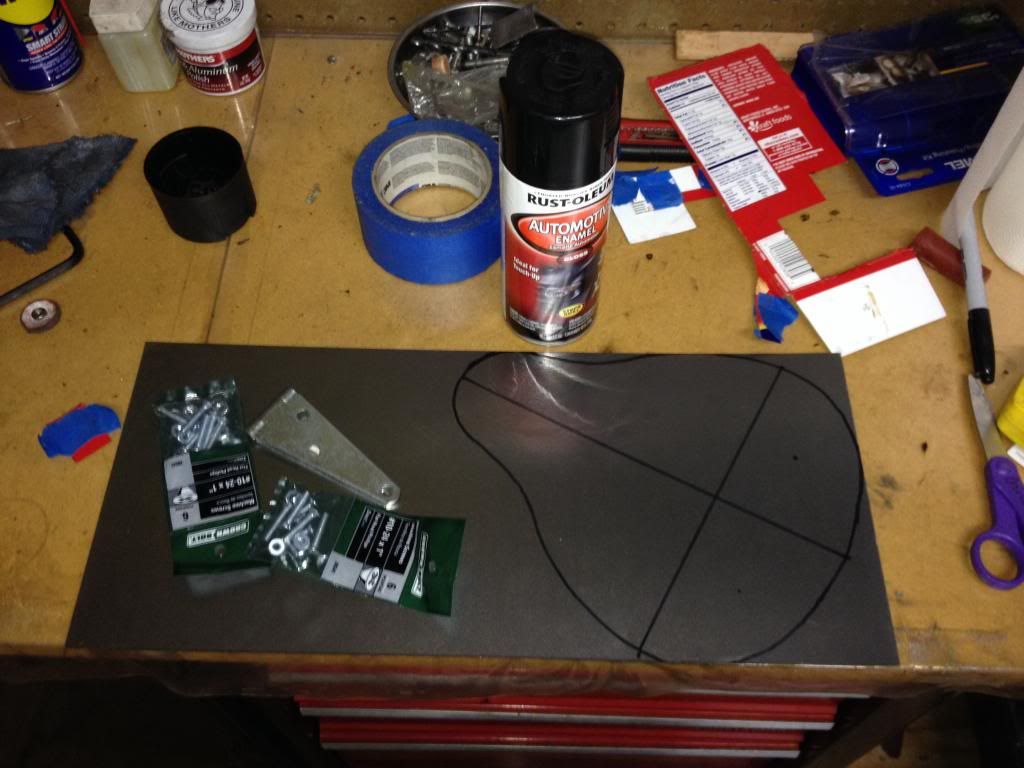
I just finished making a bobber style solo seat. It took me a little over a week but, that's becauseI have school 5 days out of the week. I wanted to do it to lower as well as push back the seat position on my latest gas bike project. I started with 16ga sheet metal and created a template using an image of a seat pan but, I scaled it down to fit on a bike.
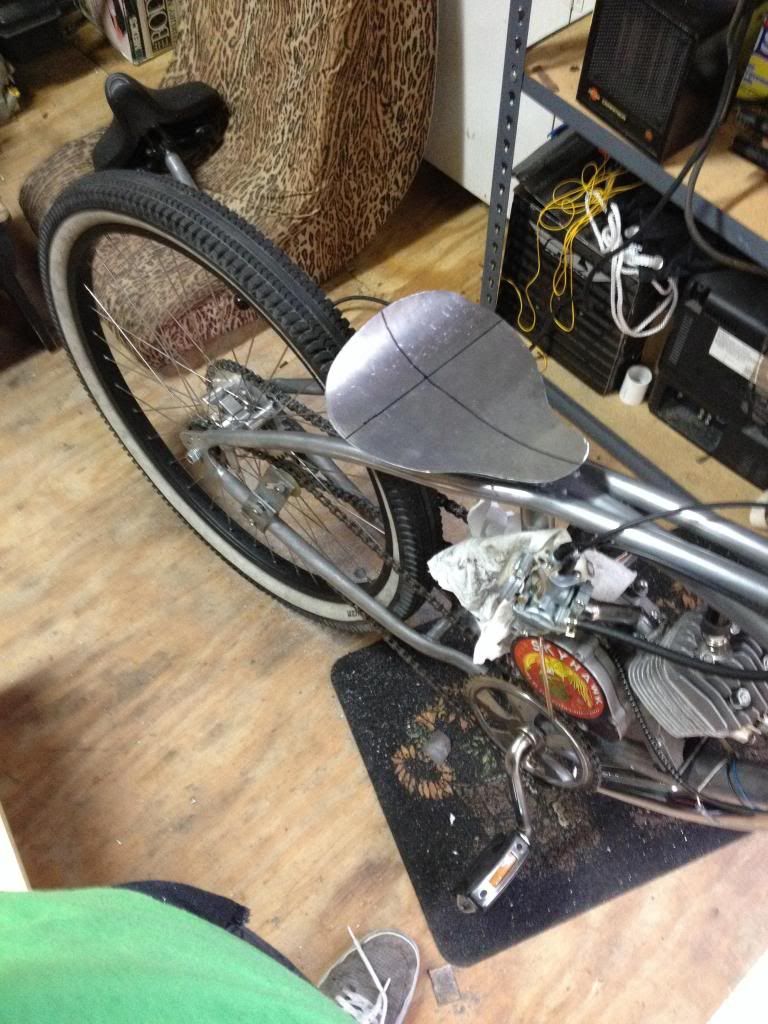
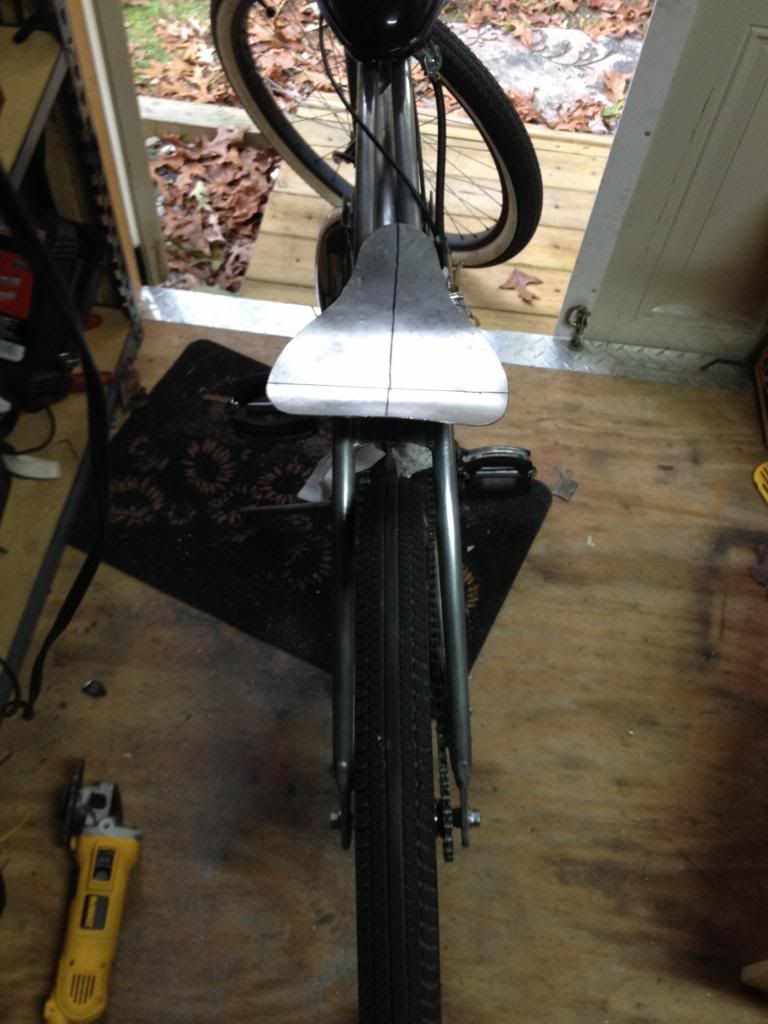
I don't have a hydraulic press, so I cut it by drilling holes around the edge and "connecting the dots" with a hacksaw.
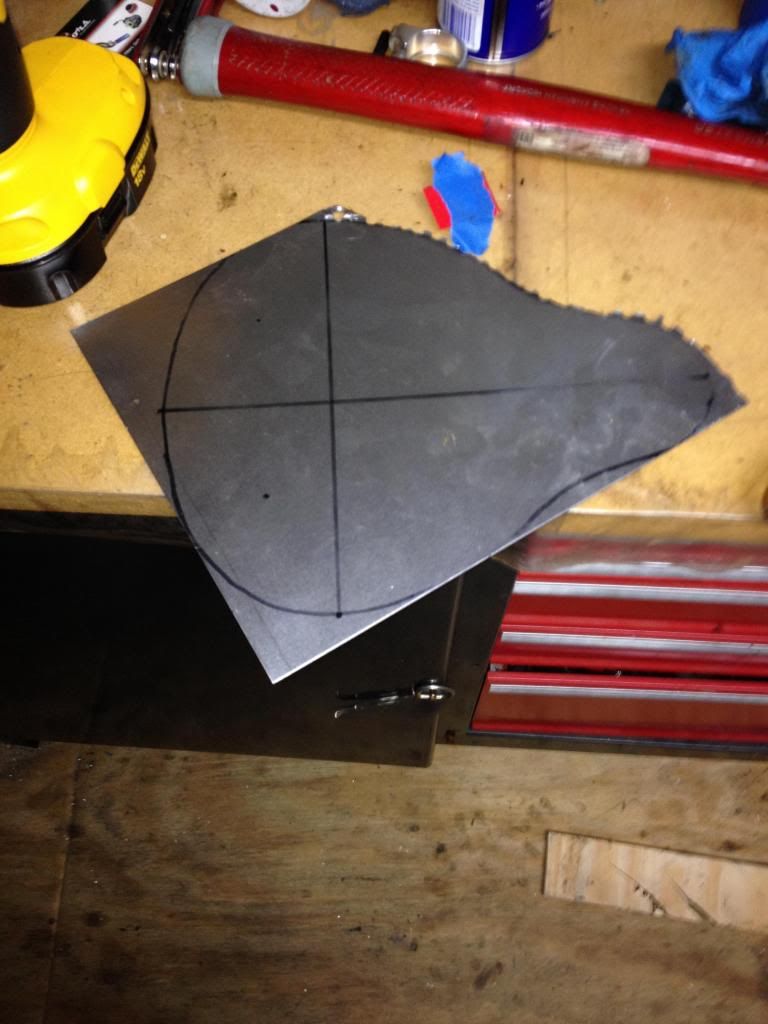
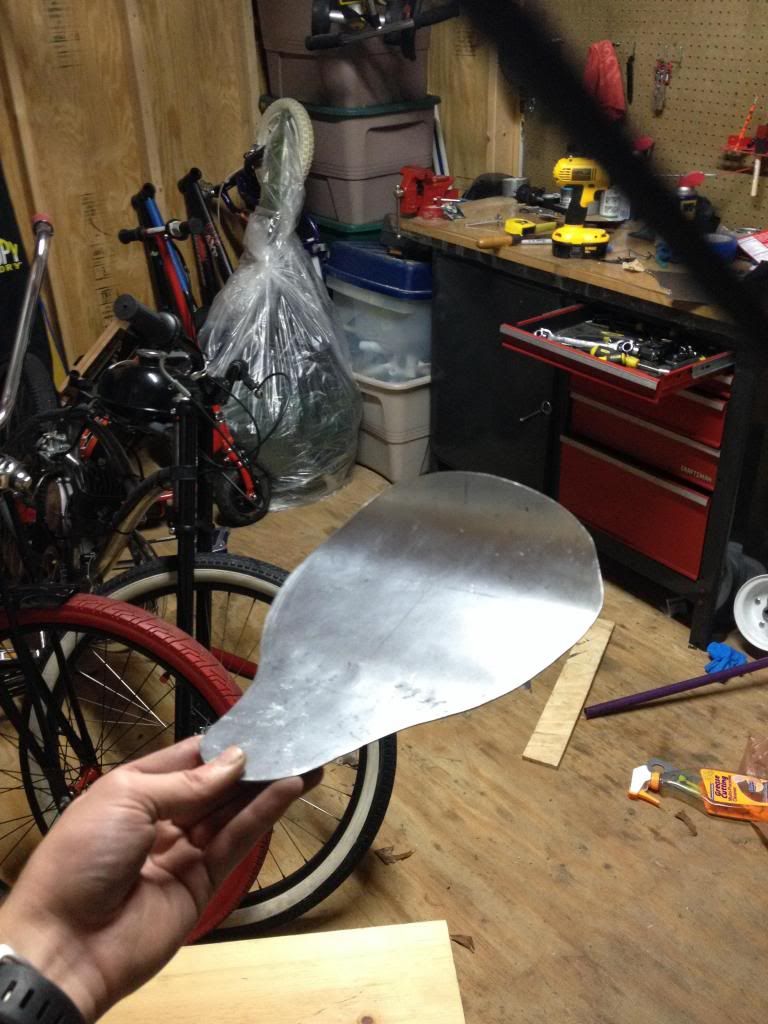
Then I cleaned up the edges with the bench grinder and shaped it with a hammer over a PVC pipe and on the floor to tone back the curve of the pipe
I mocked it up with pieces of cardboard measured to the length I wanted the springs and the hinge to get the right angle.
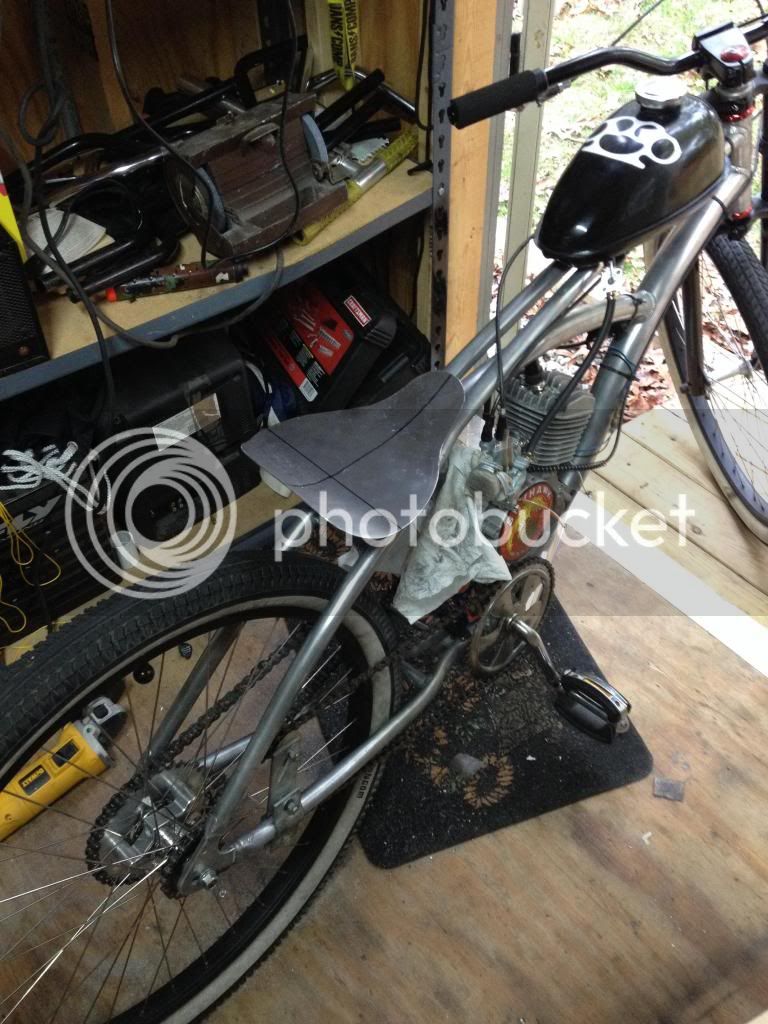
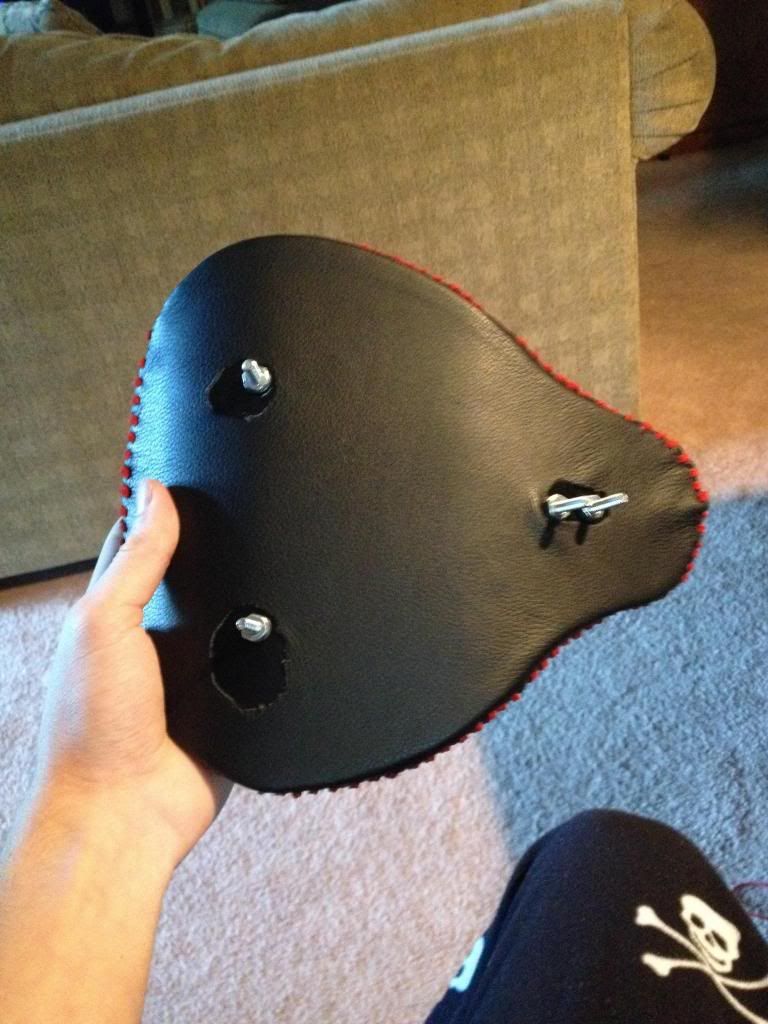
To mount the seat I cut off the seat post and ground it flush with the frame using an angle grinder. I used a hinge from Home Depot and springs from a seat I had lying around and bent the hinge to rise up from the frame about an inch and mounted them to the frame.
I found some leather sheets and lacing on eBay and got rubber foam from my local upholstery store.
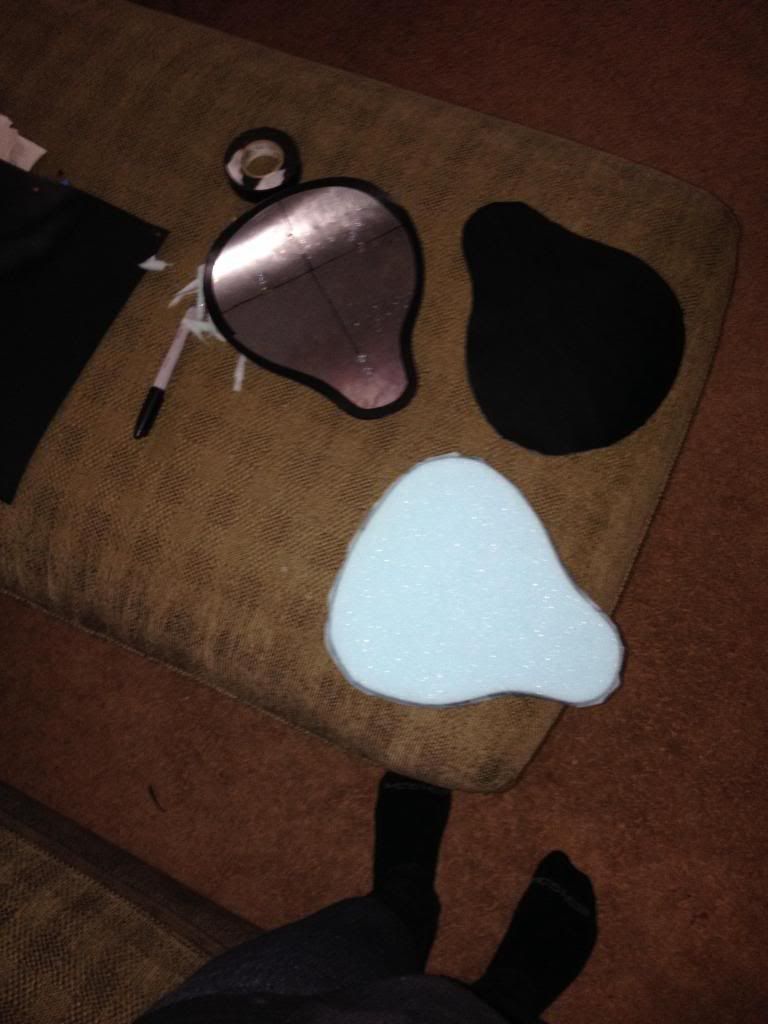
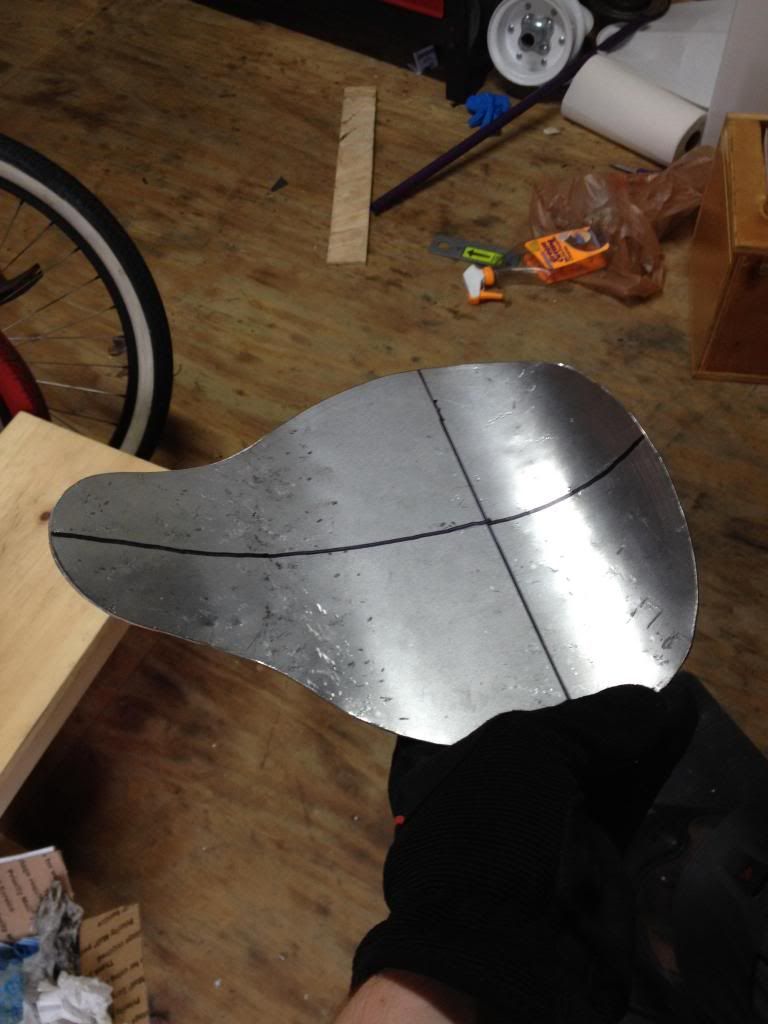
I rounded the top edge to make it a little smoother once the leather was on.

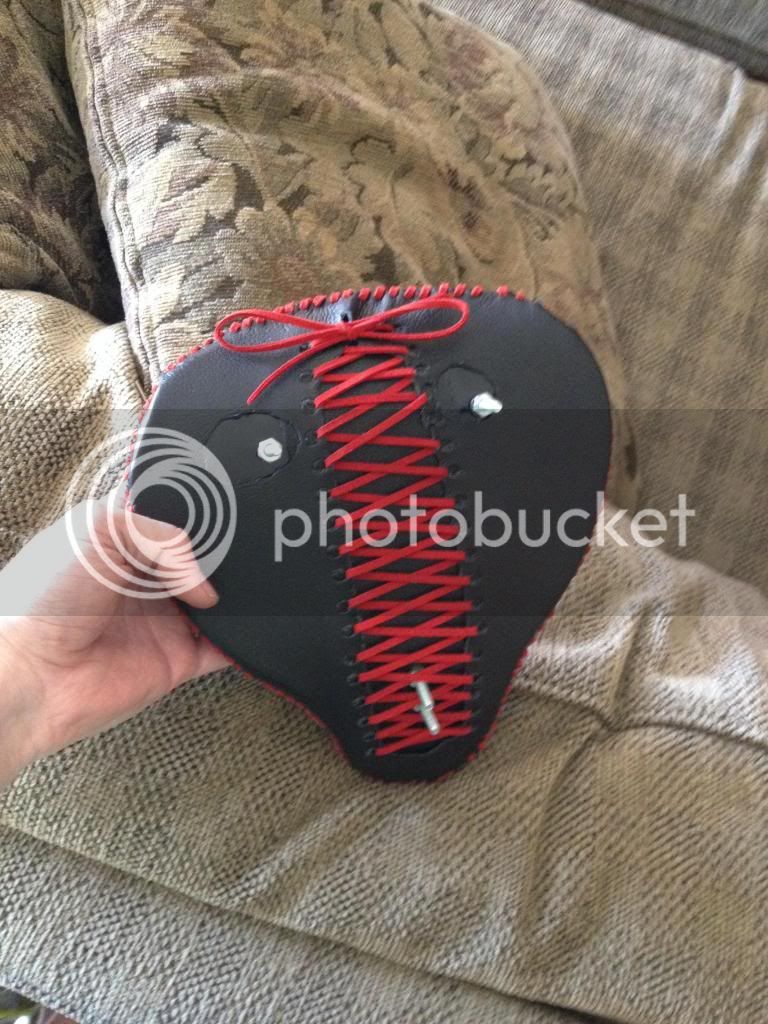
To cover the seat I put one sheet of leather on top of the seat and one on the bottom and laced them together using red leather lacing. I punched the holes using a nail rather than a punch so that when laced, the holes would not stretch.
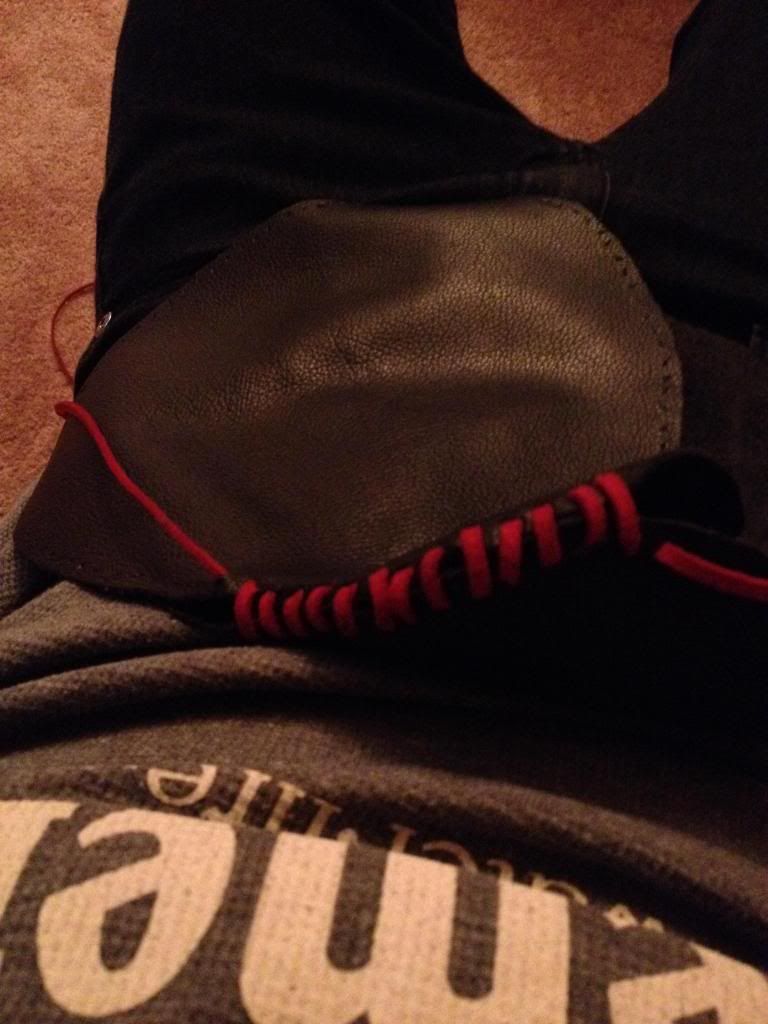
I laced them together about halfway and then stretched it over the seat and finished the rest of the lacing.
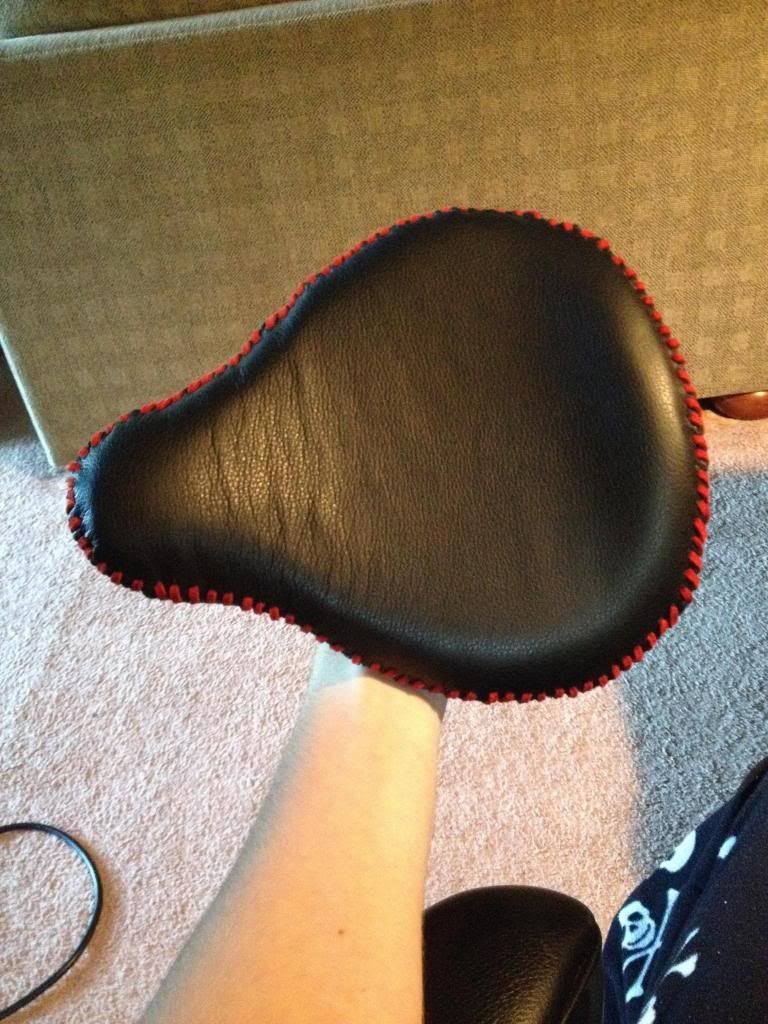
To keep the leather tight I cut out a strip from the bottom and laced it like a shoe so that I can adjust it over time and it looks pretty cool too. I also laid another strip of leather underneath to hide the metal and keep it snug.
I'll be posting pictures of it mounted on the bike soon, it's mounted just haven't had time for pictures because I've been working on my car. Thanks for reading!

I don't have a hydraulic press, so I cut it by drilling holes around the edge and "connecting the dots" with a hacksaw.

Then I cleaned up the edges with the bench grinder and shaped it with a hammer over a PVC pipe and on the floor to tone back the curve of the pipe


I mocked it up with pieces of cardboard measured to the length I wanted the springs and the hinge to get the right angle.


To mount the seat I cut off the seat post and ground it flush with the frame using an angle grinder. I used a hinge from Home Depot and springs from a seat I had lying around and bent the hinge to rise up from the frame about an inch and mounted them to the frame.

I found some leather sheets and lacing on eBay and got rubber foam from my local upholstery store.

I rounded the top edge to make it a little smoother once the leather was on.

To cover the seat I put one sheet of leather on top of the seat and one on the bottom and laced them together using red leather lacing. I punched the holes using a nail rather than a punch so that when laced, the holes would not stretch.

I laced them together about halfway and then stretched it over the seat and finished the rest of the lacing.


To keep the leather tight I cut out a strip from the bottom and laced it like a shoe so that I can adjust it over time and it looks pretty cool too. I also laid another strip of leather underneath to hide the metal and keep it snug.

I'll be posting pictures of it mounted on the bike soon, it's mounted just haven't had time for pictures because I've been working on my car. Thanks for reading!