You are using an out of date browser. It may not display this or other websites correctly.
You should upgrade or use an alternative browser.
You should upgrade or use an alternative browser.
BSA motorcycle inspired first build
- Thread starter Little_Will
- Start date


Help Support Rat Rod Bikes Bicycle Forum:
This site may earn a commission from merchant affiliate
links, including eBay, Amazon, and others.
Boris said:I cant wait to see this bike in the 'flesh'! Its evolving beautifully! Hope I'm invited to her maiden voyage!!
Haha, of course Boris. I might need the moral (and physical) support!! :lol:
Will on your first page on the photo of the paper tank mock up you have the struts connected to where the top of the shock mounts now. I think if you did a set of top struts that look like those and connect to some short rockers off of the top shock mount and the bottom to the lower shock pivot point you may have the look you want.
Mate... what a fantastic build. I am sooo jealous of all that welding talent... I have tried, but just can't seem to get it
I am new to this forum and have heaps to look at but will be keeping an on this one for sure.
Cheers,
Glen.
I am new to this forum and have heaps to look at but will be keeping an on this one for sure.
Cheers,
Glen.
Glen said:Mate... what a fantastic build. I am sooo jealous of all that welding talent... I have tried, but just can't seem to get it
I am new to this forum and have heaps to look at but will be keeping an on this one for sure.
Cheers,
Glen.
Cheers Glen. I served an apprenticeship as a welder/fabricator when I first left school (back in '87) and driving "classic" cars in the "rust friendly" UK has managed to keep my welding skills honed :lol: . All the work on this build has been done with a small hobby mig (something like this: http://www.machinemart.co.uk/shop/produ ... mig-welder) . Mig is by far the easiest form of welding to pick up, when I was an apprentice I also tried gas, stick and tig but they were much harder to get the hang of. If I were you I'd just keep trying, I was atrocious at welding when I first started. There's lots of variables that need to be right for the stuff you're welding, wire speed, ampage etc. Just fiddle around with it on some scrap for a while, you'll know if it looks right and sounds right (cos the machine will tell you if it's not happy!). Keep at it and read up about it online, it'll click. When things go wrong don't get disheartened. I still get it wrong (a lot of the time :lol: ) , just grind the weld back/off and it usually goes on better the second time anyway! :lol:
XC204 said:Will on your first page on the photo of the paper tank mock up you have the struts connected to where the top of the shock mounts now. I think if you did a set of top struts that look like those and connect to some short rockers off of the top shock mount and the bottom to the lower shock pivot point you may have the look you want.
Yep, got'ya. I still have those struts put to one side. Will have a go at adapting them to the new set-up, thanks
XC204 said:Will on your first page on the photo of the paper tank mock up you have the struts connected to where the top of the shock mounts now. I think if you did a set of top struts that look like those and connect to some short rockers off of the top shock mount and the bottom to the lower shock pivot point you may have the look you want.
Well, I messed up today
. I've been working on the bike outside in the freezing cold so my brain must've froze or something?! :lol: I had the right intention but I forgot to add a frontal, upper pivot point so I've now effectively 'locked' the shocker in place! :x


On the plus side though, at least I'm now getting the look I'm after with the forks

and it shouldn't be too hard to put right my mistake next weekend?
Will
The side profile is great! Oops been there done that on the goof! working outside sucks even in an unheated garage. I got a gas hanging furnace about 4 yrs ago what a difference in wanting to go to the garage and weld something or grind. Keep the photos coming.
XC204 said:The side profile is great! Oops been there done that on the goof! working outside sucks even in an unheated garage. I got a gas hanging furnace about 4 yrs ago what a difference in wanting to go to the garage and weld something or grind. Keep the photos coming.
I live in a flat/apartment so need to use my Dads garage when I'm working on a 'project'. Welding and grinding are NOT allowed in the there, which is fair enough, it's his garage after all. So I have no choice but to work outside weather permitting. At least our winters don't get as cold as yours! I worked in Wisconsin for a while but only during the spring and summer, I heard all about how bad it gets there :lol:
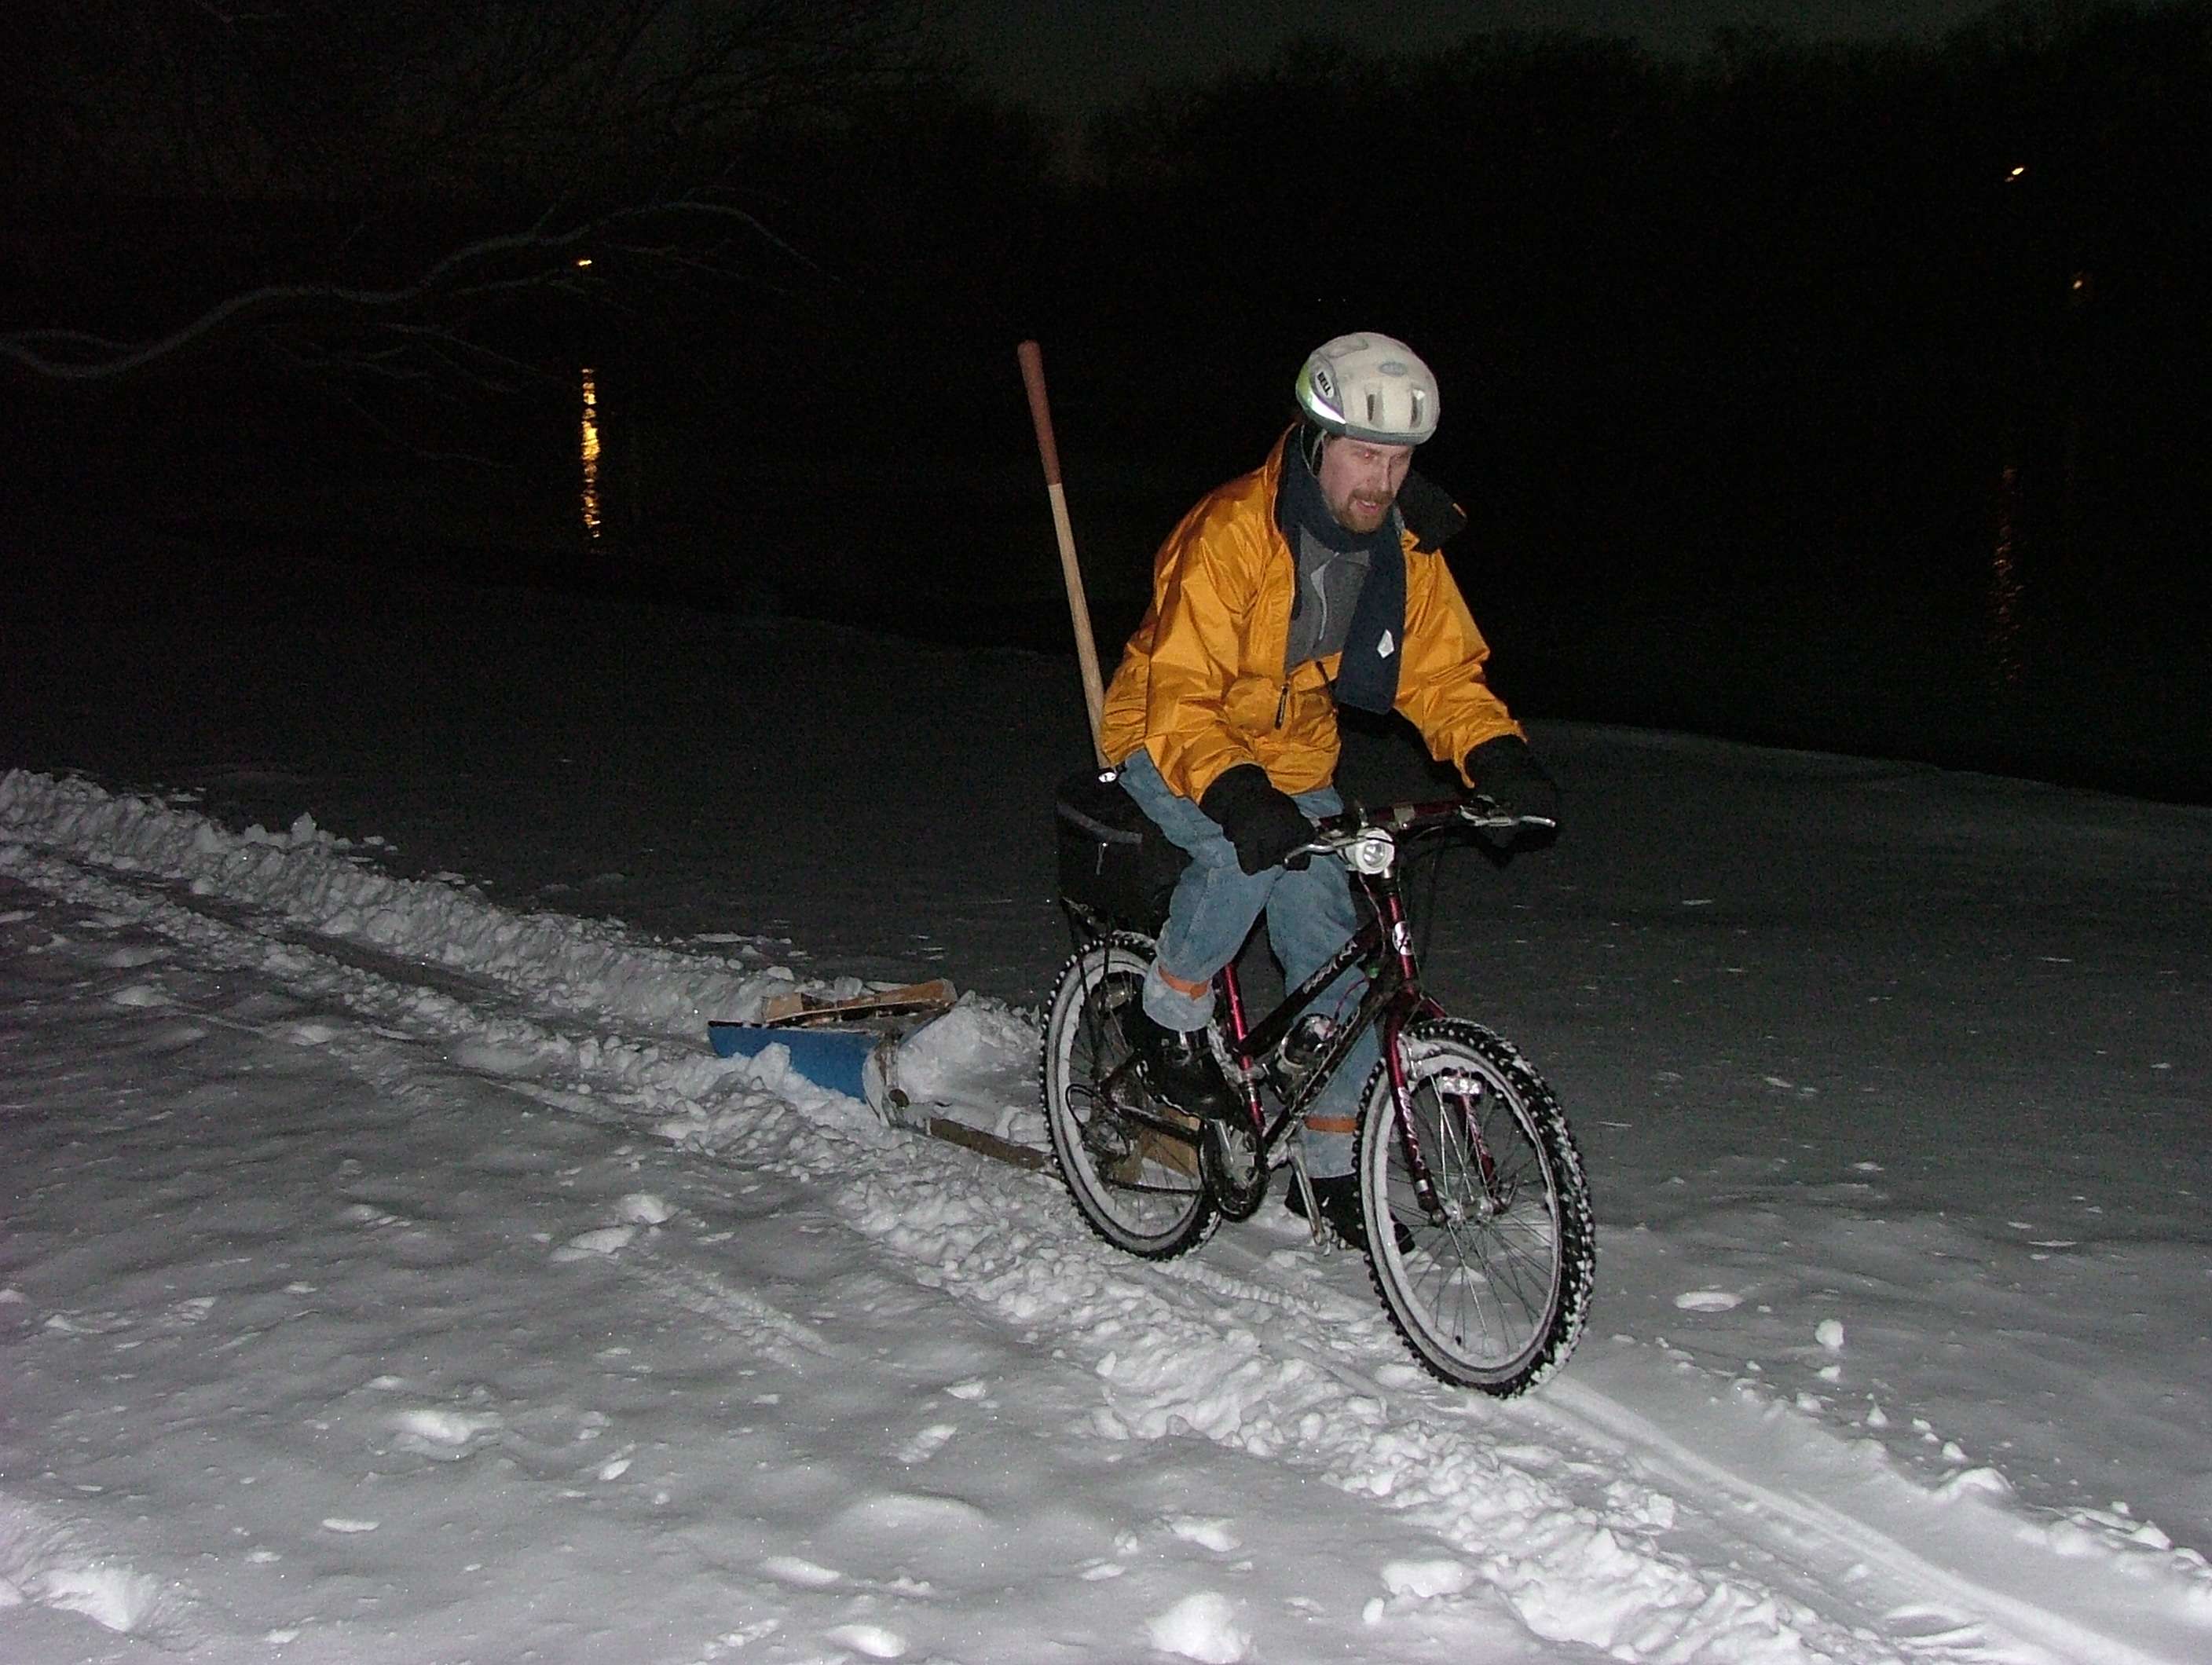
Will you heard right on the cold this is my frozen face on the way to work it was prob. 10 deg F that day we rode on a -25 a coupla winters ago. The next pic is my friend Dave plowing our route to work with his bike we help if it gets too deep.We ride all year my round trip is 15 mi

Beautiful build Little_Will, dunno how I missed it for so long... What you have done with that frame is awesome! To start with something so ordinary and end up with that is good thinking. I normally look at that girls frame and think, "Well, I can take the bottom bracket, head tube off it, maybe hang on to the rear triangle for a cheater build somewhere, and throw the rest away" Just shows, Seeing what other people are doing on this forum can save us so much time and effort and come up with amazing bikes!
Love the little extension you put on the down tube, needed that little extra there.
Loving the seats, brilliant fab work there, these things can be bought, (big $$$) but it is so much nicer knowing that it is one of a kind and you did it yourself!
Girder forks are so awesome, love the idea of using twin round bar stays, adds a nice industrial look and also lightens the look compared to thicker tubing.
Well done! :wink:
XC204 said:Will you heard right on the cold this is my frozen face on the way to work it was prob. 10 deg F that day we rode on a -25 a coupla winters ago. The next pic is my friend Dave plowing our route to work with his bike we help if it gets too deep.We ride all year my round trip is 15 mi
Wow, that looks veeerry cold I'm shivering just looking at it. We had around -10 or so a couple of years back, but that's t-shirt weather compared to yours :lol:
That's dedication cycling to work 15 miles in that sort of weather. I walk to work whatever the weather but it's only around 3 mile from home.
LukeTheJoker said:Beautiful build Little_Will, dunno how I missed it for so long... What you have done with that frame is awesome! To start with something so ordinary and end up with that is good thinking. I normally look at that girls frame and think, "Well, I can take the bottom bracket, head tube off it, maybe hang on to the rear triangle for a cheater build somewhere, and throw the rest away" Just shows, Seeing what other people are doing on this forum can save us so much time and effort and come up with amazing bikes!
Love the little extension you put on the down tube, needed that little extra there.
Loving the seats, brilliant fab work there, these things can be bought, (big $$$) but it is so much nicer knowing that it is one of a kind and you did it yourself!
Girder forks are so awesome, love the idea of using twin round bar stays, adds a nice industrial look and also lightens the look compared to thicker tubing.
Well done! :wink:
Cheers Luke! Main reason I used a girls frame was for height. At around 5'6" I have trouble reaching the ground on a Mans bike :lol: . You're right these things can be bought, but I've always been the same, I just have to be making or fiddling about with stuff or I'm just not happy!
Good point on the girder forks, I'd never really looked at them like that. I only did it that way to use up the scrap material I had :lol: .
Little_Will said:Good point on the girder forks, I'd never really looked at them like that. I only did it that way to use up the scrap material I had :lol: .
Got to love it when things just work...
Luke.
I put right my mistake with the front spring pivots today (I think?), hopefully it'll all work as it should now.


I also made a little cap to go behind the seat tube. It sits a little lower than the tank (easily remedied) but it kind of gives the illusion that the tank reaches further back.


Basically, I just wanted to mess around with the cosmetics a little :lol:
Will
I also made a little cap to go behind the seat tube. It sits a little lower than the tank (easily remedied) but it kind of gives the illusion that the tank reaches further back.
Basically, I just wanted to mess around with the cosmetics a little :lol:
Will
That tank extension is awesome!
Great idea!
Luke.
Great idea!
Luke.
illMATTic said:Any progress on that saddle?
Nah mate, I'm afraid not
. I've been unwell for a week or two (winter bugs/viruses :roll: ) so haven't been up for working on the bike. I did have an extra day off work last week but that was spent on my car. A door lock needed replacing plus a sidelight had gone off! (Good old Lucas electrics :lolillMATTic said:Any progress on that saddle?
Ok, got some more work done on the saddle this weekend. Not much though as it's been raining pretty much constantly here lately! :x
This was what the saddle started life as

I've added some spring mounts and strengthening supports to the underside and top of the saddle (more uses for those paint can lid sealing rings! :lol: )


then I made a 'bump stop' to add to the front saddle mount because the front of the seat pushes down when you sit on it


now i'm in the process of building the seat up with fibreglass, automotive 'bridging filler' to strengthen/make it more rigid

Will
Latest posts
-

-

-

-

-

-

-
TRADITIONAL Quasi-Motobike : Video Update #2 ! Surprise Surprise surprise~!
- Latest: Bike from the Dead
-

-

-
