


I took an idea from one of the links that Hugo passed along a while back and I built a super cheap bike work stand.
I spent about $19 at Home Depot - for four 8' 2x4's and some bolts, washers, and wing nuts.
Turned out that I didn't even use the bolts and only used three of the 2x4's so the total cost ended up being a little over $7 (not counting the nails which I already had).
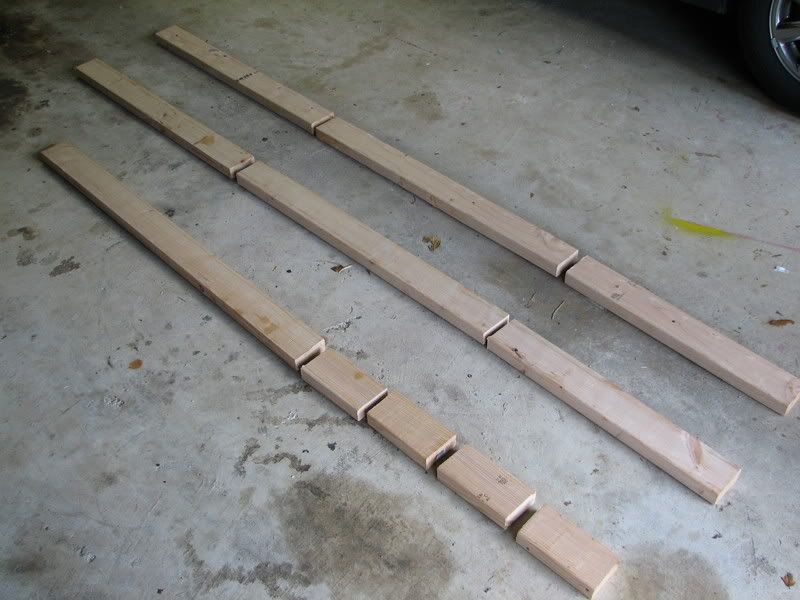
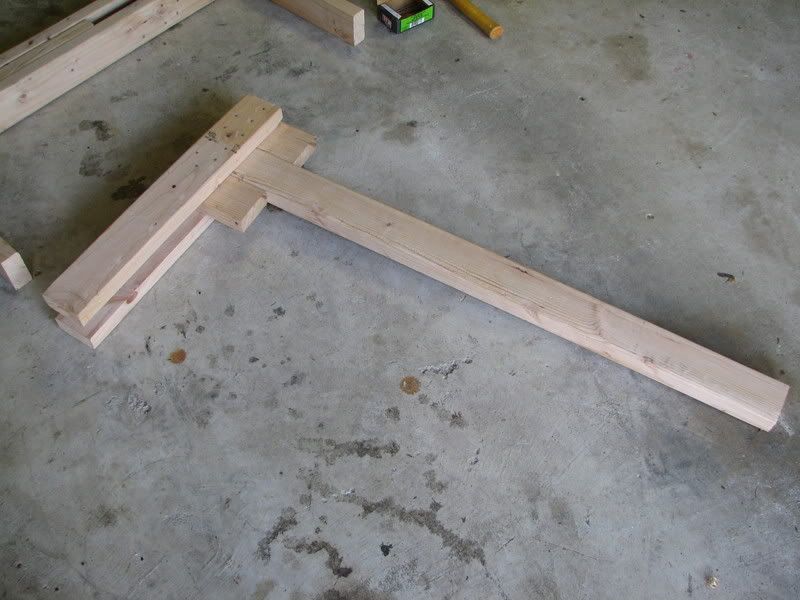
Step one was to cut the 2x4's. I cut two of them into 3', 3', and 2' sections, so I ended up with two 2' sections and four 3' sections. I cut the 3rd one into a 4' section, four 7" sections, and whatever was left.
Here's the cutting result .. and yes, the camera does give you an optical illusion since the top two boards are in sections of 3', 3', and 2' - even though it appears more like 2', 3', and 2'.
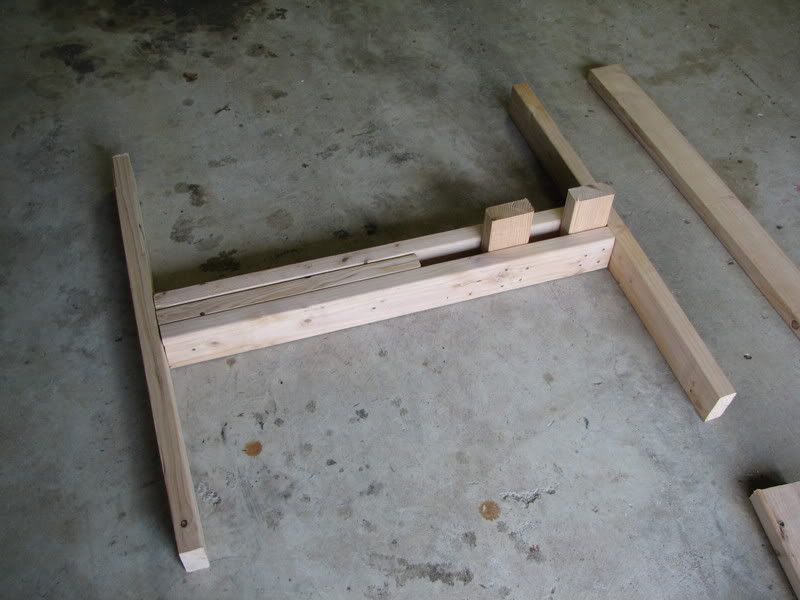
I layed the cut pieces together to do a mock up of the bottom part of the stand. The four 3' sections will go on the bottom - along with two of the 7" pieces and also the extra piece I had left over. Here's a couple of shots of how that section will look ...
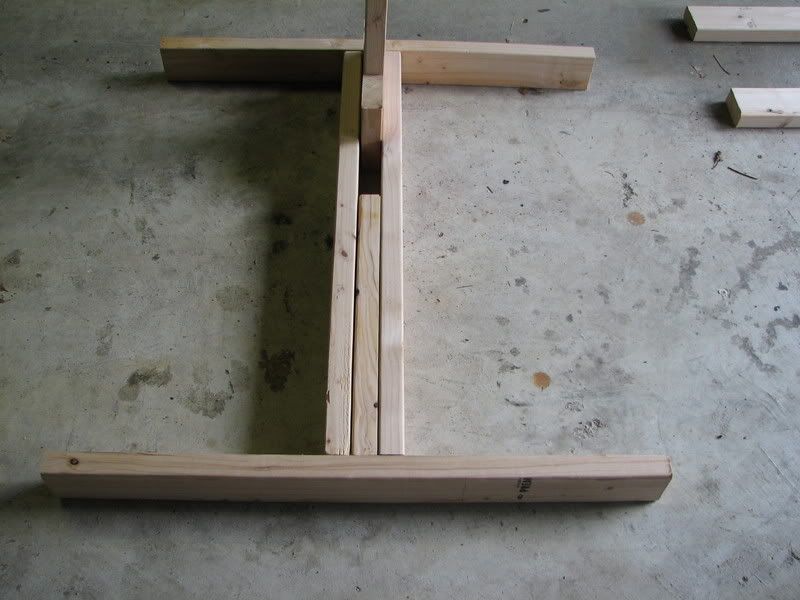
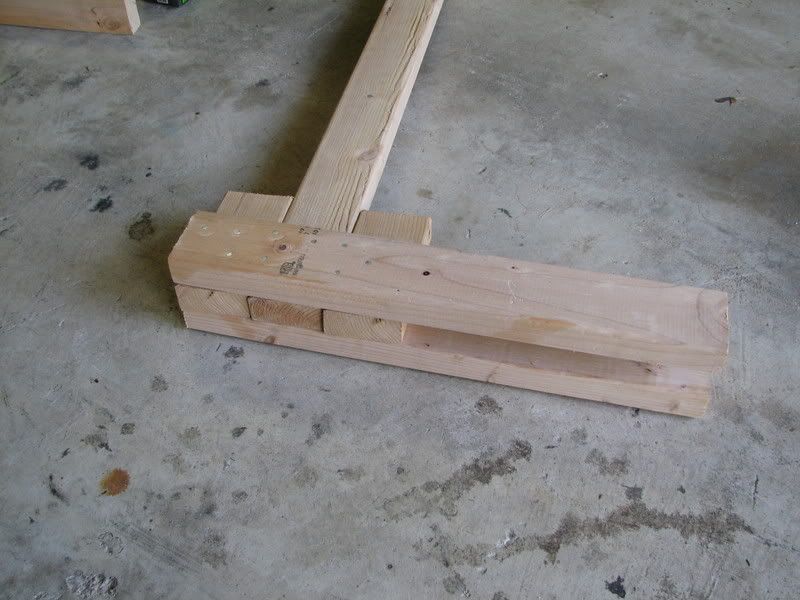
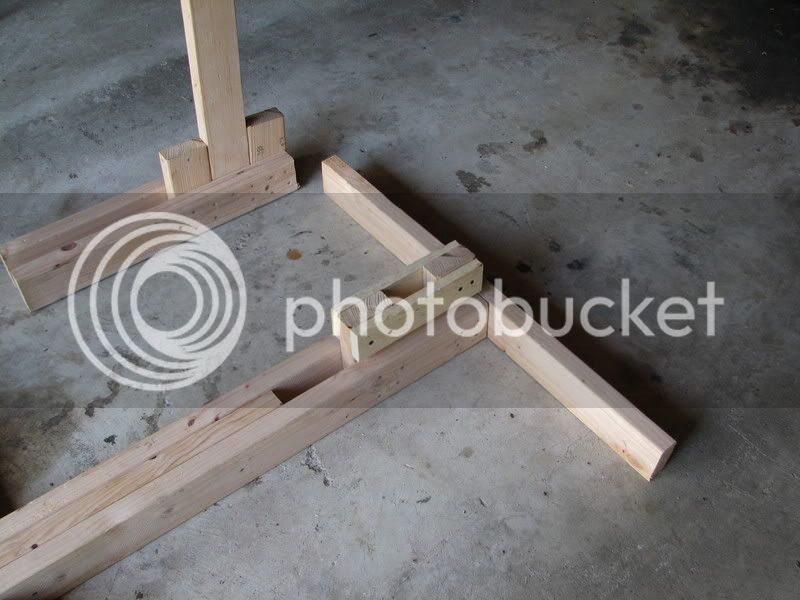
Next I pieced the center of the bottom section together and nailed it. I temporarily slipped the up post in between the 7" pieces while I nailed them to make sure I could slide that back in later once the nailing was done. This shot shows the section with the up post removed and it nailed together.
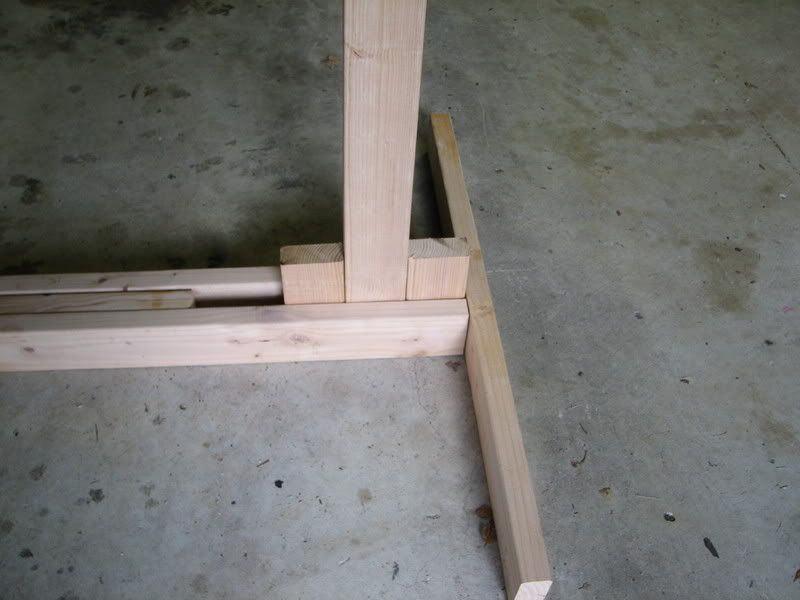
Once I had that part nailed together I then added the two 3' pieces to each end - which will support the stand from side to side. That completed the bottom section.
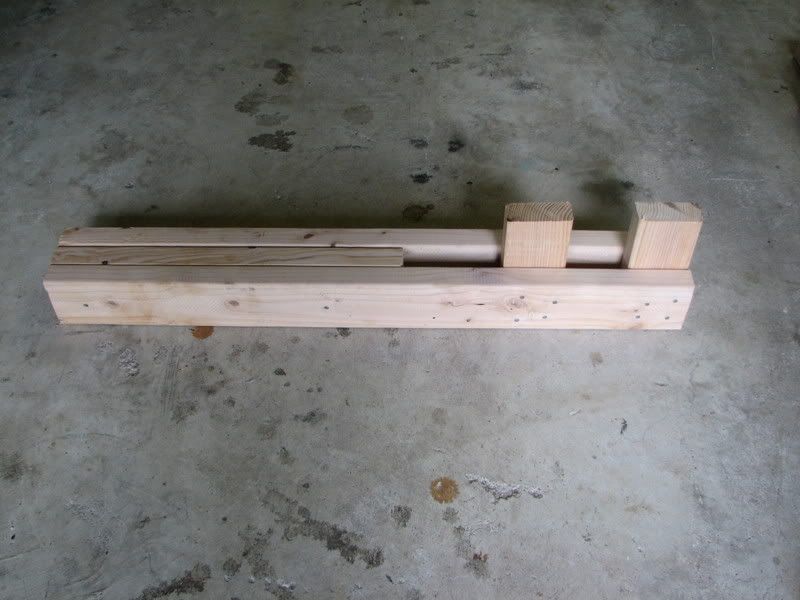
Next I nailed the top section together. I decided to have the 2' pieces on the top slant upward a little instead of being exactly level. That would keep the bike from accidentally sliding off - and also allow the top section to "settle" some over time and still be level or slanted upward a little.
Here's how the top section looked ..
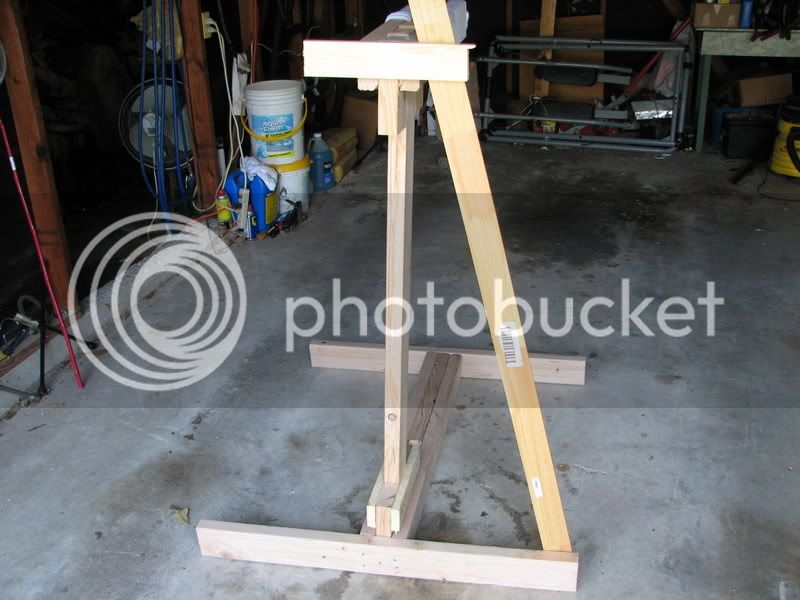
Here's a shot of the finished product ....
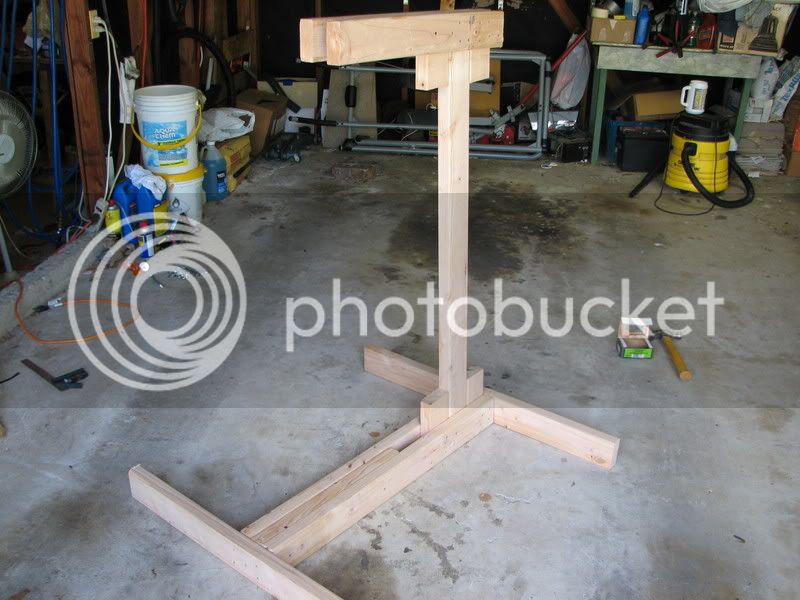
I originally planned to drill holes through the bottom section and the up post and put a couple of bolts with wing nuts through them to hold the two sections together, but once I nailed the bottom section together using the 7" braces on each side of the up post, I found just sliding the top section into the bottom section was good enough and no bolts were necessary. So you can slip the up post into the bottom section to assemble it - and then just pull it back apart to store the two sections separately out of the way.
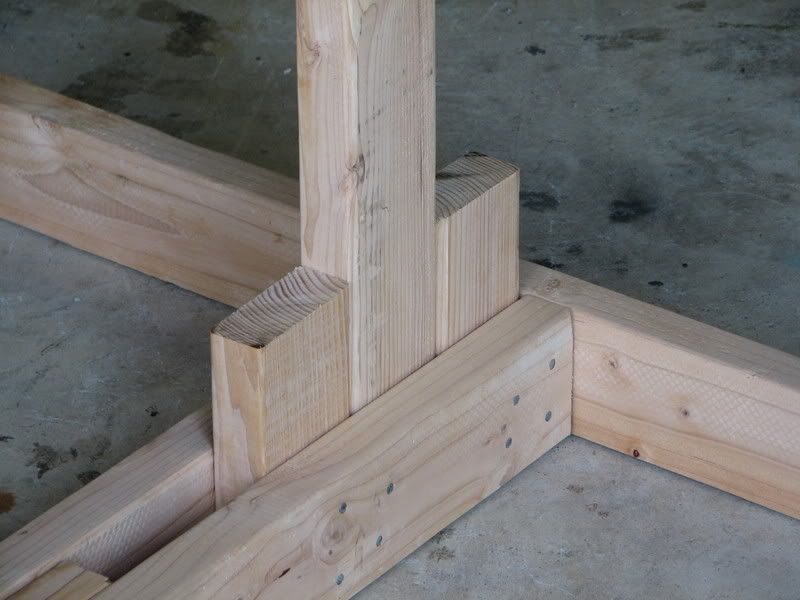
I could brace it even more by cutting some additional pieces of 2x4 and nailing them to the 7" boards that are sticking up on each side of the up post. That would put a 7" box around the up post - but that may be over kill, so I will use it as is for a while and see how it goes.
Here's a couple of shots of the stand with my new bike on it. You can hang it by the seat post, or by putting the frame posts itself in the stand. If it's a mens bike you could even slide the top arms under the top frame post - but it might not be as steady that way.
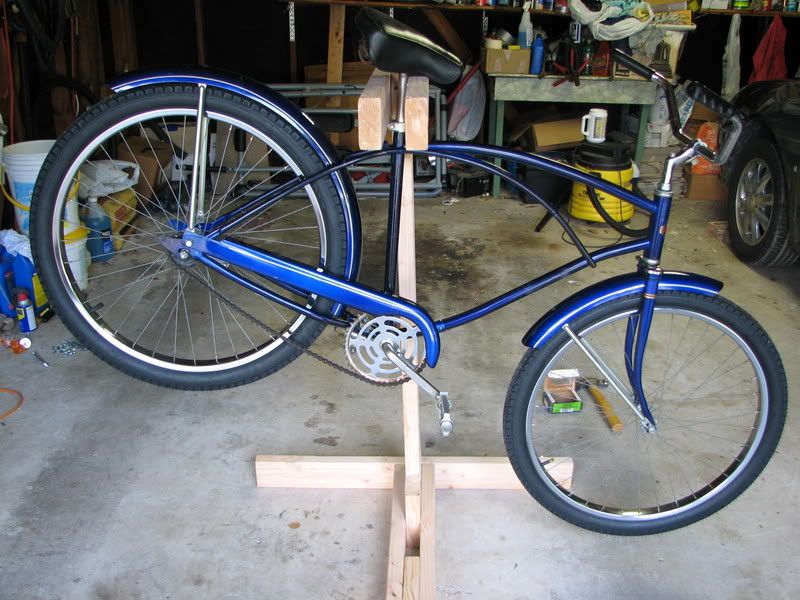
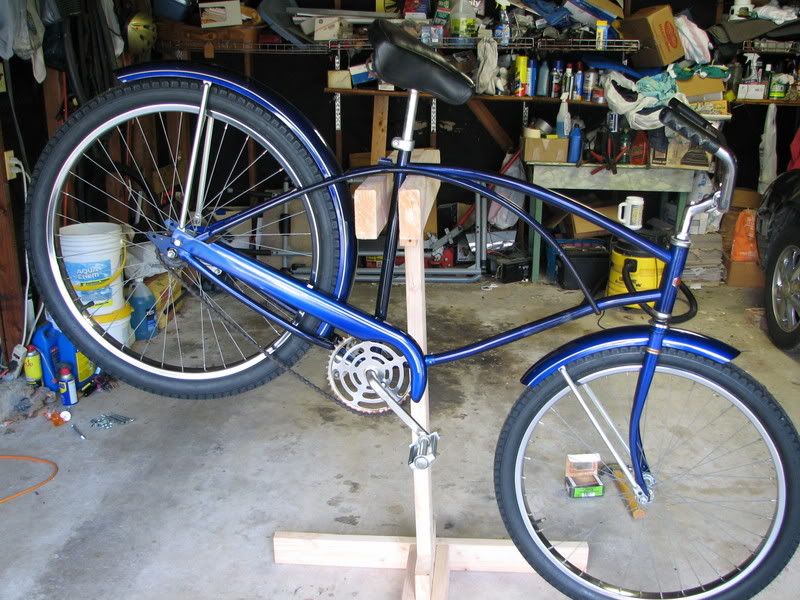
If you though that scratching your frame while using the stand might be a problem you could always wrap the upper arms with cloth - maybe a towel even, and you could also hook a piece of foam on the up post in back of the bike in case you didn't want the bike frame to bump that if it rocked backwards while you were working on it.
You can also slide the bike all the way back on the upper arms - and use a bungee cord to hold the frame to the up post if you needed to do some heavy duty wrenching and didn't want the bike to move.
So there it is. Just a little over $7 to build and it comes apart so you can store the two sections out of the way. I think it took me maybe an hour total to build it.
I put it to use and cleaned up the surface rust on the bike wheels, handlebars, crank, etc.
*********** UPDATE *****************
I made a couple of changes to the work stand and thought of one more I could make later if needed.
I had a piece of 1x3 laying around, so I cut a couple of pieces of that and boxed in the bottom section where the top section slides in - to give it a little more side to side support.
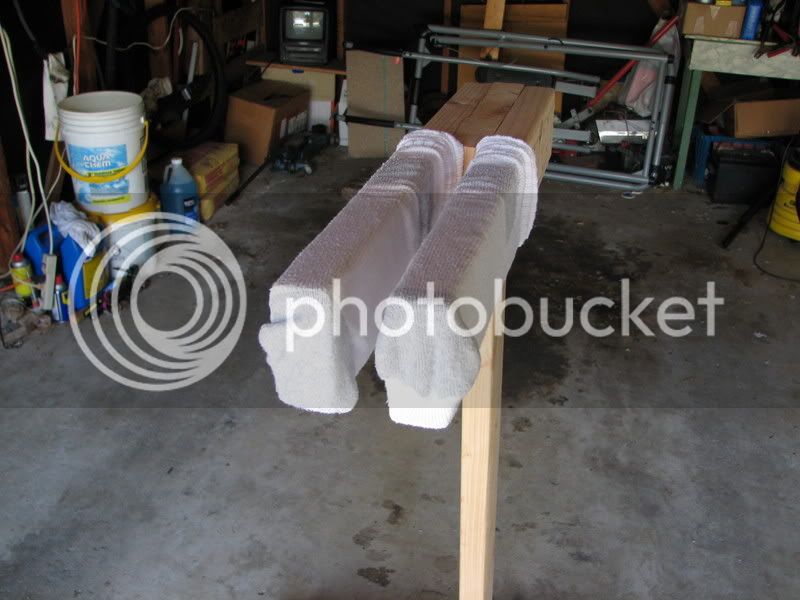
I also used my brother's idea and found an old pair of athletic socks and slid those over the upper arms - to keep from accidentally scratching the frames when using the stand. 2 socks over each arm might be even better but I only found one pair in my drawer.
I didn't do this one, but thought I would mock it up for future reference.
If you are getting much side to side sway when working on the bike, you could (1) nail a piece of board across the back of the upper section, (2) drill holes in each end of that board, (3) drill holes in the ends of the bottom rear leg, and (4) run braces from the top section down to the bottom leg.
Cross bracing the top section should totally stop any side to side motion.
And by drilling holes and using bolts to bolt the brace onto the stand rather than nailing it you could then remove it later to break the whole thing back down for storage.
Of course that might double your build cost and run it up to $14 because of the extra wood and bolts, nuts, washers, etc.!! :lol:
I spent about $19 at Home Depot - for four 8' 2x4's and some bolts, washers, and wing nuts.
Turned out that I didn't even use the bolts and only used three of the 2x4's so the total cost ended up being a little over $7 (not counting the nails which I already had).
Step one was to cut the 2x4's. I cut two of them into 3', 3', and 2' sections, so I ended up with two 2' sections and four 3' sections. I cut the 3rd one into a 4' section, four 7" sections, and whatever was left.
Here's the cutting result .. and yes, the camera does give you an optical illusion since the top two boards are in sections of 3', 3', and 2' - even though it appears more like 2', 3', and 2'.
I layed the cut pieces together to do a mock up of the bottom part of the stand. The four 3' sections will go on the bottom - along with two of the 7" pieces and also the extra piece I had left over. Here's a couple of shots of how that section will look ...
Next I pieced the center of the bottom section together and nailed it. I temporarily slipped the up post in between the 7" pieces while I nailed them to make sure I could slide that back in later once the nailing was done. This shot shows the section with the up post removed and it nailed together.
Once I had that part nailed together I then added the two 3' pieces to each end - which will support the stand from side to side. That completed the bottom section.
Next I nailed the top section together. I decided to have the 2' pieces on the top slant upward a little instead of being exactly level. That would keep the bike from accidentally sliding off - and also allow the top section to "settle" some over time and still be level or slanted upward a little.
Here's how the top section looked ..
Here's a shot of the finished product ....
I originally planned to drill holes through the bottom section and the up post and put a couple of bolts with wing nuts through them to hold the two sections together, but once I nailed the bottom section together using the 7" braces on each side of the up post, I found just sliding the top section into the bottom section was good enough and no bolts were necessary. So you can slip the up post into the bottom section to assemble it - and then just pull it back apart to store the two sections separately out of the way.
I could brace it even more by cutting some additional pieces of 2x4 and nailing them to the 7" boards that are sticking up on each side of the up post. That would put a 7" box around the up post - but that may be over kill, so I will use it as is for a while and see how it goes.
Here's a couple of shots of the stand with my new bike on it. You can hang it by the seat post, or by putting the frame posts itself in the stand. If it's a mens bike you could even slide the top arms under the top frame post - but it might not be as steady that way.
If you though that scratching your frame while using the stand might be a problem you could always wrap the upper arms with cloth - maybe a towel even, and you could also hook a piece of foam on the up post in back of the bike in case you didn't want the bike frame to bump that if it rocked backwards while you were working on it.
You can also slide the bike all the way back on the upper arms - and use a bungee cord to hold the frame to the up post if you needed to do some heavy duty wrenching and didn't want the bike to move.
So there it is. Just a little over $7 to build and it comes apart so you can store the two sections out of the way. I think it took me maybe an hour total to build it.
I put it to use and cleaned up the surface rust on the bike wheels, handlebars, crank, etc.
*********** UPDATE *****************
I made a couple of changes to the work stand and thought of one more I could make later if needed.
I had a piece of 1x3 laying around, so I cut a couple of pieces of that and boxed in the bottom section where the top section slides in - to give it a little more side to side support.
I also used my brother's idea and found an old pair of athletic socks and slid those over the upper arms - to keep from accidentally scratching the frames when using the stand. 2 socks over each arm might be even better but I only found one pair in my drawer.
I didn't do this one, but thought I would mock it up for future reference.
If you are getting much side to side sway when working on the bike, you could (1) nail a piece of board across the back of the upper section, (2) drill holes in each end of that board, (3) drill holes in the ends of the bottom rear leg, and (4) run braces from the top section down to the bottom leg.
Cross bracing the top section should totally stop any side to side motion.
And by drilling holes and using bolts to bolt the brace onto the stand rather than nailing it you could then remove it later to break the whole thing back down for storage.
Of course that might double your build cost and run it up to $14 because of the extra wood and bolts, nuts, washers, etc.!! :lol:


