LED eatery powered from generated?

Rat Rod Bikes Bicycle Forum

Help Support Rat Rod Bikes Bicycle Forum:

This site may earn a commission from merchant affiliate links, including eBay, Amazon, and others.
Joined
Oct 13, 2011
Messages
87
Reaction score
0
Location
Kokomo Indiana
Rating - 0%
0   0   0
i bought this Generated powered light on ebay, my first light since i started this bicycle building :D i just want to switch this to and LED... i want a switch on there as well i know i have to buy a battery pack and an LED flashlight that i will take apart and connect to the battery pack ive never soldered or did electrical stuff please help!
In exchange for help ill post my new idea for a wooden light bracket :lol:
1108111606.jpg
 
i recently tore apart one of the .99 cent aluminum led flashlights from autozone,and they are very simple once you get inside.you might have to bend the upper part of the light to remove the lens to remove the led cluster.from there all the similar ends are twisted into the center of the cluster which is the first leg of the series circuit and contacts one end of the battery pack,mine was a 3volt/.95mA pack,the switch is on the other end,and the outer casing works as the other leg of the series circuit.that contacts the other end of the leds which are bent up around the outside of the cluster to contact the casing when inserted.this is for the 9led 3aaa flashlights of course.kinda hard to comprehend all this stuff,but once you tear into one you'll understand.good luck and keep us posted,id like to do the same with some old corvair lights mounted on the fenders
 
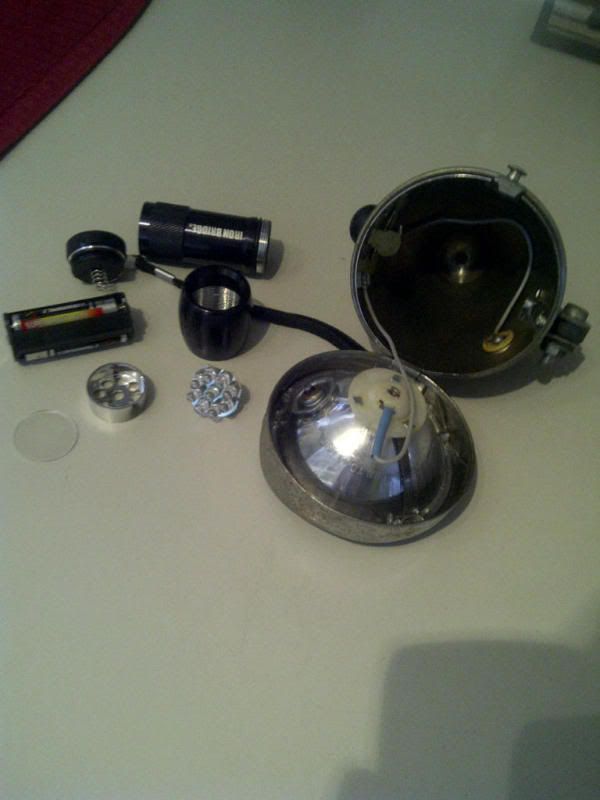
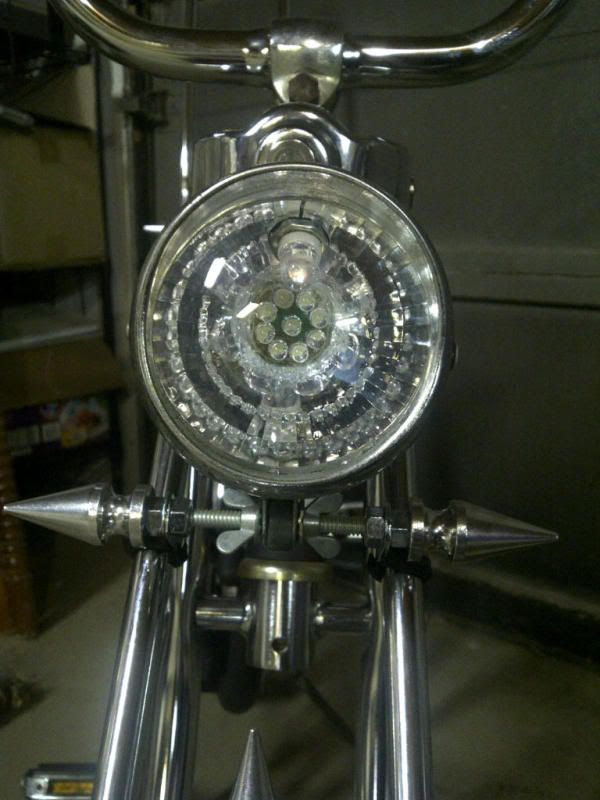
Did this with an Enwell headlight I found on ebay and a 9led flashlight (from CARQUEST). These flashlights pull apart easily with an o-ring (dental-type) pick. I used the existing switch on the headlight.
IMG-20111031-00086.jpg

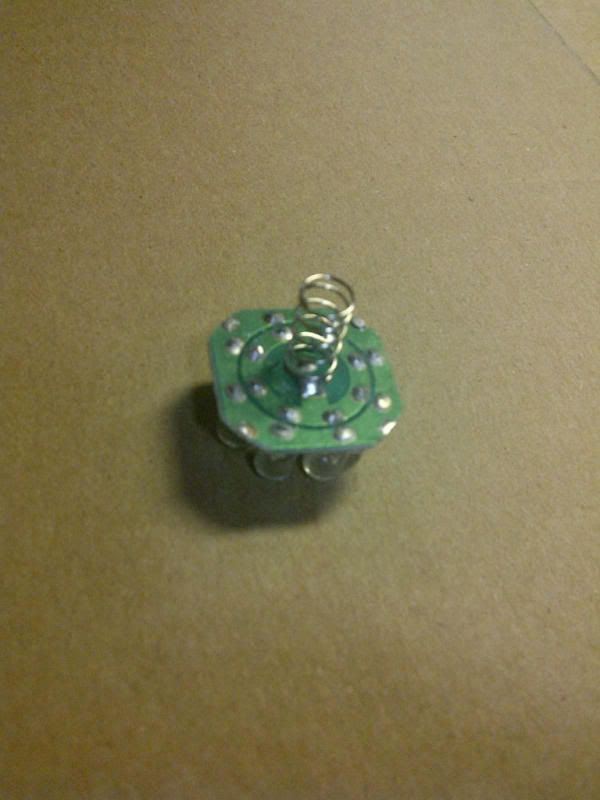
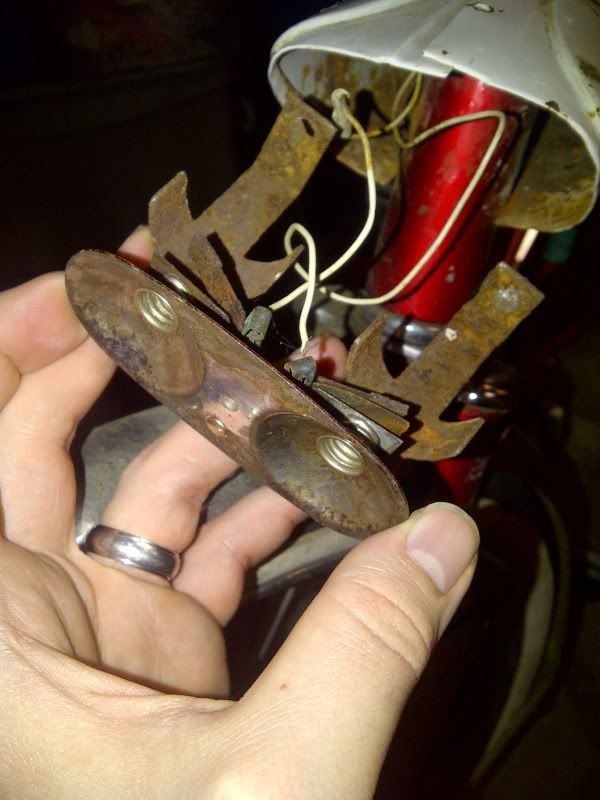
Here is the LED pack. The outermost ring is the negative, the inner ring and center are the positive. I left the spring in place to guide the wires out nicely.
IMG-20111123-00114.jpg

Thread a positive and negative wire down the center of the spring, I had wire, but lightweight speaker wire would work nicely. Solder one end of the negative wire to any one of the outer points and the other to the negative side of the battery pack. Solder the positive wire to the center where the spring attaches. and the other the outlet side of the switch. I snipped the inlet wire where it used to come in from the generator, then solder that to the positive side of the battery pack. I added another LED bulb for a low beam by simply soldering a negative lead from it to the battery pack, there is a contact point on the switch for this bulb position on this light already.
IMG-20111123-00116.jpg

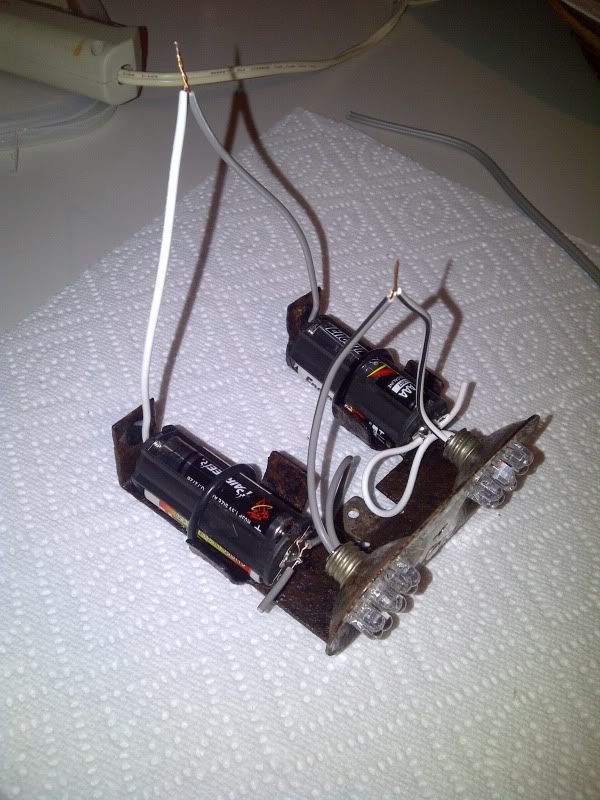
I glued the LED pack to the lens with clear silicone. I will use hot glue next time for a cleaner look and quicker setup, learn from my mistakes. lol
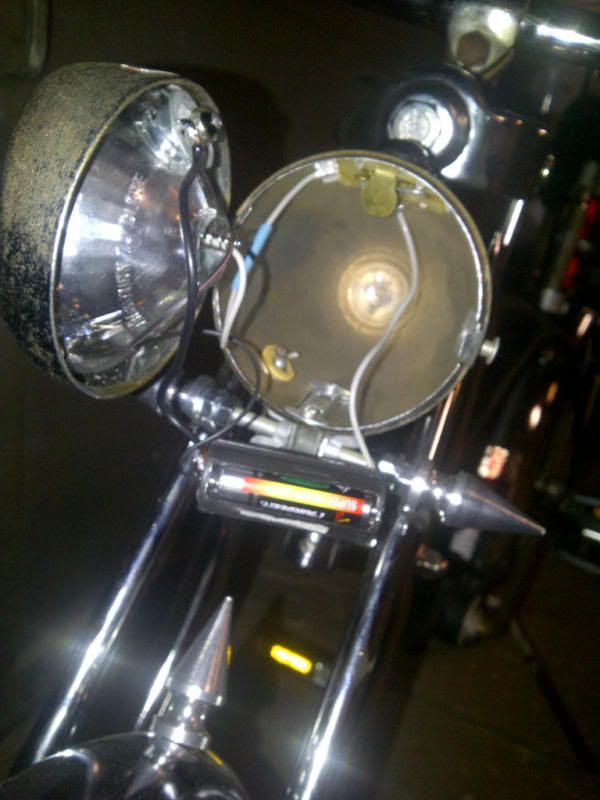
You can also see how I made a simple mount to my springer with some cable clamps, 1/4-20 threaded rod, and some wingnuts, The threaded spikes are available from studsandspikes.com and I like the look with this bike.
IMG-20111123-00118.jpg

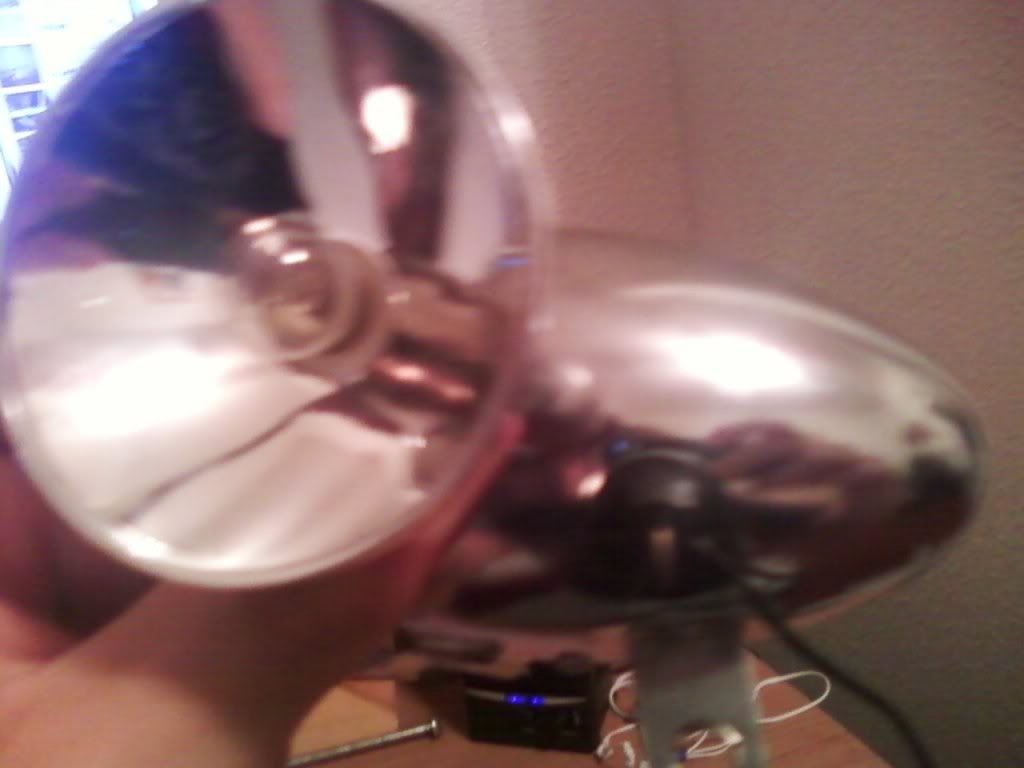
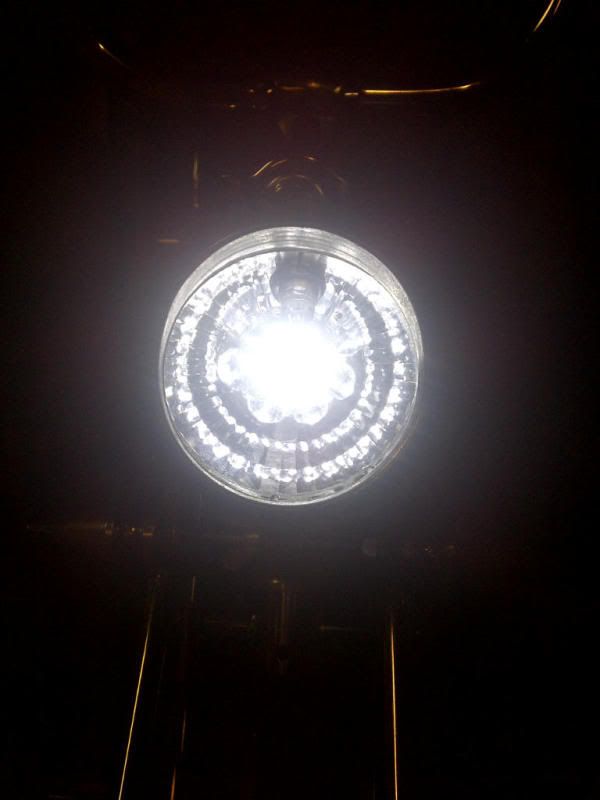
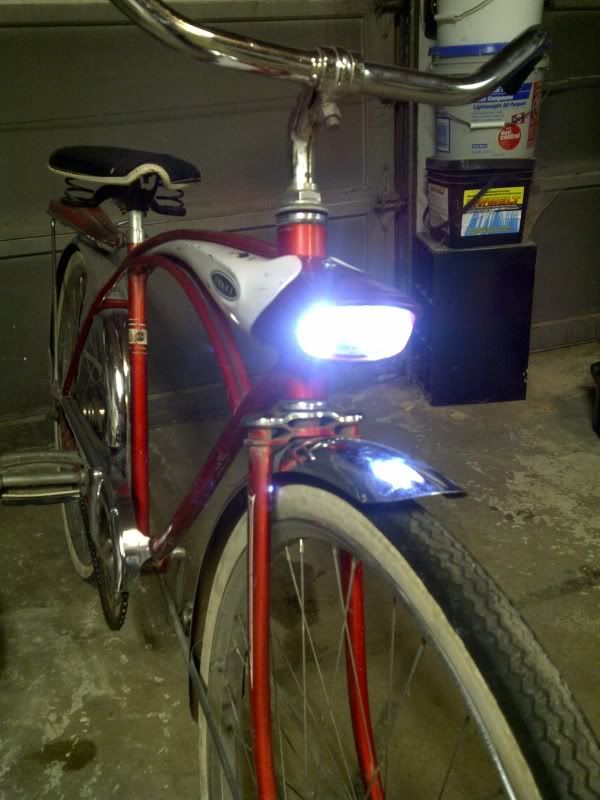
High beam...more than just show, you can see quite a way down the road with this baby!
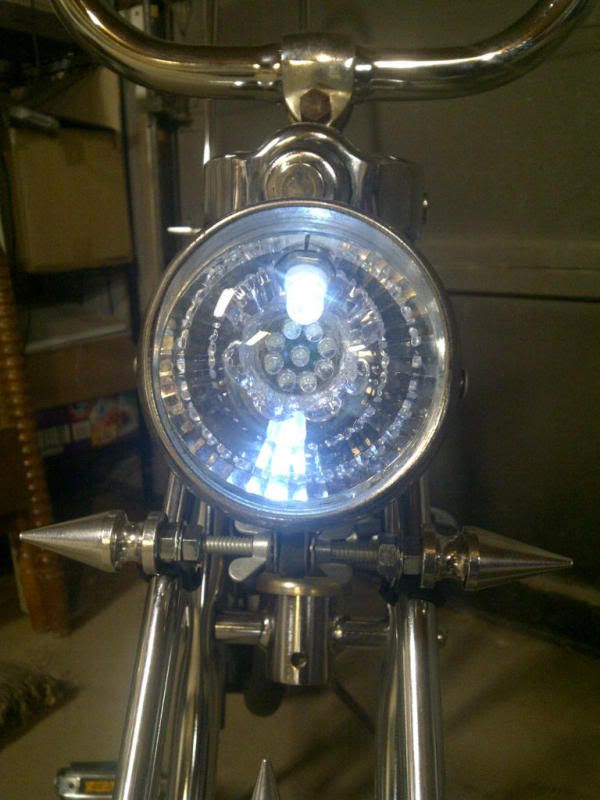
IMG-20111123-00119.jpg

Low beam
IMG-20111123-00120.jpg

I'm by no means an electrical whiz, and this project took less than a half hour. Pretty basic soldering, and the more you do it, the better you get. Hope this helps! :)
 
I have a cheap LED flashlight that had only the press in lens holding the LED plate in, once the thing got dropped the flashlight was not in mind of reliably working anymore, the grd through the body wouldnt last, try though I might. I was all set to toss it, since it was so cheap (like $1.99), but Im too cheap. The alum housing HAS to be good for something, right;....then I see this post. You bet Im saving those LEDs now! Thanx for the heads up!
I bet there are a bunch of these lights getting tossed, keep your eyes peeled.
 
Definitely! Even the battery packs are useful. I pulled the LED pack out of one, soldered a negative wire to the little tin washer that held the pack in (that also acts as the ground) and one to the positive side, then drilled a small hole in the lens to run the wires out and ran them to an led in my taillight. That way, I had a nice anodized aluminum battery case and could still use the push-button switch.
 
Here's an LED headlight I just finished in my Sears Flightliner:
I love how the lens on this bike looks...almost insect-like
IMG-20111125-00121.jpg

I pulled out the old light assembly. Looks like it was powered by D batteries...pretty neat setup, but these contacts are SO corroded, it would probably never work again anyway. The two white wires are from the switch on the tank.
IMG-20111125-00122.jpg

I gave it a healthy coating of Permatex rust treatment and let it sit overnight. Hopefully that will slow further corrosion. I wired up 2 of the 9-LED packs and hot glued them to the front of the reflectors (very quick and easy, I must say...my wife's hot glue gun might end up in the garage now). I soldered the positives to the positive side of each battery pack, then put the negatives together (I'll break the negative connection with the switch on these). Then I soldered a lead to each battery pack on the negative side. I put an o-ring on each battery pack to hold them in place where the D battery used to sit. I rolled the o-ring around the metal "housing" and the battery pack (very important to do at this point). Then I put the two negative leads together.
IMG-20111127-00123.jpg

Then I soldered the wires from the negative side of the battery packs to the inlet side of the switch, and the negative wires of the LEDs to the output side of the switch.
IMG-20111127-00129.jpg

The switch still works! It's a bit touchy, but it is like 50 yrs old. They work great!
 

Latest posts

Back
Top