


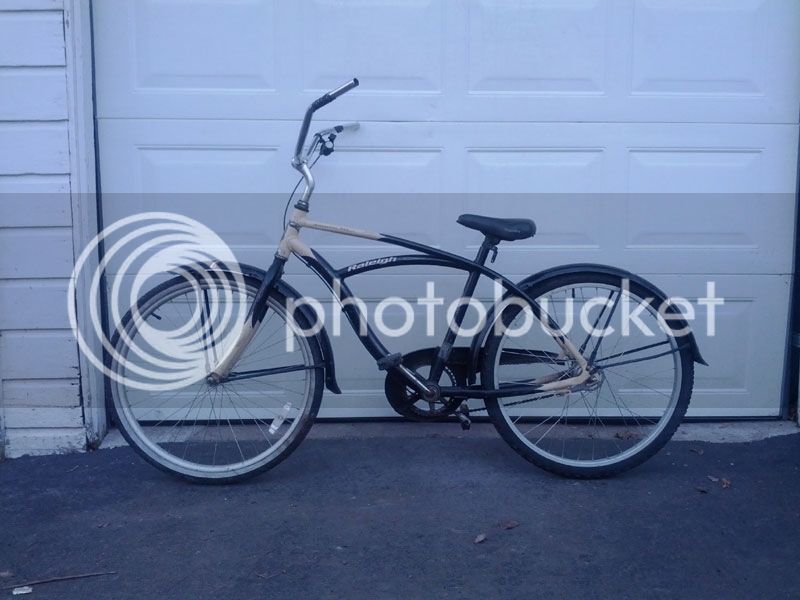
A friend of mine was doing some spring cleaning and asked if I wanted any of the bikes from his garage. Well…. Um… Yeah. I had been looking to do a go-somewhere-bike build. I have my chopper, but it wasn’t going to be ergonomic enough for longer rides or rides with hills. So I picked up a Raleigh with a beefy aluminum frame & 7 speed Nexus hub and a Huffy Catalina.
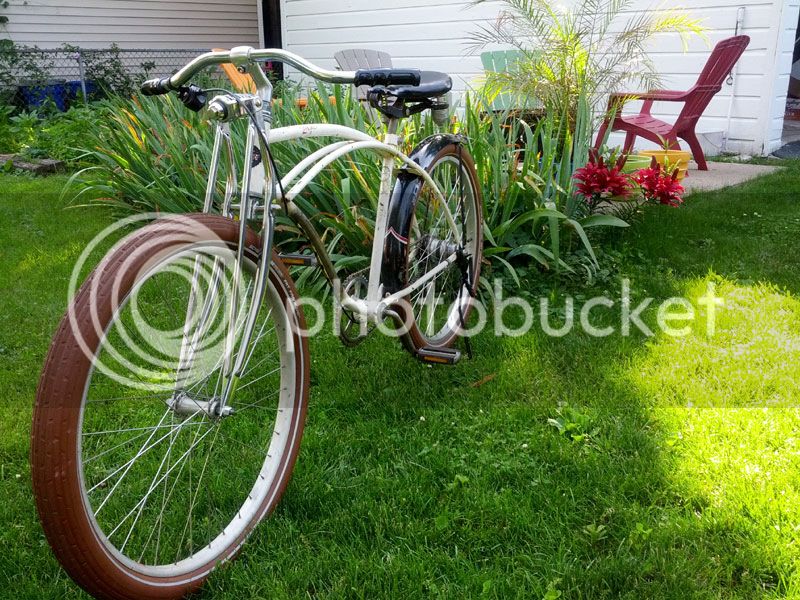
Adding a set of brown Fat Franks was a good start, but that beefy frame just didn’t set the tires off like I was looking for.
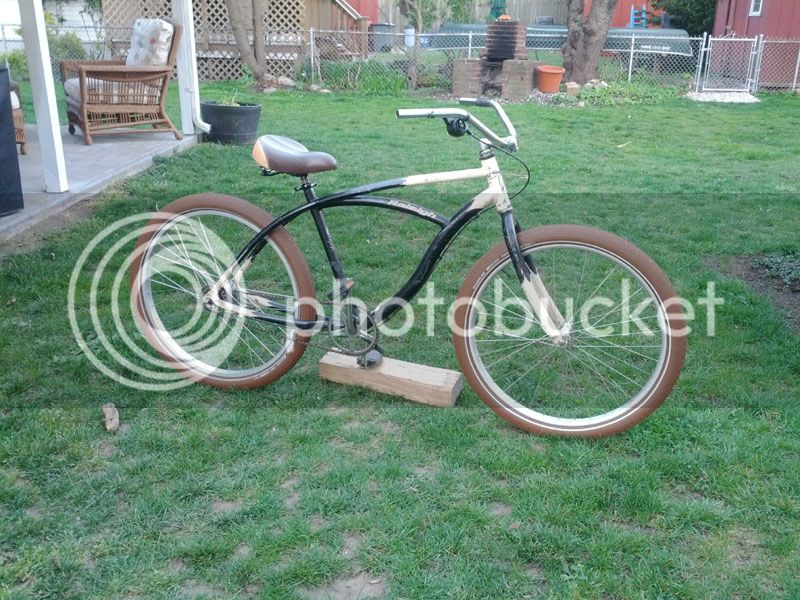
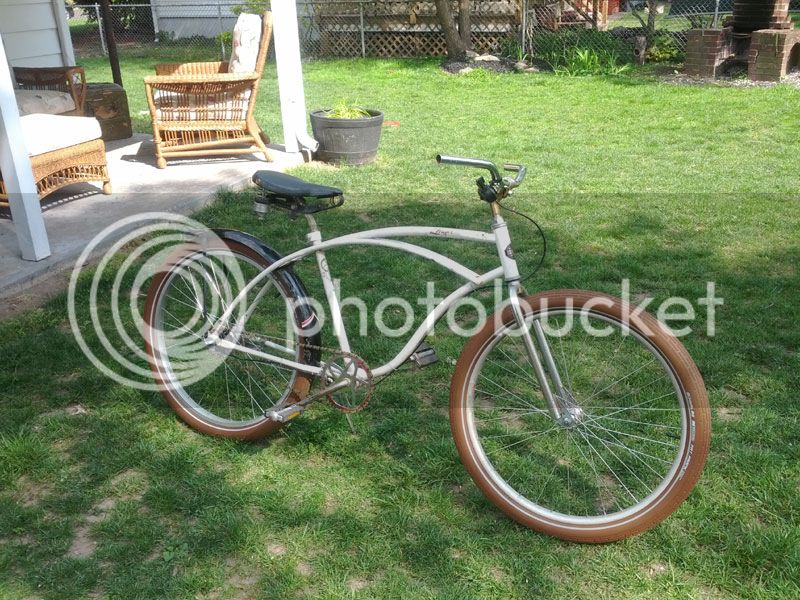
What would they look like on the Huffy?
Better. Much Better.
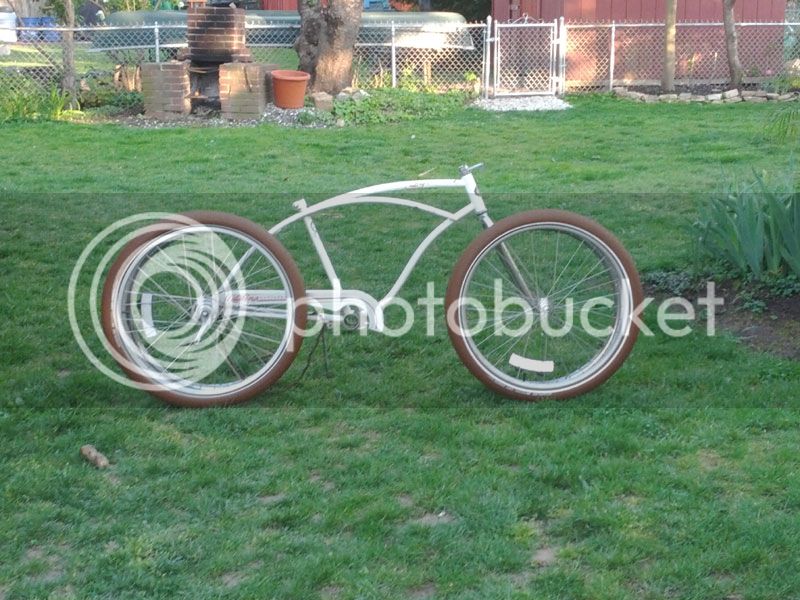
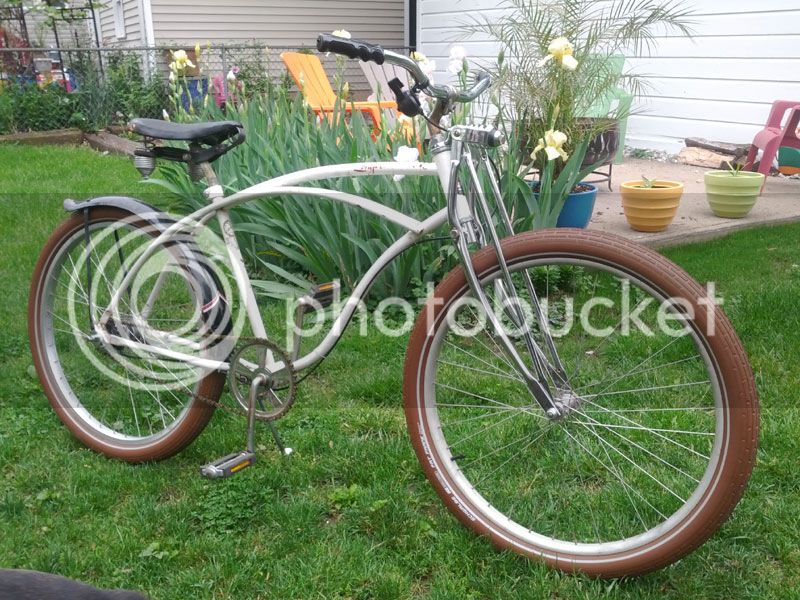
Now, if I was going to be riding this thing good distances, on bike paths, maybe in some weather I had to see what my fender options were. I knew I wanted to go with an older look. The Raleigh’s front fender fit quite well and gave it that bobbed look.
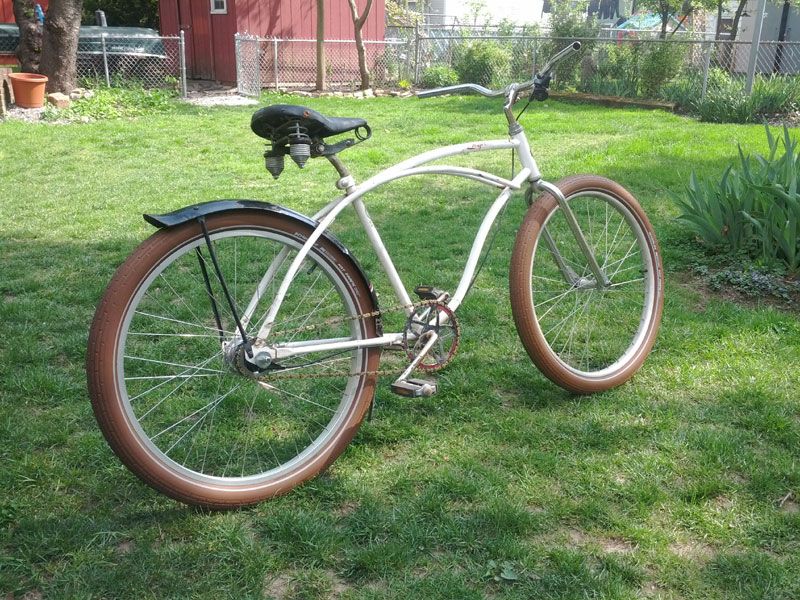
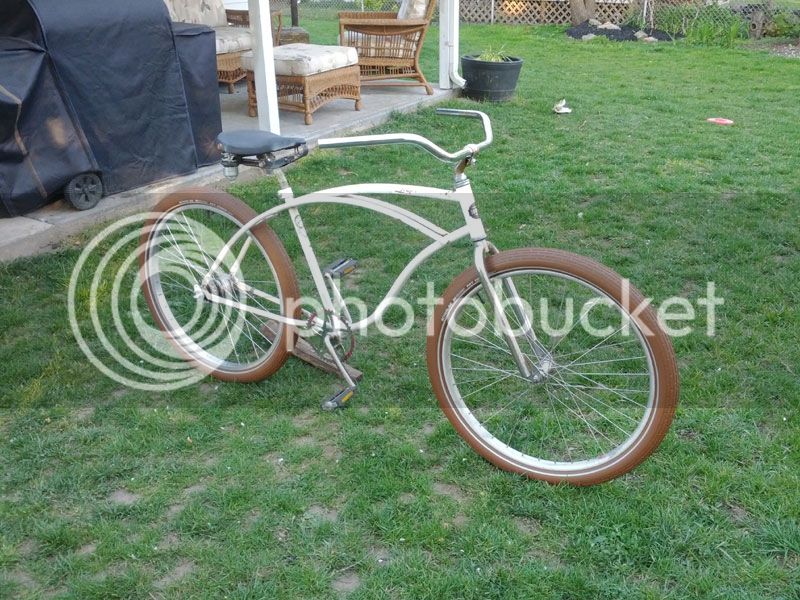
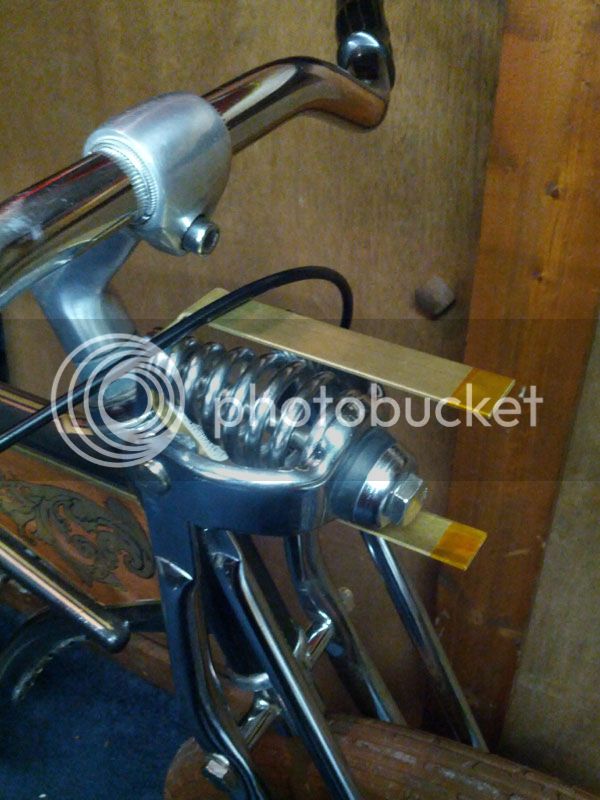
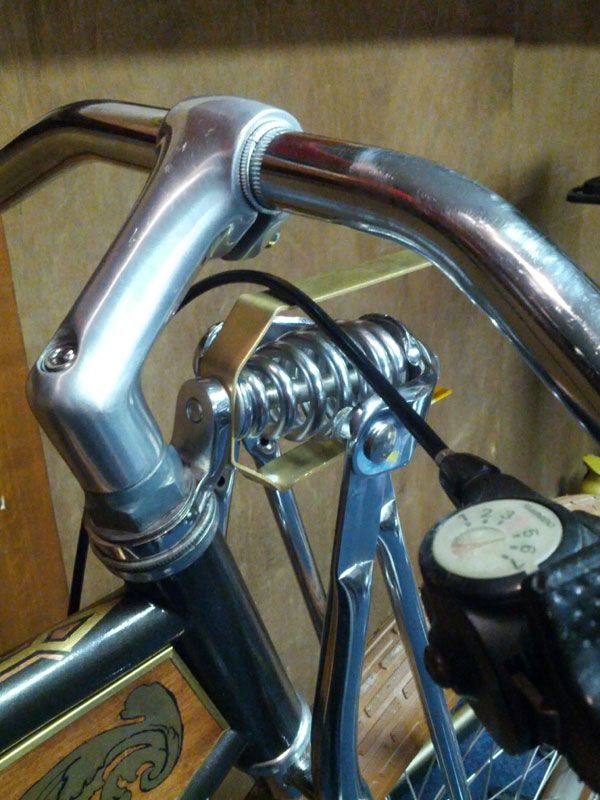
I picked up a repop springer at a swap meet.
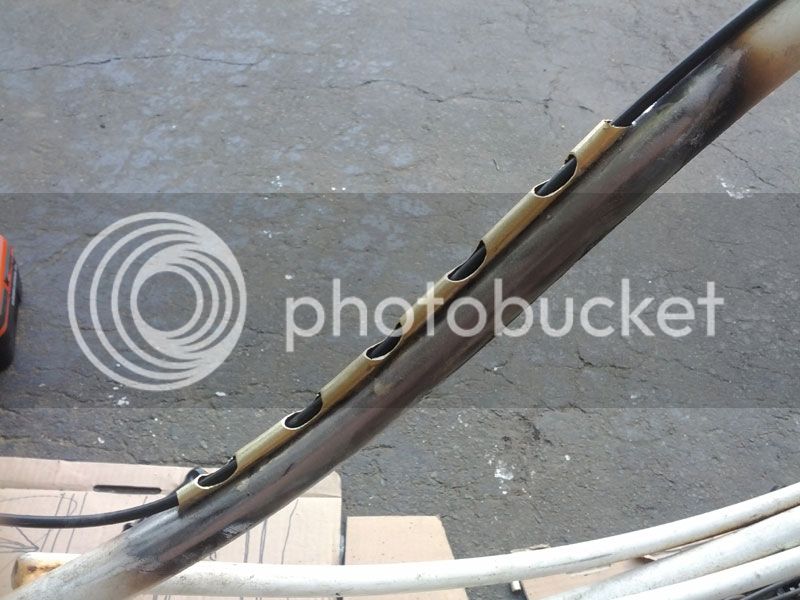
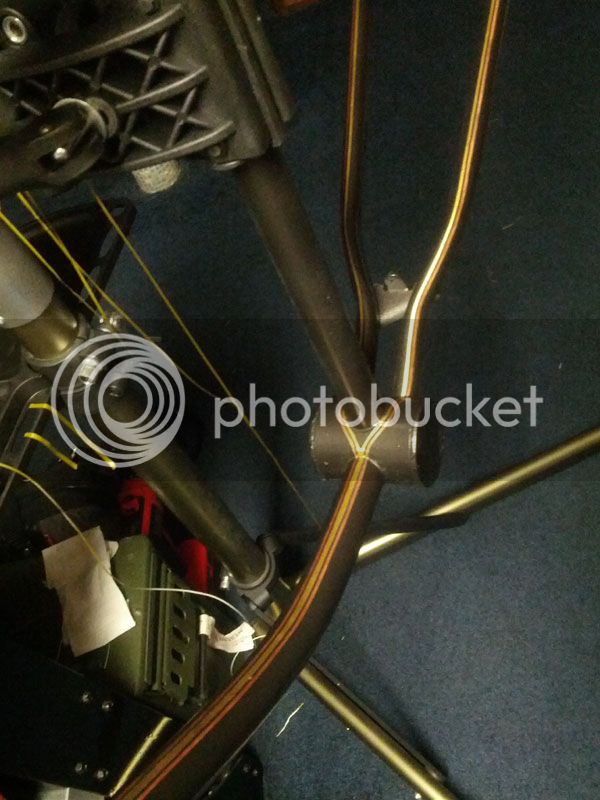
I had to run some cable guides for the shifter, so I figured I’d try to add a little detail to the one on the down tube.
A different stem and flipping the bars gave me more of the boardtracker look I wanted. I also added a behind the tire kickstand. Two slots needed to be cut into the dropouts to get the tabs on the kickstand to lock into the frame.
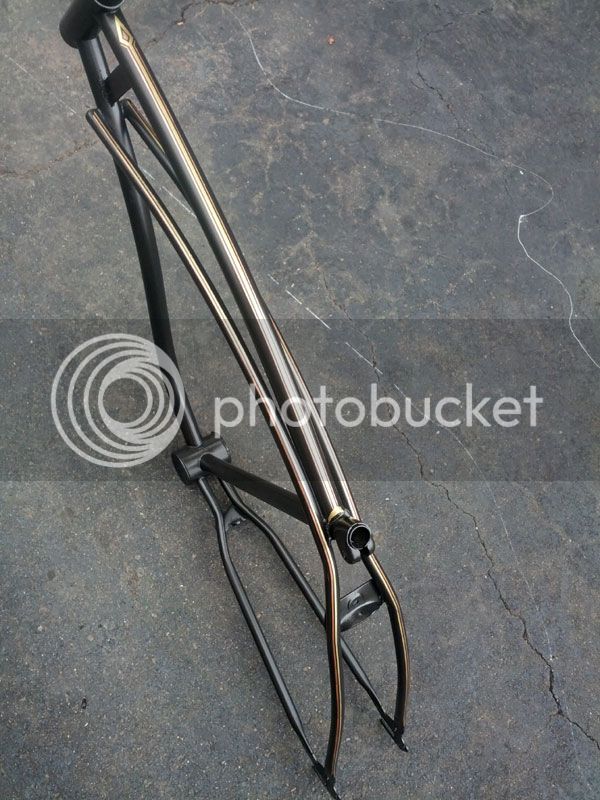
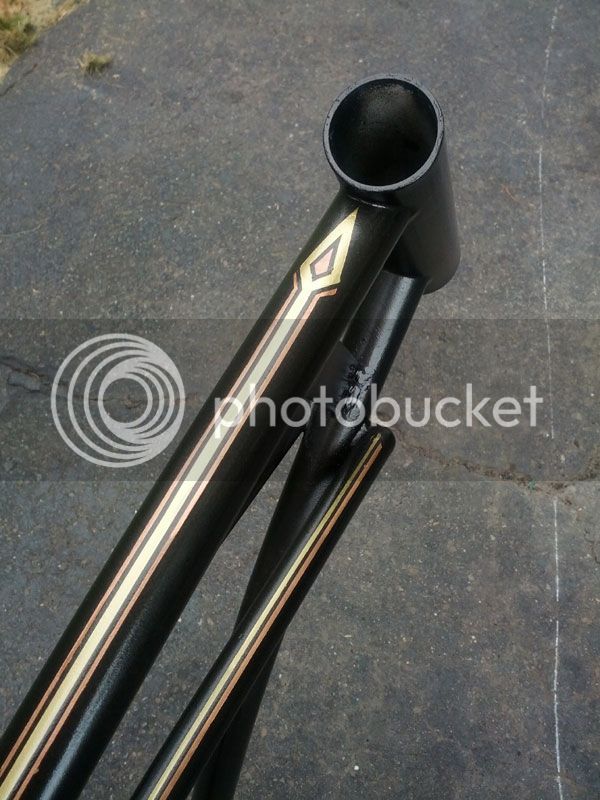
I was going to paint the frame with Rustoleum’s Carbon Mist, a dark gunmetal, so I wanted the rest of the bike to both pop and still go with the brown tires. I needed a frame insert. I welded a couple of tabs into the frame so that I could put magnets on the backs of some wooden inserts and just pop them into the frame.
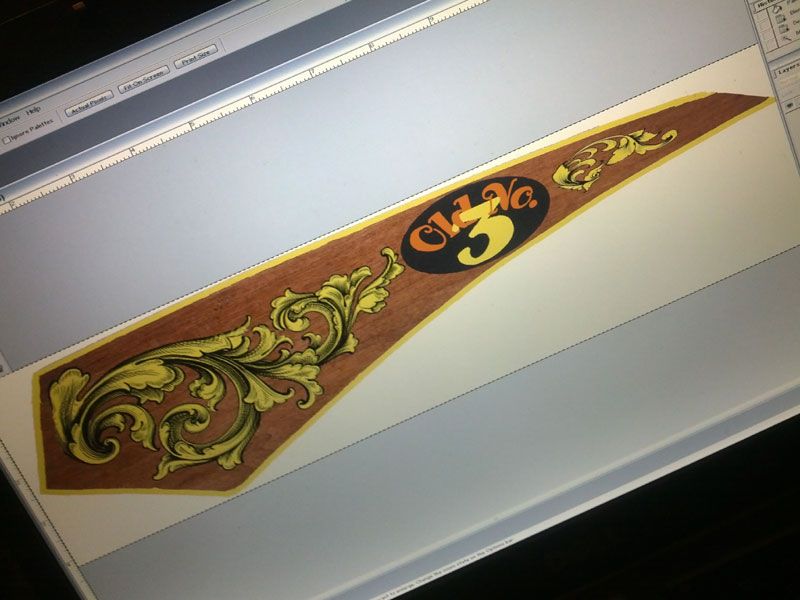
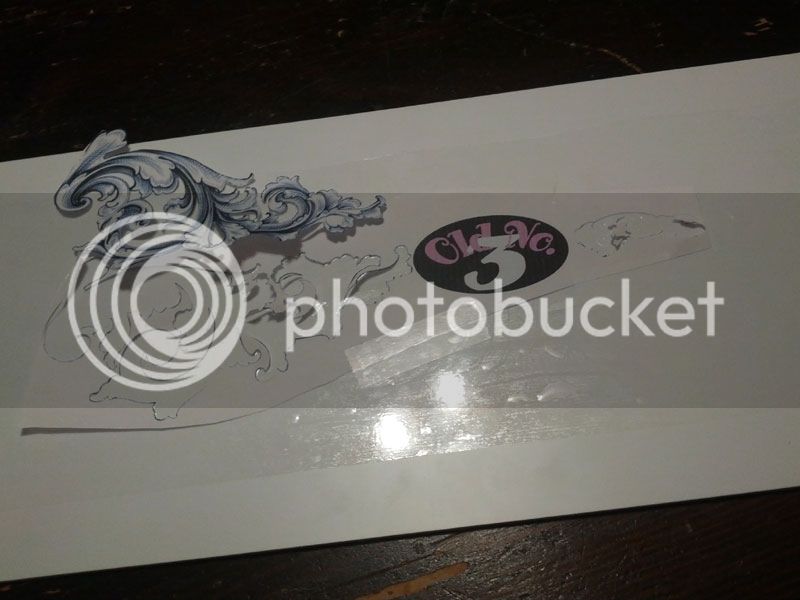
This is how I do most of my masking for detail paint. I figure out what shape I needed and then Photoshop up the design I want to attempt.
I print the design out full size. I stick a piece of clear contact paper onto a piece of styrene sheet. I’ve found that the matte finish clear contact paper works the best. I tape the printout to the contact paper.
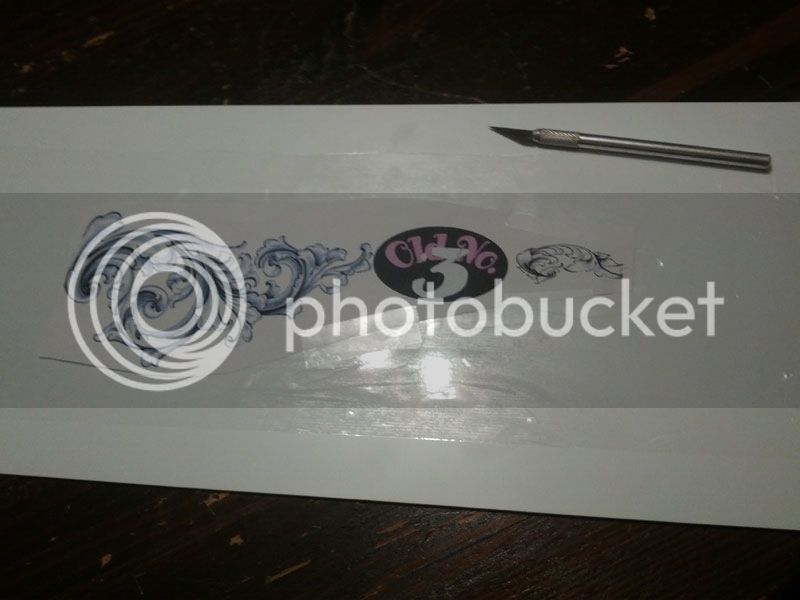
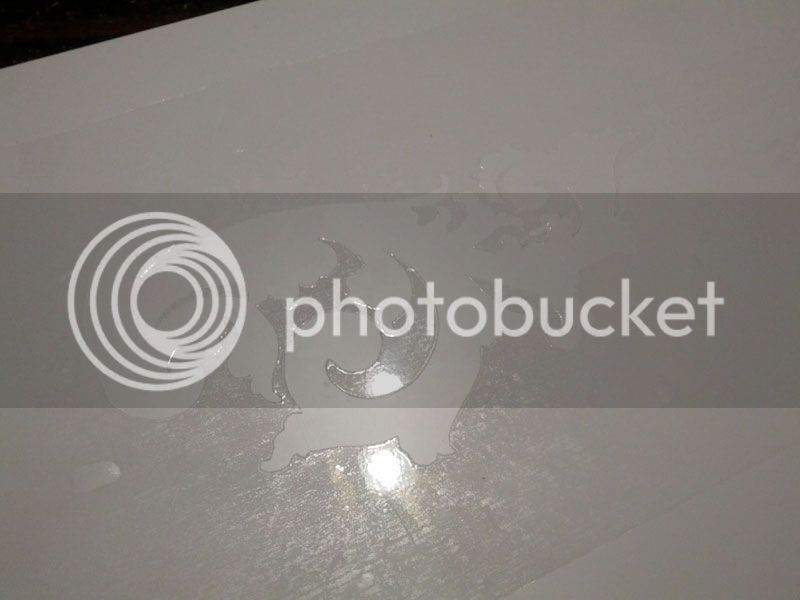
Using an X-Acto knife with a new blade, I cut through the paper and the contact paper.
I remove the areas that I want to paint. This leaves me with the correct mask.
I take another piece of contact paper and stick it to the contact paper mask. This second piece is used as a transfer sheet. It allows me to pick up the mask and not distort the pattern or lose pieces that may separate from the rest of the mask. I pull both the mask and the transfer sheet from the styrene and apply them to the piece to be painted. In this case it was a piece of bass wood that I had stained and clear coated. I then carefully pull the transfer sheet off, leaving the mask behind.
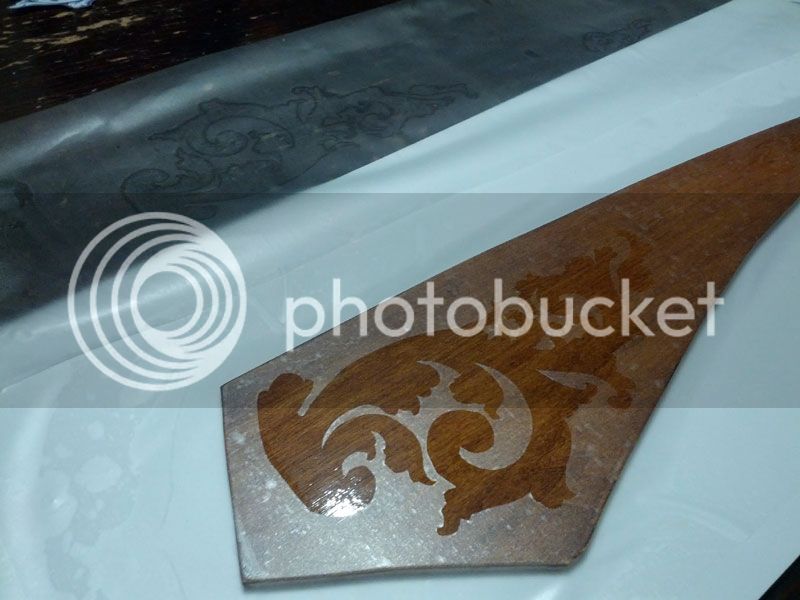
Spray the paint and remove the mask.
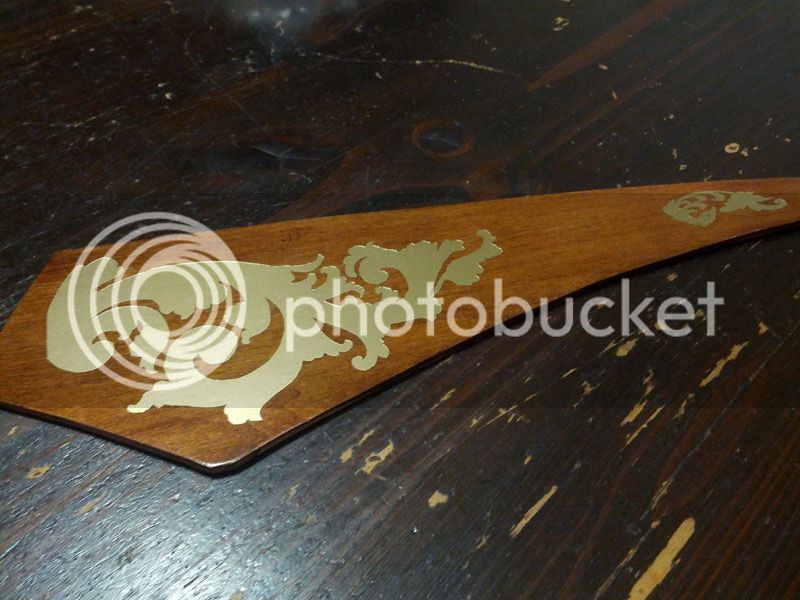
I then made another one for the other side.
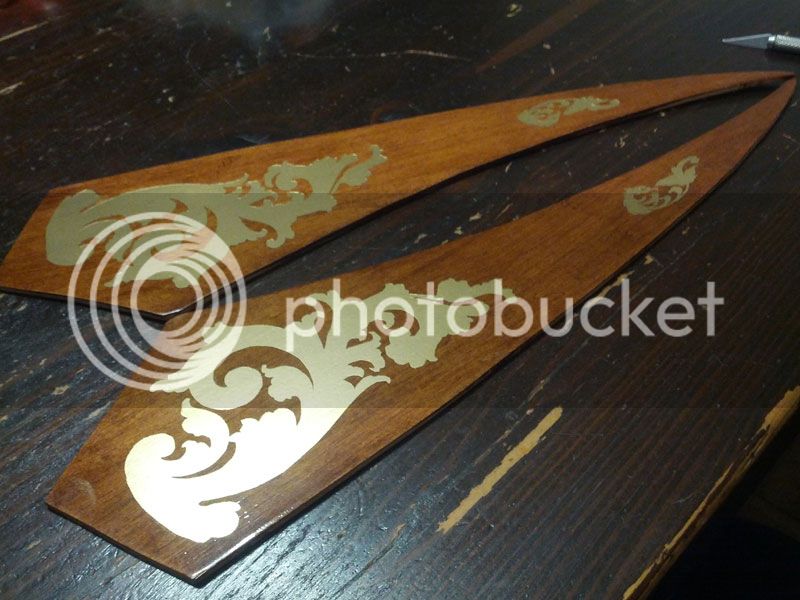
A little bit of detail painting to outline the acanthus leaves, a couple more rounds of masking and painting, and some brass C-channel to finish them off. Three small rare earth magnets epoxied to the back of each plate hold them to the frame.
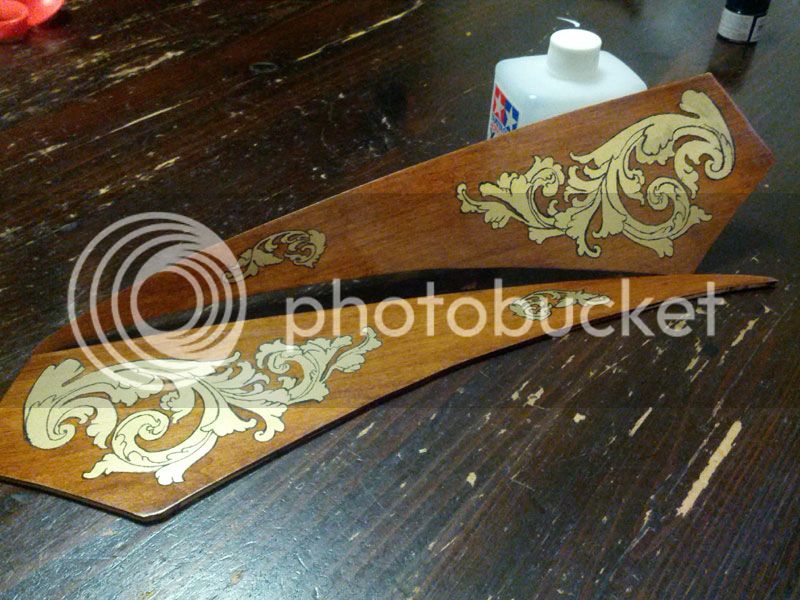

Painted and pinstriped the frame.
Painted and recovered the seat and other hardware.
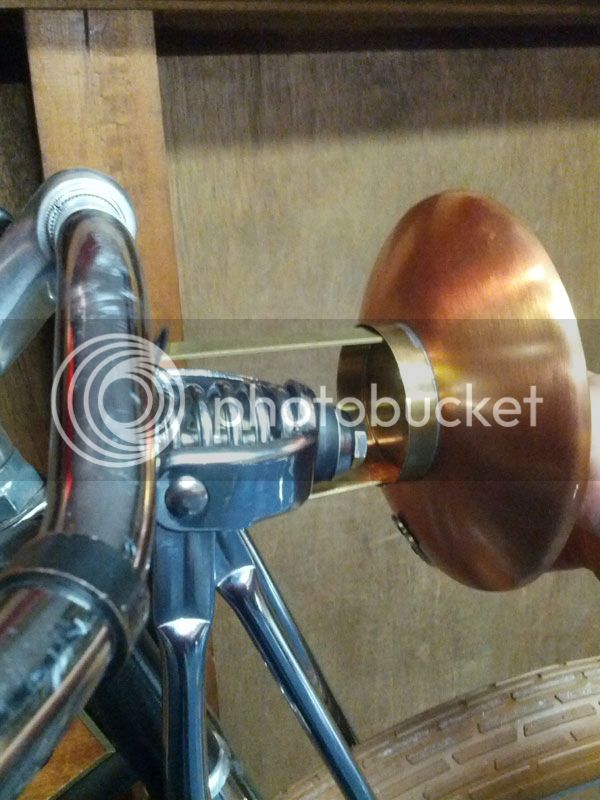
I rode it around like that for a while until I found the right headlight. Well it ended up being more of a headlight project.
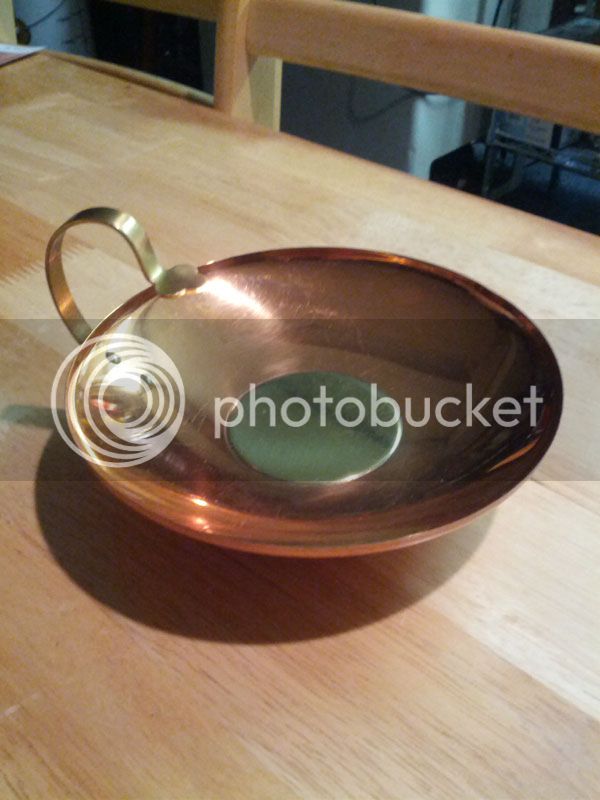
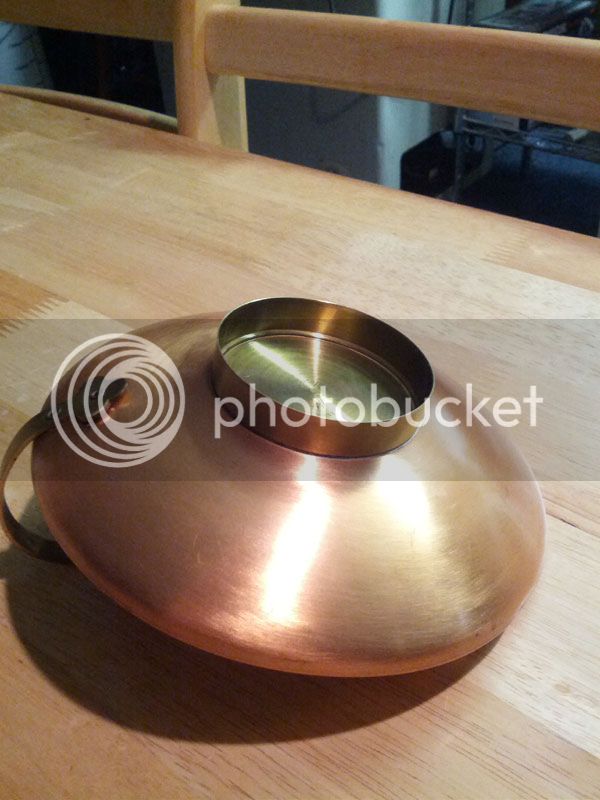
Six 3mm LEDs, soldered to a PCB blank, are screwed to the clover tab of the candle holder. The bottom of the candleholder is screwed to a piece of brass strip stock. The battery and circuit board are stuck to the inside of the bottom of the candleholder with servo tape.
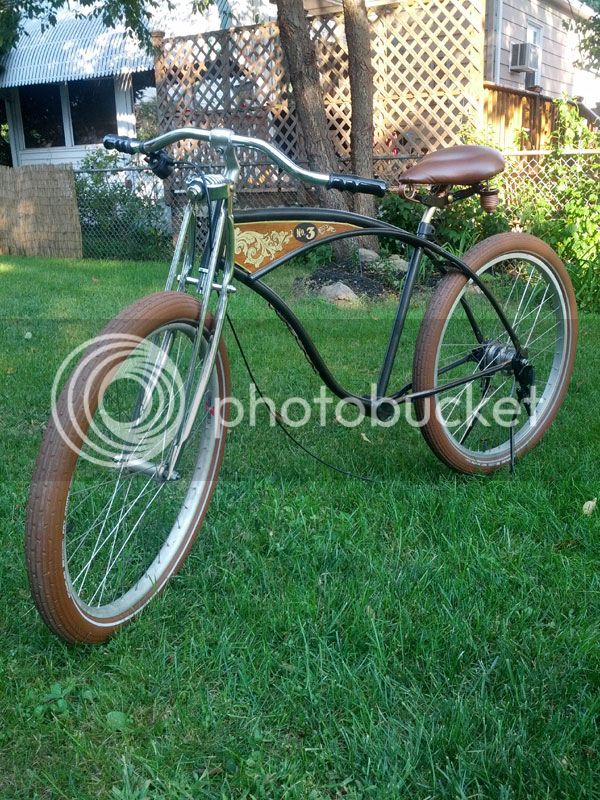
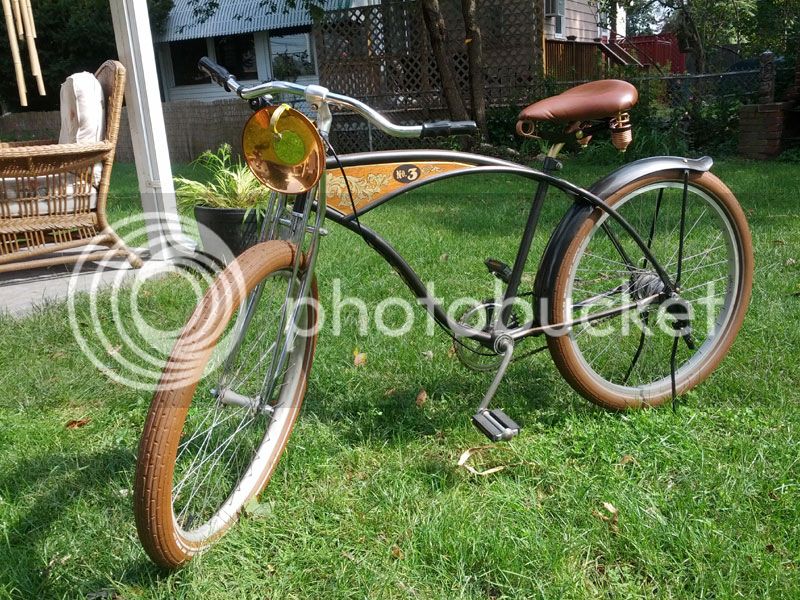
All together and this is where it sits.

Adding a set of brown Fat Franks was a good start, but that beefy frame just didn’t set the tires off like I was looking for.

What would they look like on the Huffy?

Better. Much Better.

Now, if I was going to be riding this thing good distances, on bike paths, maybe in some weather I had to see what my fender options were. I knew I wanted to go with an older look. The Raleigh’s front fender fit quite well and gave it that bobbed look.


I picked up a repop springer at a swap meet.

I had to run some cable guides for the shifter, so I figured I’d try to add a little detail to the one on the down tube.

A different stem and flipping the bars gave me more of the boardtracker look I wanted. I also added a behind the tire kickstand. Two slots needed to be cut into the dropouts to get the tabs on the kickstand to lock into the frame.

I was going to paint the frame with Rustoleum’s Carbon Mist, a dark gunmetal, so I wanted the rest of the bike to both pop and still go with the brown tires. I needed a frame insert. I welded a couple of tabs into the frame so that I could put magnets on the backs of some wooden inserts and just pop them into the frame.

This is how I do most of my masking for detail paint. I figure out what shape I needed and then Photoshop up the design I want to attempt.

I print the design out full size. I stick a piece of clear contact paper onto a piece of styrene sheet. I’ve found that the matte finish clear contact paper works the best. I tape the printout to the contact paper.

Using an X-Acto knife with a new blade, I cut through the paper and the contact paper.

I remove the areas that I want to paint. This leaves me with the correct mask.

I take another piece of contact paper and stick it to the contact paper mask. This second piece is used as a transfer sheet. It allows me to pick up the mask and not distort the pattern or lose pieces that may separate from the rest of the mask. I pull both the mask and the transfer sheet from the styrene and apply them to the piece to be painted. In this case it was a piece of bass wood that I had stained and clear coated. I then carefully pull the transfer sheet off, leaving the mask behind.

Spray the paint and remove the mask.

I then made another one for the other side.

A little bit of detail painting to outline the acanthus leaves, a couple more rounds of masking and painting, and some brass C-channel to finish them off. Three small rare earth magnets epoxied to the back of each plate hold them to the frame.


Painted and pinstriped the frame.


Painted and recovered the seat and other hardware.

I rode it around like that for a while until I found the right headlight. Well it ended up being more of a headlight project.


Six 3mm LEDs, soldered to a PCB blank, are screwed to the clover tab of the candle holder. The bottom of the candleholder is screwed to a piece of brass strip stock. The battery and circuit board are stuck to the inside of the bottom of the candleholder with servo tape.


All together and this is where it sits.
