You are using an out of date browser. It may not display this or other websites correctly.
You should upgrade or use an alternative browser.
You should upgrade or use an alternative browser.
Tribute to our friends
- Thread starter Fireproof
- Start date


Help Support Rat Rod Bikes Bicycle Forum:
This site may earn a commission from merchant affiliate
links, including eBay, Amazon, and others.
- Joined
- Mar 10, 2009
- Messages
- 1,465
- Reaction score
- 1
Have a Seat!
Thanks for the compliments folks . . . we really appreciate them!
Some more work on the seat . . .
We started to work on the other half of the seat using another piece of metal from the locker door. Using the block of oak wood and some Harbor Freight body hammers, we were able to put a compound curve in the sheet metal.
Here’s a view from the bottom. We had to cut a slot in the pan so it would fit around the tubes.
We formed this piece to fill in the slot.
It fits okay!
Welded in and ready for some grinding after some more work up on the top edges.
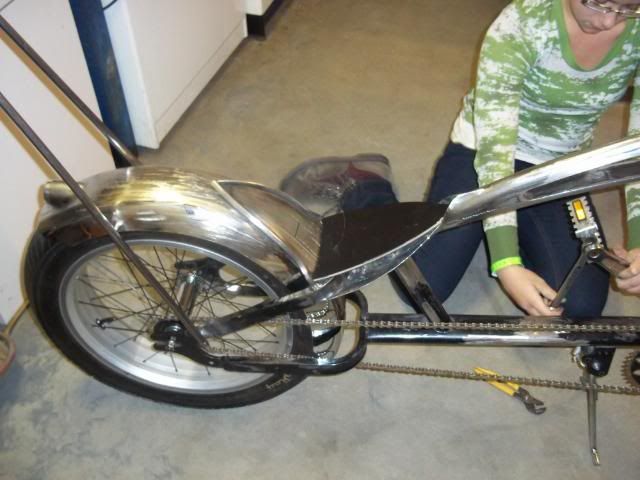
Bolting on a few parts at the last minute to get ready for the Stockton show. This is another view of the seat area up top. We will fill in that gap along the edge and fix-up a cushion for the seat.
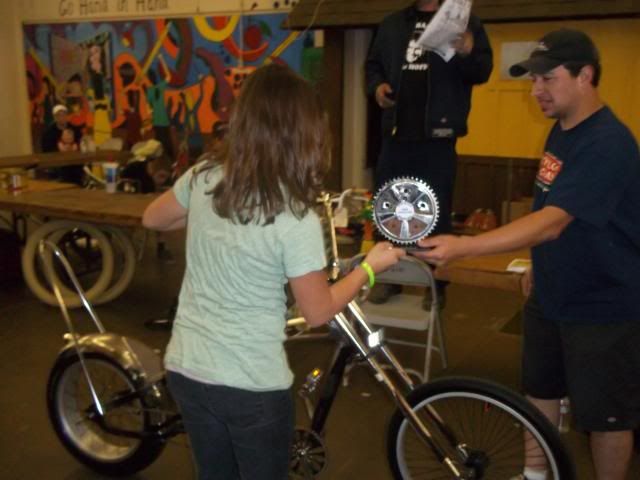
Sunday at the Stockton show
Thanks for the compliments folks . . . we really appreciate them!
Some more work on the seat . . .
We started to work on the other half of the seat using another piece of metal from the locker door. Using the block of oak wood and some Harbor Freight body hammers, we were able to put a compound curve in the sheet metal.
Here’s a view from the bottom. We had to cut a slot in the pan so it would fit around the tubes.
We formed this piece to fill in the slot.
It fits okay!
Welded in and ready for some grinding after some more work up on the top edges.
Bolting on a few parts at the last minute to get ready for the Stockton show. This is another view of the seat area up top. We will fill in that gap along the edge and fix-up a cushion for the seat.
Sunday at the Stockton show
Pretty cool.
Congratulations.
Congratulations.
- Joined
- Aug 3, 2010
- Messages
- 12,545
- Reaction score
- 2,885
This build keeps getting better and better, congrats and keep up the good.......scratch that EPIC work.
Congratulations on recieving that trophy. Keep up the great work. I can't wait to see more. Maybe once it's done you'll be getting your hands on big prize next time round.
- Joined
- Feb 6, 2011
- Messages
- 106
- Reaction score
- 0
Man thats realy cool. What award did you win? I remember you talking about paint, what did you or have you decided on what your gona do?
Well it looks great. I think its way cooler than the spoiler.keep up the great work.Oh yeah how does it handle?
Well it looks great. I think its way cooler than the spoiler.keep up the great work.Oh yeah how does it handle?
This is one awesome OCC build. The frame tricks, the stretch, and everything else you two have done is top notch :mrgreen:
I've got one I've been working on for my wife. She is wanting the front brake removed. I see that your front end doesn't have the brake mounts, did you remove them or did yours come without them :?: I was thinking about cutting them off and grinding them down. :idea:
Can't wait to see what you do next :!: :shock:
The frame tricks, the stretch, and everything else you two have done is top notch :mrgreen: I've got one I've been working on for my wife. She is wanting the front brake removed. I see that your front end doesn't have the brake mounts, did you remove them or did yours come without them :?: I was thinking about cutting them off and grinding them down. :idea:
Can't wait to see what you do next :!: :shock:
I think you should try some of that paint from Roth. Maybe a old school metal flake job with lotsa coats of clear. Or a multi-color job would look killer too. Im sure she'll come up with something awesome.
Ya all know that I'm not a chopper fan, but this build is an ode to craftsmanship and to a great father-daughter team.
I wish I could build like this.
Thanks for sharing.
I wish I could build like this.
Thanks for sharing.
- Joined
- Mar 10, 2009
- Messages
- 1,465
- Reaction score
- 1
Thanks for all the positive comments folks . . . We really appreciate them!!
I was hoping that my daughter would be able to do this update earlier this week, but she’s been slammed with homework lately and was unable to get to it. This will be better anyways because I’m going to brag about her and she’s not here to stop me! Last week, I had to explain what I mean when I say she’s not just another pretty face . . . this week, she tells me she has been selected for induction into the "Honor Society" at school! Makes me a proud daddy! :mrgreen:
Progress on the bike has been slow since the Stockton show . . . lost a bunch of time while I was enjoying a week with the flu! Then, we spent a long weekend in Redding for “Kool April Nites”. We had a great time, but it threw our schedule off. We plan to do some more work on the bike next weekend. The fur will really be flying around RatRodBikes by then with all the Build-off stuff going on!
Anyhow, we started getting something together to use as a base for the seat cushion.
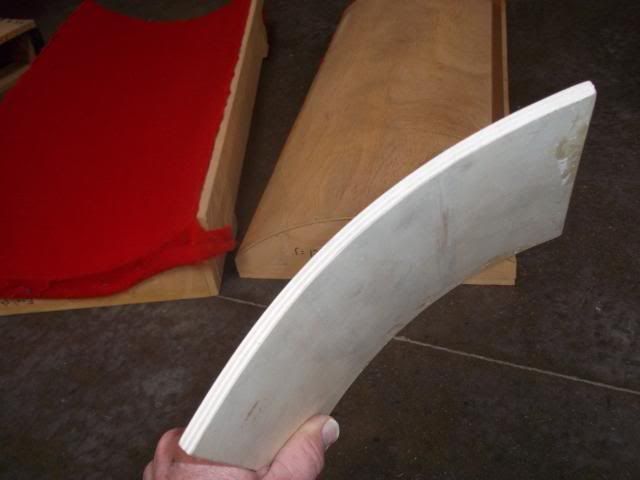
Started with this . . . it is 1/8" thick, 3-ply material called “bender panel”.
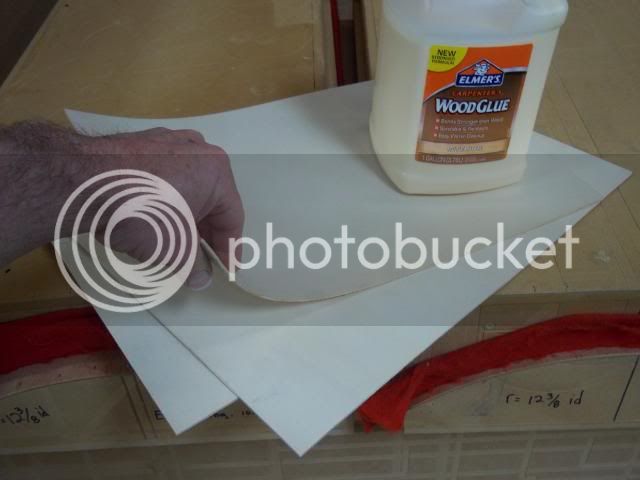
Coated two pieces of the plywood with carpenter’s wood glue, laid three pieces together and placed them into a plastic bag, and clamped them into the mold that you can see in the background. After 24 hours in the mold . . . the plywood is 3/8" thick and looked like this.
Here’s the same pattern we used when making the seat pan.
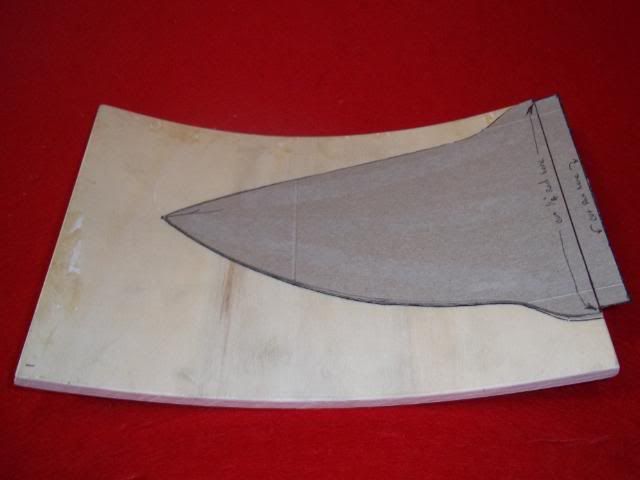
After being cut to shape on the bandsaw and a little sanding. The piece in the background is a flat piece of 3/8" plywood and it is the other part of the seat cushion base.
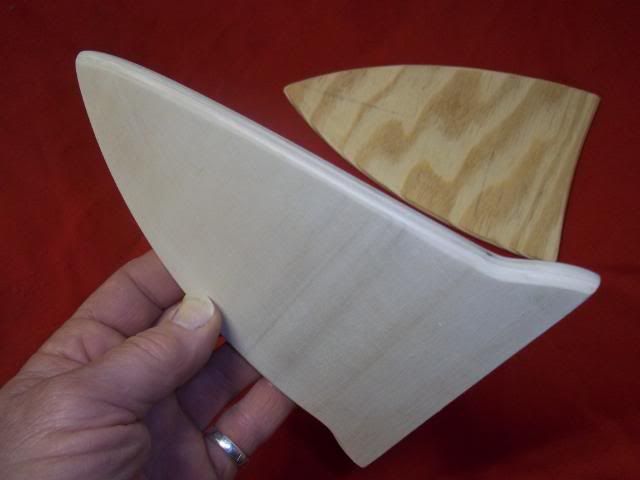
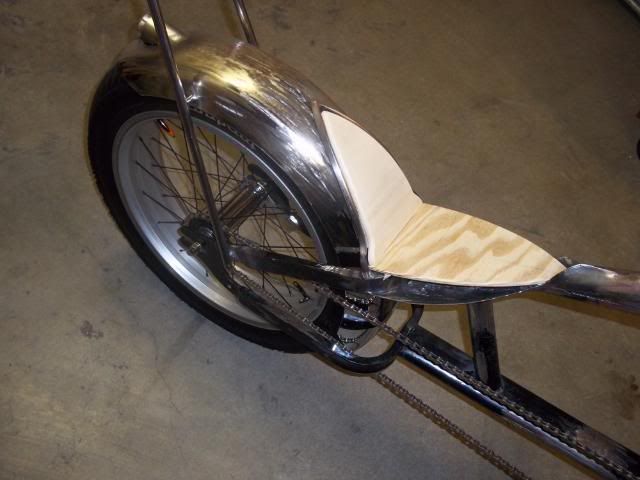
Here’s how they fit the bike. The plan is to connect them to each other into one piece, glue and shape some foam, and then cover them with some cool skin. Still need to take care of the sides of the seat pan/frame . . . hopefully next weekend!
I was hoping that my daughter would be able to do this update earlier this week, but she’s been slammed with homework lately and was unable to get to it. This will be better anyways because I’m going to brag about her and she’s not here to stop me! Last week, I had to explain what I mean when I say she’s not just another pretty face . . . this week, she tells me she has been selected for induction into the "Honor Society" at school! Makes me a proud daddy! :mrgreen:
Progress on the bike has been slow since the Stockton show . . . lost a bunch of time while I was enjoying a week with the flu!
Then, we spent a long weekend in Redding for “Kool April Nites”. We had a great time, but it threw our schedule off. We plan to do some more work on the bike next weekend. The fur will really be flying around RatRodBikes by then with all the Build-off stuff going on! Anyhow, we started getting something together to use as a base for the seat cushion.
Started with this . . . it is 1/8" thick, 3-ply material called “bender panel”.
Coated two pieces of the plywood with carpenter’s wood glue, laid three pieces together and placed them into a plastic bag, and clamped them into the mold that you can see in the background. After 24 hours in the mold . . . the plywood is 3/8" thick and looked like this.
Here’s the same pattern we used when making the seat pan.
After being cut to shape on the bandsaw and a little sanding. The piece in the background is a flat piece of 3/8" plywood and it is the other part of the seat cushion base.
Here’s how they fit the bike. The plan is to connect them to each other into one piece, glue and shape some foam, and then cover them with some cool skin. Still need to take care of the sides of the seat pan/frame . . . hopefully next weekend!
[quote="Fireproof
HELLO I'm following this project from across the Atlantic from Portugal.
and I have no words to describe the joy I'm having to keep up this magnificent project run by a magnificent double (Father and Daughter) 51 years and I have never seen a young man in the iron work at home, is something worth seeing, my children do not believe what I was saying. Thank you for sharing this magnificent project. Still like to know more details of this production of headlight. Best wishes and continue the project. excuse my English
Hello again, this is my new username, so now I won't have to post on my dad's, Fireproof!
And jose pinto, we are honored that your first post was on our build! Welcome to the forum!
And yes, I post in purple. :mrgreen:
And jose pinto, we are honored that your first post was on our build! Welcome to the forum!
And yes, I post in purple. :mrgreen:
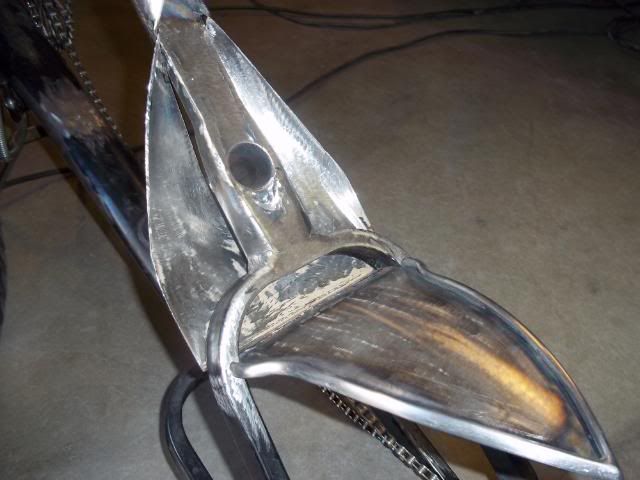
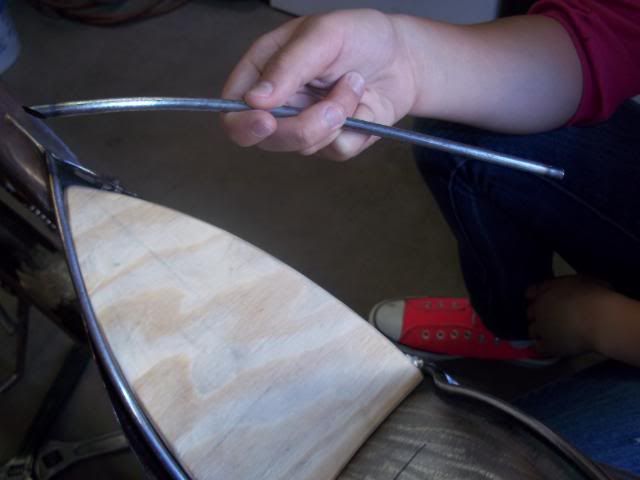
Here’s how we finished up the seat pan . . .
Here I am holding a piece of the 1/4" rod left over from the back half of the seat pan. You can see that the rod on the other side is already tacked in place . . .
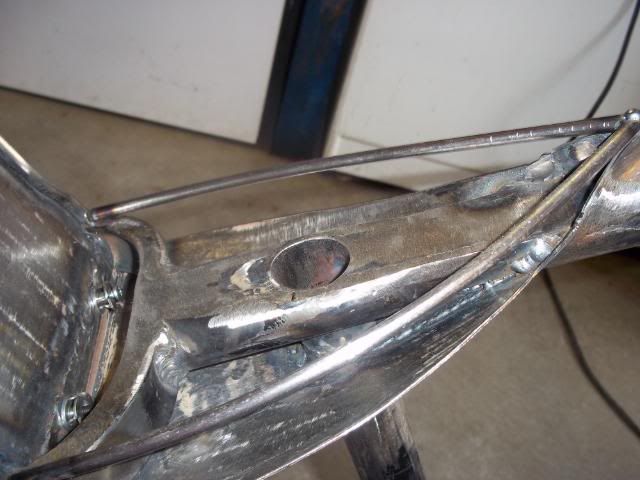
Here, both pieces of round bar have been tacked in place . . . you can now see the basic shape of the seat pan.
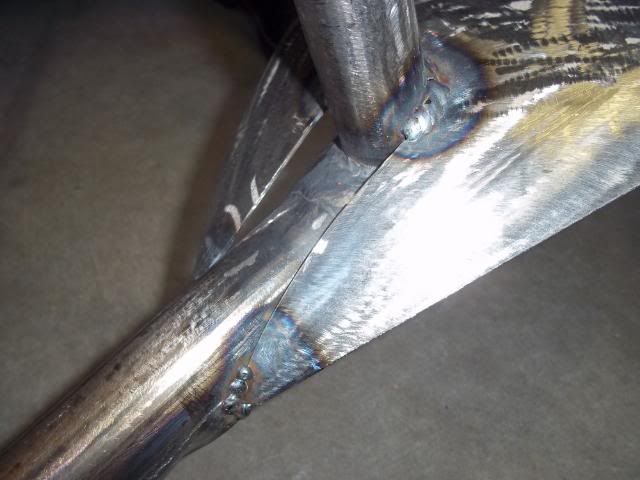
Here my dad is using a hammer and dolly to form a curve in the base so it can wrap up towards the side.
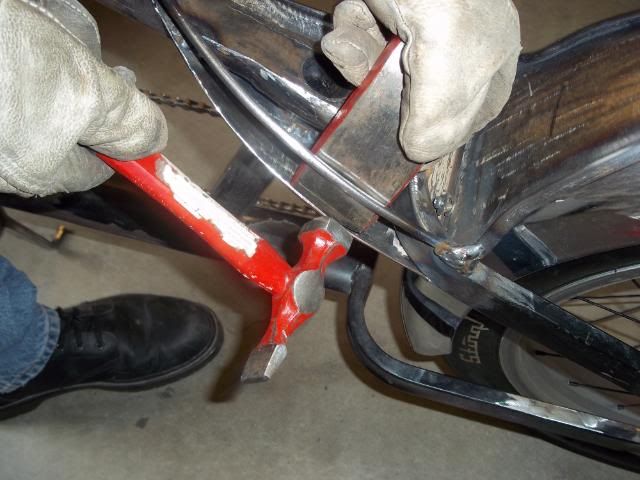
Here you can see the curve in the sheet metal formed by the hammering . . .
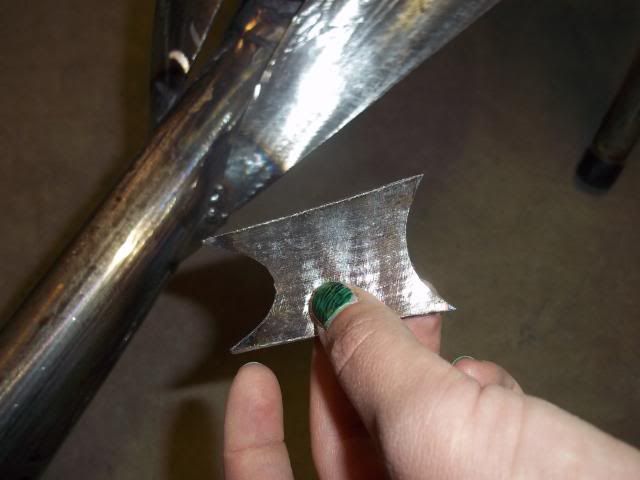
Here I am cutting a piece of scrap cardstock to use as a pattern.
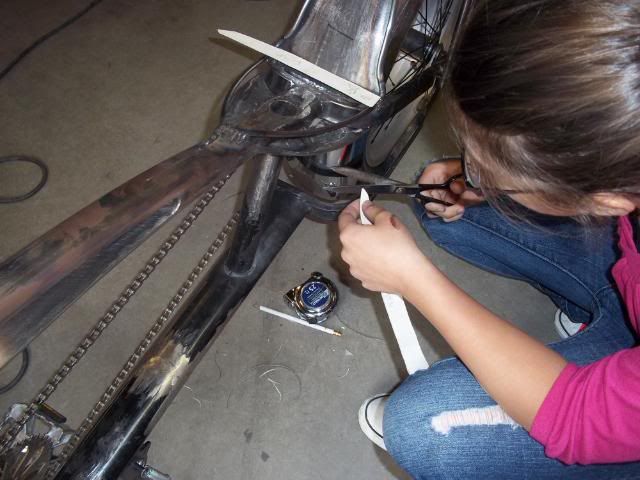
I traced the pattern onto a piece of the locker door with a sharpie and here I am cutting it out.
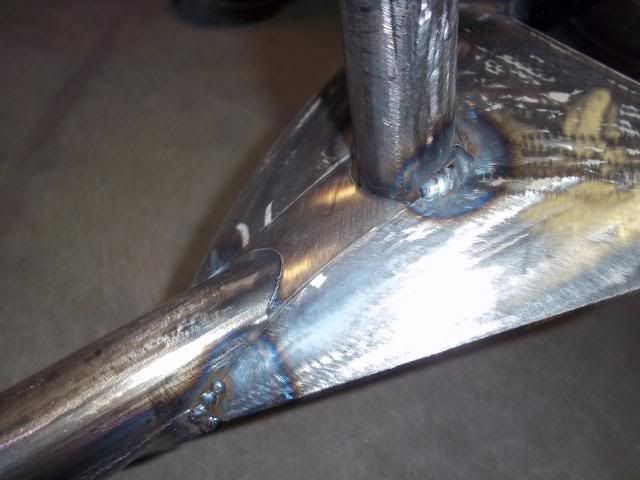
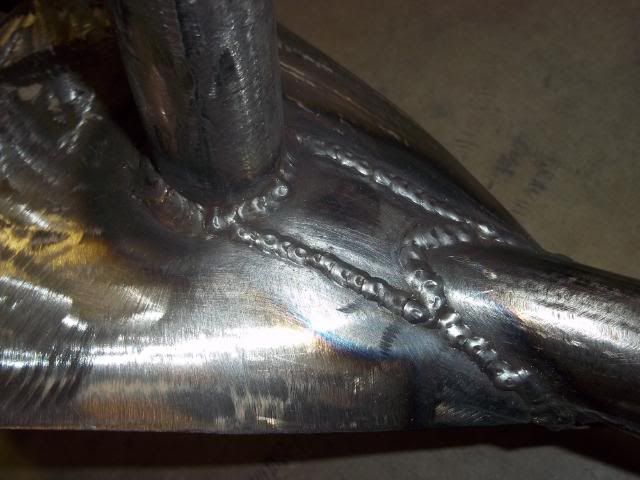
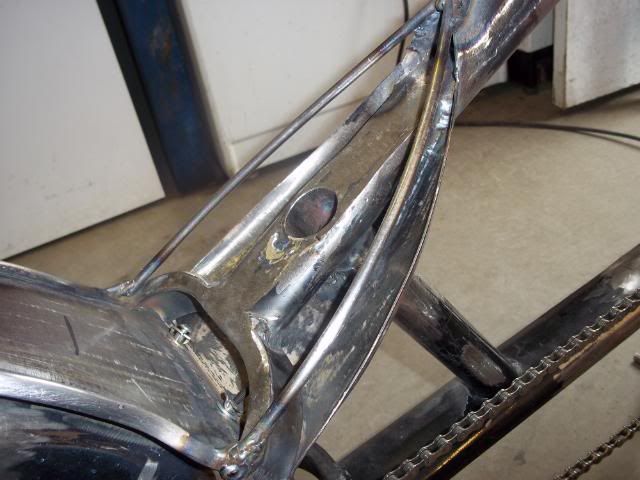
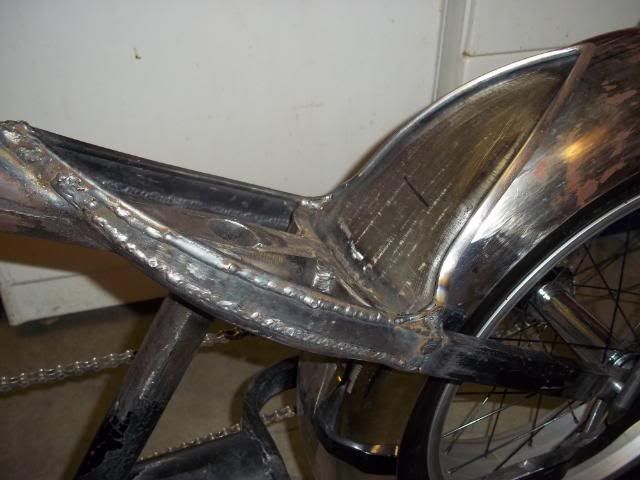
After welding the pieces in . . .
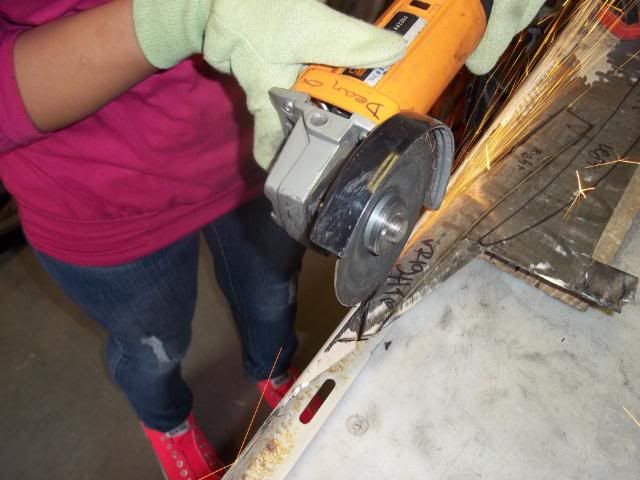
And grinding down the welds . . .
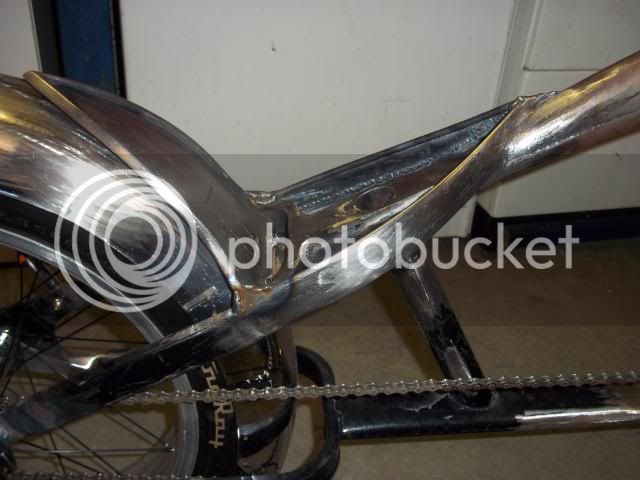
The seat cushion will be shrouded by the framework of the seat pan. We wanted the seat pan to flow into the seat stays to help smooth out the rear area. We still need to come up with a permanent mounting for the rear fender and we plan on doing some work on the chain stays also.
Here I am holding a piece of the 1/4" rod left over from the back half of the seat pan. You can see that the rod on the other side is already tacked in place . . .
Here, both pieces of round bar have been tacked in place . . . you can now see the basic shape of the seat pan.
Here my dad is using a hammer and dolly to form a curve in the base so it can wrap up towards the side.
Here you can see the curve in the sheet metal formed by the hammering . . .
Here I am cutting a piece of scrap cardstock to use as a pattern.
I traced the pattern onto a piece of the locker door with a sharpie and here I am cutting it out.
After welding the pieces in . . .
And grinding down the welds . . .
The seat cushion will be shrouded by the framework of the seat pan. We wanted the seat pan to flow into the seat stays to help smooth out the rear area. We still need to come up with a permanent mounting for the rear fender and we plan on doing some work on the chain stays also.