+1 on the gusset styling. Looking good.
You are using an out of date browser. It may not display this or other websites correctly.
You should upgrade or use an alternative browser.
You should upgrade or use an alternative browser.
MUTT
- Thread starter Bike from the Dead
- Start date


Help Support Rat Rod Bikes Bicycle Forum:
This site may earn a commission from merchant affiliate
links, including eBay, Amazon, and others.
It could totally work as both an off roader and a skinny wheel bike, but I personally like wider tires more than skinny tires. Still, it'll be easy enough to convert this bike to a muscle bike whenever I feel like it!It really is a interesting frame, off-road/road racer. It could fit in both builds.
It's a mixer...
Thanks!+1 on the gusset styling. Looking good.
Small update for today: I need to replace Mutt's seat post. The one that came with the frame is just ever-so-slightly bent, and I don't have a replacement currently. I'll probably post a want ad on the forums later, but I'd like to check with my contacts to see if they have anything first. If they have the seat post I need, they may even have some other parts I can use, and I wouldn't have to mess with shipping, just driving. I just might have to wait a bit as the weather here in Oklahoma just got a lot colder, and is going to be even uglier in the next few days, and I'd hate to ask my contacts to look for a specific seat post when it's freezing outside.
I took some measurements of the seat post I have, as well as the seat tube inner diameter, between yesterday and this morning.


Thing is, while my seat post has a 16mm/0.625in diameter up top, the banana seats I'd use need a later 22mm/0.875in diameter top. Granted, I could probably get away with using a smaller seat clamp and some washers, but if I could get something that's just a simple bolt on, it'll make everything that much easier.


So in short, I need a 12.5" long seat post with a roughly 20mm/0.775in body diameter and a 22mm/0.87in upper diameter, or something close to that.
I took some measurements of the seat post I have, as well as the seat tube inner diameter, between yesterday and this morning.
Thing is, while my seat post has a 16mm/0.625in diameter up top, the banana seats I'd use need a later 22mm/0.875in diameter top. Granted, I could probably get away with using a smaller seat clamp and some washers, but if I could get something that's just a simple bolt on, it'll make everything that much easier.
So in short, I need a 12.5" long seat post with a roughly 20mm/0.775in body diameter and a 22mm/0.87in upper diameter, or something close to that.
Thank you! I'm glad I not only had that idea, but also made it a reality!The new gussets look great! Using those old bearing races for dimples really works, that was some good creative thinking.
That is really versatile frame. Ever configuration looks good with it.Got a small update for today. I did a few more mockups on Mutt today before I started loading up everything I'd need to work on my bikes at my friend Allan's place tomorrow. I liked everything I had mocked up on the bike so far, but one thing that started bugging me was the chainring. It looked great when I was going for an '80s BMX vibe, but now that I was going for a '70s MX vibe, it just felt too new. I decided to see what a leftover Schwinn mag chainring would look like on it, and I like this much better. Plus it kind of reminds me of the original chainring that came with this bike; it had a 5-spoke guard similar to this chainring. I also mocked up the only black banana seat I currently have in my inventory, just to see how it'd look.
View attachment 255893
I might be able to get away with using this seat if I slap a few stickers over the tears in the seat, but I'd rather just use either a more intact seat or reupholster this one. I already have some black leather I was going to use on another banana seat, so this might be a good time to learn a new skill.
View attachment 255899
I also mocked up the other 24 inch tires I had on hand. First, I mocked up the "muscle bike" look with a 1.75"-wide front, and a 2.125"-wide rear, which I think looks pretty good.
View attachment 255894
Next I mocked up the knobby off road tires I just got from another freebie bike, and WOW! I was not expecting to like this look as much as I do! Now it really looks like those early MX bikes!
View attachment 255895View attachment 255896
The wheels aren't perfectly true, but there's just enough clearance in the frame for the knobbies!
View attachment 255897
A closer look at the tread on the 1.75" tire and the 2.125" slicks. Not what I'd prefer for this style of bike, but I bought them for a different project years ago, and since they aren't going on that bike, I may as well use them on this one!
View attachment 255898
I also mocked up my good black-on-white banana seat as well. I like it, but I won't know for sure until I get this bike powder coated.
View attachment 255900
One last thing I toyed around with was a set of handlebars that had more of a BMX look. They fit the bill, but they feel just a little too short for my liking, compared to those tall ape hangers I had on earlier. Kind of funny, since these are the tallest BMX bars I've got. Still, if push comes to shove, I can go back to those ape hangers or learn how to make my own out of the materials I have on hand.
View attachment 255901View attachment 255902
Tomorrow will hopefully have a very big update, with some custom gussets welded to the frame and a few other modifications! Stay tuned!
Thanks! Yeah, even I'm surprised at how many ways I can change the attitude of this bike with just a simple wheel and tire swap!That is really versatile frame. Ever configuration looks good with it.
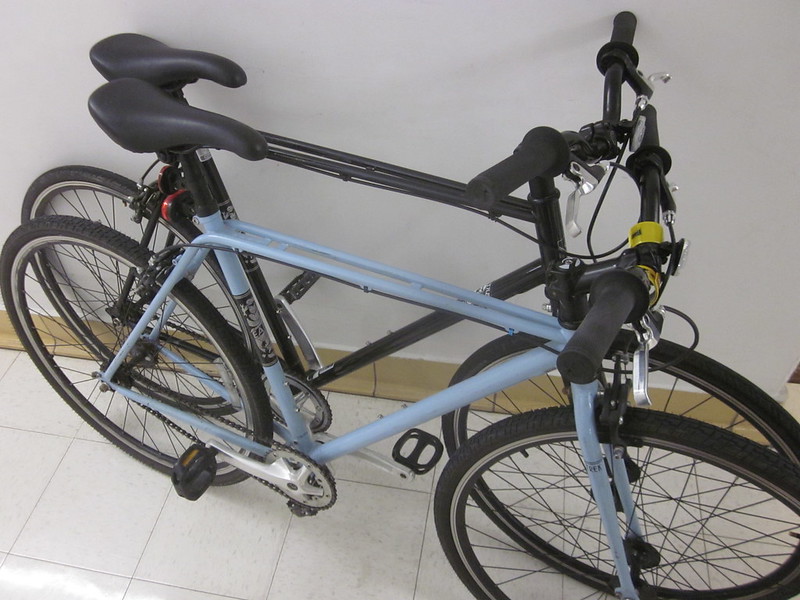
That's a fine pair of modern twin tubes you got there!I owned a couple of Trek Earl single speeds with the same twin top tube/seat stays.
IMO, the twin tubes make for a more flexible frame and a smoother ride. The black one was too tall so I sold it.
Once I get more of my bikes built, I'll be able to test for those differences myself.
Small update on Mutt.
Yesterday, I think I solved my seat post issue. Turns out the seat post clamp was on the frame super tight, pinching the seat tube to a noticeably smaller diameter.

Using a screwdriver, seat post and hammer, I managed to open that seat tube back up to a reasonable size.

I also found that I had a near-identical replacement for my seat post, and this one was nice and straight! I even managed to slide that thing all the way inside the frame with no* issue!


Well, there's still one issue. The top of the seat tube's still kind of narrow compared to the rest of the seat tube, and I noticed that there's a bit of wiggle room for the 12-inch-long seat post while it's inserted in the frame. I'm wondering if this frame was supposed to have a 13/16" seat post, but someone swapped it out with a 3/4" seat post at some point. I did some experimenting, and found that all my Murray frames took a 3/4" seat post, though even they have pinched seat tube tops. I know I can just use the seat post I've got and it'll work, but I don't know for sure just who built this frame, and what exact size seat post it's supposed to actually take.

One other thing I played around with yesterday was the chain guard. When Allan and I made the tab for the chain guard mount, I didn't have the chainguard placed exactly where I thought I did. So unfortunately, it looks off from where I initially had it.
(BEFORE)

(AFTER)

I have an idea of how to fix it, but I need to pop out the rivets at the back of the chainguard and make a new bracket for it to sit correctly. If I can still use the same chain guard, that's what I'd like to do, but I would not be surprised if I need to get a replacement. All small details for later.
I probably won't be getting much done on Mutt or my other bikes this week, as the weather's looking pretty ugly for the most part. Good news is that gives me just the excuse I need to work on my art again.

Yesterday, I think I solved my seat post issue. Turns out the seat post clamp was on the frame super tight, pinching the seat tube to a noticeably smaller diameter.
Using a screwdriver, seat post and hammer, I managed to open that seat tube back up to a reasonable size.
I also found that I had a near-identical replacement for my seat post, and this one was nice and straight! I even managed to slide that thing all the way inside the frame with no* issue!
Well, there's still one issue. The top of the seat tube's still kind of narrow compared to the rest of the seat tube, and I noticed that there's a bit of wiggle room for the 12-inch-long seat post while it's inserted in the frame. I'm wondering if this frame was supposed to have a 13/16" seat post, but someone swapped it out with a 3/4" seat post at some point. I did some experimenting, and found that all my Murray frames took a 3/4" seat post, though even they have pinched seat tube tops. I know I can just use the seat post I've got and it'll work, but I don't know for sure just who built this frame, and what exact size seat post it's supposed to actually take.
One other thing I played around with yesterday was the chain guard. When Allan and I made the tab for the chain guard mount, I didn't have the chainguard placed exactly where I thought I did. So unfortunately, it looks off from where I initially had it.
(BEFORE)
(AFTER)
I have an idea of how to fix it, but I need to pop out the rivets at the back of the chainguard and make a new bracket for it to sit correctly. If I can still use the same chain guard, that's what I'd like to do, but I would not be surprised if I need to get a replacement. All small details for later.
I probably won't be getting much done on Mutt or my other bikes this week, as the weather's looking pretty ugly for the most part. Good news is that gives me just the excuse I need to work on my art again.
Last edited:
Your art looks great! Going to look through the thread right now.Small update on Mutt.
Yesterday, I think I solved my seat post issue. Turns out the seat post clamp was on the frame super tight, pinching the seat tube to a noticeably smaller diameter.
View attachment 257244
Using a screwdriver, seat post and hammer, I managed to open that seat tube back up to a reasonable size.
View attachment 257245
I also found that I had a near-identical replacement for my seat post, and this one was nice and straight! I even managed to slide that thing all the way inside the frame with no* issue!
View attachment 257246View attachment 257247
Well, there's still one issue. The top of the seat tube's still kind of narrow compared to the rest of the seat tube, and I noticed that there's a bit of wiggle room for the 12-inch-long seat post while it's inserted in the frame. I'm wondering if this frame was supposed to have a 13/16" seat post, but someone swapped it out with a 3/4" seat post at some point. I did some experimenting, and found that all my Murray frames took a 3/4" seat post, though even they have pinched seat tube tops. I know I can just use the seat post I've got and it'll work, but I don't know for sure just who built this frame, and what exact size seat post it's supposed to actually take.
View attachment 257248
One other thing I played around with yesterday was the chain guard. When Allan and I made the tab for the chain guard mount, I didn't have the chainguard placed exactly where I thought I did. So unfortunately, it looks off from where I initially had it.
(BEFORE)
View attachment 257250
(AFTER)
View attachment 257251
I have an idea of how to fix it, but I need to pop out the rivets at the back of the chainguard and make a new bracket for it to sit correctly. If I can still use the same chain guard, that's what I'd like to do, but I would not be surprised if I need to get a replacement. All small details for later.
I probably won't be getting much done on Mutt or my other bikes this week, as the weather's looking pretty ugly for the most part. Good news is that gives me just the excuse I need to work on art again.
View attachment 257252
Weather was the same here, lots of rain and sometimes too cold to work in the evening...
Thank you!Your art looks great! Going to look through the thread right now.
Weather was the same here, lots of rain and sometimes too cold to work in the evening...
Fortunately, the garage I build my bikes in has heating, which is why I was able to make some progress on Mutt and a few other bikes this weekend despite the freezing temperatures. That said, I really need to get this coloring book project knocked out soon. Bikes are a hobby, but art is my career, and I've been slacking on the job as of late.
I put these triple trees on my last builds and the V-RROOM motor on the girls bike. Both are NOS 1977 Murray Fire King and Fire Cat forks.I felt the same way when I first saw the OCC Sting Ray as a kid; I had never seen bicycle tires that wide before, nor a bike that looked so much like an actual chopper! They may not have been the fastest bikes, but that's never stopped me from wanting one of my own!
I actually have a working Vrroom motor that would have been attached to that bike! I've currently got it mocked up on another project of mine at the moment. I just love how that Vrroom bike almost perfectly mimics a mini/pit bike!
I recently picked up a OCC mini stingray chopper as well. Grabbed just for the forks.


You've got one cool pair of bikes there! Your Mattel Vrroom motor is different from the one I have. Here's mine:I put these triple trees on my last builds and the V-RROOM motor on the girls bike. Both are NOS 1977 Murray Fire King and Fire Cat forks.
I recently picked up a OCC mini stingray chopper as well. Grabbed just for the forks. View attachment 257444View attachment 257443View attachment 257445

Mine is a 1963. I think that style is the second generation and I believe Sears sold one very similar to yours as well. That motor came on the V-RROOM bicycle as well. Your style was what I had been looking for when I found mine. I'll end up with that style as well eventually.You've got one cool pair of bikes there! Your Mattel Vrroom motor is different from the one I have. Here's mine:
View attachment 257554
I saw one like yours fitted to an old 1960s child's bike advertised for sale here in Poland. I was tempted.Mine is a 1963. I think that style is the second generation and I believe Sears sold one very similar to yours as well. That motor came on the V-RROOM bicycle as well. Your style was what I had been looking for when I found mine. I'll end up with that style as well eventually.
Cool! If it helps at all, I found my motor on Facebook Marketplace, and thankfully the seller took PayPal and provided shipping. Maybe you could find one for a good price there.Mine is a 1963. I think that style is the second generation and I believe Sears sold one very similar to yours as well. That motor came on the V-RROOM bicycle as well. Your style was what I had been looking for when I found mine. I'll end up with that style as well eventually.
Life update: I just started taking a welding class last night alongside my dad! We're taking a "hobbyist's welding class" for the next 4 weeks, twice a week. We're both learning about MIG and TIG welding, which I hope will come in handy for future bike builds.
We thought the first class last night would be more about discussing the class itself, going over basic welding terminology, but nope! It was hands-on from the start! I was expecting to do poorly my first time in class, but surprisingly, my first tries of laying down beads while MIG-welding turned out better than expected! Turns out, as long as I can sit down, brace one of my arms on the table, and overall just get comfortable, I can actually do alright! Teacher told me I was already at a point where some of his students would need at least a few weeks to get where I was!
Obviously, I still have a lot to learn, but now I feel WAY more confident that I could learn how to weld up some custom bikes! Looking forward to the next class!
Ah the joy of learning! I'm not even on your level, looking goodLife update: I just started taking a welding class last night alongside my dad! We're taking a "hobbyist's welding class" for the next 4 weeks, twice a week. We're both learning about MIG and TIG welding, which I hope will come in handy for future bike builds.
We thought the first class last night would be more about discussing the class itself, going over basic welding terminology, but nope! It was hands-on from the start! I was expecting to do poorly my first time in class, but surprisingly, my first tries of laying down beads while MIG-welding turned out better than expected! Turns out, as long as I can sit down, brace one of my arms on the table, and overall just get comfortable, I can actually do alright! Teacher told me I was already at a point where some of his students would need at least a few weeks to get where I was!
Obviously, I still have a lot to learn, but now I feel WAY more confident that I could learn how to weld up some custom bikes! Looking forward to the next class!
View attachment 258851View attachment 258852View attachment 258853View attachment 258854View attachment 258855
When MIG welding, do you move your MIG nozzle in a straigth line or do you wobble it a bit left/right?
When my welding JIG is finished, I am taking welding classes too.
Can you bring your own piece of steel to weld in the class? (like a bicycle)? Asking for a friend.