- COMPETITIONS
- THE COMPETITION ARCHIVES
- RRBBO OFFICIAL COMPETITIONS
- BUILD OFF 10 - (2015)
- BUILD OFF 10 BIKES
You are using an out of date browser. It may not display this or other websites correctly.
You should upgrade or use an alternative browser.
You should upgrade or use an alternative browser.
'37 Elfman Streamline Deluxe
- Thread starter bikewhorder
- Start date

Help Support Rat Rod Bikes Bicycle Forum:
This site may earn a commission from merchant affiliate
links, including eBay, Amazon, and others.
i know your applying hot welds but let them cool off before adding any more while filling your areas .
She's looking fantastic ! keep up the good work
She's looking fantastic ! keep up the good work
Making little dots works great to fill in but it takes time .

Sent from my iPhone using Tapatalk

Sent from my iPhone using Tapatalk
Sharks with freaking Lasers on their heads! Yeah rushing welding will twist things. It sucks taking a long time but it's best in the long run.
- Joined
- Jan 28, 2012
- Messages
- 427
- Reaction score
- 2,062
AWESOME, I seriously check the build off section just because of this build. I cannot wait to see the frame done.
Wow Thanks! I hope I can pull this build off. I have many more ideas and aspirations for this bike but this was supposed to be the easy part...
Last edited by a moderator:
- Joined
- Apr 14, 2015
- Messages
- 2,619
- Reaction score
- 4,835
Your build is getting a lot of attention , I think we all could see a great vision & new frame with much potential , but could this guy really pull this off ? Who knows , talk is cheep but having the determination & skill to pull it off is another . Well it looks like you have both . This bike is taking shape Keep up the good work . I think many of us are excited to see the end results . I hope this helps to motivate you to make it to the finally. Flame on & grind it out [emoji92][emoji106][emoji232][emoji232]
Sent from my iPhone using Tapatalk
Sent from my iPhone using Tapatalk

$19.99
Electra Glide Wall Decal 2ft Long Sport Harley Davidson Bike Motorcylce Sticker Man Cave Garage Boys Room Decor
FatCat Wall Graphics

$199.99
$229.99
Huffy Stone Mountain Women's Mountain Bike, Gray, 26 Inch Wheels/17 Inch Frame
HuffyDirect

$99.99
$108.99
Schwinn Toggle Quick Build Kids Bike, 12-Inch Wheels, Smart Start Steel Frame, Easy Tool-Free Assembly, Blue
easiness

$18.99
Old River Outdoors Bicycle/Motorcycle Chain Picture Frame 4" X 6" Photo - Faux Bike Chain
Old River Outdoors (USA Merchant)

$249.40
$289.67
Kulana Lakona Tide Adult Beach Cruiser Bike, 26-Inch Wheels, 7-Speed, Silver
Amazon.com
Great Scott! How have I missed this build until now?! Awesome fab skills bud, I love the clean lines you are making. Can't wait to see what else you have hiding up your sleeves!!!
Wow beautiful design, I am a fan can wait to see this finished.
- Joined
- Jan 28, 2012
- Messages
- 427
- Reaction score
- 2,062
Thanks for the compliments guys, I will do my best not to disappoint. I'll be chipping away at it slowly for the next month because I'm working a bunch of OT right now but things should lighten up in July and I do plan to devote a whole week to it just before the deadline. It feels really good to see this thing finally take shape.
This frame is looking so awesome! If you keep this up and if it comes out like the draft pic, Im saying now I will have no choice but to vote for your bike haha. This bike has all the best designs of all my favorite bikes. Loving it man! Keep it up the great work. 

- Joined
- Jan 28, 2012
- Messages
- 427
- Reaction score
- 2,062
I only made a little progress this weekend but at least I know that my next step is feasible although it will be a bit tedious. One of my very favorite elements of the Elgin Bluebird are those sexy dramatically tapered rear seat stays. Here's a picture I borrowed from this thread (http://ratrodbikes.com/forum/index.php?threads/barn-fresh-elgin-blue-bird-new-pics-pg8.30521/).
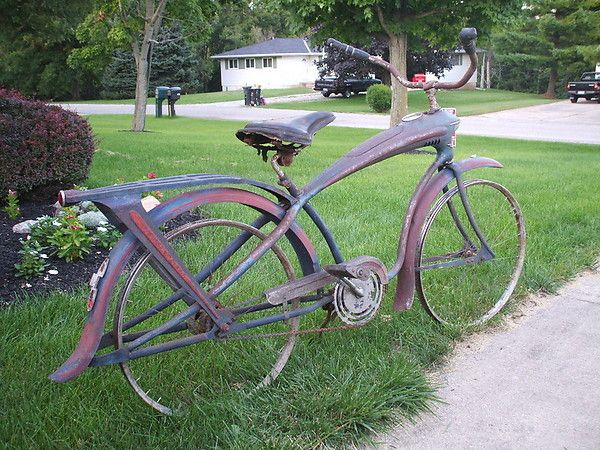
I decided early on that these were a nonnegotiable feature that this bike would have to have. I looked high and low for a supplier of tapered tubing and pretty much came up empty handed unless I wanted to place a container sizer order of them from Alibaba. I knew I could just grind out a set from some solid rod stock but I really didn't want to add that much weight to the frame. So I came up with an acceptable solution to grind them out of some thick wall tubing that I would connect in decreasing diameter segments. I got some 3/4 OD 1/8 wall tubing and some 5/8 OD 1/8 wall tubing and by connecting them in the middle of the tube I should have a tapered tube that will go from 3/4 to 1/2 from the top tube to the rear fender. I also plan to taper the middle and lower seat stays but for those I will only need one tube to taper from 3/4 to 5/8 to connect to my 5/8 loop tail rear. I started with the bottom stays and I've been grinding in internal lugs to ease the alignment process. Its a subtle detail but its one that I think really adds some elegance to the bike. This is going to burn up some precious though.
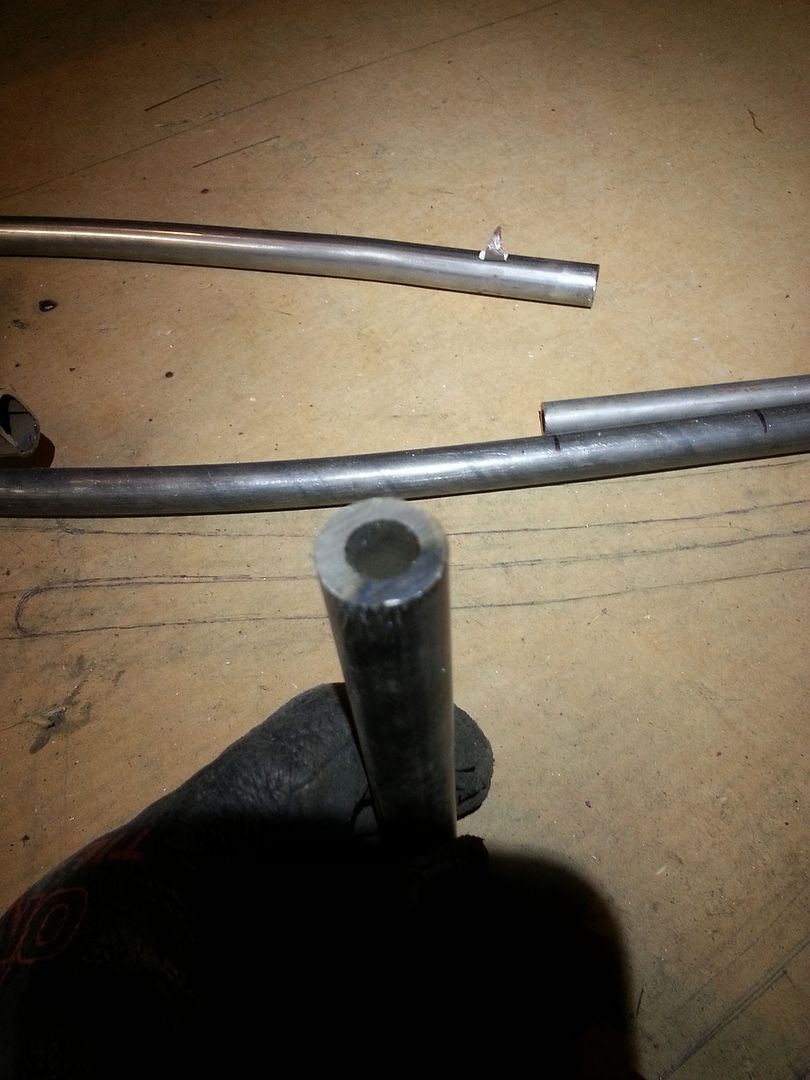
Here I've ground the one end down to a 5/8 square so I have some reference for shaping the tube.
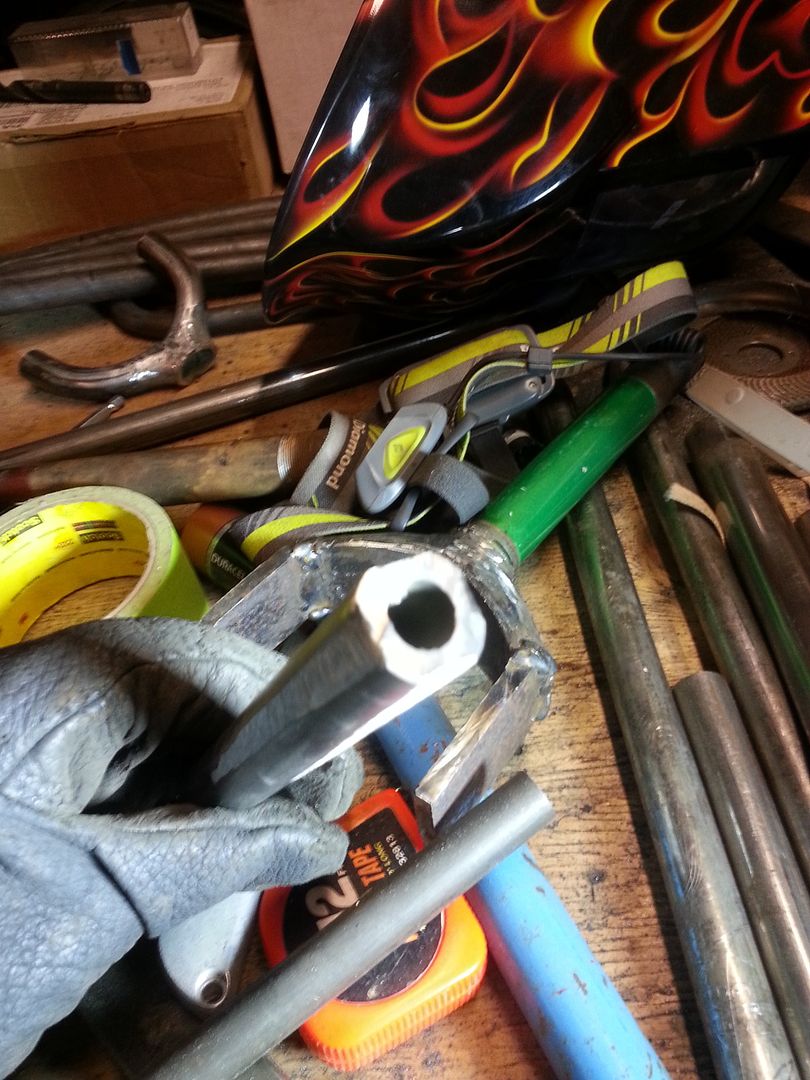
Internal lugs for alignment
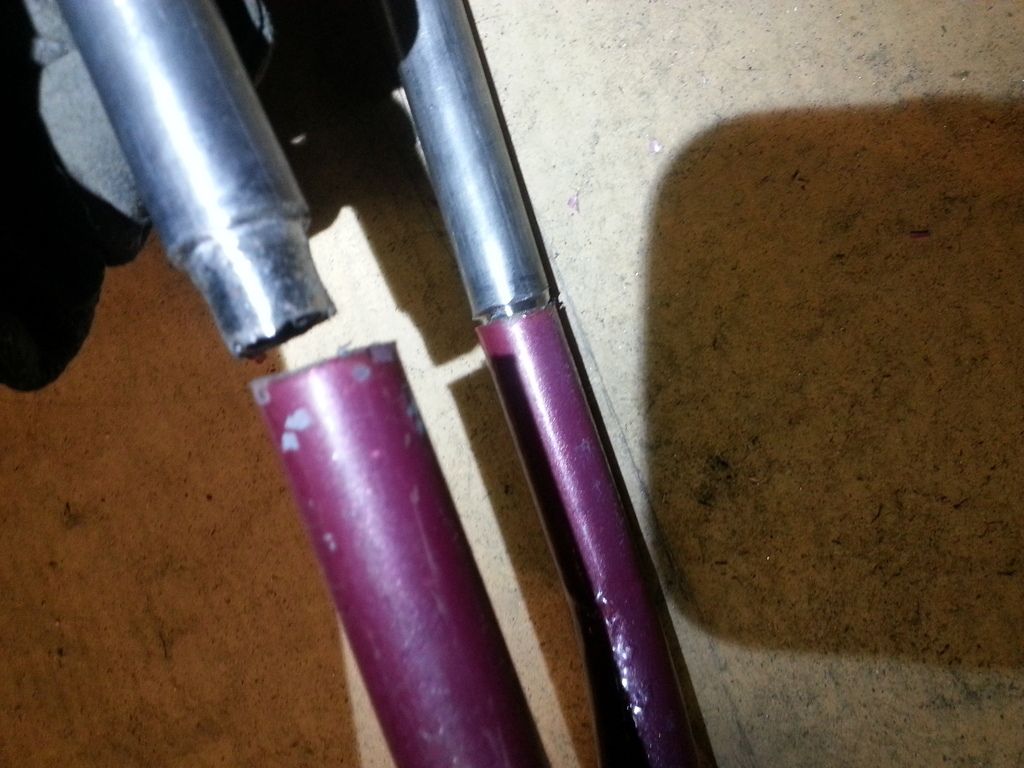
Dry fit.

I decided early on that these were a nonnegotiable feature that this bike would have to have. I looked high and low for a supplier of tapered tubing and pretty much came up empty handed unless I wanted to place a container sizer order of them from Alibaba. I knew I could just grind out a set from some solid rod stock but I really didn't want to add that much weight to the frame. So I came up with an acceptable solution to grind them out of some thick wall tubing that I would connect in decreasing diameter segments. I got some 3/4 OD 1/8 wall tubing and some 5/8 OD 1/8 wall tubing and by connecting them in the middle of the tube I should have a tapered tube that will go from 3/4 to 1/2 from the top tube to the rear fender. I also plan to taper the middle and lower seat stays but for those I will only need one tube to taper from 3/4 to 5/8 to connect to my 5/8 loop tail rear. I started with the bottom stays and I've been grinding in internal lugs to ease the alignment process. Its a subtle detail but its one that I think really adds some elegance to the bike. This is going to burn up some precious though.

Here I've ground the one end down to a 5/8 square so I have some reference for shaping the tube.

Internal lugs for alignment

Dry fit.

Are you kidding me? That looks like a lot of work. Wow.
You can buy tapered tubing meant for forks. Maybe you could make that work? Here's an example: http://www.cycle-frames.com/bicycle...OWN-DISK-BRAKE-DROPOUTS-and-FORK-STEERER.html
You can buy tapered tubing meant for forks. Maybe you could make that work? Here's an example: http://www.cycle-frames.com/bicycle...OWN-DISK-BRAKE-DROPOUTS-and-FORK-STEERER.html
One of my favorite builds this year.
I love watching you execute what your mind comes up with!!!
I love watching you execute what your mind comes up with!!!
- Joined
- Jan 28, 2012
- Messages
- 427
- Reaction score
- 2,062
Are you kidding me? That looks like a lot of work. Wow.
Eh, I don't mind doing it. I have an unusually high tolerance for tedious work. I actually enjoy it. Thanks for the link, I did look for bicycle tubes for this application but the tubing available doesn't seem to work for this application.
- Joined
- Jan 28, 2012
- Messages
- 427
- Reaction score
- 2,062
This is very, very cool! As was earlier suggested, I probably would have looked at tapered fork tubes for the stay extensions, and lived with it being not quite exactly right, but your method will give you the exact taper you want! 
Luke.

Luke.
- Joined
- Jan 28, 2012
- Messages
- 427
- Reaction score
- 2,062
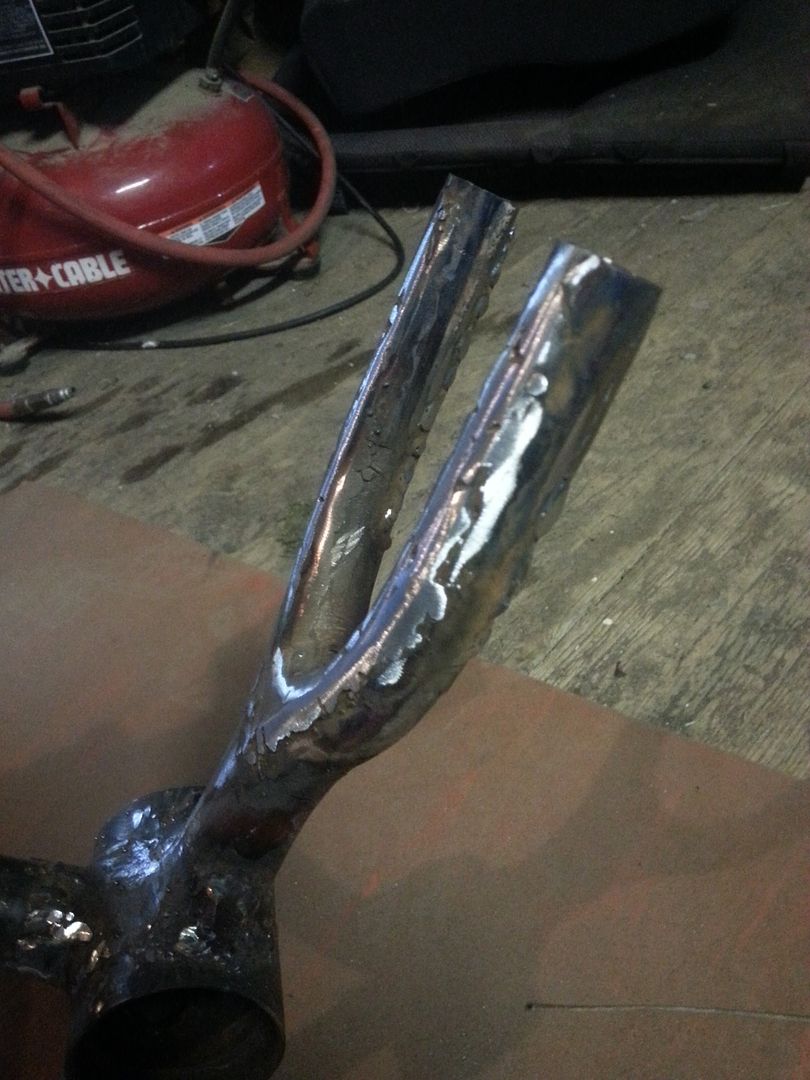
Its been a busy past two weeks for me but unfortunately I wasn't busy on the Elfman. I got kinda bogged down with some design indecisiveness and wasted a bunch of time and welding wire trying to add some meat to my lower rear stays. Its bad enough trying to grind down a tube to a taper but building one up I've discovered is a lost cause.
The reason I wanted to do this was because I found a willing donor for some tapered tubing with this old Mt bike frame I scrounged from the dump
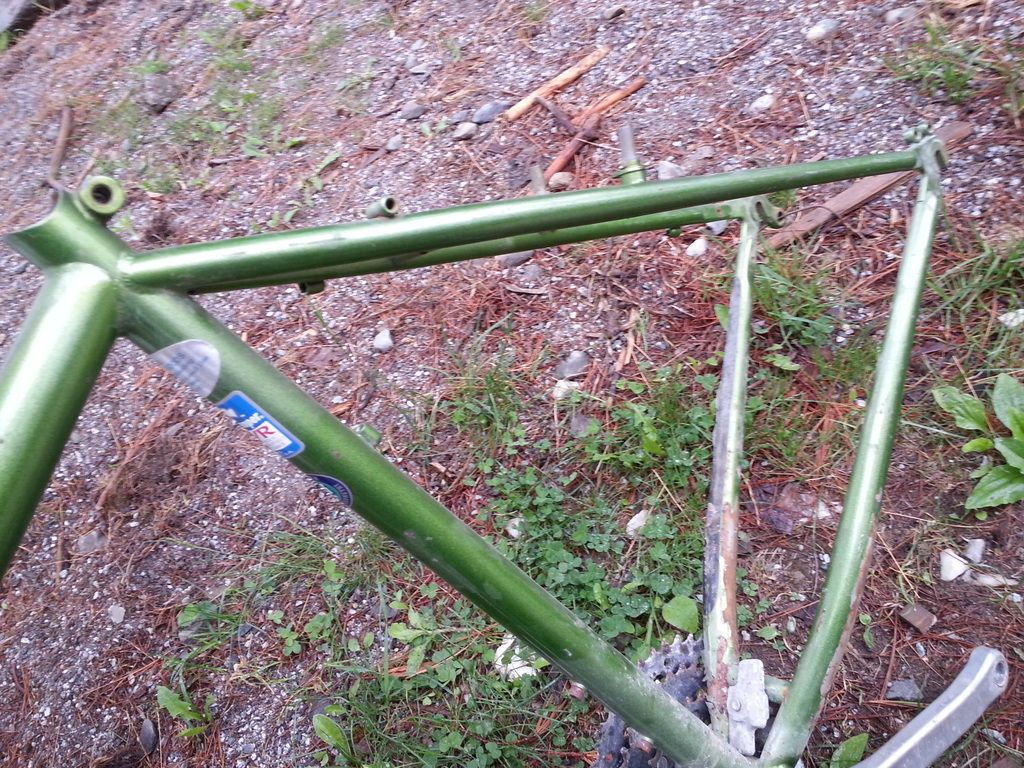
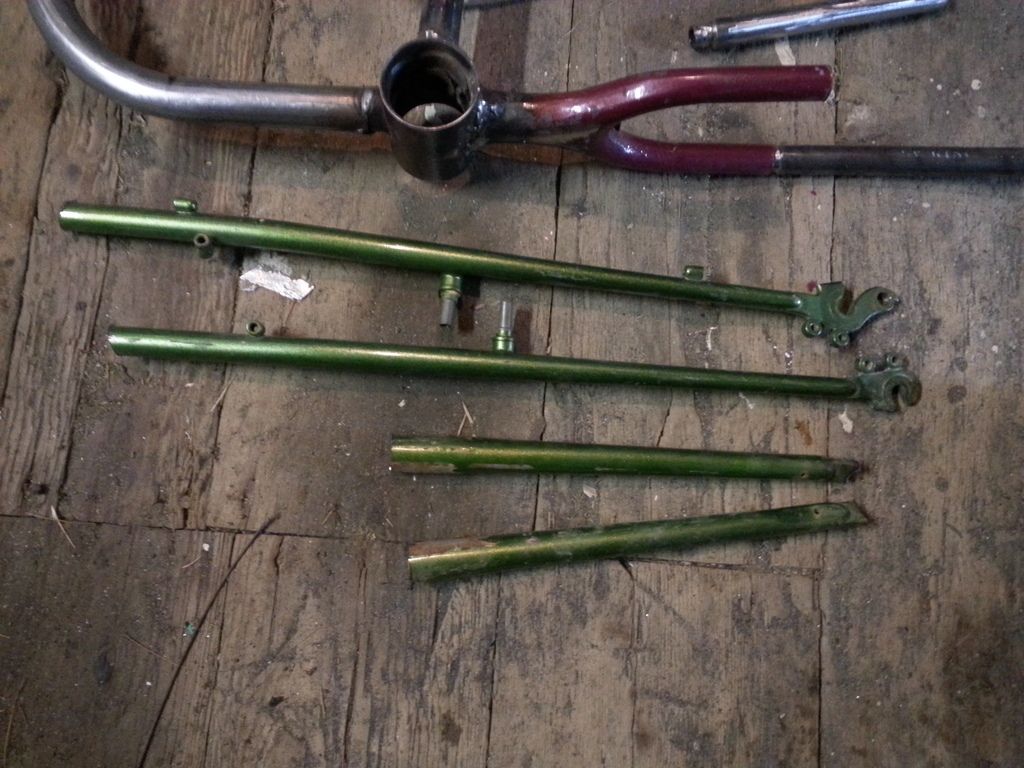
The problem was the larger lower tapers were 7/8 at the widest and my elgin stays were 3/4. I thought i could just build it up but I started looking for alternatives after about and hour of welding and grinding and realizing that I was causing the stays to warp. I don't have a die to bend 7/8 tubing to the radius I wanted so started looking though my dump bike pile to see if any forks could be used but they were all too fat for this application. I was thinking I was out of luck when I noticed this:
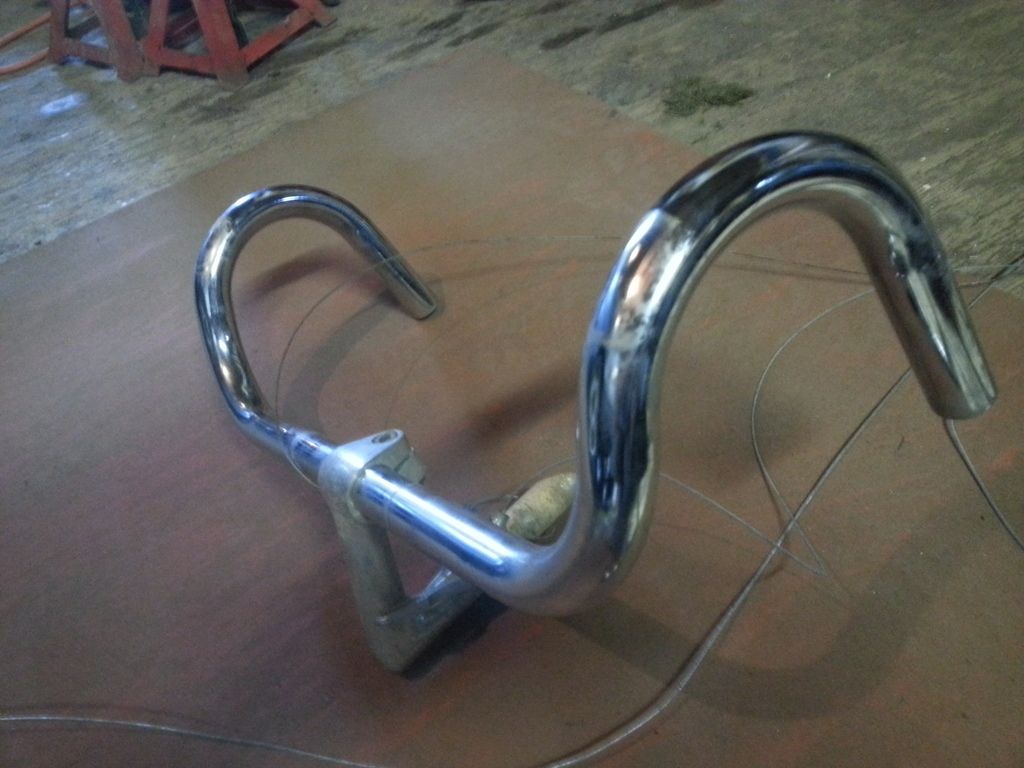
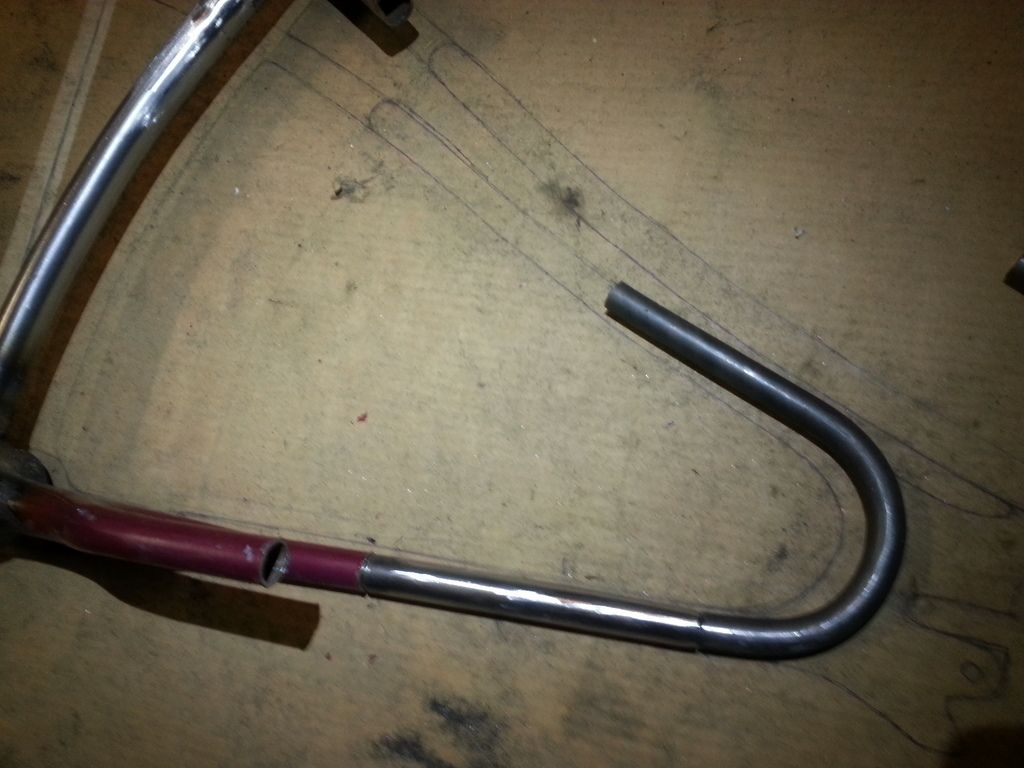
I was like: "Well hello there old crappy steel road bike bars I thought I would never find a use for".
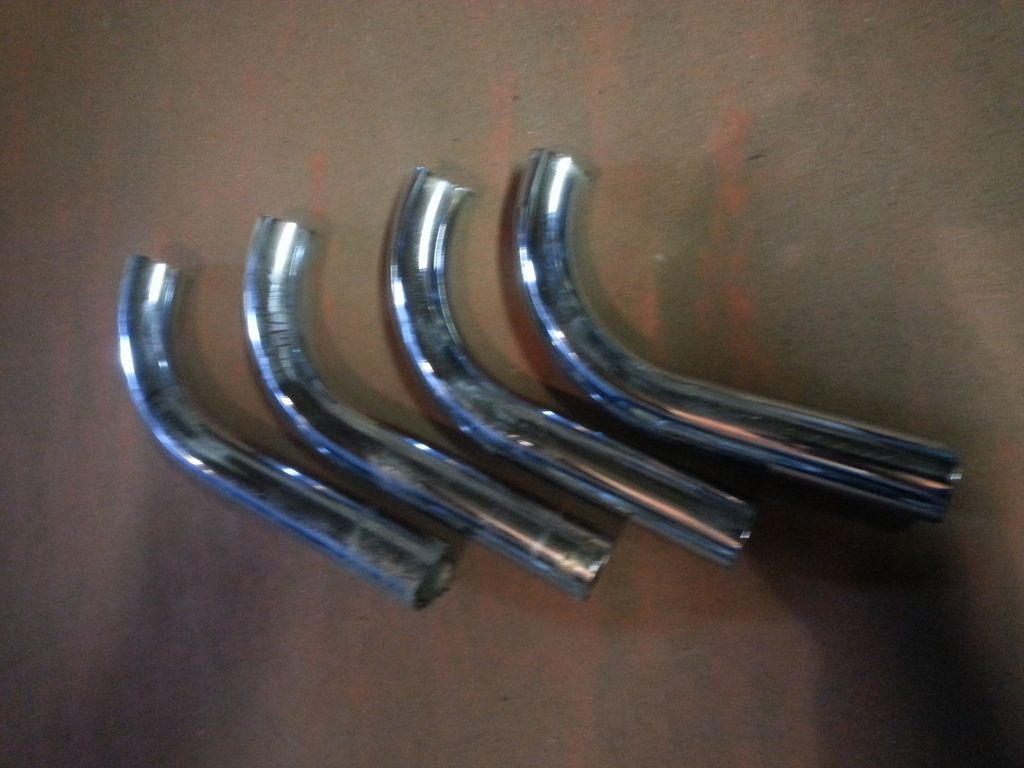
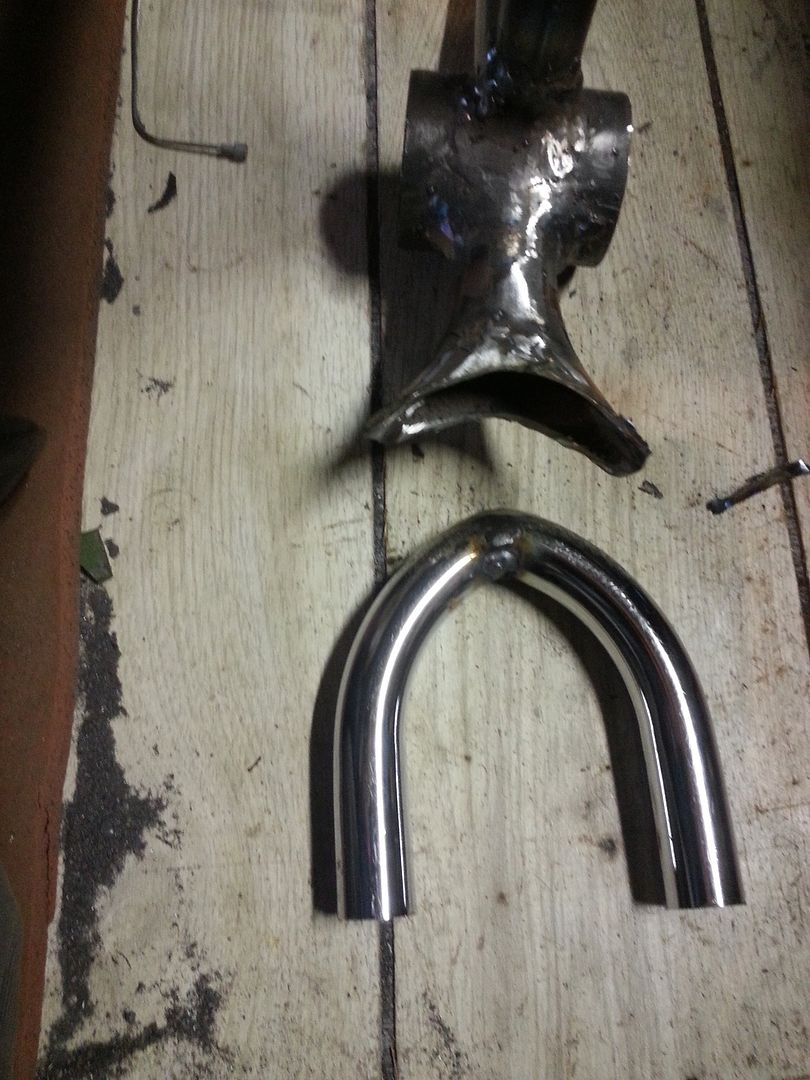
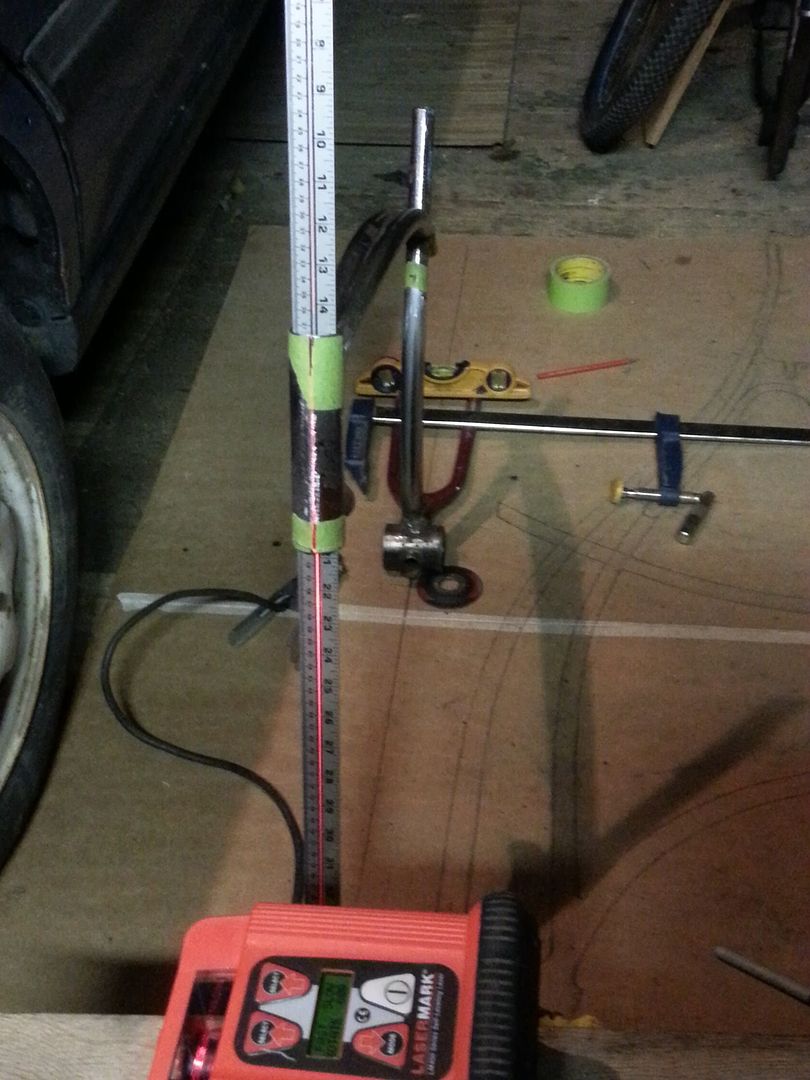
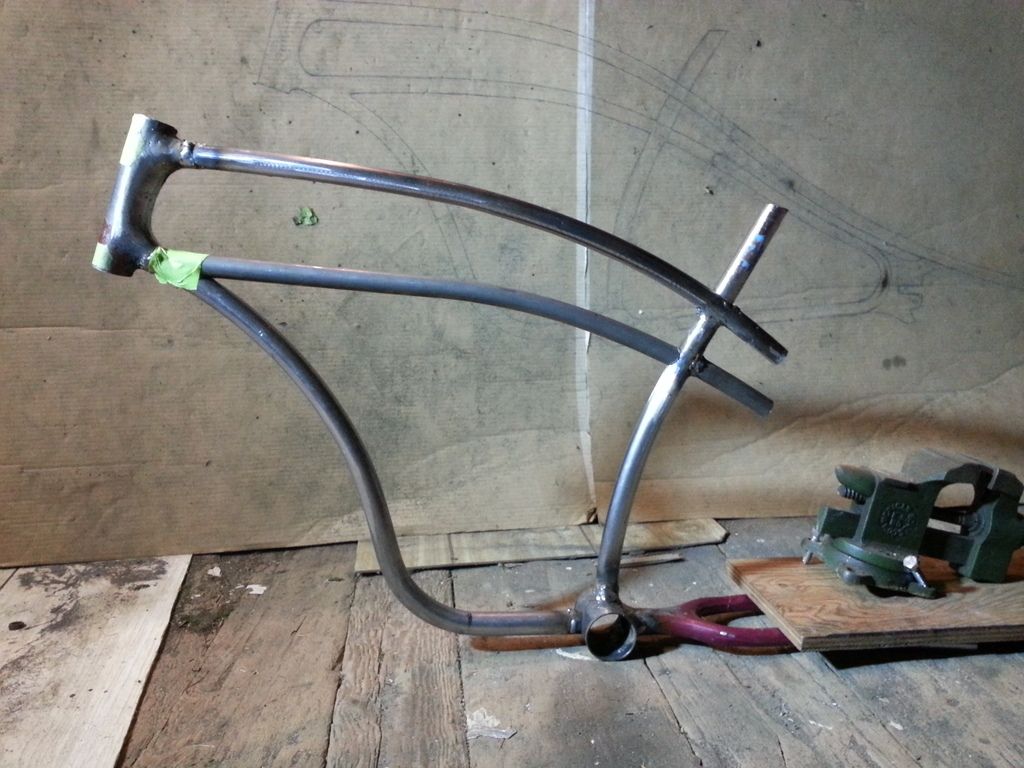
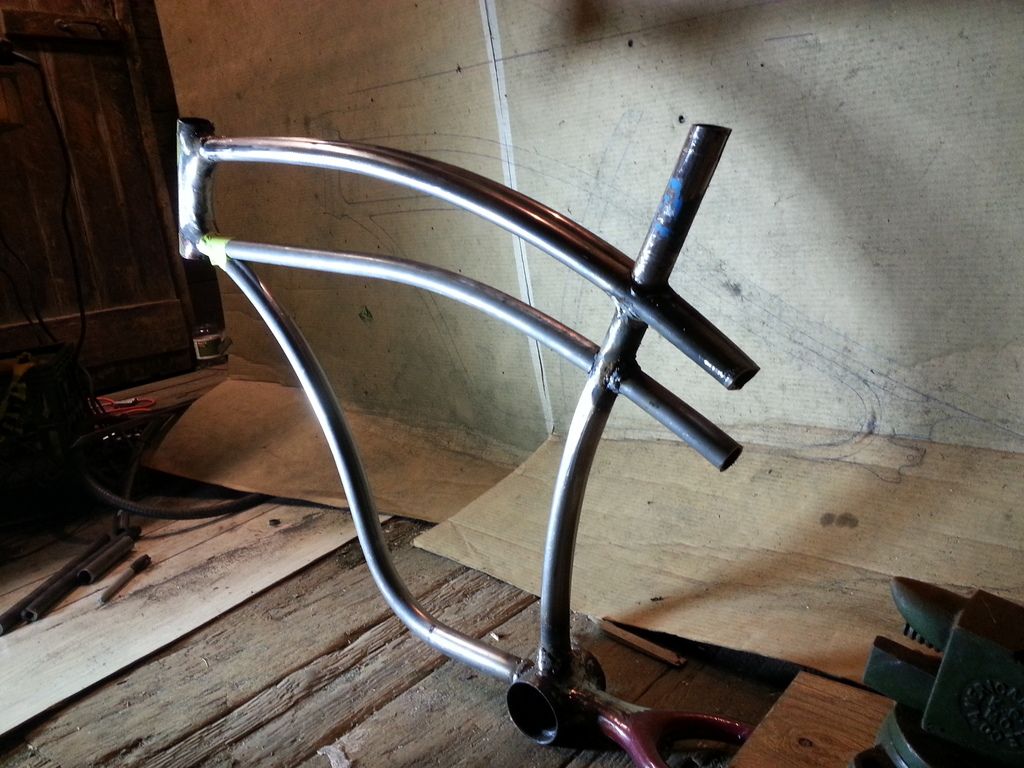
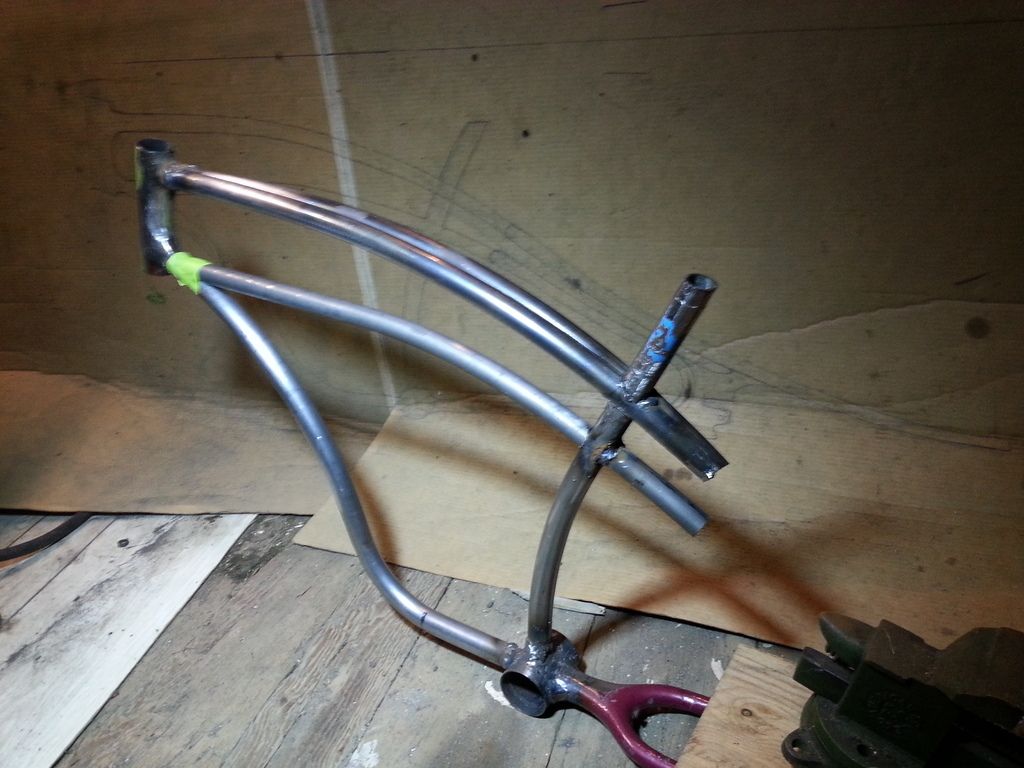
I welded my loop tails on the tapered stays and fit the arch with my internal lugs which are just a smaller diameter tube sliced on one side like a drift pin and taped into the tube. This is essential to keep everything lined up for welding.
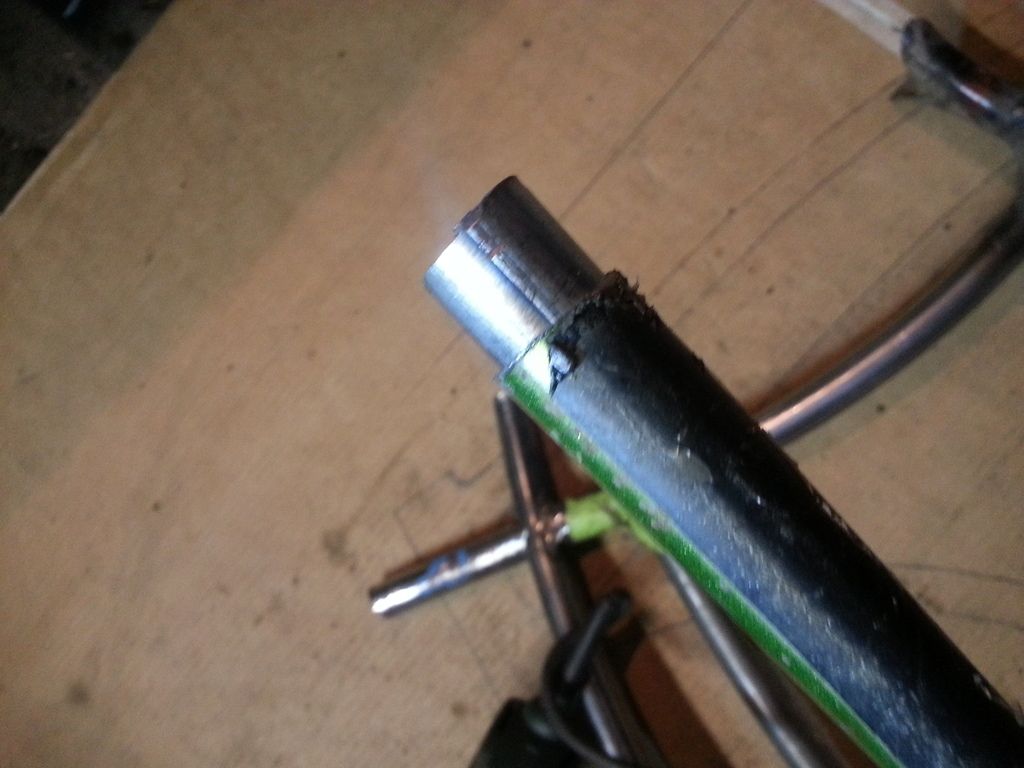
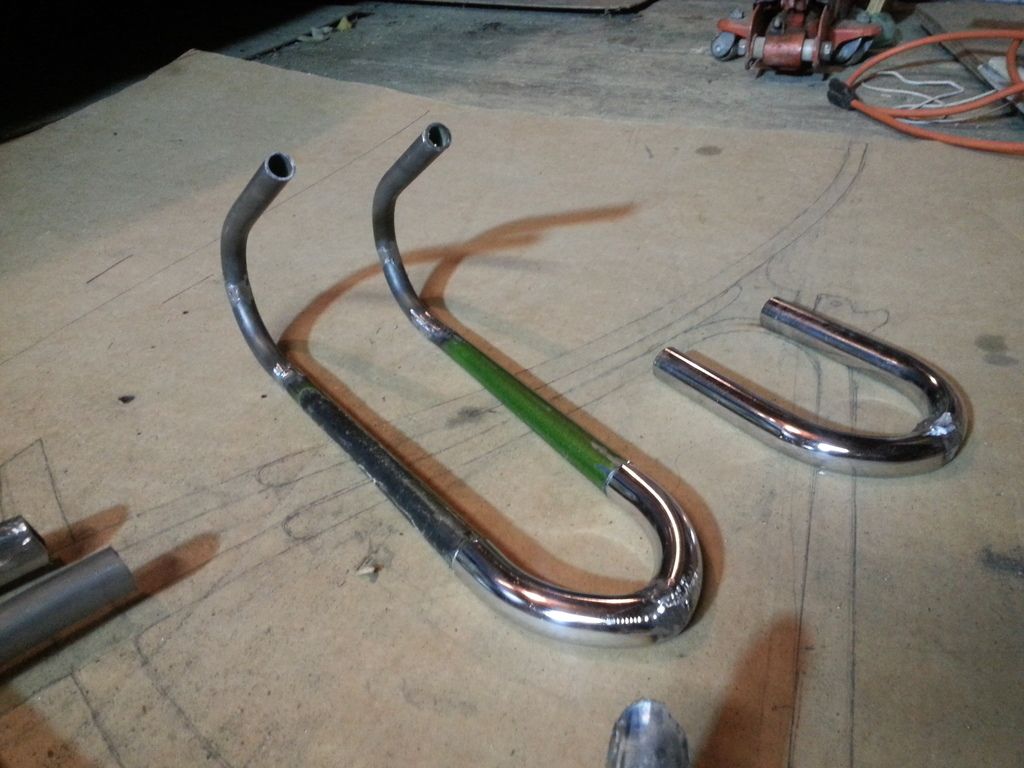

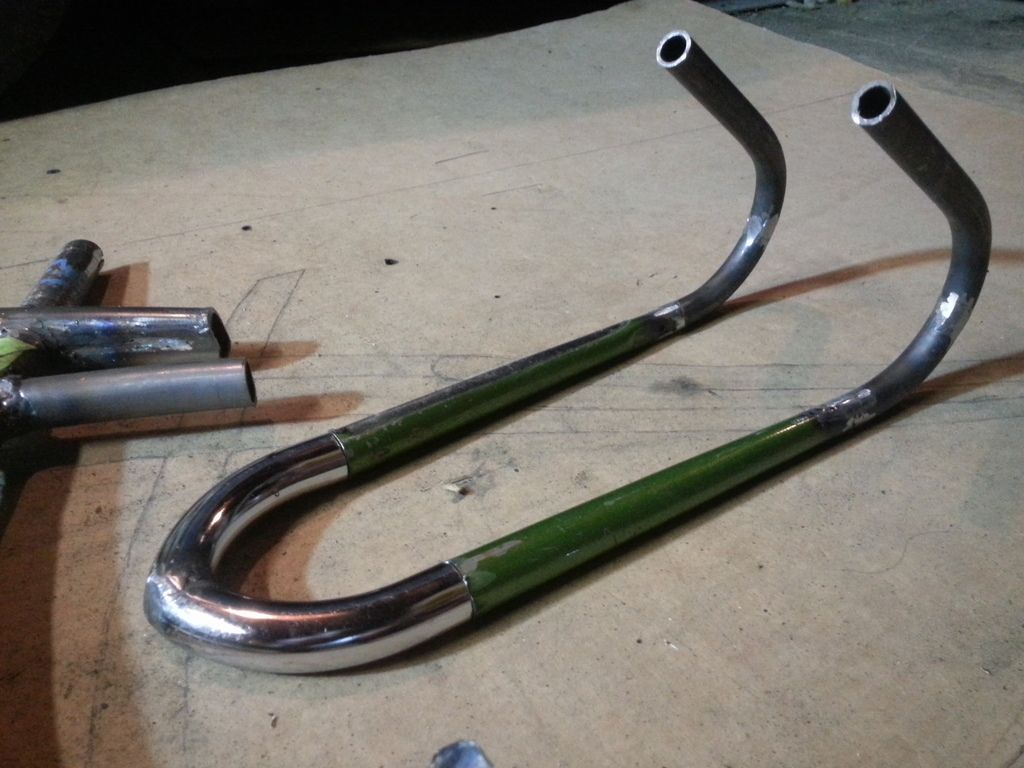
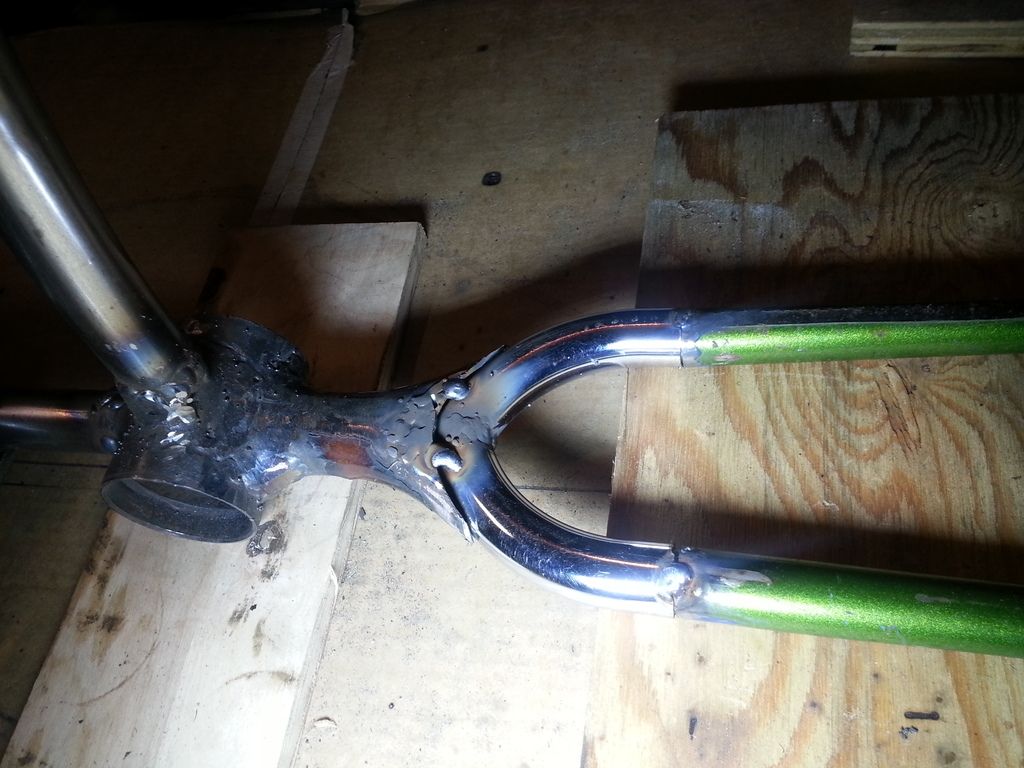
Then I welded my new rear on with just a few tacks. I'm done welding and grinding things as if they are permanent because I've learned that nothing is permanent on this project.
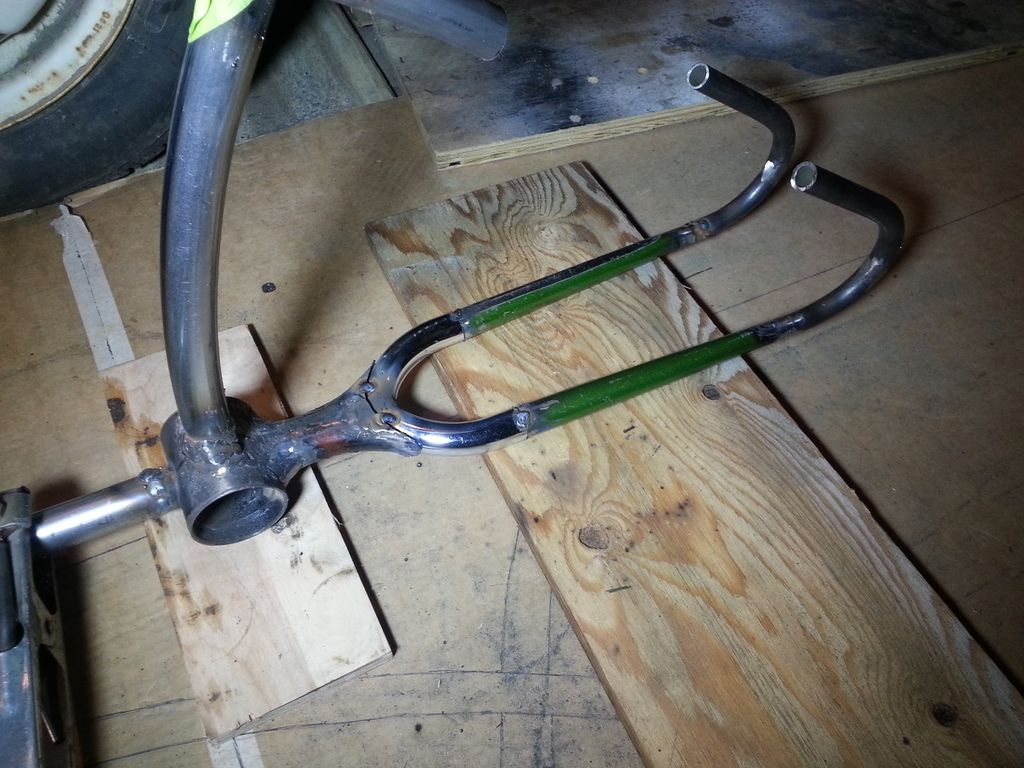

The reason I wanted to do this was because I found a willing donor for some tapered tubing with this old Mt bike frame I scrounged from the dump


The problem was the larger lower tapers were 7/8 at the widest and my elgin stays were 3/4. I thought i could just build it up but I started looking for alternatives after about and hour of welding and grinding and realizing that I was causing the stays to warp. I don't have a die to bend 7/8 tubing to the radius I wanted so started looking though my dump bike pile to see if any forks could be used but they were all too fat for this application. I was thinking I was out of luck when I noticed this:

I was like: "Well hello there old crappy steel road bike bars I thought I would never find a use for".


I welded my loop tails on the tapered stays and fit the arch with my internal lugs which are just a smaller diameter tube sliced on one side like a drift pin and taped into the tube. This is essential to keep everything lined up for welding.


Then I welded my new rear on with just a few tacks. I'm done welding and grinding things as if they are permanent because I've learned that nothing is permanent on this project.

Nice recovery on the stays!
Luke.
Luke.
This build is so much fun to follow seeing what you are creating from scraps.


