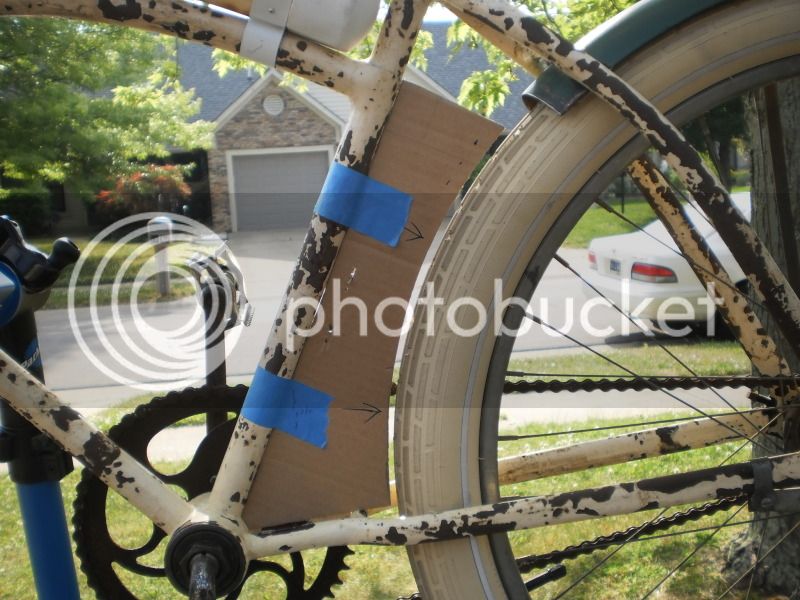
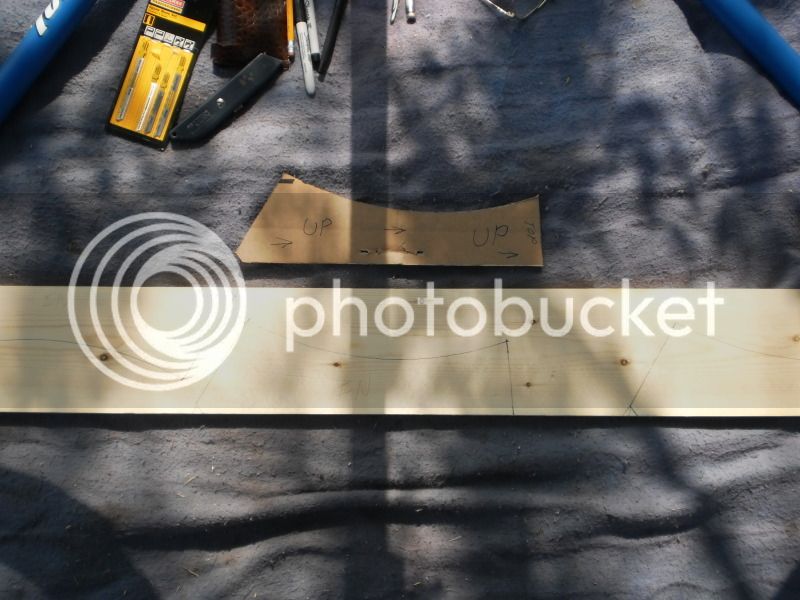
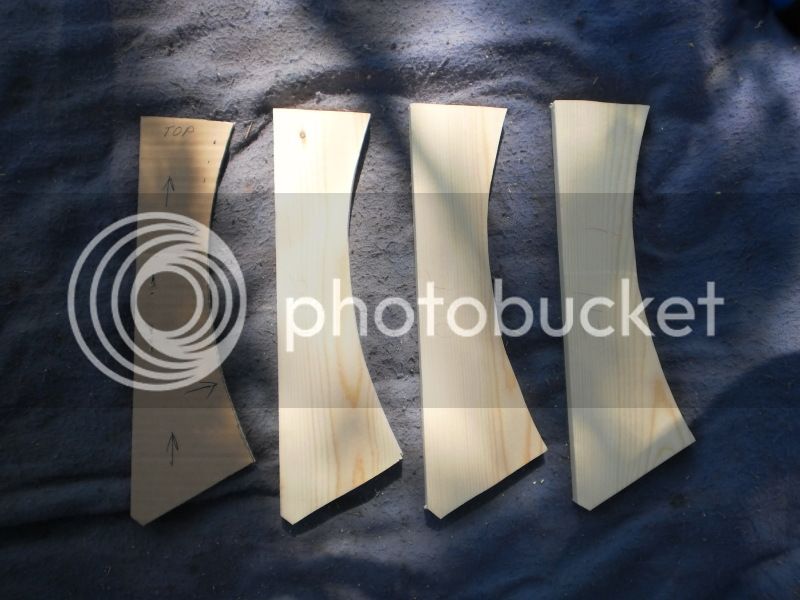
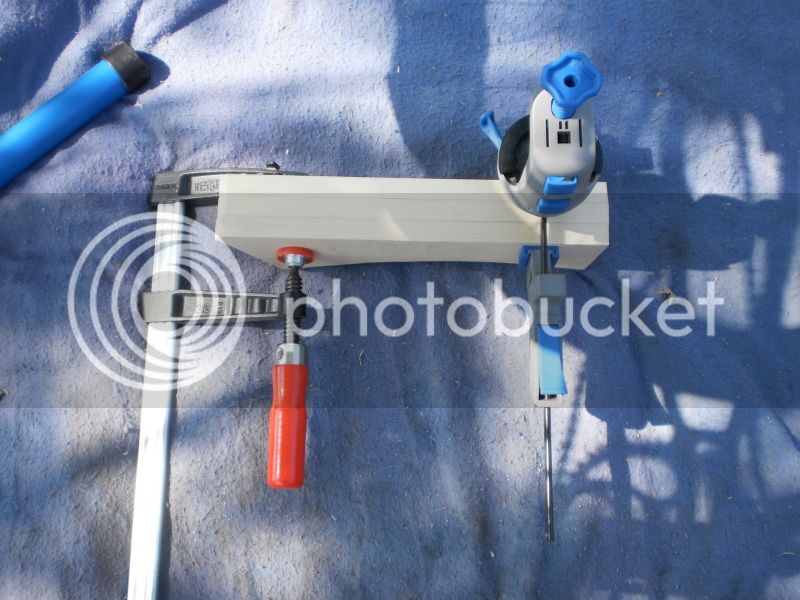
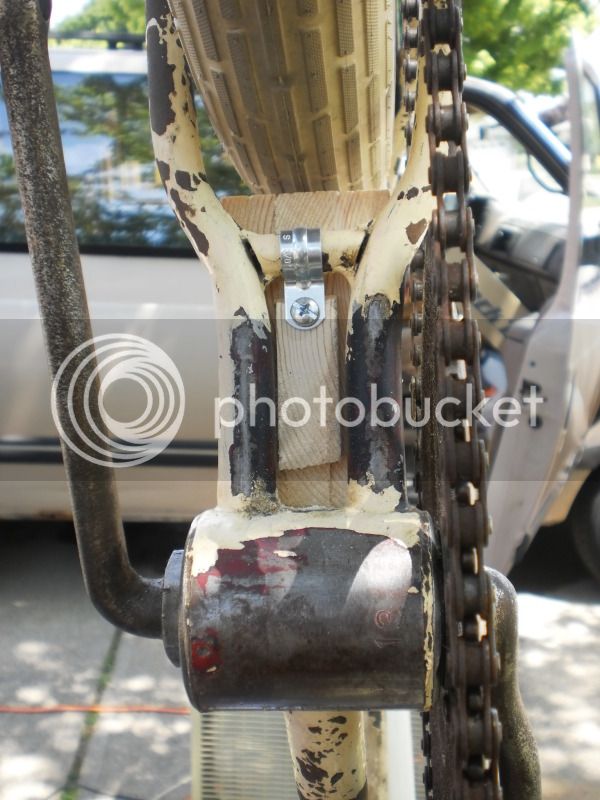
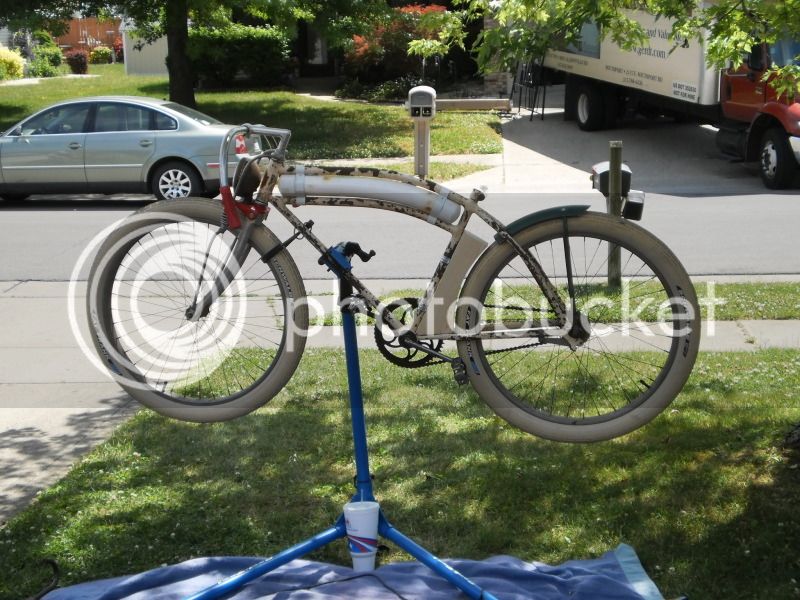
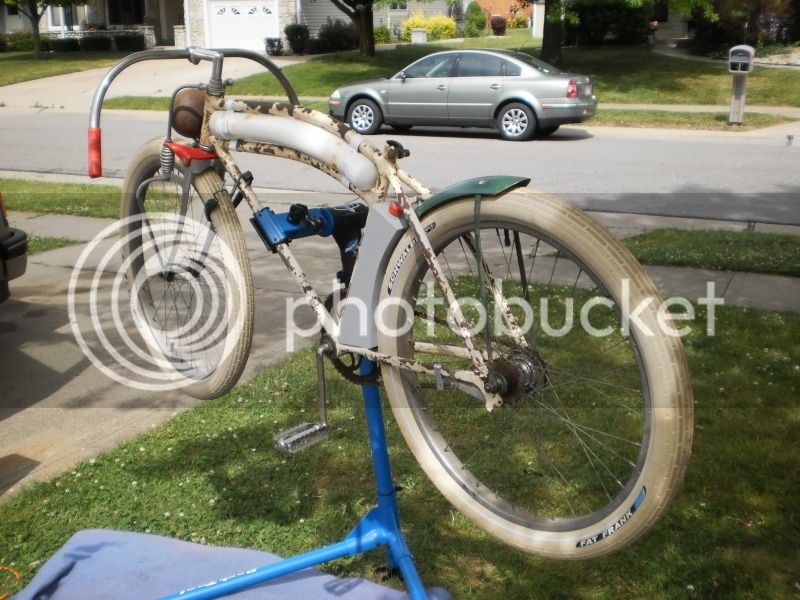
'38 Special ------ Update July 2nd

Rat Rod Bikes Bicycle Forum

Help Support Rat Rod Bikes Bicycle Forum:

This site may earn a commission from merchant affiliate links, including eBay, Amazon, and others.
'38 Special ---- Update May 24th - Opinion?

Hi! I spent all morning cleaning parts so this afternoon I started fiddling around with a pattern for my oil tank. From my research any board tracker that had a rear fender kept the oil tank below the end of the fender nearest the seat tube. Also the top of the oil tank was sitting perpendicular to the side parallel to the seat tube. And finally there was a fill cap on top. My first pattern I cut the length so it stopped about a half inch below the fender stub but that didn't seem like it allowed enough room to access the fill cap so I cut it lower. Then I cut the pattern so it cleared the tire by 1/2" but that looked too spacious so I cut another pattern and reduced it to 1/4" spacing from the tire.

I temp taped the pattern on the frame to see what it would look like. I walked away and put back a few tools and then looked at it again. I don't like the length - I think it's too short. But while I was standing there looking at it I saw a line that I could match the oil tank to so it would flow better. So tomorrow I'll cut another pattern and match the top of the oil tank with the top line of the 2nd top tube - curve and all. That will give me a larger tank and an aesthetic line visually - all this for a tank? So tonight I'm looking for opinions, observations and ideas addressing the height of the tank and if it needs to be closer to the tire? Everything is welcome - I always believe that fresh eyes have the potential to see something different. I appreciate all comments. Thanks alot for all the support and kind words also. TBC! Robert


001-6.jpg


002-6.jpg


005-5.jpg


006-3.jpg
 
Re: '38 Special ------ Update May 24th

I like your idea of making the top of the oil tank follow the curve of the lower toptube.

It might me cool to add some bling in the area above the tank by attaching a hood ornament type of doodad to the fill cap.
 
Re: '38 Special ------ Update May 24th

kingfish254 said:
I like your idea of making the top of the oil tank follow the curve of the lower toptube.

It might me cool to add some bling in the area above the tank by attaching a hood ornament type of doodad to the fill cap.

I have a couple fender ornaments - I might check that out. If I use your idea you'll get full credit - I don't want to get into a "Credit" war like you got going w/ Xcruiser! Thanks alot! Robert
 
Re: '38 Special ------ Update May 24th

Road Master said:
kingfish254 said:
I like your idea of making the top of the oil tank follow the curve of the lower toptube.

It might me cool to add some bling in the area above the tank by attaching a hood ornament type of doodad to the fill cap.

I have a couple fender ornaments - I might check that out. If I use your idea you'll get full credit - I don't want to get into a "Credit" war like you got going w/ Xcruiser! Thanks alot! Robert

You can just pay me back with a vote! :mrgreen:
 
Re: '38 Special ------ Update May 24th - Opinion?

truly an awesome looking bike,robert! 8) love the direction your taking it.
 
Re: '38 Special ------ Update May 27th

Hi! Today I lengthened the oil tank pattern so it completed the line with the lower top bar - I like it much better. I also recut the curve around the tire so it is just a little closer and more consistent. Then I layed out 3 pattern markings on the 1" x 6" trying to end up with all easy to sand edges - no knots. My scrolling skills aren't as good as they used to be but I'll get the variations in the sanding stage.

Note: This is something I learned from my youngest brother that worked in a wood shop. Part of his job was "laying up panels" which is simply taking multiple strips of wood, applying glue to the edges and then clamping them all together on multiple bar clamps. Then with a rubber mallet they beat all the strips down so the bottom side of each strip is resting on the bar portion of the clamp. I saw him due this a hundred times and didn't give it a second thought. We both had full time jobs but we moonlighted evenings and weekends installing Oak Staircases and Railings in rich peoples homes. I'm sure you've all seen a staircase that goes up part way to a landing, turns 90 degrees and then completes the rise. One particular owner didn't want a landing but opted for curved steps which ends up with each tread about 4" wide on the inside of the curve and about 18" on the other end. To accomplish this we had to glue multiple treads together edge to edge - basically lay up a panel. The next day we cut the stair tread and I couldn't understand why they wouldn't break on the seams that we glued together. He told me a glued and clamped joint is stronger than the grain of the wood. Well I wasn't believing that so I took a leftover panel cutting, set it up on 2 concrete blocks and wailed as hard as I could on that seam - it broke, but not on the seam. It broke in the grain about an inch to the left of the seam - he was right - with solid 5 quarter hard wood. So what does this have to do with anything - I glued and clamped three cut 3/4" thick boards together and it will be just as strong as a solid piece of 4" x 6" beam. Without a band saw I couldn't cut curves on a hunk of wood that large so instead I cut three smaller boards and glued them together. Knowing the strength of glued and clamped wood may come in handy someday when trying to knock out a "to do" list so you can get back to tinkering with your bikes!

I measured the distance between the center of the seat tube and the back side of the chain to make sure I would have clearance which is how I ended up with a simulated oil tank 2 1/4" in depth. If my calculations are correct I should be able to clamp the tank centered onto the seat tube without interferring with anything. I practiced clamping the parts together so after I put the glue on I wouldn't be scrambling trying to line up the edges and figuring out how I wanted to clamp them at the same time. Everything went fairly smoothly, which is the way I like it. I'll let the glue dry overnight and start sanding. About time to go get some more materials. I'm going to try my hand at tail pipes and I think I finally came up with a solution for attaching them to the frame but not permanently - I don't want to damage the frame in any way if I can prevent it. It's a hot one today so it's time to pick up. TBC. Robert


001-7.jpg


002-7.jpg


003-6.jpg


004-5.jpg


005-6.jpg


006-4.jpg
 
Re: '38 Special ------ Update May 27th

Man those Fat Franks are way phat!! Looking pretty sweet so far 8)
 
Re: '38 Special ------ Update May 27th

how did i miss this build?
i dig it 8)
 
Re: '38 Special ------ Update May 27th

Xcruiser said:
Figured Id check in on ya RM.Thats super info on working with wood ,too bad Im the worlds worst carpenter!!
Truly love this build,keep rollin'

Not being a carpenter but knowing some tricks like this might help out the average Homeowner. I know owning a home can be a never ending project so any idea that speeds things along can be a great help. Thanks for checking out my build. Robert
 
Re: '38 Special ------ Update May 27th

Road Master said:
Xcruiser said:
Figured Id check in on ya RM.Thats super info on working with wood ,too bad Im the worlds worst carpenter!!
Truly love this build,keep rollin'

Not being a carpenter but knowing some tricks like this might help out the average Homeowner. I know owning a home can be a never ending project so any idea that speeds things along can be a great help. Thanks for checking out my build. Robert

I built my wife a house once,this is what it looked like the day I finished.....
thumbnail-6.jpg
 
Re: '38 Special ------ Update May 27th

Road Master said:
A little caulking and a coat of paint is all it needs or you may just like the "patina" - it's a RatHouse!


Haha, you made me laugh.
 
Re: '38 Special ------ Update May 30th

Hi! Can you say OIL TANK? I had a few glitches that were entirely my own fault. I picked up some two hole electrical metal conduit straps to mount the oil tank to the seat tube. The footprint of the strap was definitely wider than the tank so I simply had to reshape it to make it work. I needed 2 straps - the first one was a piece of cake, happened by itself. But for some reason I could not duplicate that first one to save my butt. I fiddled & fiddled with it the other day in the 90 degree heat and I just got more frustrated as it went. I finally decided I needed a break from it - packed everything up and went inside. In case you haven't noticed my workshop is on the front lawn under a tree - wife NOT Happy!

The next couple days the thought of going back out there and working on that stupid strap - well, I just didn't. But I woke up this morning feeling positive and knowing that I WILL finish this stupid strap! I set up my workshop, grabbed the strap and 2 pairs of needle nose pliers and two quick bends later I was done - aaarrrggg! Everything went perfectly today. I put 2 straps on the seat tube and one under the bottom of the frame in case the tank ever got bumped it wouldn't swing around and get ate up by the chain.


004-6.jpg


005-7.jpg


006-5.jpg


007-4.jpg


008-4.jpg


Used a Dremel Tool w/ a Cutting Wheel to reshape the strap where the mounting hole is.


009-4.jpg


010-1.jpg


011-2.jpg


Love my Park Repair Stand - swung the bike's butt around up in the air to install the under strap!


012-2.jpg


013-1.jpg


I had been collecting all kinds of plastic bottles with caps because I wanted a smaller fill cap on the oil tank and then a larger one for the gas tank. The two liter plastic jug looked about right for the oil tank but then the little woman's boy visited the other day and he brought with him a Cherry Coke Bottle - cap is red. Red is going to be one of my trim colors so for mockup purposes it was mo' better! Anybody ever cut the threaded part off the top of a plastic bottle? I hadn't but the plastic is many times thicker. I used a utility knife to rough cut the top of the bottle off and used it again to cut as close as I could to the ringed area just below the cap - looked like a good stopping point for the filler. To get it flat I started w/ 100 gritt sandpaper - naugh, then I tried 80 gritt - still slow going so I finally got out a wood rasp and went to work. Plastic is tougher than I thought but it was just what I wanted. Primed the tank and the spout, then glued the spout on w/ rubber base glue (one of my favorites). Reinstalled the tank, took some pics and called it a day. I need some copper pipe - last pic shows a metal part I messed around with today for the next project - can you guess what it is? TBC. Robert


014-2.jpg


015-1.jpg


016-2.jpg


017-2.jpg


018.jpg


019.jpg


020.jpg


021.jpg


022.jpg


023.jpg


024.jpg


025.jpg
 
Re: '38 Special ------ Update May 27th

Ahhhh, the pause that refreshes!!!

Nice Coke tank!
 
Re: '38 Special ------ Update May 27th

Xcruiser said:
Now your cookin',looks super man.Dont ya just hate it when something frustrates you for hours then happens in seconds after simply walking away for a bit.lol

Frustrating is putting it a little mildly, but that will work. Another one that gets me is when I'm looking for something and I know it's right in front of my face but I still can't see it - I go get someone else and of course they point to it immediately. It's amazing what another set of eyes can do. Robert
 
Back
Top