Allow me to entertain for a week..

Rat Rod Bikes Bicycle Forum

Help Support Rat Rod Bikes Bicycle Forum:

This site may earn a commission from merchant affiliate links, including eBay, Amazon, and others.
Joined
Nov 8, 2013
Messages
22
Reaction score
12
Rating - 0%
0   0   0
There are moments in life when you see something and know exactly how it should be built. Inherently all bikes made have compromises or flaws. Allow me to digress... So a while ago a friend shot me some pics of his latest 15$ score; in the assortment of BMX pics was a Mosh DJ3 frame. I knew what direction the frame needed to go and how to get it to that point. He kindly donated the frame to me for this build. I did not want to build a bike that was run of the mill. I have a Haro Sport sitting on the wall for that. I have had a long hiatus from Bike's; that was up till two years ago when I invested in a RZ 120. That bike brought me full circle back to my roots and when I learned to ride . Riding again has brought back the fun that it was to be a kid. The DJ3 has so many unique design features that it will be hard to not make a wonderful bike.

Here is the frame:


Now to get thing sorted out...
 
freestyle & bmx riders don't like heavy bikes
Fair enough. On too day two of musings, I was pretty sure that I wanted to do a distressed metal look on the build as well as a custom art piece. First I had to get some sanding done:


Working with 120-200 grit sand paper I was able to get a good portion of the clear coat that was protecting the rust veins removed


for the final I hit the frame with the trusty sandblaster, to get into all the gouges and hard to reach areas; and finished off with 120 grit


I ordered some Cult white walls and mounted them on a set of Araya 7c's I had laying around. Initially I was going to use these for this build. Some bits and bobs:


Back up handlebars, just incase my idea for the real handlebars doesnt work out!
 
Initial mock up; gotta get the fork tube lengths measured for cutting, and this will be the last time before it gets primer and I have to worry about leaving finger prints on it:


With white walls installed!


No sooner had I done this initial mockup a pare of 20" disc brake rims fell into my lap. (actually a buddy who scours craiglist found them and I went immediately to get them also scored a threadless head set and mechanical disc brake caliper)


Cleaned up rims and got white walls mounted again:


and just a concept of the direction for paint, did this mock up in Photoshop:

 
That paint mock up just put a big goofy grin on my face. Can't wait to see this one finished, the paint reminds me of a free agent warbird
 
Thanks fella's the process was a ton of fun (except the sanding) :mad:

On to Priming, and filling all the dents and blemishes with filler and primer.


All smoothed out:


So two steps forward, one step back (its always that way right? :confused: ) I ordered up this .25" ISO disc brake mount:


After much measuring and remeasuring, mounting and remounting, and grinding it, I was able to get the surfaces matched up for welding:


And here is an example of why you need an extra set of hands to take photos I got caught up in the process ( sanded back off the primer for welding surface, did an initial bead on both sides, then ground it down, made another pass on each side of the original bead, and ground smooth and finally primered) And didnt take a single pic! :banghead:


Teaser for tomorrow; I got some 7/8' .058 and 1.5" .120 chromoly tubes and chopped em to size:


Till tomorrow!
 
After much coffee with the Machinist:


I decided on a 10 out, 3 up 10 back welding complete:


Quick mockup on the forks to see which is better.


vs. backups:


Next up paint!
 
Decided after much debate to try another direction for the paint, I found the whitest white my paint store could mix, and went to town:


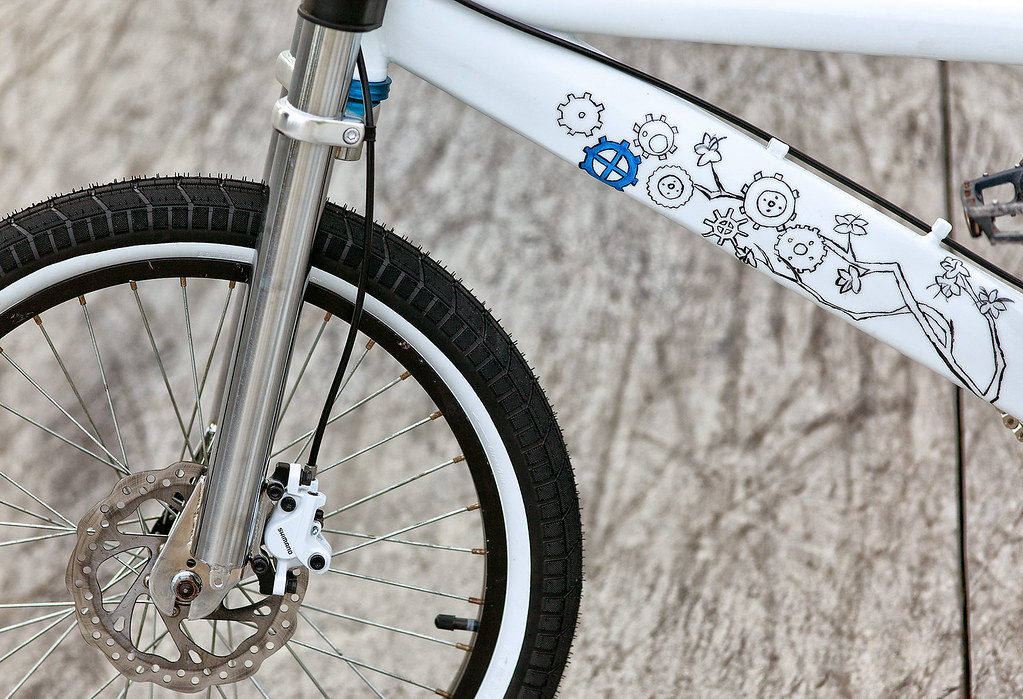
After flash and a few minutes it was off the the artist for the art:


Now for some clear-coat before base completely cures:


Gummy thick clear:


Next up is final solutions, and photo shoot!
 
First off; thanks to everyone following this thread, this bike was a learning experience for me. Now to hang some parts:


Set of hydraulic brakes:


Sprocket and crankset, bars painted, grips on, still needs chain and final adjustments:

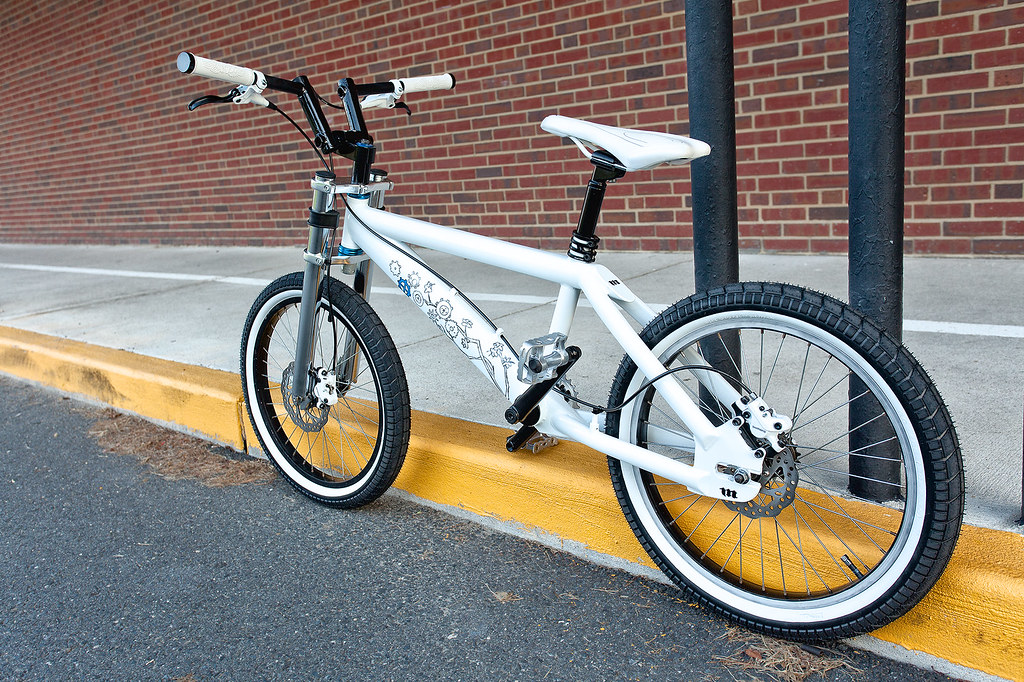
Finished product out for a photo shoot:


Thanks again for following this build, and making this an awesome community!
 
Last edited:
That thing is SO FRIGGIN COOL! I was kinda lost at the start of this build, but you pulled it off!
 

Latest posts

Back
Top