"BLACKJACK" MiniVelo FatBike BUILD. (New owner, new progress soon!)

Rat Rod Bikes Bicycle Forum

Help Support Rat Rod Bikes Bicycle Forum:

This site may earn a commission from merchant affiliate links, including eBay, Amazon, and others.
I really like the idea of the suspension fork, but there are 2 things you want to think about.

1. Turning radius - if the fork crowns are wide and thick, you will probably need them to sit in front of the head tube a bit, so they don't hit. The down tube. This is going to make the suspension fork sit even farther out than a triple tree rigid, and may make your steering wierd. OR, you could kink your down tube, like your head tube.

2. Brake dive - those rotors look nice and big. Your going to have to run a pretty stiff front spring to fight brake dive.

If it was me, I would go with a suspension fork, but if you already like rigid bikes, that would be a lot easier, and potentially less frustrating. I basically had to scrap my second fork idea because of the 2 things I listed above. I'll reuse all the parts I made on another build, but it's still an exercise in frustration.

What are you going to use the bike for? Cruising around, jumping, mountain biking?
 
Thanks for the imput Blown240, I was hoping you would chime in! I guess it might be a good idea to kick up the front of the down tube either way...
What are you going to use the bike for? Cruising around, jumping, mountain biking?
Pretty much just cruising around, maybe some mild trail work, I am not energetic enough for anything more serious!

Luke.
 
For cruising around you could make the bike full suspension and nice and comfy! Like a monster Moulton!

MOUL_12_TSR_27_GREEN_1.jpg
 
Check out how the Moulton fork works, almost like a lawwill leader!


Do it like that!
 
Wow! I have never heard of them before, had to do some research just to know what you were talking about. Very cool set up.

Pretty sure I will be going full rigid at this point, going to save my rockers and plan a springer fork for it later on like you have been with the Beast builds.

Luke.
 
Those leader forks are sweet!

Full rigid makes it a lot easier. And it sounds like it will be more of what you want anyway.
 
I ended up designing a way to do the springer fork which will fix the issues, but decided I need more time thinking on it before I build it, so it will be another project down the track some time.

In the meantime, here is the rigid fork build part 1, hopefully tomorrow I can get it finished off.

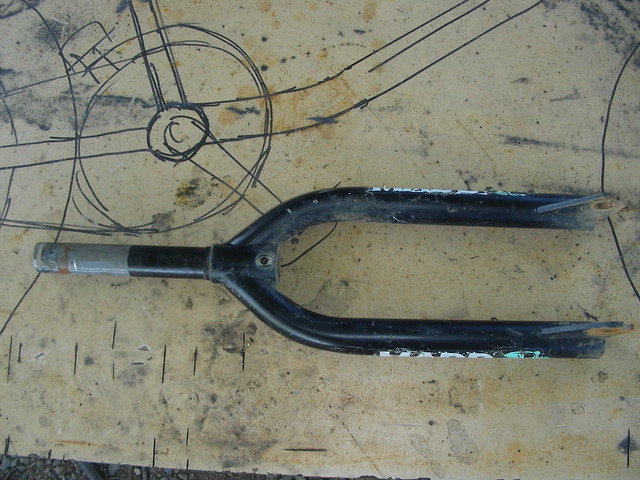
Started with a threadless BMX fork:

14194315679_7331581e14_z.jpg


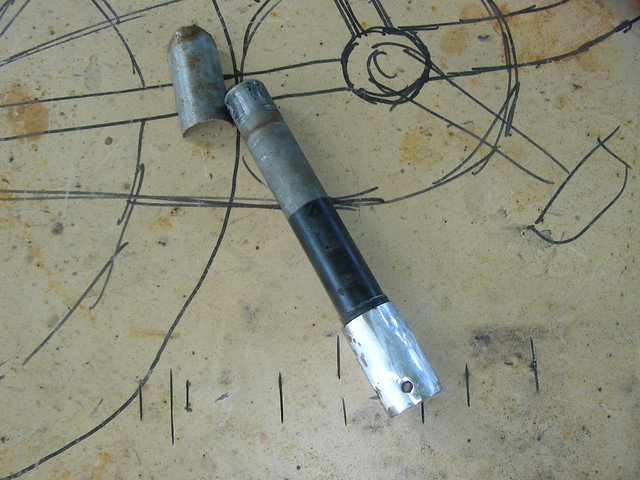
A little surgery (double amputation):

14379517482_21238e1c31_z.jpg


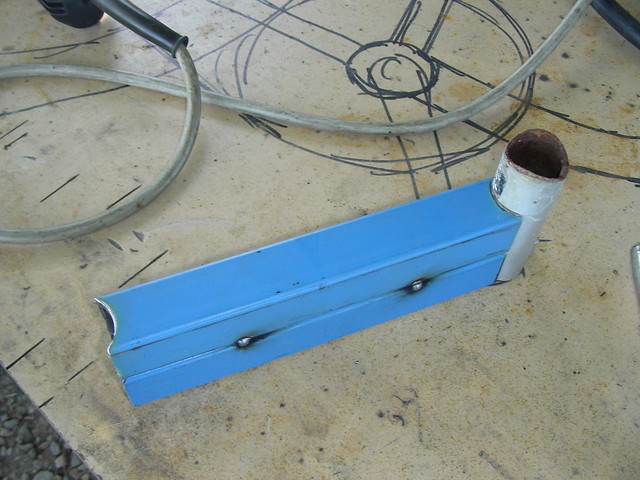
Then grabbed some 32x32x1.6 rhs and temporarily tacked two pieces the right length together and fish mouthed the ends to suit my planned 32mm fork legs, by making them together I could make sure they would be as identical as possible:

14379984814_2c0530ca0c_z.jpg


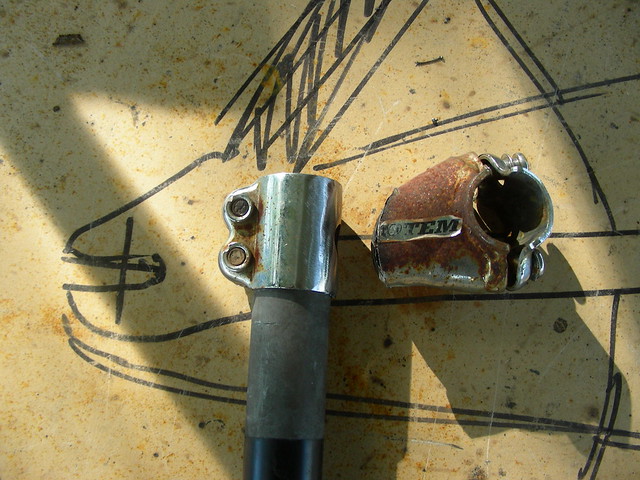
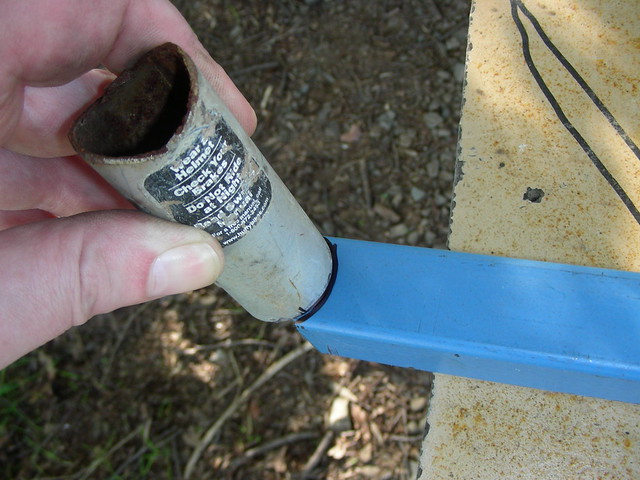
Amputated the bar clamp side off a head stem:

14379514612_6d40451294_z.jpg


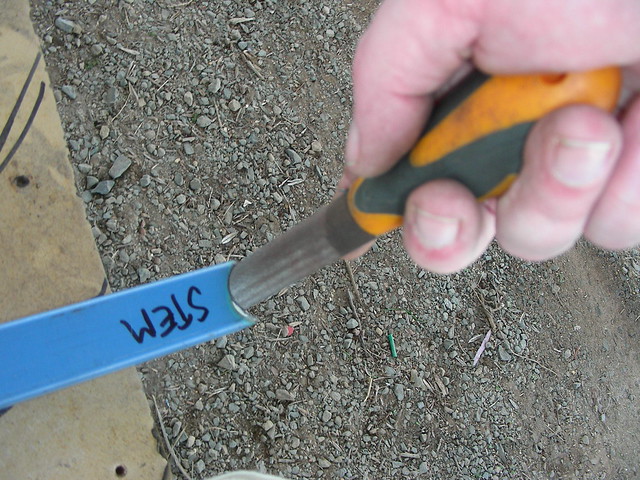
Fishmouth marked out using scrap tube to fit the stem:

14194311309_c3dc61a2bb_z.jpg


After grinding pretty close I like to finish with a half round file:

14379511612_0a268c40ed_z.jpg


Did the same for the lower fork tube next.

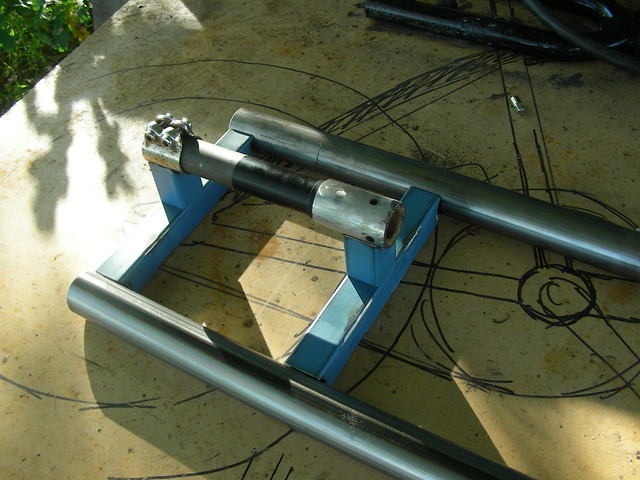
Then I decided to switch to 38mm fork legs instead of the 32mm ones, but instead of re-grinding all the cuts, I decided to just use them as is, (laziness was creeping in) and set it all together for a test fit and photo:

14194308099_cf10260309_z.jpg


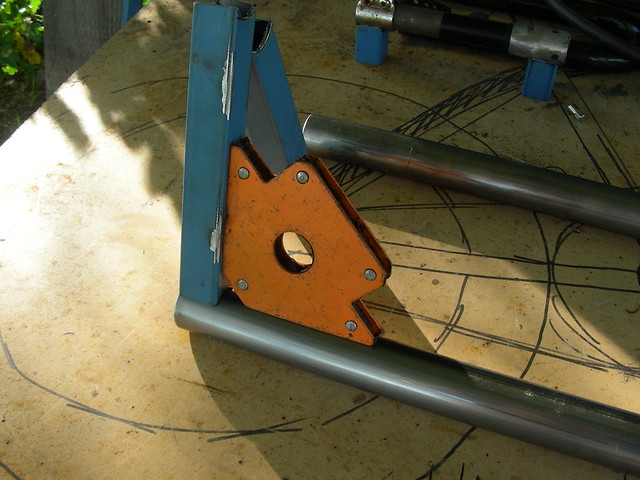
Everything fit together well, so moved on to setting up for welding, 90* magnetic squares are awesome for this:

14401114923_7b46862b0d_z.jpg


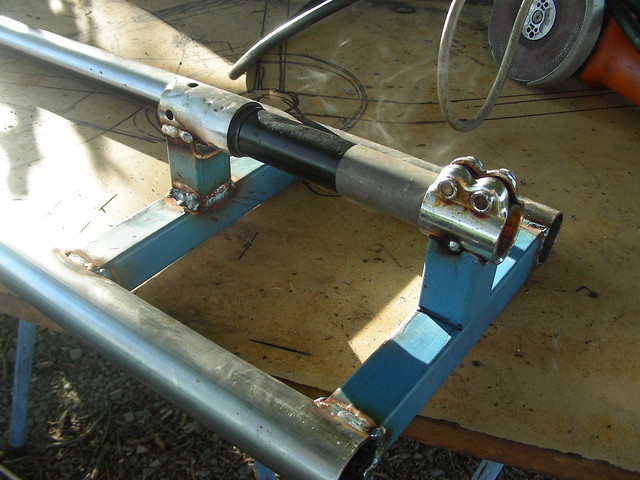
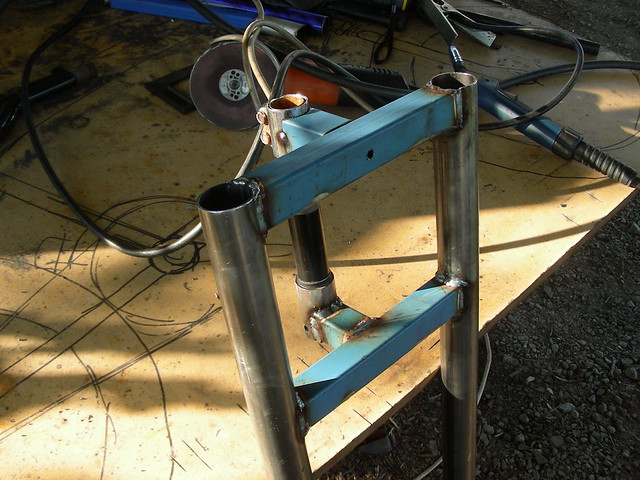
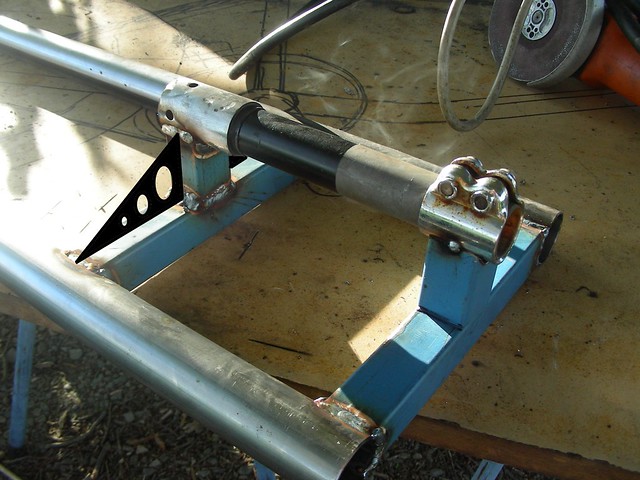
Welded both stays to one leg and then to the other one, then welded the lower fork support on followed by the fork tube, as you can see the stem section is only temporarily tacked until I get an accurate stack height and there is no welds at all on the joint between the stem support and the fork crossbar, this will be a bolted joint as it has to be removable to allow the forks to be removed from the bike:

14380939465_29bf0e7770_z.jpg


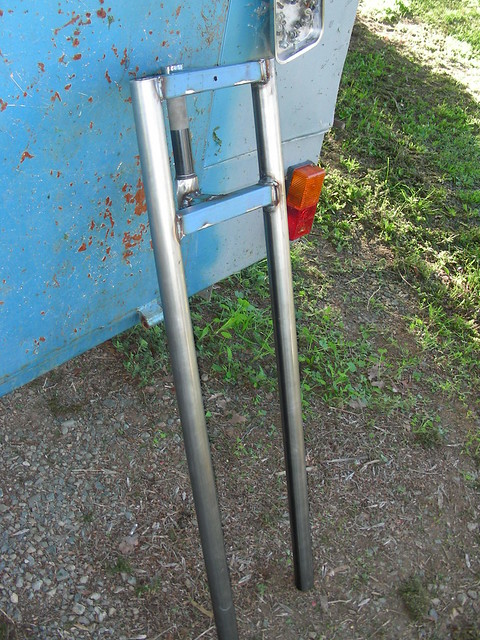
And that is as far as I got today, here are more pics of the forks at this point:

14380938265_fa4d15a693_z.jpg


14379972734_d3c1a68c30_z.jpg


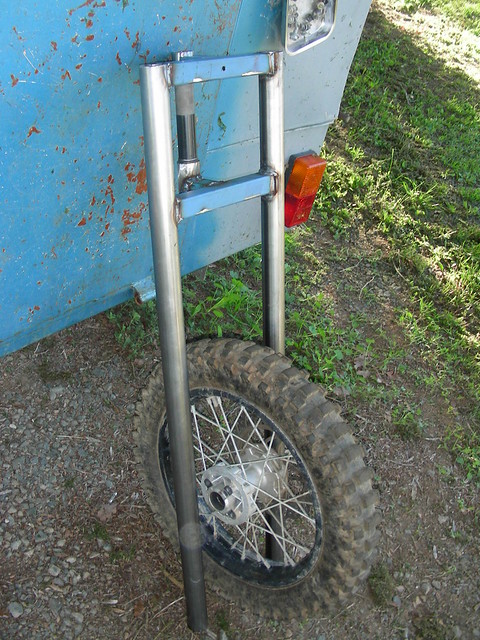
And with the wheel:

14377599641_30a516d13a_z.jpg


As you can see I have left plenty of length on the fork legs to cut them to length later on.

Luke.
 
Luke how do you get the frame on to the forks ?


Sent from my iPhone using Tapatalk
 
Luke how do you get the frame on to the forks ?


Sent from my iPhone using Tapatalk
You notice the top stem mount is not welded to the forks? It will be bolted on there so it can be removed and the forks slid out.
I should get that bit done tomorrow hopefully and I can show it a bit better.

Luke.
 
Luke how do you get the frame on to the forks ?
Figured I could explain it a little better with this pic:

14380938265_fa4d15a693_z.jpg


That pilot hole in the middle of the top crossbrace will be where the bolt goes through into a nut welded in the stem piece.

Once I get the frame built, if there is room I am planning on adding braces to the lower crown like this:

14359678476_b6162e9768_z.jpg


I don't want to add them yet as I am unsure on how much clearance there will be to the bottom tube on the frame.

Luke.
Oh I see now
Yes really cool they will look the nuts.
I'm going to do mine a bit different
I'm going to do the top plate on the forks removable with 3 nuts holding it on like this
nysygemy.jpg


Sent from my iPhone using Tapatalk
 
Oh I see now
Yes really cool they will look the nuts.
I'm going to do mine a bit different
I'm going to do the top plate on the forks removable with 3 nuts holding it on like this
nysygemy.jpg


Sent from my iPhone using Tapatalk
That is cool too! I did my other ones a similar way because they were the threaded style, but these new ones being threadless I figured time to try something new!

Luke.
 
That is cool too! I did my other ones a similar way because they were the threaded style, but these new ones being threadless I figured time to try something new!

Luke.
Yeah that's the thing I've got one inch threaded head tube and forks


Sent from my iPhone using Tapatalk
 
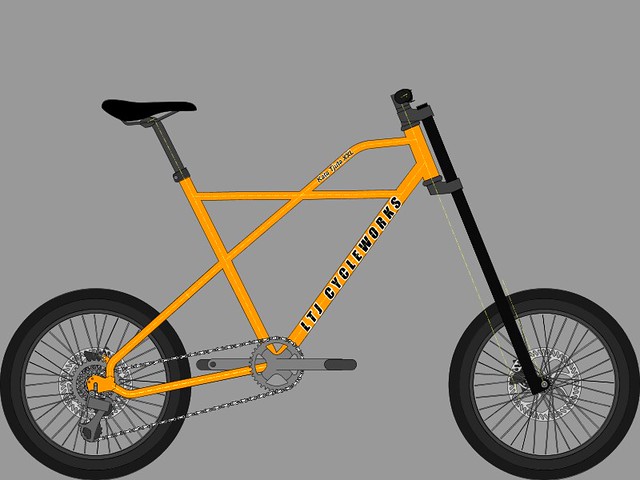
I was messing around with the fork as I was packing up today, and decided I wanted them to be a bit taller, as it seemed like the bike was too small for me, so back into BikeCad for some more adjustments to height and headtube angle:

14403214033_3bd8a796b3_z.jpg


Just realised I forgot to change the fork tube size to 38mm instead of 32... :headbang:

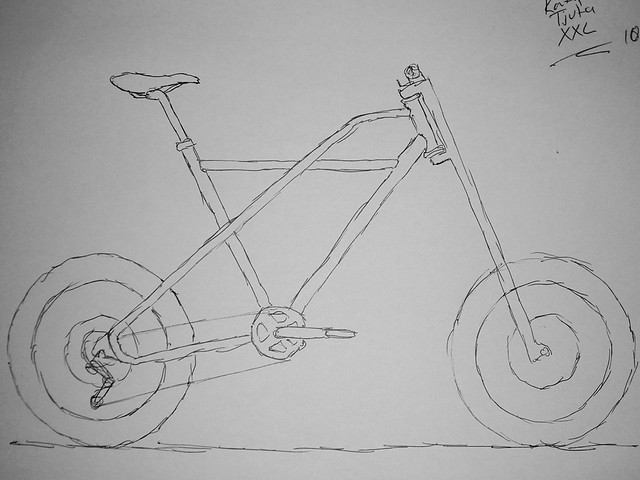
Here is my working drawing for building the frame, soon to be scaled out and drawn onto my workboard. Posting it here so you can see how the frame will work, it shows the full loop better:

14403213303_fe39db6165_z.jpg


Luke.
 
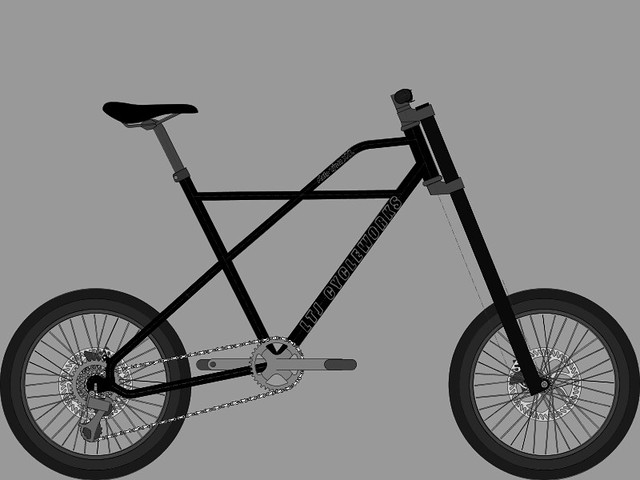
Picked up all the remaining bolts I need to finish the forks, but spent the rest of the day fixing guttering on the roof, so no progress to report, I did however update the BikeCad pic to the right size fork tubes and also tried a different color set up:

14202789760_e2f1006843_z.jpg


Luke.
 
Picked up all the remaining bolts I need to finish the forks, but spent the rest of the day fixing guttering on the roof, so no progress to report, I did however update the BikeCad pic to the right size fork tubes and also tried a different color set up:

14202789760_e2f1006843_z.jpg


Luke.
Looking good in black


Sent from my iPhone using Tapatalk
 
How's your forks looking today Luke ?


Sent from my iPhone using Tapatalk
 

Latest posts

Back
Top