I just saw the old movie The Blue Max about a month ago with George Peppard and Ursula Andress. Good movie. But when I was a kid one of my favorite Top Fuel funny cars was the Blue Max driven by Raymond Beadle. You obviously like racing so I'm taking it you are going more for the Racing theme with this build than the movie theme? (Even though they really go hand in hand) We lost Raymond Beadle about a year and a half ago, at 70, way too young, I believe he would approve of this build. Good luck.
- COMPETITIONS
- THE COMPETITION ARCHIVES
- RRBBO OFFICIAL COMPETITIONS
- BUILD OFF 11 (2016)
- BUILD OFF 11 BUILD JOURNALS
You are using an out of date browser. It may not display this or other websites correctly.
You should upgrade or use an alternative browser.
You should upgrade or use an alternative browser.
Blue Max (tank & chain)
- Thread starter roadwarrior
- Start date


Help Support Rat Rod Bikes Bicycle Forum:
This site may earn a commission from merchant affiliate
links, including eBay, Amazon, and others.
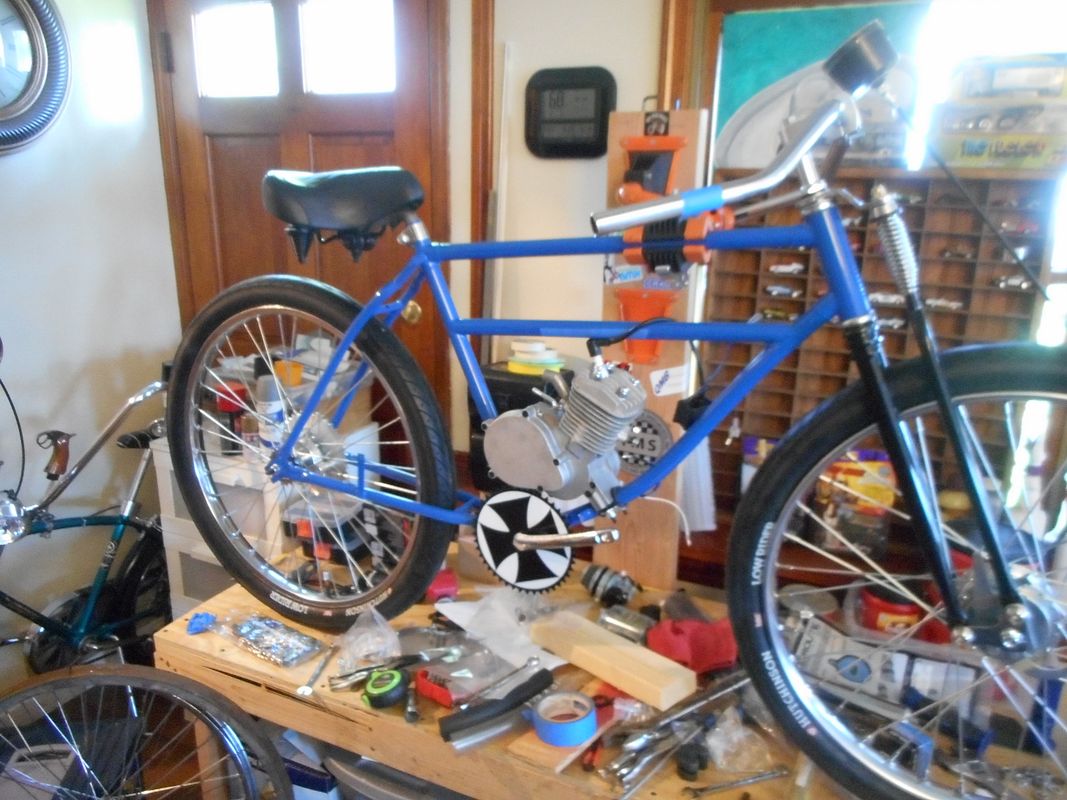
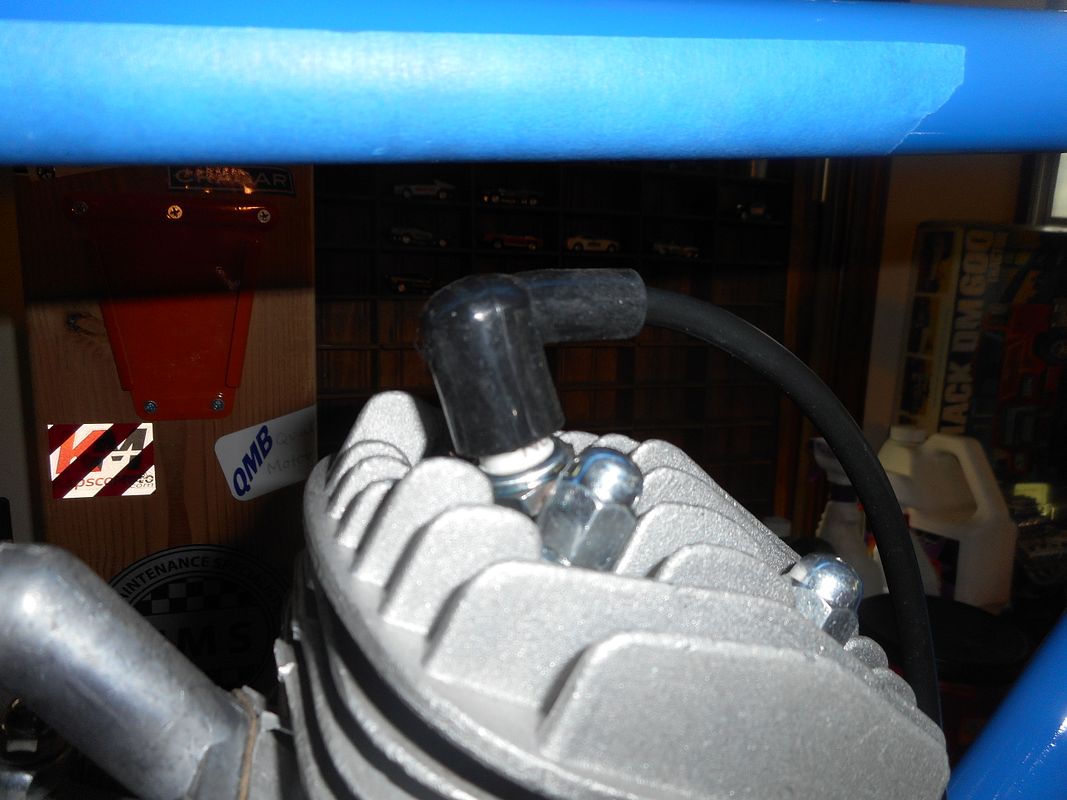
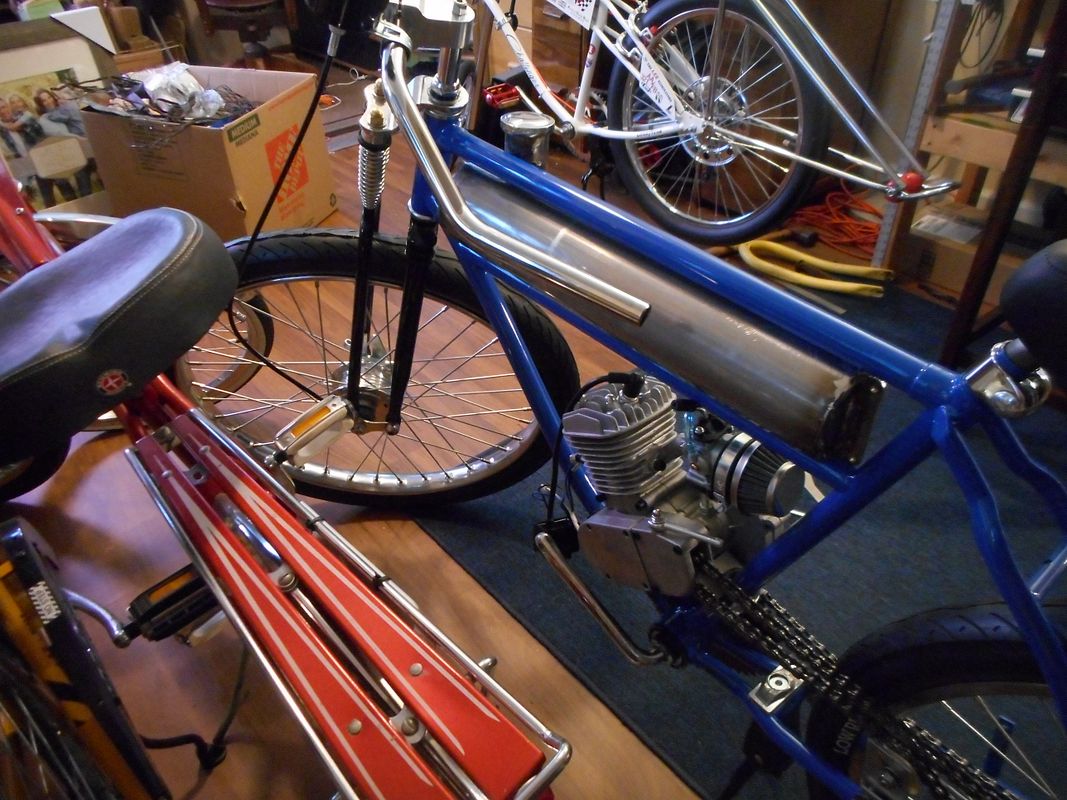
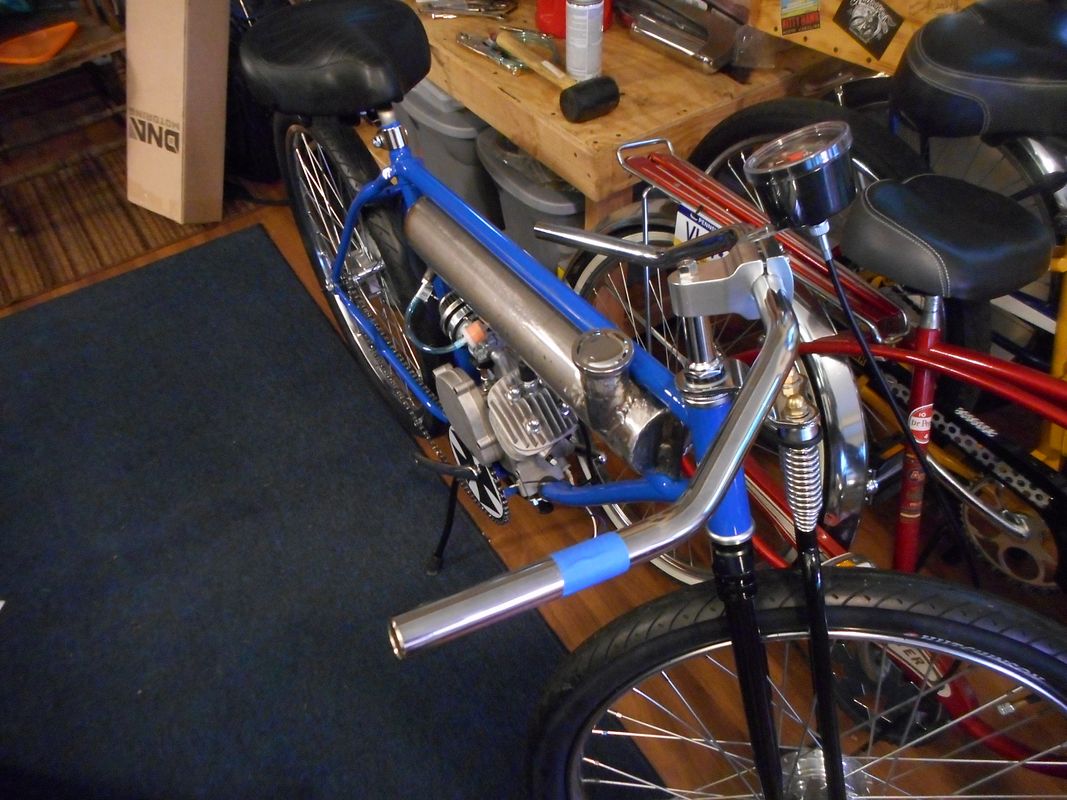
I got to do a little bit of work on the bike during my busy work week. I took TRM's suggestion and got a piece of hose for the motor mounts. I knew it would raise the engine a bit and as you can see that plug wire fits pretty snug. I also got the seat post re-bent to a 90* angle and mounted the seat. My next major issue will be sourcing the material for my fuel cell.
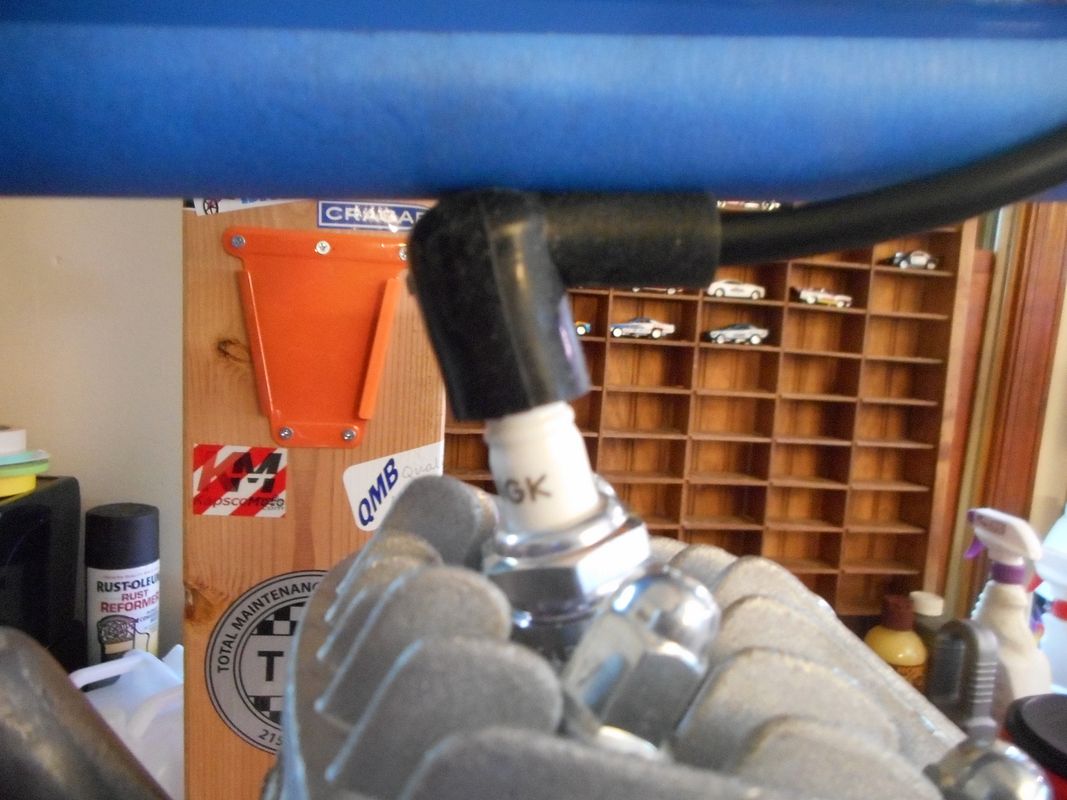
I wonder if you can find a shorty plug...
Auto parts store ought to be able to cross reference one.
It's be a shame to dimple the frame, but that rub will lead to a failure.
Carl.
Auto parts store ought to be able to cross reference one.
It's be a shame to dimple the frame, but that rub will lead to a failure.
Carl.
Might try a colder plug for better clearance, just check for fouling.
GMTA.
You could also turn the cylinder cap half around so the plugs coming out to the front.


$19.99
Electra Glide Wall Decal 2ft Long Sport Harley Davidson Bike Motorcylce Sticker Man Cave Garage Boys Room Decor
FatCat Wall Graphics


$199.99
$229.99
Huffy Stone Mountain Women's Mountain Bike, Gray, 26 Inch Wheels/17 Inch Frame
HuffyDirect


$99.99
$108.99
Schwinn Toggle Quick Build Kids Bike, 12-Inch Wheels, Smart Start Steel Frame, Easy Tool-Free Assembly, Blue
easiness


$18.99
Old River Outdoors Bicycle/Motorcycle Chain Picture Frame 4" X 6" Photo - Faux Bike Chain
Old River Outdoors (USA Merchant)


$249.40
$289.67
Kulana Lakona Tide Adult Beach Cruiser Bike, 26-Inch Wheels, 7-Speed, Silver
Amazon.com


The Renaissance Man
__CERTIFIED DIVER__ (Open Water & Open Dumpster)
Staff member
Moderator
Pro Member
That is the solution. I believe it can be turned either way. Here's mine:You could also turn the cylinder cap half around so the plugs coming out to the front.
Last edited:
Sweet!
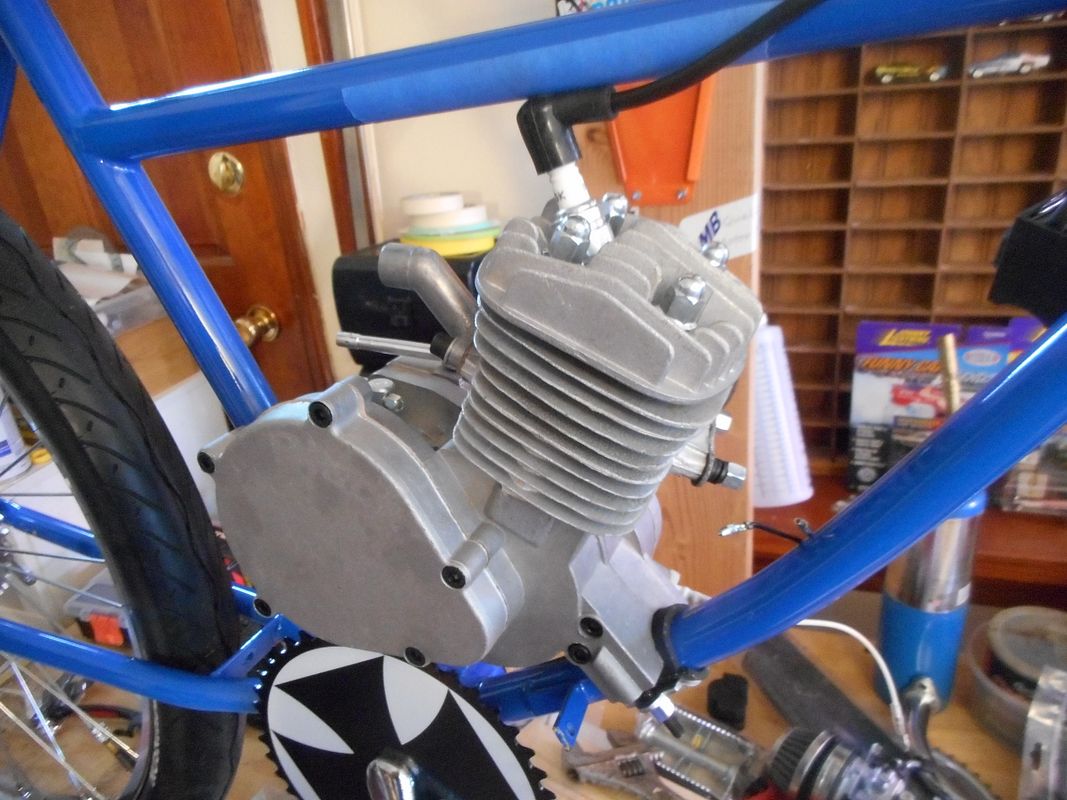
The stock CDIs ain't all that high quality either, I've discovered.Yeah, rubber mount these engines. All the vibration these chinese motors make tend to loosen up the cheap bolts non stop. And, if you haven't done so already, change EVERY bolt that came on this motor with high quality ones. I think china used the cheapest metal known to man when casting these bolts and they tend to strip out at the most inopportune time.
I talked to my brother (small engine mechanic) and he cross referenced a short plug...I wonder if you can find a shorty plug...
Auto parts store ought to be able to cross reference one.
It's be a shame to dimple the frame, but that rub will lead to a failure.
Carl.
NGK, BPM7A. I got a couple on the way!

hemi head...
http://www.pedalchopper.com/v-twin-fire-hemi-head-ignition-system/
found this site reading a brake adapter thread...
Lots of cool parts.
Carl.
http://www.pedalchopper.com/v-twin-fire-hemi-head-ignition-system/
found this site reading a brake adapter thread...
Lots of cool parts.
Carl.
Shorty plug installed, problem solved. Time to move to the next phase.I talked to my brother (small engine mechanic) and he cross referenced a short plug...
NGK, BPM7A. I got a couple on the way!
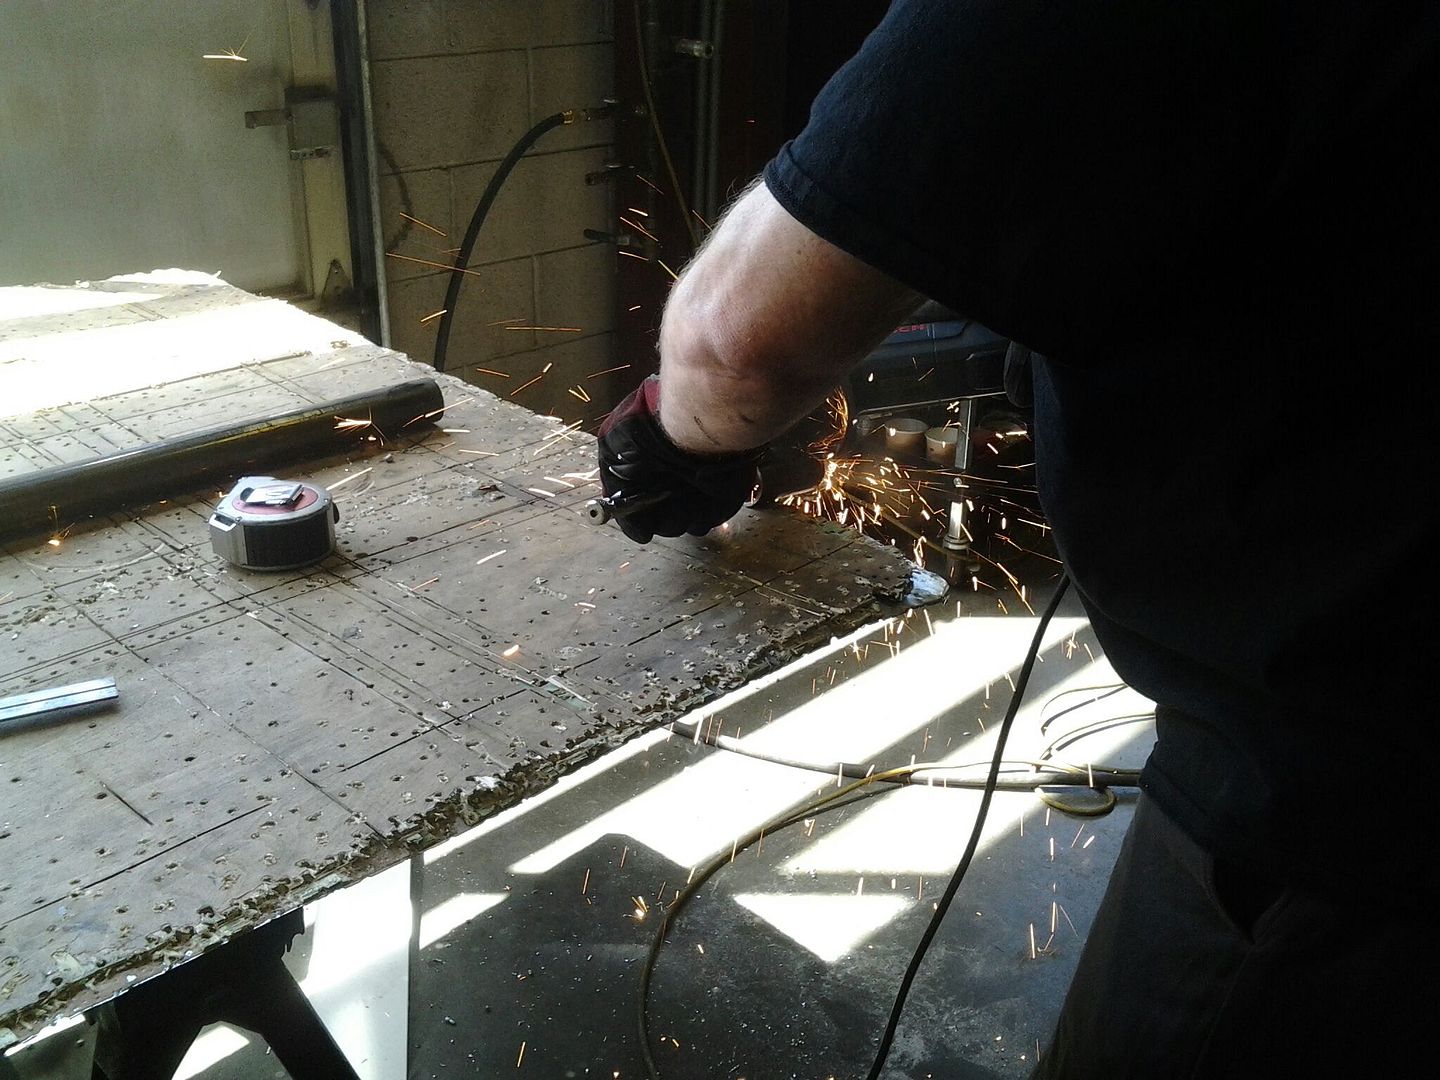
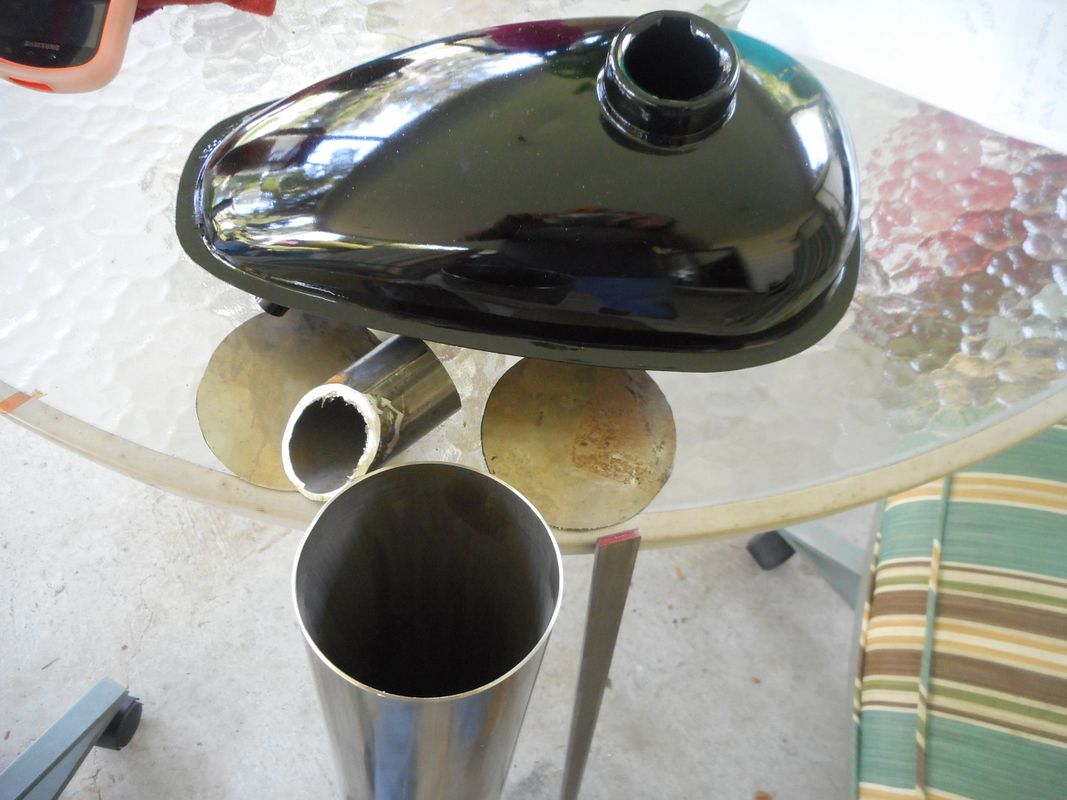
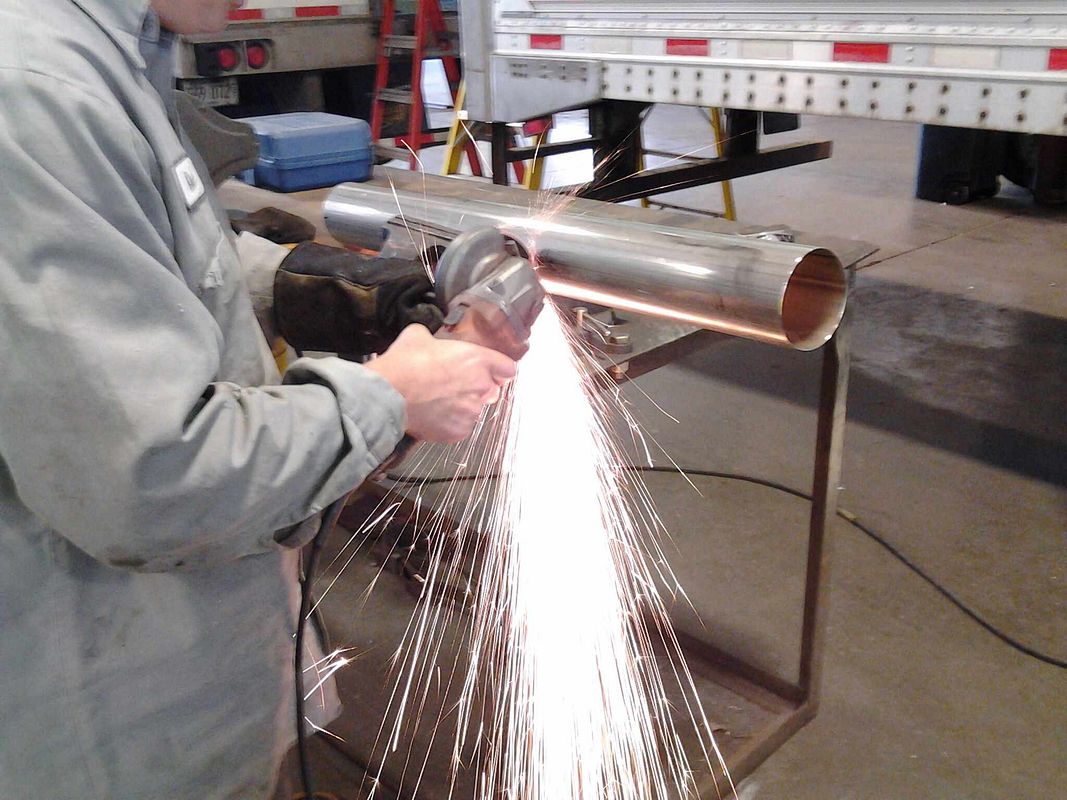
It has been hard getting time to work on the bike. Work has been busy and this past Saturday I was at an all day concert. I managed to get all of the pieces gathered to start building my tank. The fuel spout and the bung will be cut off the supplied tank that came with the kit. Doing the math I will yield just over 3/4's of a gallon with my tank vs. 1/2 gallon stock tank. I went to a pipe supply company to get a piece of 1-3/4X3 inch pipe and they cut it for me and put a 45* cut on it as well. Price? NO CHARGE!
Second picture: My parts gathered. I cut out the tank ends with my jigsaw and firing up the Dremel to do some cutting and shaping.
Second picture: My parts gathered. I cut out the tank ends with my jigsaw and firing up the Dremel to do some cutting and shaping.
OH, Man! What a busy past few weeks. My job and upcoming wedding have been utilizing all of my time and being just to darn tired to work on the bike. It's a motivation zapper!
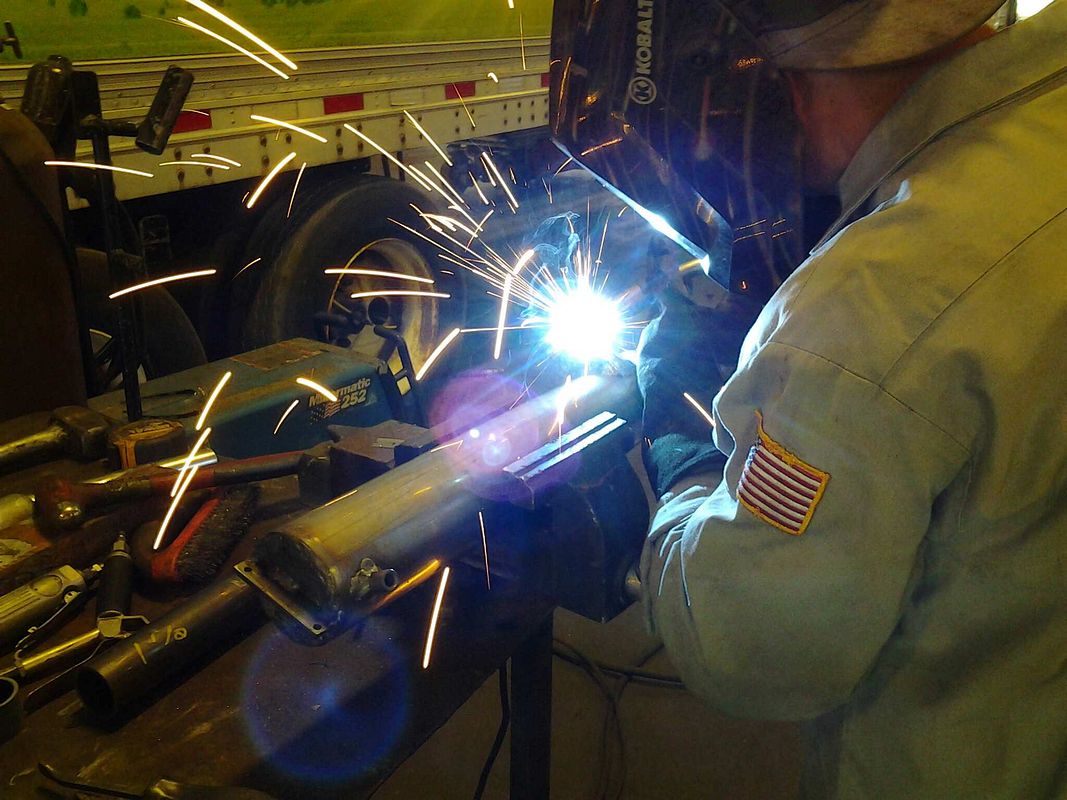
I have got all of my tank parts cut out except for my mounting brackets and that is just a 5 minute job to make those. I hope to have it all welded together by the end of the week. It's a good idea to put the petcock in the bung and mark it so you'll know the correct position it needs to be in before you weld it in place.
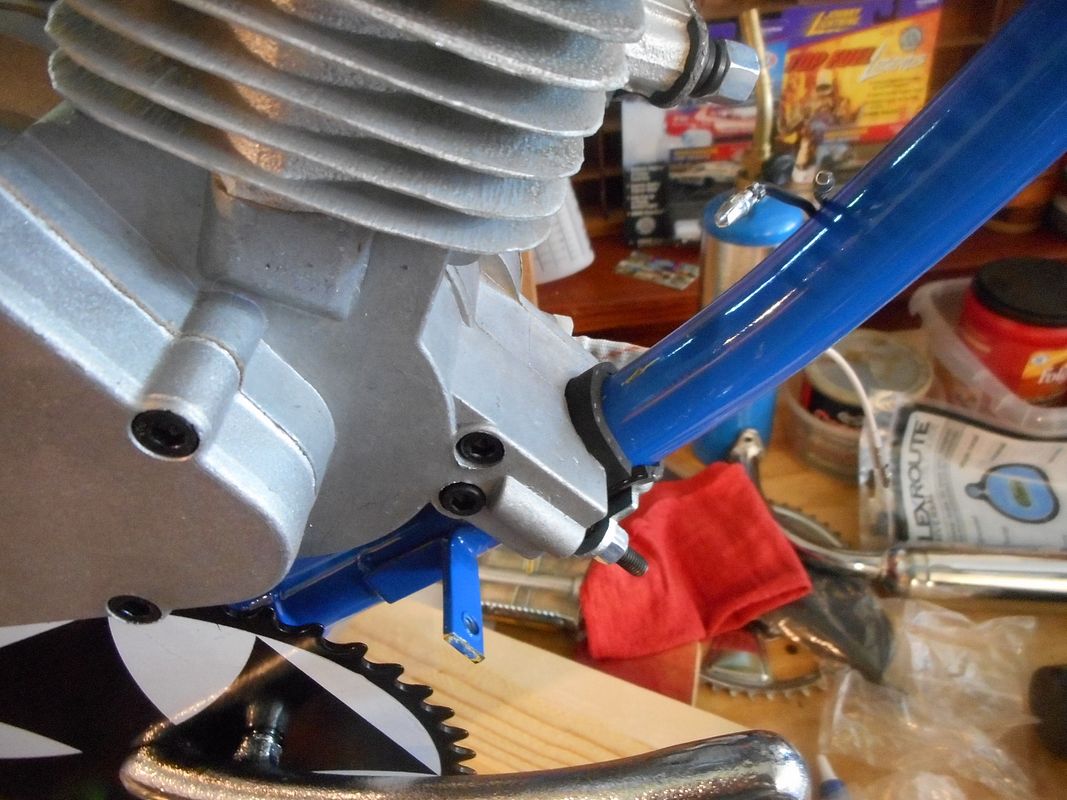
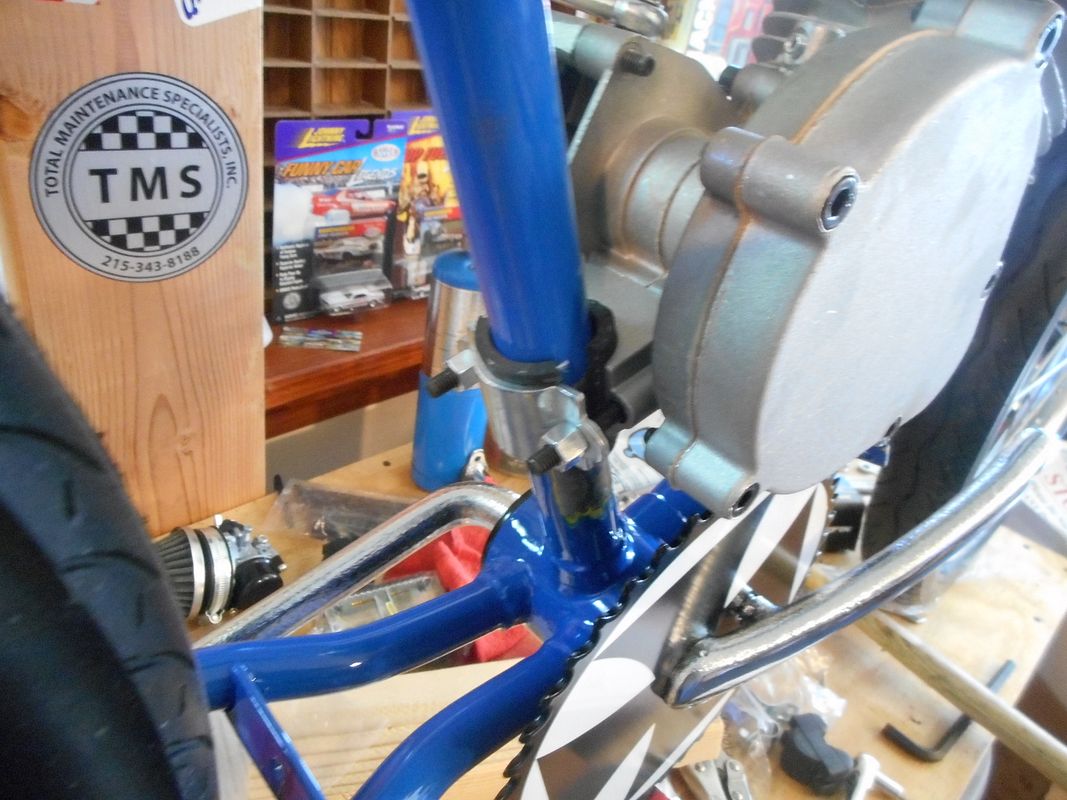
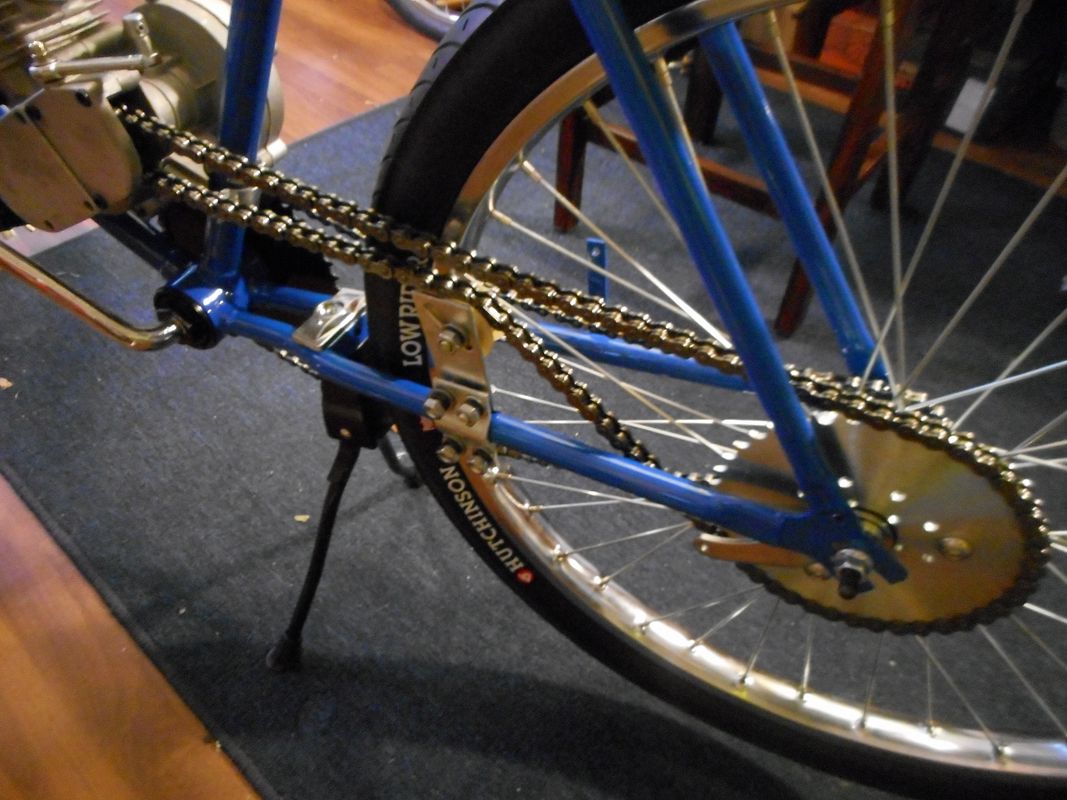
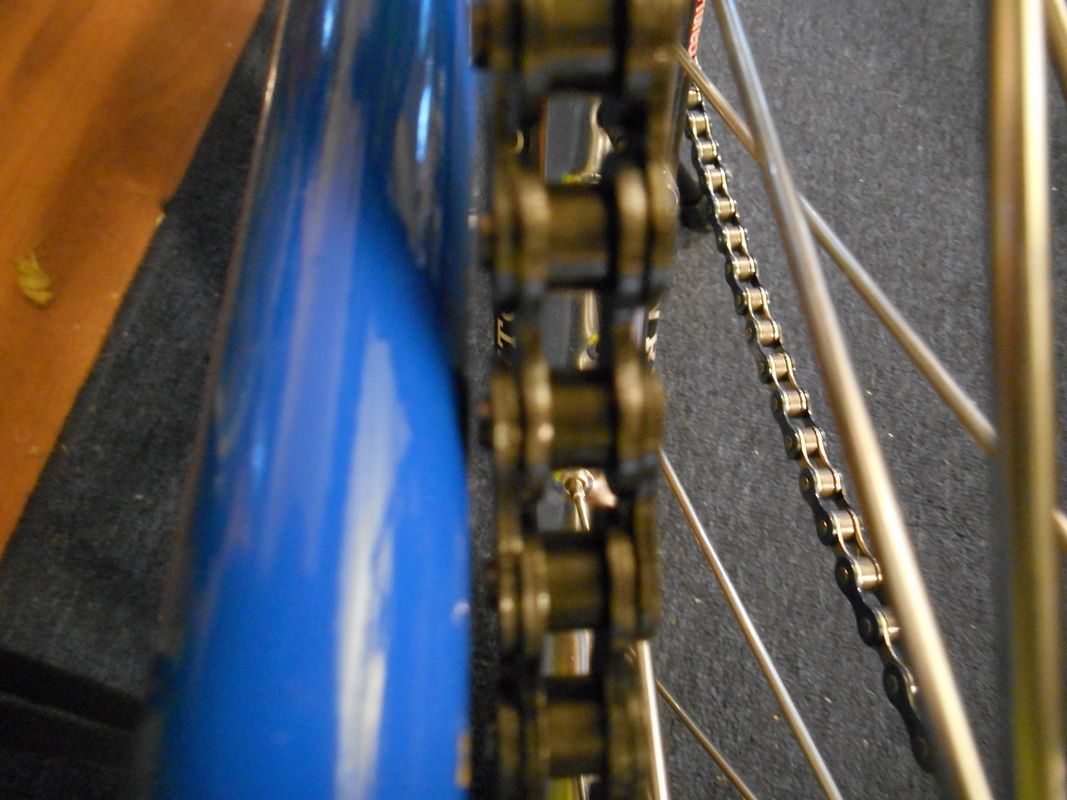
I have both chains hung and I thought it would be a good idea to use banjo bolts on the rear axle. Those will be here Friday. Then I can break chain. If I have to use a half link I rather use that on the pedal side. I think I may have to heat up and crimp the bottom chain stay to make sure my drive chain doesn't rub.
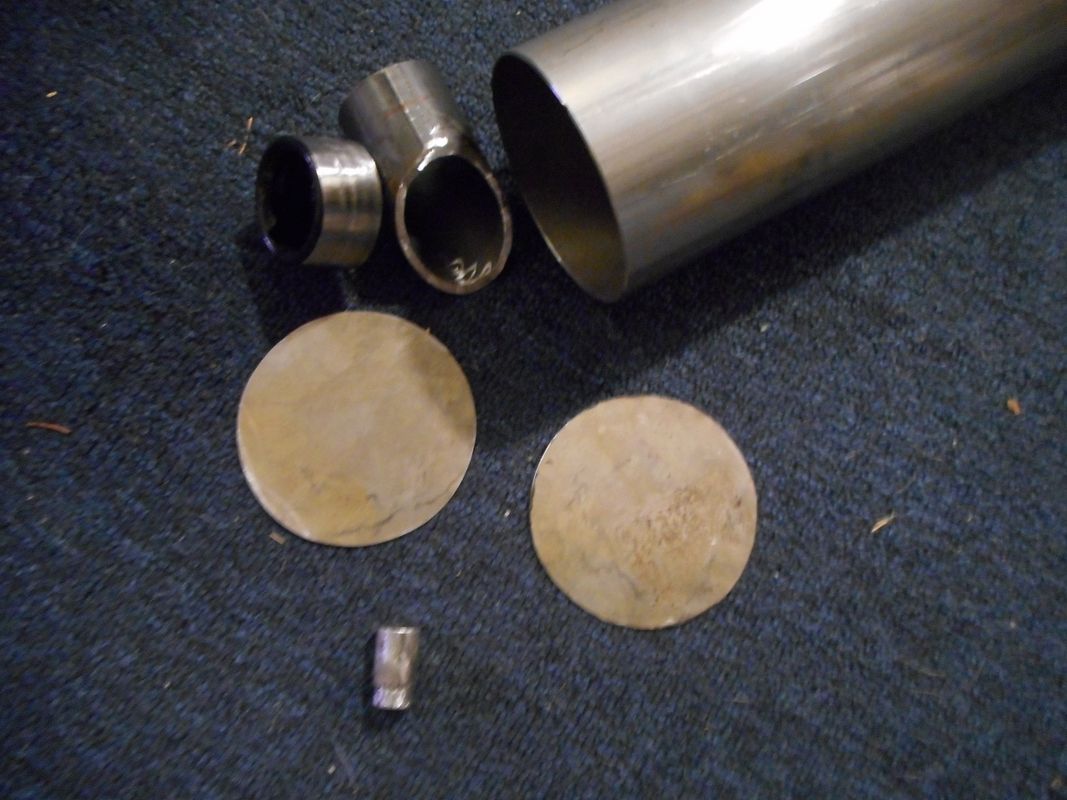
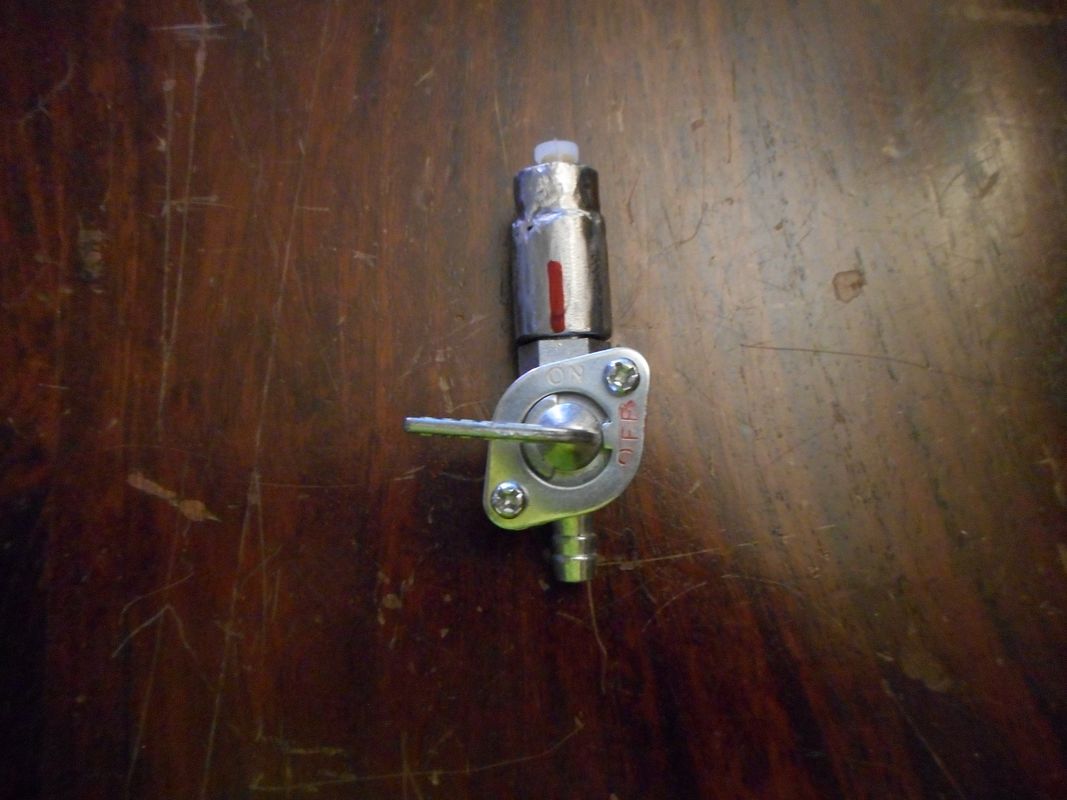

I have got all of my tank parts cut out except for my mounting brackets and that is just a 5 minute job to make those. I hope to have it all welded together by the end of the week. It's a good idea to put the petcock in the bung and mark it so you'll know the correct position it needs to be in before you weld it in place.
I have both chains hung and I thought it would be a good idea to use banjo bolts on the rear axle. Those will be here Friday. Then I can break chain. If I have to use a half link I rather use that on the pedal side. I think I may have to heat up and crimp the bottom chain stay to make sure my drive chain doesn't rub.
One precise ball peen wack and that no problemo...
Carl.
Carl.
One precise ball peen wack and that no problemo...
Carl.
Carl's right, but with one added element....
Mark the location with tape, then disassemble. Instead of a bare hammer blow to the chainstay, use a piece of solid round metal, say an inch or so in diameter, to make the indention. Place the round stock against the chainstay, in the same direction as the chain travels, then give it a good strike. The round stock provides a more subtle indention, and the tape lessens the severity of the blow on the surface finish.
Old hot rodder's trick for clearancing headers....
I got the tank all put together thanks to Kirk's welding skills. I cut and shaped and he put it together.
The Renaissance Man
__CERTIFIED DIVER__ (Open Water & Open Dumpster)
Staff member
Moderator
Pro Member
That looks great! Looks like it will hold a good amount of gas too. ")
Be sure to check for leaks around the welds with water before you put fuel in it in case you have to go back and weld again.
Be sure to check for leaks around the welds with water before you put fuel in it in case you have to go back and weld again.