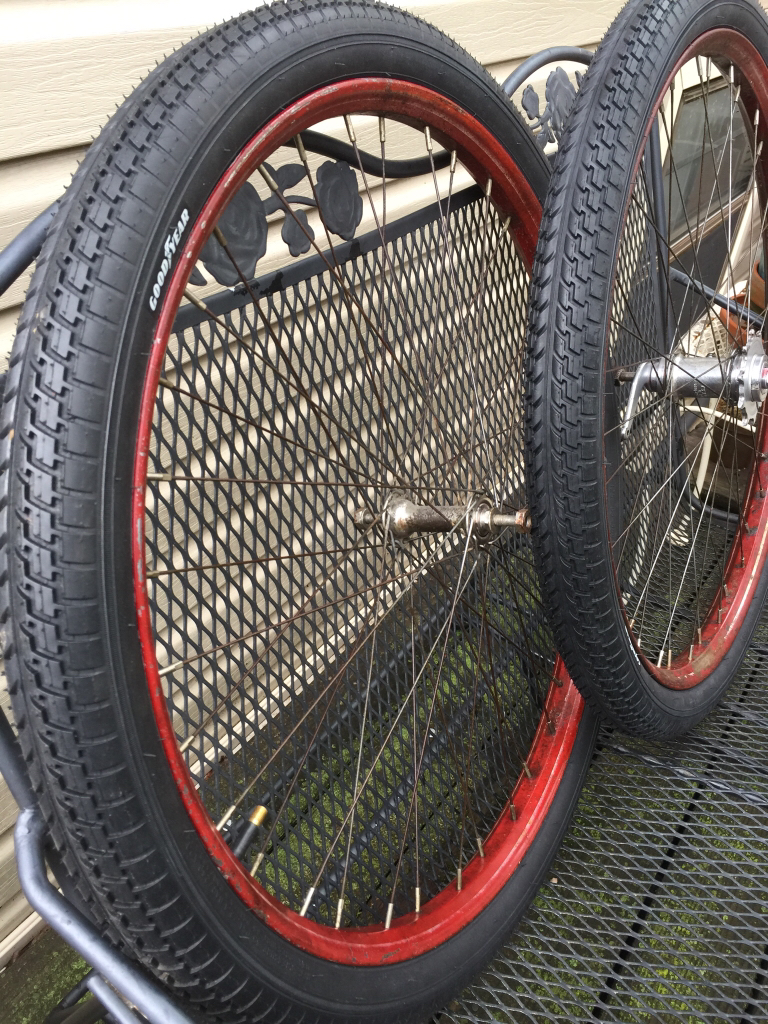
Awesome wheelset. Looking good.I put the rear Model D hub back together. I ended up looking at a parts list from Memory Lane and a how to thread by UdallCustomBikes.
https://r.tapatalk.com/shareLink?share_fid=77973&share_tid=30484&url=http://www.ratrodbikes.com/forum/index.php?threads/New-Departure-Model-D-Rebuild.30484/&share_type=t
I mounted up the GoodYear tires...they may get replaced.
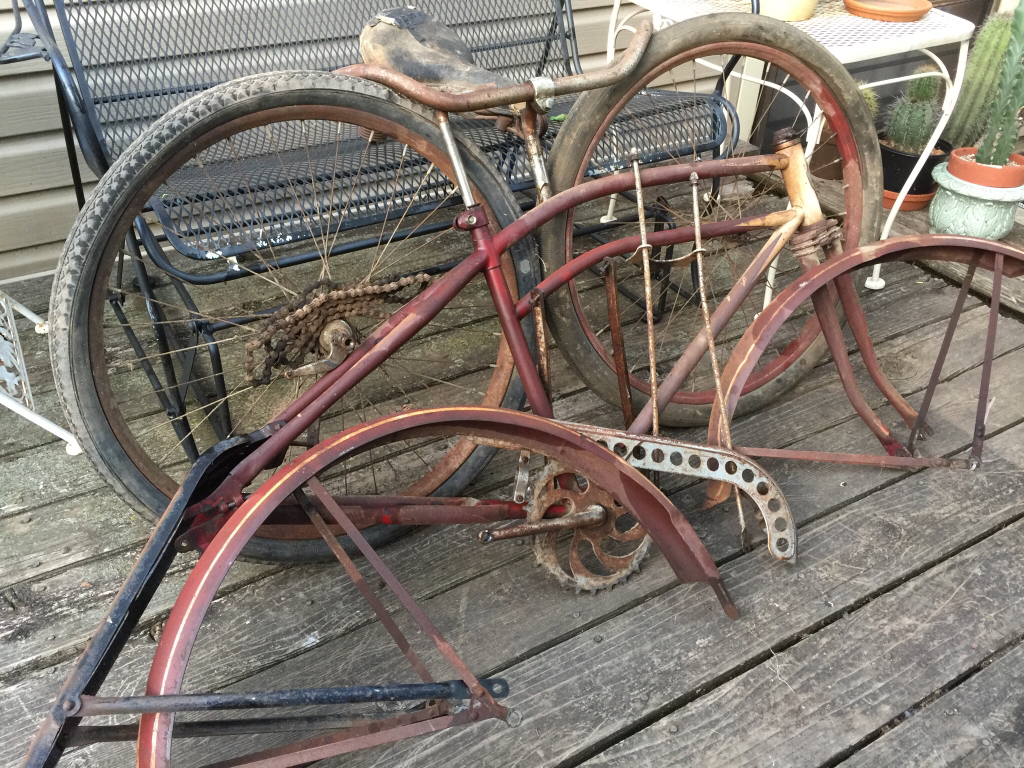
Previous appearance...
Sent from my iPhone using Tapatalk
- COMPETITIONS
- THE COMPETITION ARCHIVES
- RRBBO OFFICIAL COMPETITIONS
- BUILD OFF 12 (2017)
- BUILD OFF 12 BUILD JOURNALS
You are using an out of date browser. It may not display this or other websites correctly.
You should upgrade or use an alternative browser.
You should upgrade or use an alternative browser.
Born Again Hawthorne - A Rider it is
- Thread starter MazdaFlyer
- Start date

Help Support Rat Rod Bikes Bicycle Forum:
This site may earn a commission from merchant affiliate
links, including eBay, Amazon, and others.
MazdaFlyer
Like “RadioFlyer”
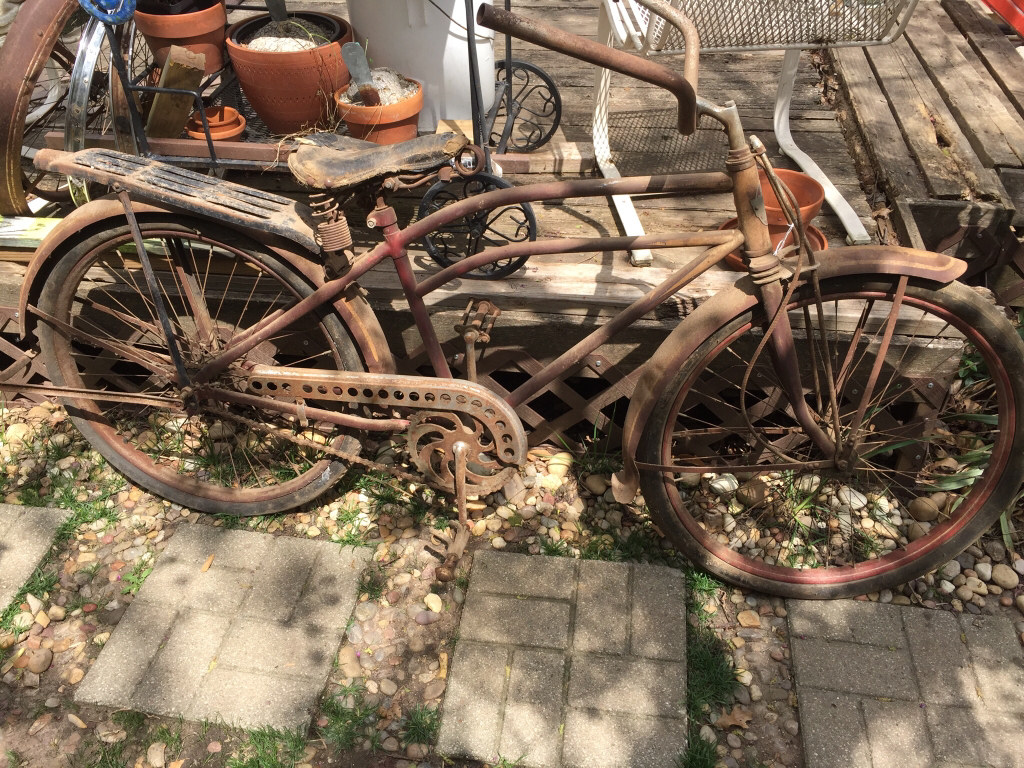
The fenders and truss rods are back in place along with the wheels. Fenders were mounted using the original hardware, no shiny stuff. I did use some new washers on wheel axles, original nuts. I also put the bars back on, pusher/roller. Tires decision still in limbo.

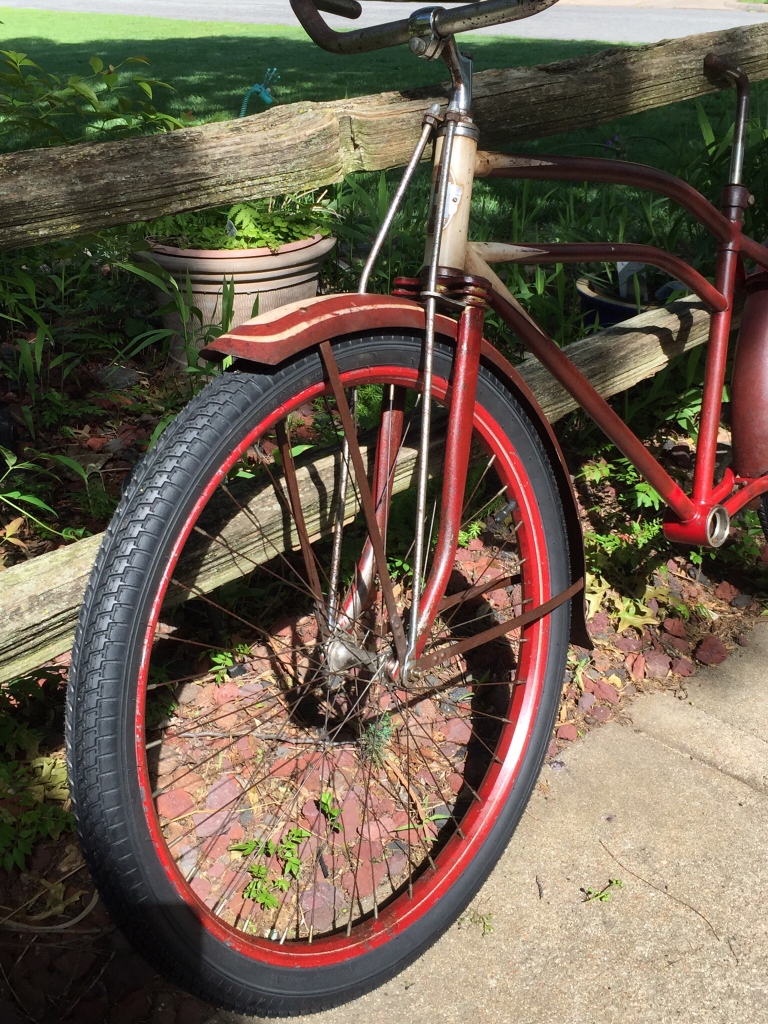

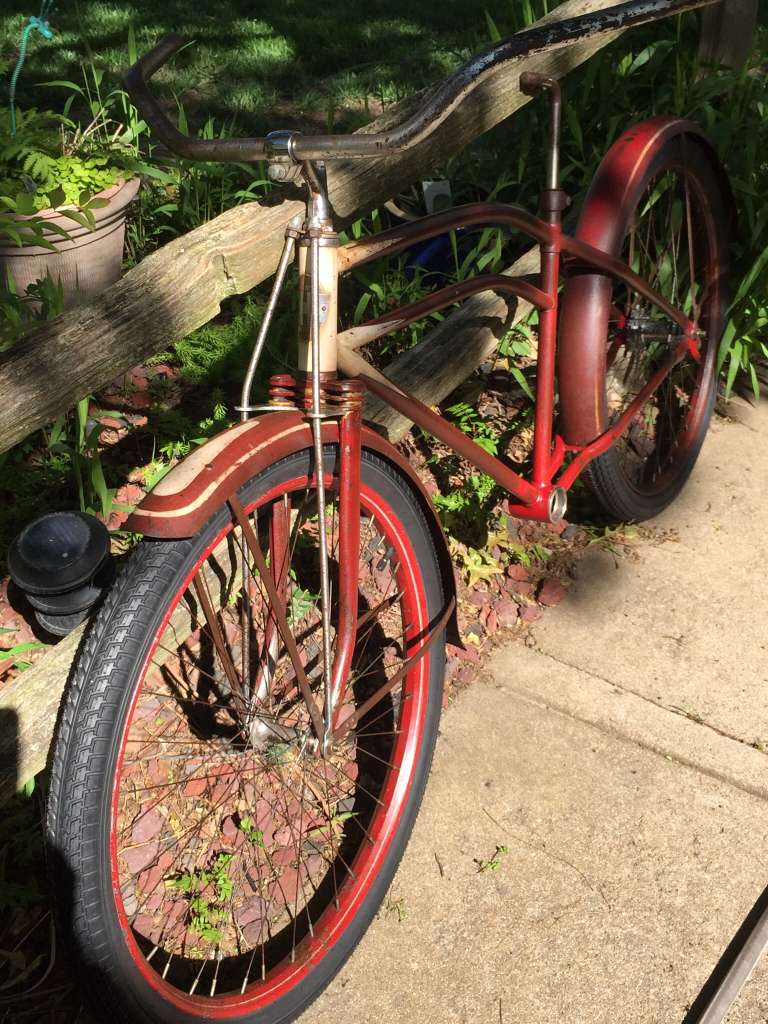
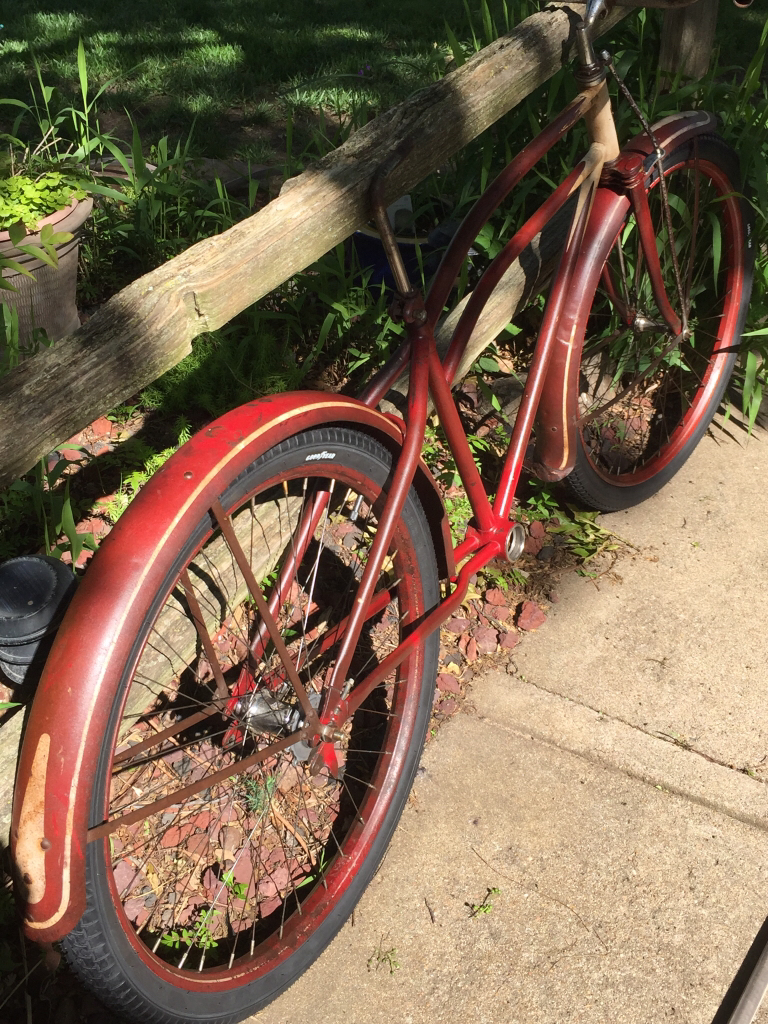
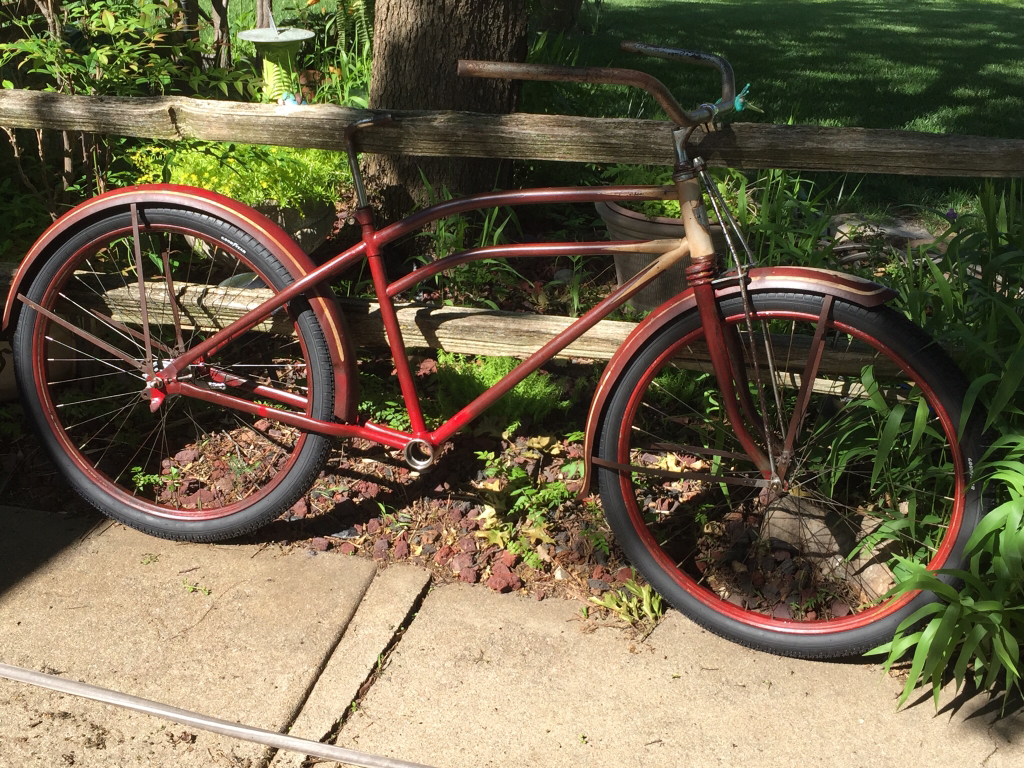
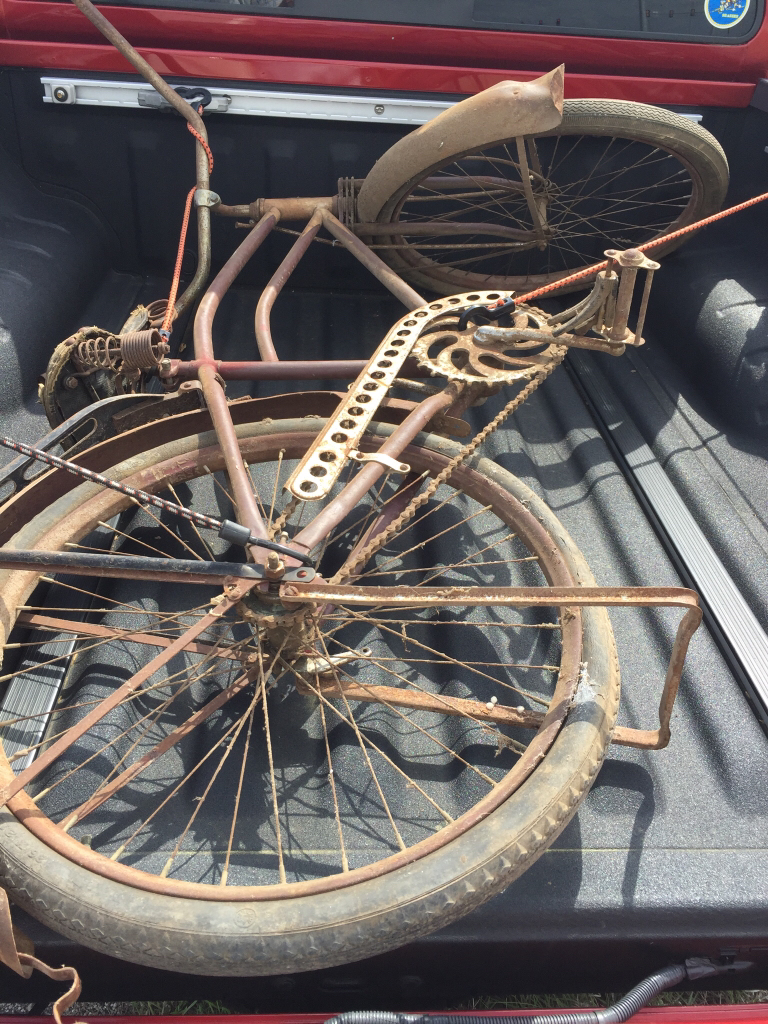
In case you haven't followed the thread here is the starting point.
Sent from my iPhone using Tapatalk


In case you haven't followed the thread here is the starting point.


Sent from my iPhone using Tapatalk
See how much fun that was Ed? 
Your clean and polished builds have always been very well done. But this one, this one is high on the 'rat-isfaction' scale for me!
Couple q's. Are you going to use the trak stand? I have the same frame, and was thinking about making one. Is there a button or 'stop' on the rear fender to hold it up when riding?
Secondly, how is the saddle coming along? I'm assuming you will use that cool long springer that is in the original start picture...
MazdaFlyer
Like “RadioFlyer”
See how much fun that was Ed?
Your clean and polished builds have always been very well done. But this one, this one is high on the 'rat-isfaction' scale for me!
Couple q's. Are you going to use the trak stand? I have the same frame, and was thinking about making one. Is there a button or 'stop' on the rear fender to hold it up when riding?
Secondly, how is the saddle coming along? I'm assuming you will use that cool long springer that is in the original start picture...
Hey thanks, definitely a different animal, this is. I'm enjoying not messing with primer and paint. I had another complete '47 Roadmaster bike a few years ago but it was all rust, no paint and had a seized stem. I eventually sold it.
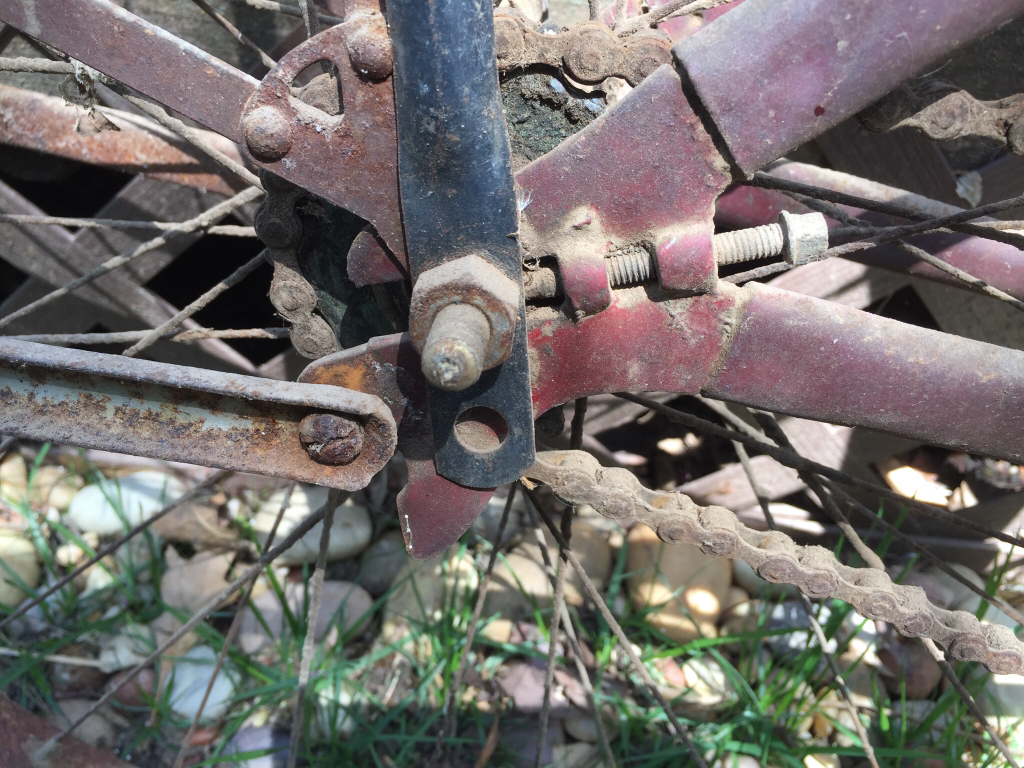
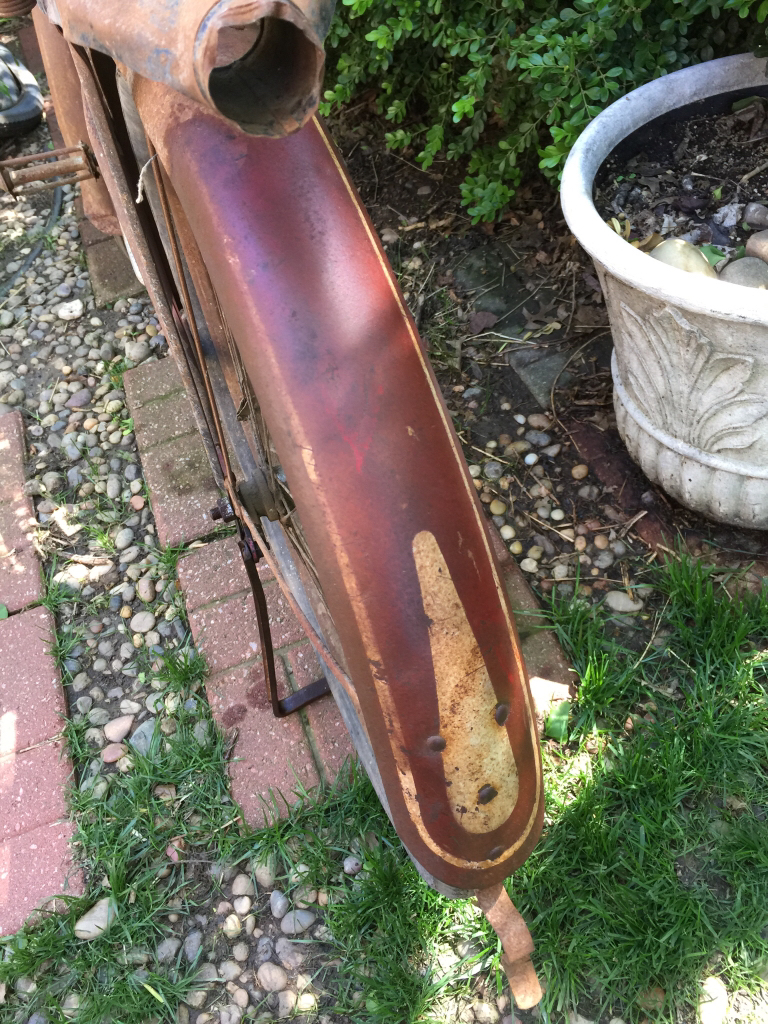
Yes I plan to use the drop stand, the fender has a catch and there are stop flanges on the dropouts.
The saddle remains untouched. I have a cover coming that I hope will fit and allow the shape and appearance to be maintained. There is a guy advertising new leather sewn covers on FB "old bikes club" group...but pricey. Worst case scenario I might pop for another one like I used on my Last Elgin.
Sent from my iPad using Tapatalk
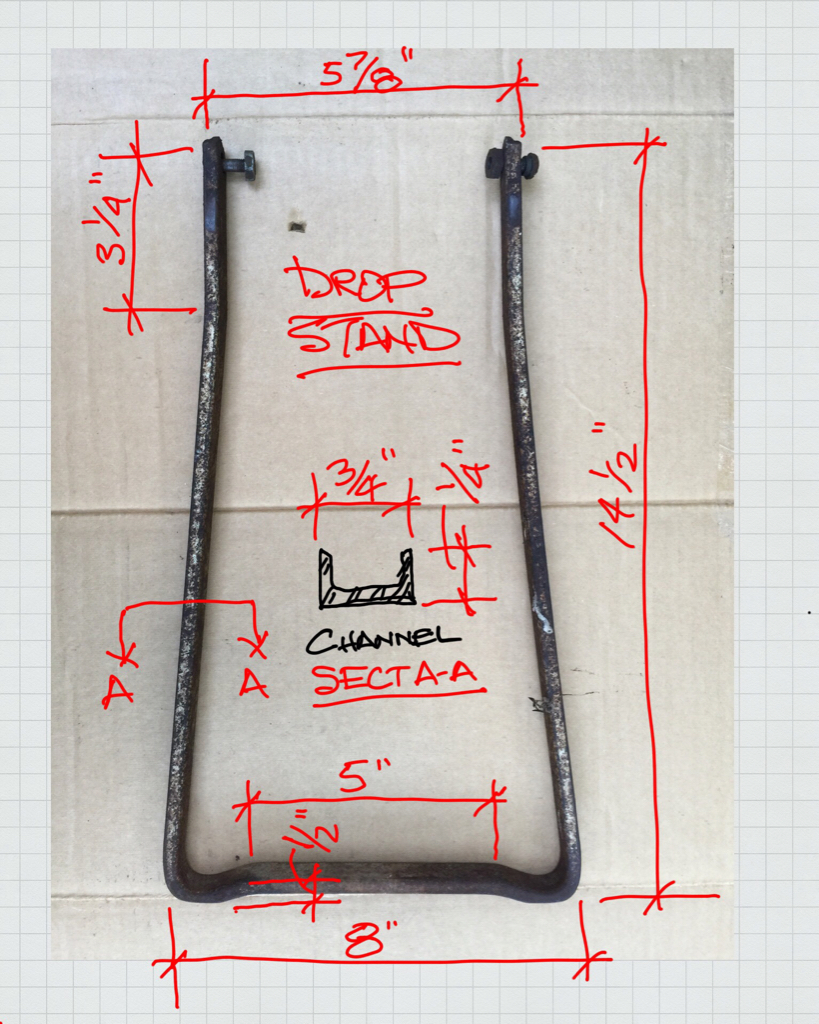
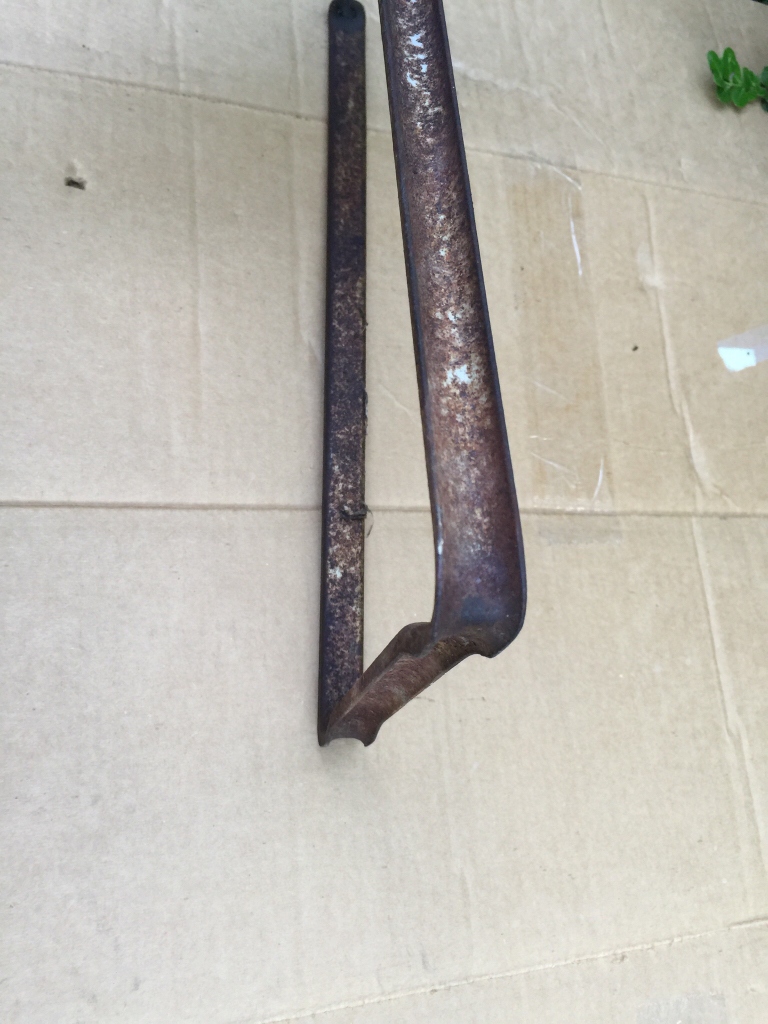
Thanks for the pics! Just curious, how long are the 'legs' on that drop stand? Or approx how far off the ground is the rear tire when stand is down?
MazdaFlyer
Like “RadioFlyer”
Thanks for the pics! Just curious, how long are the 'legs' on that drop stand? Or approx how far off the ground is the rear tire when stand is down?
I'll make a sketch with measurements for you if you want...they are costly on eBay. There are some modern adaptations on eBay that are more within reach...search bicycle drop stand.
Sent from my iPad using Tapatalk

$29.95
Crossroads Home Décor A Biker's Prayer, Gift for Motorcycle Riders, Inspirational Bike Picture Frame, 6451BW
Crossroads_Home_Decor

$19.99
Old River Outdoors Bicycle/Motorcycle Chain Picture Frame 4" X 6" Photo - Faux Bike Chain
Old River Outdoors (USA Merchant)

$455.36
$509.99
Schwinn Loop Adult Folding Bike for Men and Women, 20-inch Wheels, 7-Speed Drivetrain, Rear Cargo Rack, Carrying Bag, Black
OJCommerce

$19.99
Top Brass Bicycle/Motorcycle Chain Picture Frame 5" X 7" Photo - Faux Bike Chain
Old River Outdoors (USA Merchant)

$19.99
Electra Glide Wall Decal 2ft Long Sport Harley Davidson Bike Motorcylce Sticker Man Cave Garage Boys Room Decor
FatCat Wall Graphics

$19.95 ($31.17 / oz)
$21.28 ($33.25 / oz)
Hayes Semi-Metallic Disc Brake Pads Dyno/Ryde T122
Bell's Bike Shop
MazdaFlyer
Like “RadioFlyer”
Thanks! That iPad sketch is really cool. Very helpful - can't wait to get started!
MazdaFlyer
Like “RadioFlyer”
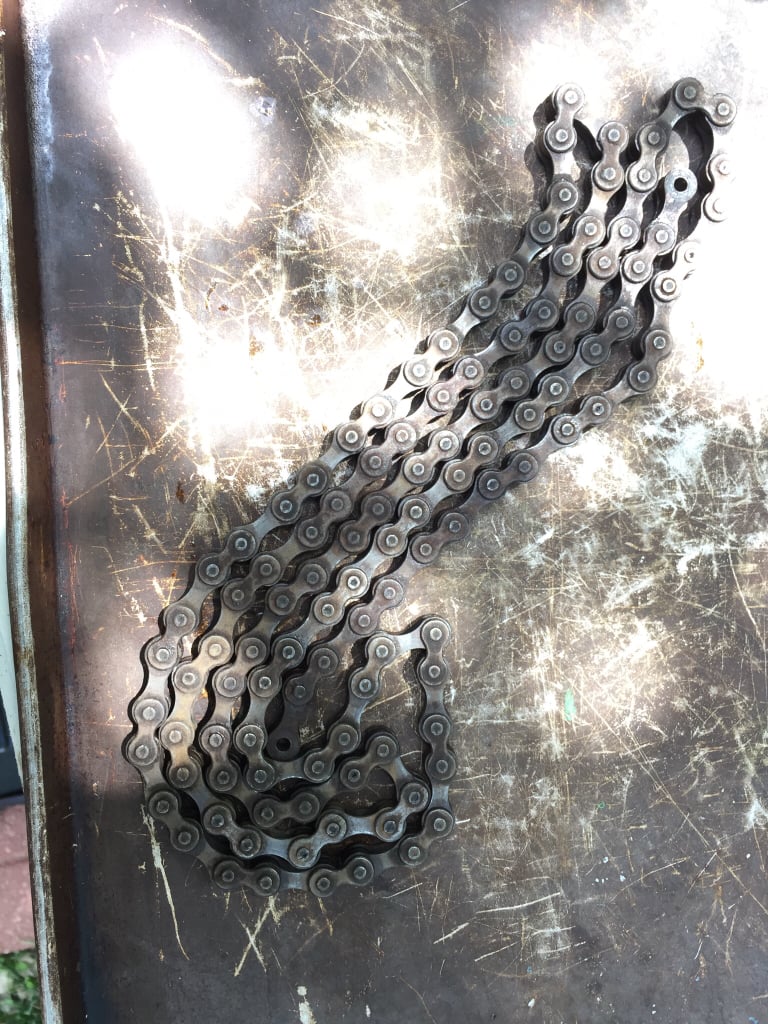
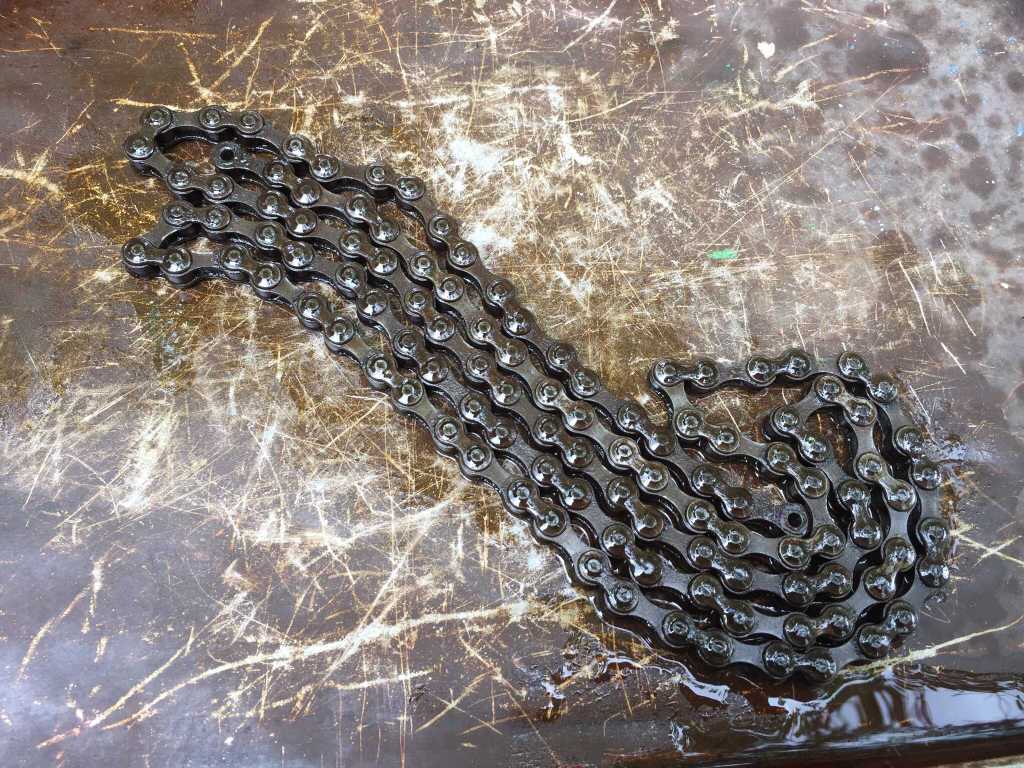
I cleaned up the chain. It's been soaking in WD40 in a sealed plastic bag for several weeks. I wire brushed it and wiped it dry. Then I shot it with degreaser, wire brushed, and rinsed it then let it dry. I gave it another coat of WD40 until I'm ready to use it, then it'll get some oil. It has one sticky link, did have two.
Wife's wheel yard art project...masking straws, labor intensive. She remarked "I didn't know you would to do all that."
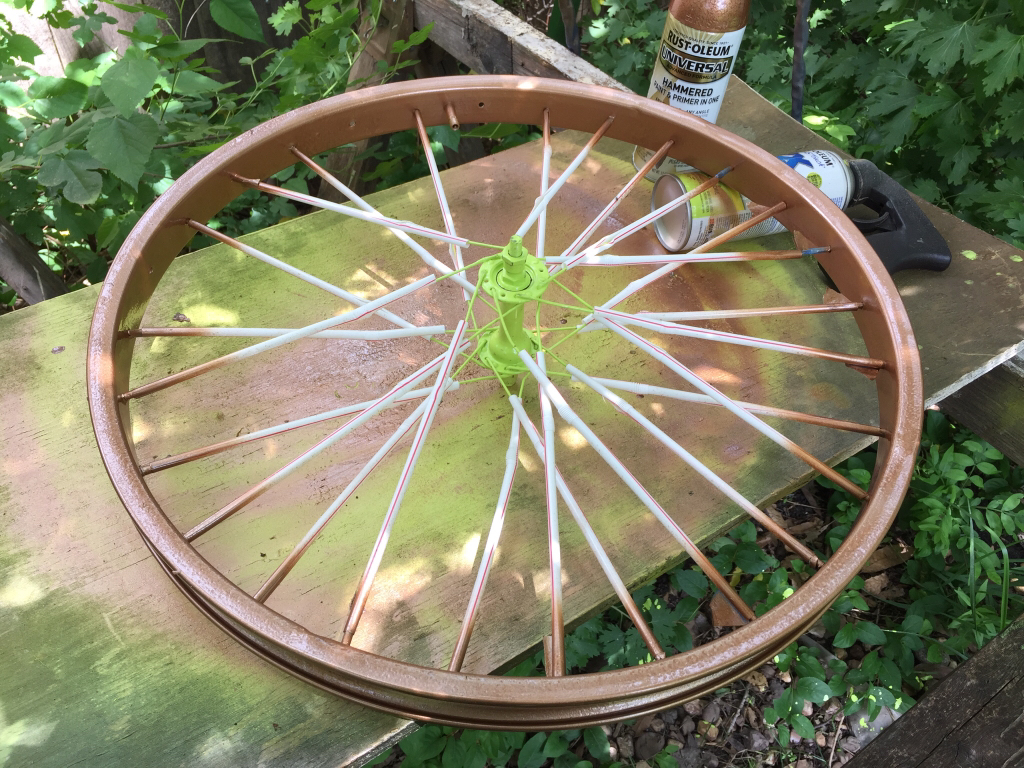 At least we're using left over build paint.
Sent from my iPhone using Tapatalk


Wife's wheel yard art project...masking straws, labor intensive. She remarked "I didn't know you would to do all that."

Sent from my iPhone using Tapatalk
Last edited:
MazdaFlyer
Like “RadioFlyer”
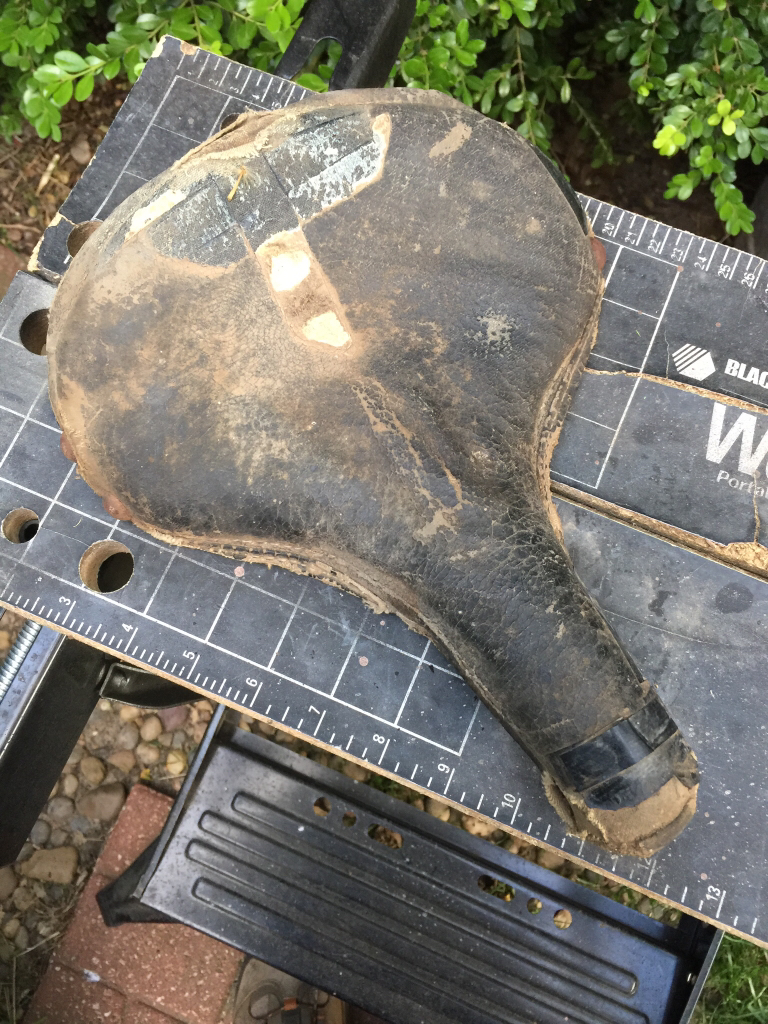
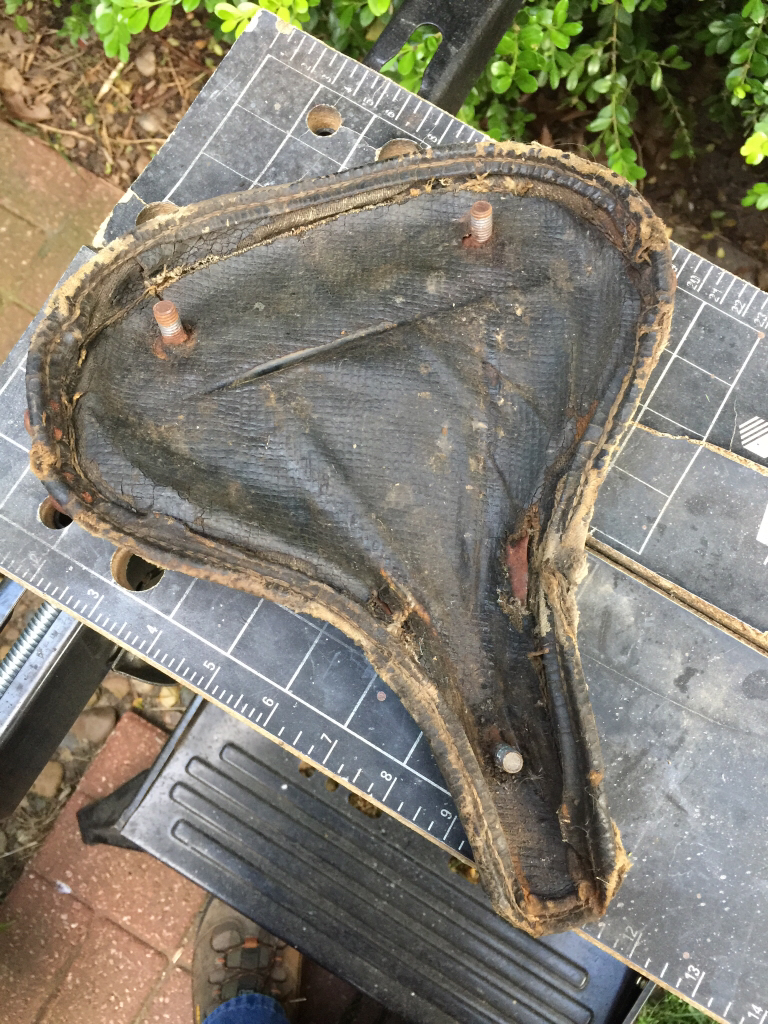
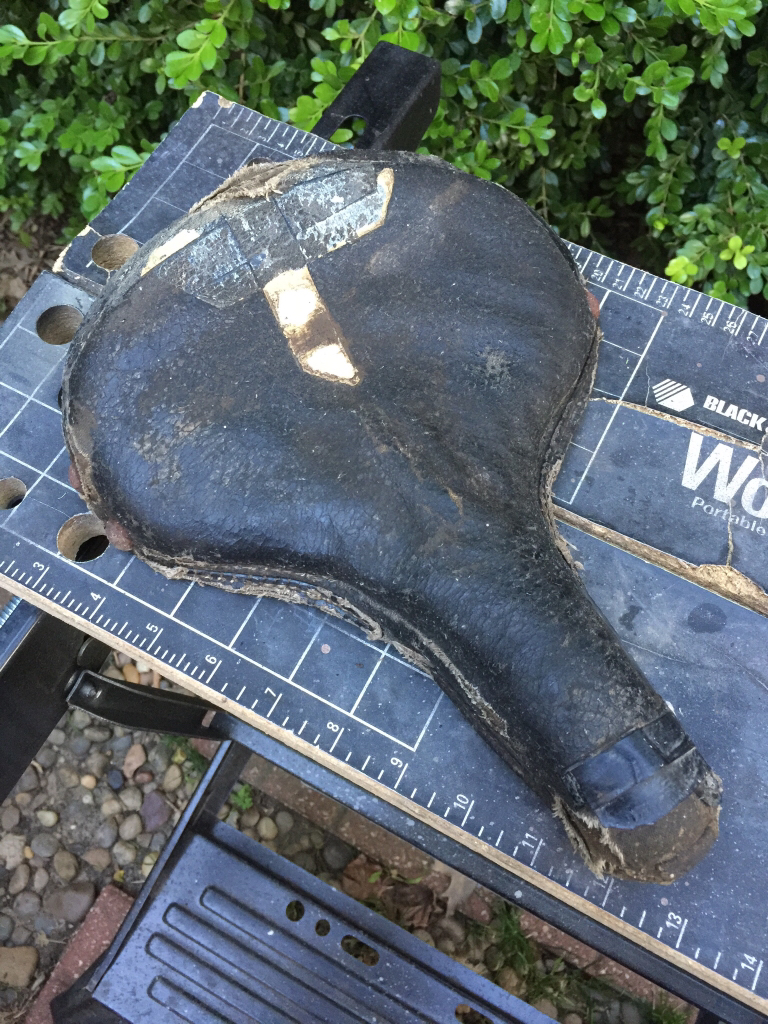
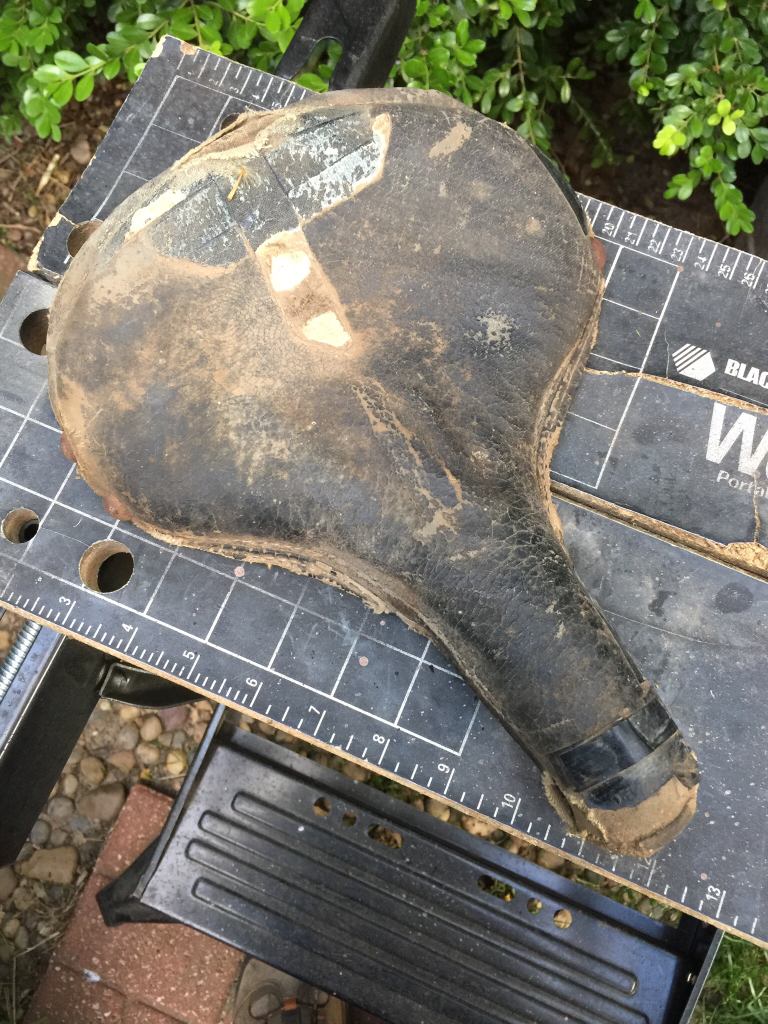
I ordered a large Selle Royal seat cover, which is a little short in regards to fitting the Hawthorne seat. It might fit if I work patiently with it. The gel pad is probably too thick as well. I cleaned the surface dirt off the OG seat surface and some tape that had been applied as a patch. It is the faux leather oil cloth used back then in lieu of real leather.
I could ride it as it is to retain the original look. I hate to mutilate it.
I had a thought of spraying it with some rubberized paint. Anyone have experience with adding a flexible overlay coating???
Don't really want to pay for a new sewn cover.
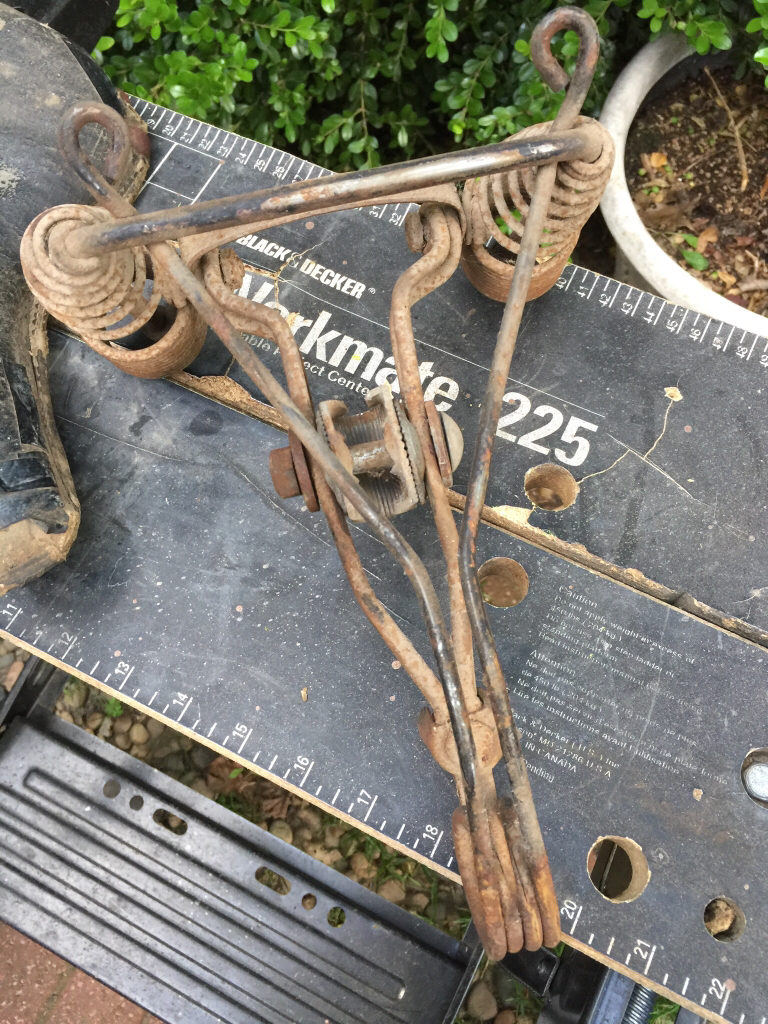
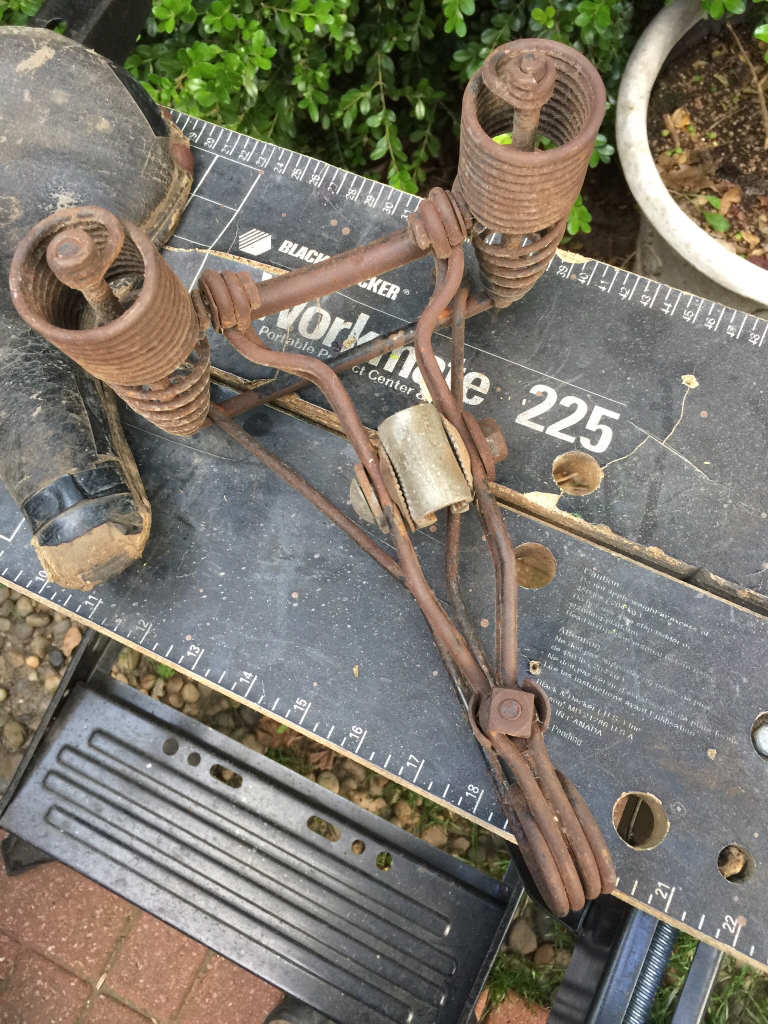
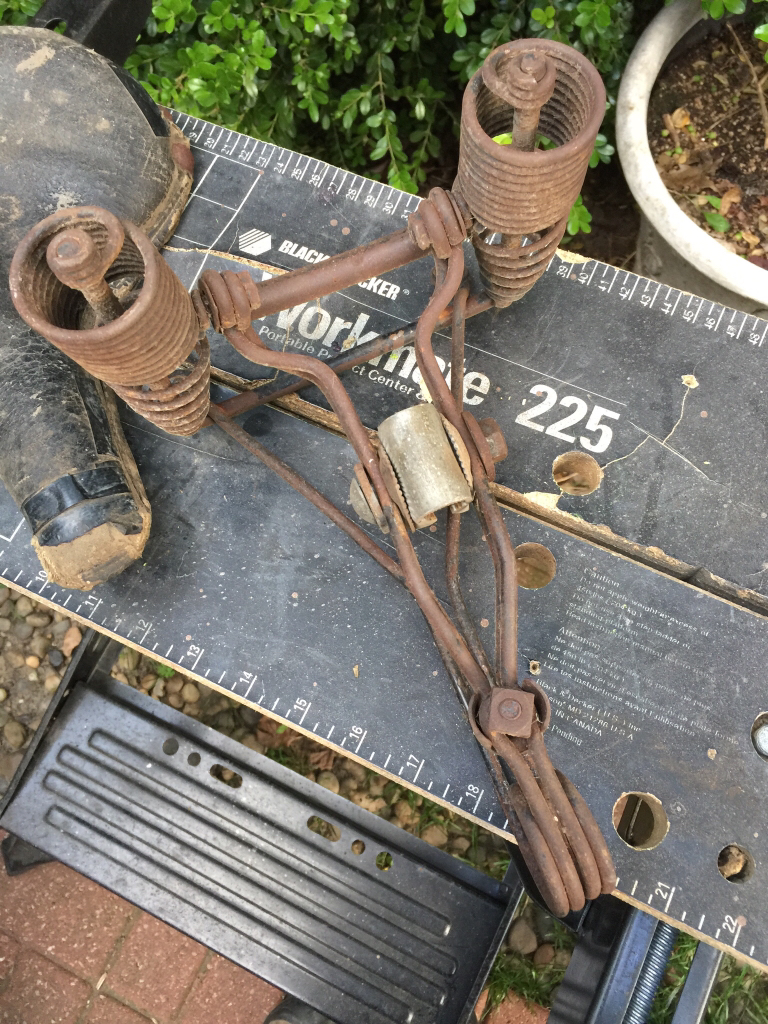
The undercarriage is in good shape, just needs a cleaning.

Sent from my iPhone using Tapatalk
I could ride it as it is to retain the original look. I hate to mutilate it.
I had a thought of spraying it with some rubberized paint. Anyone have experience with adding a flexible overlay coating???
Don't really want to pay for a new sewn cover.
The undercarriage is in good shape, just needs a cleaning.


Sent from my iPhone using Tapatalk
My seat on the Firestone Pilot build is in about the same shape. One of my friends suggested maybe a clear Flexseal paint? I wondered if that might be too thick?
If you could preserve your old saddle it would really fit in well with the rest of the build.
I'll keep my thinking cap on...be cool if we could come up with something that might work for us and others down the road.
If you could preserve your old saddle it would really fit in well with the rest of the build.
I'll keep my thinking cap on...be cool if we could come up with something that might work for us and others down the road.
MazdaFlyer
Like “RadioFlyer”
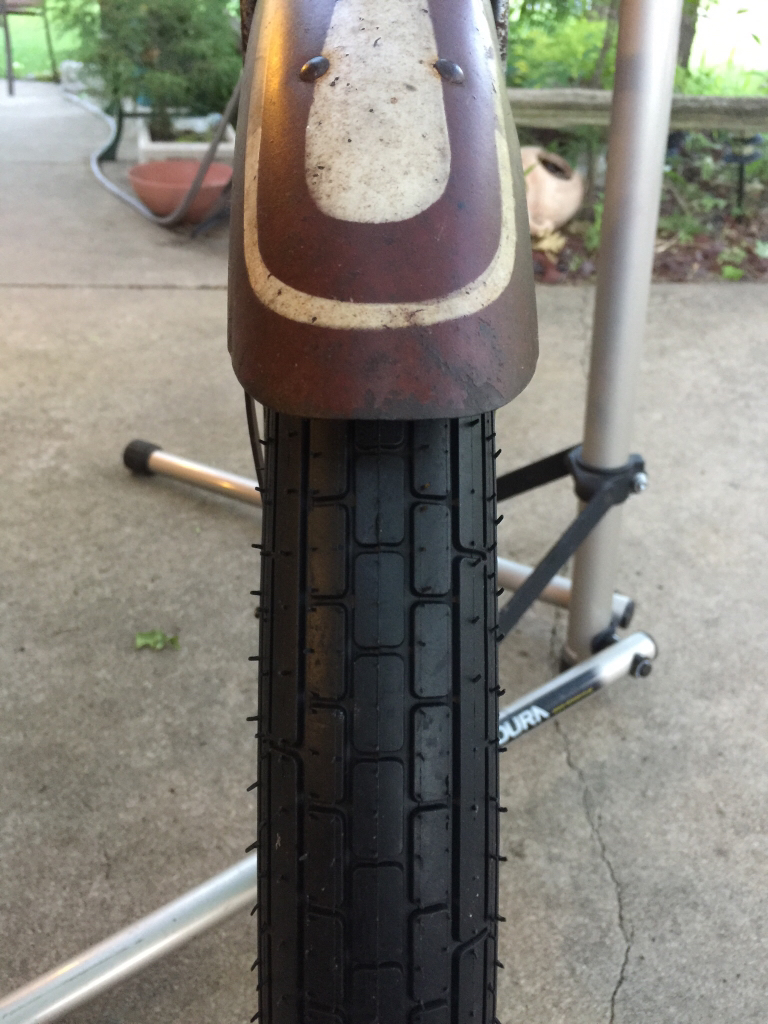
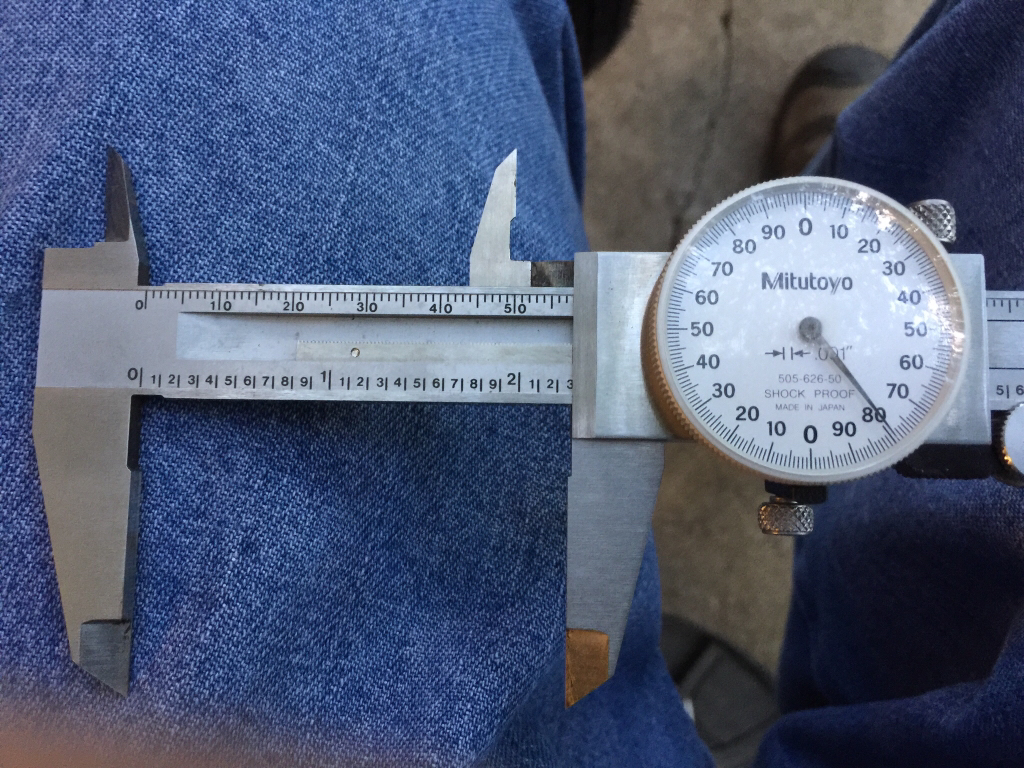
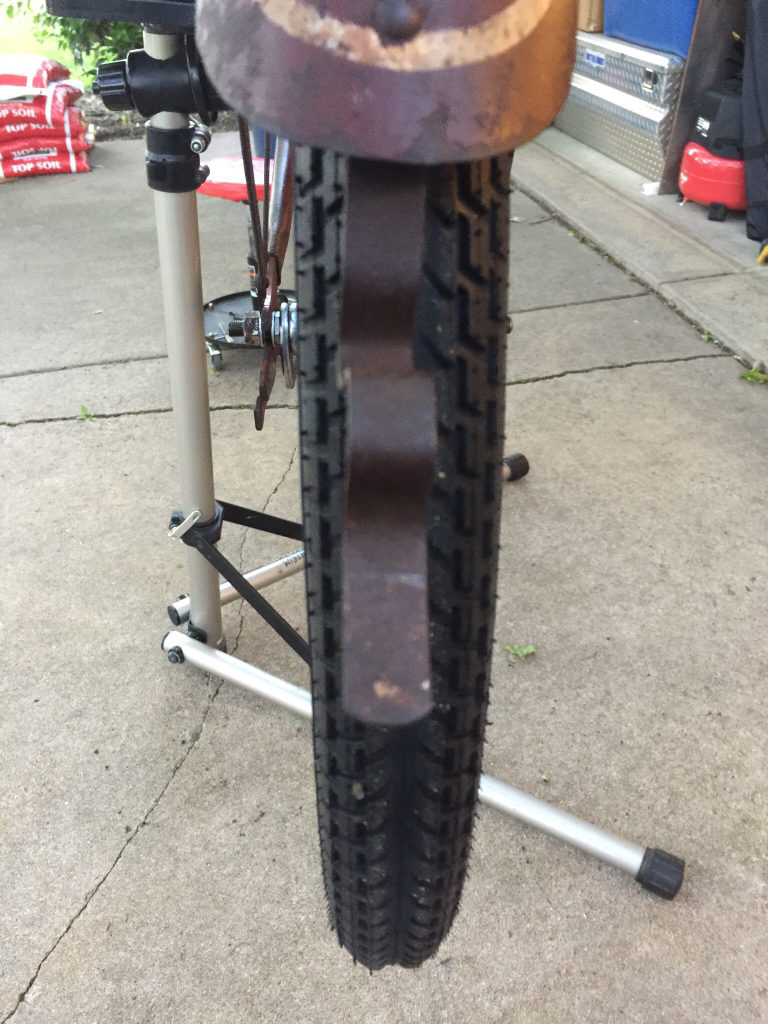
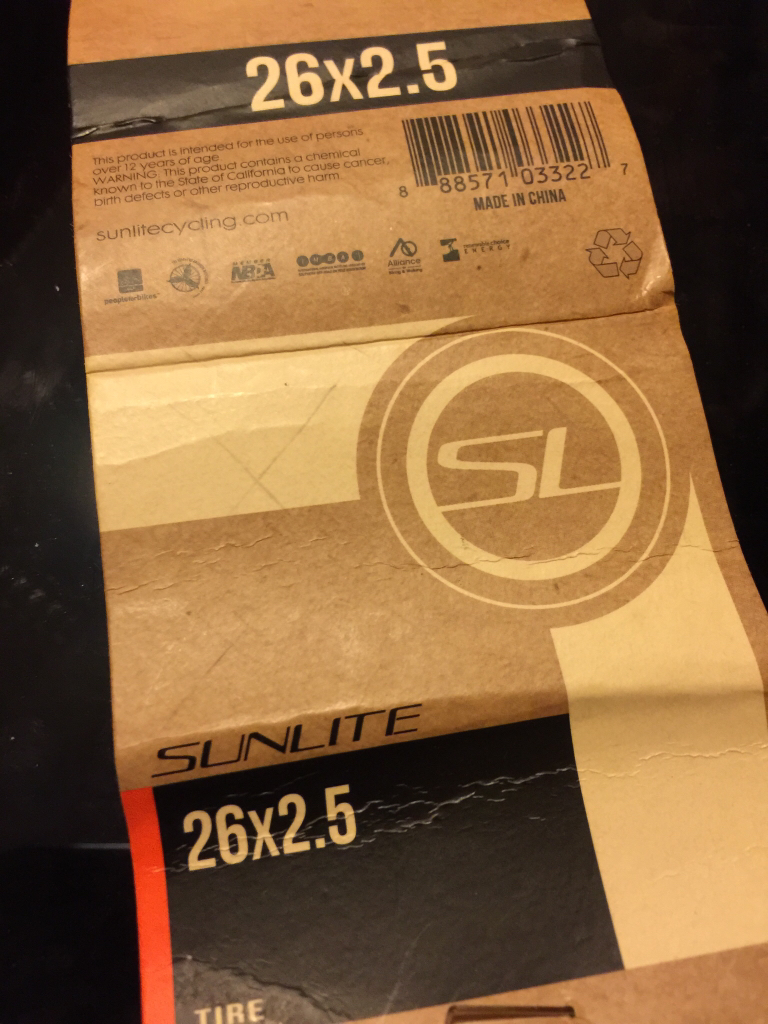
I got a pair of the Sunlite Sandy Beach 26x2.5 tires. I put one on the front wheel for comparison to the GoodYear 26x2.125's. Not quite what I expected. The Sunlite tire measure in at 2.28" inflated. They are wider than the GoodYears at 2.05".
I wonder if the tire specs are based on a wider rim? Still seems a little deceptive. I've had similar experiences with Fat Franks being short on advertised width.
Sent from my iPhone using Tapatalk
I wonder if the tire specs are based on a wider rim? Still seems a little deceptive. I've had similar experiences with Fat Franks being short on advertised width.


Sent from my iPhone using Tapatalk
MazdaFlyer
Like “RadioFlyer”
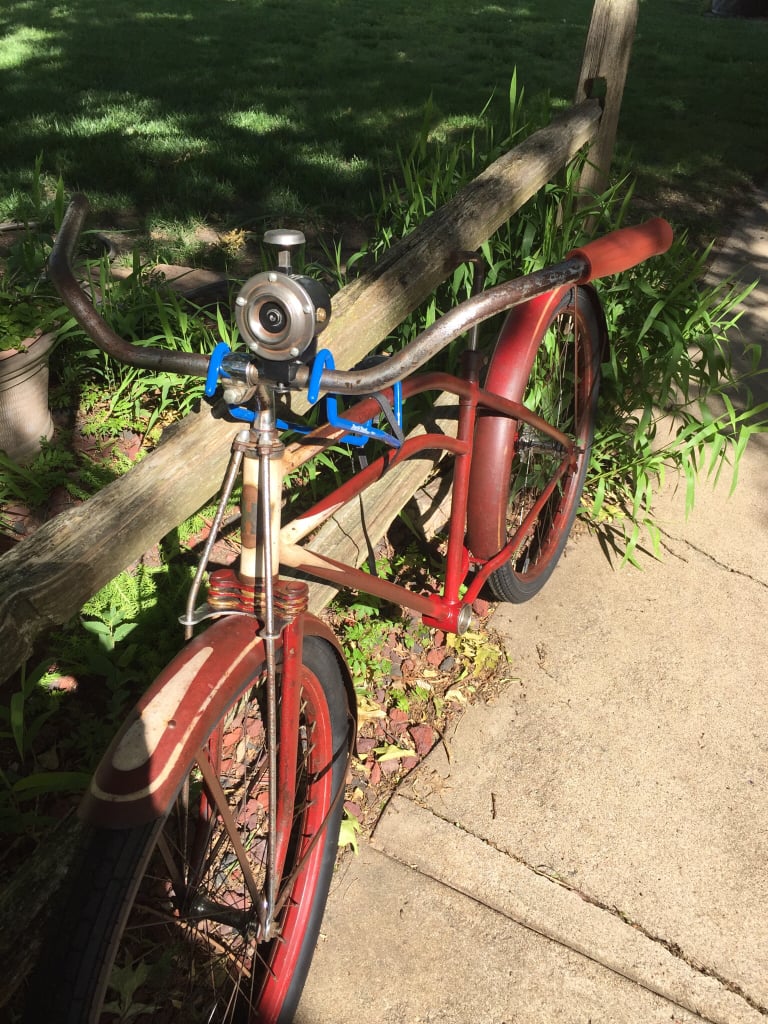
Fitting grips and horn...seat cover results to follow. May get fitted with dual headlights. Tires still in limbo.
Sent from my iPhone using Tapatalk

Sent from my iPhone using Tapatalk
Just FYI. I did a measurement on 3 tires mounted on 3 similar rims, but varying slightly.
All tires inflated to exactly 40 psi.
The results:
Continental Retro Ride Creme 26 x 2.2"
On drop center rim Rim width 1.47"
Tire actual 2.28" (bigger)
Schwalbe Fat Frank Creme 26 x 2.35
On drop center rim Rim width 1.56"
Tire actual 2.36" (spot on)
Sunlite Sandy Beach Black 26 x 2.5
On drop center rim Rim width 1.52"
Tire actual 2.25" (smaller)
MazdaFlyer
Like “RadioFlyer”
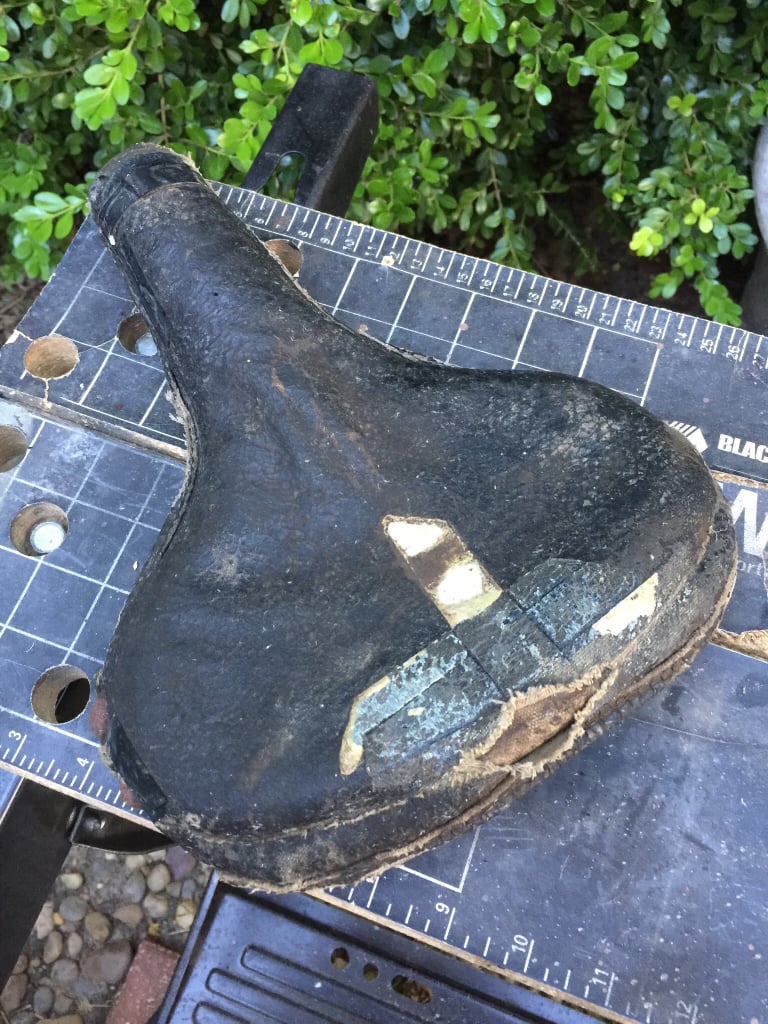
I'm almost reluctant to make this post about the saddle/seat outcome. After the fact I almost wish I would have left well enough alone. I'll share my learning experience though.
Th first couple of photos show my starting point with some cleaning.
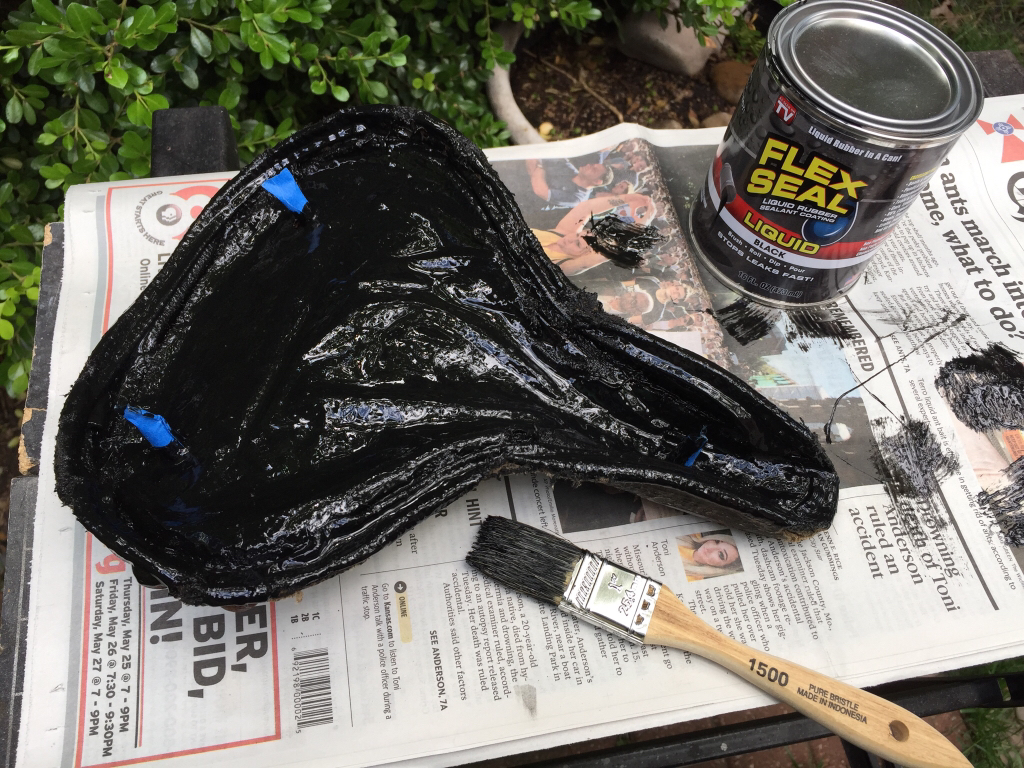
I got a can of liquid FlexSeal and brushed on a coat on underside of seat. The stuff went on well but dried glossy. They say you can paint over it. I decided not to use it on the top.
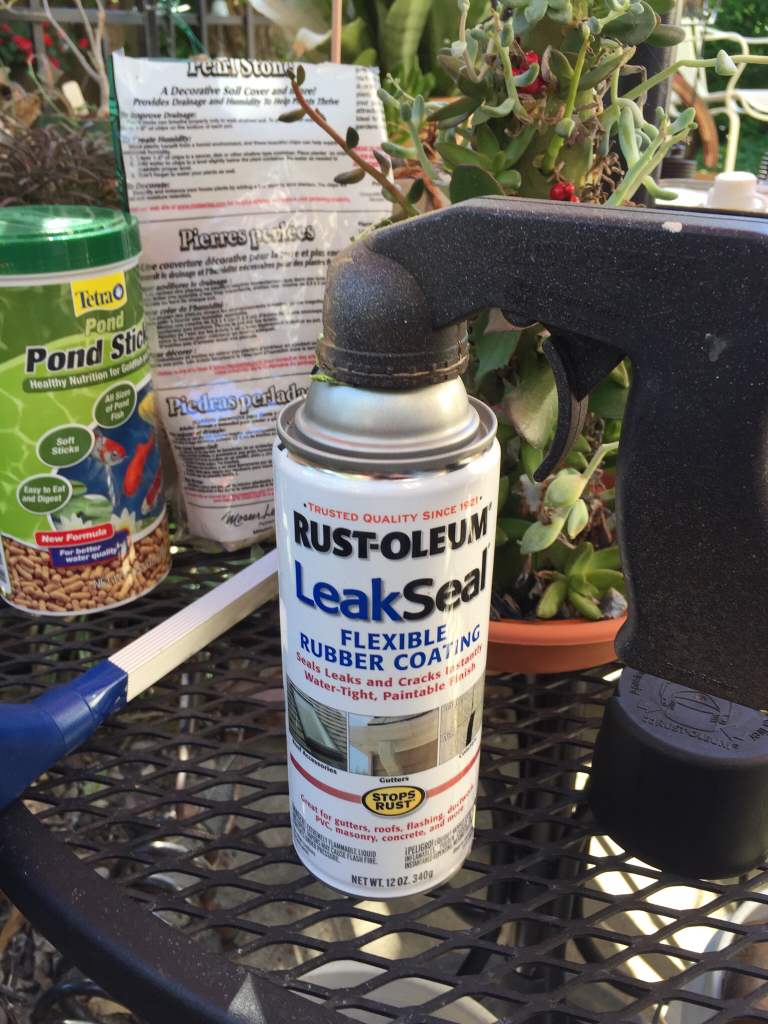
I found some rattle can Rustoleum LeakSeal at HD. It's description sounded similar to the FlexSeal but was to dry to a matte finish.
I sprayed two coats on top side and it dried to a dull finish.
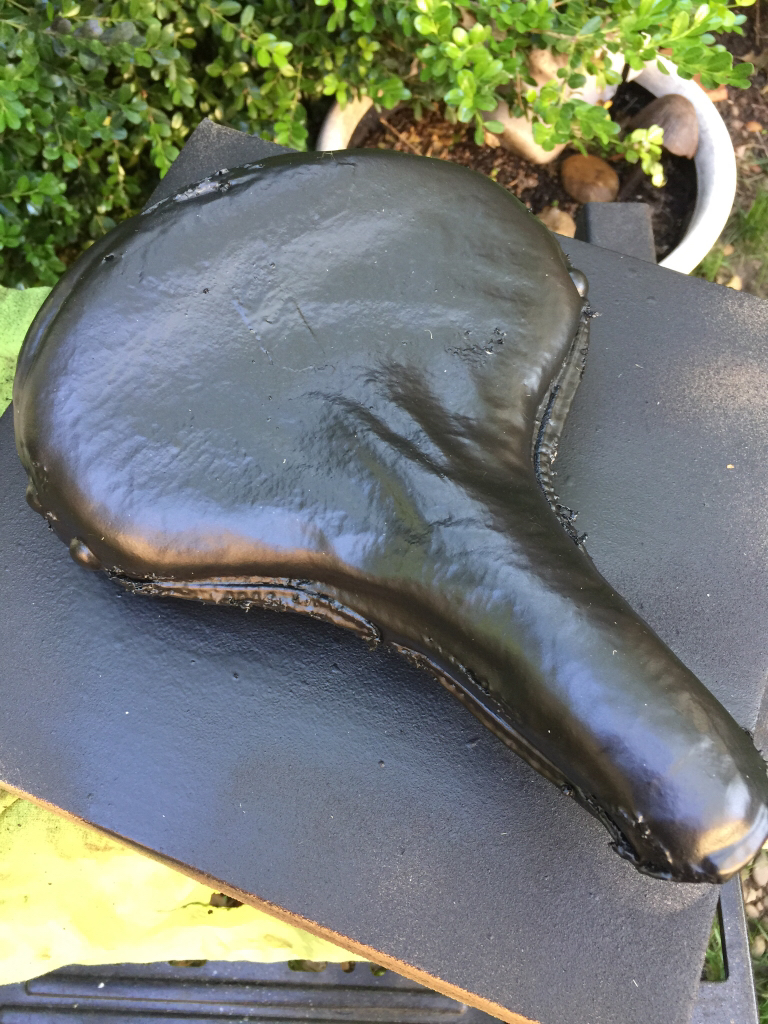
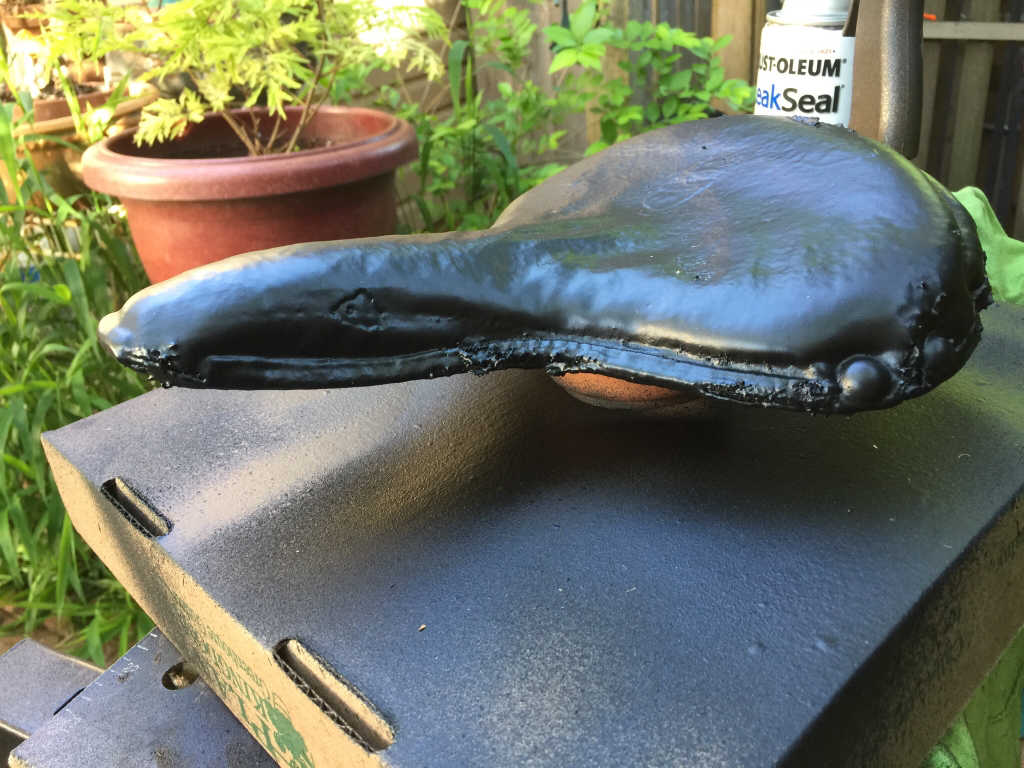
I then gave it another coat a day or so latter and cleaned up the undercarriage.
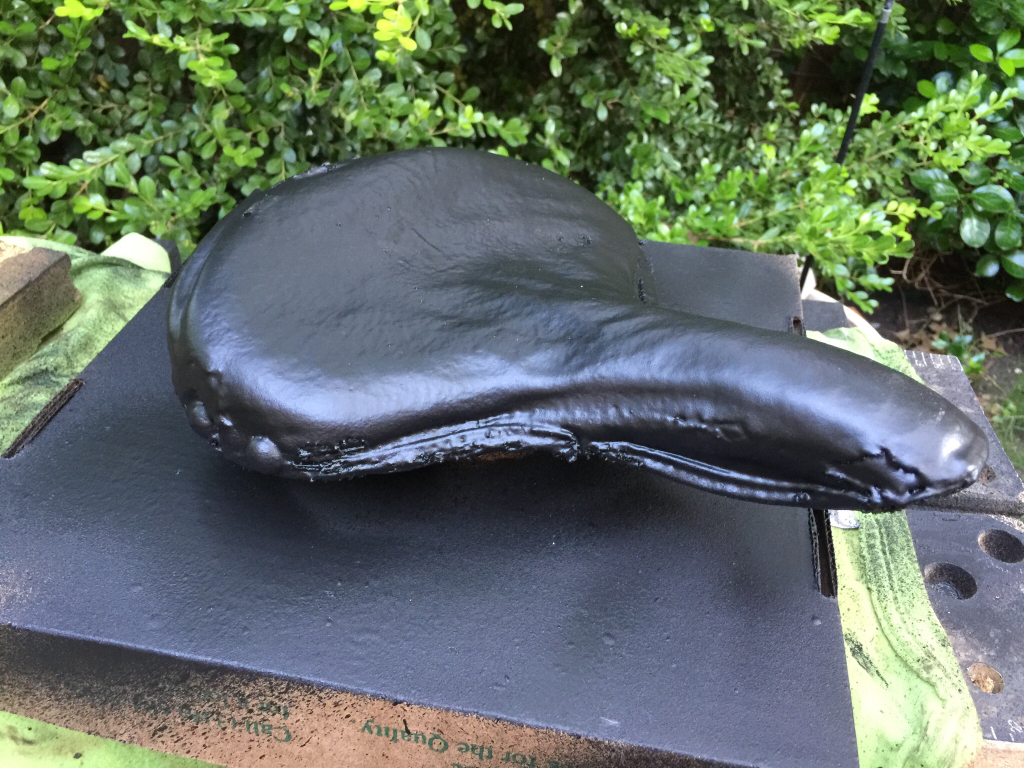
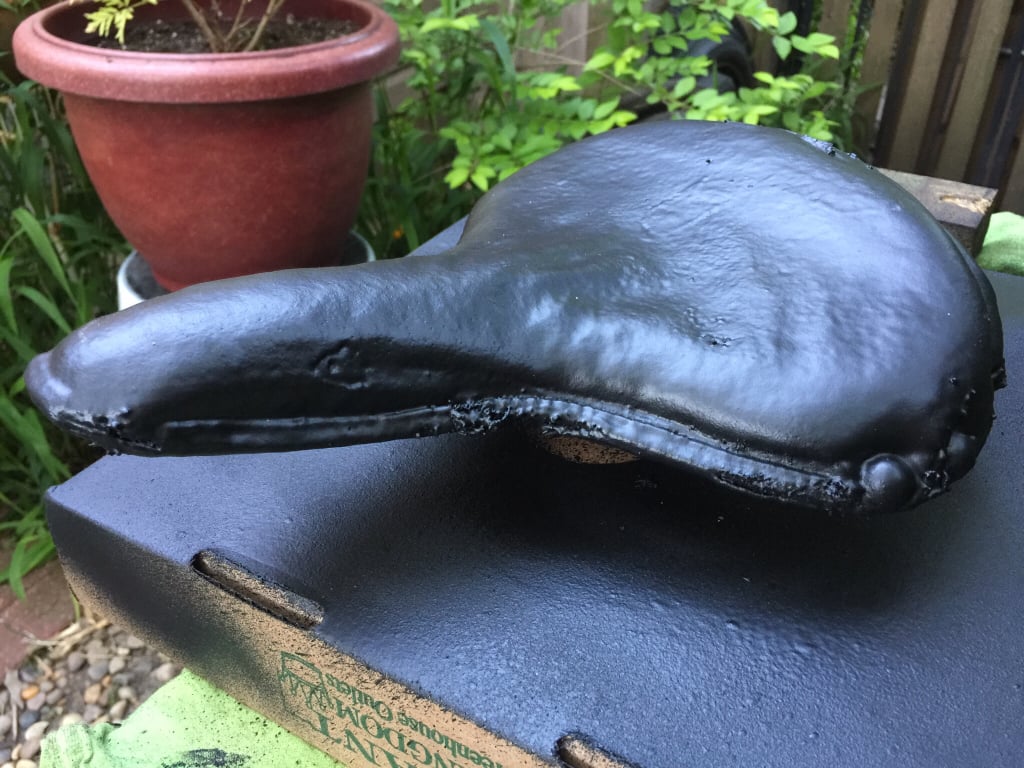
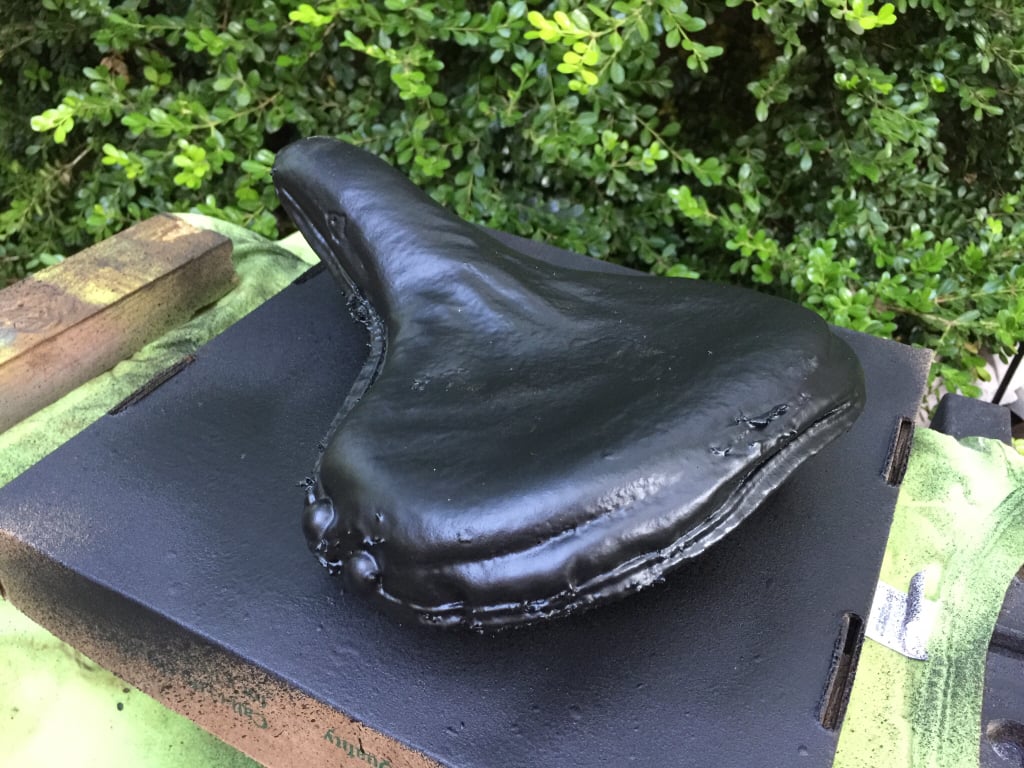
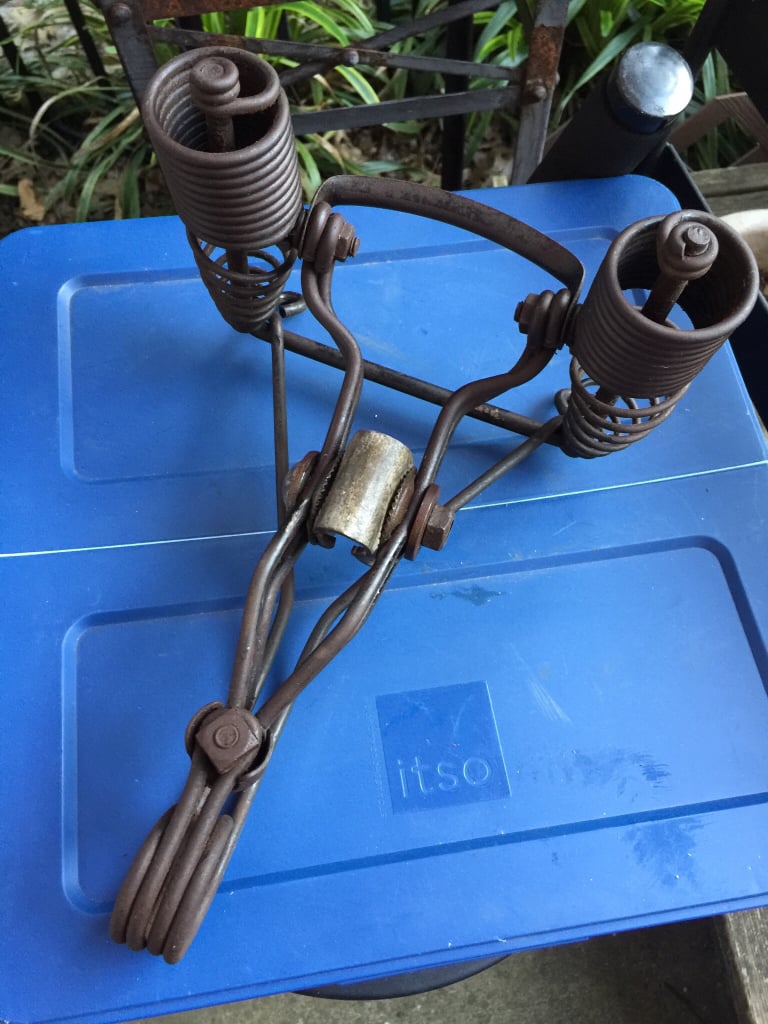
It is what it is...since I'm in this far I may give it some highlights and aging with some overspray. We'll see. I saw where I could get a sewn cover for a couple of hundred dollars...too rich for this old bike.
Let me know what you think...thick skin and broad shoulders here.
The real test will probably be, "What happens when you try to ride it?"
Sent from my iPhone using Tapatalk
Th first couple of photos show my starting point with some cleaning.


I got a can of liquid FlexSeal and brushed on a coat on underside of seat. The stuff went on well but dried glossy. They say you can paint over it. I decided not to use it on the top.

I found some rattle can Rustoleum LeakSeal at HD. It's description sounded similar to the FlexSeal but was to dry to a matte finish.
I sprayed two coats on top side and it dried to a dull finish.


I then gave it another coat a day or so latter and cleaned up the undercarriage.


It is what it is...since I'm in this far I may give it some highlights and aging with some overspray. We'll see. I saw where I could get a sewn cover for a couple of hundred dollars...too rich for this old bike.
Let me know what you think...thick skin and broad shoulders here.
The real test will probably be, "What happens when you try to ride it?"
Sent from my iPhone using Tapatalk
Last edited:
Fv2
Don't know what I'm doing, gonna do it anyway.
Can you peel the sealer off like Plasti dip?
It looks good, but to shiny for what I think you're looking for. Maybe some sandpaper to rough it up and age it, possibly some acrylic paint staining?
It looks good, but to shiny for what I think you're looking for. Maybe some sandpaper to rough it up and age it, possibly some acrylic paint staining?
MazdaFlyer
Like “RadioFlyer”
I don't think it will peel off. Rustoleum did have another rubber product they advertised as removable. It isn't really as shiny as the photos show although it does reflect light. It does look too "new" as it is but the previous tape patches all but disappear.Can you peel the sealer off like Plasti dip?
It looks good, but to shiny for what I think you're looking for. Maybe some sandpaper to rough it up and age it, possibly some acrylic paint staining?
I can always put a sheepskin cover on it...
Sent from my iPhone using Tapatalk
Personally, I'm impressed with how well it blended your patched areas in with the rest of the saddle. What you want to do now is to give it that 'aged' look you mentioned.
Couple of ways I have achieved that. Basically, you just want to 'reduce' the amount of color, black. So a lighter shade of black, which is grey, could be applied to damp down the shininess.
I use the Folkart 100% acrylic in a small bottle. Put just a pinkie finger nail sized dab on a rag and rub it in. Less is more. It will dry matte, and will reduce the intensity of the black. Keep applying and as is my motto always, "Quit before you think you are done."
Another method, which is a little trickier, is to use a rattle can of a muted matte color to reduce the intensity of the black. Again, a grey, using the stand back 5 feet and spray into the wind method, will leave just a light spray and when dry, will take out the glare.
Here's the process used on the 'cold beer' arrow for Beer Boy Delivery. I used a Rustoleum combo of 'Corn Flower' yellow, 'Cinnamon', and a light dose of the Multicolor Texture. The first two colors are in the red, orange, yellow spectrum and they just helped mute the bright bold red. Multicolor added a little surreal rust.
Before:

10 minutes later...

Couple of ways I have achieved that. Basically, you just want to 'reduce' the amount of color, black. So a lighter shade of black, which is grey, could be applied to damp down the shininess.
I use the Folkart 100% acrylic in a small bottle. Put just a pinkie finger nail sized dab on a rag and rub it in. Less is more. It will dry matte, and will reduce the intensity of the black. Keep applying and as is my motto always, "Quit before you think you are done."
Another method, which is a little trickier, is to use a rattle can of a muted matte color to reduce the intensity of the black. Again, a grey, using the stand back 5 feet and spray into the wind method, will leave just a light spray and when dry, will take out the glare.
Here's the process used on the 'cold beer' arrow for Beer Boy Delivery. I used a Rustoleum combo of 'Corn Flower' yellow, 'Cinnamon', and a light dose of the Multicolor Texture. The first two colors are in the red, orange, yellow spectrum and they just helped mute the bright bold red. Multicolor added a little surreal rust.
Before:

10 minutes later...

Last edited:


