Columbia Convertible Commuter *FINISHED*

Rat Rod Bikes Bicycle Forum

Help Support Rat Rod Bikes Bicycle Forum:

This site may earn a commission from merchant affiliate links, including eBay, Amazon, and others.
RM....I put one of those 3-bolt cup converters in my 37 Shelby. I had no size issues. Maybe the shell is a bit small on that particular frame.... FYI, the Shelby developed a nasty creak yesterday on a long ride, and I found the three long screws holding the cups in the shell worked loose. Make sure you locktite them during the install..(post-grindoff):thumbsup:
Thanks for the heads up. I'll do that.

I've been out of town all day today, so maybe I can get to finish fitting tomorrow. I forgot to mark the top tube locations the first time around, so I took the tank back apart and marked it this evening.

I used a silver sharpie and marked the tank and frame where they intersected. After I bolted the tank back together I scored a line across both halves. Then I found the measurement from center to center of the top tubes and scored marks to correspond on the tank. It got too late to drill them, so I'll do that tomorrow.
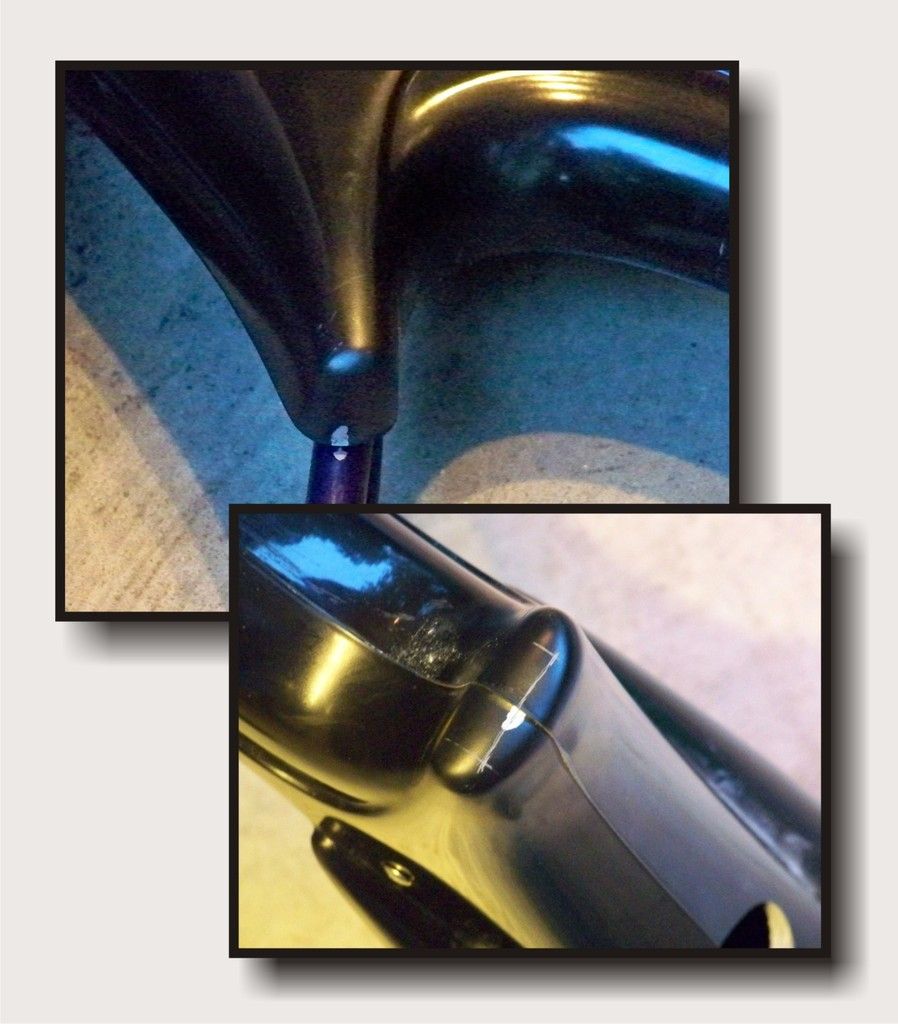
tank%20marking%203_zpsr46f6db0.jpg
 
Ren Man, your instructional is at both times informative and intimidating....after entering this contest and seeing the skills, tools, and experience that many of you have, I feel like an extreme newbie at this game! :( My fabrication experience is limited to using wood, some 1/8 x 1/2 steel, paint, and other parts that can be manipulated with a hand drill, hack saw, and vise grip! But, being the overachiever that I am, I will press on to try to meet the standards that you all have set.....Thanks for sharing your expertise, and for your input and supportive words!
 
Ren Man, your instructional is at both times informative and intimidating....after entering this contest and seeing the skills, tools, and experience that many of you have, I feel like an extreme newbie at this game! :( My fabrication experience is limited to using wood, some 1/8 x 1/2 steel, paint, and other parts that can be manipulated with a hand drill, hack saw, and vise grip! But, being the overachiever that I am, I will press on to try to meet the standards that you all have set.....Thanks for sharing your expertise, and for your input and supportive words!
I hope that it's never intimidating. I am in no way an expert, but I do have Google! :21: This forum and the build-offs are very inclusive and resourceful for all of us. It's interesting that you bring up "skills, tools, and experience". After last year's bike with a good share of one-off fabricated parts, one of my goals for this build-off is to demonstrate how my bike can be built by almost anyone with common tools, available parts and a desire to tinker on bikes. I really hope when it's finished that others will like what I've done and know that they can do something similar if they want to!
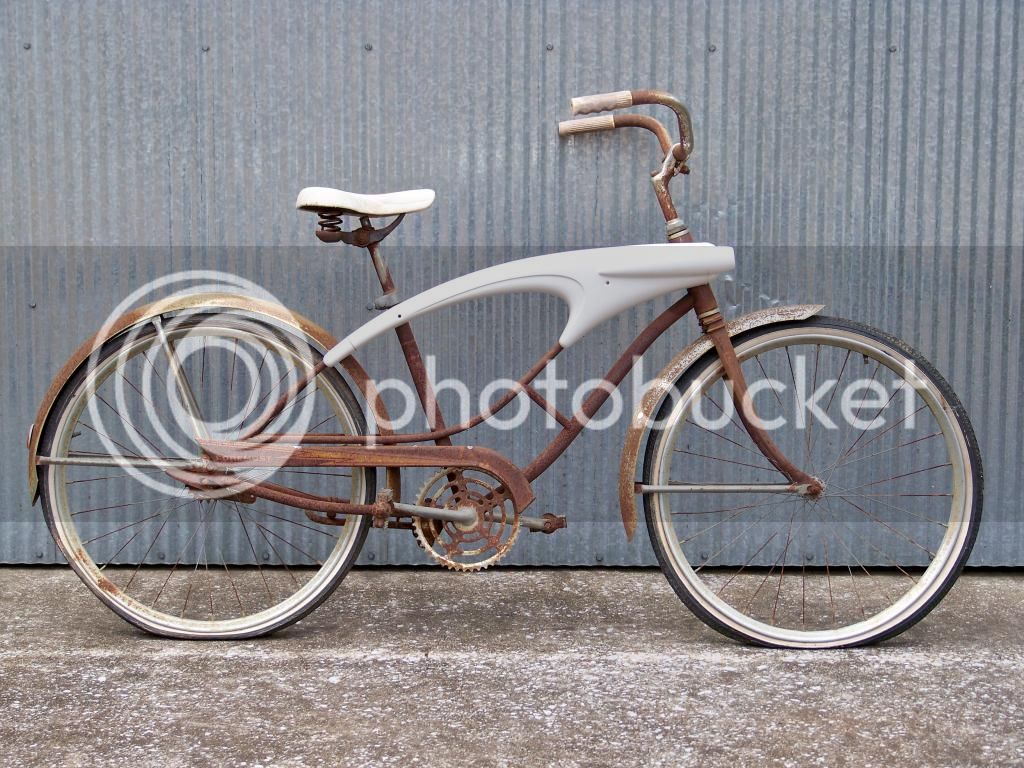
Build on fellow ratter! :)
 
Wait a minute , I thought it was "I'm no expert but I did stay at a Holiday inn last night" :21:
I'm wondering if one of those tanks would fit a 24" wheeled frame.
Mark
I have stayed at a Holiday Inn, but it wasn't last night.:p

That question came up once before. I just happen to have a 24" frame and I taped one side in place to see. It would have to be altered some (mostly the trailing end would need to be shorter), but it looks like it could be made to work.
100_8530_zpsfb8d86c6.jpg
 
Ren Man, your instructional is at both times informative and intimidating....after entering this contest and seeing the skills, tools, and experience that many of you have, I feel like an extreme newbie at this game! :( My fabrication experience is limited to using wood, some 1/8 x 1/2 steel, paint, and other parts that can be manipulated with a hand drill, hack saw, and vise grip! But, being the overachiever that I am, I will press on to try to meet the standards that you all have set.....Thanks for sharing your expertise, and for your input and supportive words!
We all started somewhere OddJob!
I am in no way an expert, but I do have Google! :21:
:113:

Luke.
 
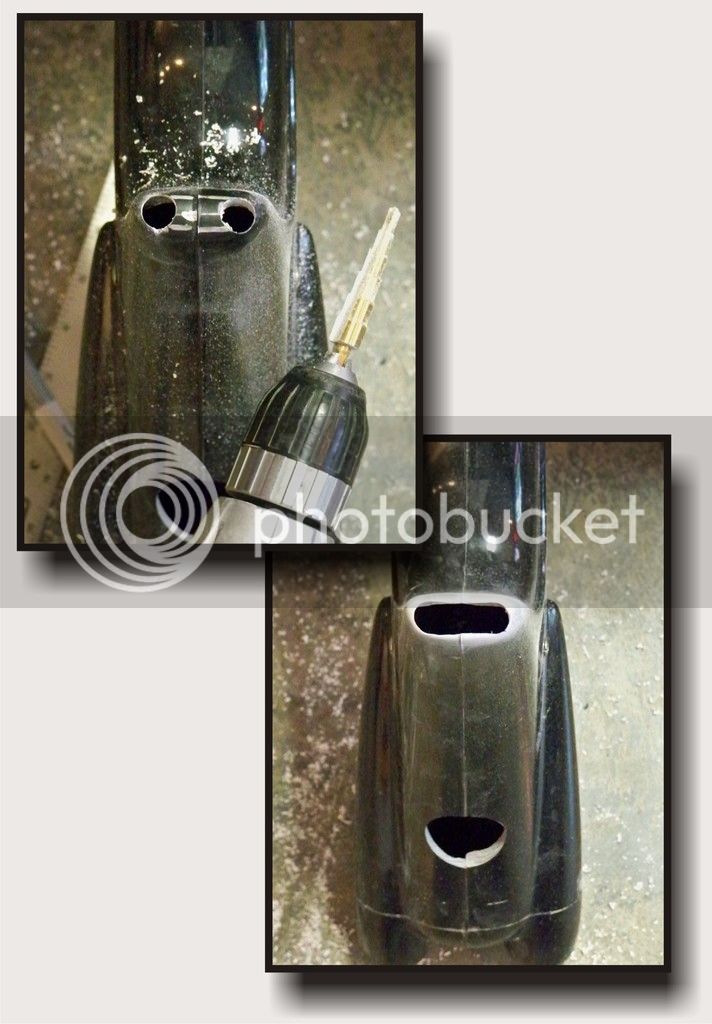
Next step. I drilled two holes with a step drill for the top tubes. I got this a little out of line but no big deal because I still have to grind some away with a rotary tool anyway. Next I used the rotary tool with a small cutting disk to connect the holes. This has to be removed for the tank halves to slide together over the frame. Still roughing things in at this point.

tank%20top%20tube%20holes_zpscdx1ckjo.jpg
 
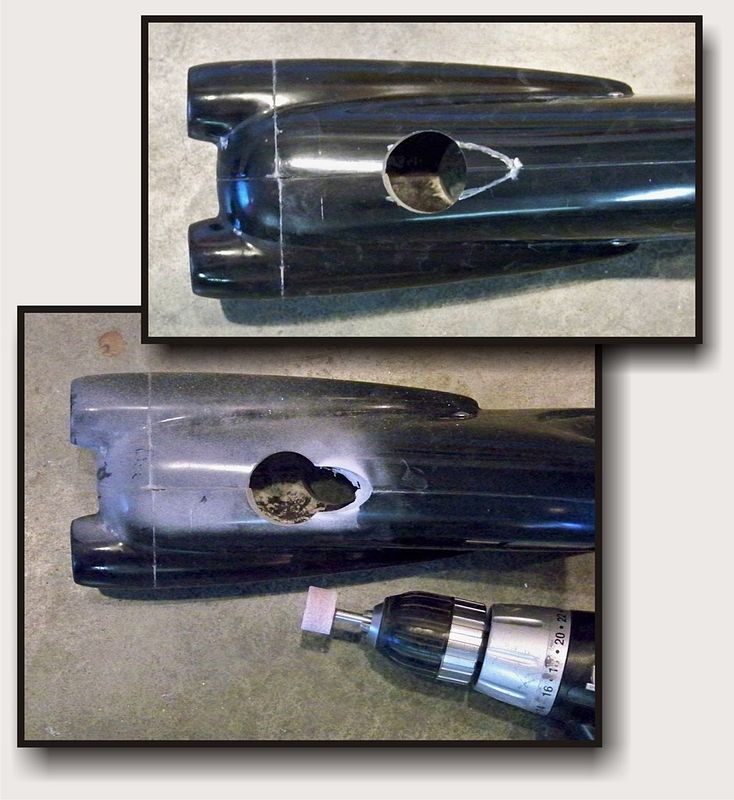
The downtube has to partially pass through the bottom of the tank where it meets the head tube. I held the tank in position and marked where it would come through. After roughly drawing the cut with a sharpie, I used a 1" grinding rock in my drill and held it at the approximate angle to grind the material away. The downtube is also 1" so the grinding rock left the correct profile for the tube. I took my time and made sure not to let it get off center. The guidelines where 1/2" to the left and right of center to keep me on track.
tank%20down%20tube%20hole_zpsm2vbyjcp.jpg
 
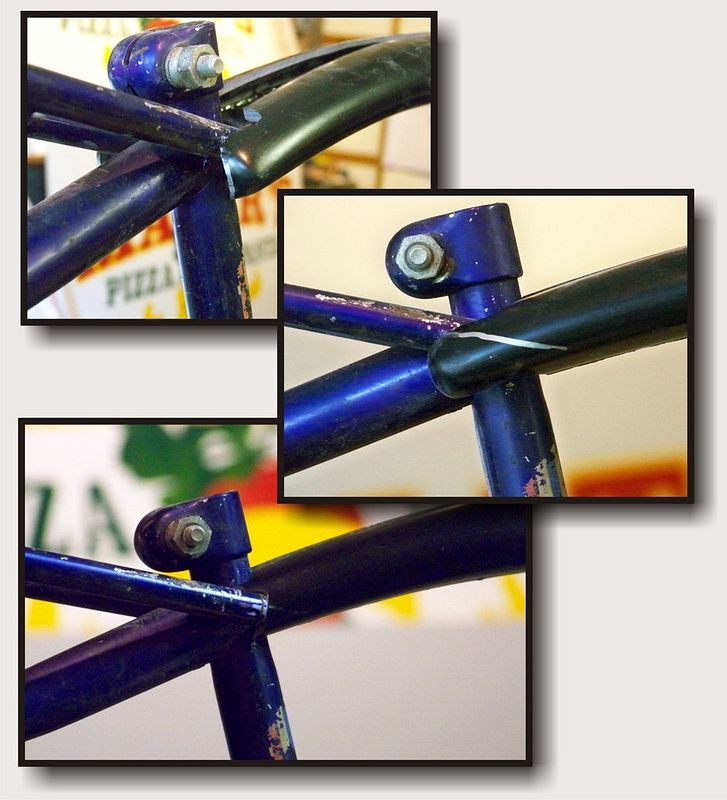
I saved showing the trailing end for last because it is completely different on this Columbia frame compared to a Spaceliner or Flightliner frame. For those frames the procedure is just like what I did for the double top tubes.

Initially I cut one hole in the center of the rear of the tank to match the seat stay tube size. As it turned out, I later decided to completely remove the trailing end and instead I'm going to end the tank at the rack. I actually left the end of the tank to start with, but there was so little of it left to hold it in place that I decided to cut it off.

Once again I held the tank half in place and used a sharpie to mark a guide for the angle. Then I took my rotary tool with a 1/2" grinding rock and cut the material away. This took several passes of grinding small amounts and rechecking it in place on the frame in order to get the right fit.

It was dark outside when I took the last picture, so I didn't have very good light. I'll get better pics tomorrow.

tank%20seat%20tube%20holes_zpssxm3z1yh.jpg
 
Dude that bike is already looking sweet:thumbsup: Cant wait to see how nice you make a "practical" bike look.
Thanks, I'm looking forward to seeing how it turns out myself!
Great tutorial!

Luke.
Thanks Luke. I would rather have done this on video, but I didn't have much time as it was. It's a little challenging to explain things clearly with just a few pictures and text. I hope that by doing this that it might help some of the folks that are also fitting these tanks. Most of this is explained in the instruction sheet that comes with the tanks, but I tried to add a little more detail here.
 
Awesome tutorial going on here!!
 
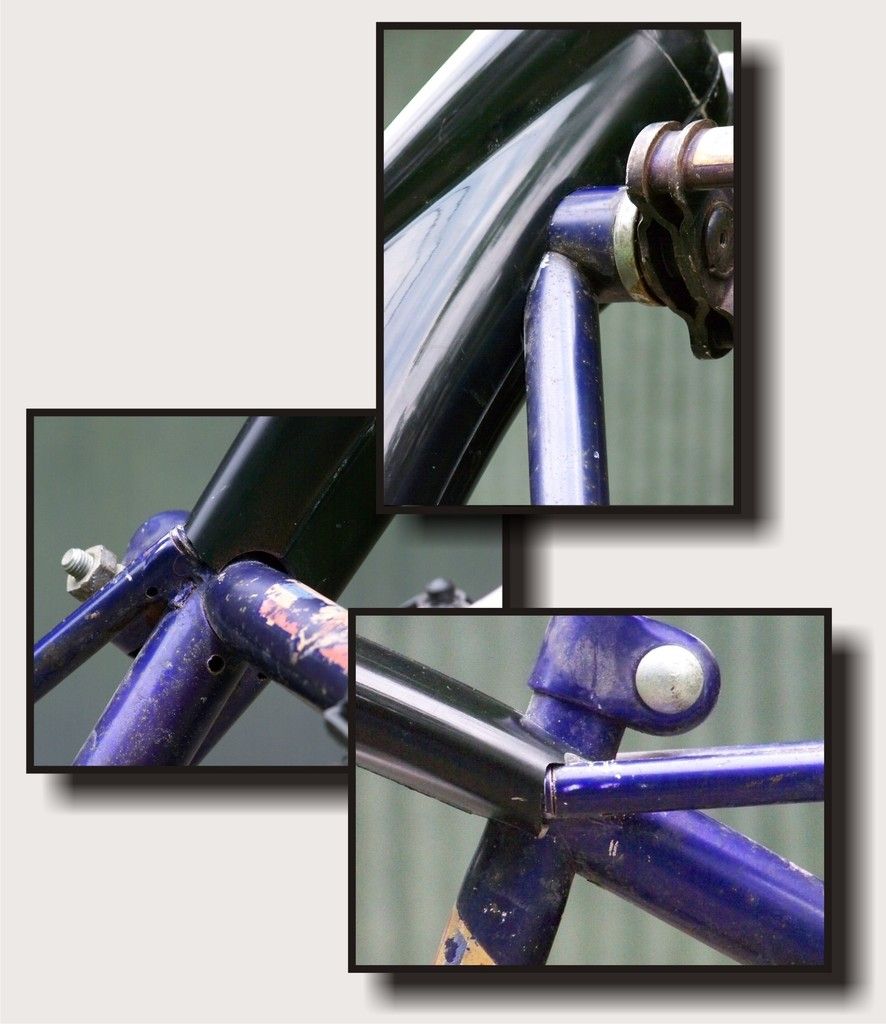
OK, here's the last installment of the tank fitting. These are just a few pictures of the openings with the frame.
Tank%20fit%20pix_zps52myegxm.jpg

I missed the mark just a little under the seat tube end, but overall I'm very satisfied with how it fits. :)
This was strung out over several days but all totaled I'd say I spent a good half day or better getting it to fit right. I tend to slow down and try to double check every thing I do at this stage. Any goofs can be repaired, but I'd rather take a little more time and try to get it as close to right as possible.
 
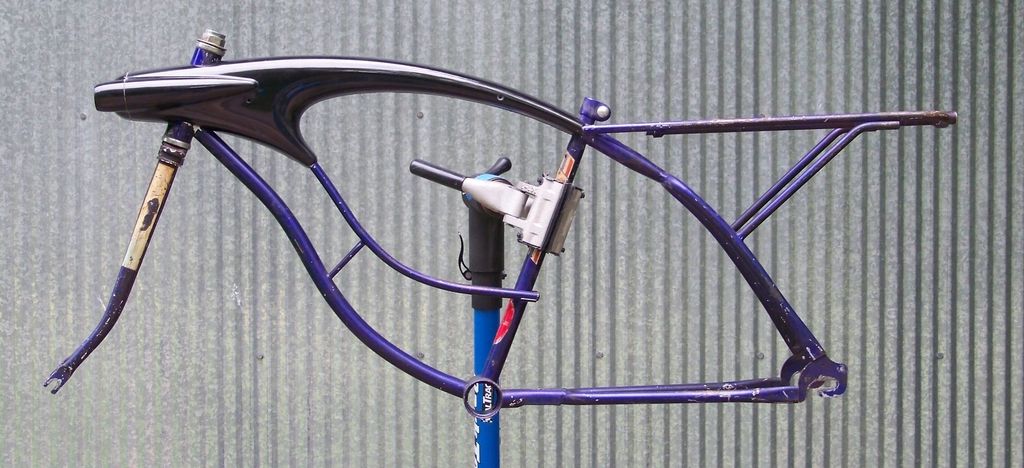
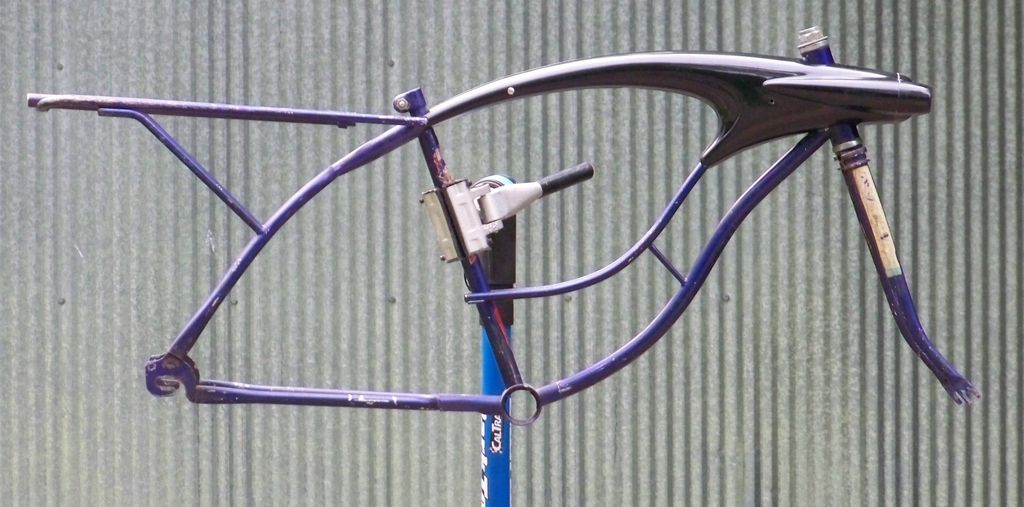
With the tank officially part of the frame, it was time to take it outside for the first real profile shots! I'm even more stoked about converting this Columbia frame! I love the way the rack and the headlights play off each other and slash through the curves. :happy:

a384dea9-9a41-42da-8c0d-05f4f06c61c6_zpsncrxtsdx.jpg

9c190f66-5622-4c38-9eb7-9a44671805d5_zpslbenmvda.jpg
 

Latest posts

Back
Top