Custom-built Surly Pacer

Rat Rod Bikes Bicycle Forum

Help Support Rat Rod Bikes Bicycle Forum:

This site may earn a commission from merchant affiliate links, including eBay, Amazon, and others.
Joined
Mar 25, 2011
Messages
1,226
Reaction score
144
Location
Rochester, NY
Rating - 100%
1   0   0
Ok, so this isn't a rat rod project, however a lot of what I've learned building rat rods went into this. Also, truth in advertising, this all past-tense, I built this bike at the end of summer into fall. For the sake of story telling and posting simplicity, I'll tell it as if it were quasi-live.

Some time last year, I had the idea it was time for a new road bike. My old Raleigh Grand Prix is still a fine bike, but its old and never really fit me. However, I wasn't real pleased with the usual suspects out there. Everyone I know either rides a Trek or a Specialized, and frankly, most of the modern designs just don't appeal to me. It's two-fold: first, I really particularly like the aesthetic of vintage road bikes up through, say, the '70s. Second, I have no illusions of racing. I like to ride for the sake of riding, enjoying the weather, going down new roads, etc. That doesn't mean slow, necessarily.

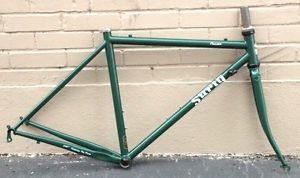
So for these reasons and a variety of others, I decided on a steel frame rather than aluminum or plastic. I looked a couple of choices, but the new Grand Prixes don't offer a small enough size and while the Jamis Quest was appealing, I couldn't find a local dealer to try it out. Eventually, I decided on a 46 cm Surly Pacer. However, the new ones were "Sparkleboogie Blue" and the components they came with where OK, but not really what I wanted. But with Surly, you can buy just the frame set and do what you want. I was set to order one, repaint it green, then build it how I saw fit. But I came across a slightly used frameset on eBay, in the right size not far away at a LBS in Elmira. But the bonus was that it was a 2011 frame, so it was already British Racing Green. On top of all that, I got it for $150 (versus $460 for a new one).

So with this
T2eC16NyUE9s6NDMq2BRTL2Ld0Q60_35_zpsa3c01b99.jpg
, my project begins.
 
OK, so I have the frameset, and its even green, but I'm still not entirely satisfied with it. I do like the color, and aside from tubing diameters, it already has a sort of vintage look. However, I want it to really stand out and really look old-school. So, I've decided a custom paint job is still in order. However, since the green is already powder coated on, I'm going to have to work with what's already there. I think a 2-tone color scheme with accent pinstriping is really what I'm after, something akin to what was on prewar 28" bikes, or even on some of the balloon tire bikes into the '50s. The initial plan is to go with a second, darker, green on the head tube, forward portions of the top and down tubes, and on the fork crown lug work. I think I'll use a crème pinstripe to break the colors. I will in turn match that to crème colored tires, and maybe a brown leather saddle and bar tape.
 
What I'm really after is something with vintage appeal but is relatively modern in terms of hardware. Regarding components, I'm not racing, but I do plan to put on a lot of miles. I'd like everything on the bike to be 105-grade or better. I don't plan to use a Shimano crankset, though, since they've gone all to Hollowtech and Octolink and such on any of the decent component groups. I still want to have a square-taper bottom bracket for simplicity, maintenance and for aesthetic reasons. Right now, I'm thinking about using the Velo Orange Grand Cru 6-spoke crankset. It has the look I'm after and I've come to really like VO's parts...
 
I think you mean 5 arms Cranks. It sounds like you have a great plan for building up this bike. My skinny tire bike is along the same style.
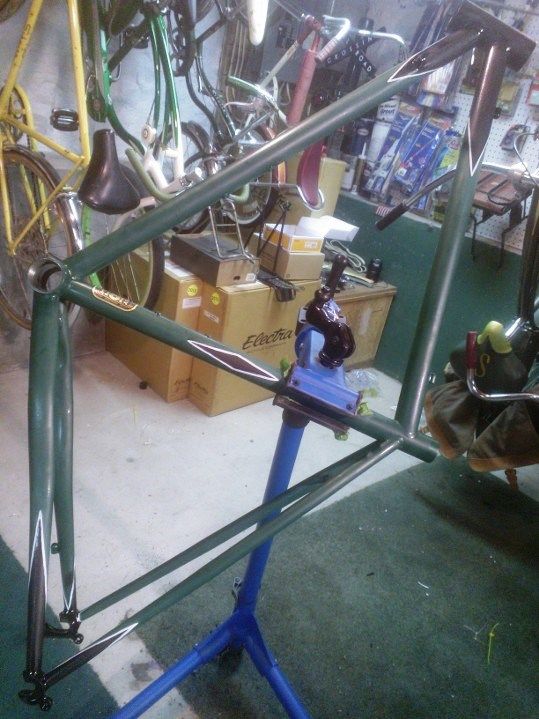
 
Well, the next step was to have the headset cups knocked out. Thanks to a friend at the LBS, that was easily accomplished. Then I spent some time removing the original decals so that I could scuff sand the finish. Since the decals were a couple years old, they didn't simply peel off. They'd dried out some, and consequently they came off in flakes. I tried using a heat gun at first to try to make them more pliable, but it really didn't make a difference. In the end, persistence with a plastic putty knife did the job. Fortunately, I was able to track down a replacement set of decals online fairly cheap. Surly sells their decal sets for this reason, but in between the time this frame set was made and now, they changed the font of all the lettering. Frankly, I like the old version better, its classier and fits with what I'm going for here.
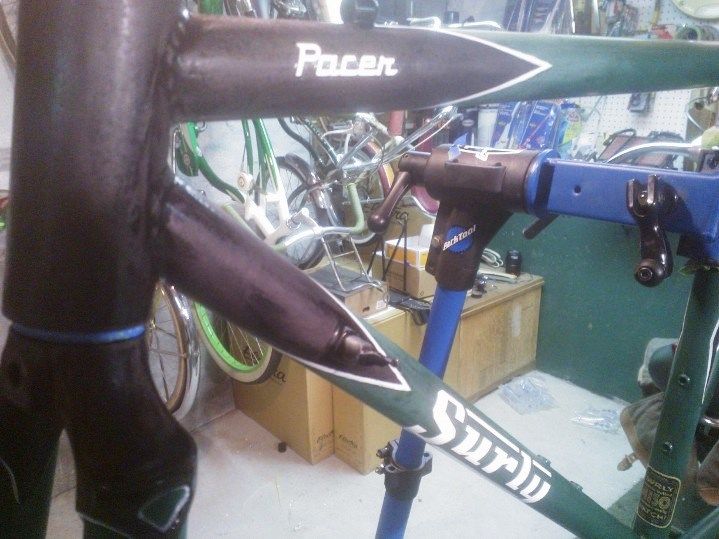
My intent, as I said, wasn't to repaint the entire frame. Rather, I want to add a second color to it, then put a clearcoat over the whole thing. So, which I'm only adding a color to part, I guess I'm essentially still painting the whole thing. I'm just not going to bare metal to do it. So, I'm learning that prepping powder coat to accept paint isn't easy, but it is possible. I could simply spray a gloss paint on the head tube and leave the OEM finish alone. But I want a higher level of gloss than powdercoat has, and I want the decals to be protected too. So, lots of sanding. Harder, more aggressive paper seems required to actually scratch the powdercoat, and everytime I think I've covered an area adequately, I find it needs more work to properly rough the surface...
 
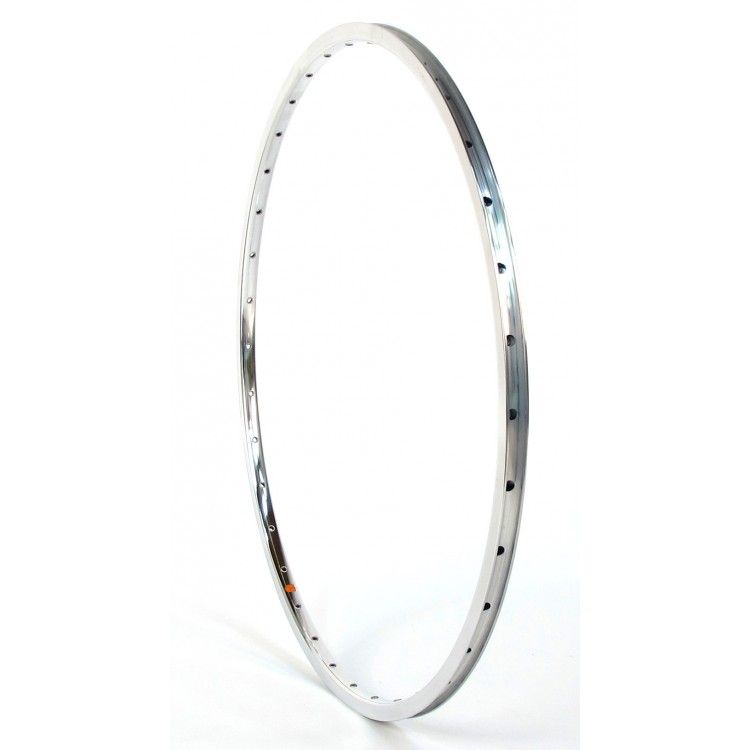
More regarding component selection - one of the reasons that I knocked the headset out (rather than mask it off) is that what Surly used from the factory was black. It was a decent enough headset, a Cane Creek 40 IIRC, but with the look I'm going for, I want everything to be bright work instead of blacked out. I'm not actually going to use any chrome plated steel parts, but polished aluminum certainly fits the bill. I ordered a set of VO rims, the 700c PBP model. They're a nice double wall, eyeleted polished rim with a simple, elegant look IMHO:
pbp_3_4_zps65d29766.jpg


I also ordered a rear hub (Shimano 105, in silver), though I haven't bought the front yet. I've been back and forth regarding actual drivetrain choices. As much as I'm inclined to go for the newer tech, I think I'm going to use a 9-speed rear instead of 10. Everything 10 speed related seems more expensive. The cassettes, the shifters, the chain even. And the chain isn't as durable from what I've heard. The catch might be finding shifters - I want to use downtube shifters, and finding 9-speed ones (when everything seems to have gone 10) might be a problem. VO offers a set that can go up to 9-speed, but they're friction only and I'd really like indexing ones. But, it is an option if all else fails...
 
The next installment: trying to decide the second color.

I brought home several different shades of green spray paint from the Depot. Since Rustoleum now makes all sorts of color choices, it seemed like a logical starting place. I'd also been paying attention to colors of auto paint, ie, keeping an eye open for a car with a color that I liked. However, nothing I came across really worked well with the existing green. I looked at lighter, I looked at darker. But I didn't find anything that tested well against the specific bluish sort of forest green that Surly had used. Although I like the idea of a 2-tone green paint job, it doesn't seem to work in practice, at least not within the confines of what I'm doing.

I had an alternative thought - Green Phantom. Not that I'm putting a springer or anything on the Pacer, but the tasteful, classy, green/black combination that Schwinn used looks really good, even if its overshadowed by black Phantoms. So that's the direction I decided to take. I originally was thinking of buying a Phantom paint mask kit that you see on eBay, and then use the decals available for the paint pinstripes. But due to the different tubing shape and diameters, I elected not to.

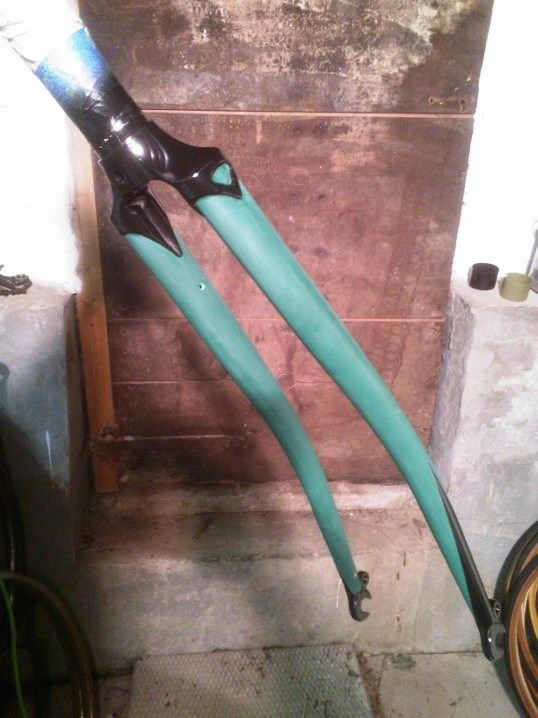
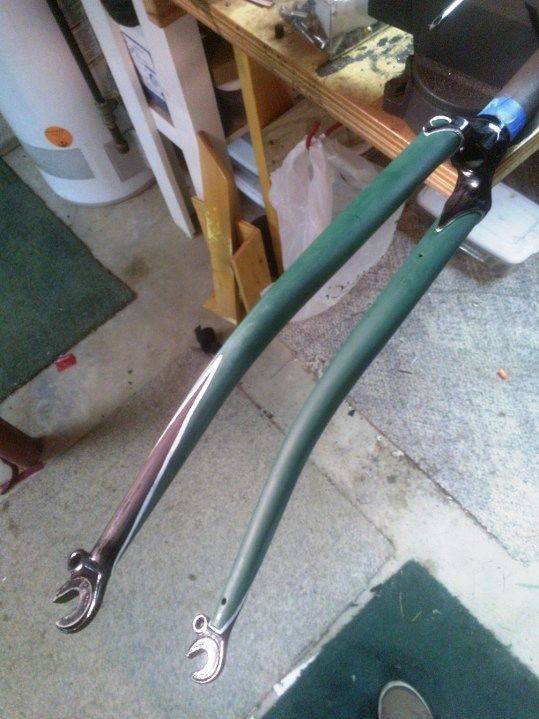
With that, I started masking off the frame and fork. This was a little tricky, since I was essentially masking a negative - painting the small area last instead of first. I also decided it would look really cool to detail the lug work on the fork. Sanding the inside to the lug details was a PITA. I also decided to do the fork ends at the last minute, since there were a few chips in the powder down there. With a bit of screwing around, I achieved this:

WP_001811_zpscc798b3b.jpg


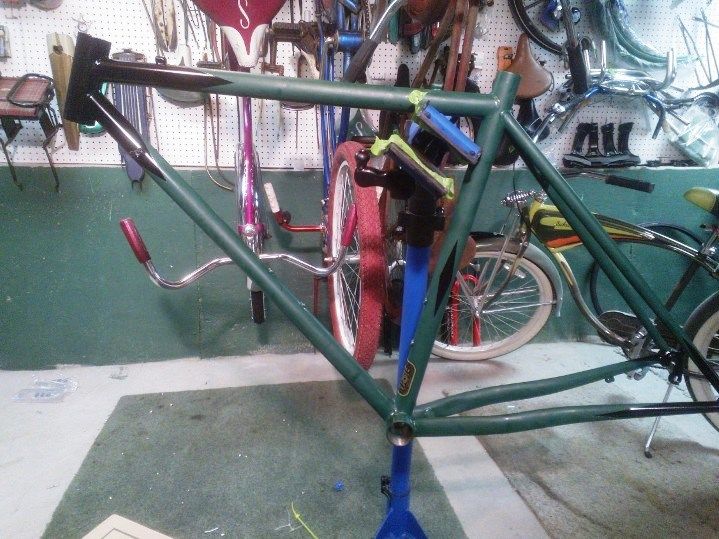
And the frame:
WP_001812_zps8a458eda.jpg


Obviously, the seat tube diamond was also inspired by the Phantom. But I really think it works here as well. I also mirrored what I did on the fork ends on the frame drop outs as well.
 
Nice! Some pinstripes at the color change would really tie it all together nicely!

Luke.
Agreed. Now, this was a problem area - I was all set to buy white striping tape, and cut it and lay it on the frame. I've done that before, and with a bit of fussing to bring both sides of a scallop together, it can look OK. But I decided it would be really neat to also accent the edges of the lugs on the fork. There was no way tape would work, it would have to be painted. I don't know of anyone in the area that does painted pinstriping (there probably are, but I didn't have any luck finding them).

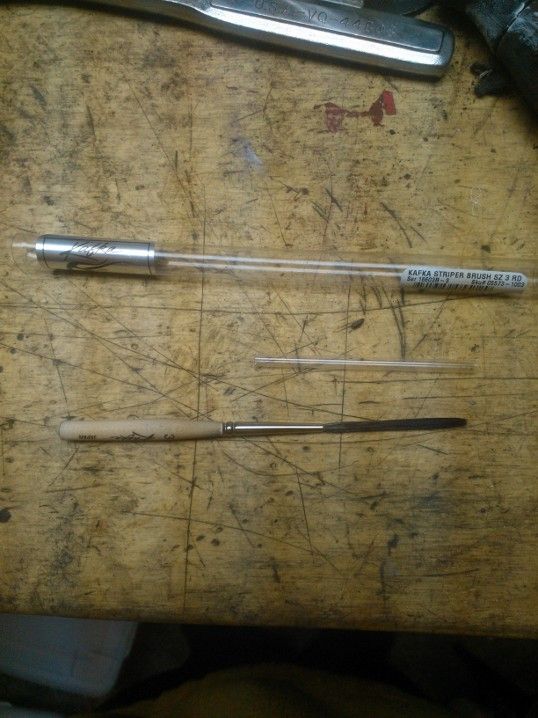
So, I bought this:
WP_002118_zps34bc3cd3.jpg

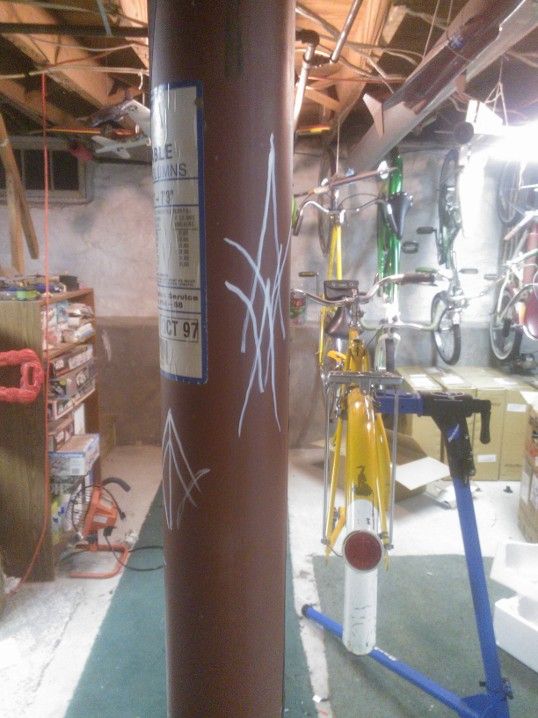
and started practicing. At first, I drew out some patterns on scrap cardboard. Of course, I was doing the typical sort of patterns of lines and swoops you see on rat rods. But I decided that I needed to practice on something tubular, so I started striping on the support columns in my shop:
WP_002119_zps37be76a1.jpg

I eventually moved on to drawing lines similar to what I would have to do on an old bike frame (no photo there).

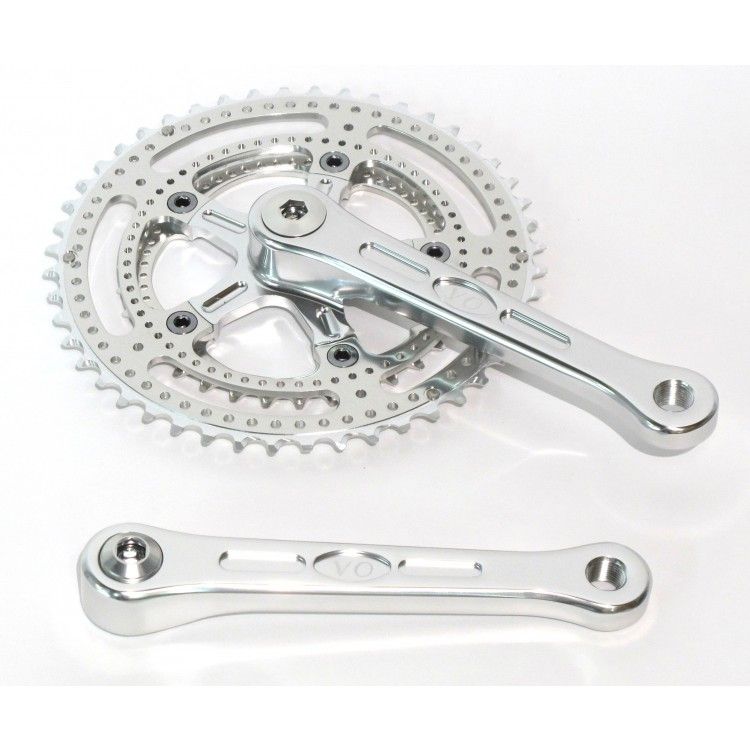
Around this time, as least as is important to the story, Velo Orange introduced a new crankset that had me rethinking the look I was going for. They added a drillium variant of their 5-arm crank, which I thought was wicked cool:
img_6844_zps01f68350.jpg

I know that there really isn't a lot to be gained, weight-wise here. But it really looks neat. So, of course, I ordered it. Now, this had me thinking about what I could do to coordinate with the crank. They offer a set of drilled non-aero brake levers, and of course, high flange hubs with phone-dial styling. You can see where this is going...
 
I like all the parts selection. I have those rims except built with the VO hubs to. They are a great option for a classy looking bike.
 
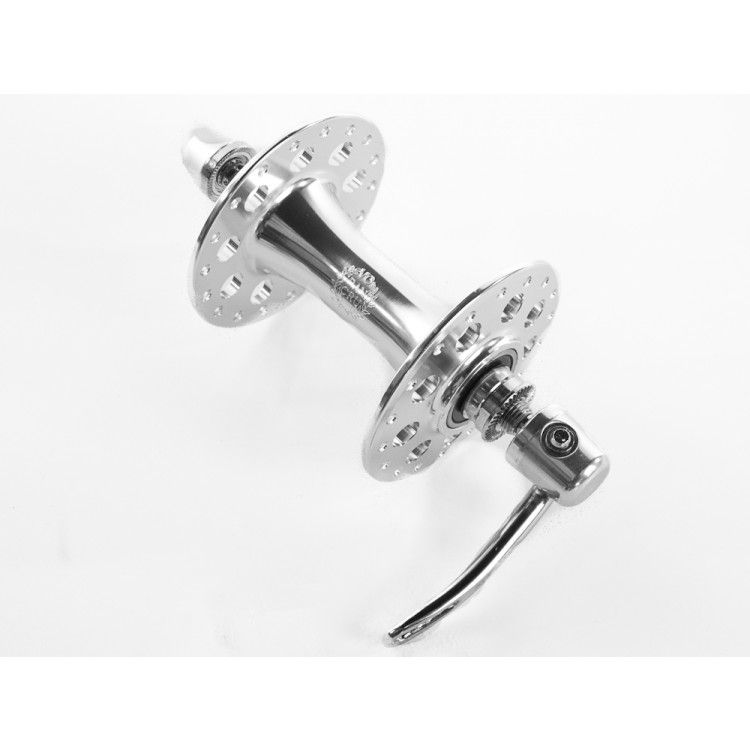
Well, that's the direction I was leaning too. I already had the 105 rear hub. But I ordered the VO high flange hub for the front.
vo_front_hub_zpsce58075b.jpg

The trouble is that they don't match. Obviously, the flanges are different; that's less of an issue to me. The rear hub flanges are half hidden by the cassette anyway. The bigger issue, to me, is that the color is different. The VO hub is polished, as seen above. The 105 hub is "silver", but in reality is a dark silver, almost a gunmetal color. I'll have to take a picture of it. Its really a little thing, I suppose, but to me it just doesn't look right in combination with the front.

In other news, I jumped into the striping headfirst. I figured its either going to look acceptable or it'll be terrible and I'll have to sand it down and repaint. Either way, I have to give it a go. And... it wasn't too bad. I started with the lug work. I had to start somewhere, so I started there. I was pleased enough with the result that I went on to the fork legs:
WP_001820_zps684d6621.jpg

After managing a fair amount of success on the fork, I went straight into doing the frame.
WP_001819_zps27522c1a.jpg

It is far from perfect. But after fighting to be very consistent and not really achieving it, it came to realize that the minor imperfections that come with doing it by hand actually add something to it. Granted, I don't want it to look like crap, but the slight variation that occurs from one spot to the next is enough to be able to tell that it was done by hand, and that a lot of time was put into it. I'm not sure if that makes any sense, and if I keep practicing with it, I'll probably get more consistent. But for the time being, I'm happy with the result here, and think it came out better than I'd feared it would. The white striping really does make the color break lines pop. I thought it looked pretty good before, but especially so now. From this point, it was only a few more minutes to put the decals on as well, so that everything would be pretty much ready to be clearcoated.
WP_001823_zps66b533f1.jpg

I'd talked before about white versus crème for the striping. The other reason for going with white is that it matched the lettering decals, so that was what clinched it for me. I also wound up ordering a set of Vittoria Randonneur tires in white, so it all ties together.
 
You can try to strip that annondizing off. I did this with a set of Deore cranks. Then I polished them.
 
You can try to strip that annondizing off. I did this with a set of Deore cranks. Then I polished them.

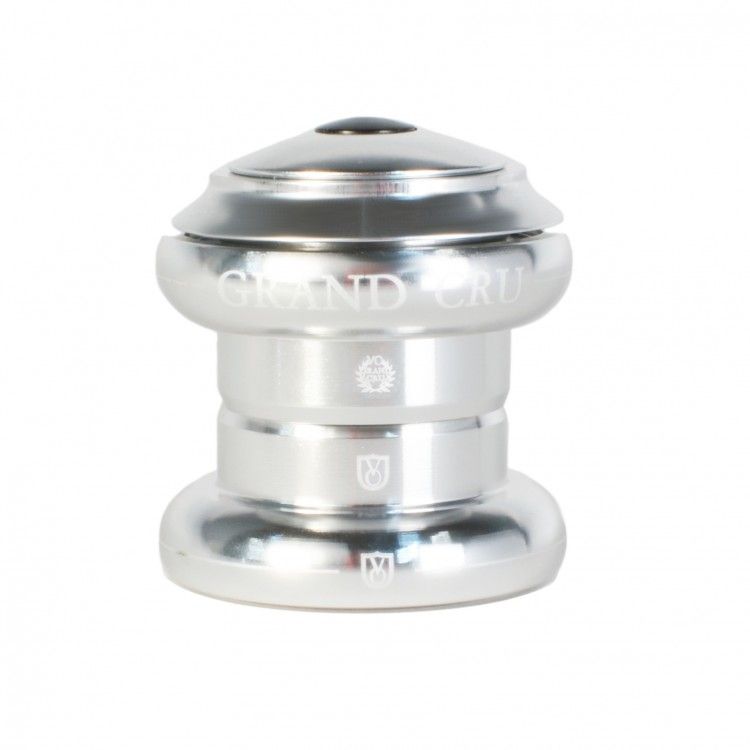
I probably could, but it would moot at this point. I eventually decided to pony up the clams for the matching (though pricy) VO rear hub. The 105 hub went into the hub bin for use later on. While I was at it, I also bought VO's sealed Grand Cru headset.
head_on_1_2_zps94b5364f.jpg


Really look good Rick!
Luke.

Thanks! I thought so too. Just wait till its actually clearcoated!
 
Moving along, with the hubs in hand, I measured the flanges and bought my spokes, and then proceeded to build up the wheels. I forgot to take a picture of the built wheels themselves. I'd also ordered a cassette, a Shimano CS-80 I think, which is technically a 9-spd MTB cassette, though I can't see how that matters if it has the gearing I'm looking for. Given how and where I generally ride, I put more of a priority on having a wider range of gearing than having small steps between the gears, so I bought a cassette with 11-28 gearing. That will, I think, suit what I need nicely. It's also on the end of the range that the road rear derailers can generally swing over. To that end, I found a shop online that had last year's 105 front and rear derailers marked significantly. They also had a good price on Dura-Ace 9-spd downtube shifters, which solves that issue. The trouble is that they're in the UK, so shipping is long.

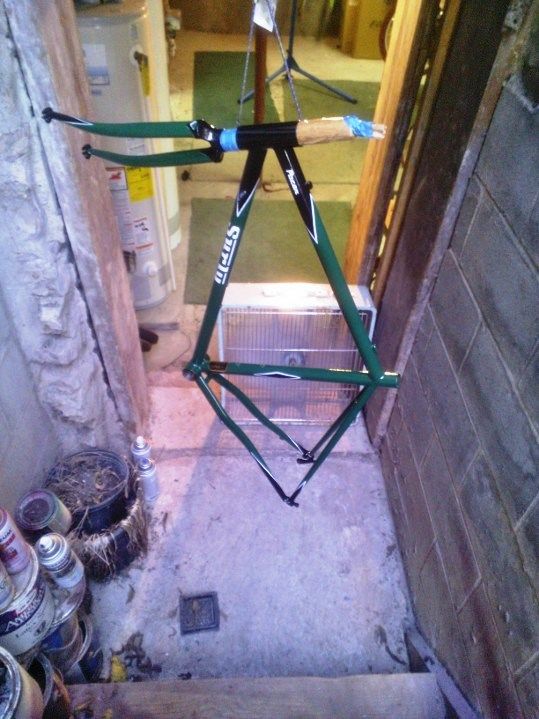
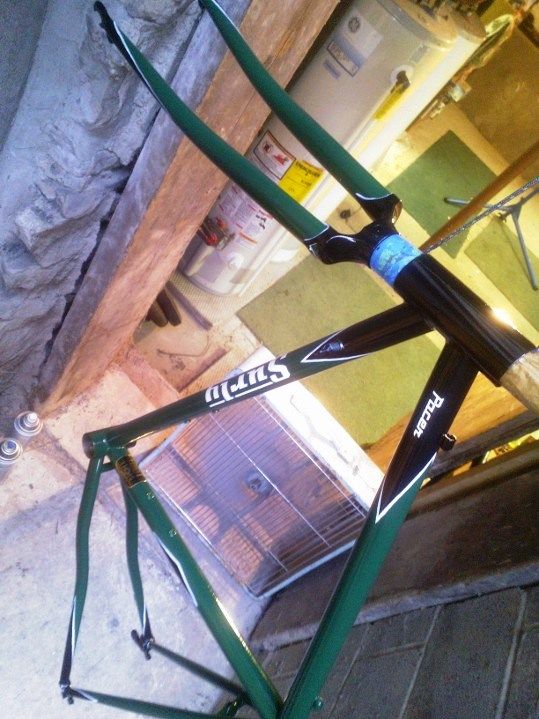
Anyway, the next part that's interesting is that the frame has been clearcoated. I used, as always, the urethane clearcoat spray that Eastwood sells. I've found that hanging a frame in the outside entrance to my basement (where my shop is) inside the bilco doors moves the fumes outside enough while still offering protection from the wind and such. It's the best I've come up with short of setting up a ventilated spray booth.
WP_001831_zps4be9fa79.jpg

WP_001832_zps1bf8bcc5.jpg

The clear still looks wet in the pictures, but it isn't. That's what is so awesome about this stuff. Some fine wet sanding is still necessary for orange peel issues in a few places, but overall it looks good. The clearcoat really brings the colors out.
 

Latest posts

Back
Top