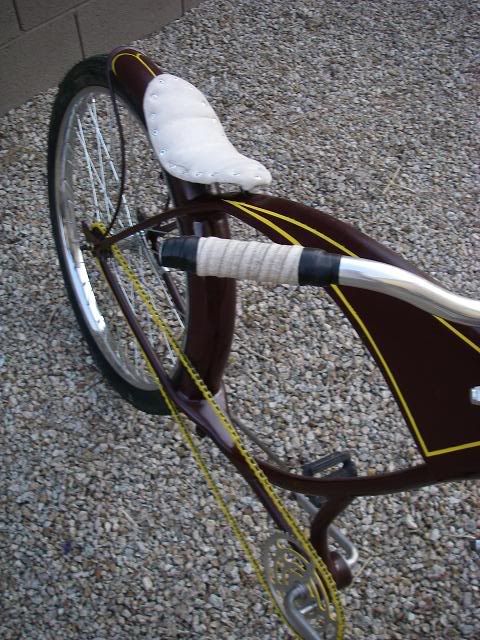
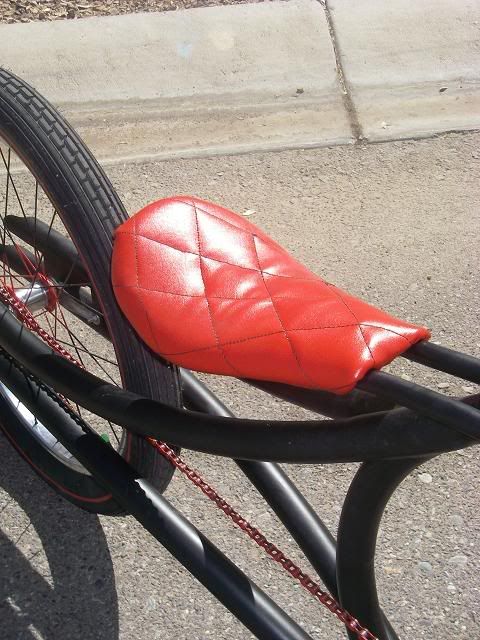
Finally getting around to posting this how to. While processing the photos I noticed there could have been some more images but I think there are enough to give everyone an idea of how it was done. Since the bike is influenced by the bobber motorcycles I patterned the seat after what seems to be the current trend in customizing.
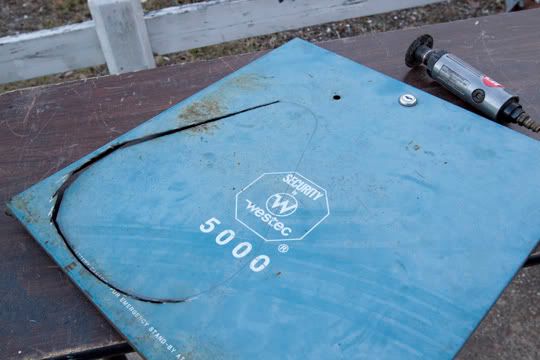
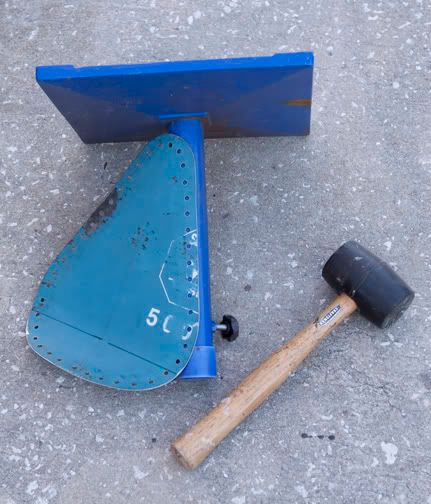
STEP 1: With some pictures from the internet I created a cardboard templete to get a feel for the shape I wanted. Using an electrical panel door I found, I cut out the seat shape using an air cutter. Measurements ended up 13" long X 9" wide. The edges were then filed and sanded to smooth them out.
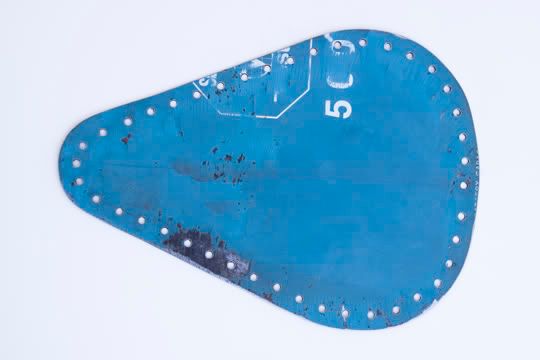
STEP 2: Holes for the lacing were drilled next. 3/16"holes 3/4" on center 1/2" from edge
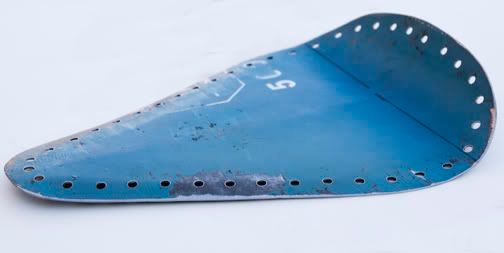
STEP 3: I shaped the pan using the largest steel tube I had which was an stand for an outdoor unberella. By using a rubber mallet i was able to get a smoother bend without putting dents into the metal were I was stricking it. The back curve started about 3" from the back edge. Basically I beat on it then sat on it to see how it felt. I gave the sides just a slight curve for comfort but not so much that it could be confuse with a bicycle seat.

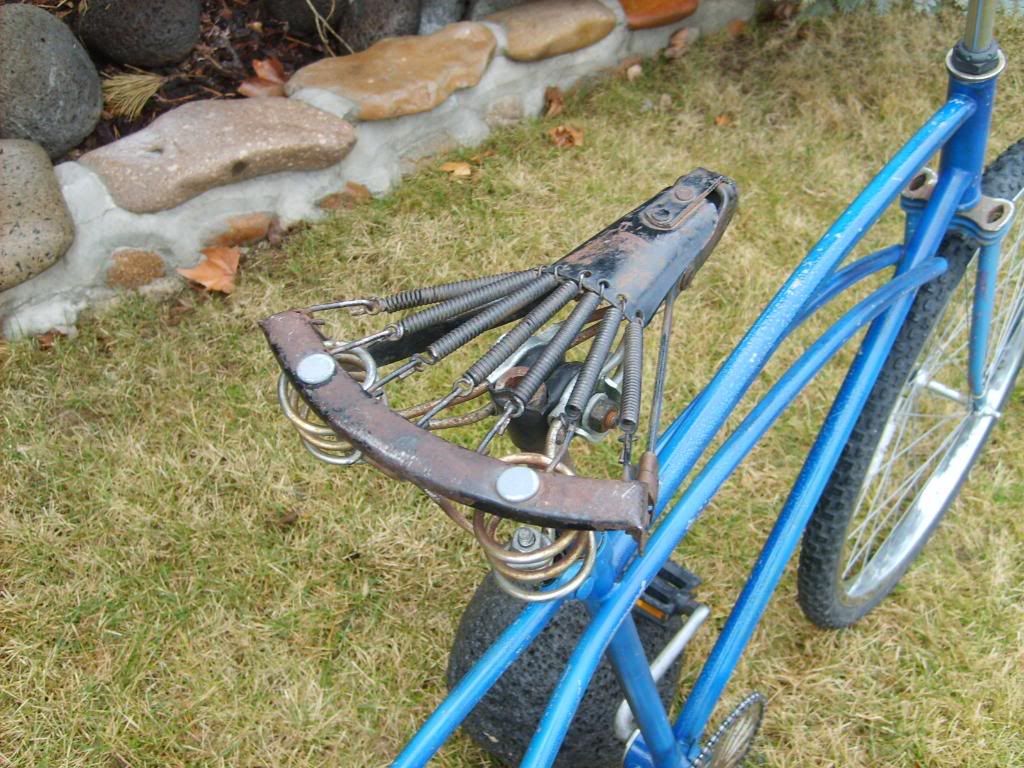
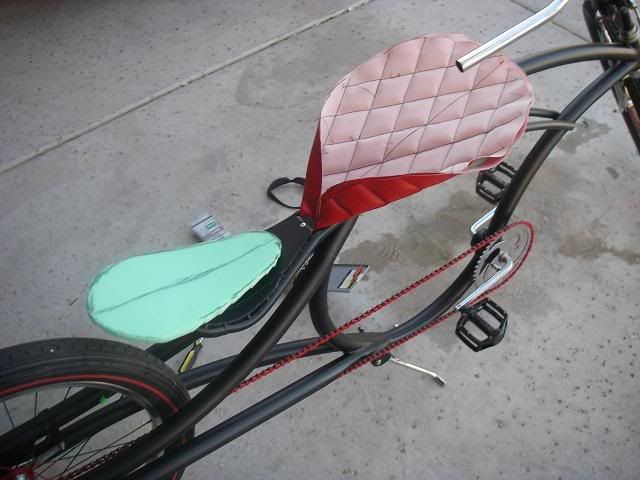
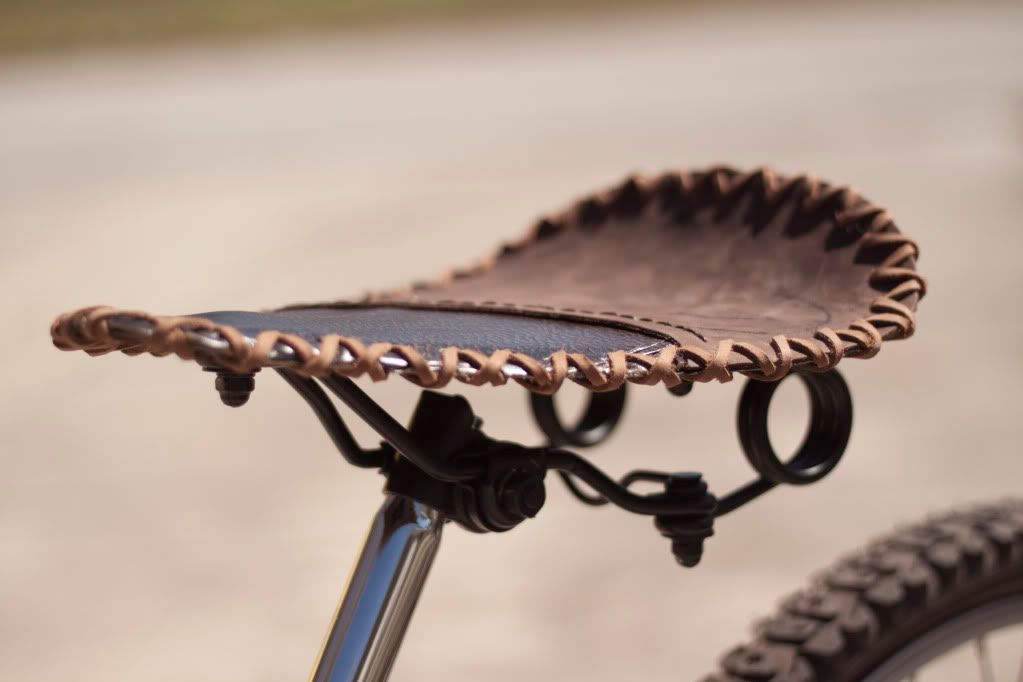
Step 4: I decided the pan was feeling a little flexy so added some supports. This also helped to re-enforce were I drilled for the carriage mounting bolts. The original springs were to weak for my weight so purchased these motorcycle springs online. They also helped to create a nicer look.

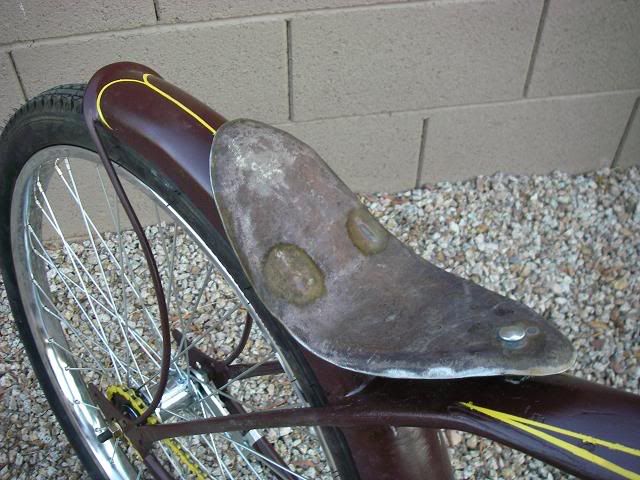
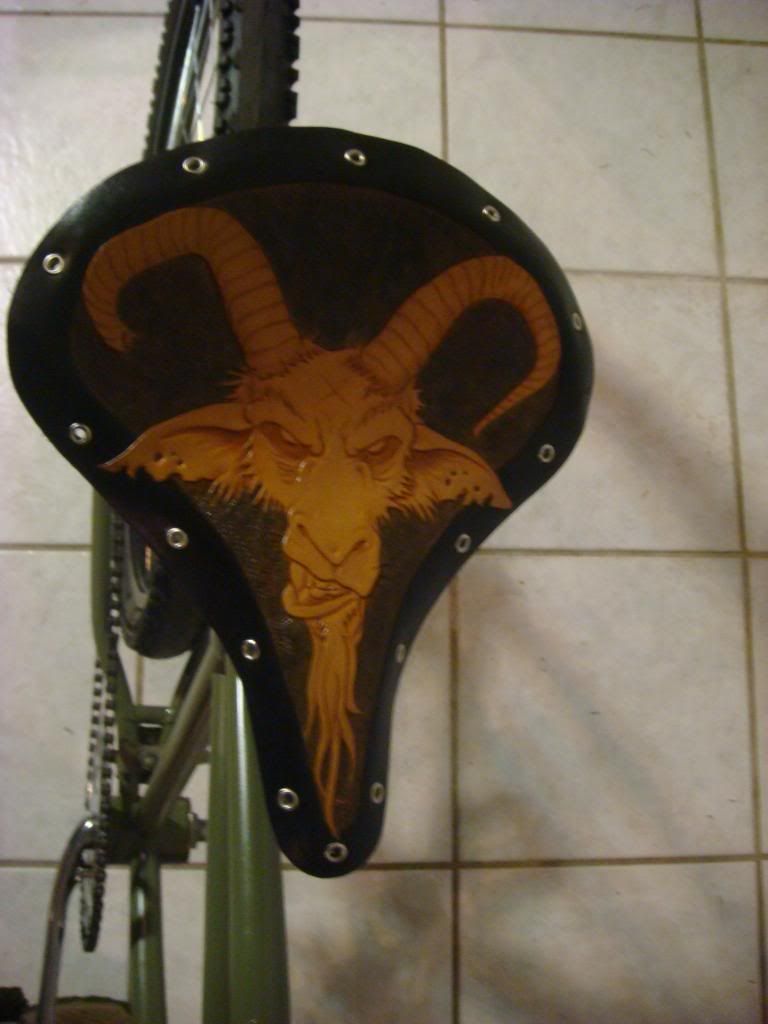
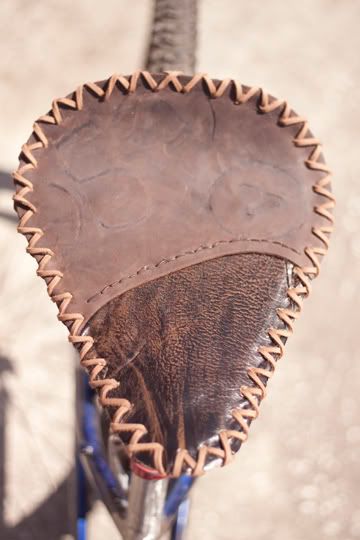
Step 4: A trip to my local Tandy leather and some advice from a nice old man help me create the leather cover. Was originally going to use one piece of leather and carve into it but when I saw the branding marks on the one piece I knew I wanted to use it so came up with this design. Once the pieces were sewed together I traced the seat out line onto it and used a hole punch to create the stitching holes. The back piece that is thicker seems to lay better then the thinner front piece. I wanted this to be a bite "Manly" so did not use any padding but had an old gardners nealing pad I was originally thinking of using for this. Maybe next time.
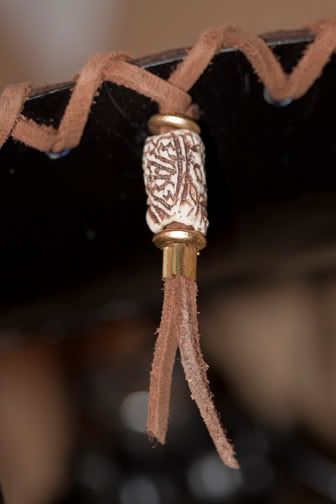
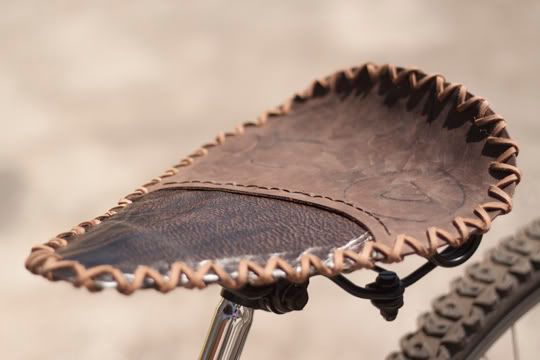
Step 5: I bought a piece of leather cord from my local art supply store. It came in a 3 meter pack and I used all but 4 inches of it. Starting in the back I wrapping it counter clock wise all the way around until I ended up were I started. Then I switched directions an went clock wise till I ended up were i started. To tie it off and give it some decoration I threaded it through some brass rings and a bead my wife had then crimped it off with 2 more pieces of brass tubing.
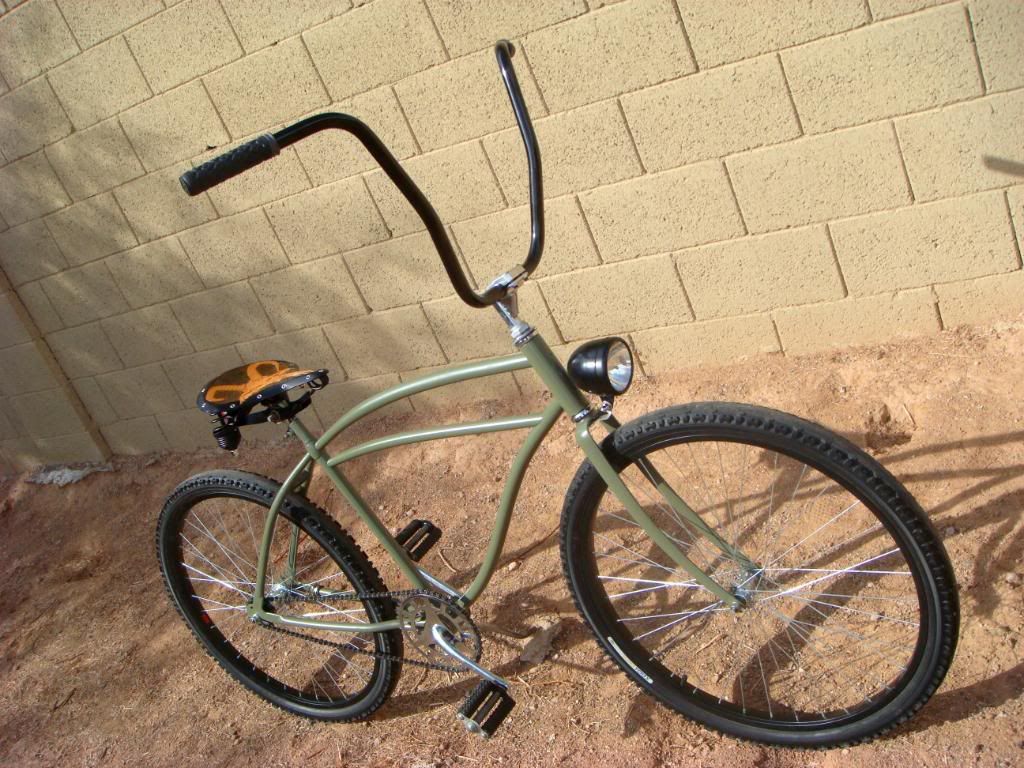
A couple of more views:
STEP 1: With some pictures from the internet I created a cardboard templete to get a feel for the shape I wanted. Using an electrical panel door I found, I cut out the seat shape using an air cutter. Measurements ended up 13" long X 9" wide. The edges were then filed and sanded to smooth them out.
STEP 2: Holes for the lacing were drilled next. 3/16"holes 3/4" on center 1/2" from edge
STEP 3: I shaped the pan using the largest steel tube I had which was an stand for an outdoor unberella. By using a rubber mallet i was able to get a smoother bend without putting dents into the metal were I was stricking it. The back curve started about 3" from the back edge. Basically I beat on it then sat on it to see how it felt. I gave the sides just a slight curve for comfort but not so much that it could be confuse with a bicycle seat.
Step 4: I decided the pan was feeling a little flexy so added some supports. This also helped to re-enforce were I drilled for the carriage mounting bolts. The original springs were to weak for my weight so purchased these motorcycle springs online. They also helped to create a nicer look.
Step 4: A trip to my local Tandy leather and some advice from a nice old man help me create the leather cover. Was originally going to use one piece of leather and carve into it but when I saw the branding marks on the one piece I knew I wanted to use it so came up with this design. Once the pieces were sewed together I traced the seat out line onto it and used a hole punch to create the stitching holes. The back piece that is thicker seems to lay better then the thinner front piece. I wanted this to be a bite "Manly" so did not use any padding but had an old gardners nealing pad I was originally thinking of using for this. Maybe next time.
Step 5: I bought a piece of leather cord from my local art supply store. It came in a 3 meter pack and I used all but 4 inches of it. Starting in the back I wrapping it counter clock wise all the way around until I ended up were I started. Then I switched directions an went clock wise till I ended up were i started. To tie it off and give it some decoration I threaded it through some brass rings and a bead my wife had then crimped it off with 2 more pieces of brass tubing.
A couple of more views: