Although there might be other topics about this, I thought it could be a good idea to share how I do it.
If there´s one thing I hate is sanding, so I try to get away from doing it every chance I get. This is the way to minimise that.
In this particularly occasion I´ll be doing a chain guard, but you can do pretty much everything, like fenders, tanks, headlights, etc.
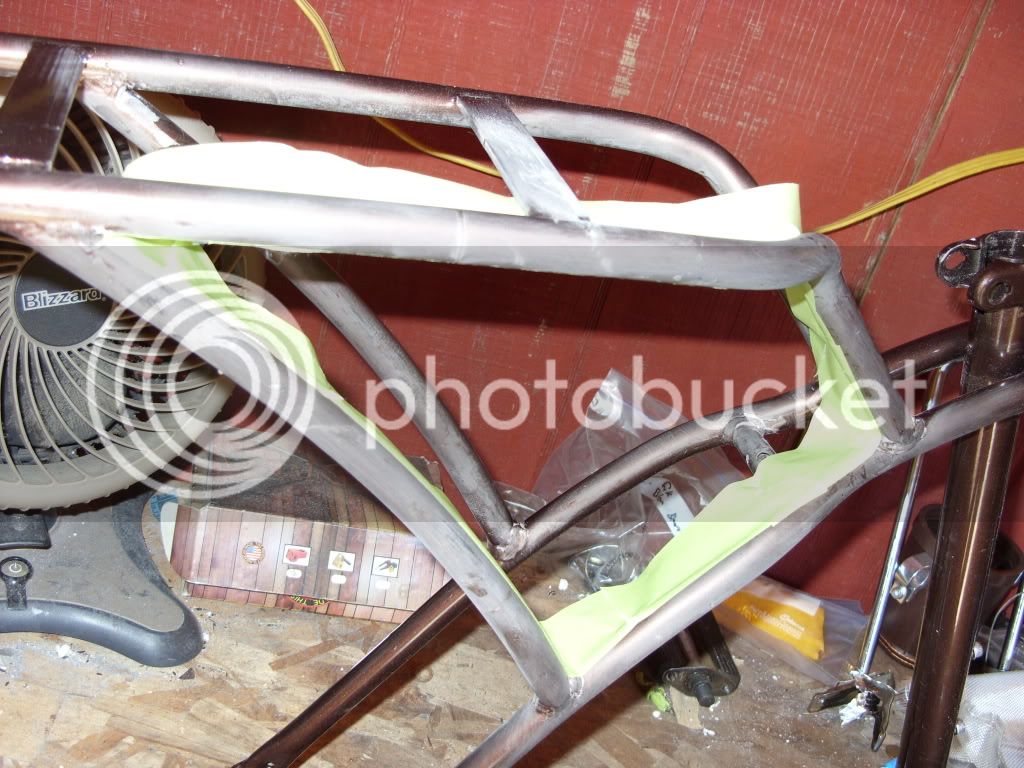
We start drawing our part in cardboard


Once we´ve got our design done, we run a fit test

We change everything we need here at this point, and we move on to the second stage.
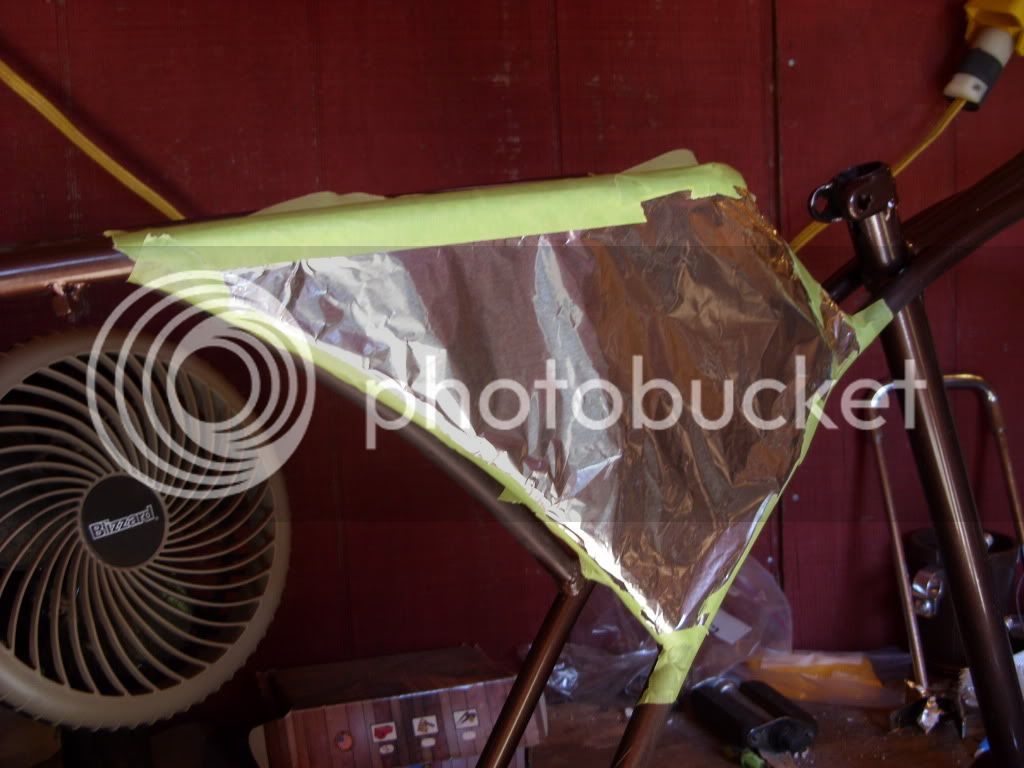
Now you´ll notice that I'm using regular foam. Regular foam melts down in contact with resin, but don´t panic, it will serve it´s purpose.


Now we cut the basic shape of our part

And then shape it the way we want it... how? sanding it :? but don't worry, takes almost no effort :mrgreen:

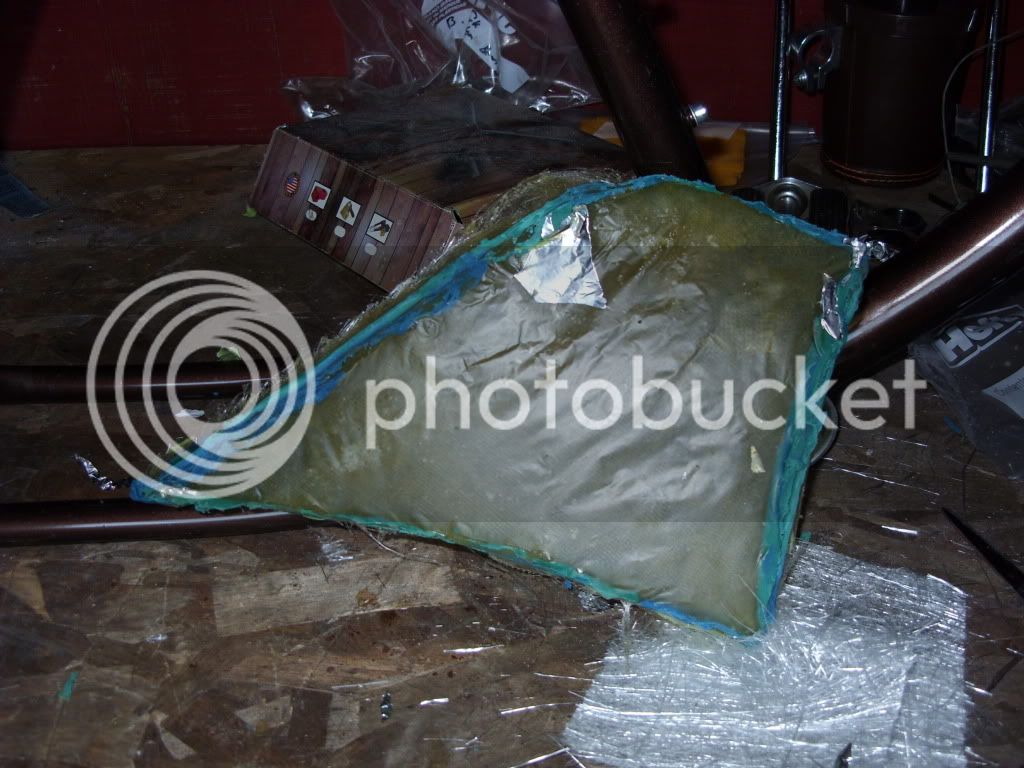
Now we wrapper up using common kitchen film

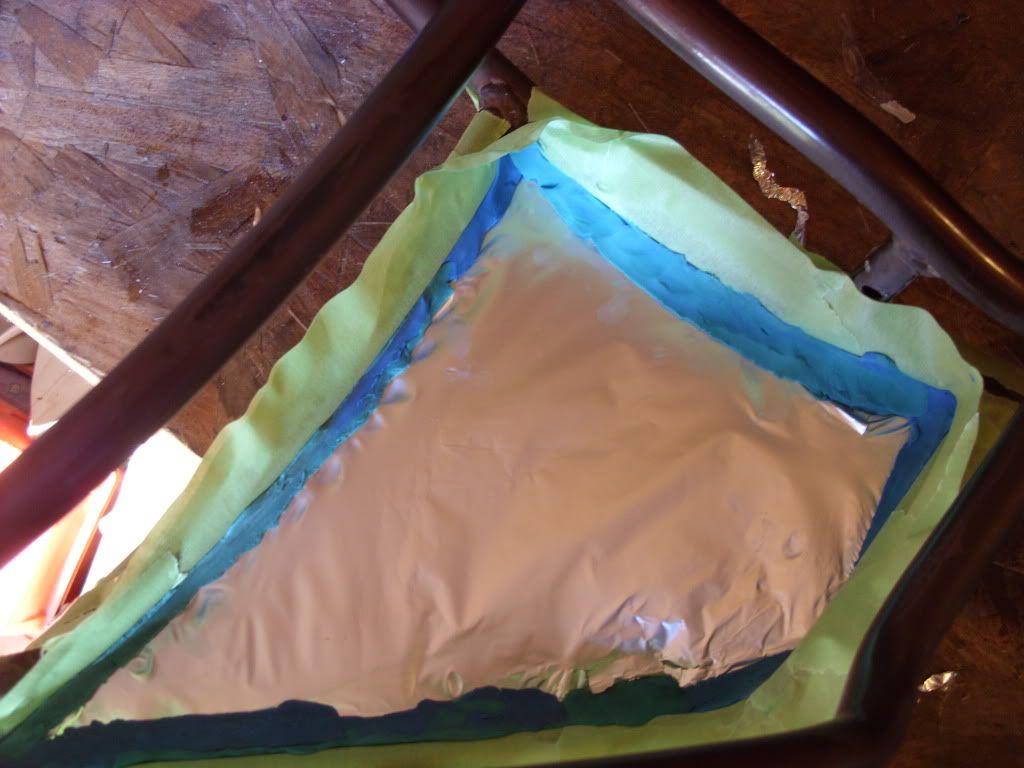
Ok, at this point we´ll start our mould, made of paper mache. We need gloves, an old newspaper (cut in small pieces) brush and some vinyl glue.

We apply at least six layers of paper and glue and let it dry for a day.
Remember, this may seem a long proses but it saves time and effort when sanding the final piece.

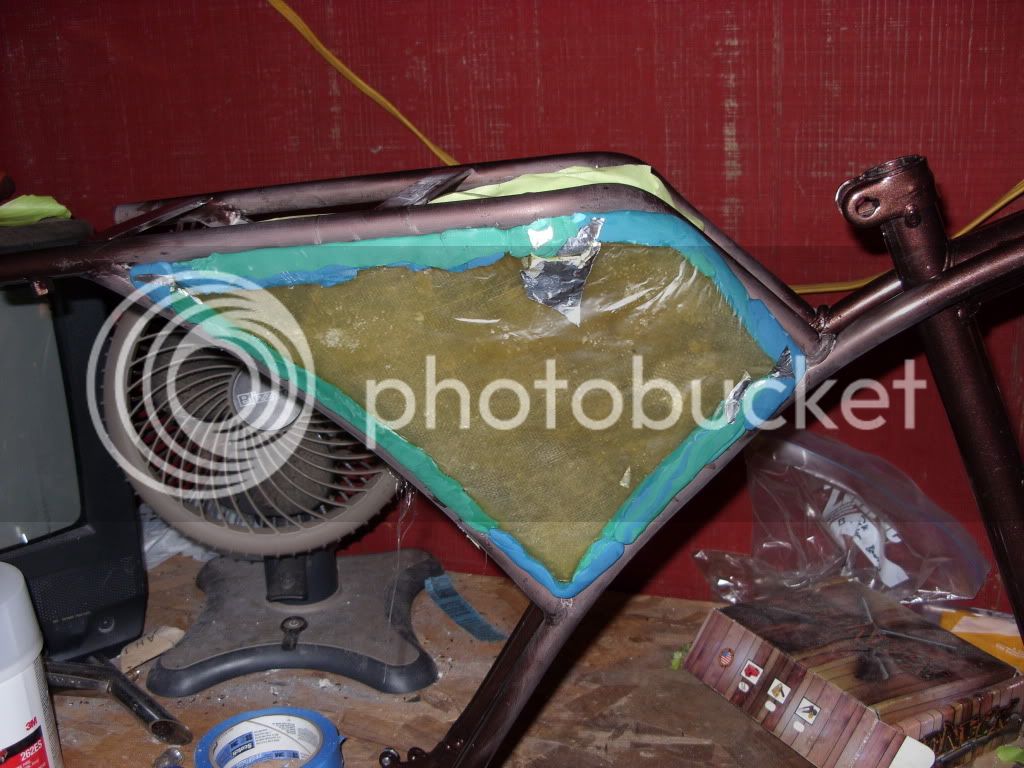
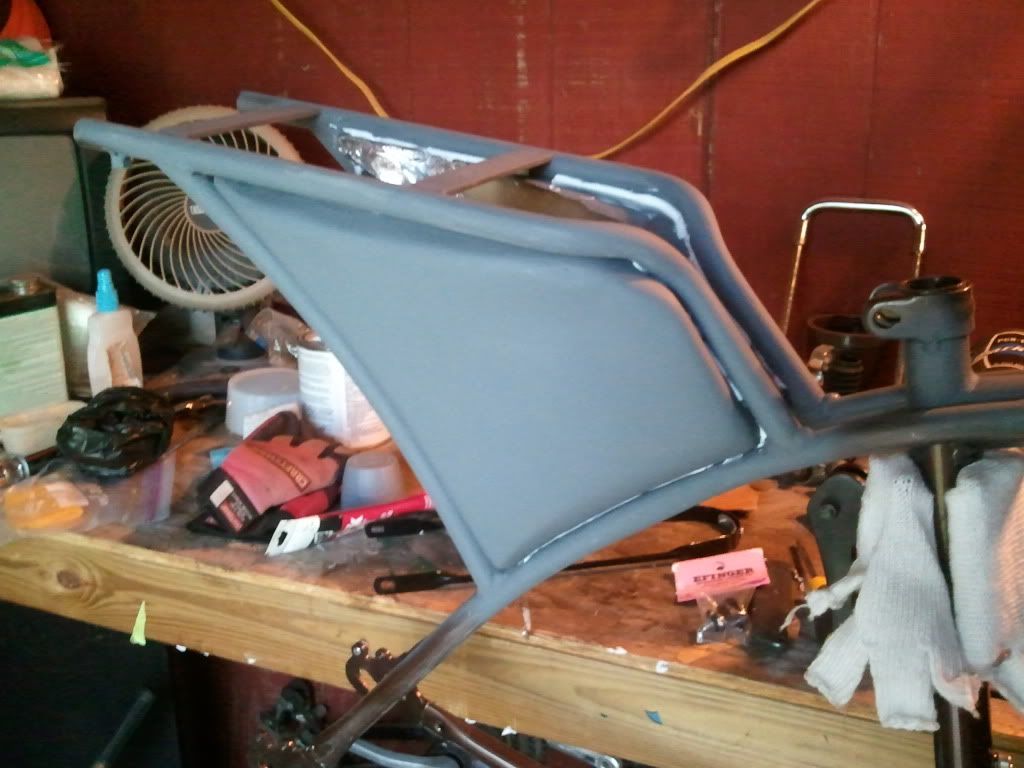
When is finally dry, we remove the foam from the back and we have our mould ready to receive the resin and fibber.


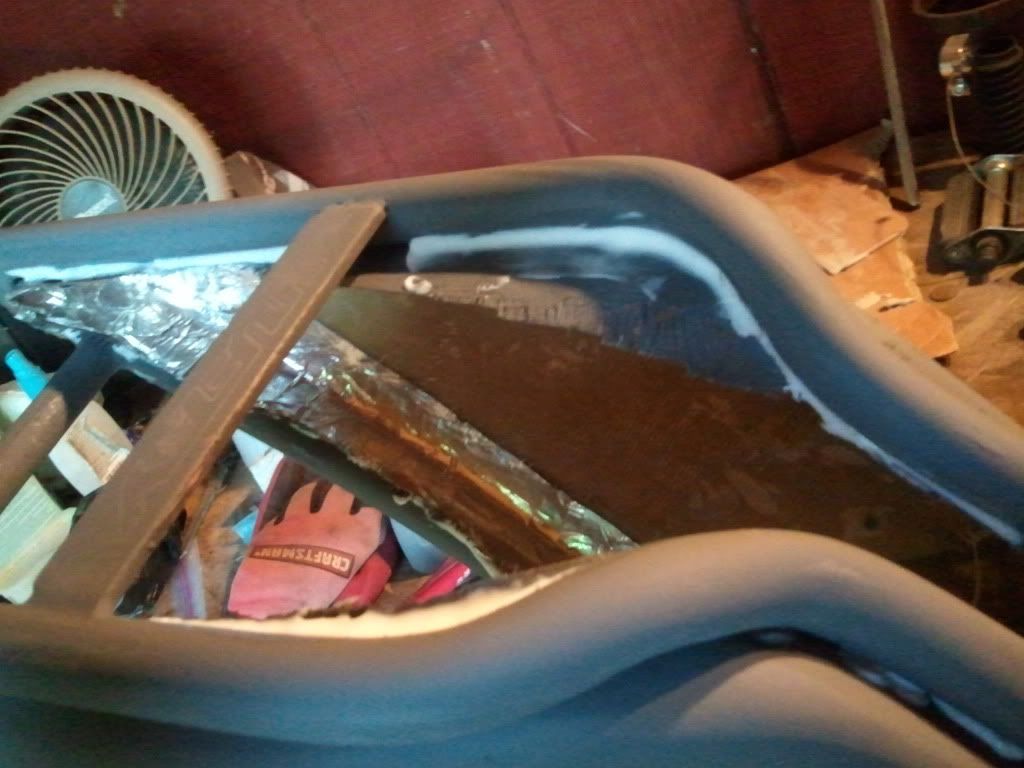
Now is time to apply the resin directly inside the mould, but first make sure you have gloves, a recipient for the resin (I use a cut plastic bottle), brush and precut (in different sizes) pieces of fibber glass.

There´re different types of fibber, in this case I used one as similar as cloth as possible cause I find it better when dealing with small parts.

We apply it pretty much the same way we did with the paper and glue, make sure you cover all the surface and that there are no air bubbles.
Let it dry, and once its hard, you cut the excess with a jigsaw.
Sand the edges and remove the paper mache in hot water.
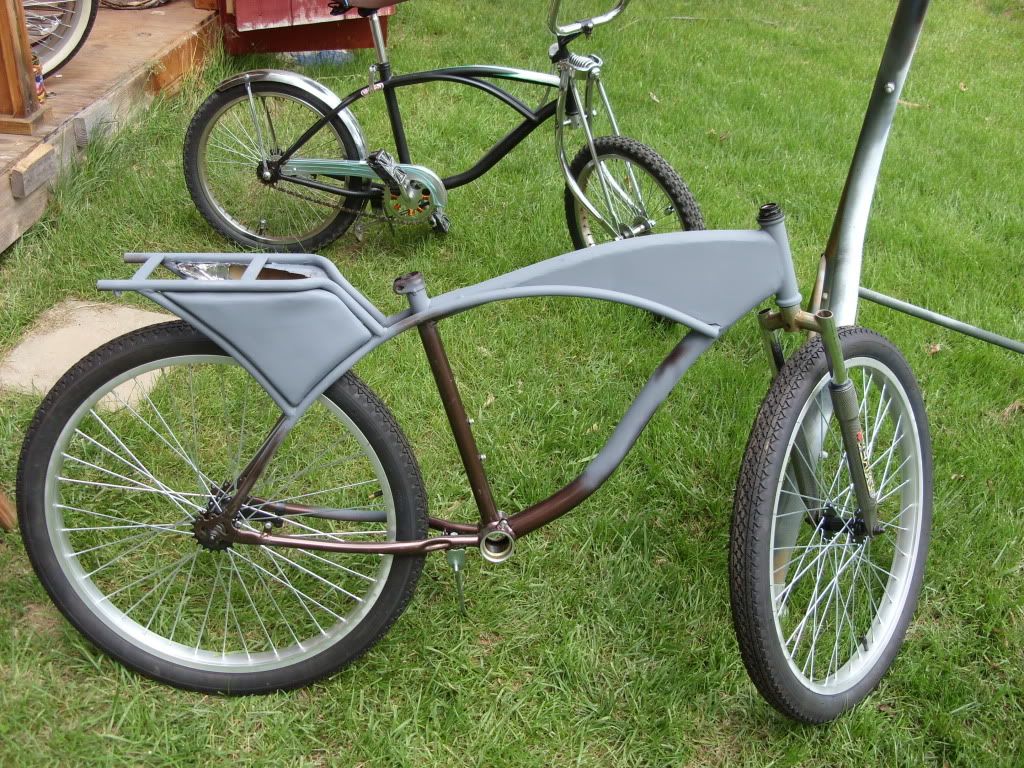
This is how it looks after all the work is done


Now all is left is to apply bondo on the surface, and sand but just a little bit :wink:
I´ll post some pics when this is finally done.
Hope you find it helpful and try to make some parts using fiberglass.
If you have any questions or comments please let me know.
If there´s one thing I hate is sanding, so I try to get away from doing it every chance I get. This is the way to minimise that.
In this particularly occasion I´ll be doing a chain guard, but you can do pretty much everything, like fenders, tanks, headlights, etc.
We start drawing our part in cardboard
Once we´ve got our design done, we run a fit test
We change everything we need here at this point, and we move on to the second stage.
Now you´ll notice that I'm using regular foam. Regular foam melts down in contact with resin, but don´t panic, it will serve it´s purpose.
Now we cut the basic shape of our part
And then shape it the way we want it... how? sanding it :? but don't worry, takes almost no effort :mrgreen:
Now we wrapper up using common kitchen film
Ok, at this point we´ll start our mould, made of paper mache. We need gloves, an old newspaper (cut in small pieces) brush and some vinyl glue.
We apply at least six layers of paper and glue and let it dry for a day.
Remember, this may seem a long proses but it saves time and effort when sanding the final piece.
When is finally dry, we remove the foam from the back and we have our mould ready to receive the resin and fibber.
Now is time to apply the resin directly inside the mould, but first make sure you have gloves, a recipient for the resin (I use a cut plastic bottle), brush and precut (in different sizes) pieces of fibber glass.
There´re different types of fibber, in this case I used one as similar as cloth as possible cause I find it better when dealing with small parts.
We apply it pretty much the same way we did with the paper and glue, make sure you cover all the surface and that there are no air bubbles.
Let it dry, and once its hard, you cut the excess with a jigsaw.
Sand the edges and remove the paper mache in hot water.
This is how it looks after all the work is done
Now all is left is to apply bondo on the surface, and sand but just a little bit :wink:
I´ll post some pics when this is finally done.
Hope you find it helpful and try to make some parts using fiberglass.
If you have any questions or comments please let me know.


 )
)